General Settings
Overview
This page is mainly used to configure user login methods.
Through General Settings, administrators can flexibly enable or disable different login methods, set the default login page, and configure custom login methods.
Usage Guide
Supports configuration of login methods and login or browser-related settings.
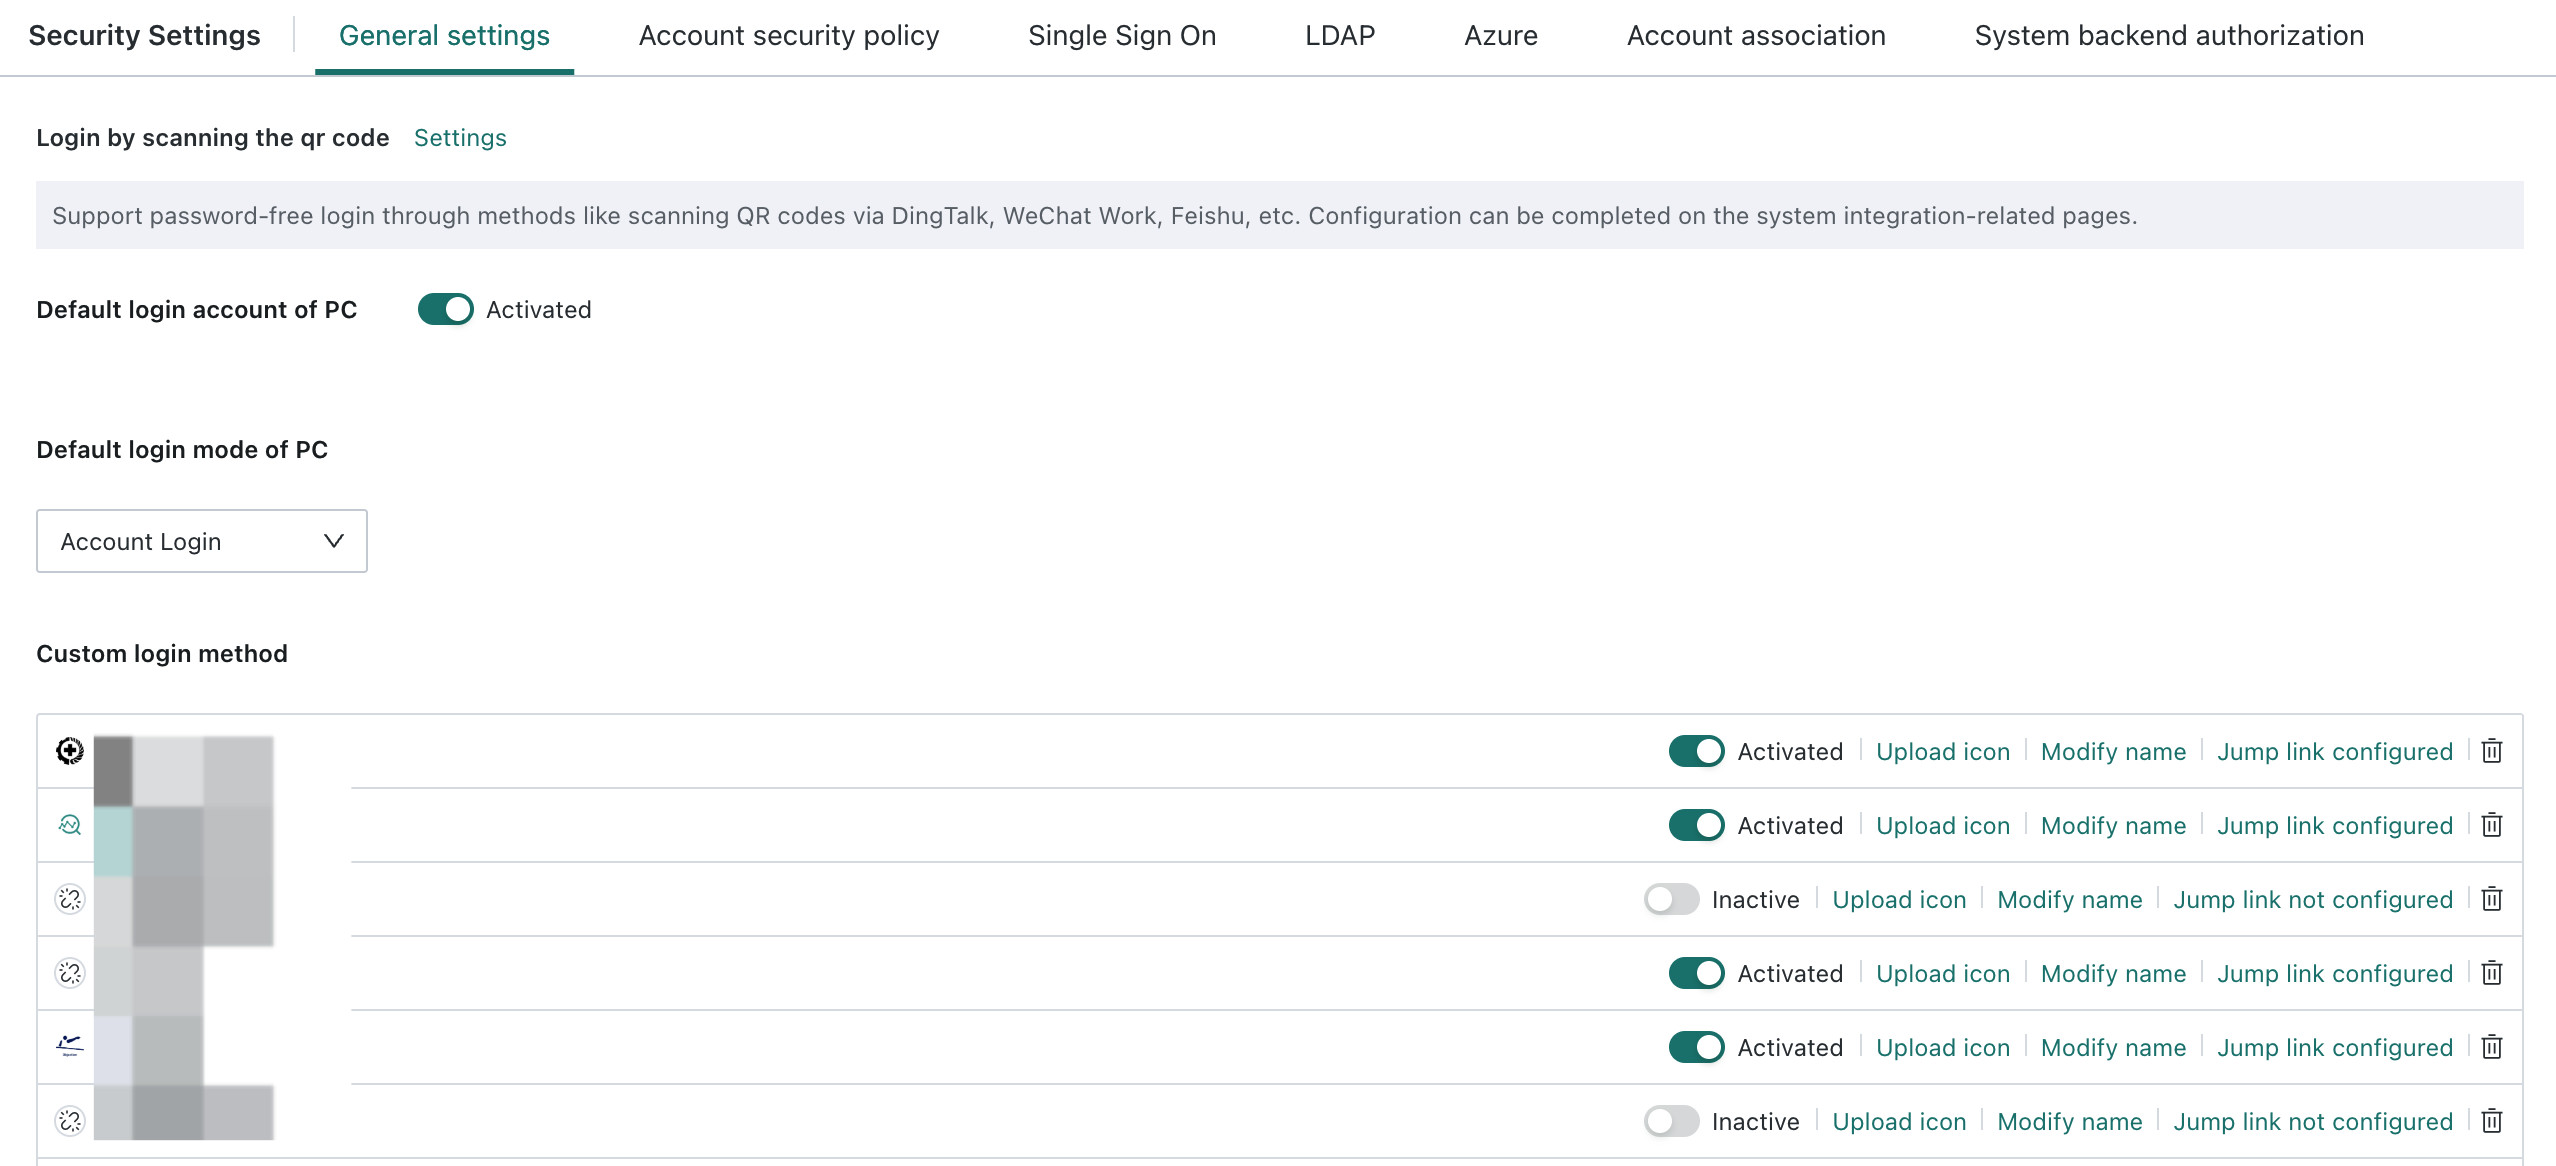
Feature | Description |
|---|---|
| QR Code Login | QR Code Login is a convenient password-free login method. It supports scan authentication through third-party applications such as DingTalk, WeCom, and Feishu. After clicking Settings, the system jumps to System Integration > Office OA, where you can continue configuring the required office OA platform. The detailed platform-specific integration guides are not yet included in the current English help center. |
| Desktop Guandata Account and Password Login | If enabled, the Guandata account and password login method is displayed on the login page. If disabled, it is hidden. |
| Default Desktop Login Method | Supported default login methods include account and password login, LDAP, Azure, WeCom, Feishu, DingTalk, Yunzhijia, and custom login methods. |
| Custom Login Method | Supports configuration of custom login methods, including login name, login icon, which must be a 1:1 image because it is shown as a circular icon on the login page, and redirect link. After configuration is complete, you must turn on the enable switch before it is displayed on the login page. Example: if some users log in through DingTalk and others log in through OAuth 2.0 SSO, you can configure that here. 1. Complete the DingTalk login configuration in your office OA integration setup. 2. Complete the SSO configuration. For details, see Single Sign-On - OAuth 2.0. In this scenario, there is no need to configure a default login address. 3. Configure the custom login method: ${BI service address}/standard-oauth2/authenticate.4. Open the login page and confirm the result. |
| Default Page After User Login | This setting is used to configure the authenticated page users are redirected to after successful login. Clicking Settings automatically jumps to Enterprise Configuration > Simple Portal. For the detailed configuration process, see Simple Portal. |
| Single Login Settings | For users without an account count limit, Single Login Settings is visible under Admin Center > System Settings > Login Settings. For users with an account count limit, single login is enabled by default. When enabled, one account can log in to at most one device each on mobile, desktop, and other terminals. When disabled, there is no multi-device login restriction. |
| Browser Login Settings | When this feature is enabled, the Guandata account is automatically logged out when the user closes the browser or closes all Guandata pages in the browser. |