Single Sign-On - OAuth 2.0
OAuth 2.0 Overview
OAuth is a single sign-on protocol. Through configuration, Guandata can complete authentication and authorization integration with an OAuth service provider, allowing users to log in to Guandata through a unified account platform that has been purchased or built in-house.
Standard OAuth 2.0 Configuration Steps
Preparation
-
Confirm whether the unified authentication service you are using provides a standard OAuth 2.0 protocol. If not, custom development may be required.
-
Confirm the OAuth callback address of the Guandata platform, which is required when configuring the application on the authentication server:
${BI service address}/standard-oauth2/authenticate -
The authentication server needs to provide the following information:
- Authorization URL: the address of the authentication service provider, usually the page where users enter account credentials or scan codes to obtain
Code.
For example: http://xxx.guandata.com/auth/realms/guandata/protocol/openid-connect/auth
- AccessToken URL: the URL used to request a
Tokenfrom the authentication service provider by exchangingCodeforToken.
For example: http://xxx.guandata.com/auth/realms/guandata/protocol/openid-connect/token
- User Info URL: the URL used to request user information from the authentication service provider by exchanging
Tokenfor user information.
For example: http://xxx.guandata.com/auth/realms/guandata/protocol/openid-connect/userinfo
- Logout URL, optional: the address used to log the current user out of SSO.
- ClientID: the client ID of the authentication application.
- ClientSecret: the client secret of the authentication application.
- BindKey: the field in the returned user information used to match BI users, such as
email.
- Make sure the BI server can connect to the SSO authentication server over the network.
Modify the Configuration
1. Go to Admin Center > System Settings > Login Settings > Single Sign-On, and choose OAuth as the single sign-on method.
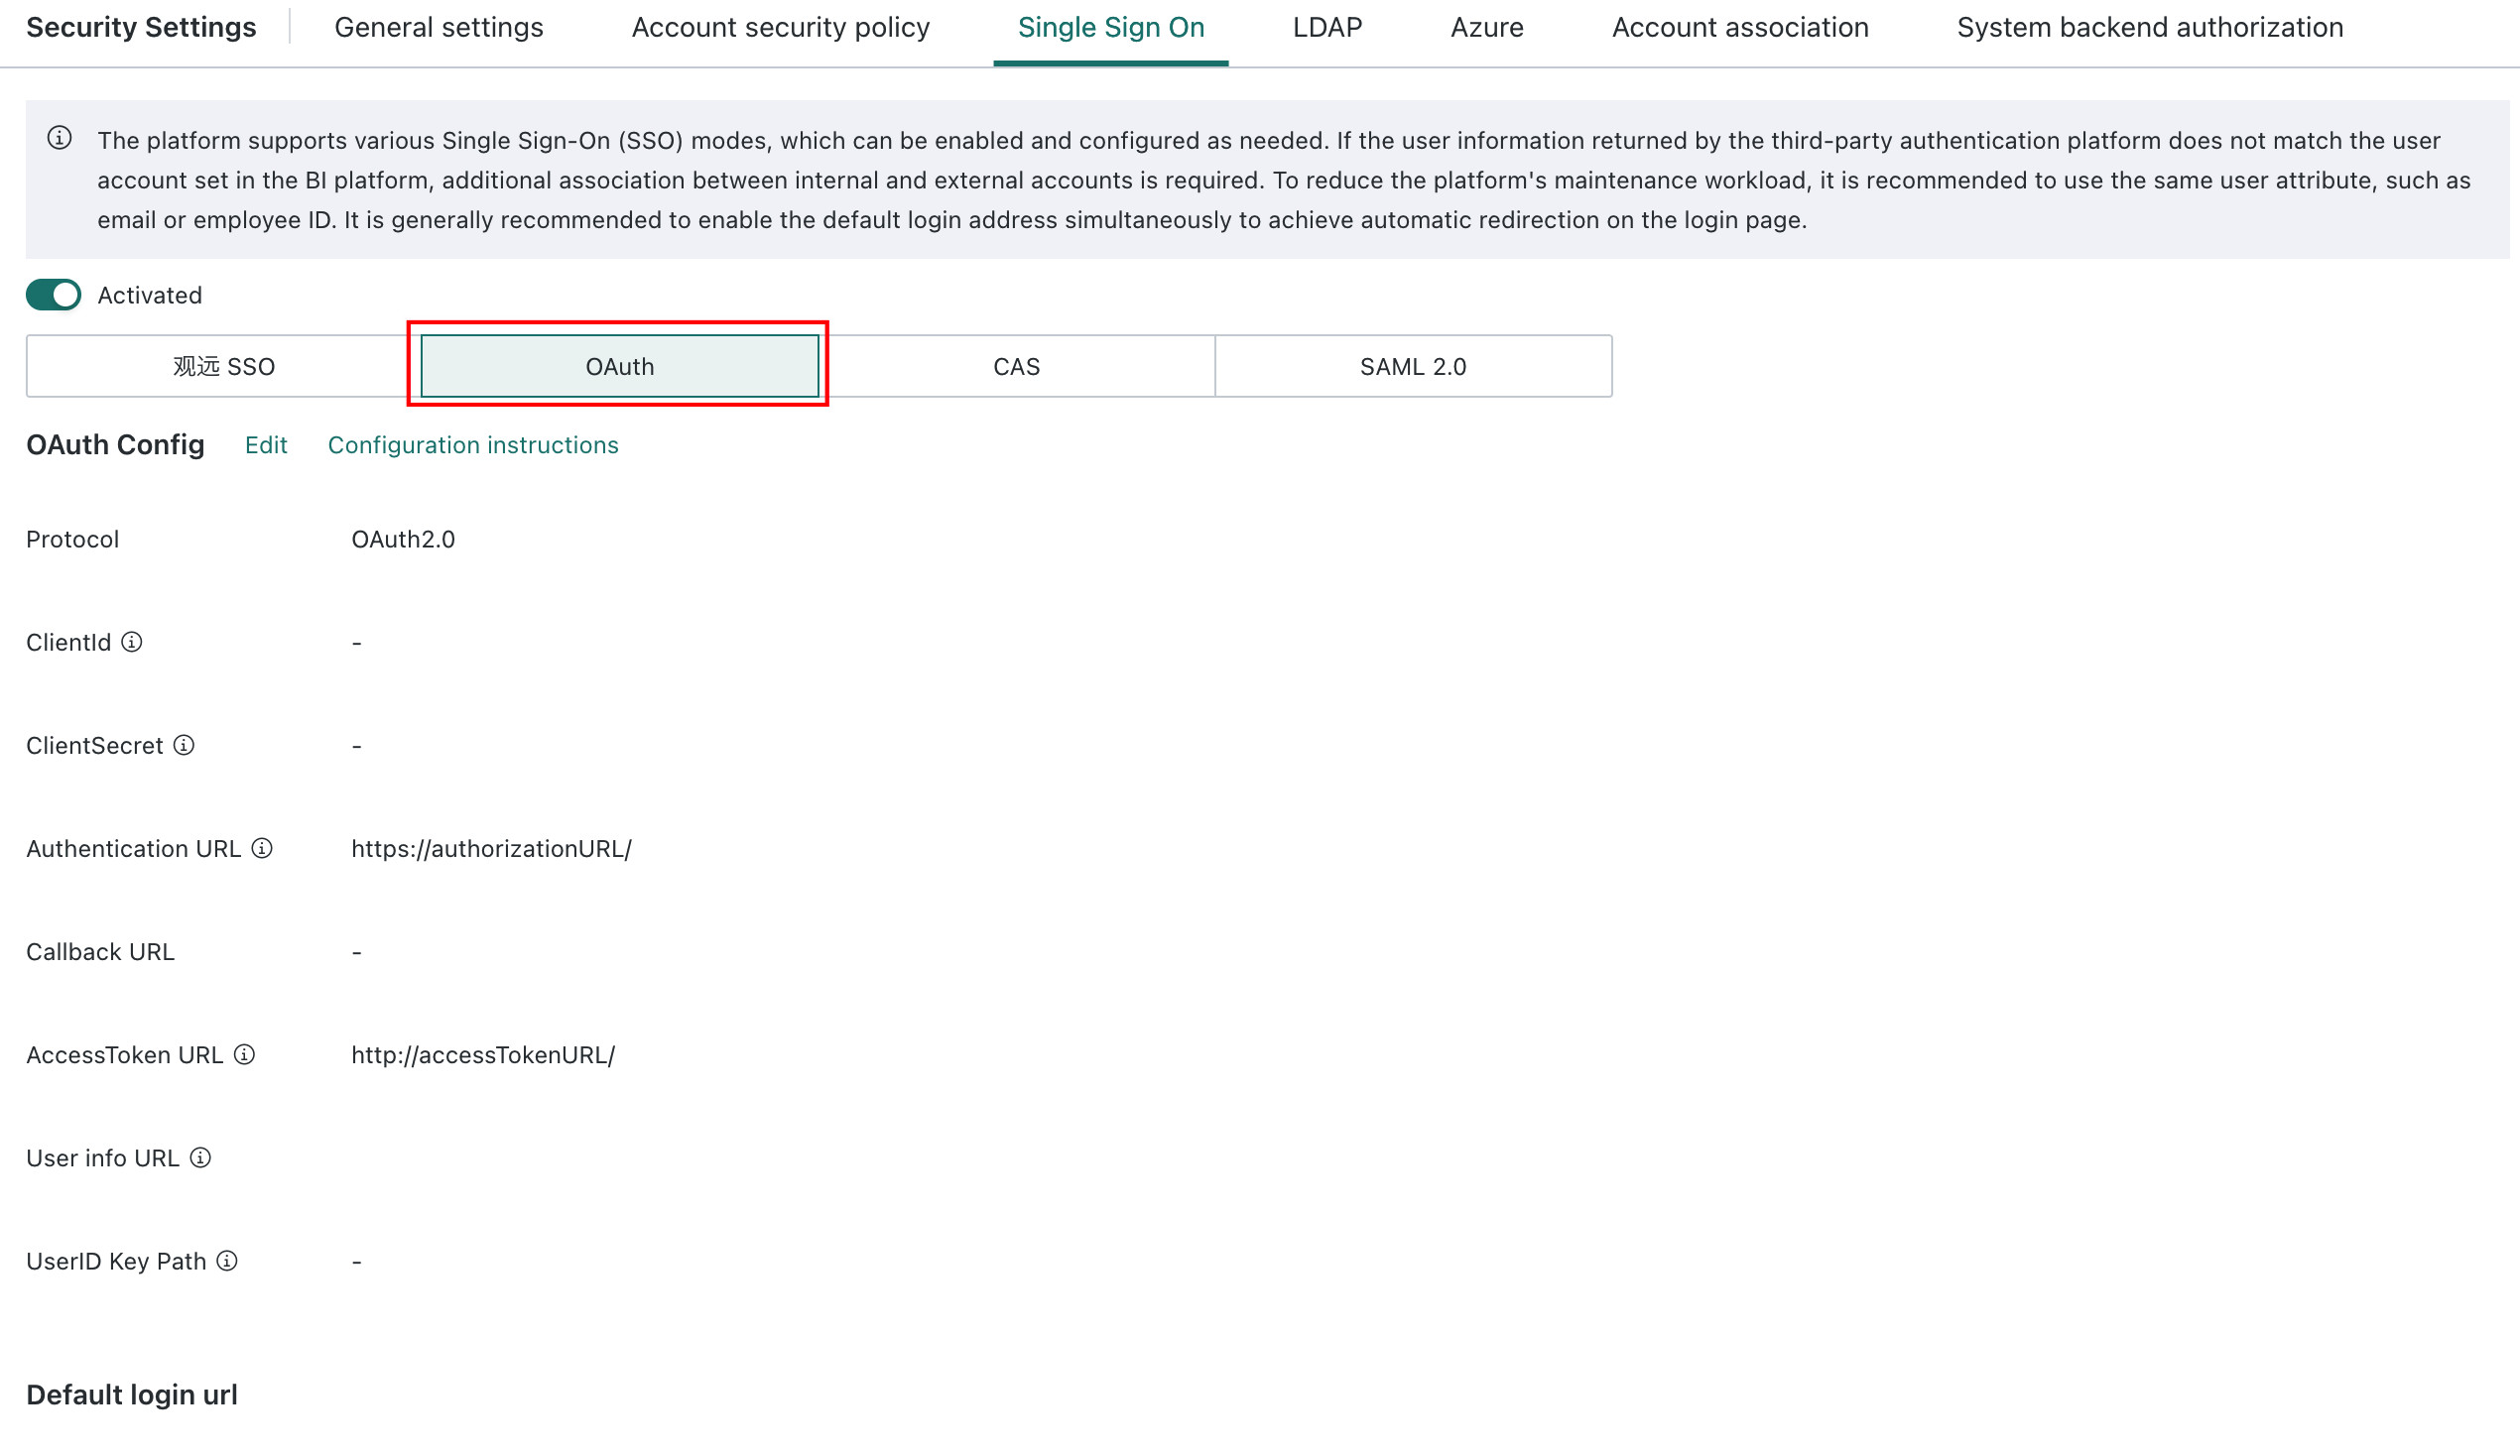
2. Edit the OAuth configuration.
-
Protocol: OAuth 2.0
-
ClientId: client ID of the authentication application
-
ClientSecret: client secret of the authentication application
-
AuthorizationURL: authentication service provider address, usually the page where users enter account credentials or scan codes
-
Callback URL, optional and depends on whether the authentication service requires the
redirect_uriparameter:${BI service address}/standard-oauth2/authenticate -
AccessTokenURL: the URL for requesting a token from the authentication service provider by exchanging
CodeforToken. The token can be passed in the request header. -
ApiURL: the URL used to request user information from the authentication service provider by exchanging
tokenfor user information. The token can be passed in the URL, header, or POST body using the${accessToken}format.-
Token passing supports three methods:
-
Method 1: pass it in the URL, for example:
Get:https://www.xx.com/auth/userinfo?token=${accessToken}; -
Method 2: pass it in the request header. The parameter value must include
${accessToken}, for example: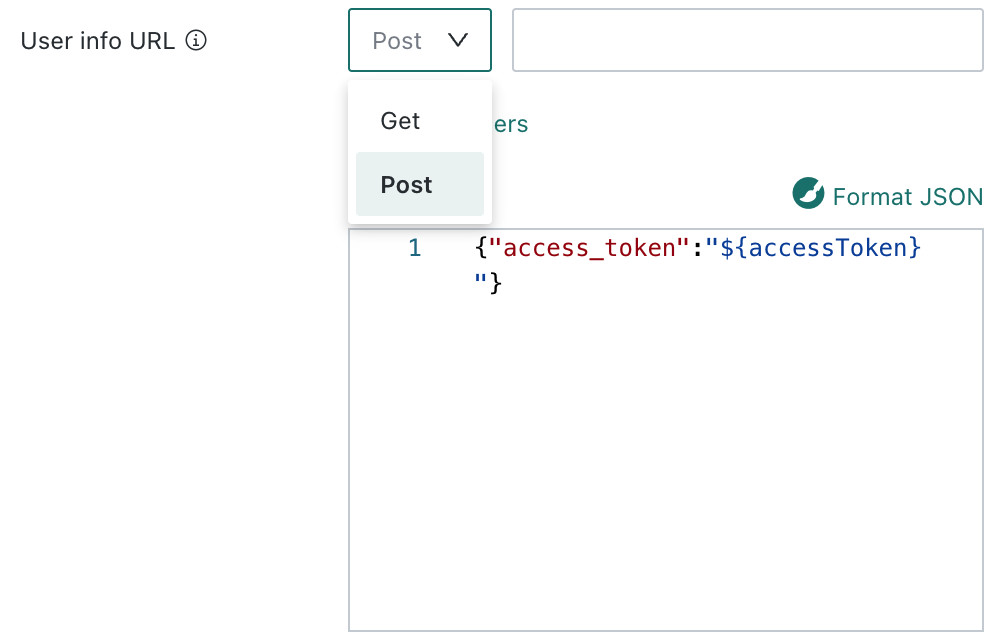
Method 3: pass it in the request POST body. The JSON line must include
${accessToken}, for example: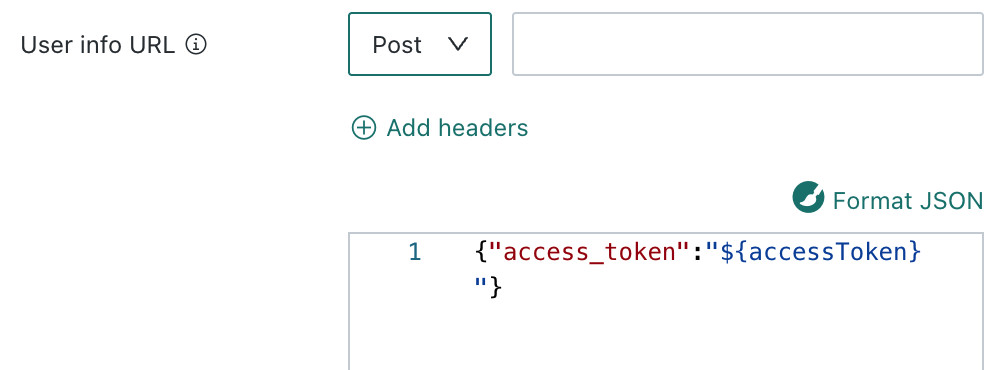
-
-
UserIDKey: the field in the user information that is used to map to BI users, such as
email.
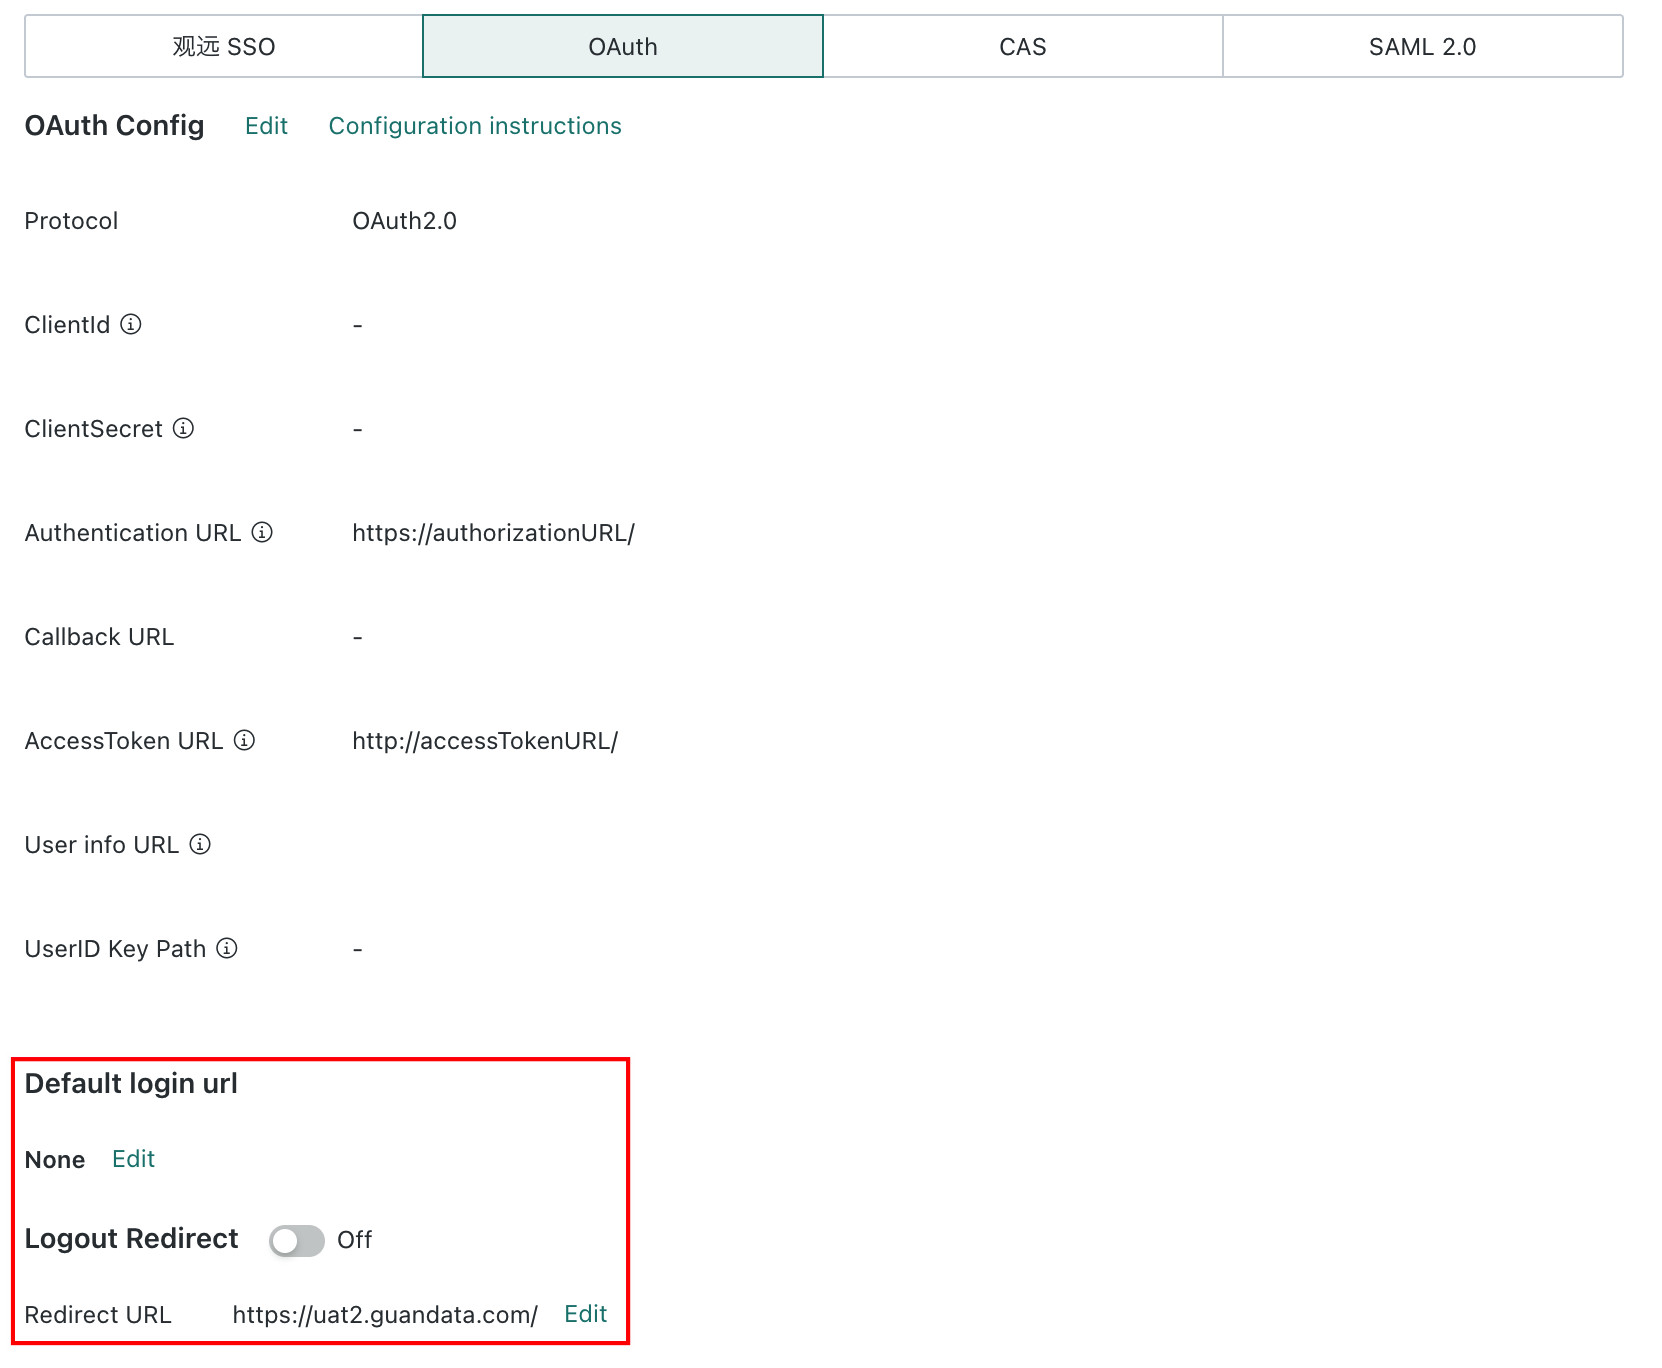
3. Default login address and logout redirection, optional
- The default login address is:
${BI service address}/standard-oauth2/authenticate - If you provide a logout URL, turn on the logout redirection switch and configure the address as the provided
LogoutURL, which is usually the single logout address.
If the value of the user information field does not match an existing user account, go to System Settings > Login Settings > External Account Association and configure the mapping table in BI.

Test Process
- Visit
${BI service address}/standard-oauth2/authenticate, and the system automatically redirects to the SSO login authentication page, such as Keycloak.
.png)
- After entering the correct account credentials, the system redirects back to BI. Confirm that the logged-in user is the SSO user bound in the SSO mapping table.
- If a logout address is configured, selecting logout in BI logs the user out from SSO and returns to the SSO login page.