User
Overview
The Users module is one of the core administration modules in Guandata BI. It is primarily used to manage all user account information in the system. Through this module, administrators can create, edit, view, enable, and disable users, while also performing fine-grained permission management such as role assignment and permission transfer.
Main functions include:
- centralized maintenance of user information
- assignment and transfer of user permissions
- configuration and management of Business Administrators
- associations between users, user groups, and roles
User Information Management
View User Information
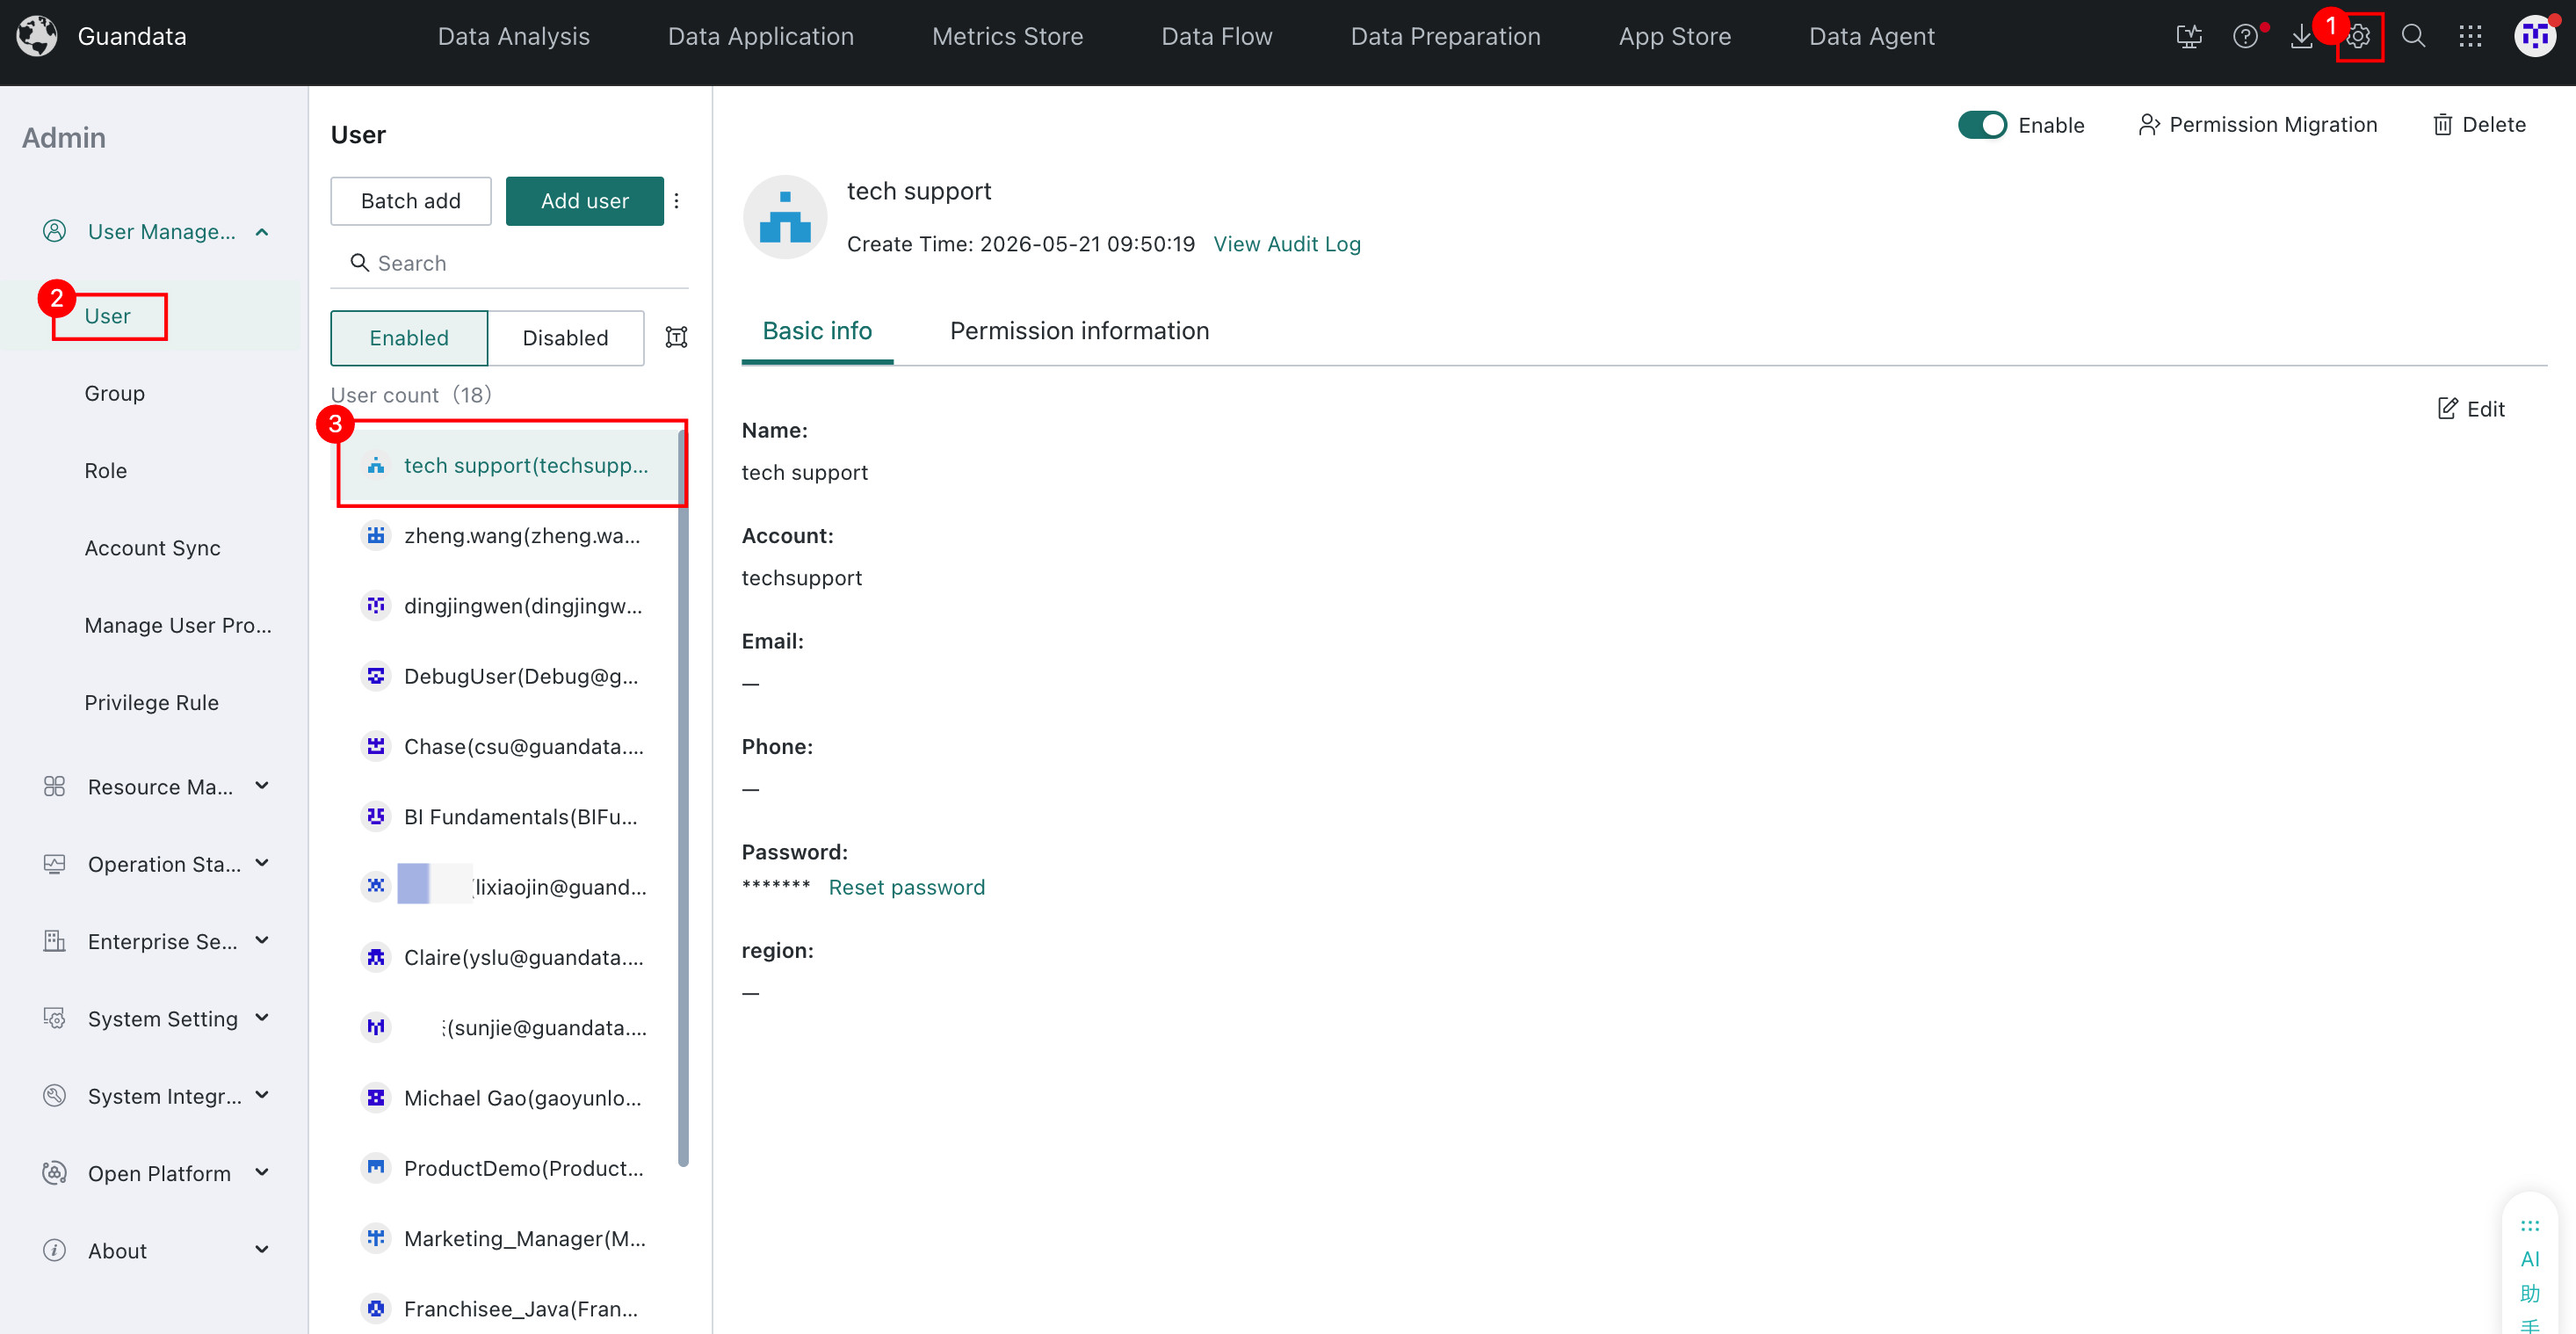
On the Admin Center > User Management > Users page, you can see the list of users in the current company domain. Select a user to view detailed information in the right-side panel.
In some customer environments, multiple users may share the same mobile number or email address. Guandata BI does not enforce uniqueness validation on phone numbers or email addresses, so different users may use the same phone number or email.
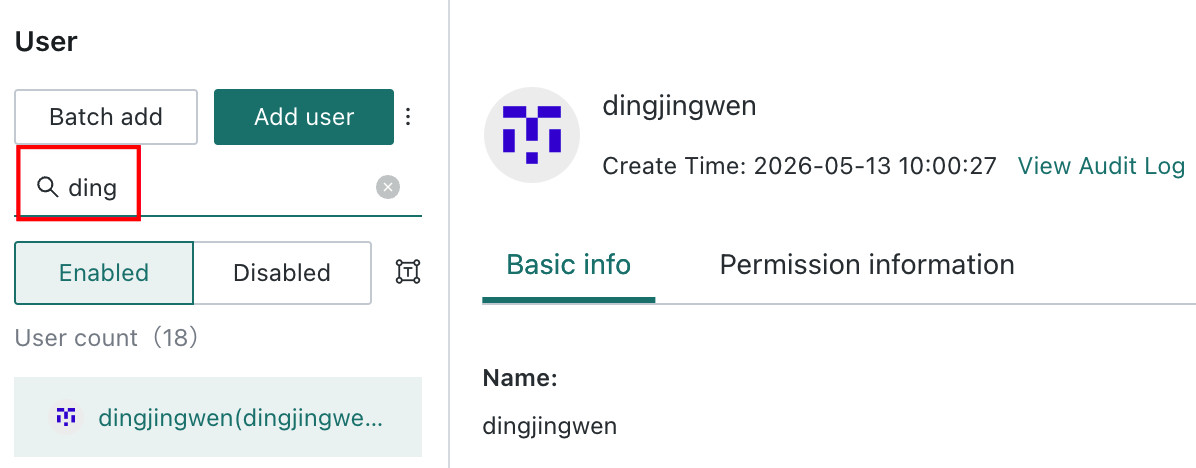
Search for Users
Enter the target user in the search area, and the system returns matching users.
Disabled users are not returned by default in user search. If you need to search disabled users, contact technical support to enable the corresponding feature switch.
Create Users
Create a Single User
Click Create User, enter user information, and then click Save. Name, email, password, and role are required fields for a new user. Other fields are optional.

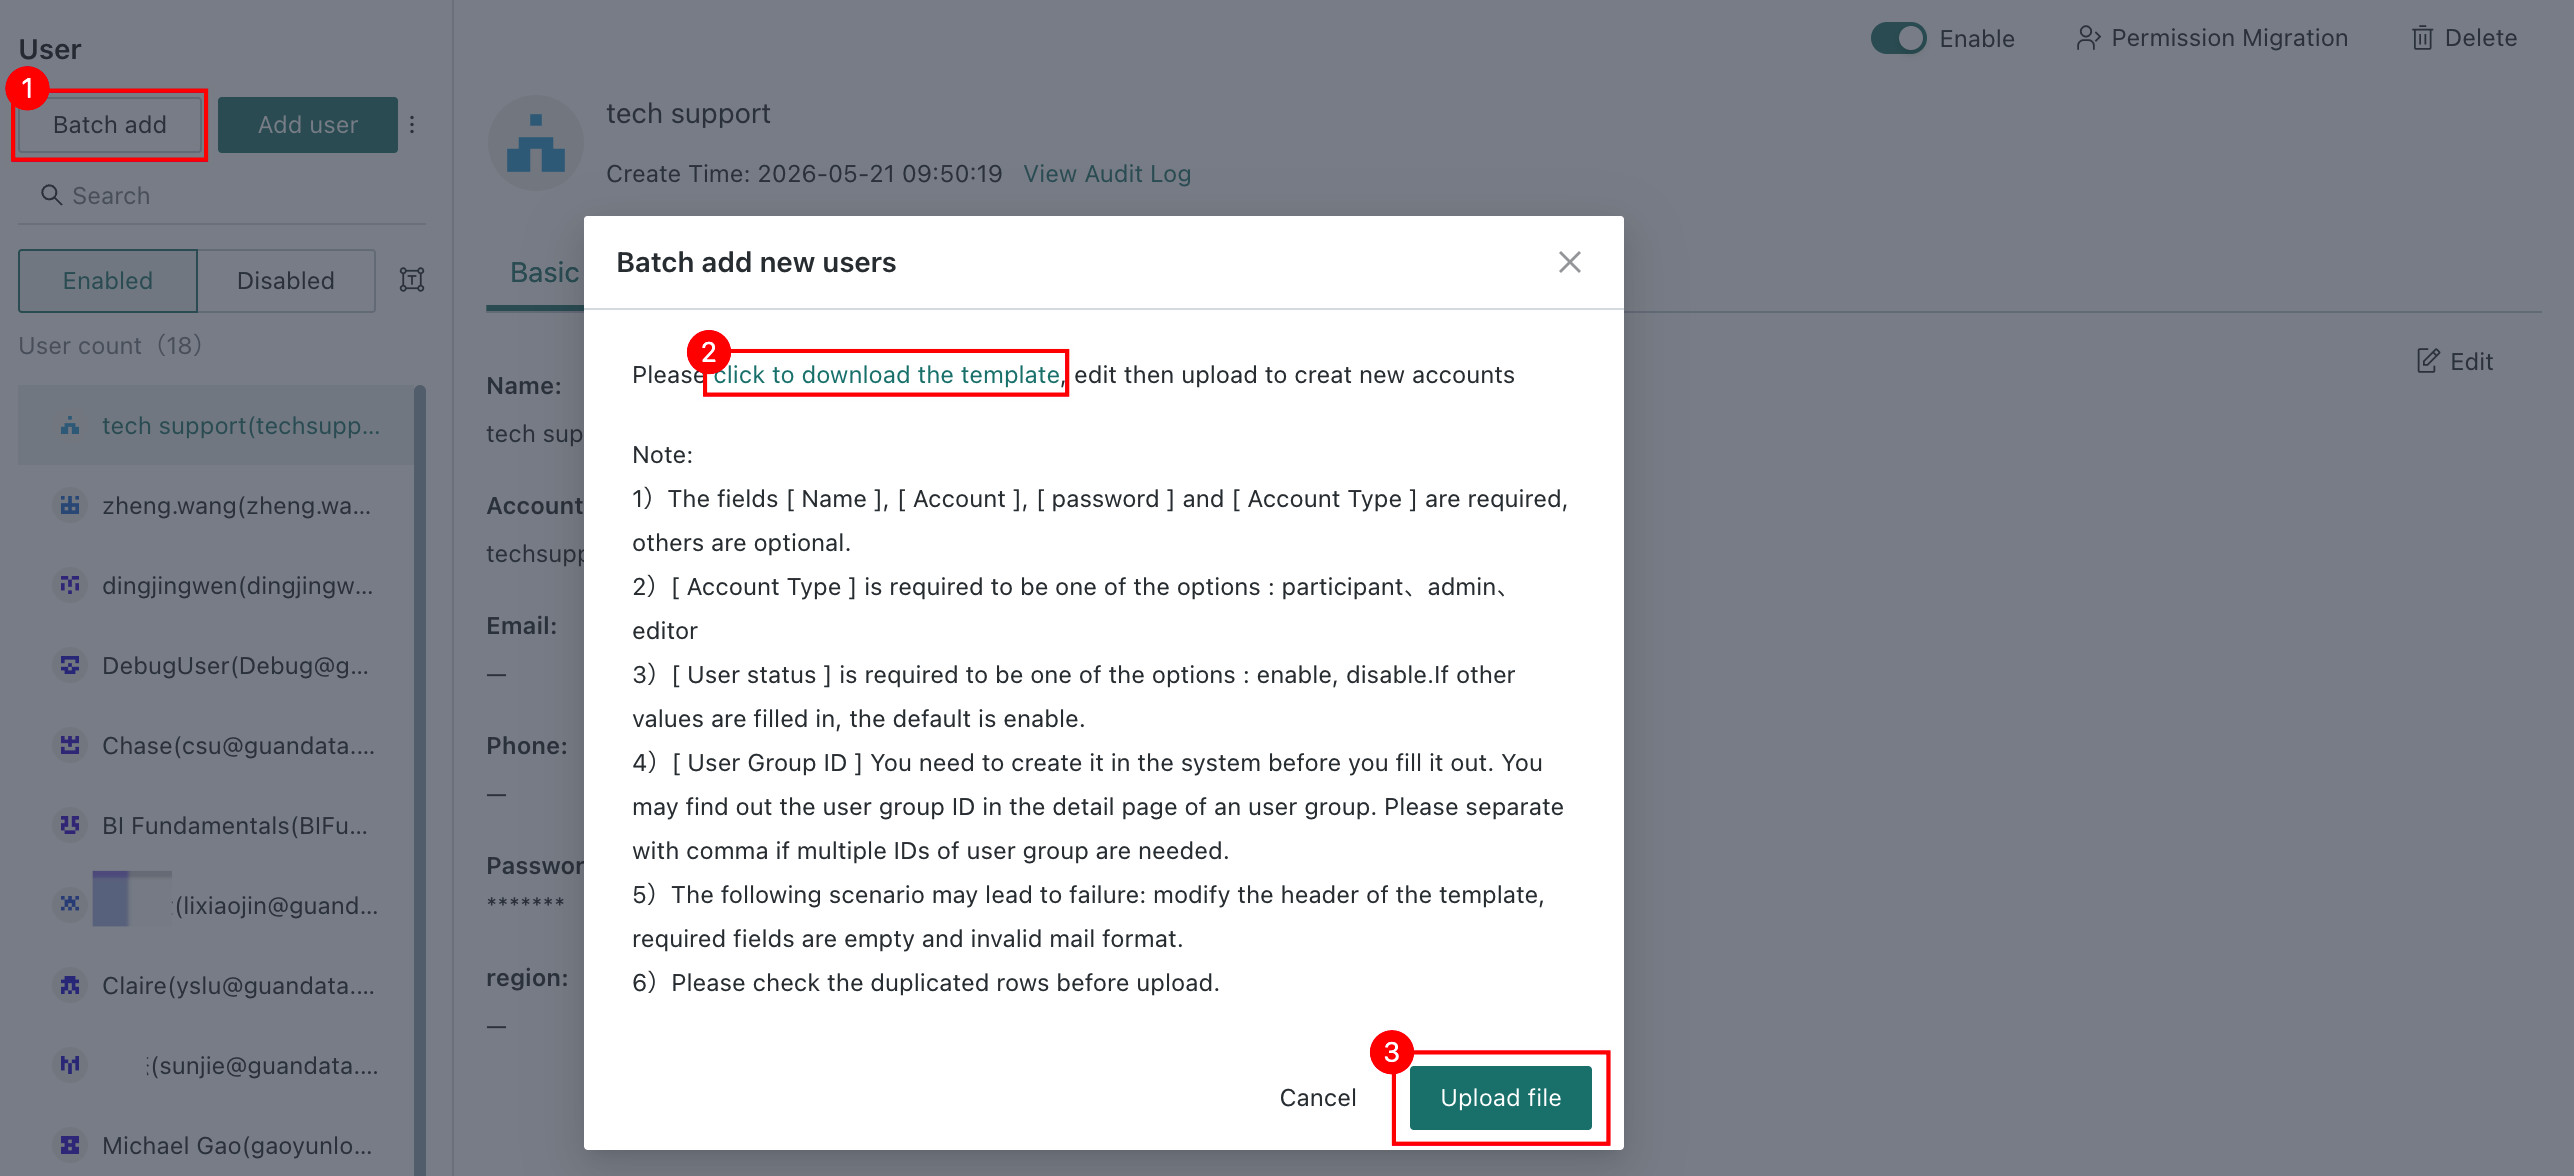
Batch Create Users
Click Batch Create Users, download the template file, fill in the user information based on the template, and then upload the completed file to create users in bulk.
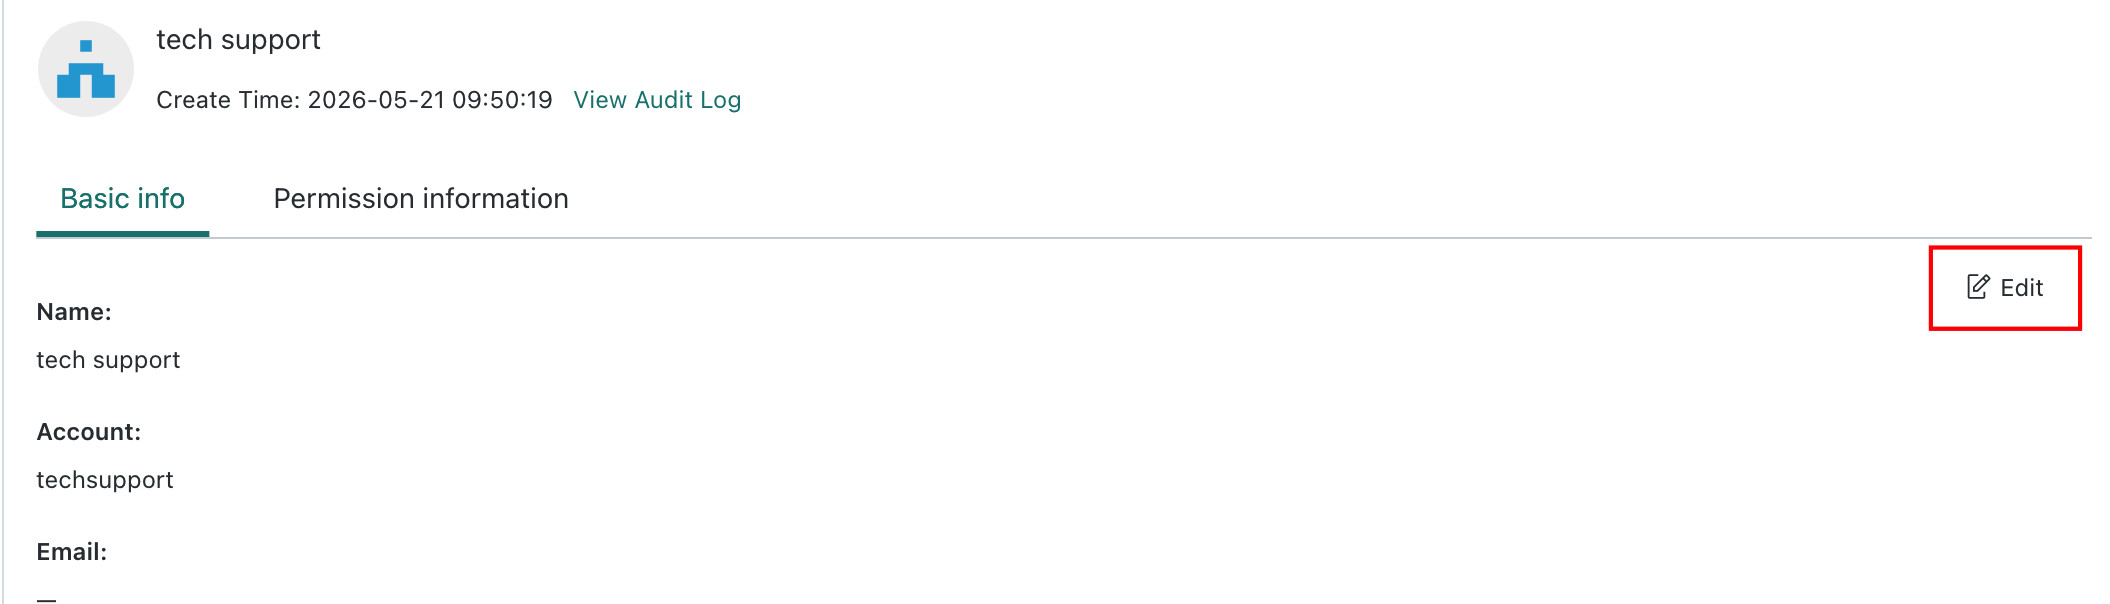
Modify User Information
On the user detail page, click Edit in the upper-right corner of the Basic Information tab to add, modify, or complete user information.
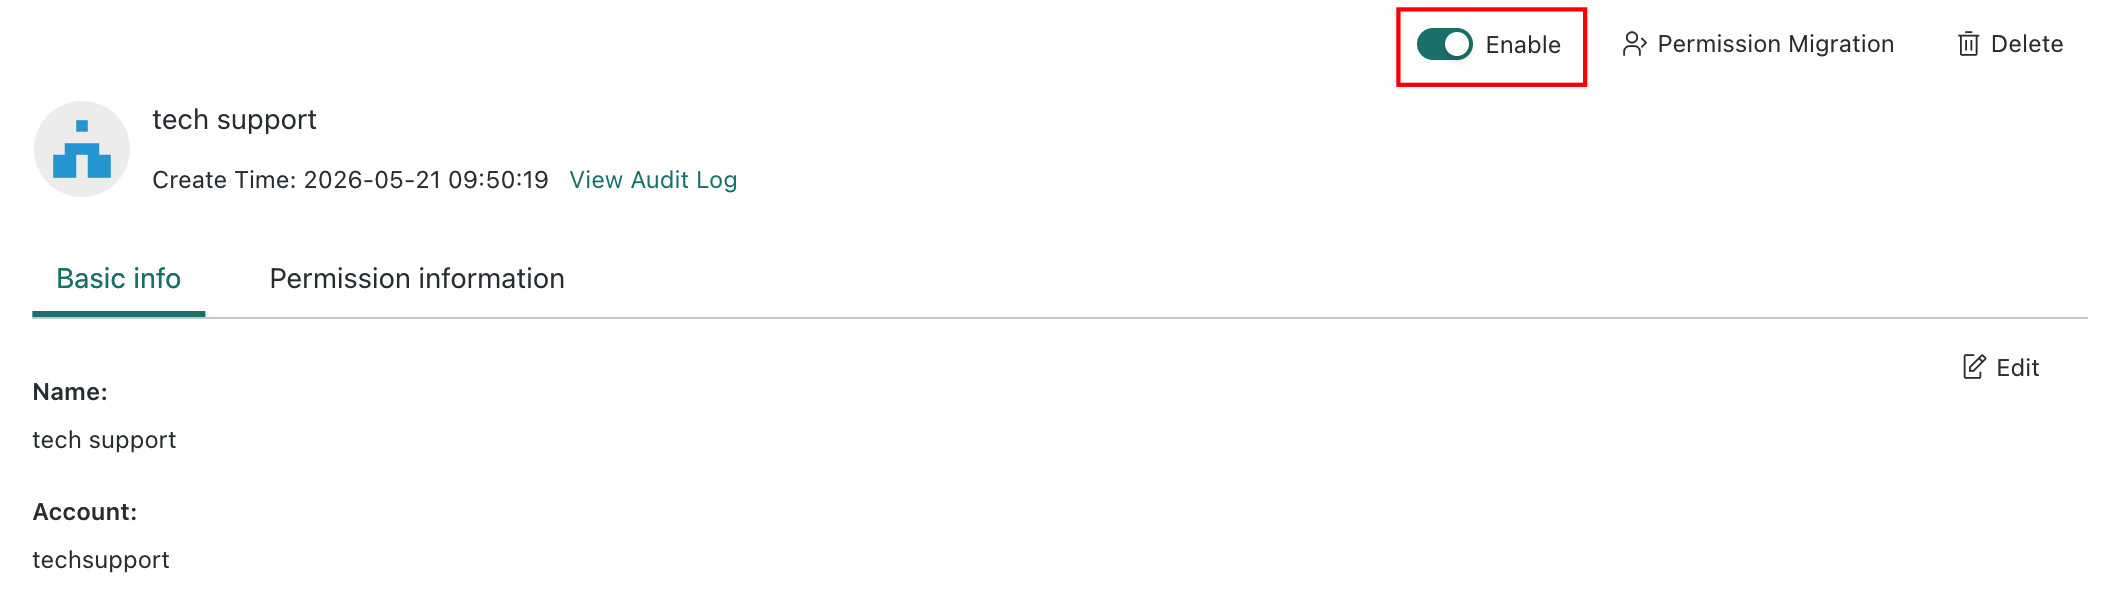
Enable or Disable Users
Enable or Disable a Single User
Use the switch in the upper-right corner of the user detail page to enable or disable the current user.
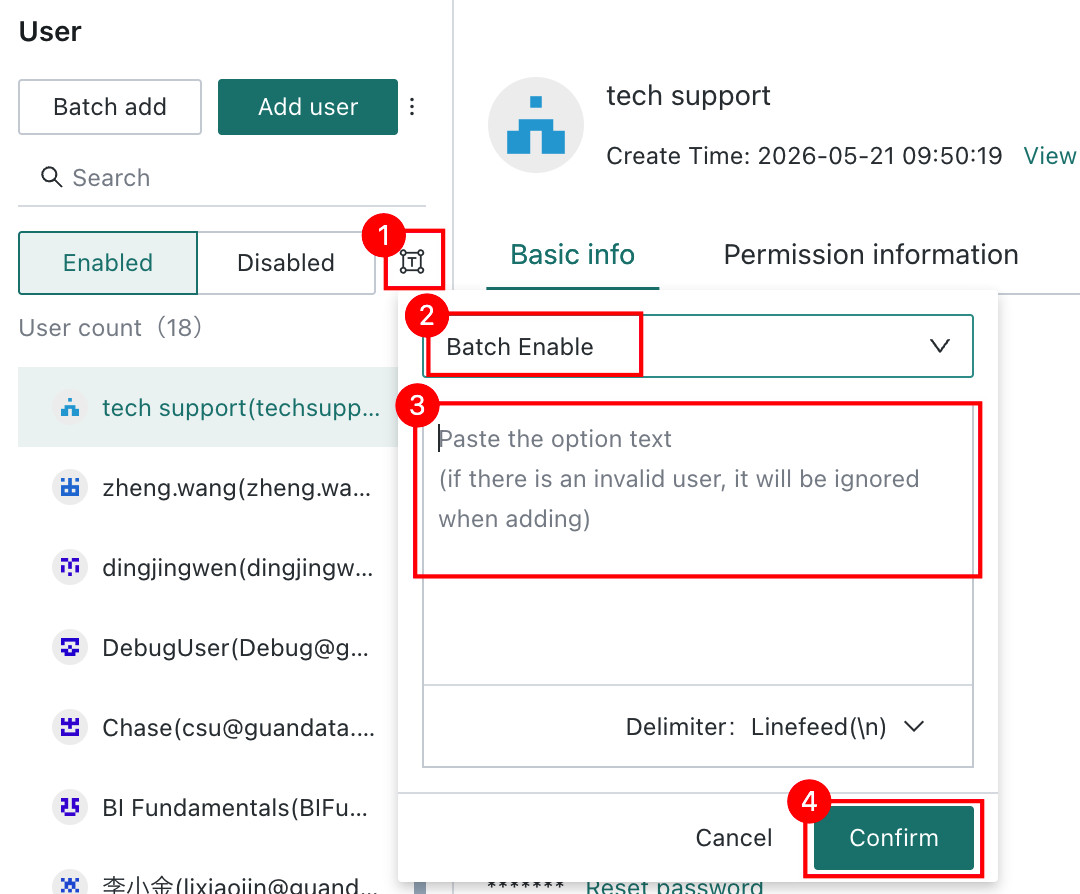
Batch Enable or Disable Users
Click the small icon next to Enable / Disable to perform batch enable or disable operations for users.
Batch Export Users
Click the menu next to Create User and choose Batch Export Users to export all user information in the current domain.

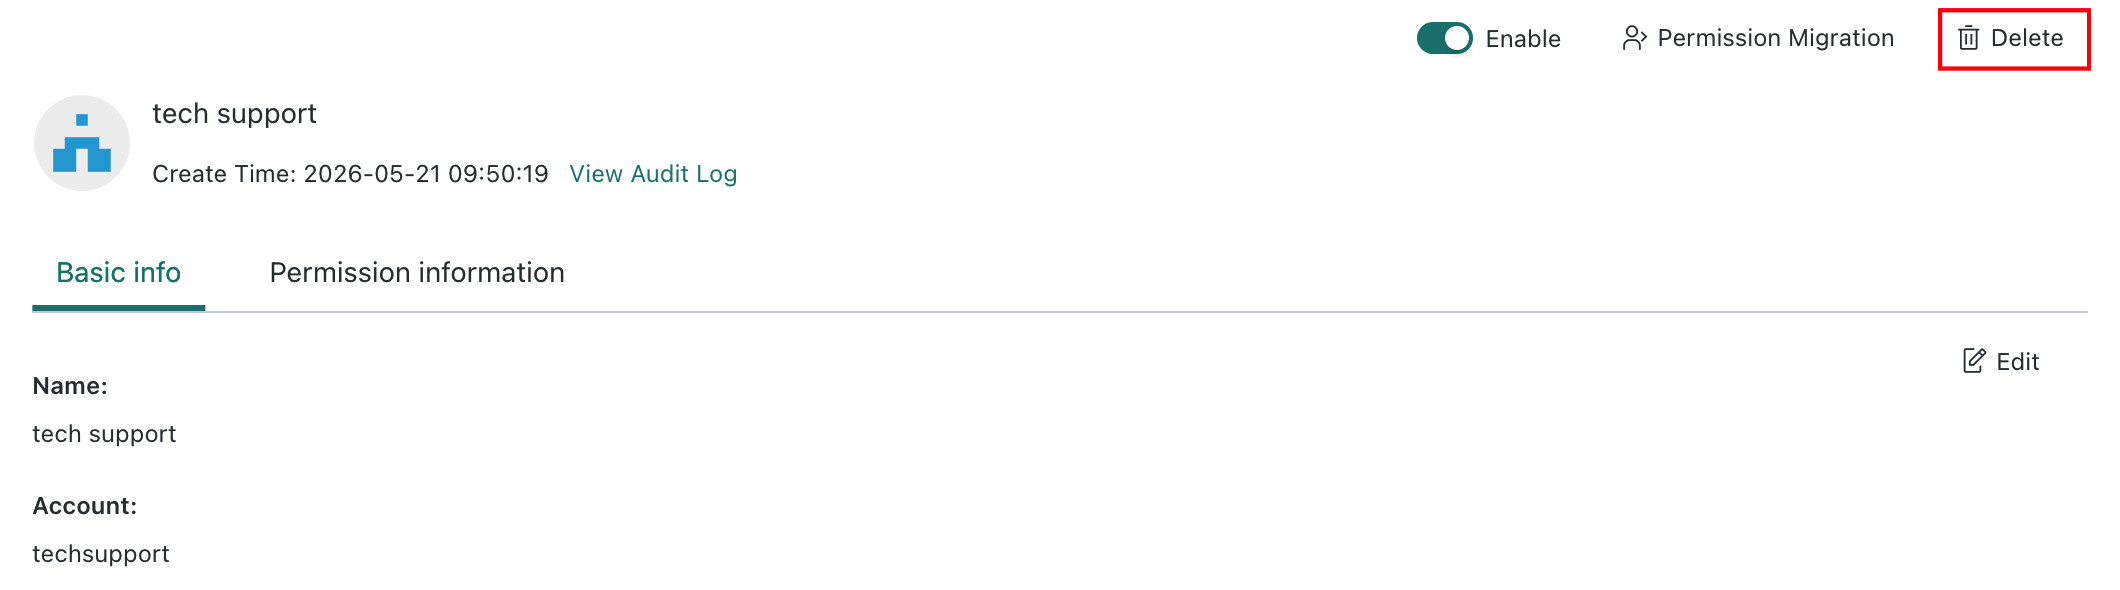
Delete Users
Click Delete in the upper-right corner of the user detail page to delete the current user.
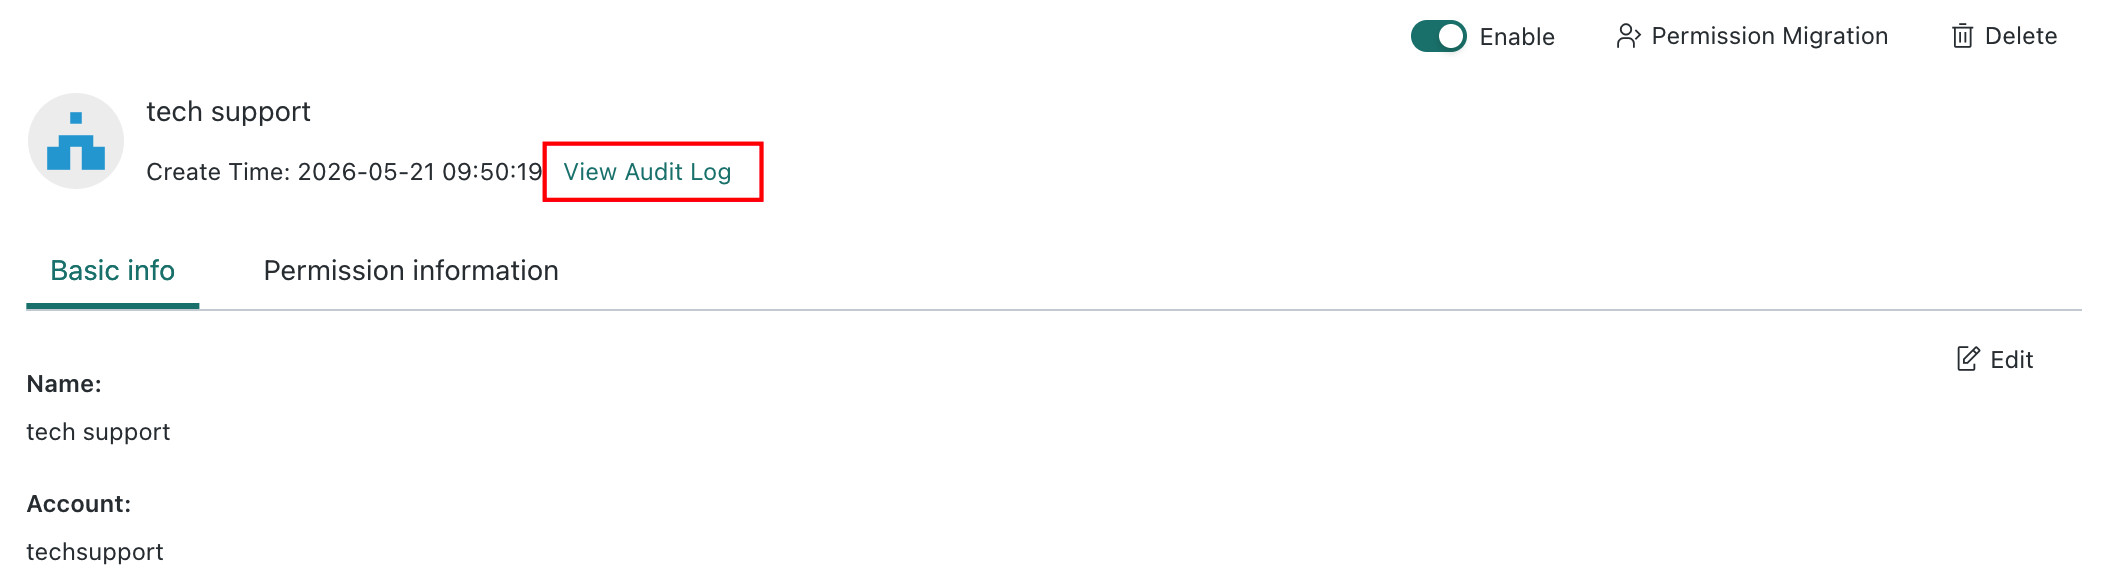
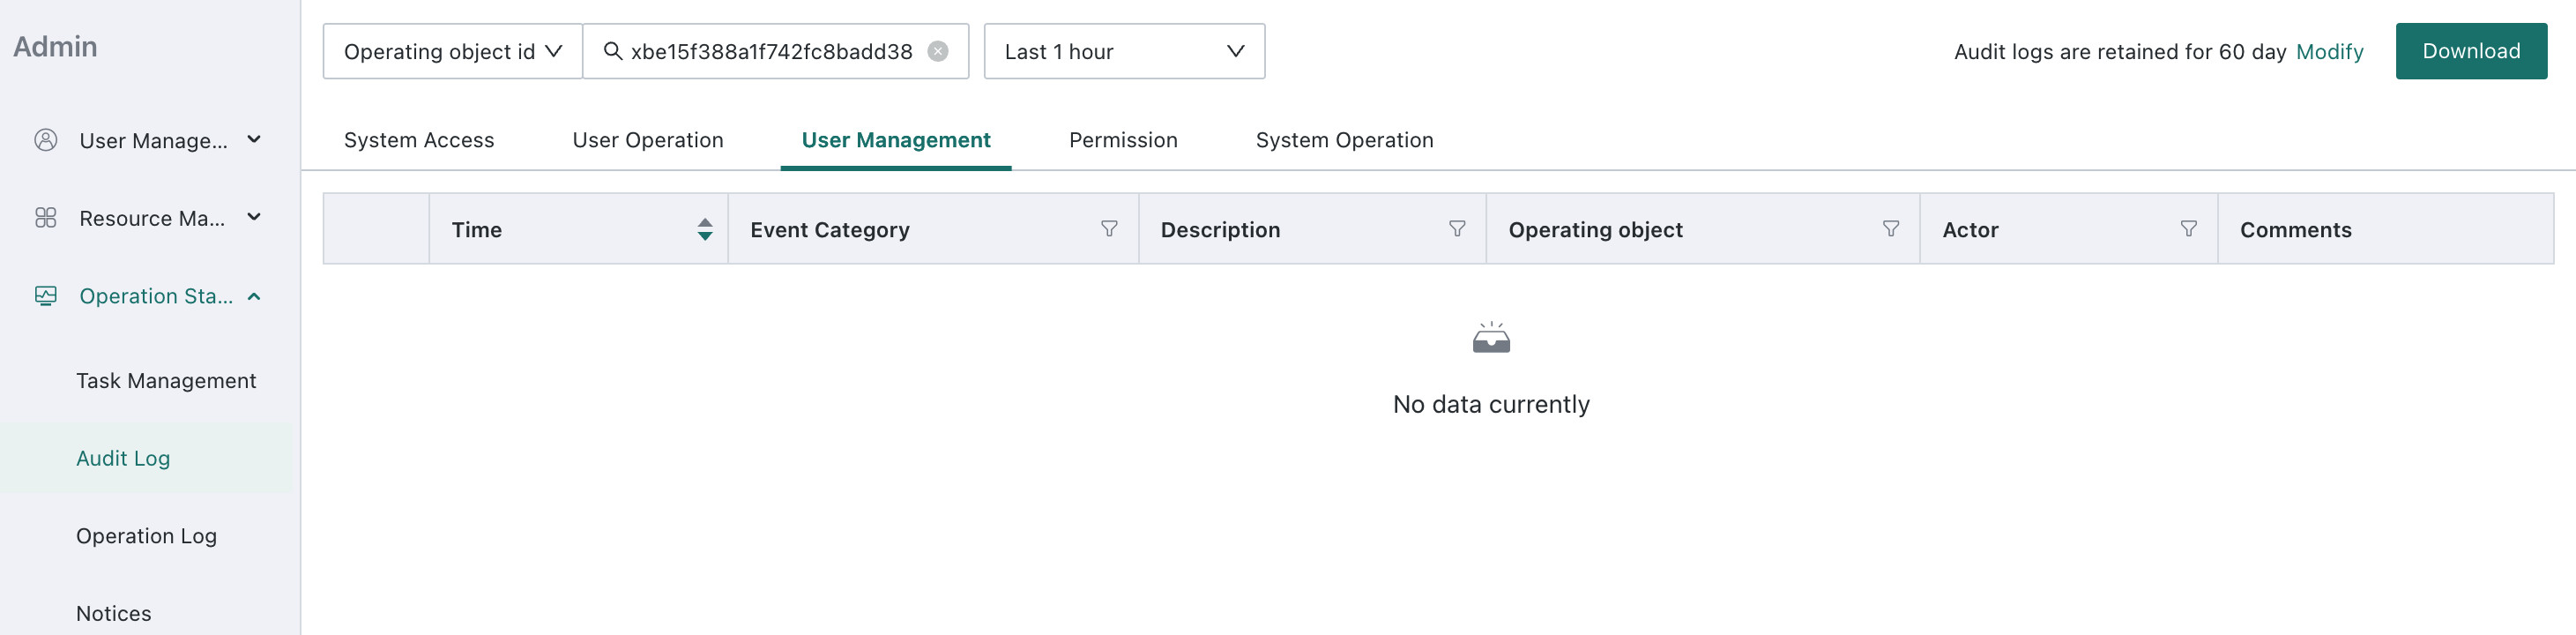
View Audit Logs
Click View Audit Logs to check operation logs related to the current user, including user creation, editing, and deletion. For more information, see Audit Logs.
User Permission Management
Modify Permission Information
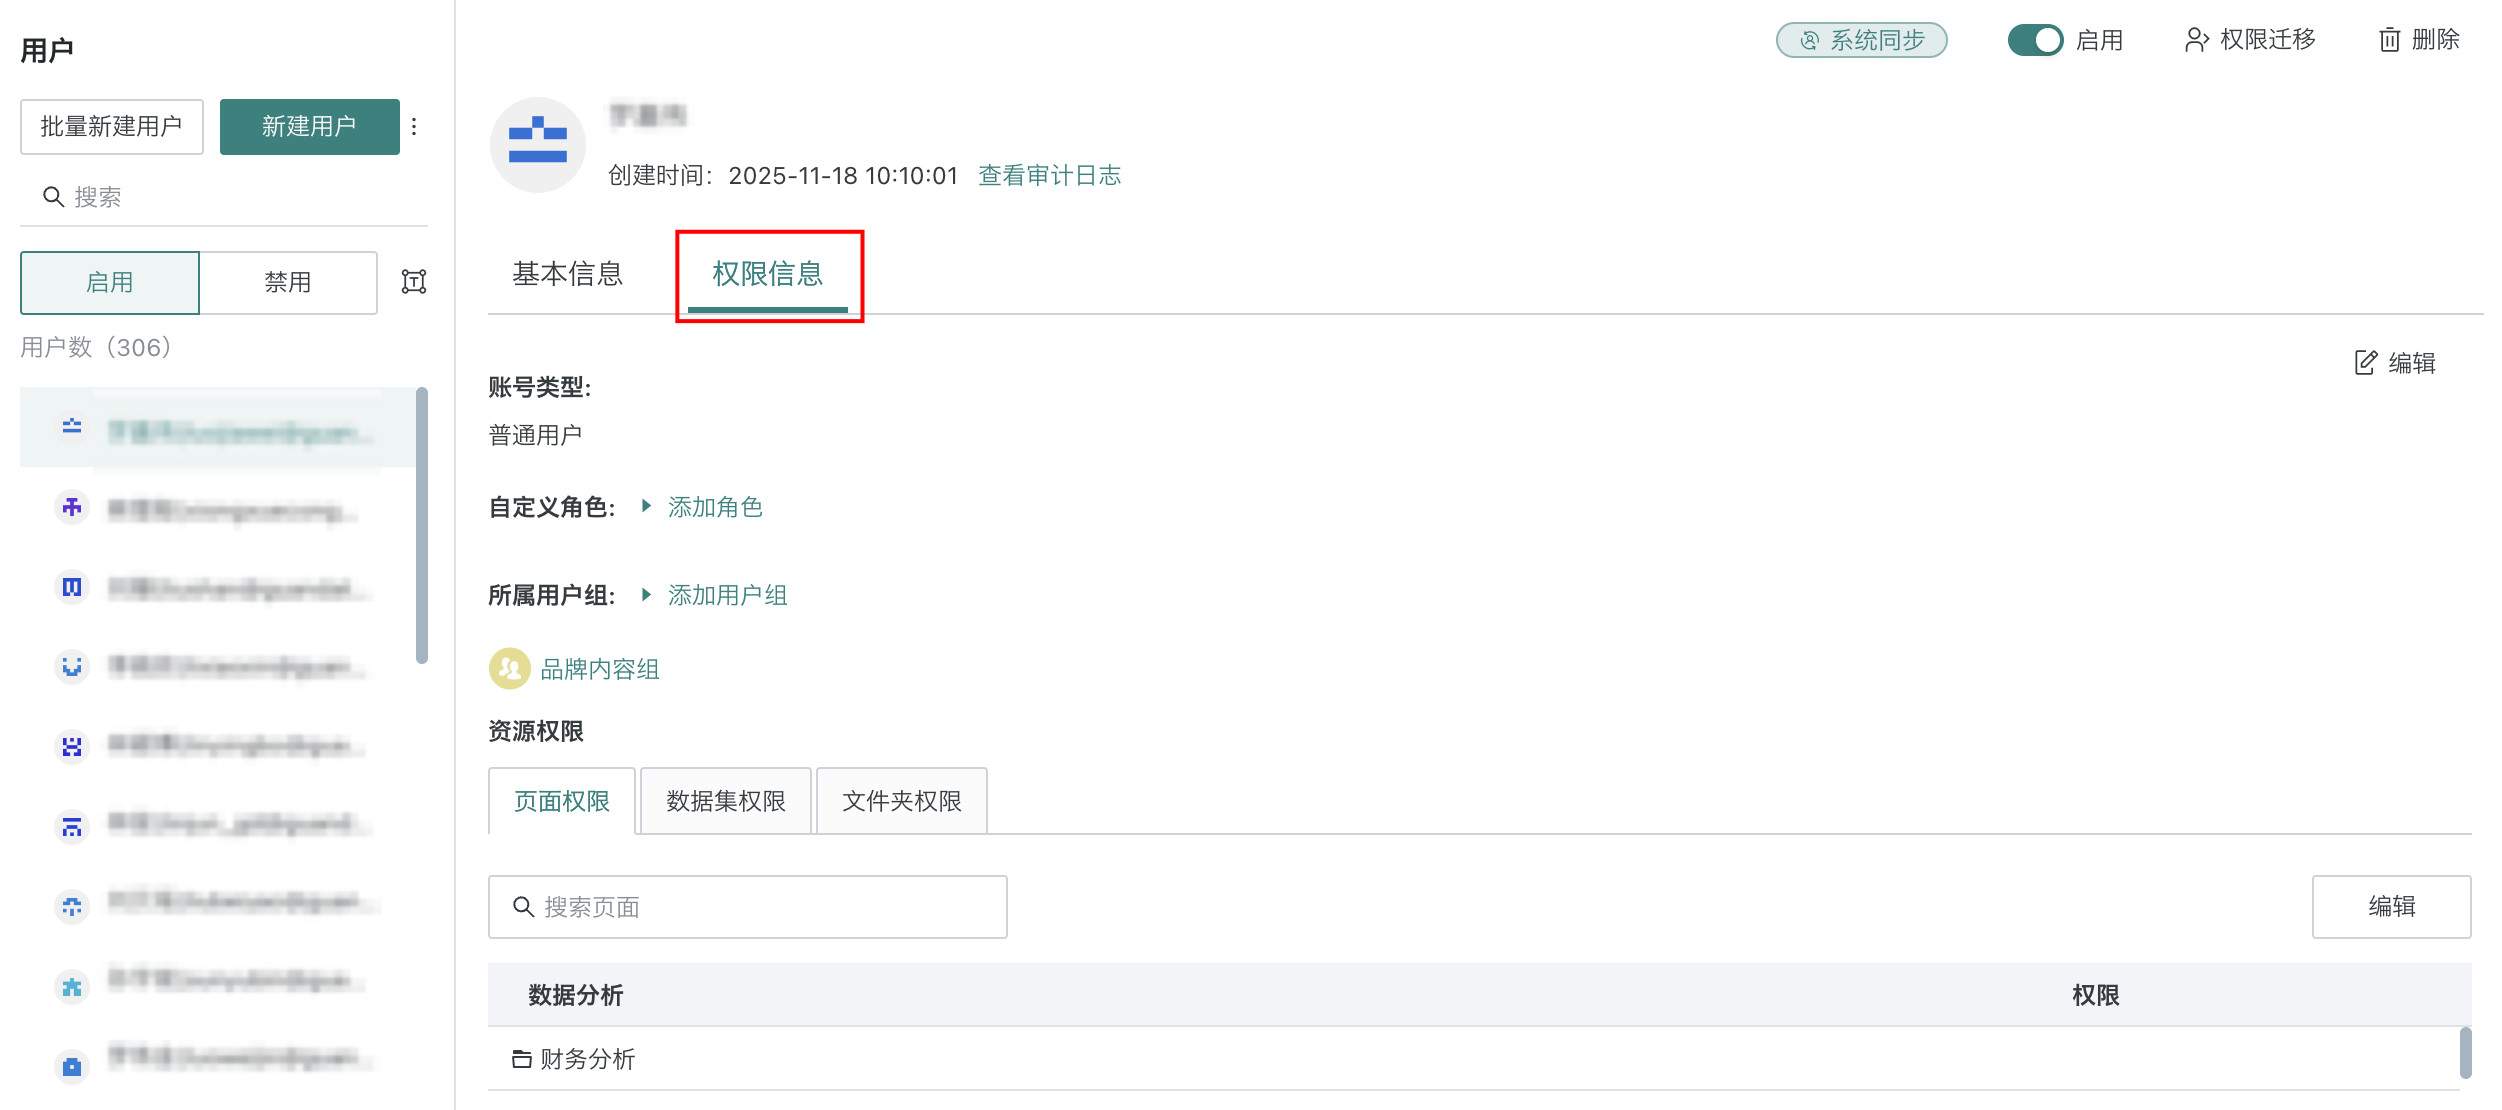
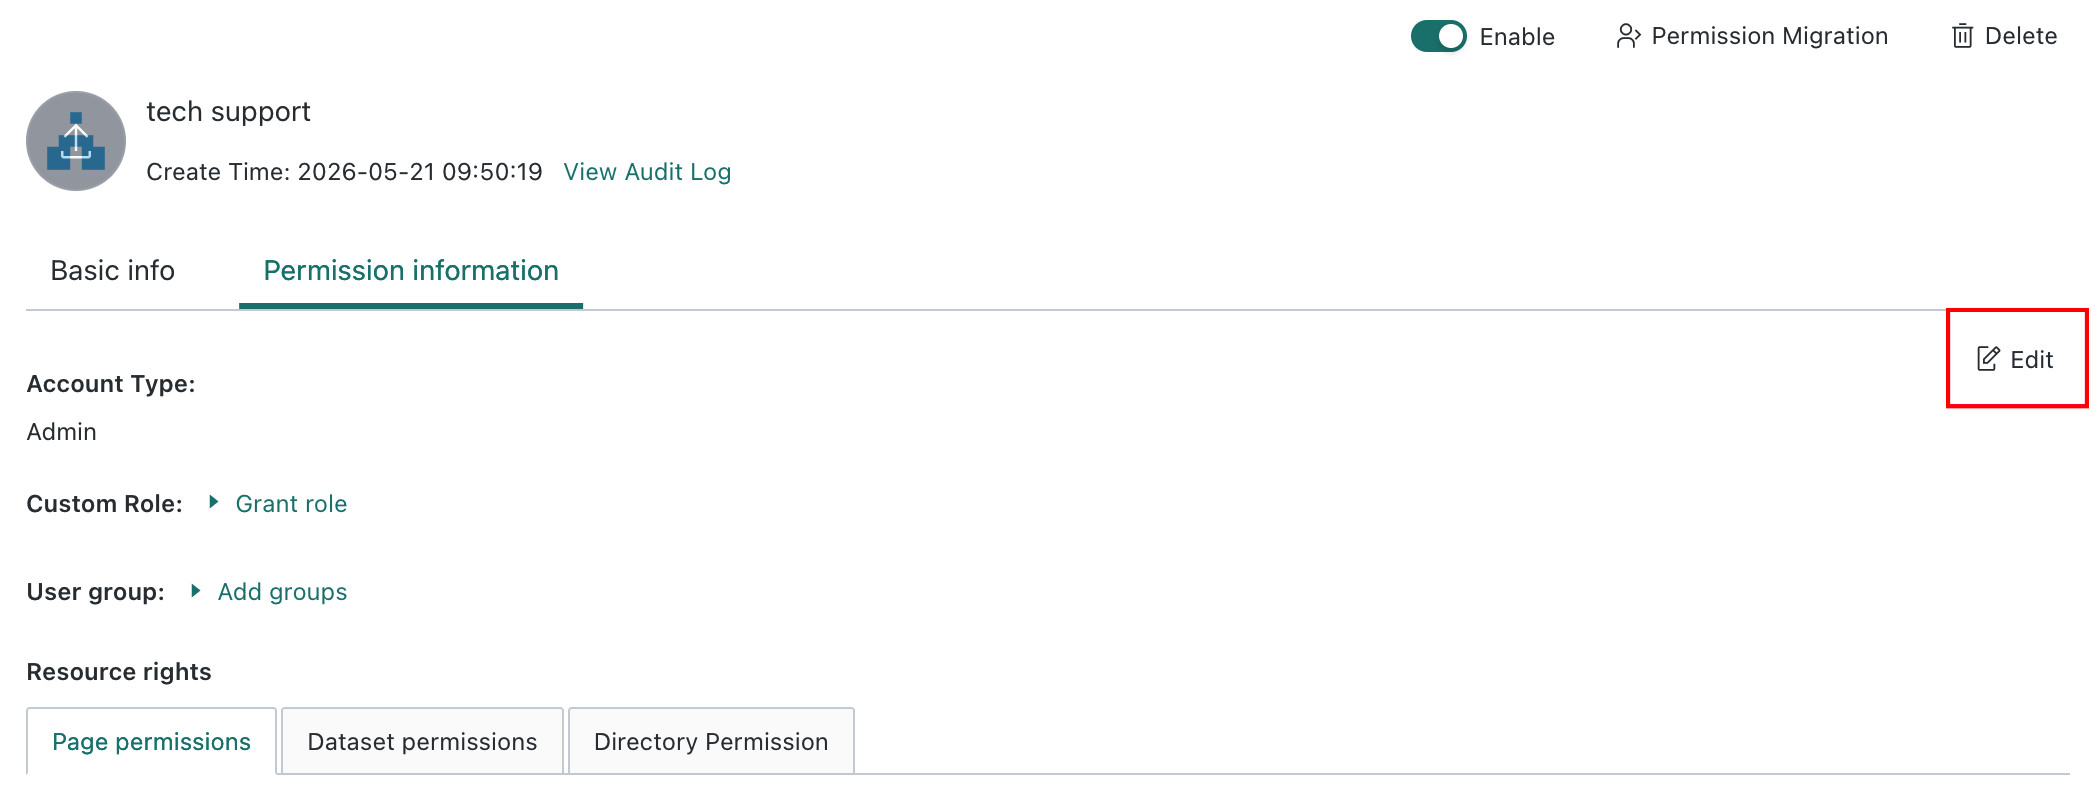
On the user detail page, click the Permission Information tab to modify the user's permission configuration.
Modify User Permissions
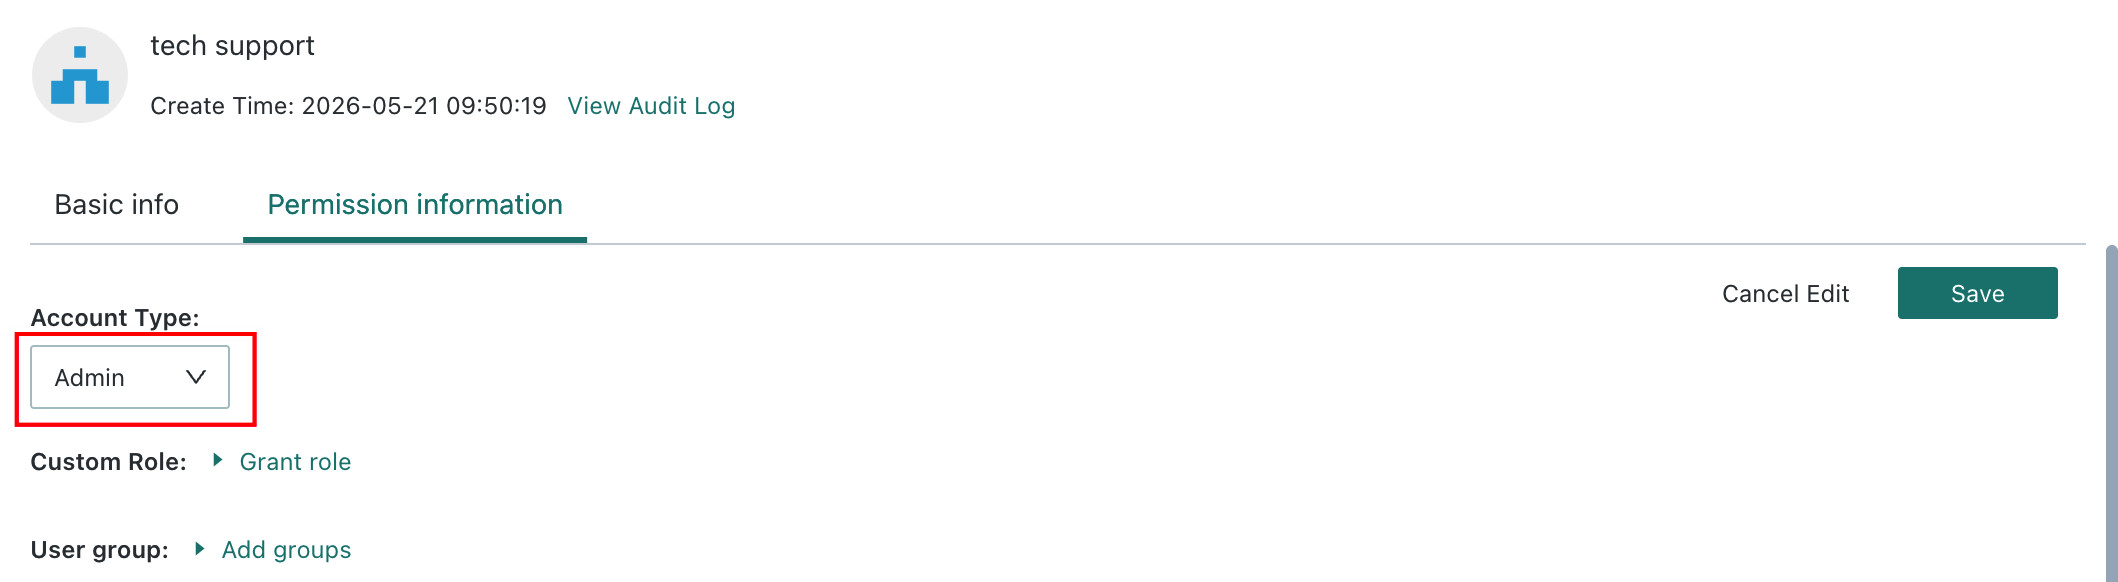
Click Edit beside Account Type to modify the user's permission settings. Click Save after the change to make it take effect.
-
Account Type: choose among Read-Only User, Standard User, and Administrator.
If Business Administrator Settings are enabled underPermission Rules, then whenAccount Typeis set toAdministrator, you can also choose whether to make the user aBusiness Administrator. A Business Administrator can manage users and all resources, while their feature permissions remain flexibly configurable.NoteA Business Administrator cannot set other members as Administrators and cannot configure custom roles.
-
Custom Roles: click
Add Role, choose the roles to assign, and clickAdd. The user becomes a member of the selected roles.
-
User Groups: click
Add User Group, choose the groups to assign, and clickAdd. The user becomes a member of the selected groups.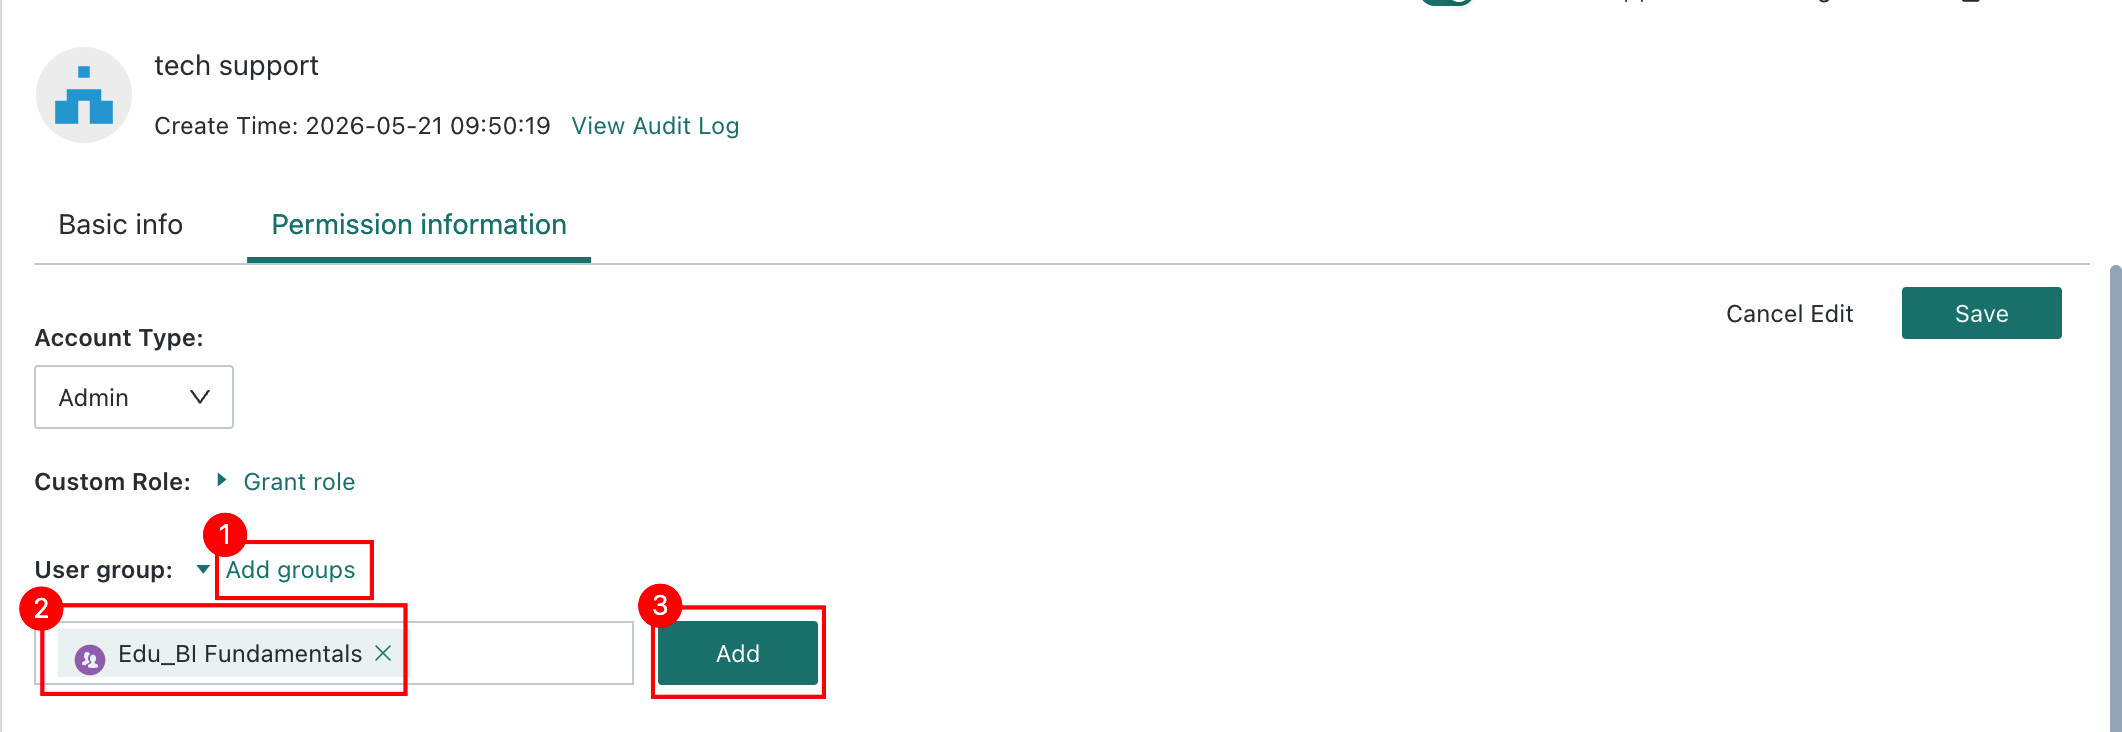
Modify Resource Permissions
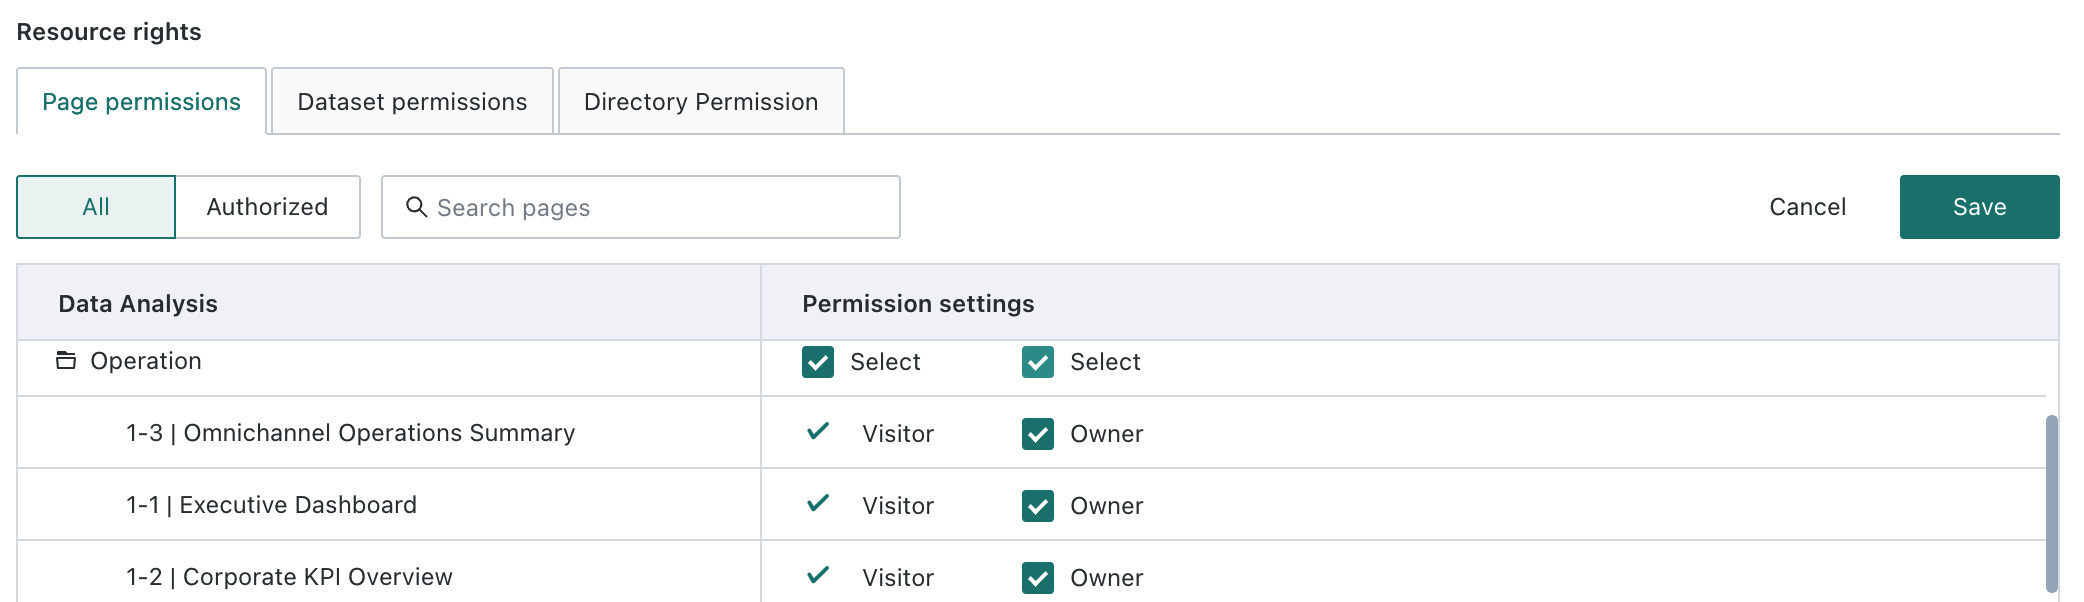
Click Edit below Resource Permissions to modify resource permissions. Click Save after the change to make it take effect.
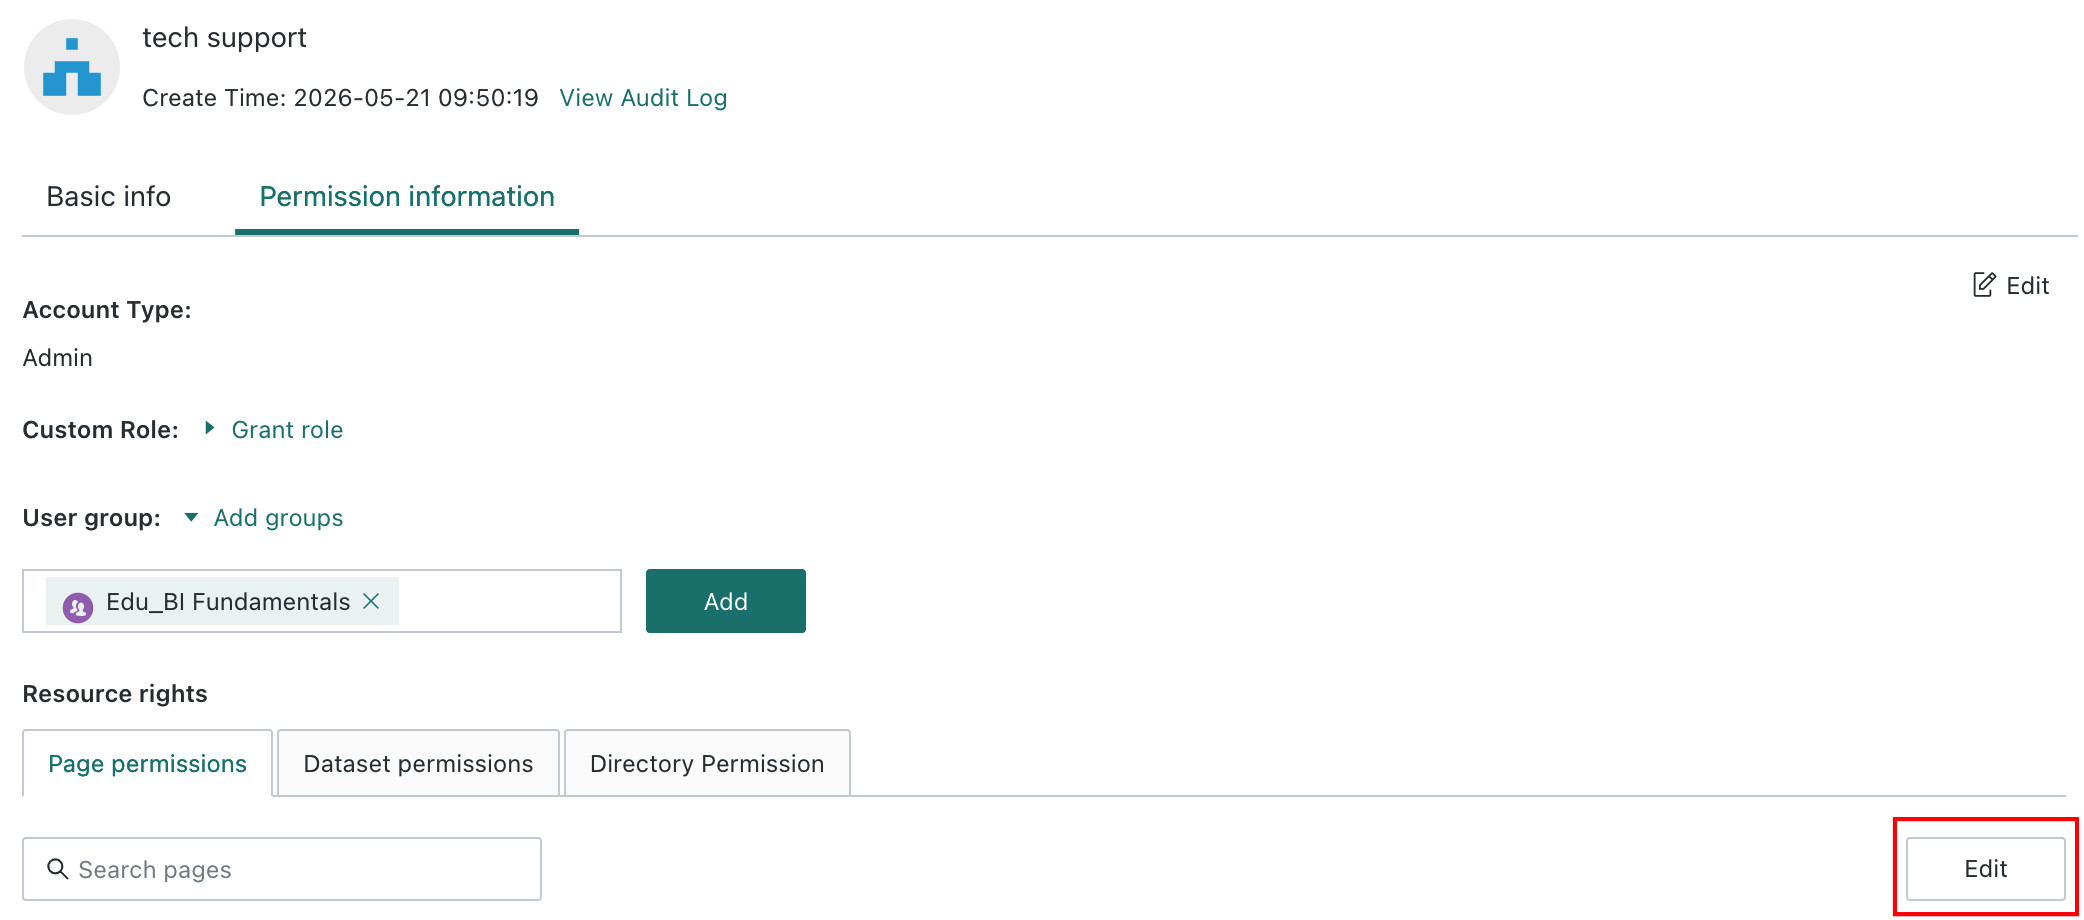
You can modify the user's permissions for Dashboards, Datasets, and Folders. Supported permission types include Visitor and Owner.
- Owner: usually the creator of the resource. Owners can share the resource permission with other users.
- Visitor: can only view the resource and cannot edit or modify it.
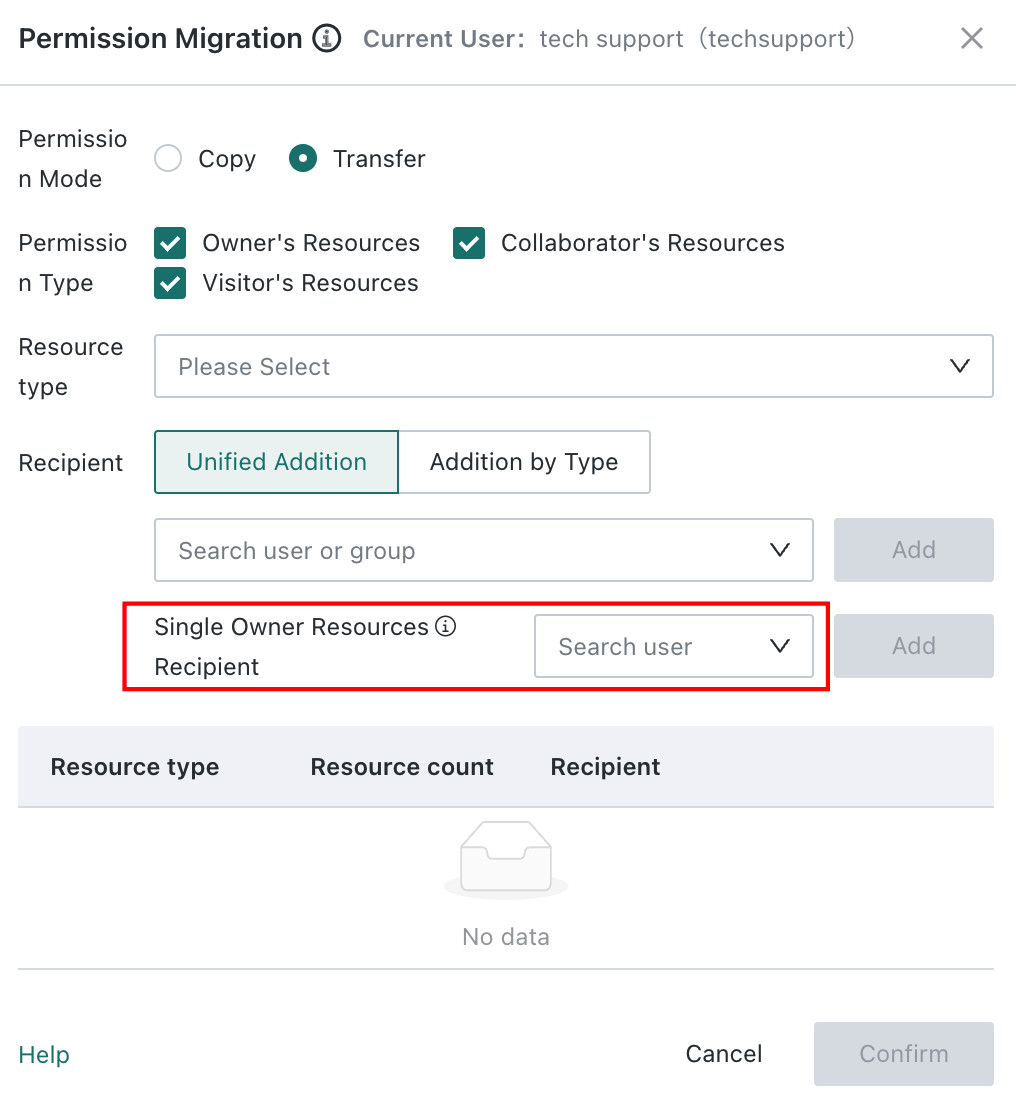
Transfer Permissions
Permission transfer does not include permissions inherited from batch authorization or user groups, and it cannot transfer permissions related to the dashboard overview page.
Steps
-
Click the
Permission Transferbutton in the upper-right corner of the page tocopyortransferthe current user's permissions to another user or user group.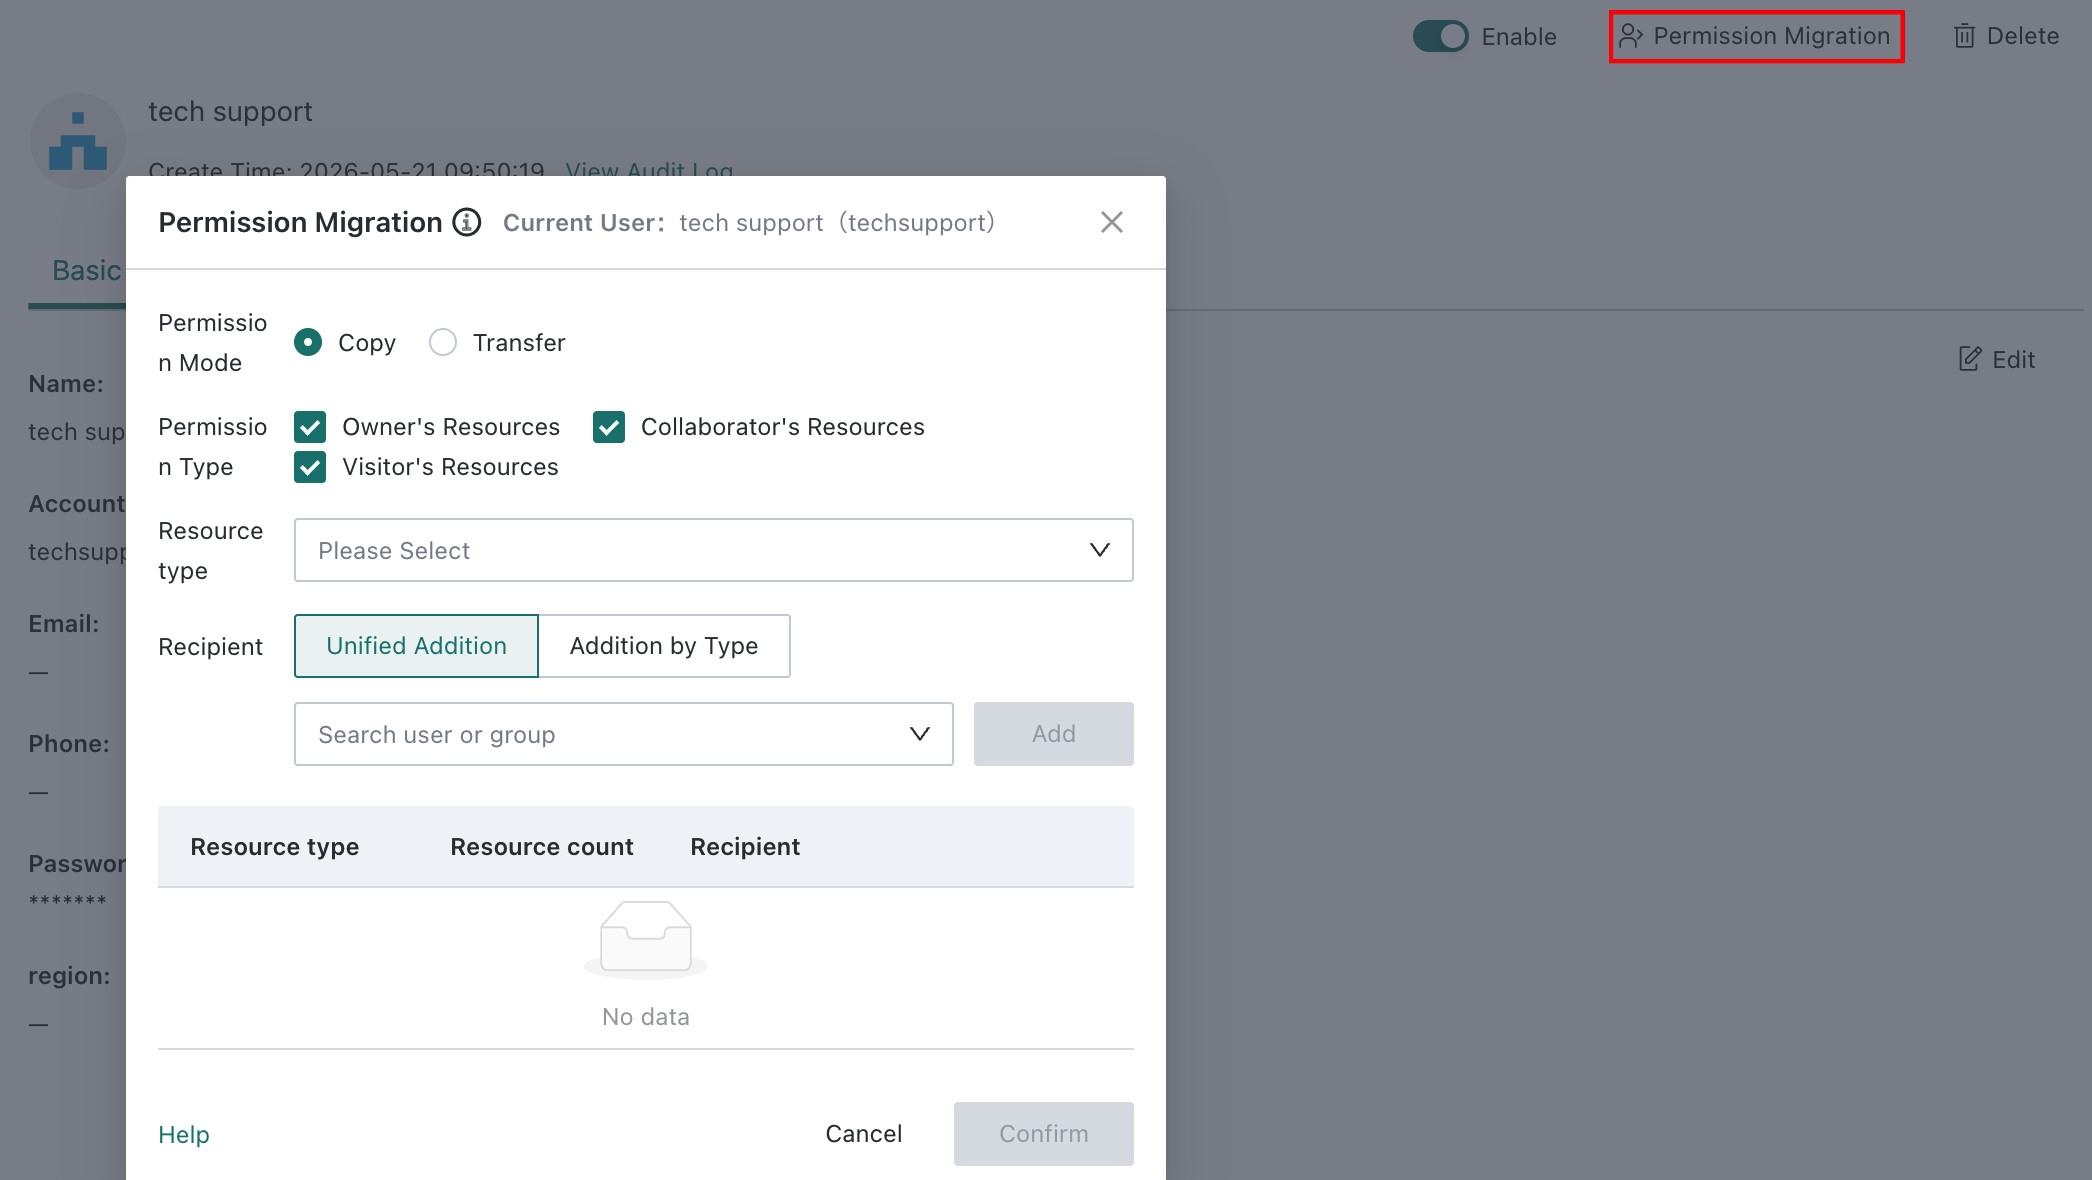
-
Choose a transfer mode. Both
CopyandTransferare supported.- Copy: copy the current user's permissions to another user while keeping the original user's permissions.
- Transfer: transfer the current user's permissions to another user and remove them from the original user.
NoteThe transfer operation also transfers resources owned by the user, including cards, pages, Datasets, ETL jobs, Data Accounts, Spreadsheet-style Data Entry resources, Data Screens, subscriptions, alerts, Custom Maps, Mobile Apps, Desktop Apps, slides, task monitoring, and notification management. After transfer, the original user can no longer edit these resources. Please proceed carefully.
-
Choose the permission types to transfer. Partial transfer is supported, for example transferring only Owner or only Viewer permissions.
If the user has both Owner and Viewer permissions on the same resource, it is treated as Owner permission in this context. -
Select the permission scope by resource type. For example, if User A originally handled both data preparation and data analysis, but now only handles data preparation, you can transfer Dashboard- and Application-related permissions to User B.
-
Select the permission recipient. Both unified assignment and assignment by type are supported.
- Unified Assignment: all copied or transferred permissions go to the same recipient
- Assignment by Type: transfer Owner resources to one recipient and Viewer resources to another
Note- In transfer mode, some resources allow only a single owner, such as ETL. In these cases, there can be only one recipient.
- When transferring Spreadsheet-style Data Entry permissions, if the transferred permission is Owner and there are multiple recipients, the Data Account permission of the form-entry Dataset is randomly assigned to one of the recipients.
Additional Notes
1. Resources that can be transferred
If the user is the owner of a resource and the permission is transferred to a new user, the new user obtains Owner permission on the resource. The transferable resource types include:
| No. | Module | Included Content |
|---|---|---|
| 1 | Cards | — |
| 2 | Pages | — |
| 3 | Datasets | — |
| 4 | ETL | — |
| 5 | Data Accounts | — |
| 6 | Spreadsheet-style Data Entry | — |
| 7 | Dataset Permission Templates | — |
| 8 | Folders | — |
| 9 | Composite Reports | — |
| 10 | Data Screens | — |
| 11 | Subscriptions | Card Subscription, Merged Subscription, Page Subscription, Dataset Subscription |
| 12 | Alerts | Card Alerts, Dataset Alerts |
| 13 | Custom Maps | — |
| 14 | Mobile Apps | — |
| 15 | Desktop Apps | — |
| 16 | Slides | — |
| 17 | Task Monitoring | Owner, Recipient |
| 18 | Notification Management | — |
2. Transfer result messages
After transfer, a dialog indicates which items were transferred successfully and which failed.
If the user remains on the current page, the related message is shown. If the user leaves the page or closes the transfer window, the message is not shown in the UI.
3. Validation during deletion
If the user still has resources that have not been transferred, the user cannot be deleted.
4. Role restrictions during transfer
Permissions can only be transferred to an equal or higher account type:
- Administrator permissions can be transferred only to another Administrator
- Standard User permissions can be transferred to an Administrator or Standard User
- Read-Only User permissions can be transferred to an Administrator or Standard User
The recipient's account type does not change after the transfer.
5. Other notes
During transfer, the transferred user's user-group and role information are not processed.