Create and Configure an Agent
Overview
An agent is one of the core capabilities of Data Agent. This module mainly includes agent creation and agent testing. It helps users quickly build business-oriented conversation logic and validate performance, ensuring the accuracy and smooth experience of Data Agent.
Prerequisites
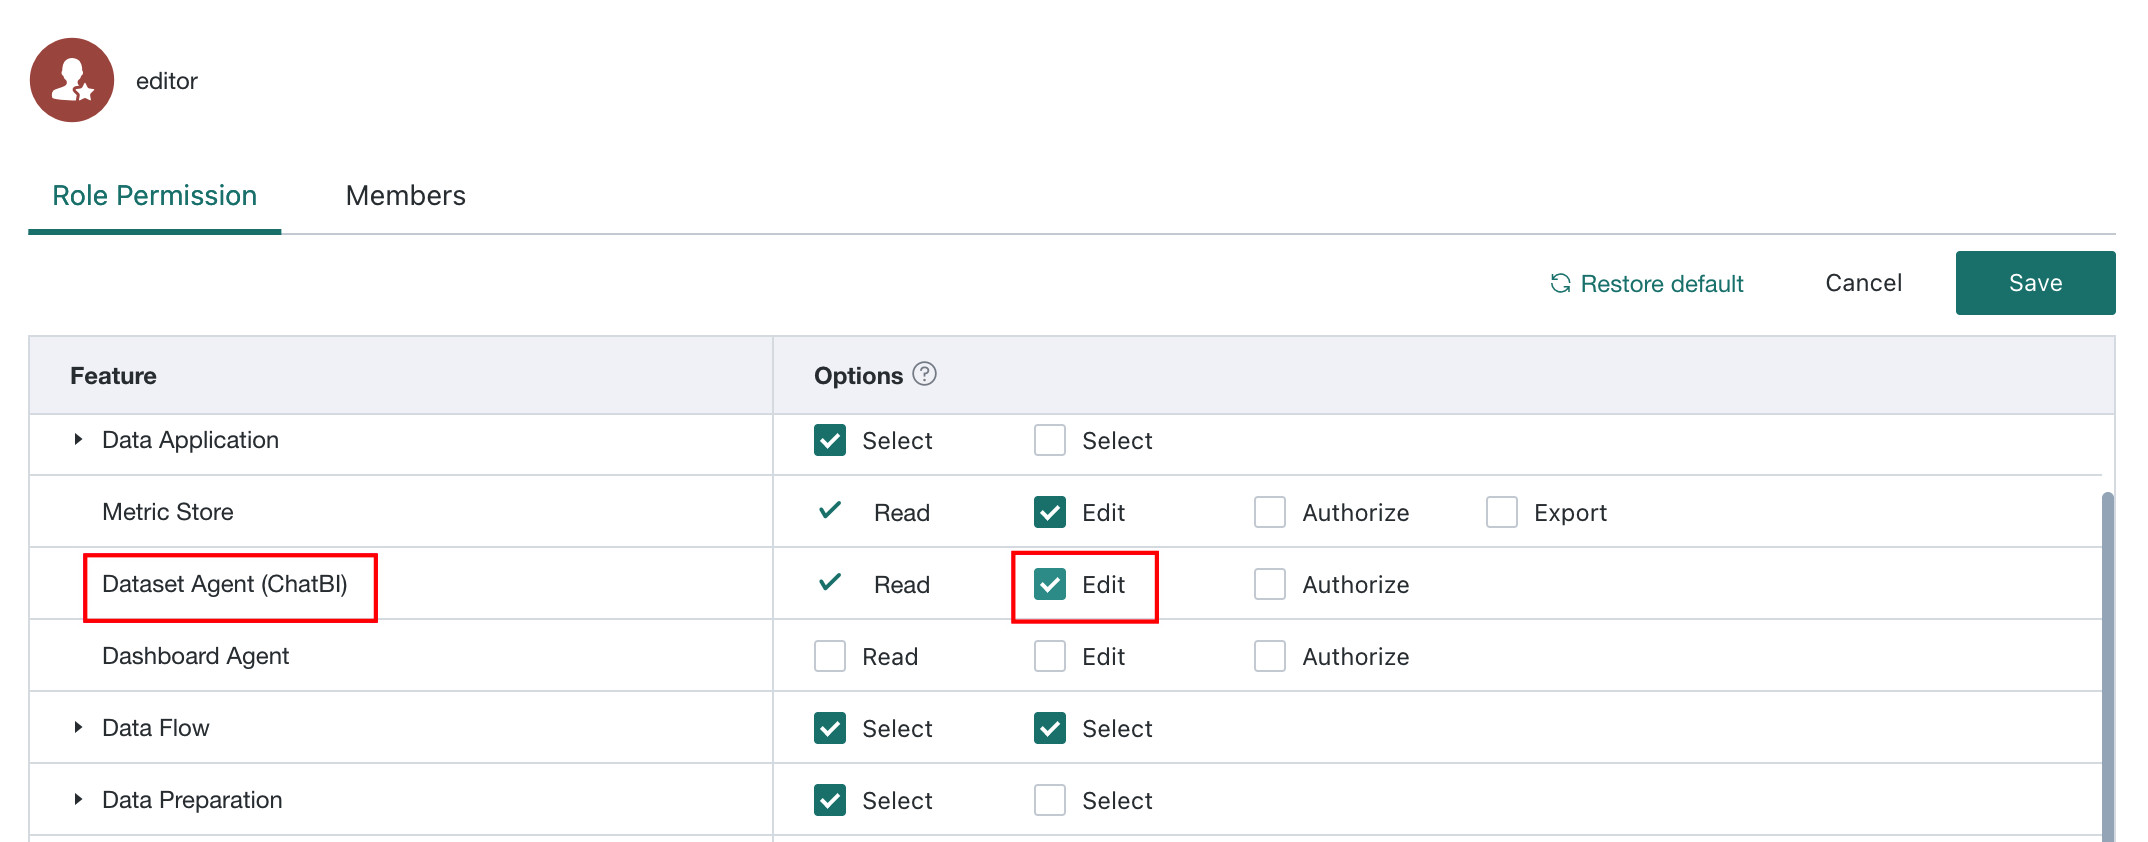
Only users with Dataset Agent(ChatBI) Edit permission can access the Agent Management page and perform agent configuration operations.
Create an Agent
Entry URL: http://<your-domain>/agent/manage/dataset. For private deployments, replace <your-domain> with your actual environment address.
When creating an agent for the first time, we recommend starting with a single table. After the single-table Q&A accuracy reaches 80%, expand to additional tables.
-
On the
Data Agent > Agent Managementpage, clickCreate Agent.
-
Fill in the basic information. If you later need to modify it, see Basic Configuration.
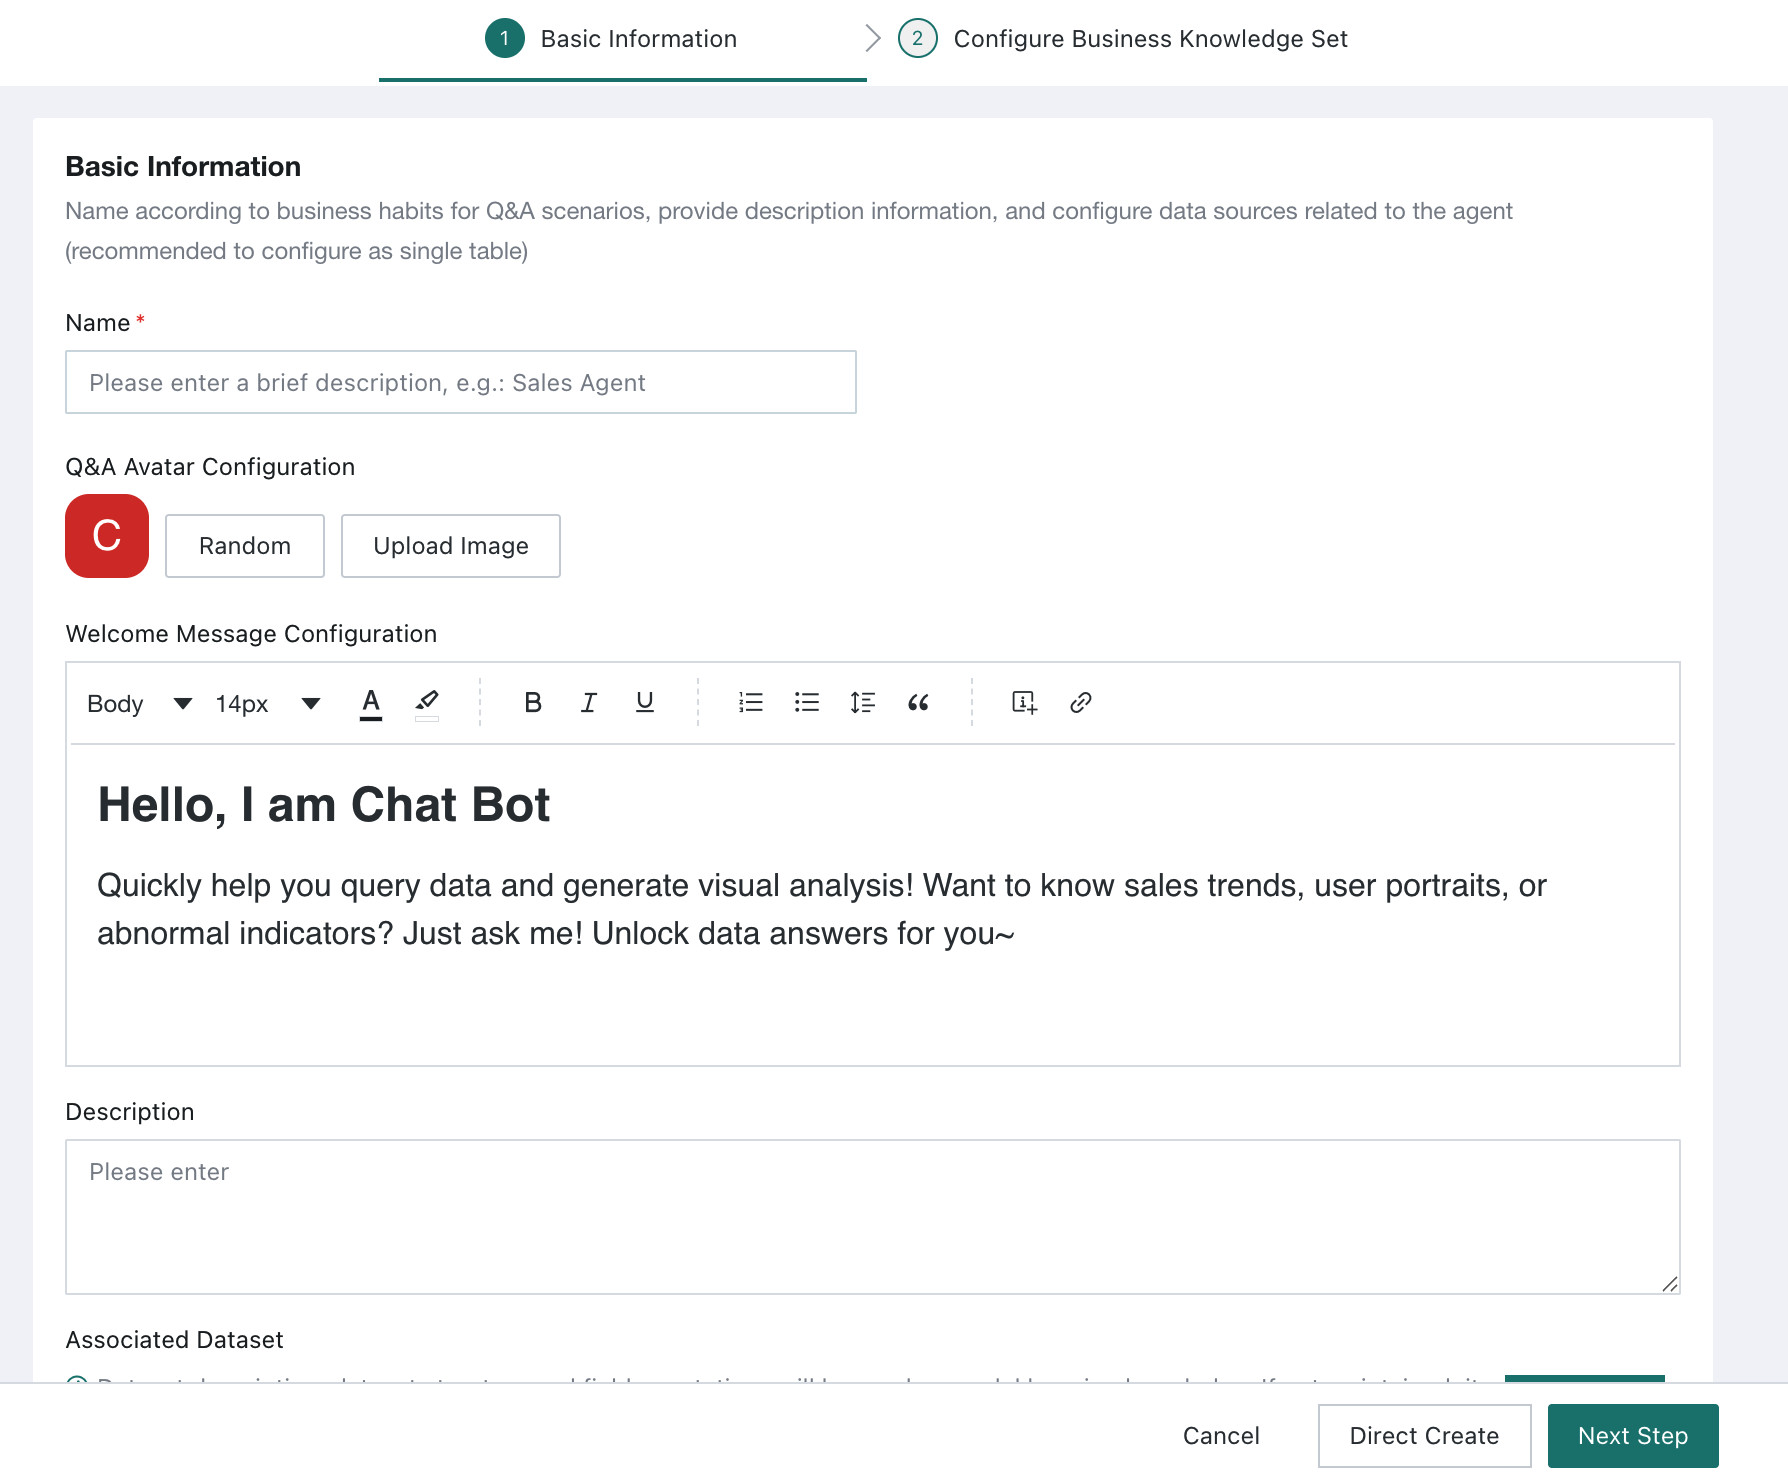
- Name (required): a concise business-oriented summary of the agent. It is provided to the model as training knowledge and supports up to 30 characters.
- Q&A avatar configuration: by default, the Guandata logo is used. Users can upload their own image to change the frontend Q&A avatar.
- Welcome message configuration (optional): by default, the first line is the welcome title, and the second line onward is the body text. The welcome message supports a rich-text editor and references to specific attributes.
- Description (optional): helps business users understand which business scenarios or problems the agent can address. It is also provided to the model as training knowledge.
- Related datasets (optional): defines the scope of data available for
Query. The current version supports some direct database connections and extracted datasets. Dataset descriptions, dataset structures, and field comments are used as model learning knowledge.
Note- Direct database support: MySQL, Postgres, Starrocks, Doris, Hive, Presto, Trino, SQL Server, ClickHouse, and kylin
- We recommend preparing at least one usable dataset in advance to improve Q&A performance.
-
Complete agent creation.
-
If the knowledge base is not ready yet, click
Create Directlyto finish creating the agent. You can add knowledge later on theBusiness Knowledge Librarypage.
For knowledge-related operations, see Business Knowledge Library.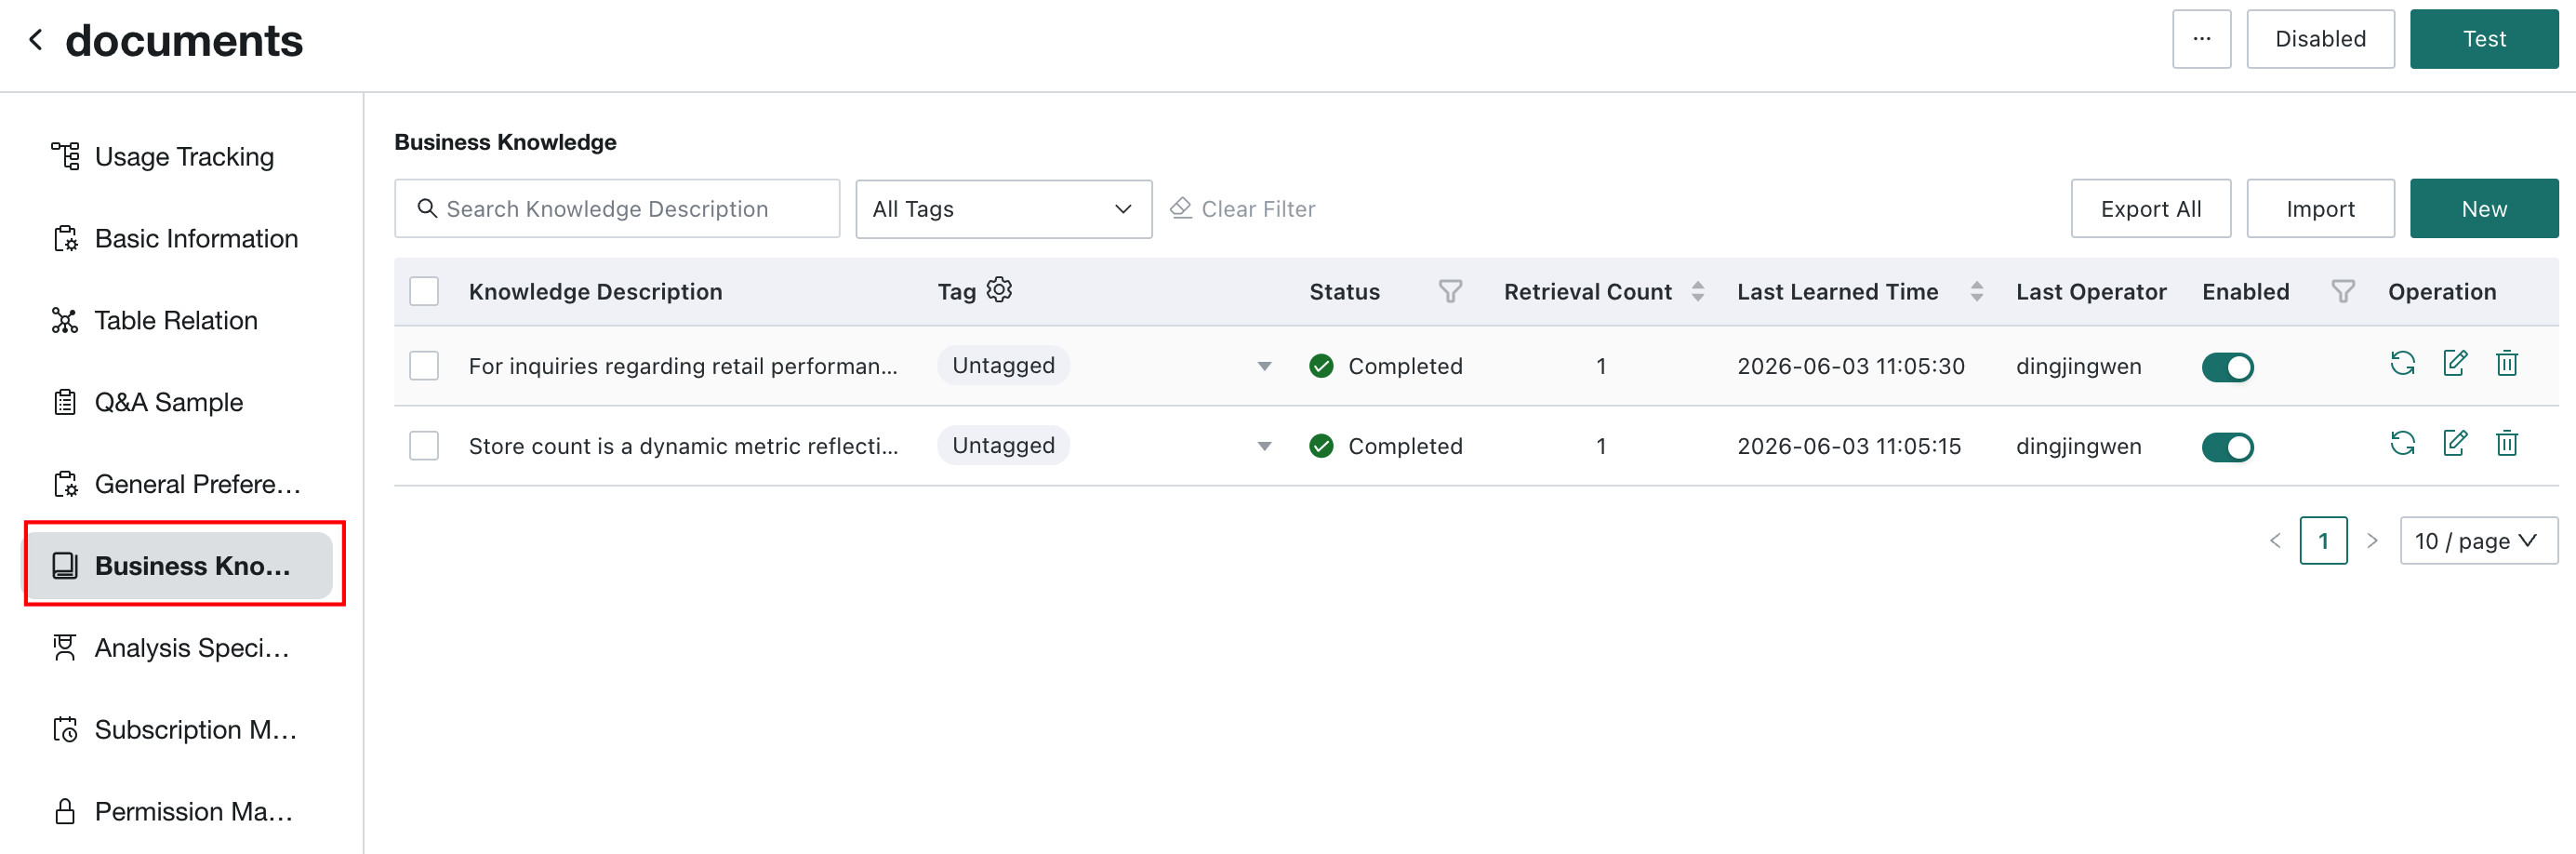
-
If the knowledge base is already prepared, click
Nextto configure the business knowledge collection, then clickFinishto complete agent creation.
For knowledge-related operations, see Business Knowledge Library.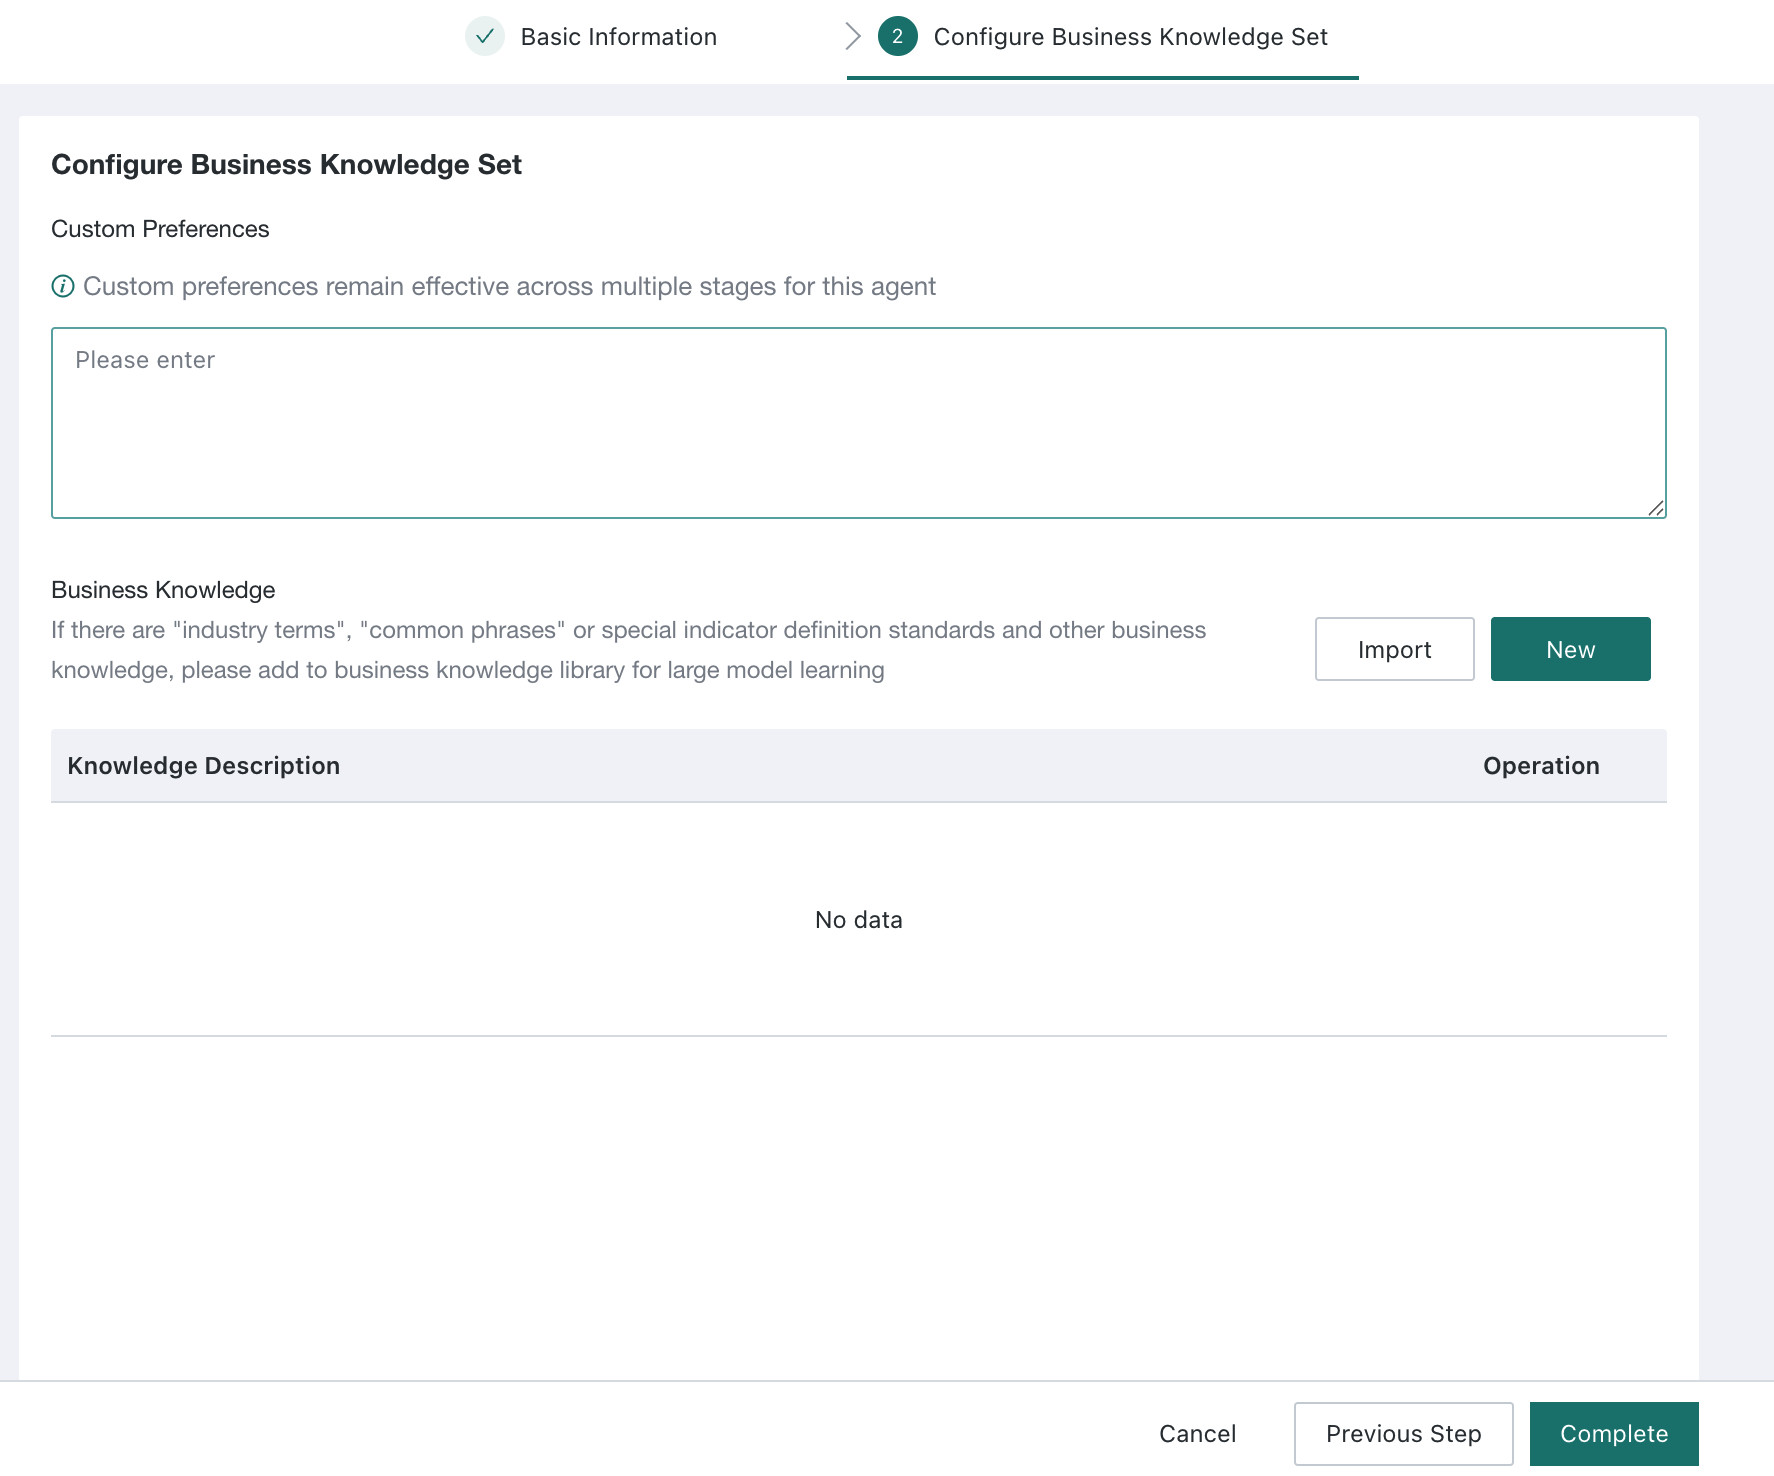
-
-
After all information is filled in, click
Finishto complete agent creation.
After creation, the system enters theAgent Detail Settingspage by default. For follow-up operations, see Agent Detail Settings.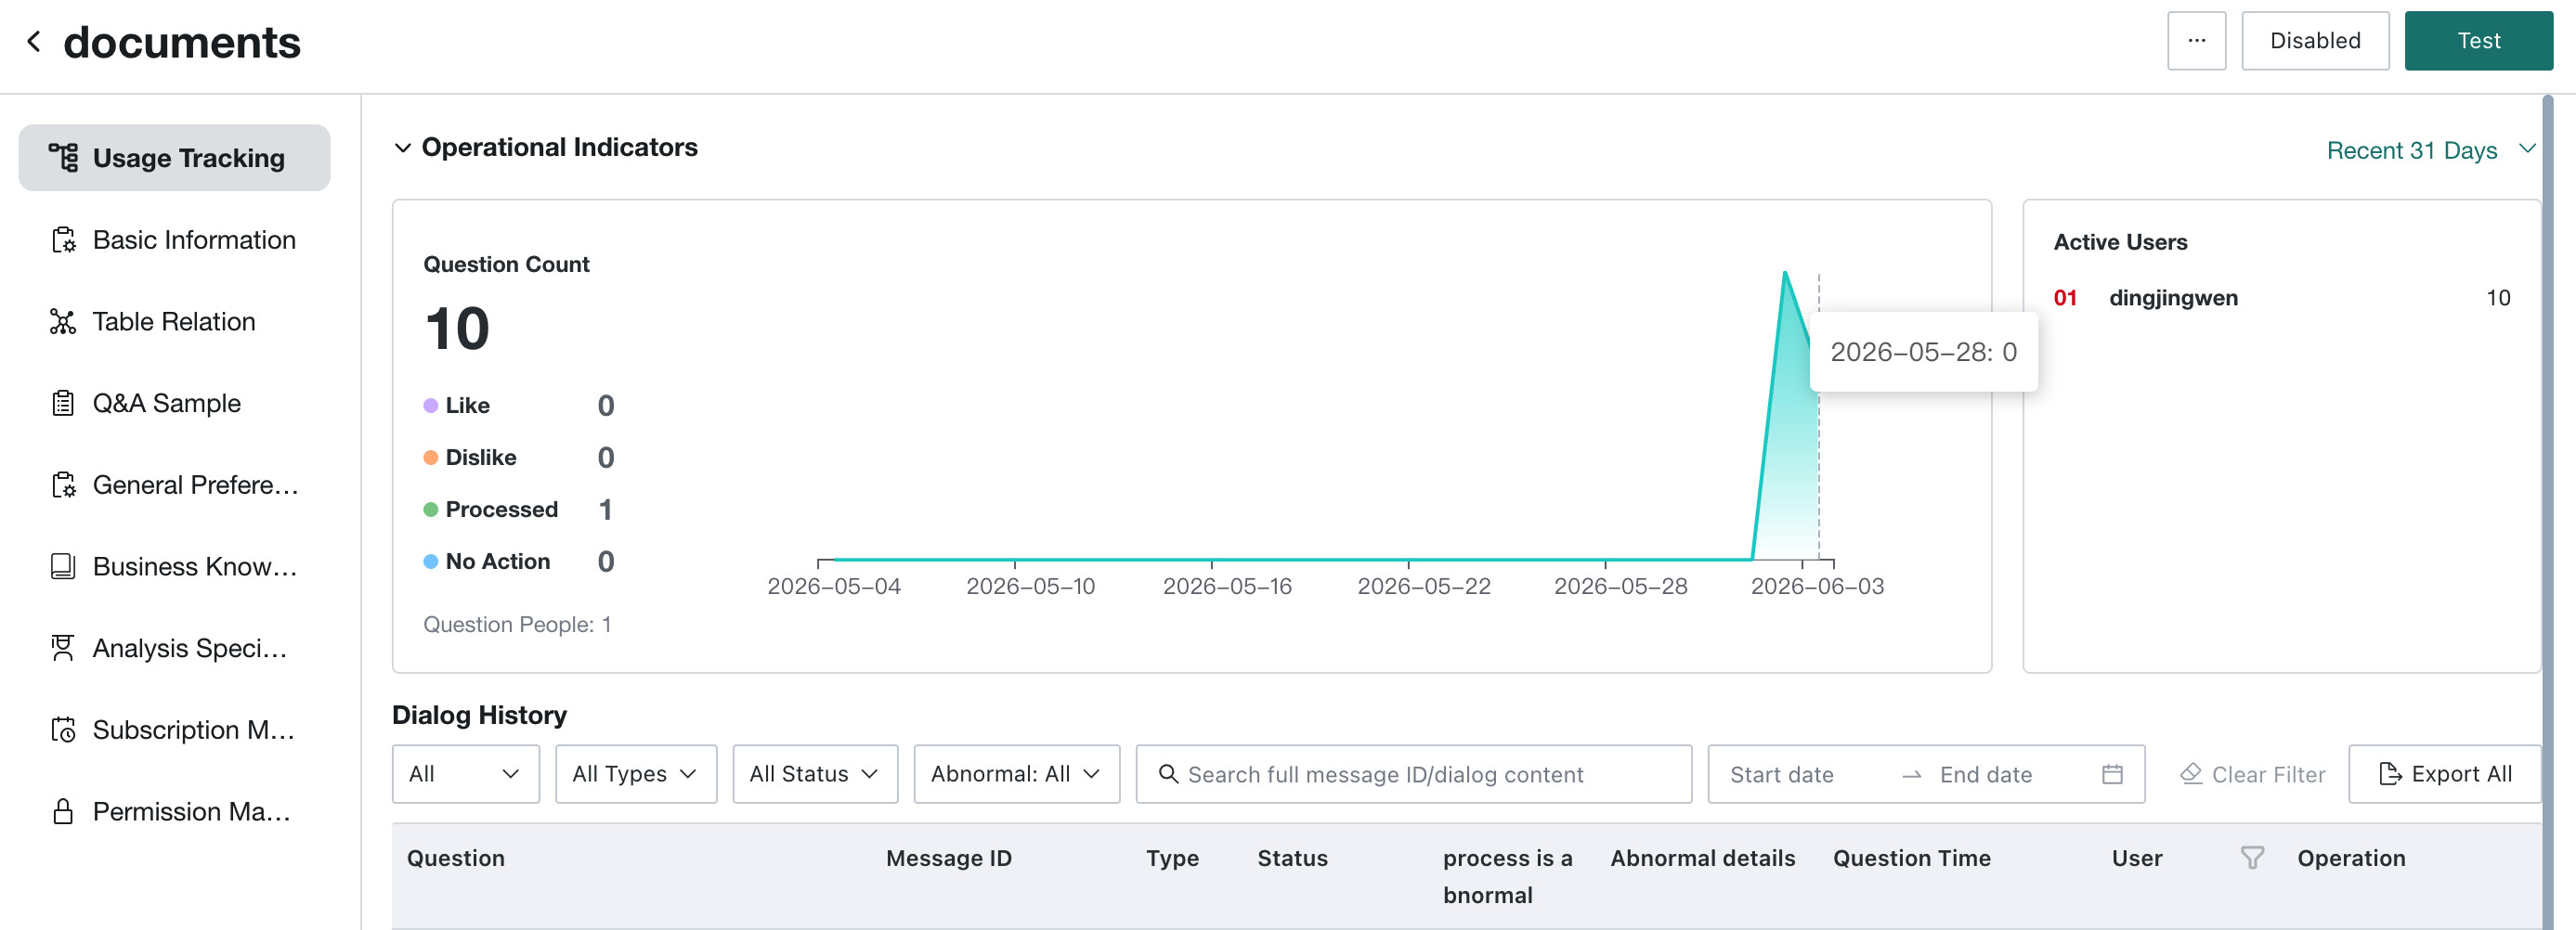
-
(Optional) If you want to reuse the knowledge base of an existing agent, use
Save Asto quickly create a copy.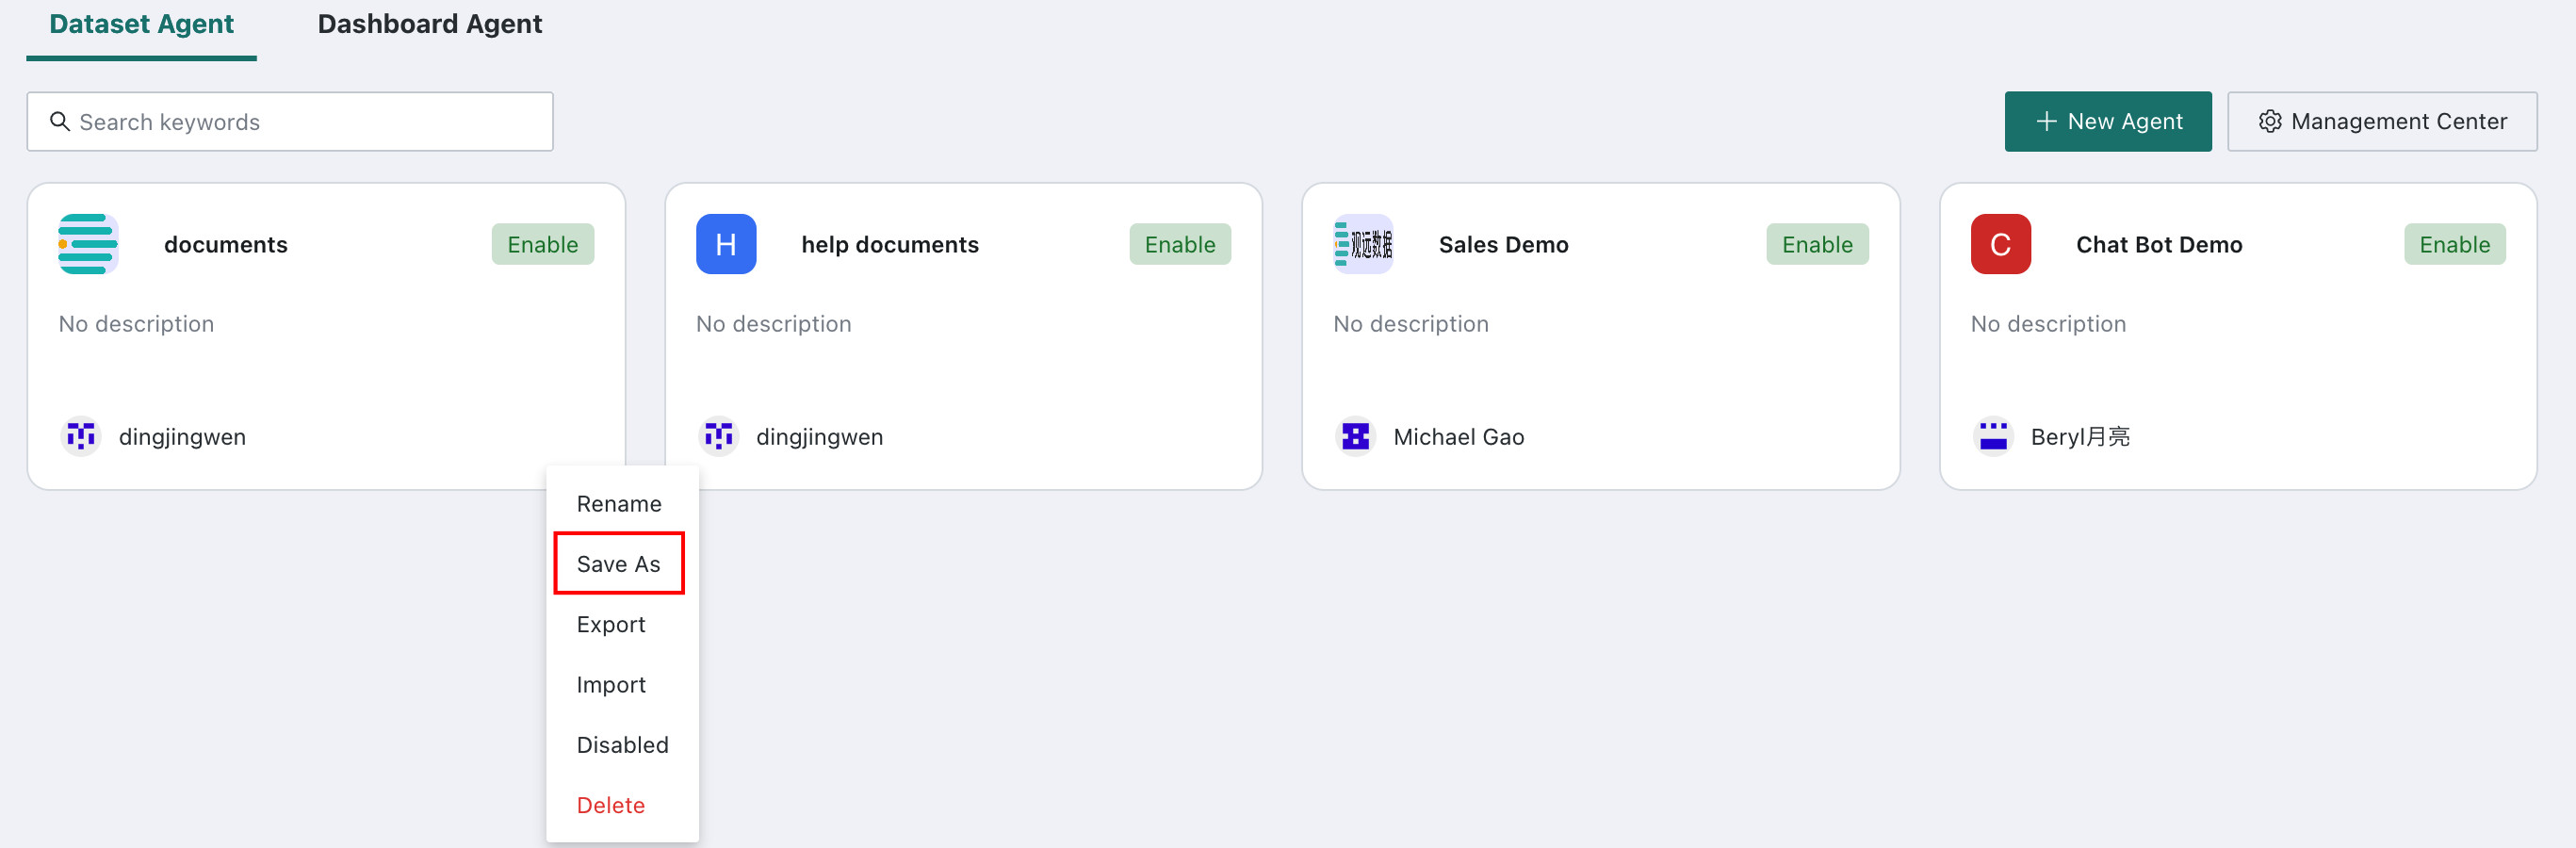
Agent Testing
After creating a new agent, we recommend testing it. Test accuracy directly affects the accuracy of Data Agent in production, so make sure the test accuracy reaches at least 90% before enabling the agent.
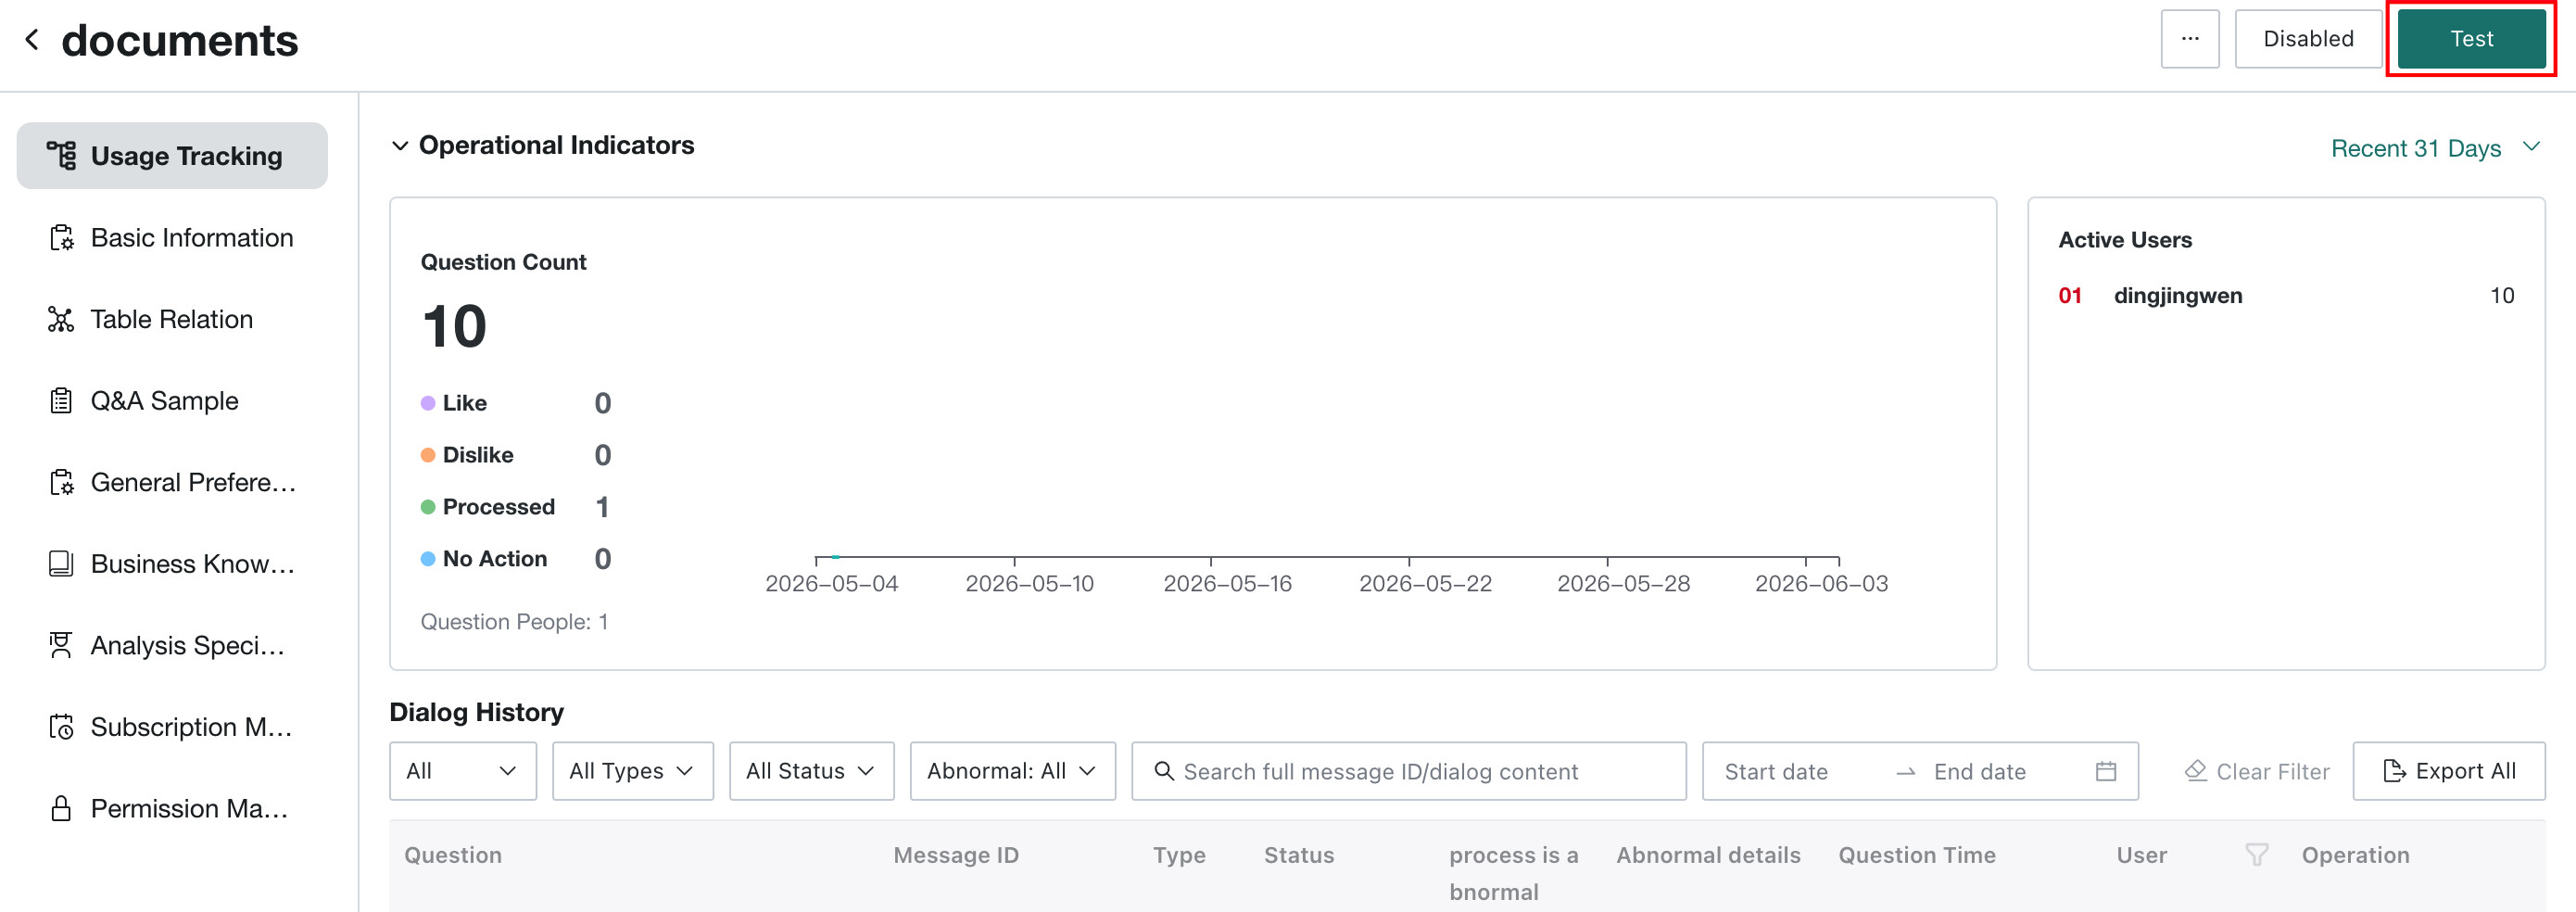
Enter the Test Page
On the Agent Detail Settings page, click Test in the upper-right corner to enter the test page.
Test Q&A Effect
Import Questions
On the test page, you can add test questions in three ways: AI-assisted generation, Batch Import, or Manual Add.

-
AI-assisted test questions: the system combines the fields of related datasets in the current topic with user-defined metric/dimension definitions and generation preferences, then uses AI to generate test data and quickly expand the test question library.

If you are not satisfied with the generated questions, click
Regenerate.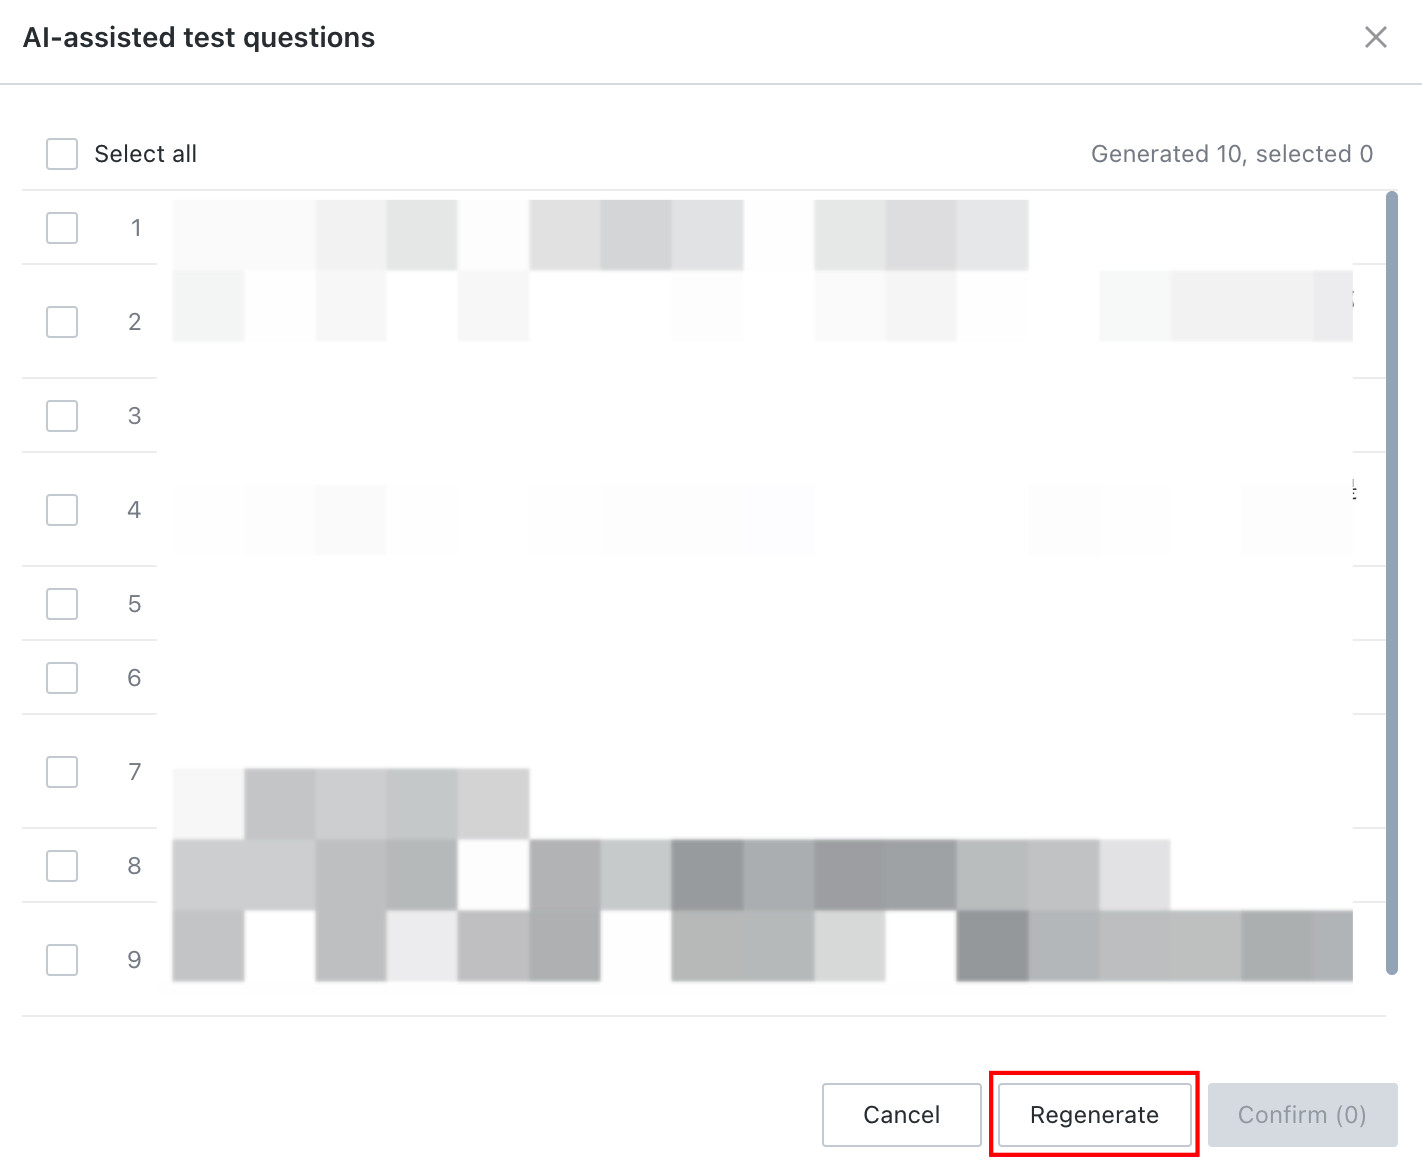
Select the questions you want to add to the test set, then click
Confirm.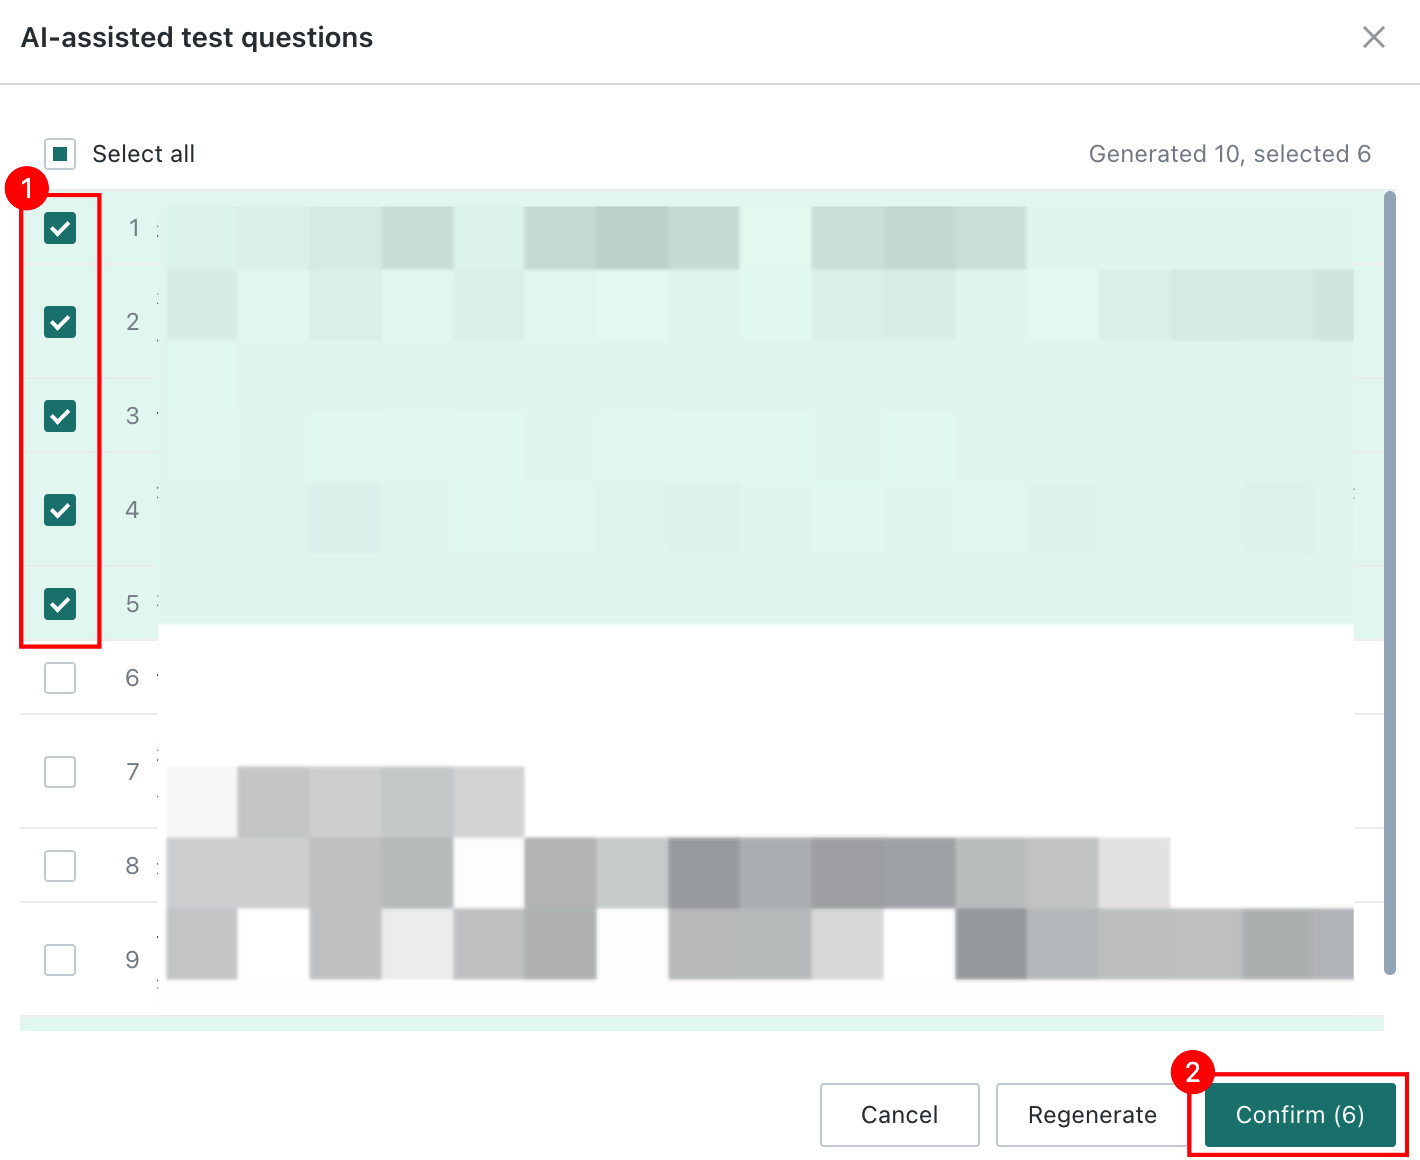
-
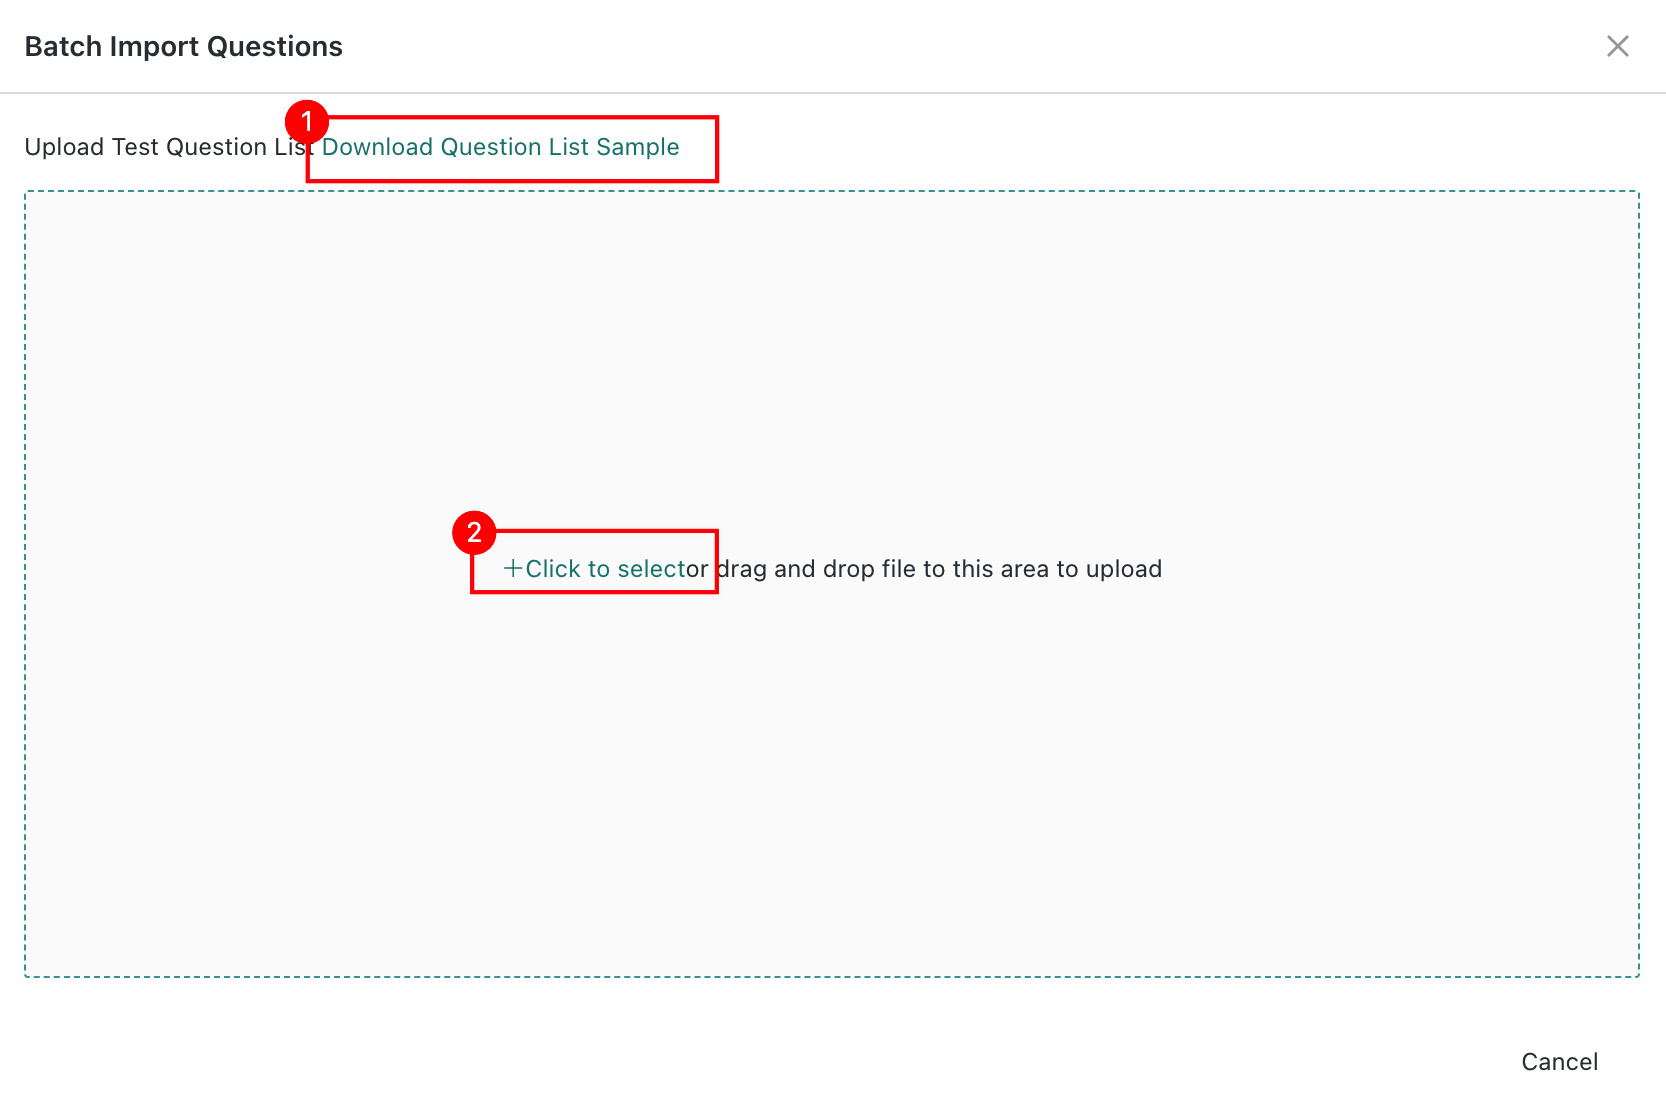
Batch Import: download the Excel template, fill in the collected user questions and answer SQL, then upload them in batches.
NoteThe answer SQL in the sample question list is optional. You can upload only test questions. After the file is uploaded, testing begins for all question entries in the file.
-
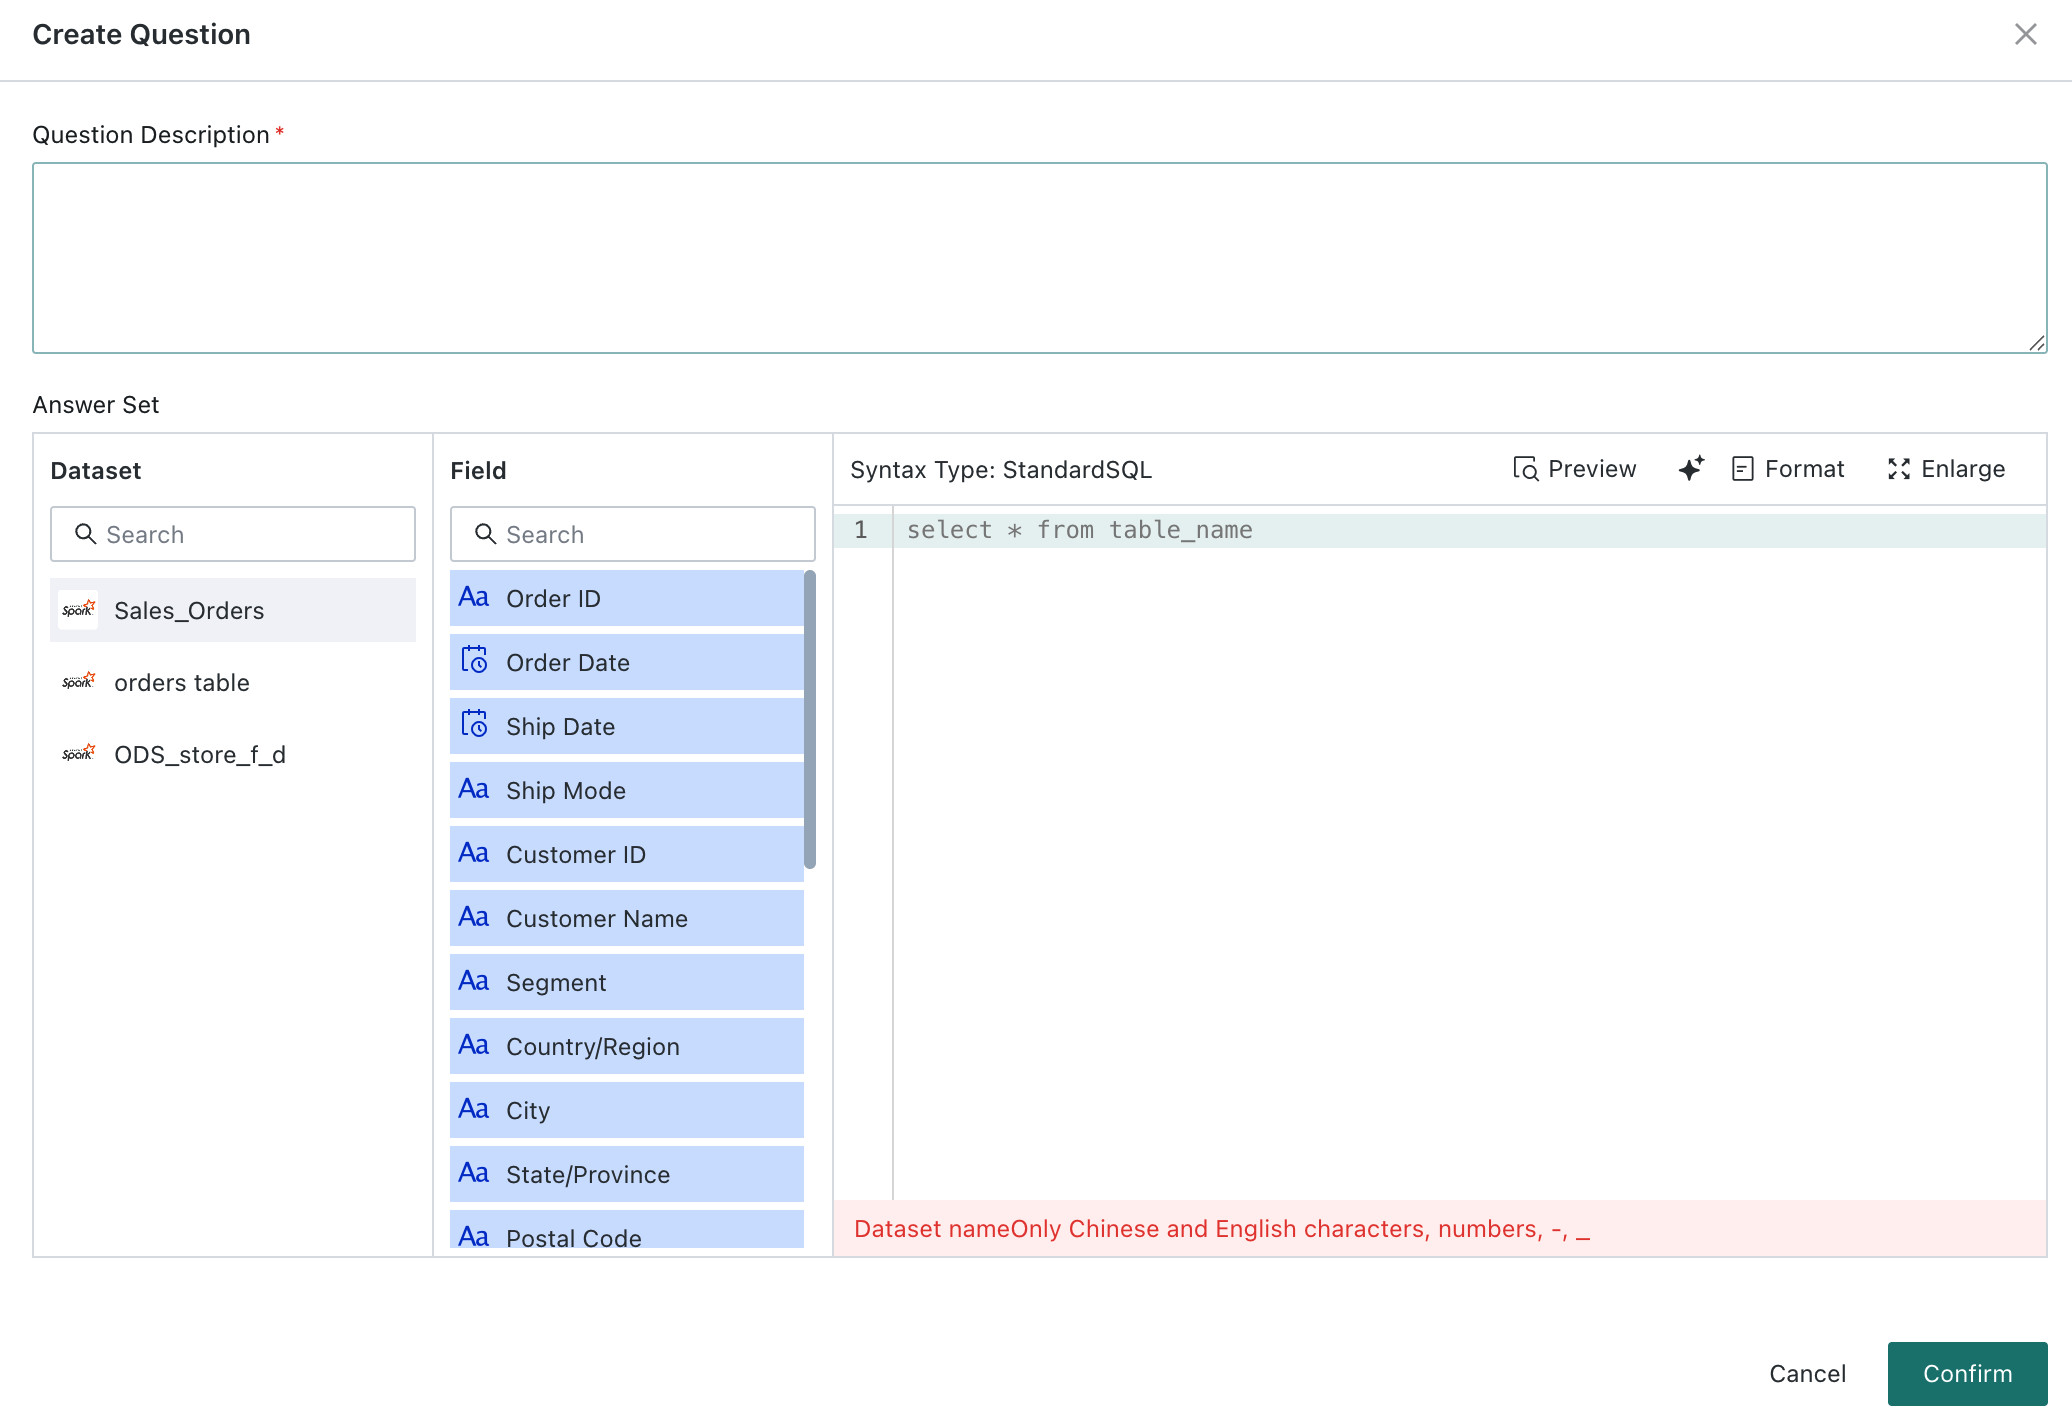
Manual Add: enter questions and answer SQL one by one. After clicking
Confirm, testing starts immediately for that question entry.Note- Answer SQL is optional. You can fill in only the question description.
- If datasets were already related when the agent was created, the
New Questionpage displays dataset and field information.
Question Testing and Review
After questions are uploaded, the system automatically starts testing them. Based on the current tables and knowledge, the model generates SQL for each question in batch, and the system executes the SQL and checks its validity.
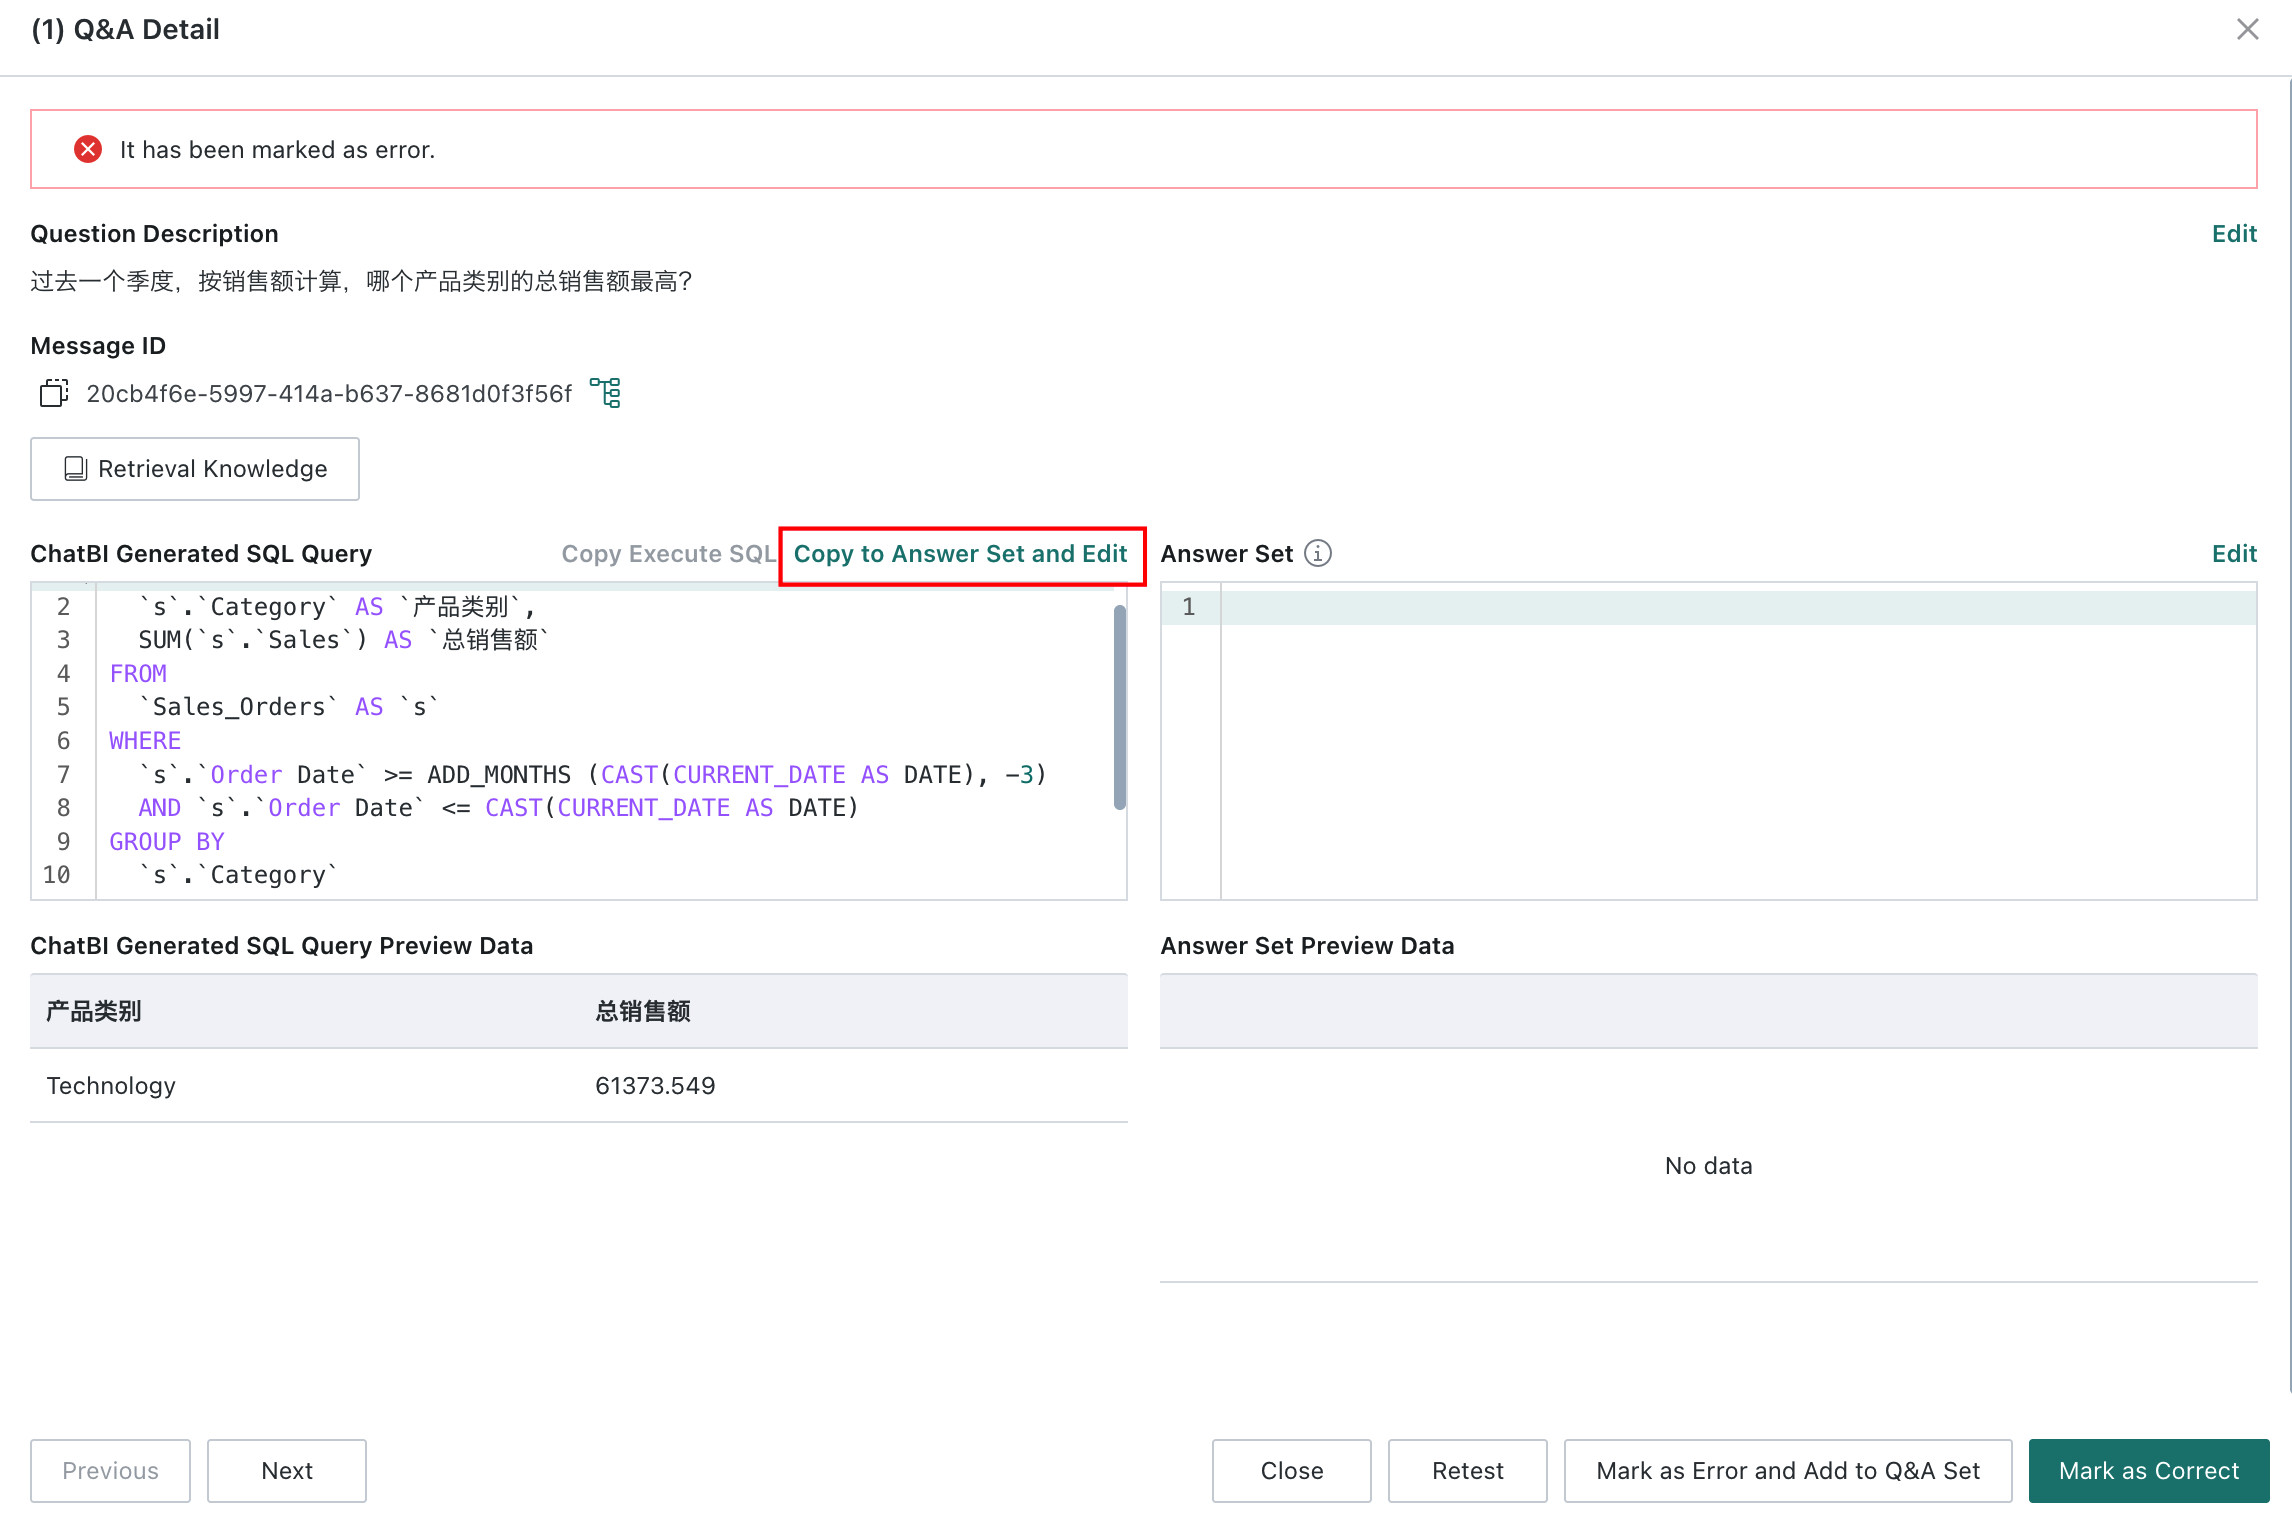
When SQL Validity Is Incorrect
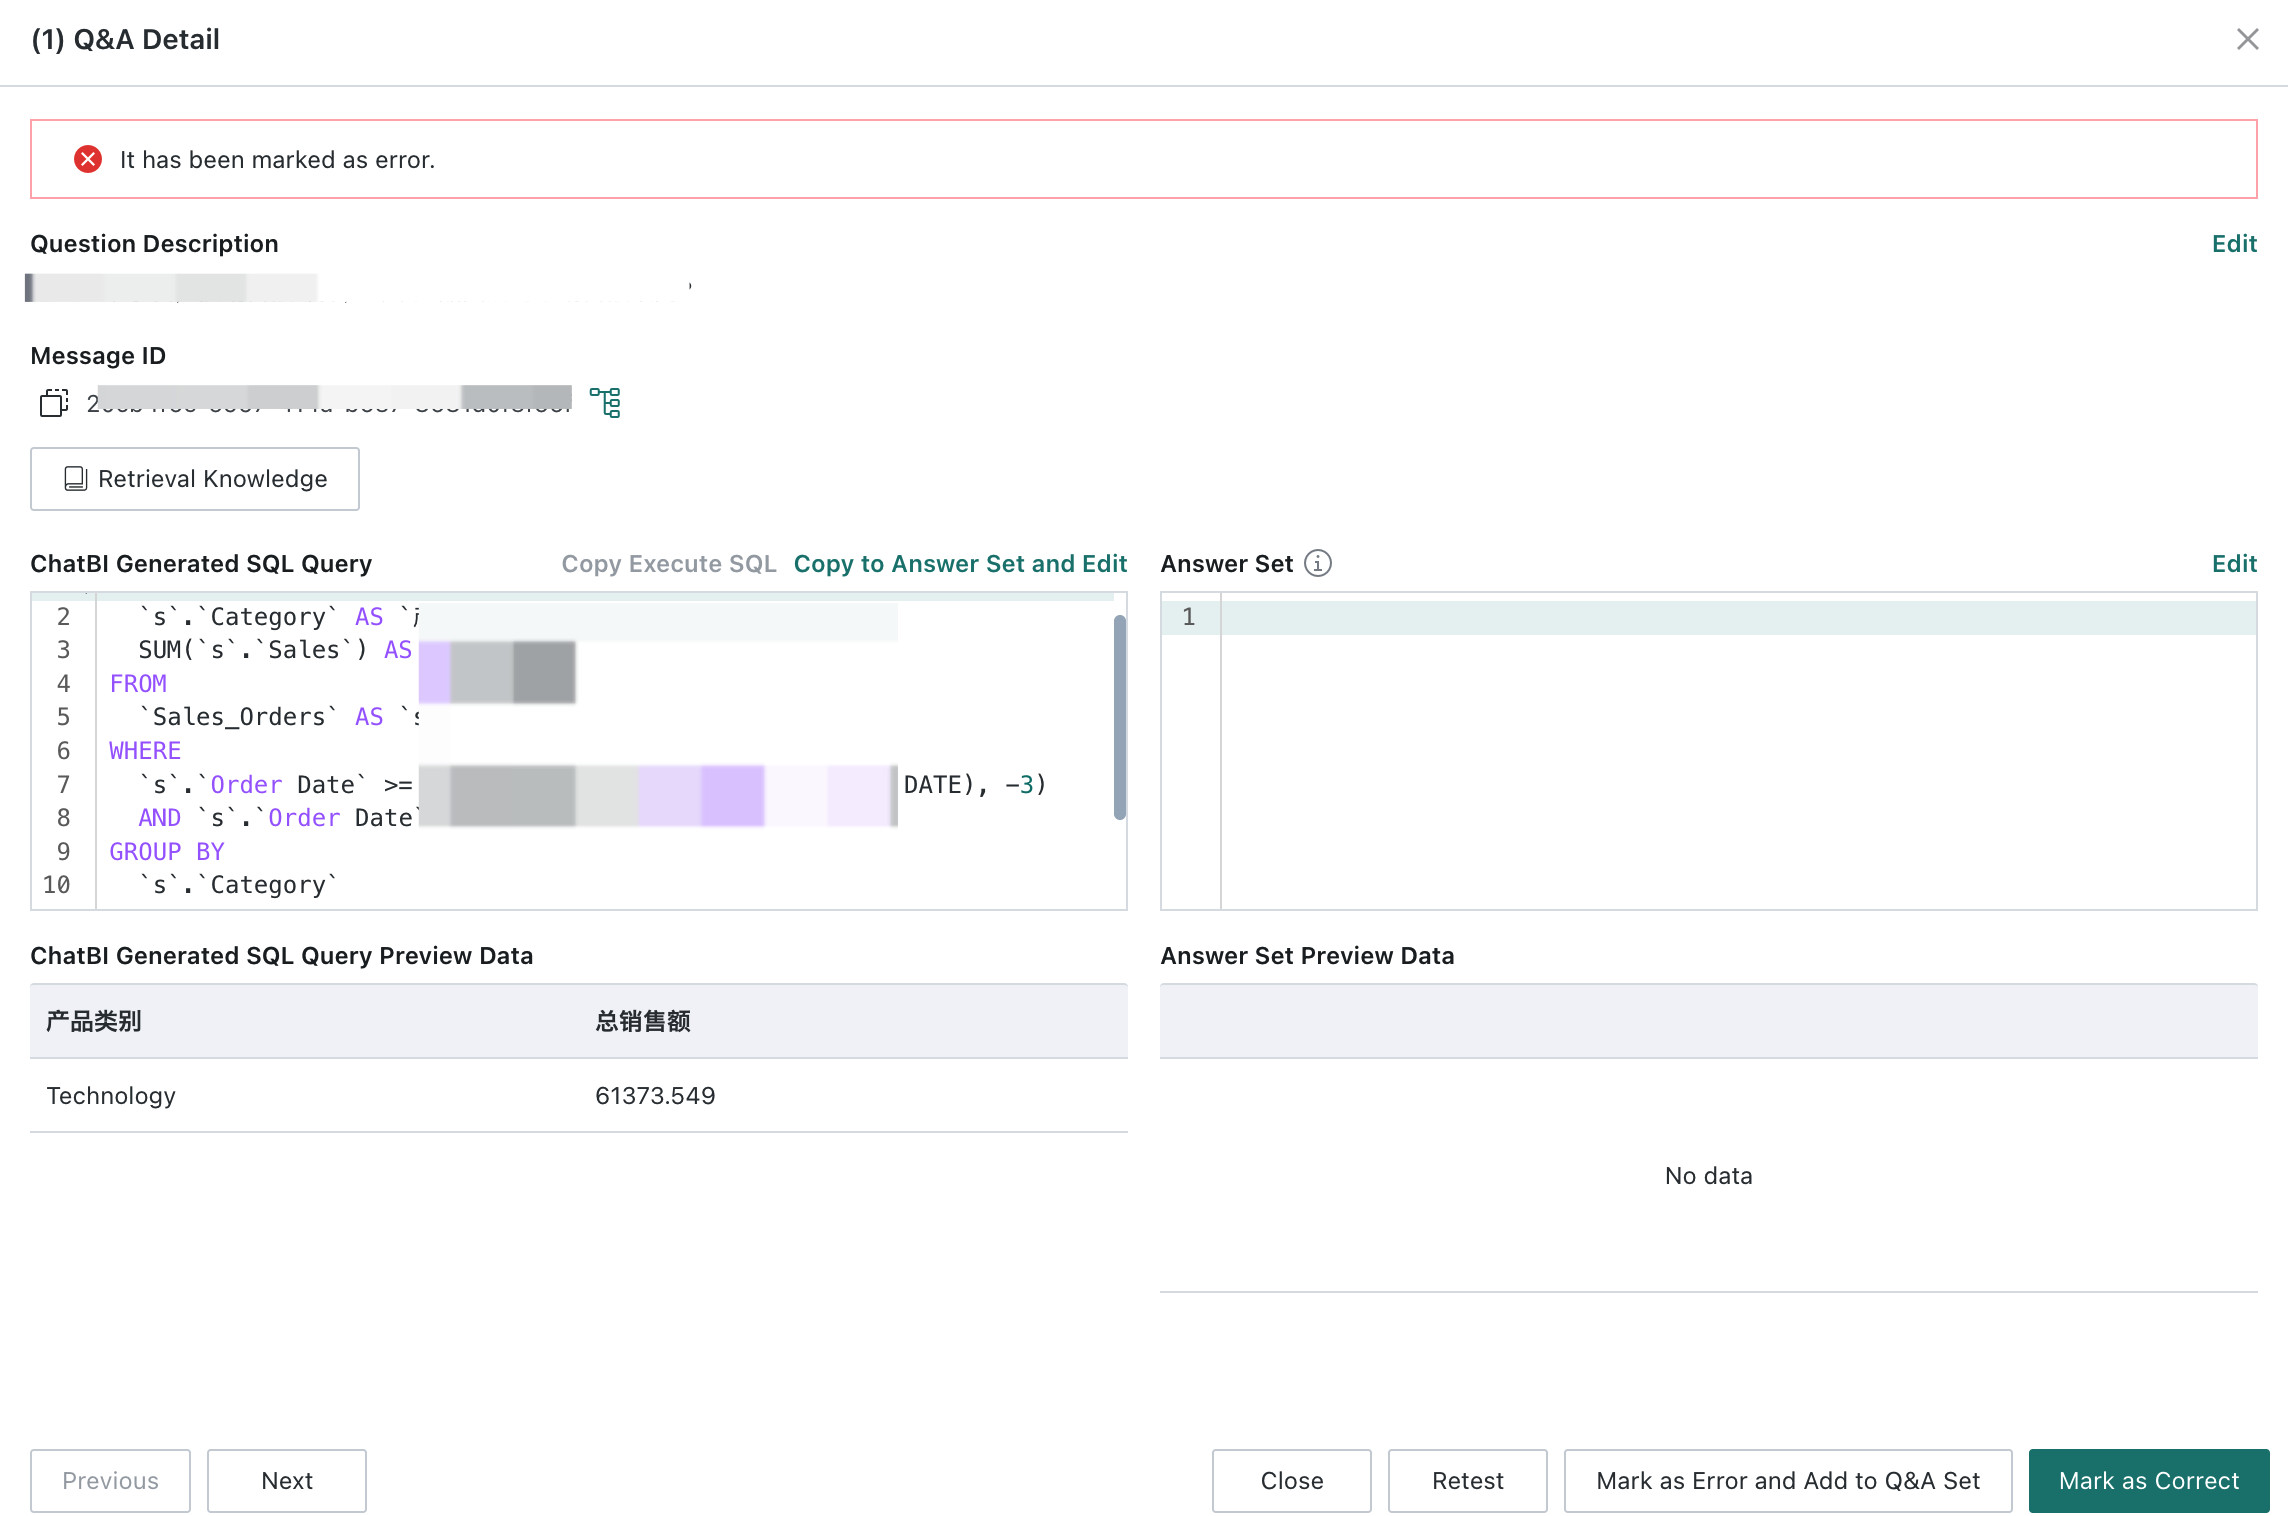
If SQL execution fails, the interface displays SQL validity and review result errors.

-
Click
Checkto the right of the question to view the SQL details generated by the model. On the Q&A detail page, the following operations are supported:- View and copy the message ID for troubleshooting with product or engineering teams.
- Copy Executed SQL: after clicking
Copy Executed SQL, the SQL statement actually executed against the database is copied to the clipboard, so it can be pasted into the database for querying. - The following error scenarios are displayed:
- When the AI model cannot generate valid SQL, the system displays a specific failure reason such as
Failed to answer the question. Reason: xxxx. This usually relates to model understanding of the question or the data structure. - When the model successfully generates SQL but execution fails, the system displays an SQL validation error such as
Current SQL validity check failed. Reason: {xxxxx}. Common causes include syntax errors, missing table names or field names, or incorrect filter conditions. - When SQL executes successfully but returns no data, the system prompts possible reasons such as
No data was returned. Please check whether the data source was updated correctly and whether row- and column-level permission rules are configured correctly.
- When the AI model cannot generate valid SQL, the system displays a specific failure reason such as
-
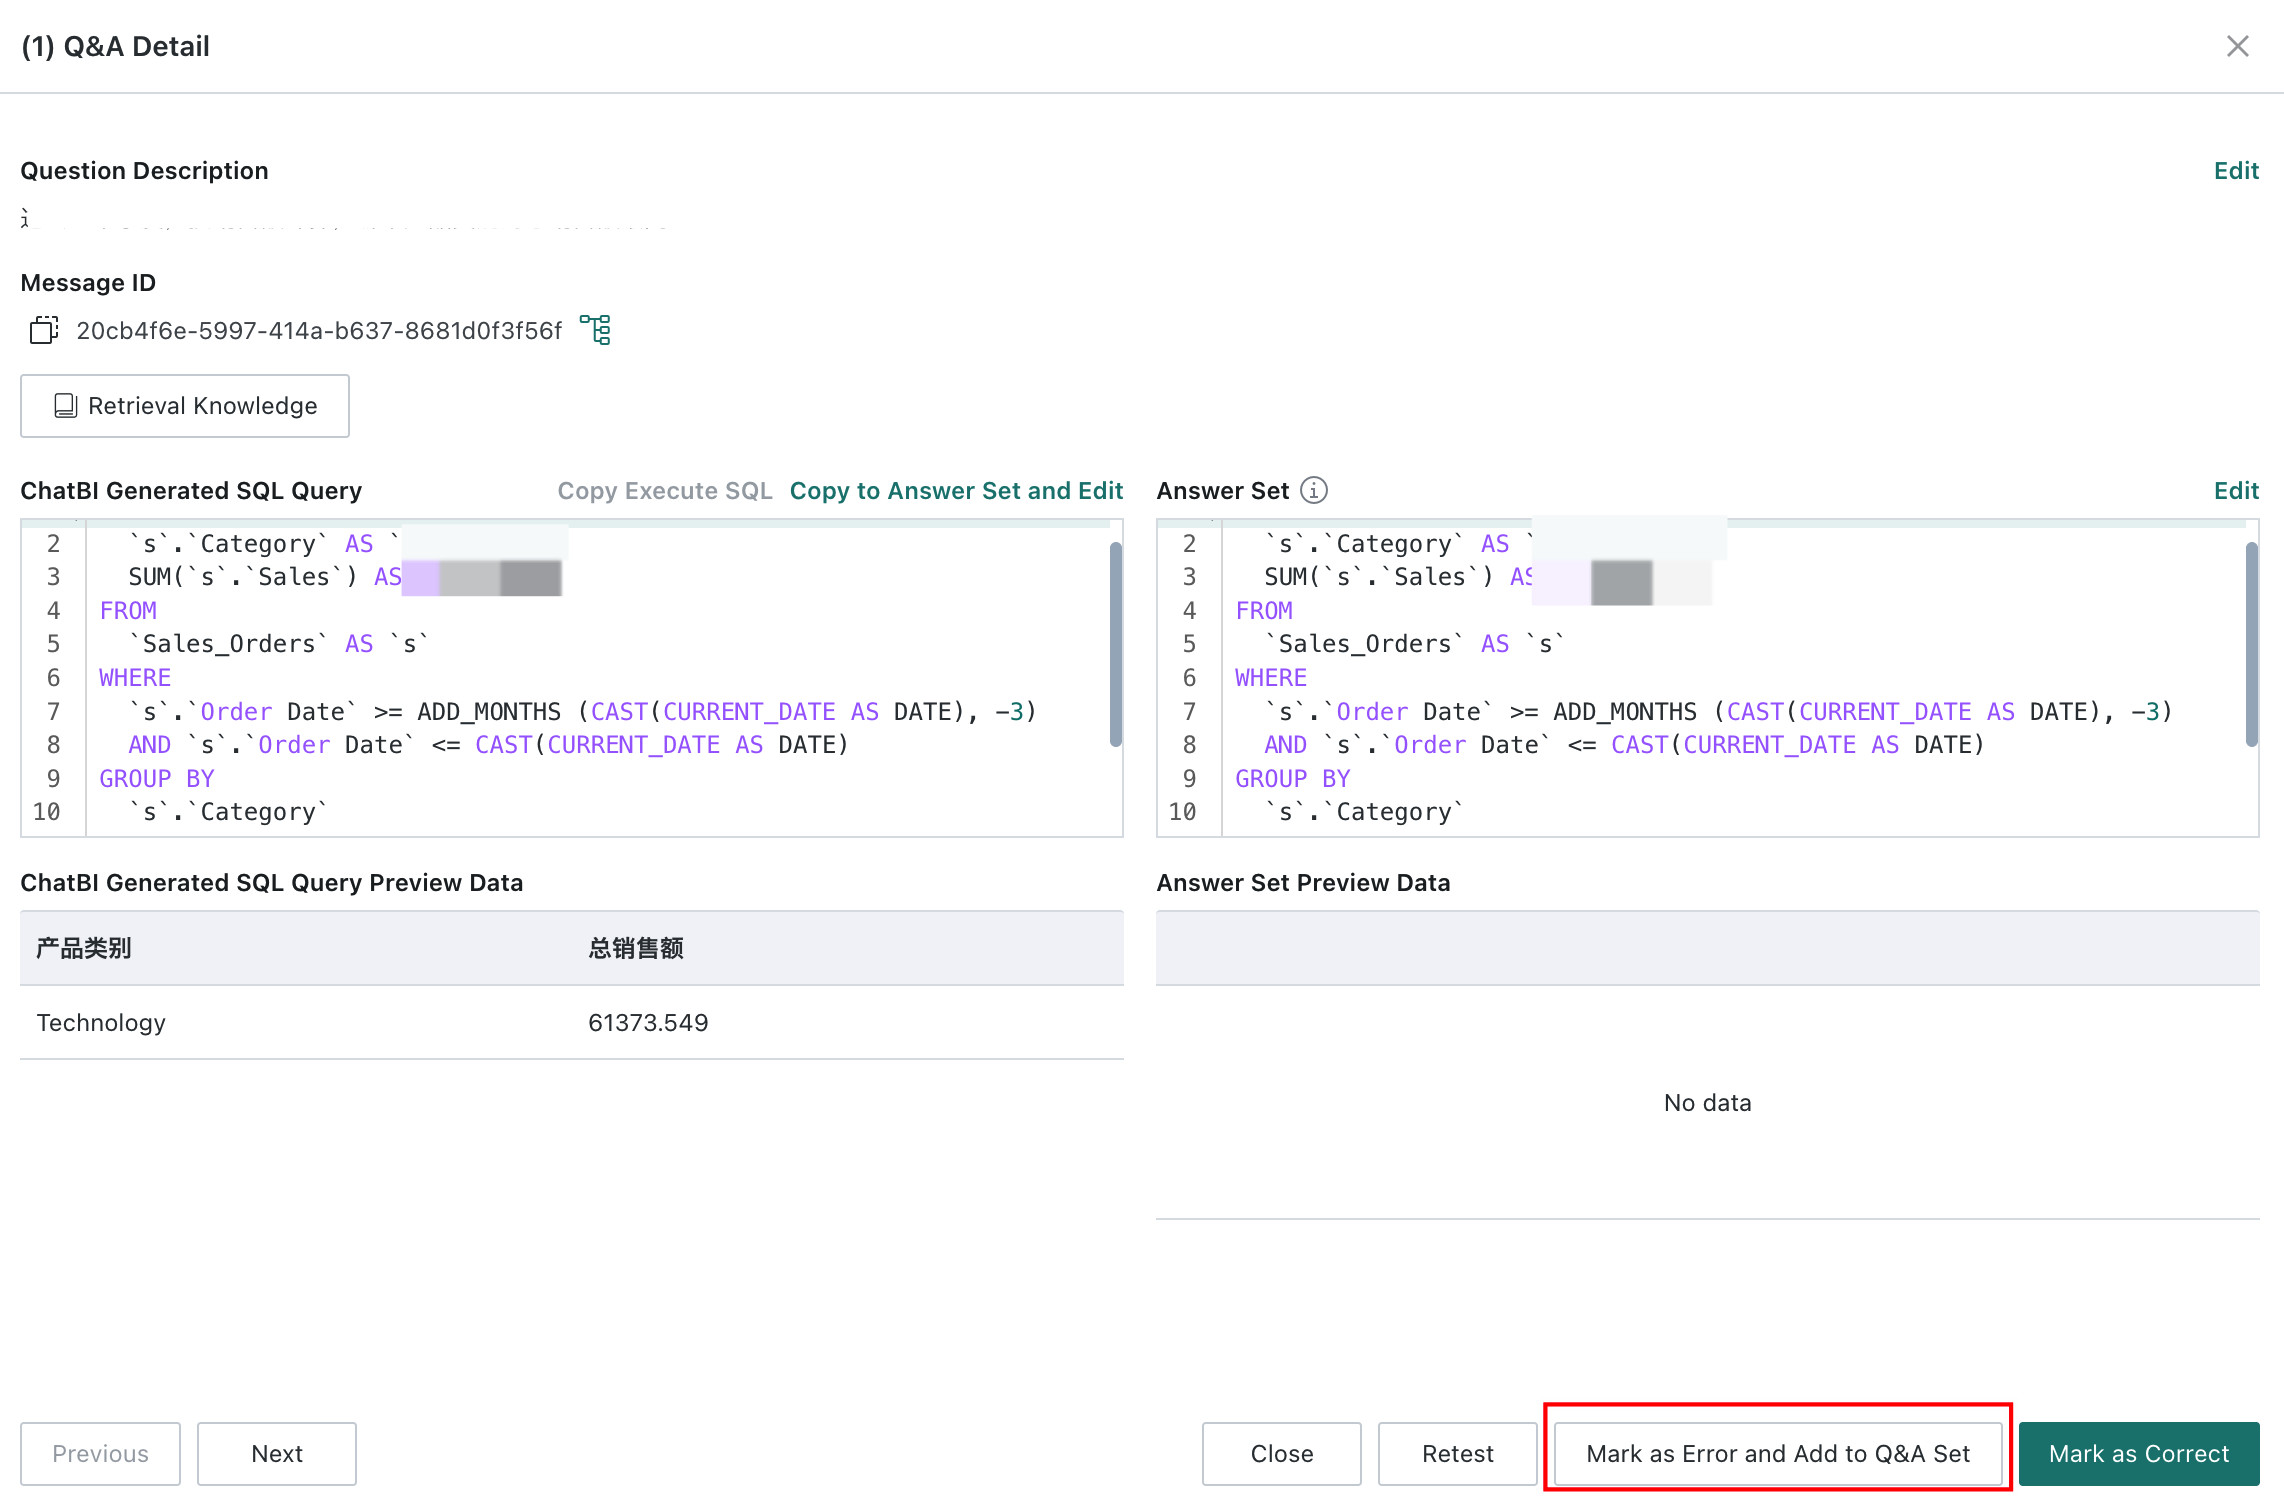
Maintain the answer set.
- If there is no answer set yet, click
Copy to Answer Set and Edit, correct the SQL, and save it. The corrected SQL is then stored as the answer for that question.
- If an answer set already exists or the correct SQL has already been maintained there, click
Mark as Incorrect and Add to Q&A Sampleto add this question to the knowledge base.
- If there is no answer set yet, click
-
Return to the list page, select the question, and click
Start Testingto test again. After SQL validity is correct, clickReviewand mark the question asCorrect.
When SQL Validity Is Correct
-
For questions without an answer set, click
Review. The same operations as above are supported on the Q&A detail page.- If the data result is correct, click
Mark as Correct. The test question is marked as passed, and the SQL generated by the model is automatically stored in the answer set. - If the data result is incorrect, click
Copy to Answer Set and Editto maintain the answer set, then clickMark as Incorrect and Add to Q&A Sampleto maintain knowledge entries.
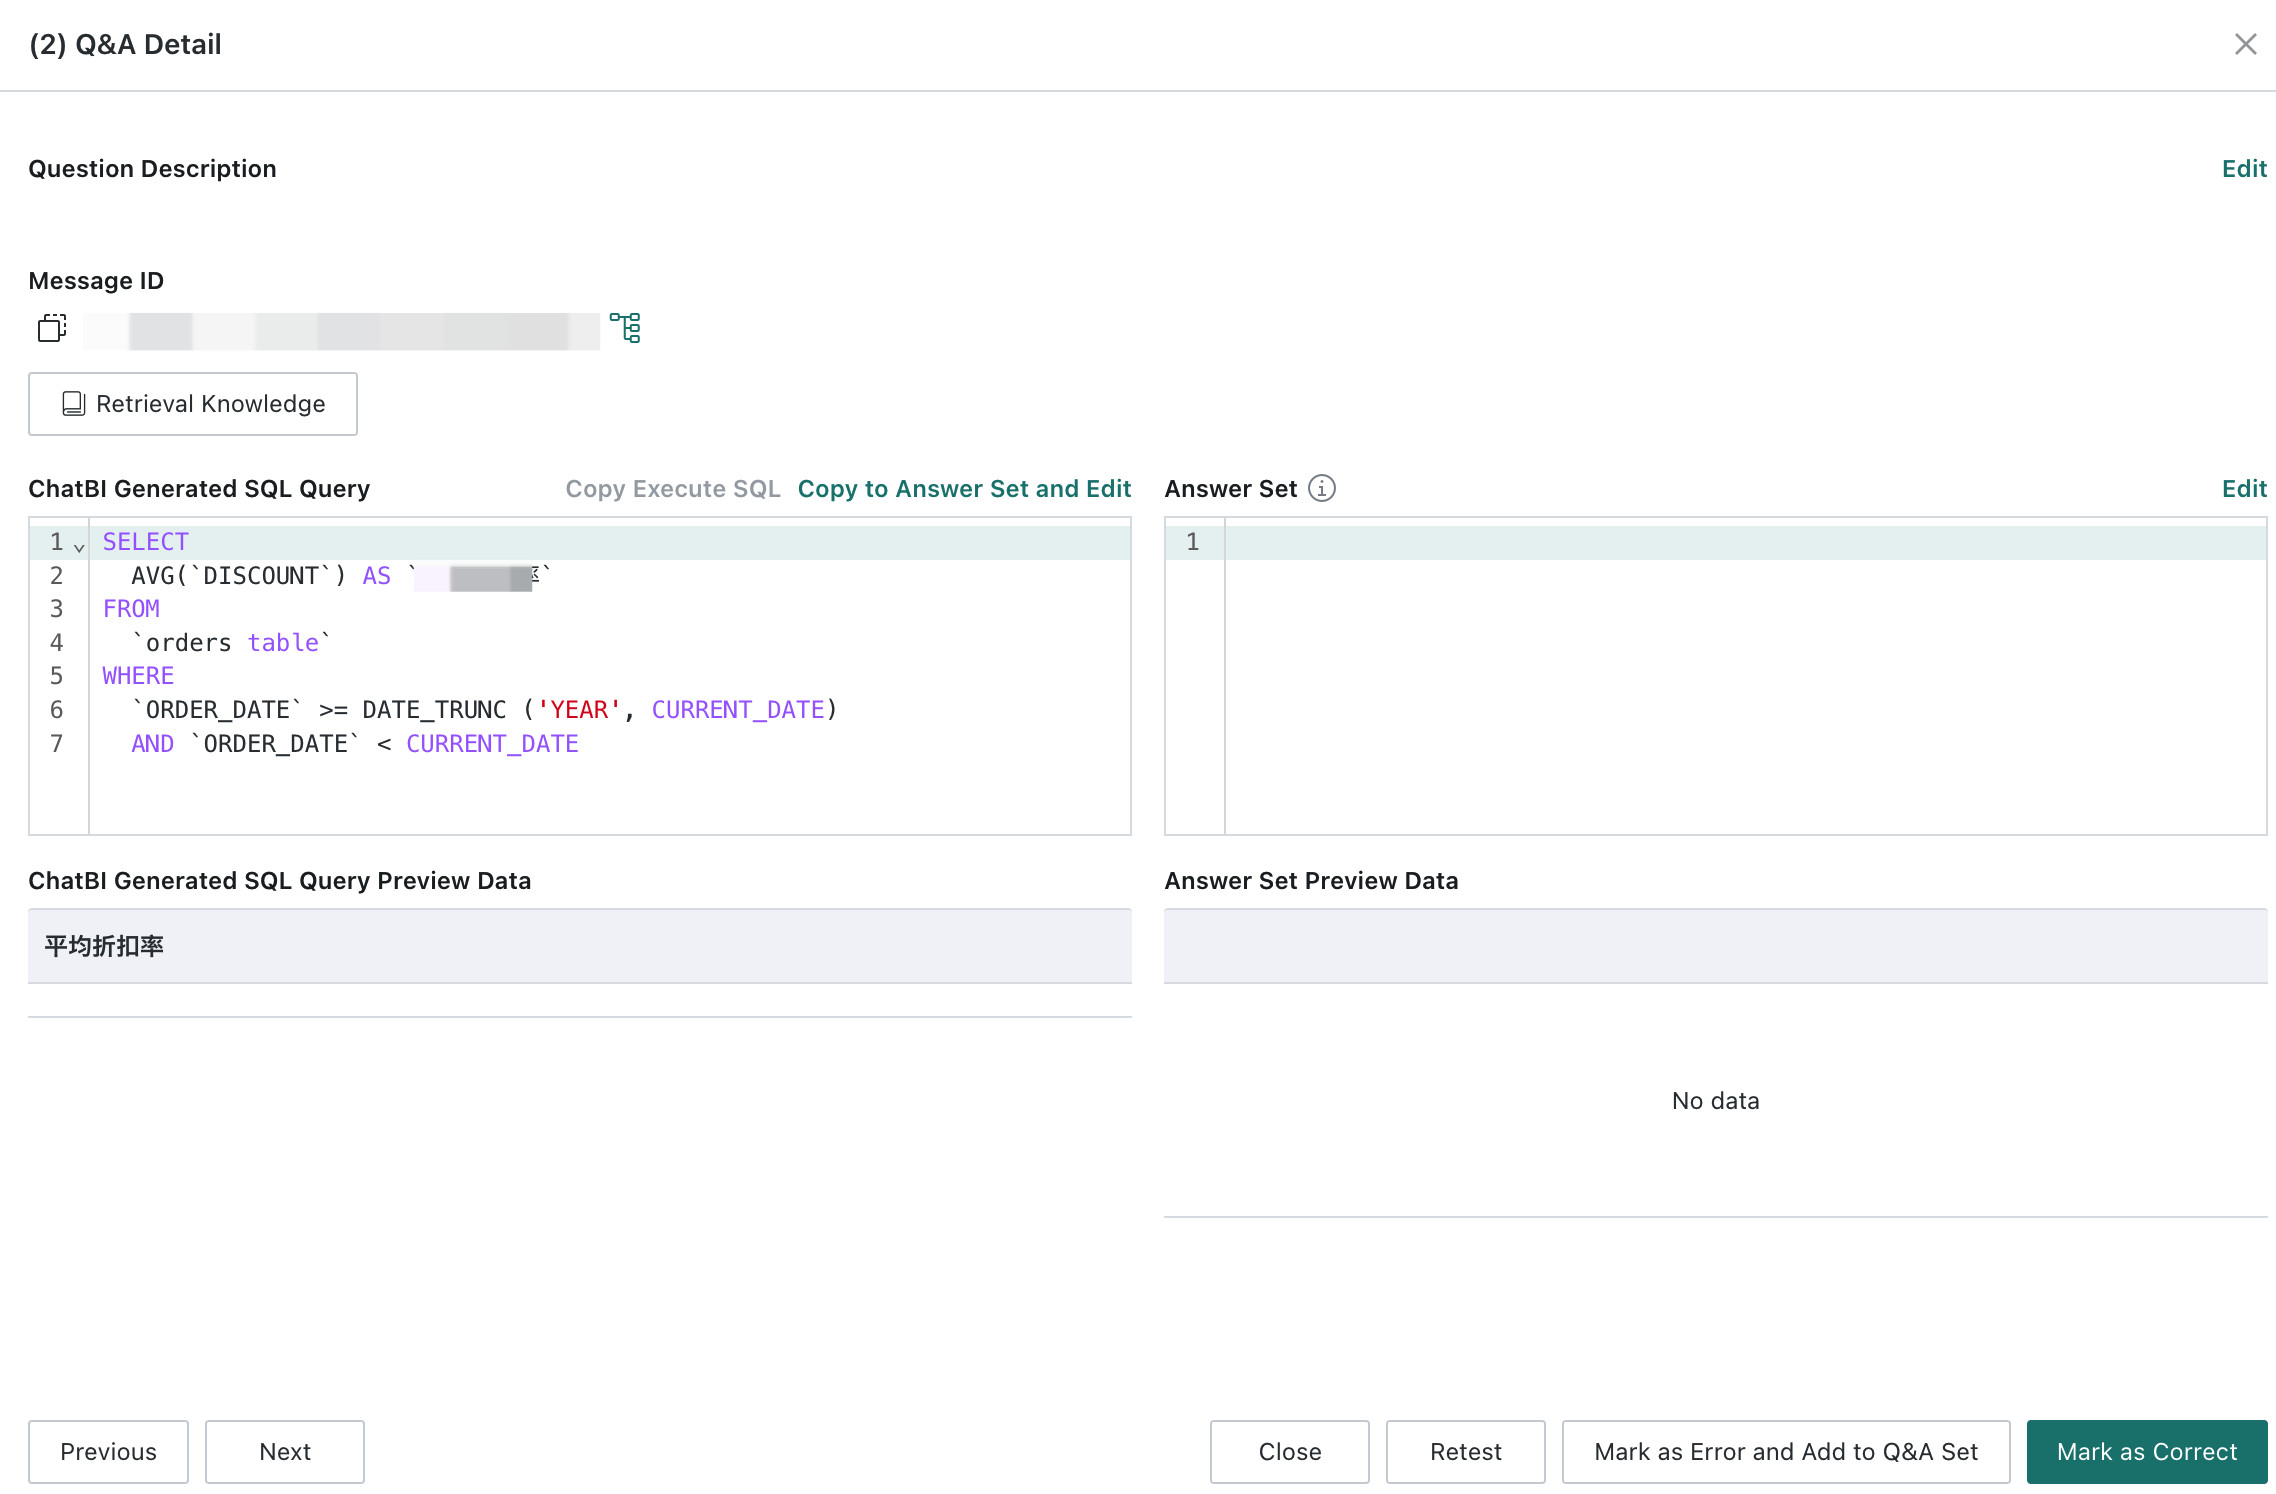
- If the data result is correct, click
-
For questions that already have an answer set, the system compares the execution result of the model-generated SQL with the execution result of the answer-set SQL. Only when the two results are exactly the same is the result automatically marked as correct. Otherwise, the system marks it as incorrect.
- For questions marked correct by the system, users can still manually verify the data and decide whether the result needs adjustment.
- For questions marked incorrect by the system, click
Editin the upper-right corner of theAnswer Setarea to maintain the answer set, then clickMark as Incorrect and Add to Q&A Sample.
Enable an Agent
After all test questions have been reviewed, the list header displays the test accuracy. We recommend enabling the agent only after the test accuracy reaches 90% or above.
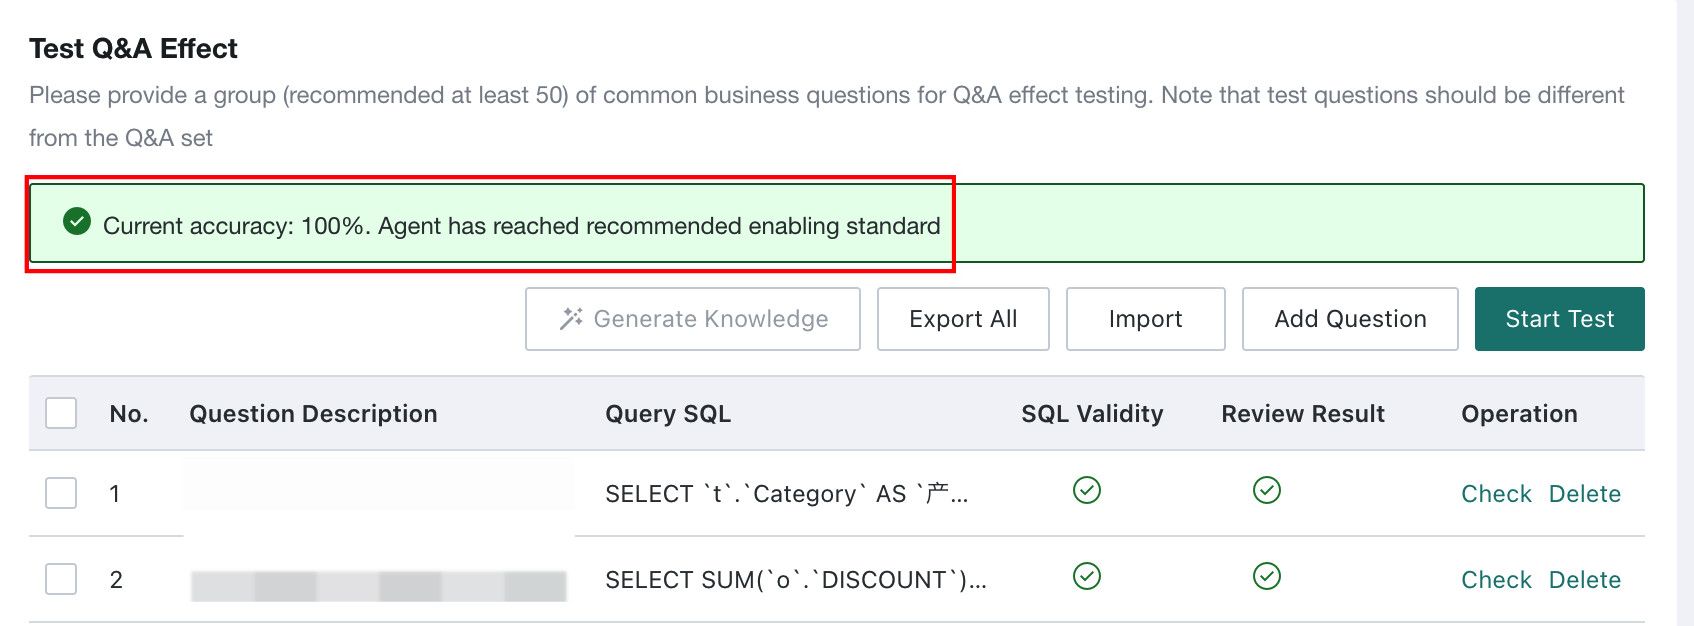
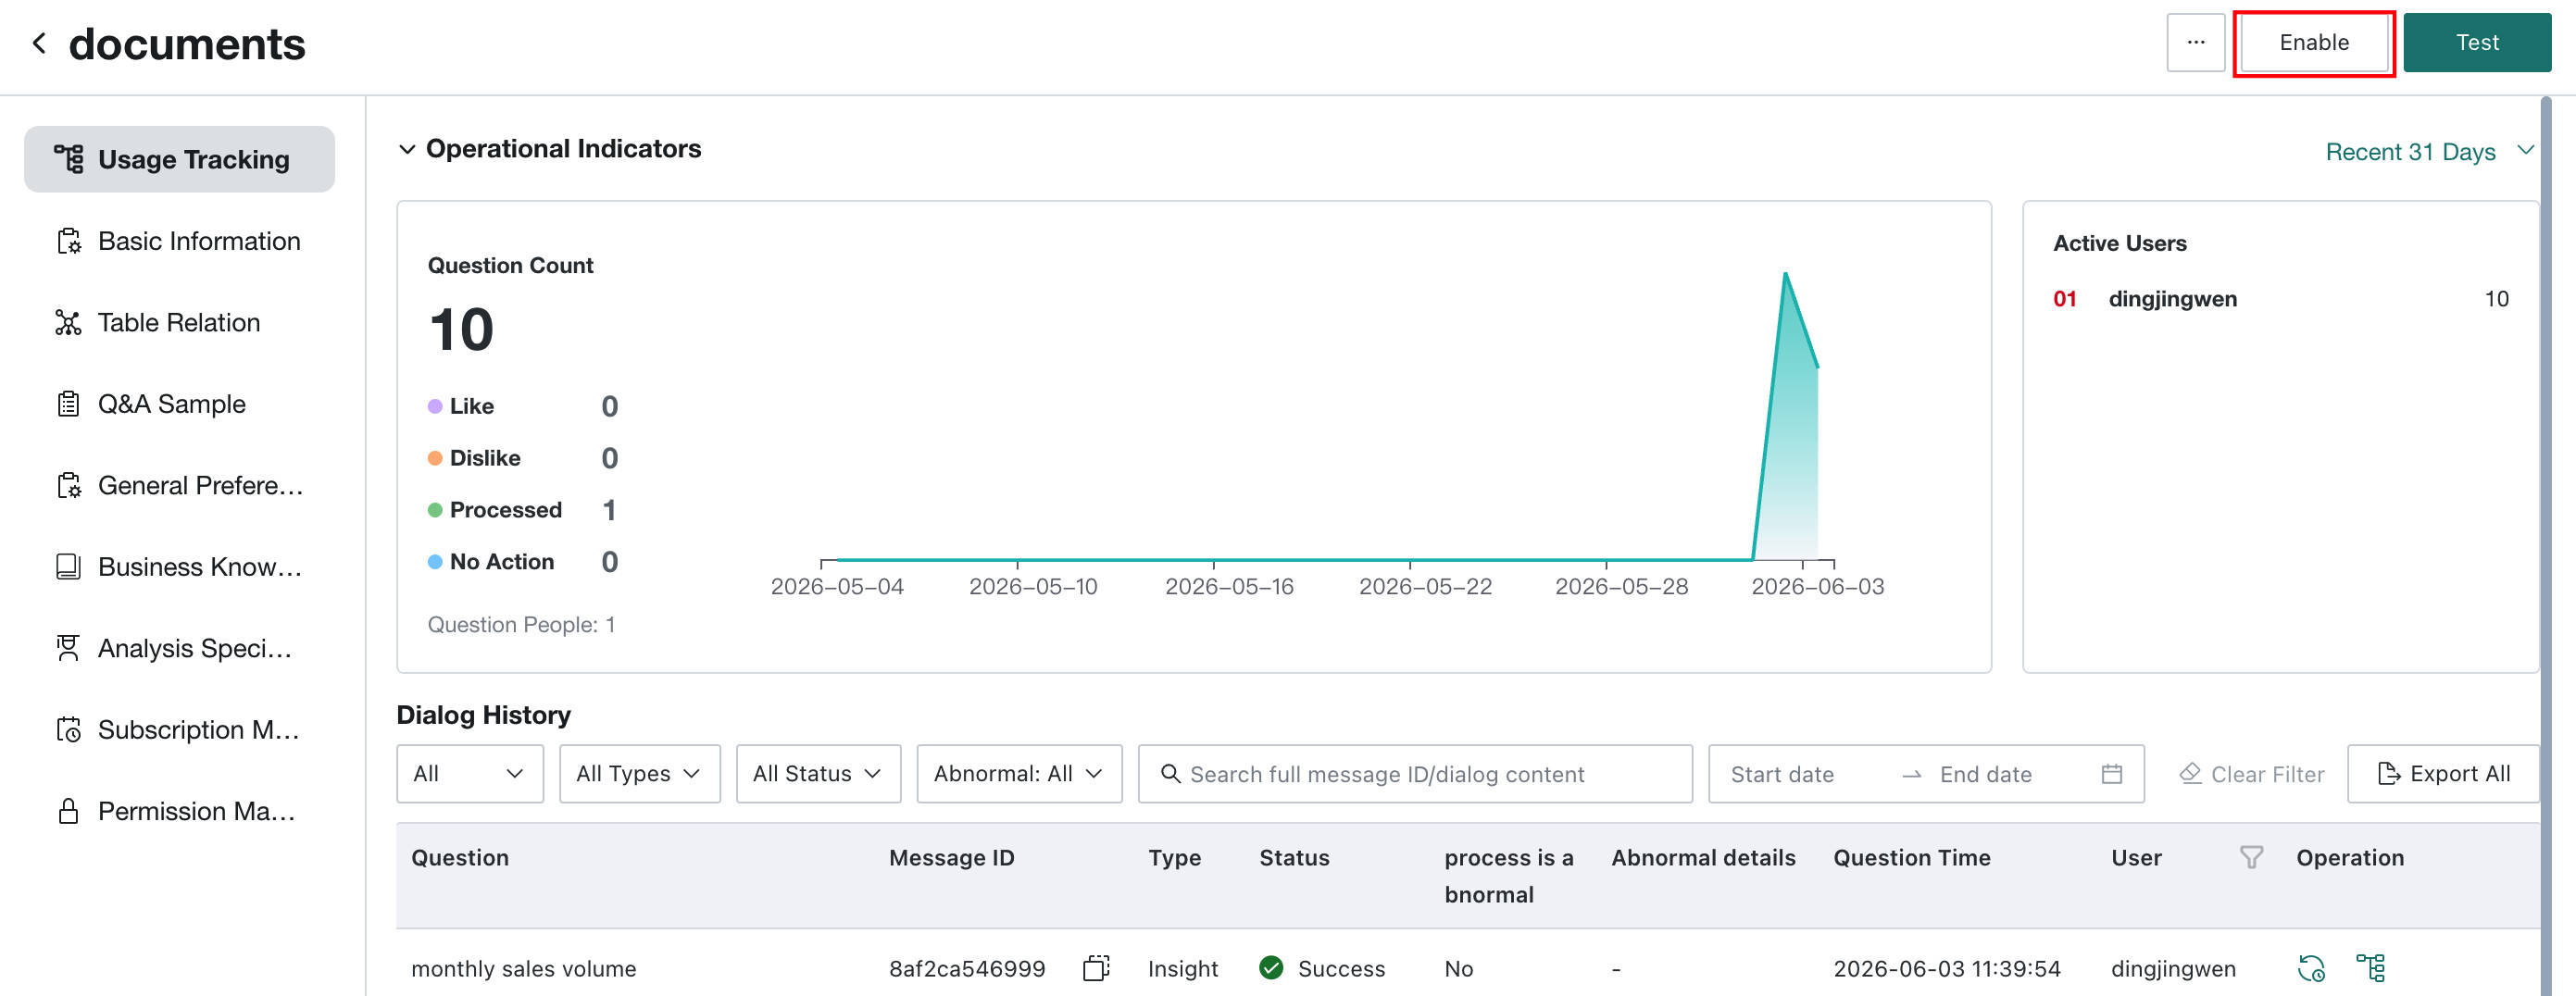
Return to the Agent Detail Settings page and click Enable.
Additional Operations
Click the More icon in the lower-right corner of the agent card to perform additional common operations.
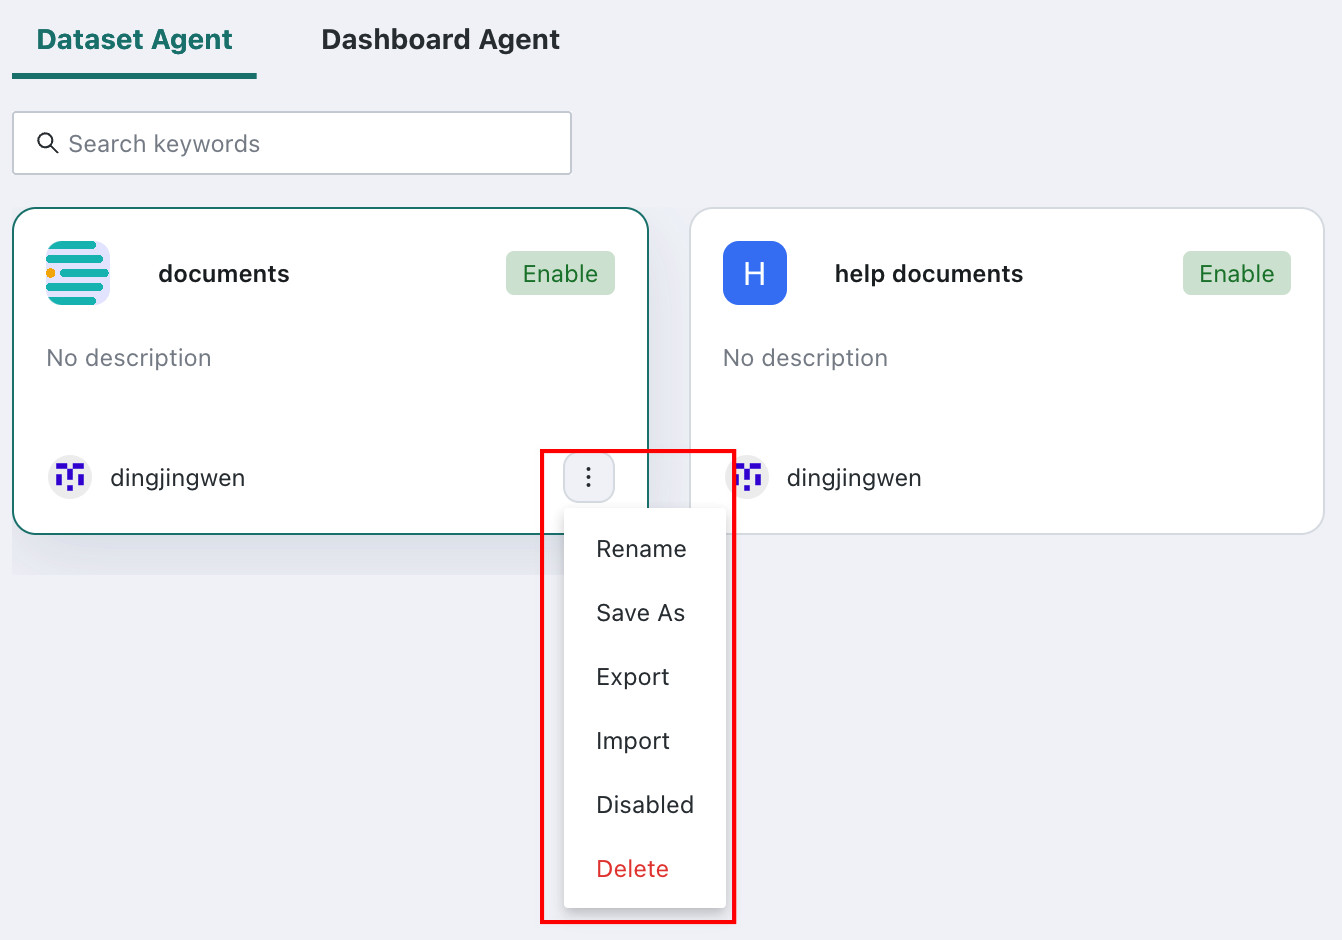
Enable / Disable
After an agent is created and tested for the first time, click Enable to publish it. Business users can then see all enabled agents they are authorized to use on the Query Agent and Insight Agent pages.
If the agent needs to be taken offline, click Disable. Disabled agents show the Disabled status label in the upper-right corner. To reactivate the agent, click Enable again.
Rename
Click Rename to rename the current agent.
Save As
Click Save As to quickly create a new agent based on the current configuration.
Import and Export Agents
Agent import and export are supported to simplify migration in private deployments, such as moving agents from a test environment to a production environment.
- Click
Exportto export the current agent's full configuration as a file, including basic information, knowledge base, disabled dataset fields, enumeration learning values, analysis experts, subscription management, theme switch configuration, and more. - Click
Importto upload an agent configuration file and quickly reproduce the same configuration in a new environment.
Delete
Click Delete to delete the current agent. The system requires a second confirmation to prevent accidental deletion.