Agent Management Feature Navigation
Overview
Agent Management is used to maintain Data Agent throughout its full lifecycle, including agent creation, configuration, and permission assignment.
Agent Management Overview
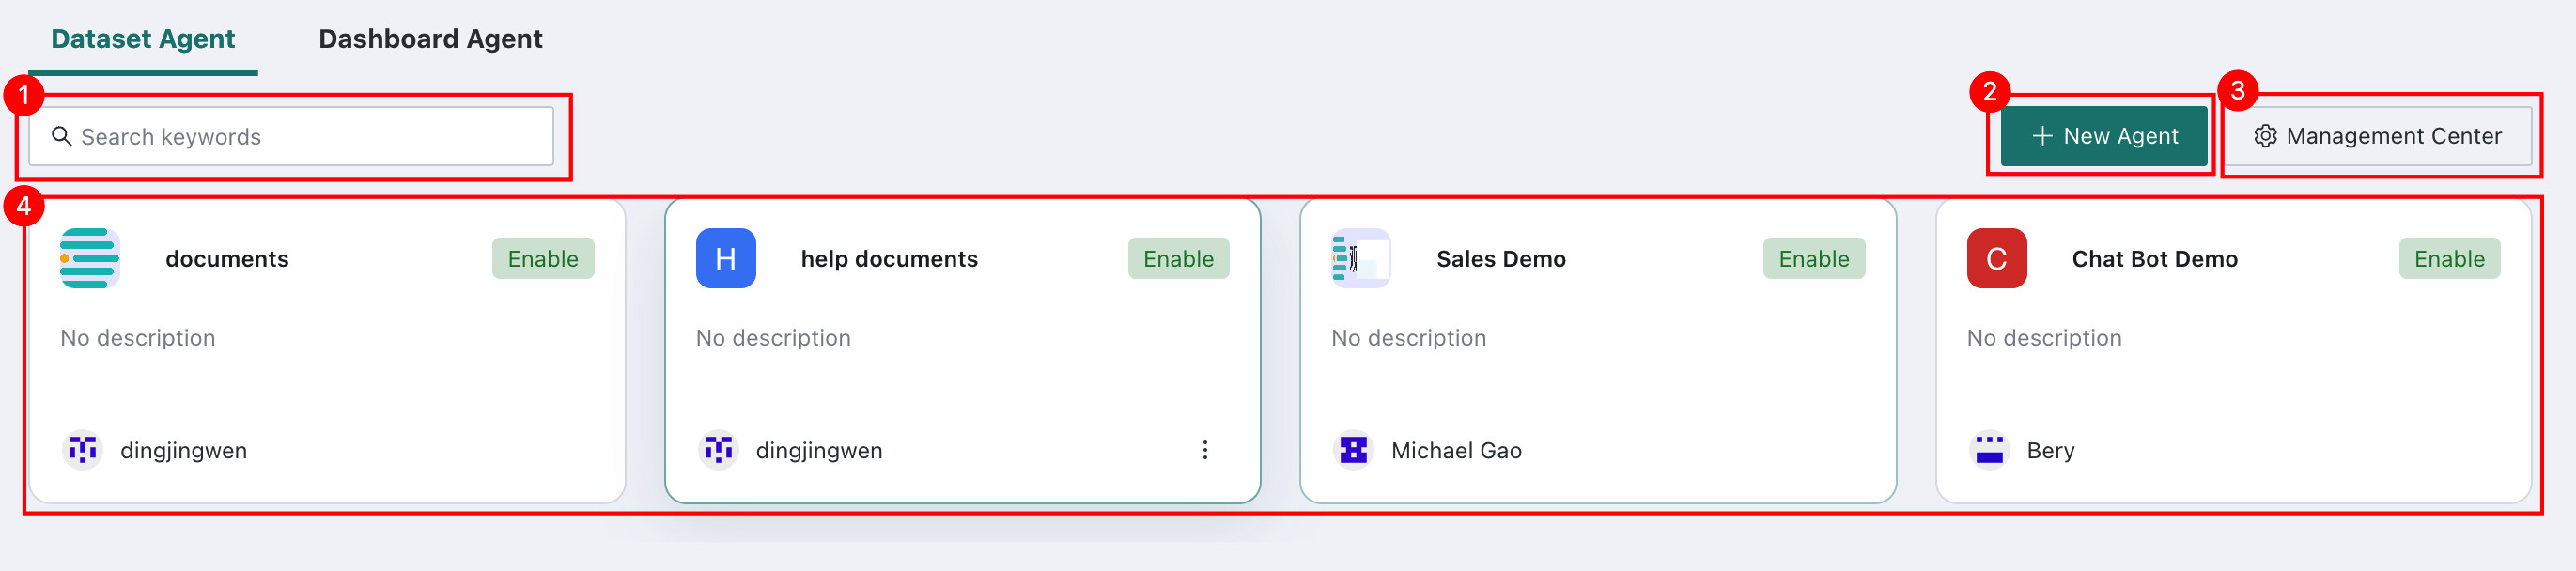
The Agent Management overview page displays all created agents and supports searching, creating, and managing agents.
| No. | Description |
|---|---|
| 1 | Search Box: search agents by keyword to quickly locate the target agent. |
| 2 | Create Agent: click to create a new agent. See Create and Configure an Agent. |
| 3 | Management Center: click to enter Management Center for usage control and feature configuration. See Management Center. |
| 4 | Agent Card List: displays all created agents. Each card shows the agent name, status (Enabled or Disabled), description, and owner information. Click a card to enter the Agent Detail Settings page. |
Agent Detail Settings
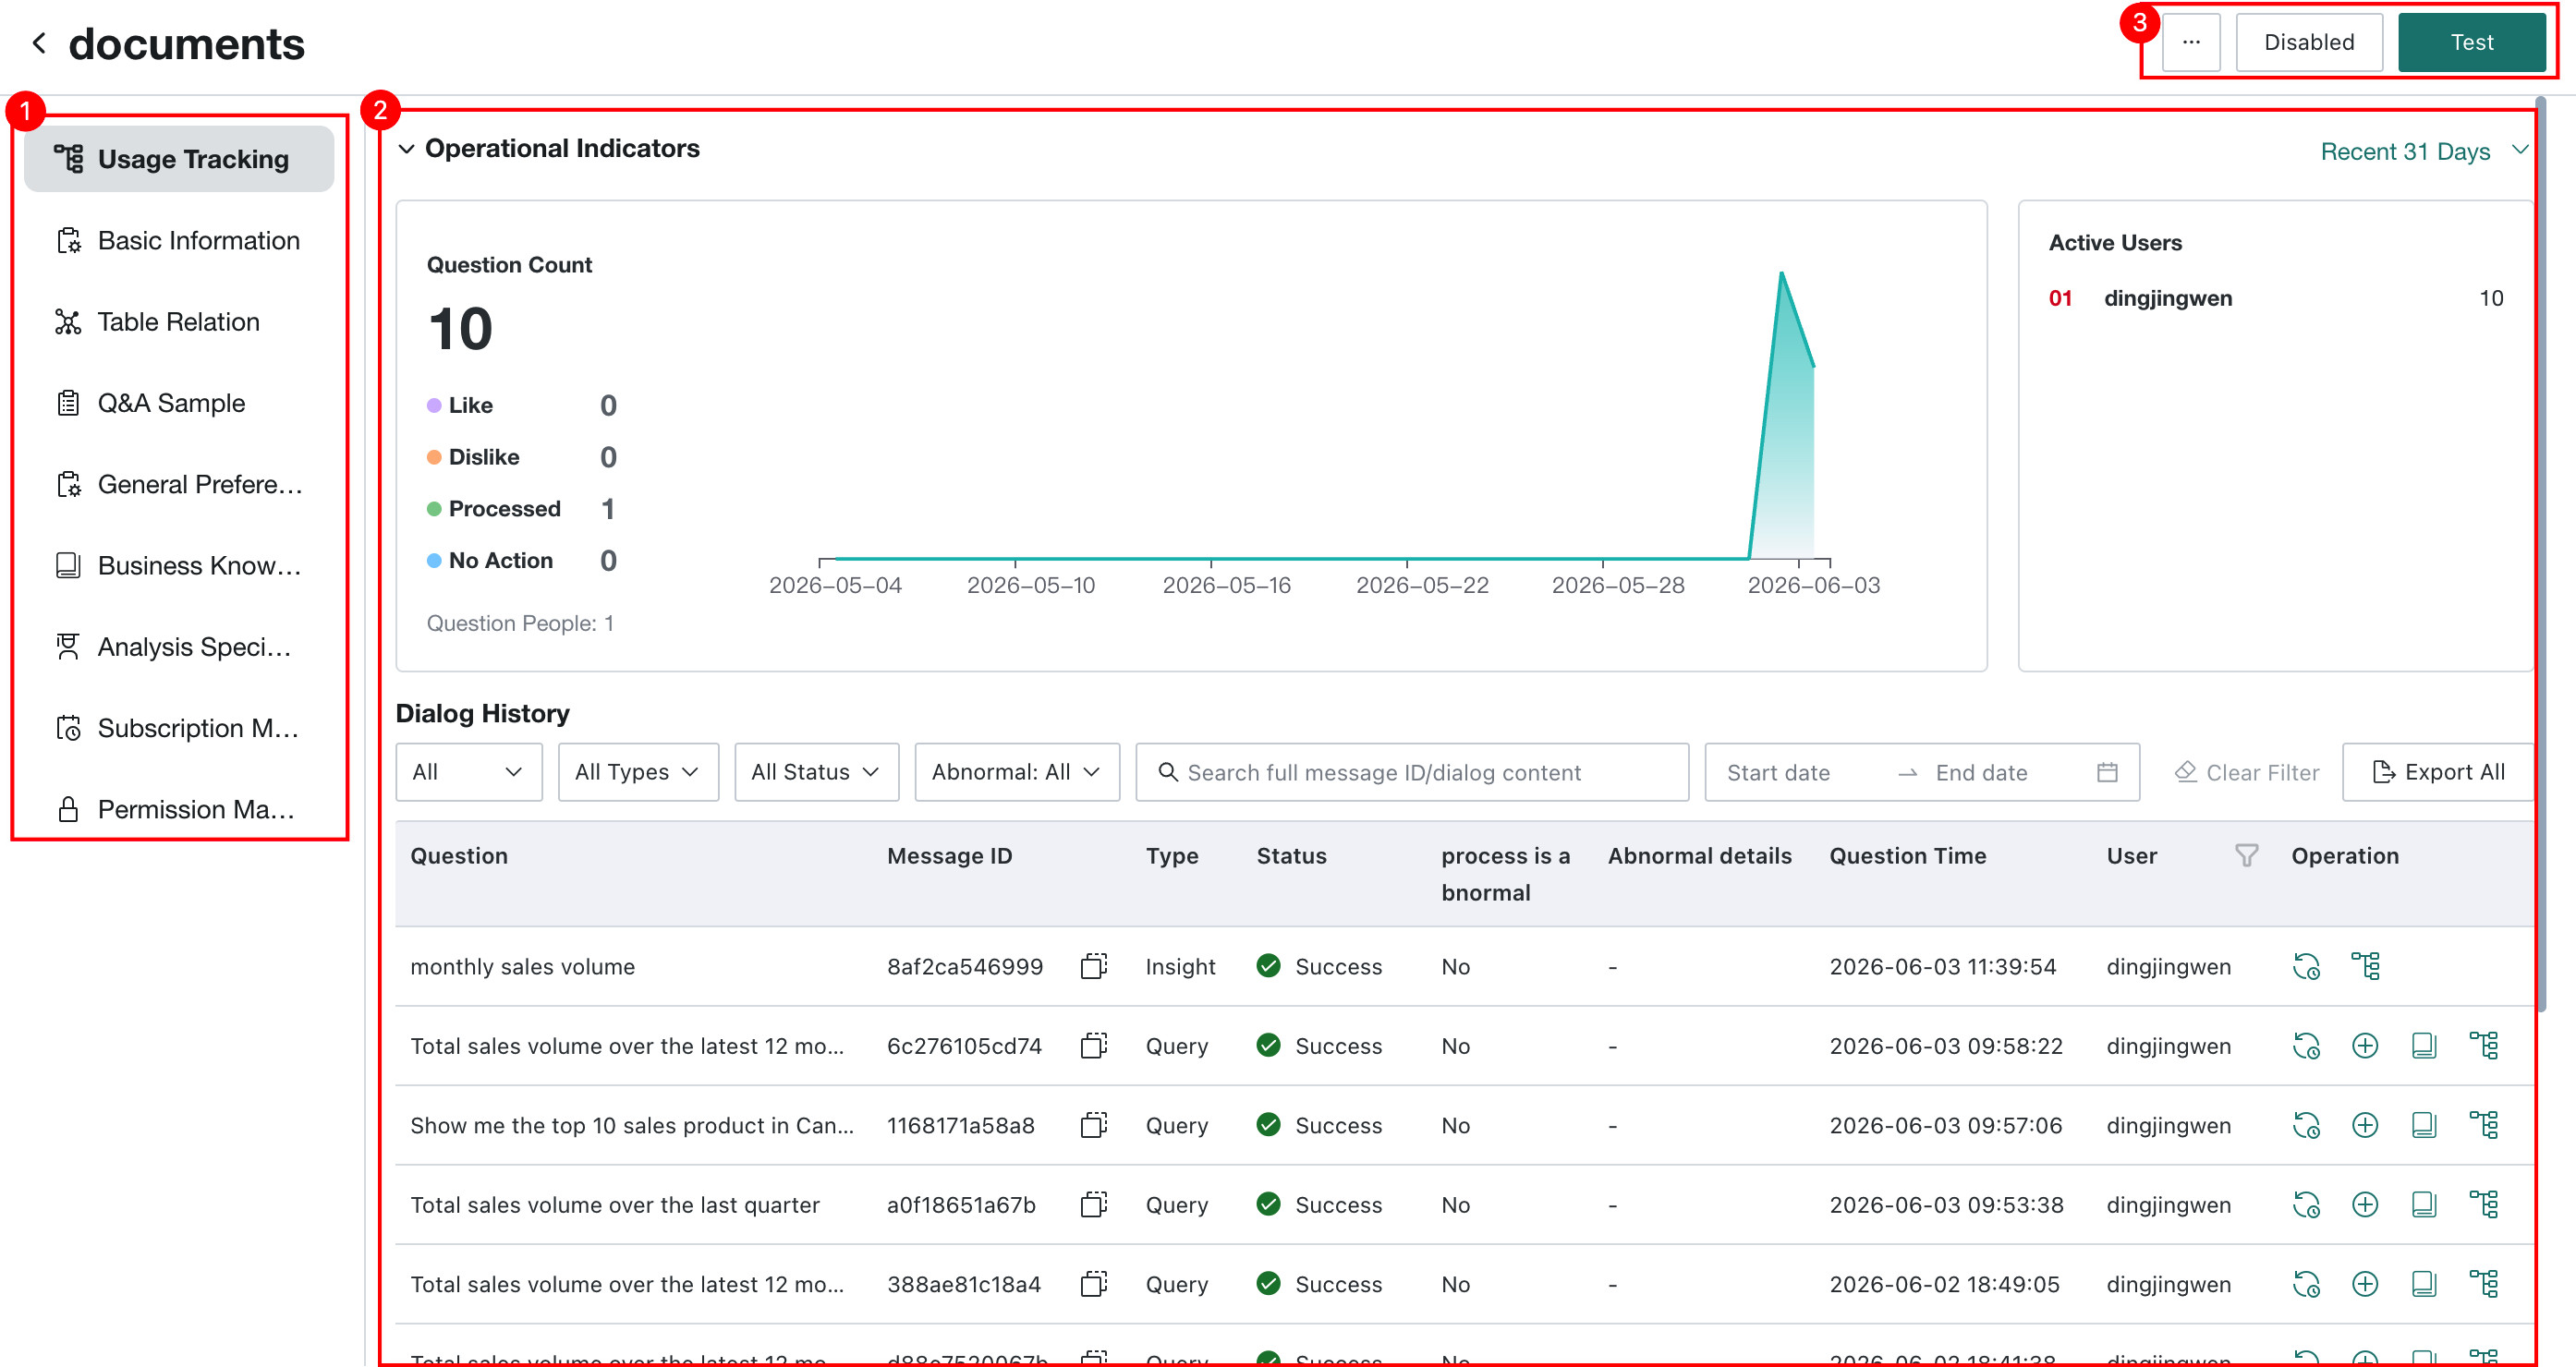
Click any agent to enter its management page. The left side contains the feature menu, and the right side displays the corresponding detail panel or configuration items.
| No. | Description |
|---|---|
| 1 | Agent Management Configuration Area: contains entry points for all agent configuration features. |
| 2 | Detail Panel or Configuration Area: displays the detailed content corresponding to the selected feature on the left, such as operational metric charts in Usage Tracking or dialog history lists. |
| 3 | Agent Action Area: operations available for the current agent, including:More (...): rename, duplicate, delete, and more.Disable / Enable: control the running status of the agent.Test: enter test mode to verify agent performance. See Agent Testing. |