MySQL Database Environment Preparation
Overview
This article explains how to enable CDC in Binlog mode for a MySQL database.
Steps
Confirm the Current Database Version
Supported versions: 5.5 <= version < 8.2.0
Enable Database Binlog
Because Real-time Sync reads MySQL data through Binlog, you must enable Binlog in advance.
Go to the etc directory and edit the my.cnf file, as shown below:

Confirm the Binlog Retention Period
For MySQL deployed on a cloud platform, operations personnel need to confirm the Binlog retention period in the cloud console. Binlogs older than the configured retention period may be moved to OSS, and Flink cannot consume them there. It is recommended to monitor Binlog write speed and set an appropriate retention period.
For privately deployed MySQL, Binlogs older than the retention period are deleted.
Confirm the Maximum Size of a Single Binlog
The size of a single Binlog file should be configured based on your business scenario. In most cases, we recommend keeping a single Binlog file smaller than 500 MB.
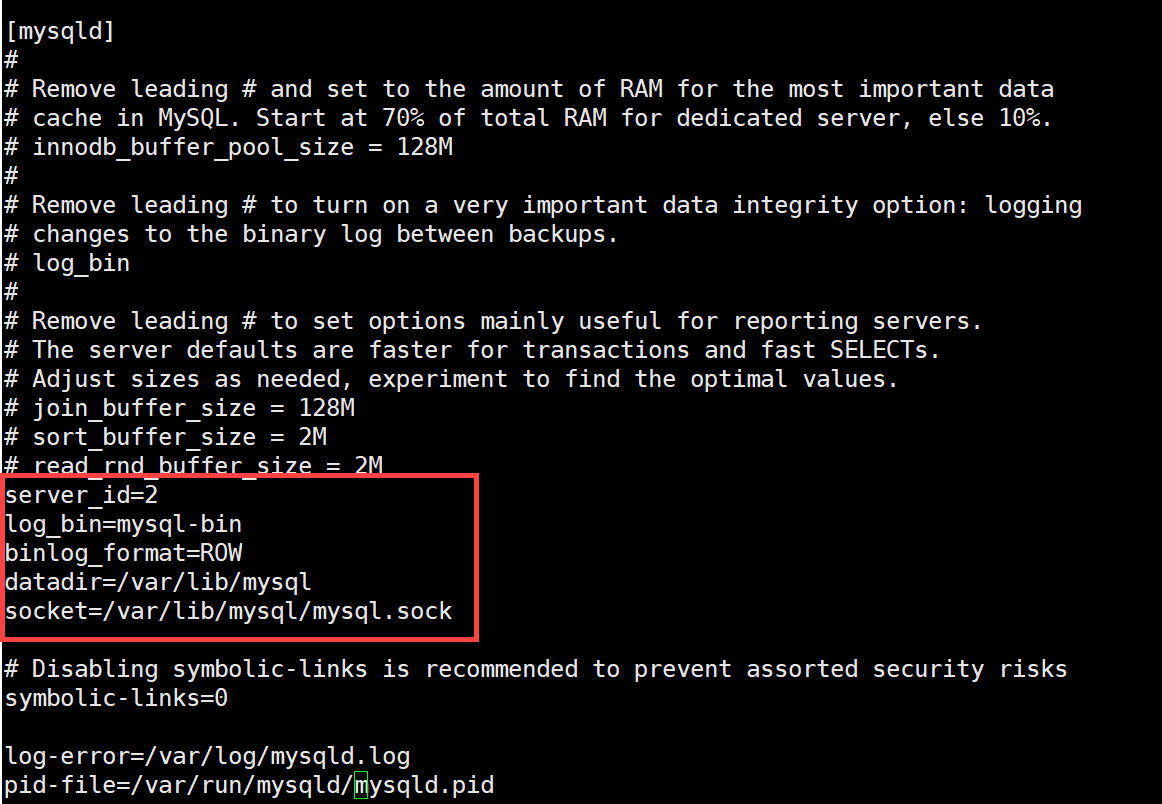
Modify the my.cnf File
Add the following content:
server_id=2
log_bin=mysql-bin
binlog_format=ROW
datadir=/var/lib/mysql
socket=/var/lib/mysql/mysql.sock
# Here, `7` means keeping Binlog files for the most recent 7 days. If it is set to `0`, Binlog files are never deleted.
expire_logs_days = 7
# Set the Binlog file size as needed. The recommended value is `500 MB`.
max_binlog_size = 536870912
In server_id=2, the value 2 can be replaced with any valid numeric ID.
After saving the file, restart MySQL for the configuration to take effect.
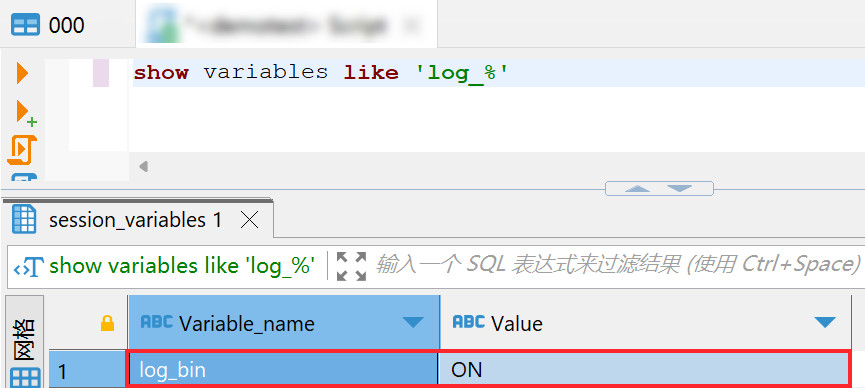
Run show variables like 'log_%' to check whether logging is enabled. If the value of log_bin is ON, logging is enabled, as shown below:
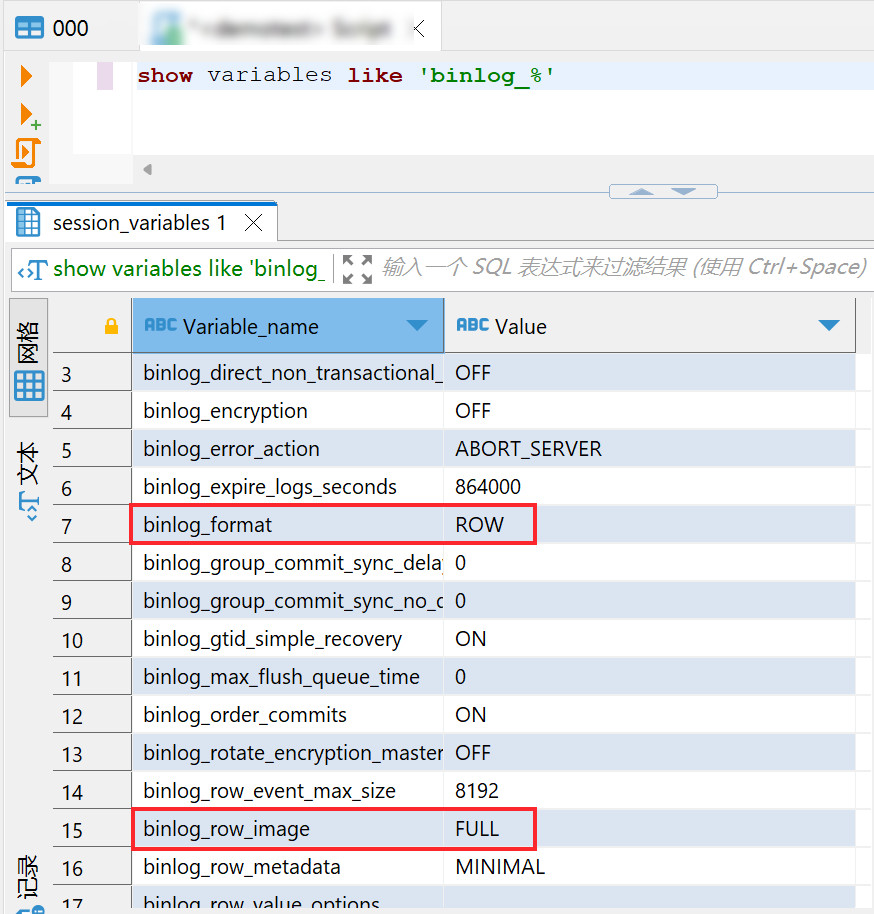
Then run show variables like 'binlog_%' to verify that binlog_row_image and binlog_format are set to FULL and ROW respectively, as shown below:
Run show variables like 'max_binlog_size' to check the Binlog size. The recommended value is 500 MB, so max_binlog_size should be 536870912.
Enable Replication Permissions for the Specified Account
Replication accounts typically require the following two permissions: REPLICATION SLAVE and REPLICATION CLIENT.
Among them, REPLICATION CLIENT cannot be used to establish replication. It only enables commands such as SHOW SLAVE STATUS and SHOW MASTER STATUS.
- Check the user status:
You can use show grants for username to verify the replication status of the replication user.
If the returned privileges do not include replication client and replication slave, replication permissions must be enabled.
- Enable the permissions with the following commands:
grant replication client on *.* to username;
grant replication slave on *.* to username;
Then run show grants for username to verify the user's permissions. If the returned privileges include the entries below, the permissions have been enabled successfully, as shown in the figure:
