Shell Node
Overview
The Shell node runs multiline Shell commands or scripts in a workflow. Use it to call cloud-provider CLI tools, transfer files, or migrate existing Bash and Shell scripts.
Before you begin
- Configure at least one Shell image.
- Make sure that the selected image contains every command and tool required by the script.
- Make sure that you can edit the workflow.
Add a Shell Node
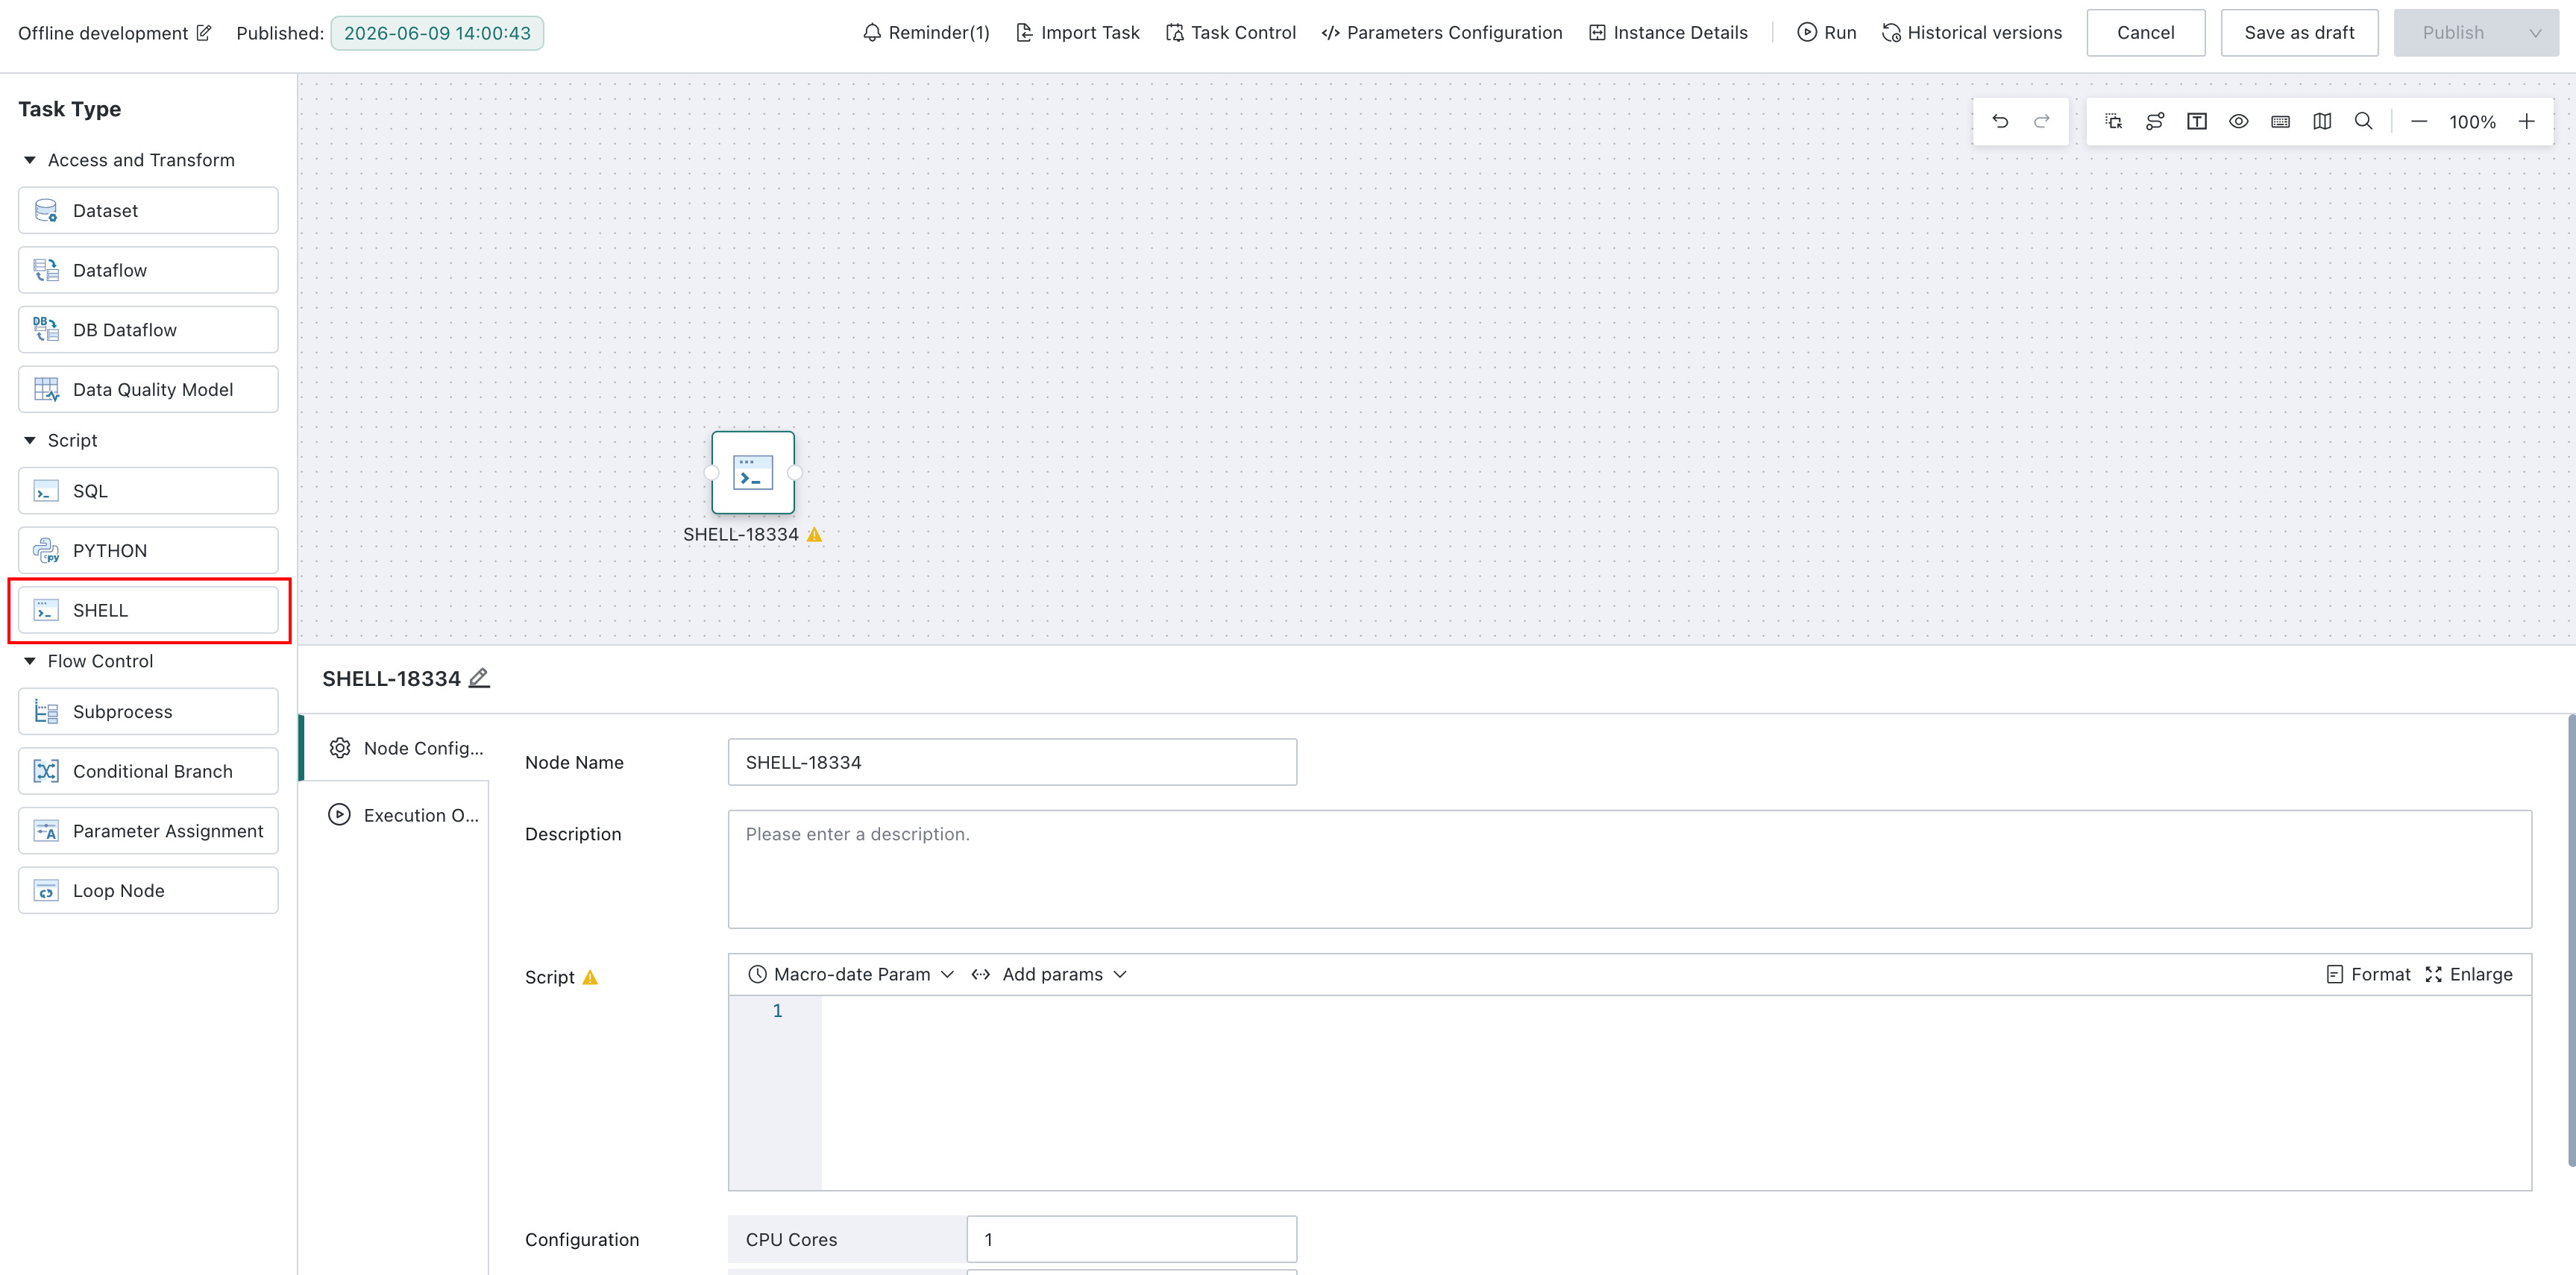
- Open the workflow editor and drag SHELL to a valid location on the canvas.
- Select the node. The configuration panel opens on the Node Configuration tab.
An incomplete node displays a warning on the canvas. A node with an empty script cannot be saved.
Configure the Node
Basic Information
- Node name identifies the node on the canvas, in task instances, and in Task Management.
- Description is optional. Use it to record script purpose, processing logic, or operational notes.
Shell Script
Enter the Shell commands or script to run in the script editor. The script is required and supports:
- Entering and editing multiline commands.
- Referencing task, global, time-macro, and dynamic parameters.
- Formatting script content.
- Expanding the editor to view and edit long scripts.
If the script is empty, the node cannot be saved and the platform displays Script content cannot be empty.
Reference Parameters
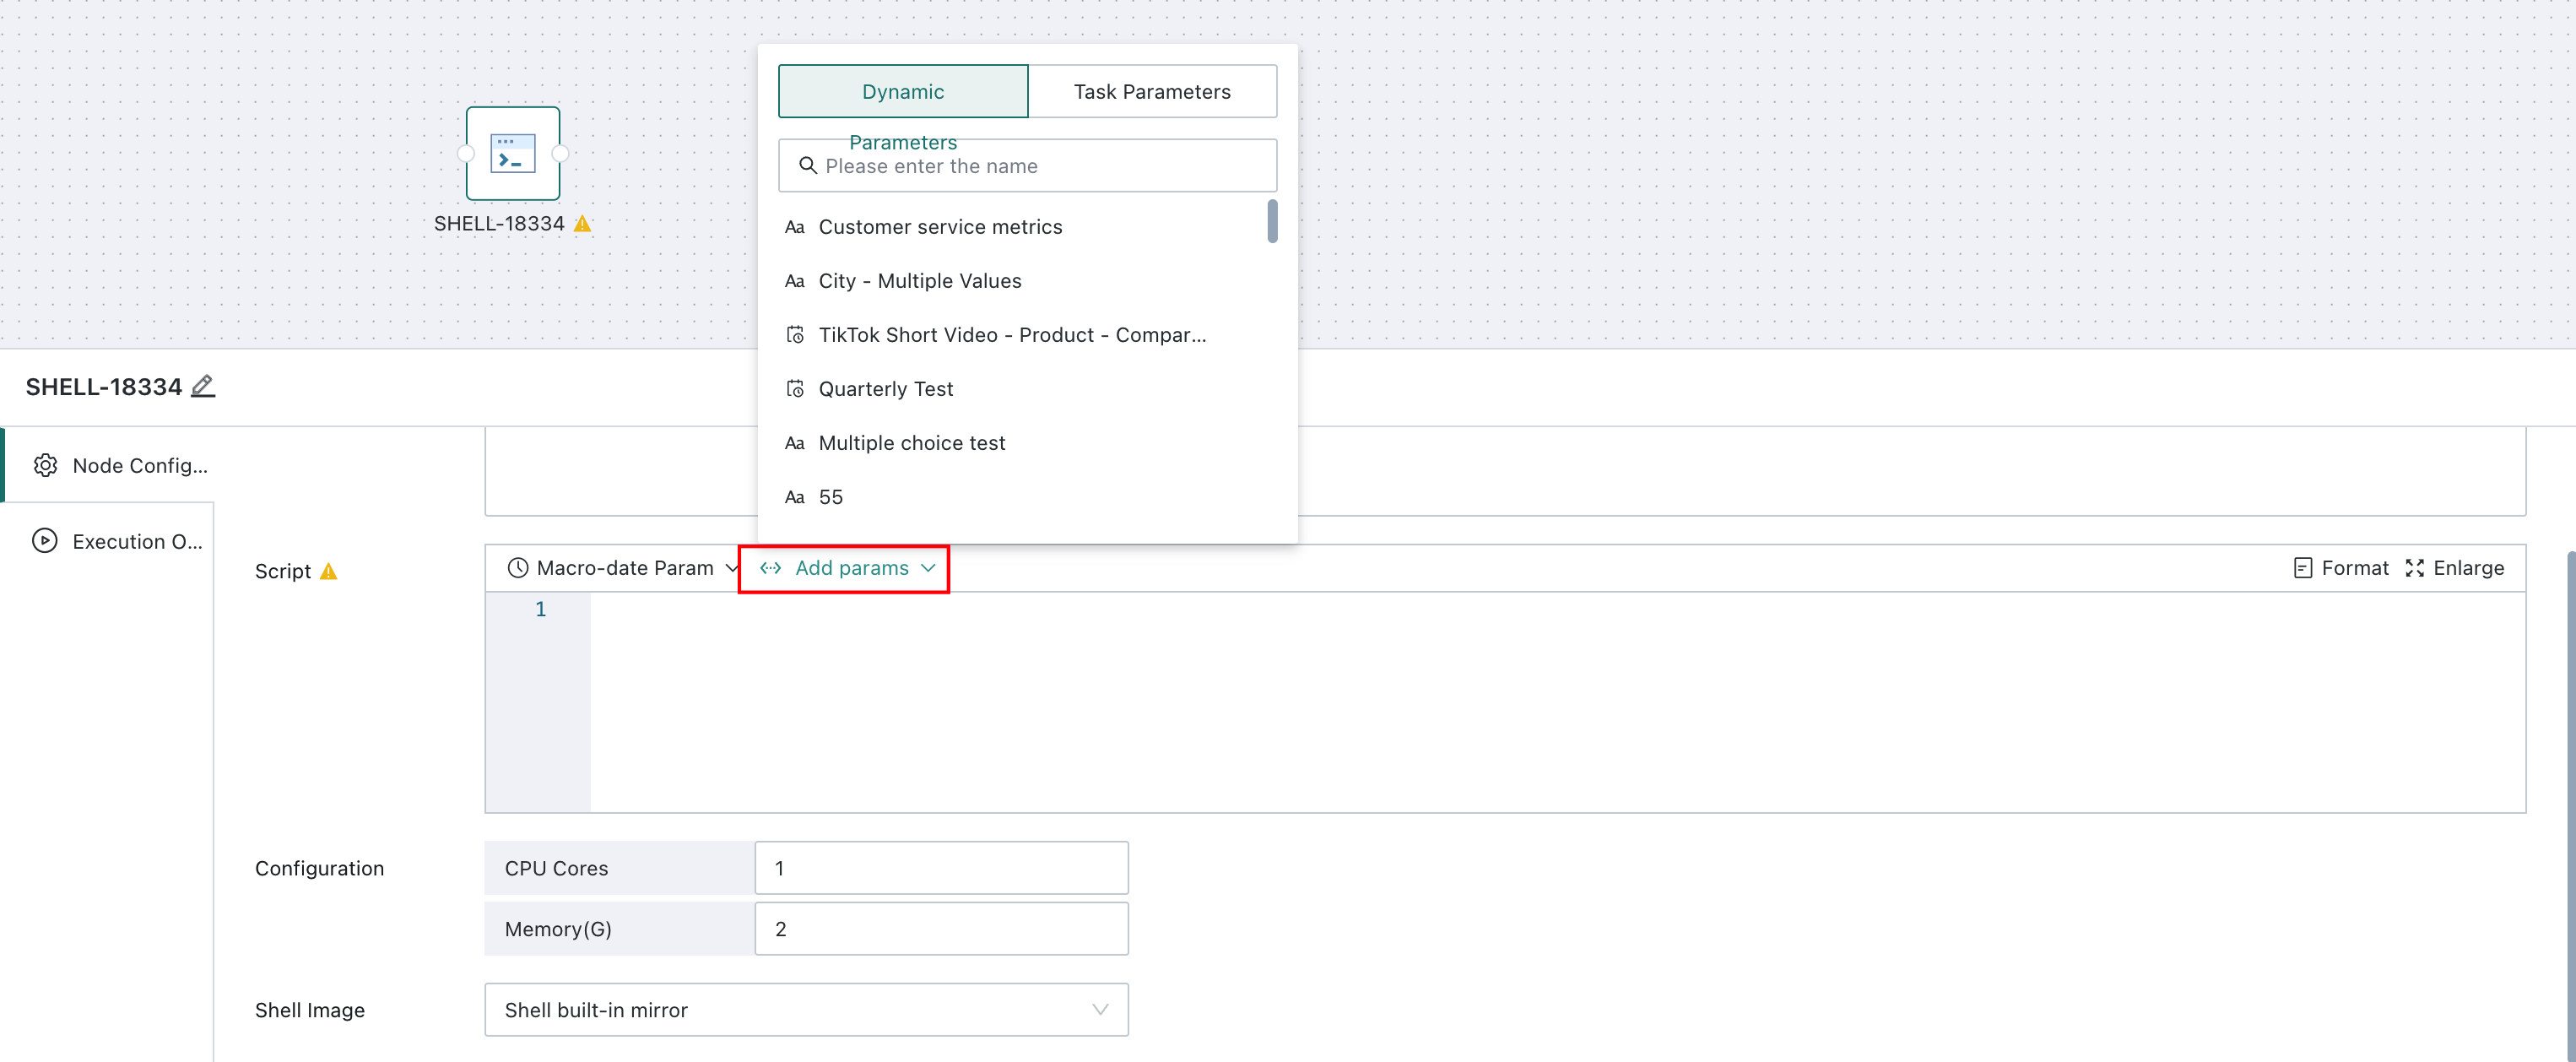
- Place the cursor where the parameter is needed, or select text to replace.
- Click Insert Parameter in the script editor.
- Select task, global, time-macro, or dynamic parameters.
- Select the target parameter. The platform inserts its expression at the cursor or replaces the selected text.
Parameter values are resolved when the task runs. Verify their names, scope, and run-time values before publishing.
Resource Configuration
- CPU (cores) defaults to 1.
- Memory (GB) defaults to 2.
Set resources according to the volume of data and the tools used by the script.
Shell Image
Select the Shell image that runs the script. New nodes use the administrator's default Shell image. If the required image is unavailable, ask an administrator to configure it in Management Center > System Integration > Image Configuration.
Configure Run Options
On the Run Options tab, configure:
- Run Flag: Enables normal execution or disables the node.
- Failure Retry: Sets the retry count and retry interval after a failure.
- Timeout Limit: Sets the maximum allowed execution time. The platform treats an overrun as a timeout.
After configuring the node, save and publish the workflow. Run it once to verify the script, parameters, image, and resources.
View Run Logs
After the task runs, open the workflow instance to view Shell node status and logs. Logs record node submission, script start, and completion, for example:
[INFO] time Node name [SHELL] submitted
[INFO] time Node name [SHELL] running Shell script
[INFO] time Node name [SHELL] completed
In Task Management, the Shell node description is SHELL. Click the node name in the operation target to open its instance node.
Stop a Running Node
When a task reaches a Shell node, you can stop the task. The platform stops the running Shell script and cleans up temporary files created during execution.
Manage Shell Images
This section is for administrators.
Image Configuration manages both Python and Shell images. Administrators can create Shell images, set a default image, and filter the list by image type.
Create a Shell Image
- Open Management Center > Image Configuration.
- Click New Image.
- Select Shell Image as the image type.
- Enter the image name, image address, image registry credential, and notes.
- To use this image for future Shell nodes, select Set as Default Image.
- Click Confirm.
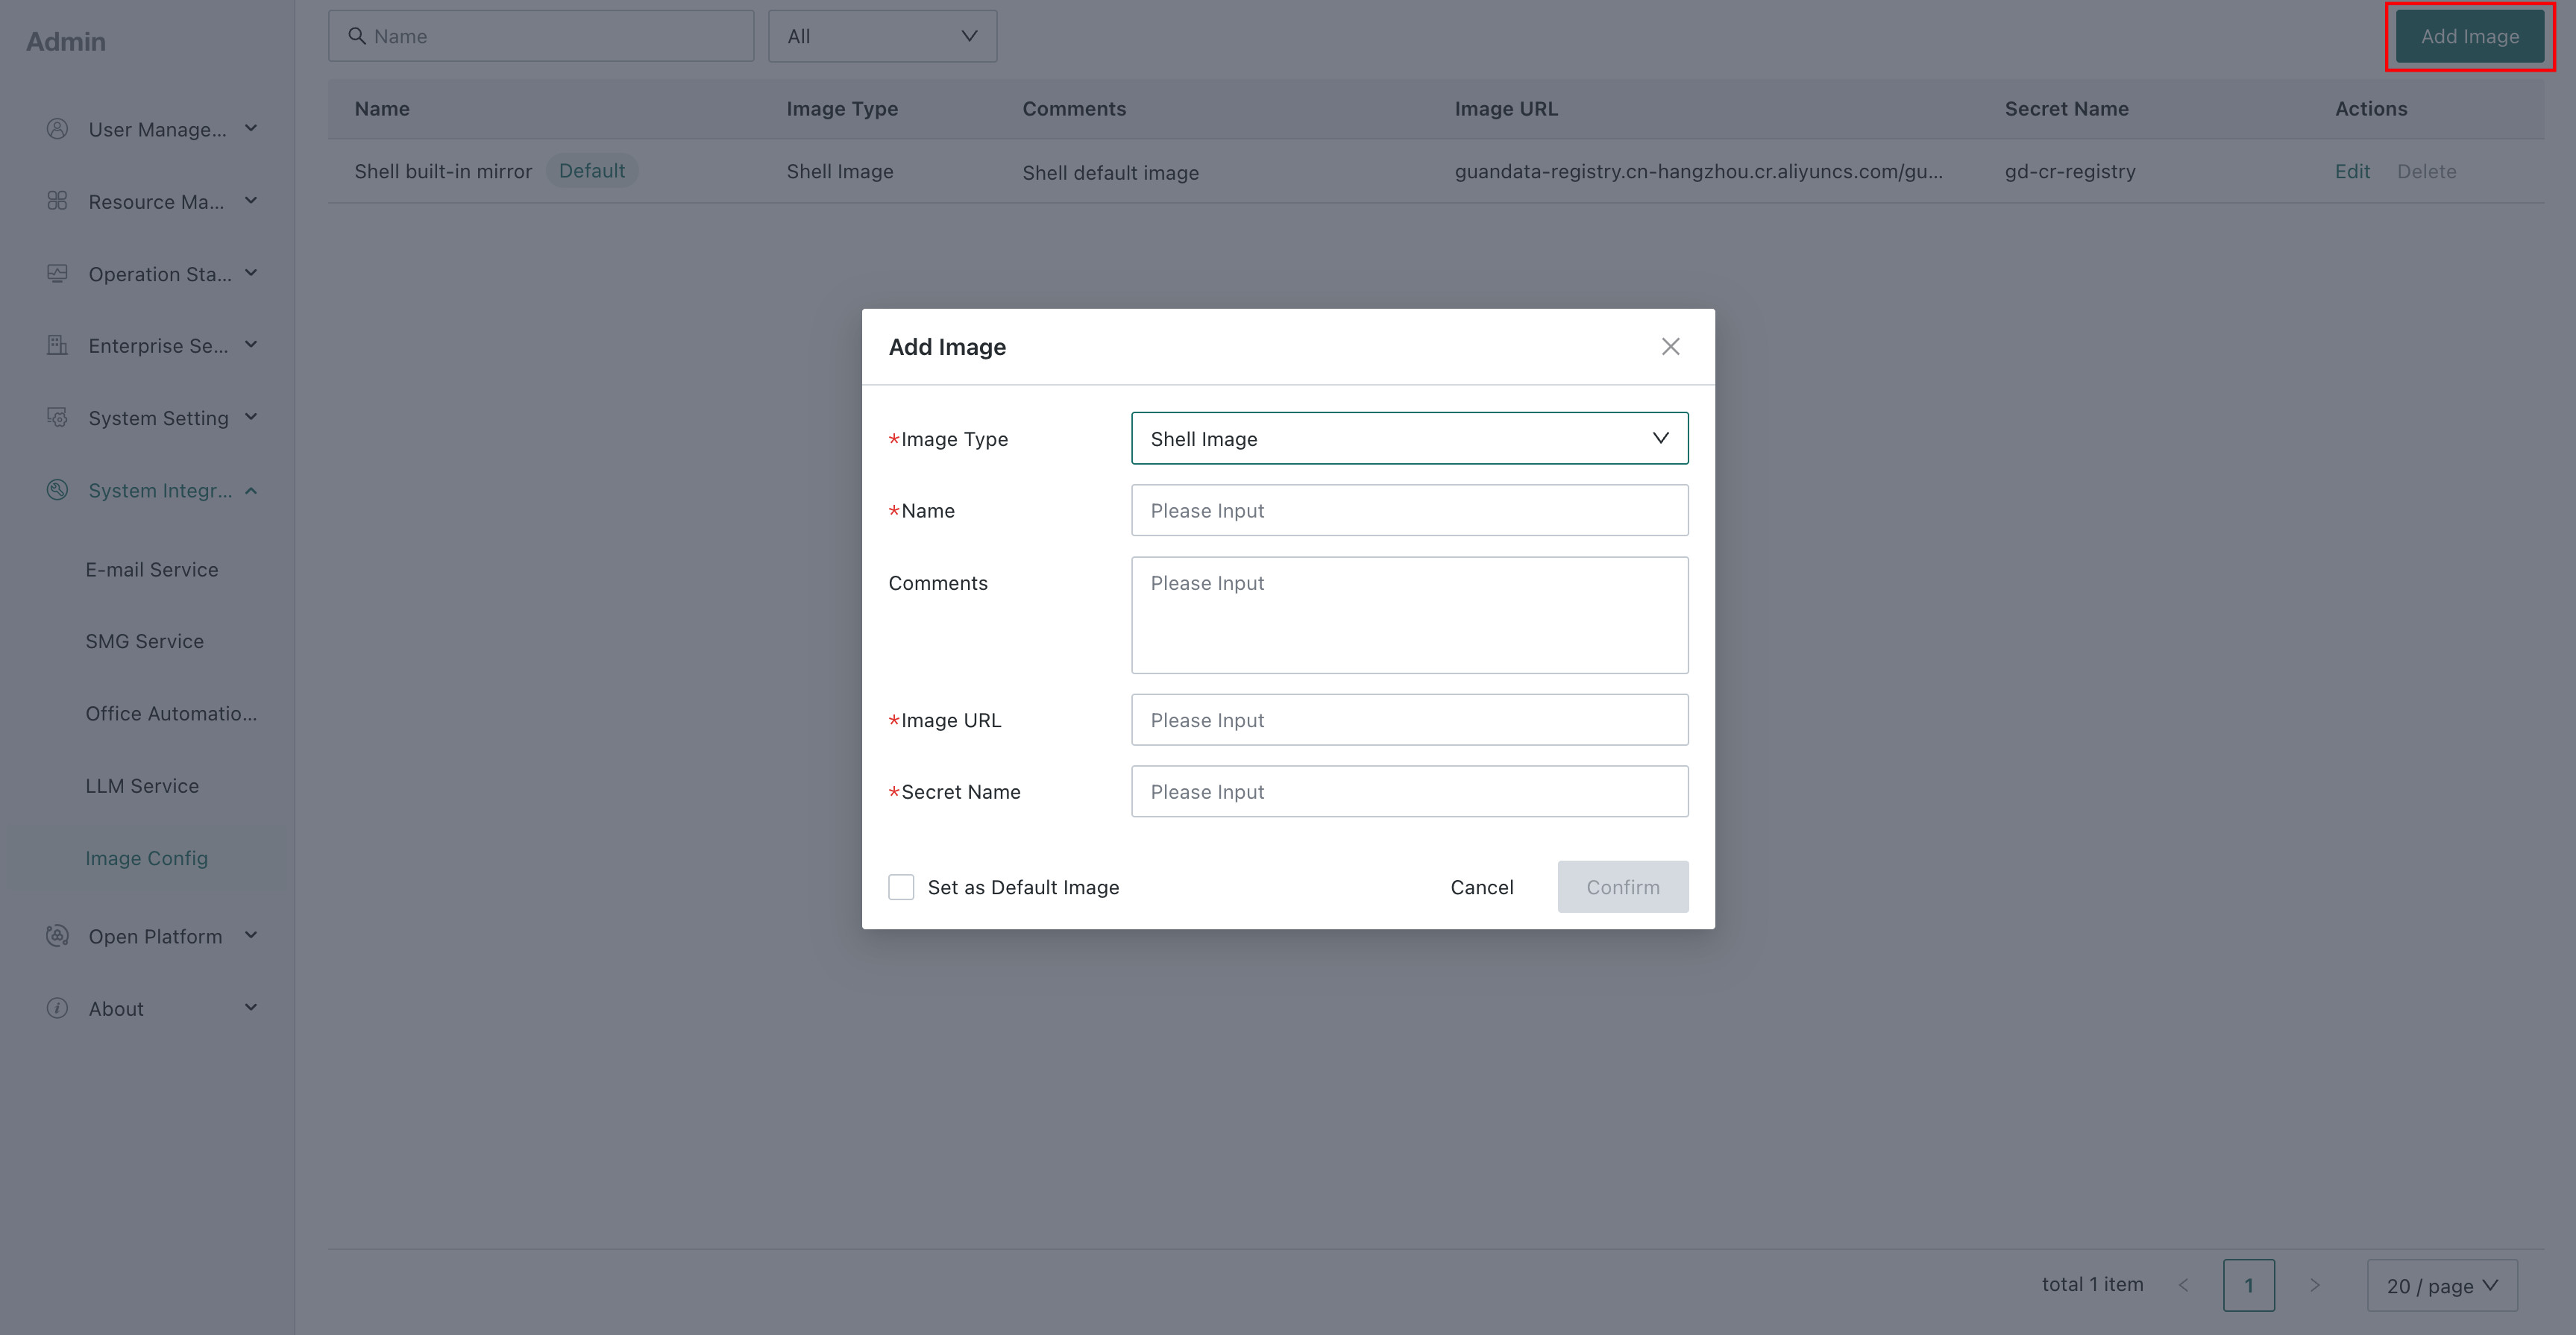
| Image Name | Select the image by name in a Shell node. |
|---|---|
| Notes | Description of the image. |
| Image Address | Shell image address. |
| Image Registry Credential | Pulls the Shell image using its address and credential. |
| Set as Default Image | Future Shell nodes use this image by default; existing node selections do not change. |
Troubleshooting
- If you cannot add a Shell node, verify that the environment includes the advanced Offline Dev capability and that you have node-edit permission.
- If the node remains in warning state, enter a script and verify the image and resource settings.
- If a command fails, review instance logs and verify image tools, parameter values, network access, and credentials.