Data Sync Node
Overview
The Data Sync Node synchronizes data from a source database table to a target database table within an offline development task. You can configure source and target tables, filter conditions, field mappings, update modes, and runtime parameters.
Prerequisites
Before using a Data Sync Node, configure the source and target data connections and obtain permission to use the corresponding data accounts. Regular users can select only accounts they have permission to use.
Node Configuration
Add a Data Sync Node
-
Go to Data Development > Offline Dev and create or edit an offline development task.
-
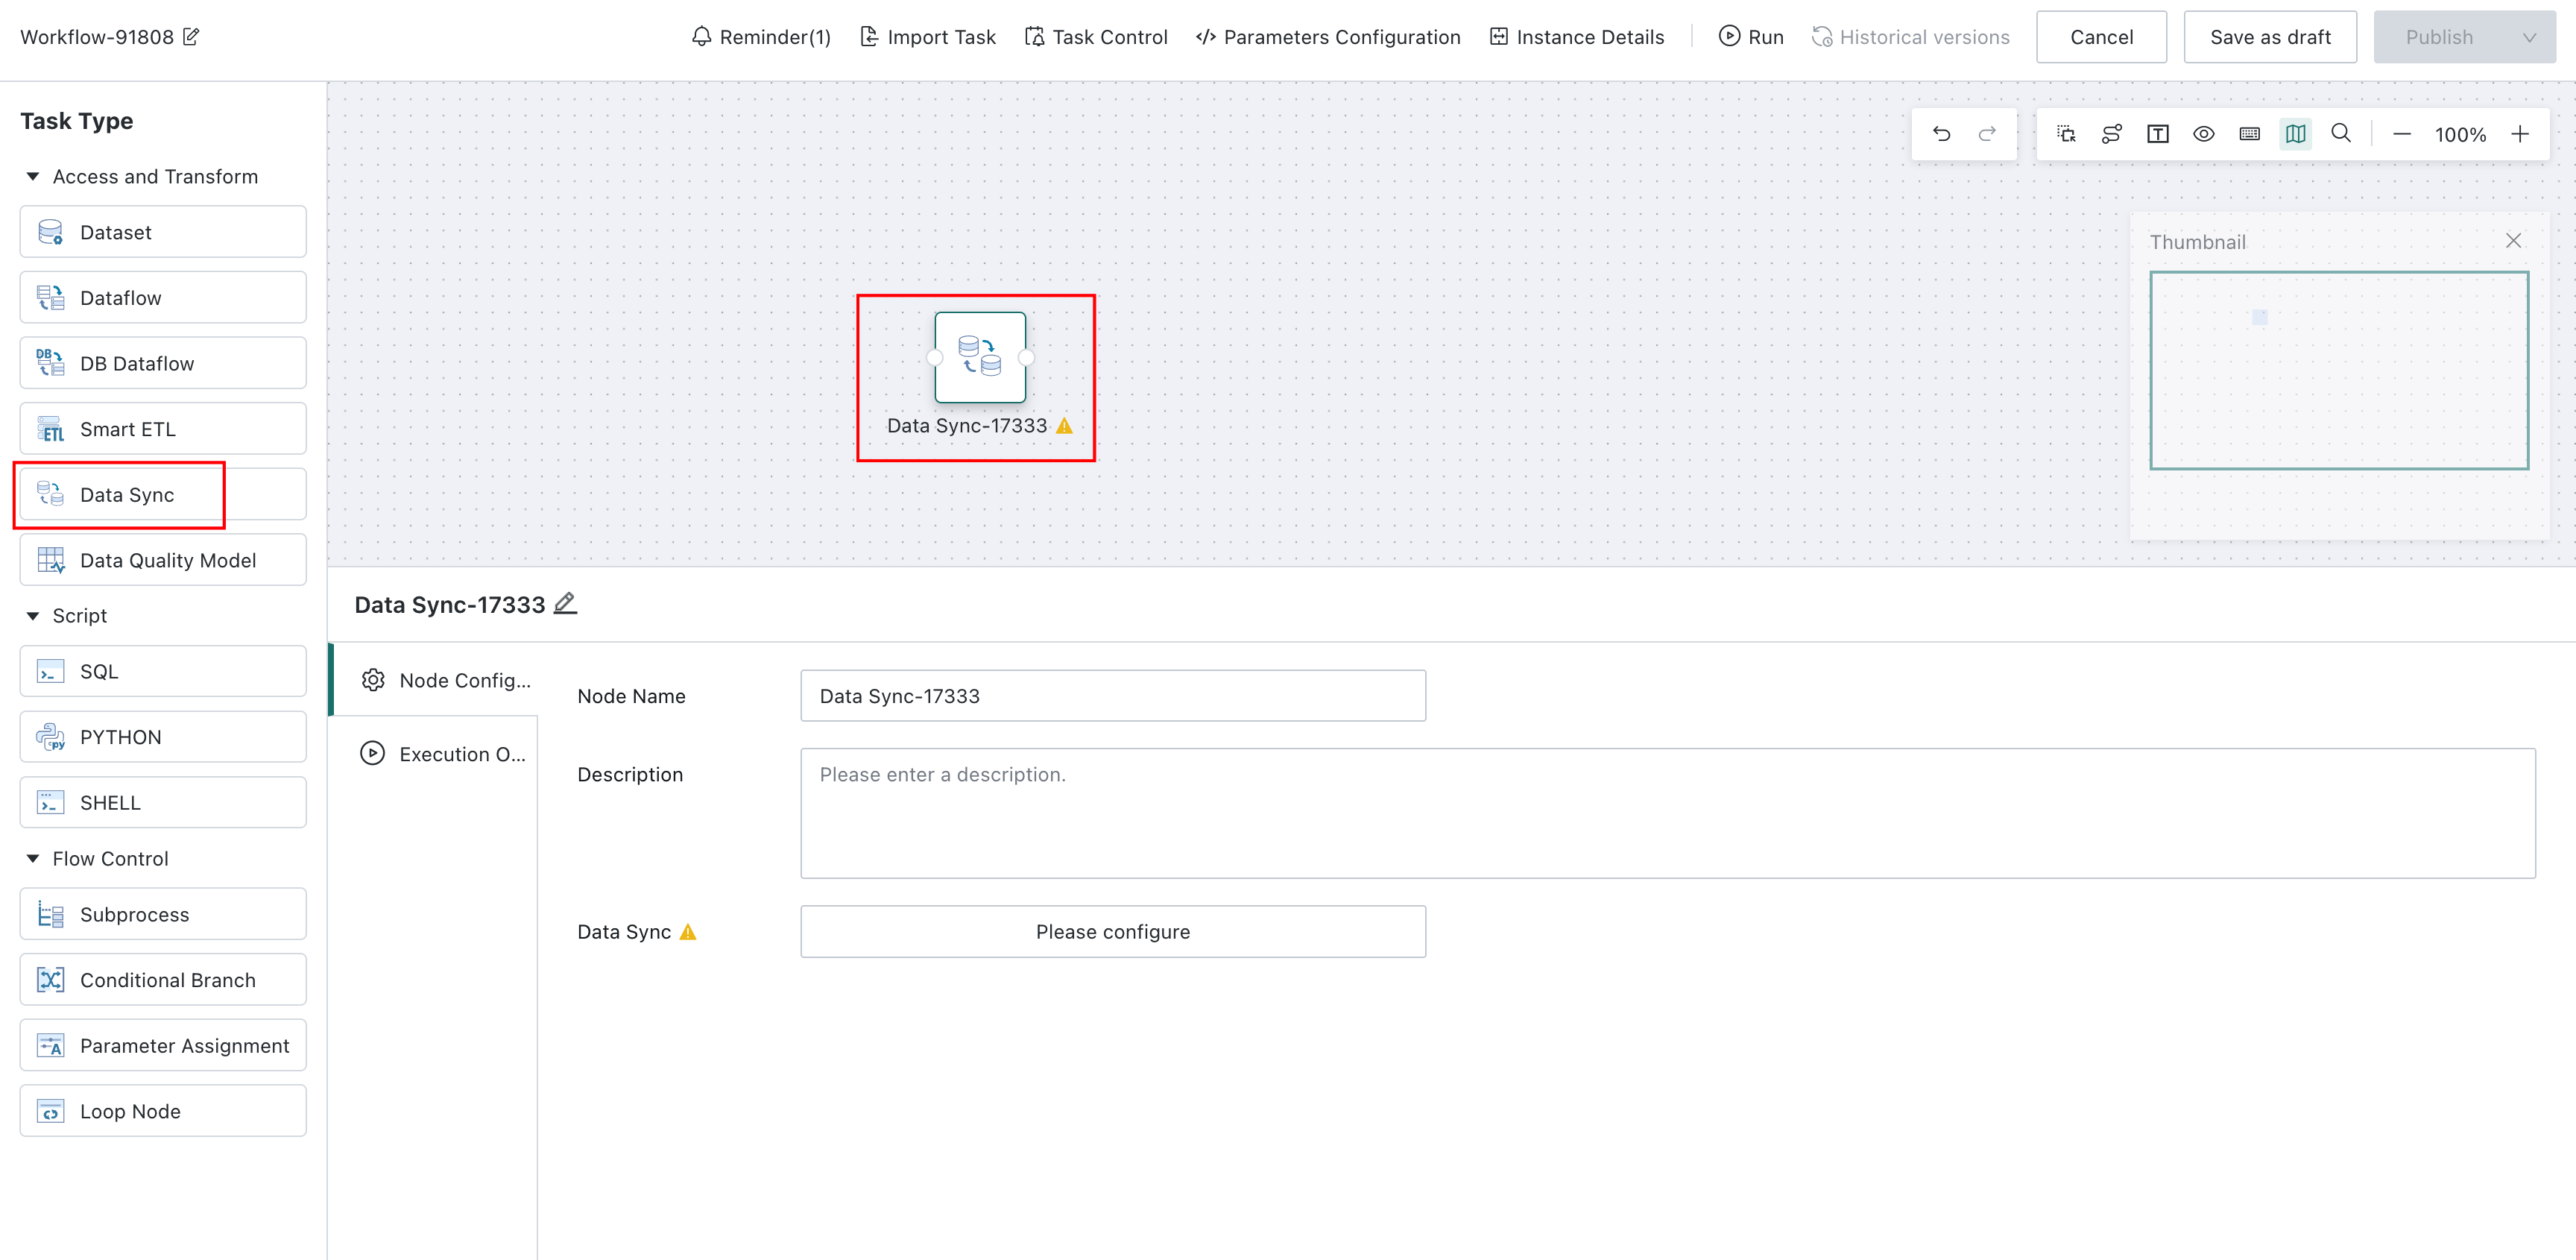
Drag the Data Sync node from the node list on the left onto the canvas, then select it.
-
Click Please configure next to Data Sync to open the synchronization configuration page.
Select Tables
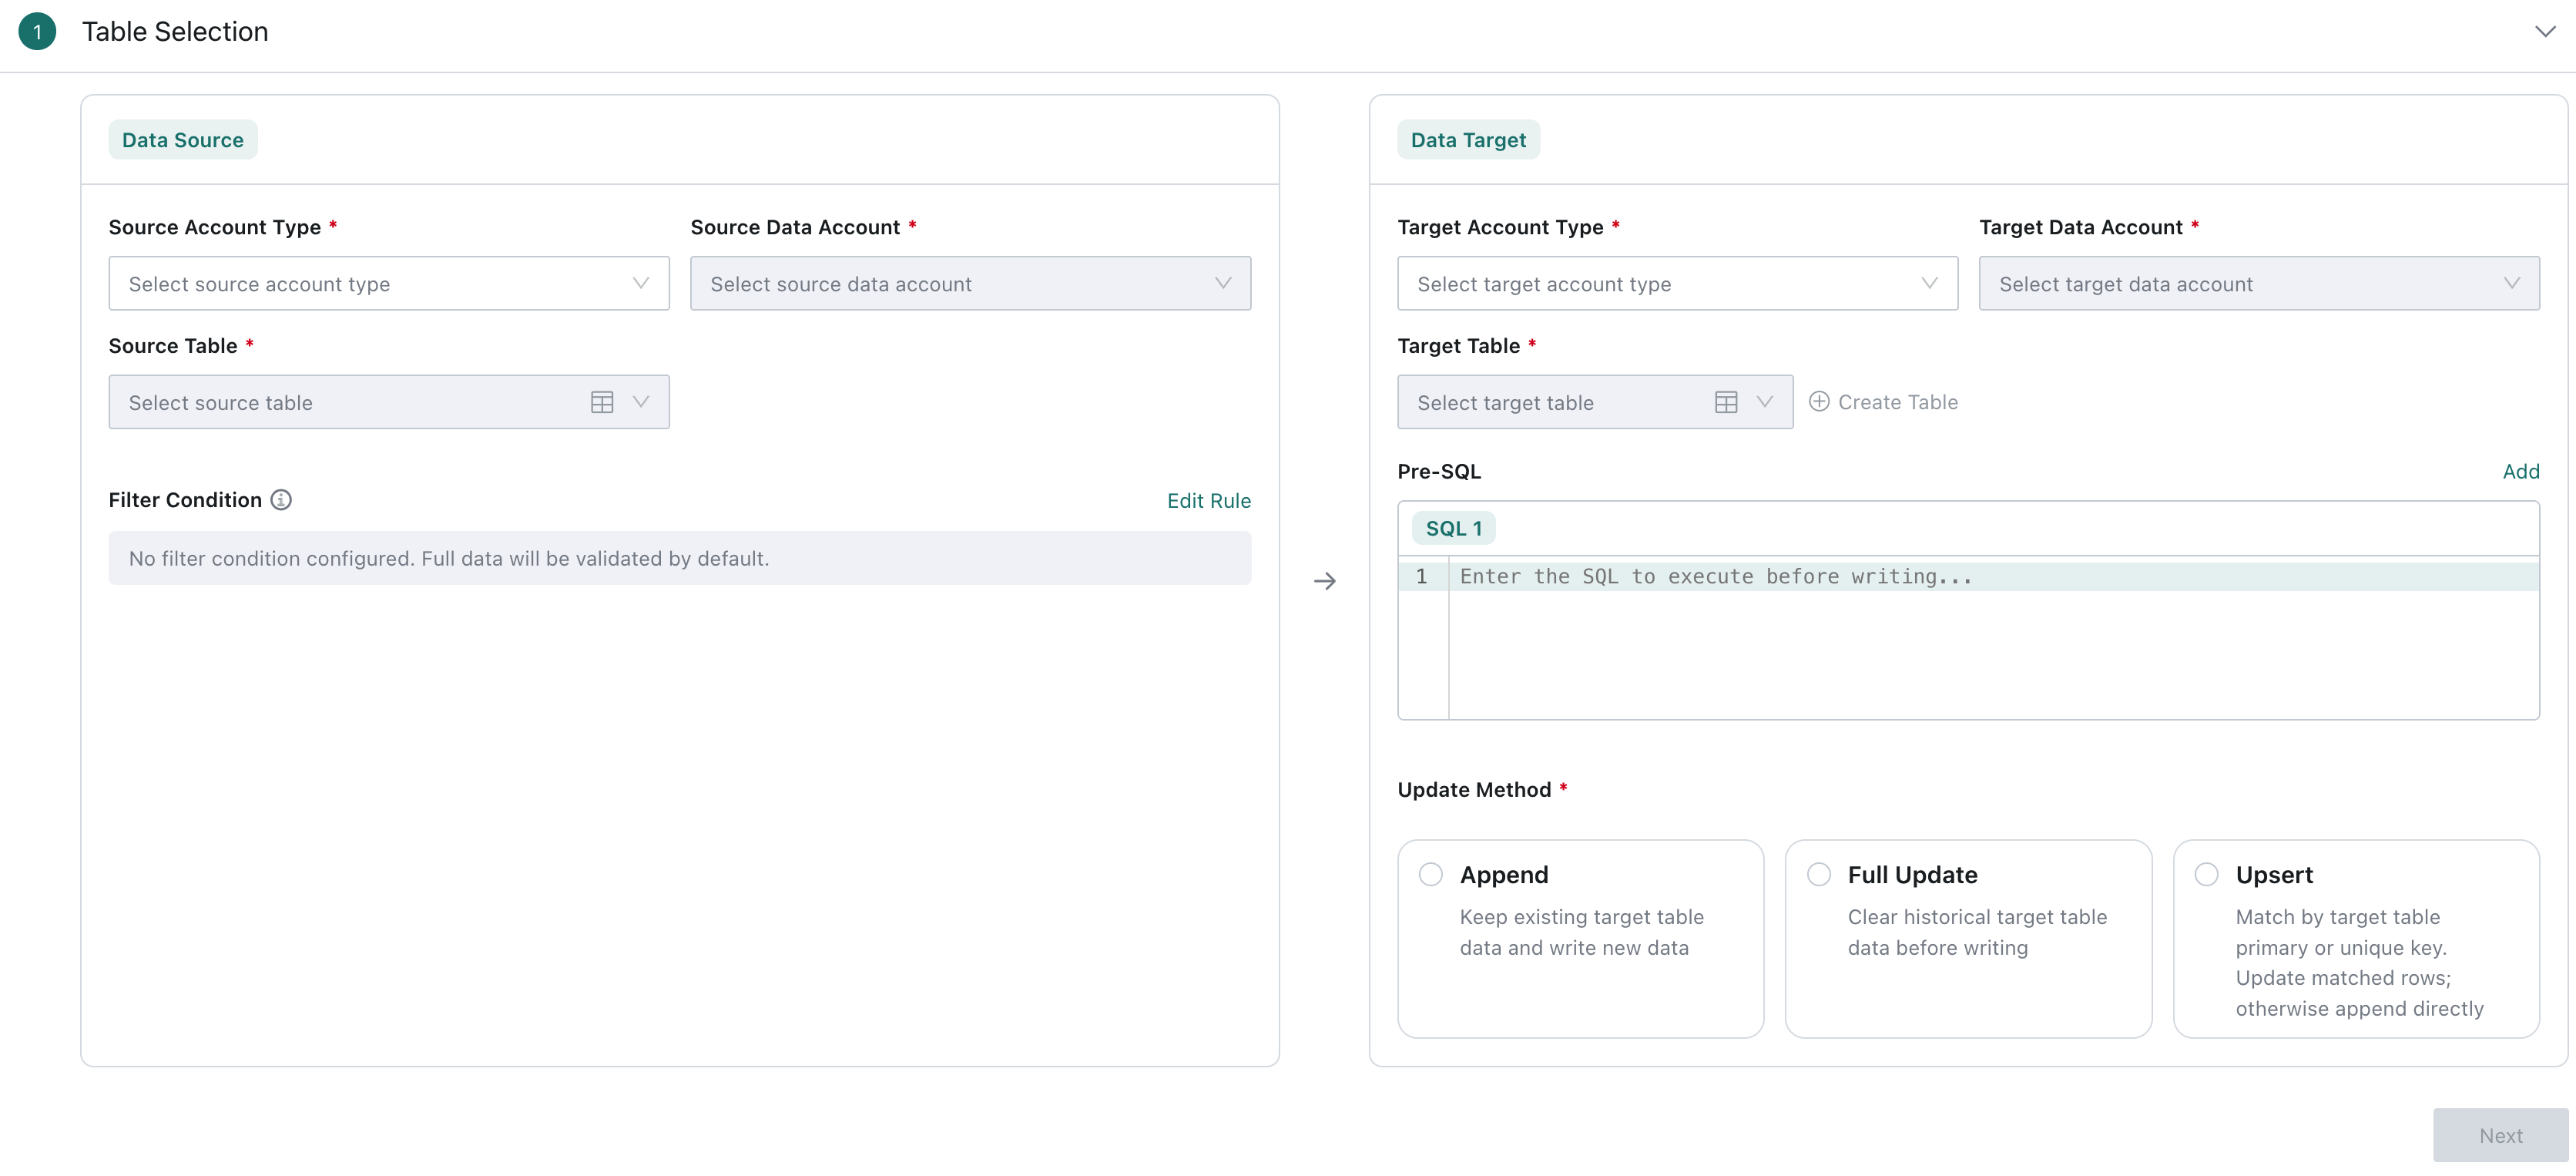
Under Table Selection, configure the source table, target table, and update mode.
1. Configure the source table
| Setting | Description |
|---|---|
| Source Account Type | Select the account type for the source database. |
| Source Data Account | Select the source data account. Regular users can select only accounts they have permission to use. |
| Source Table | Select the table to synchronize. |
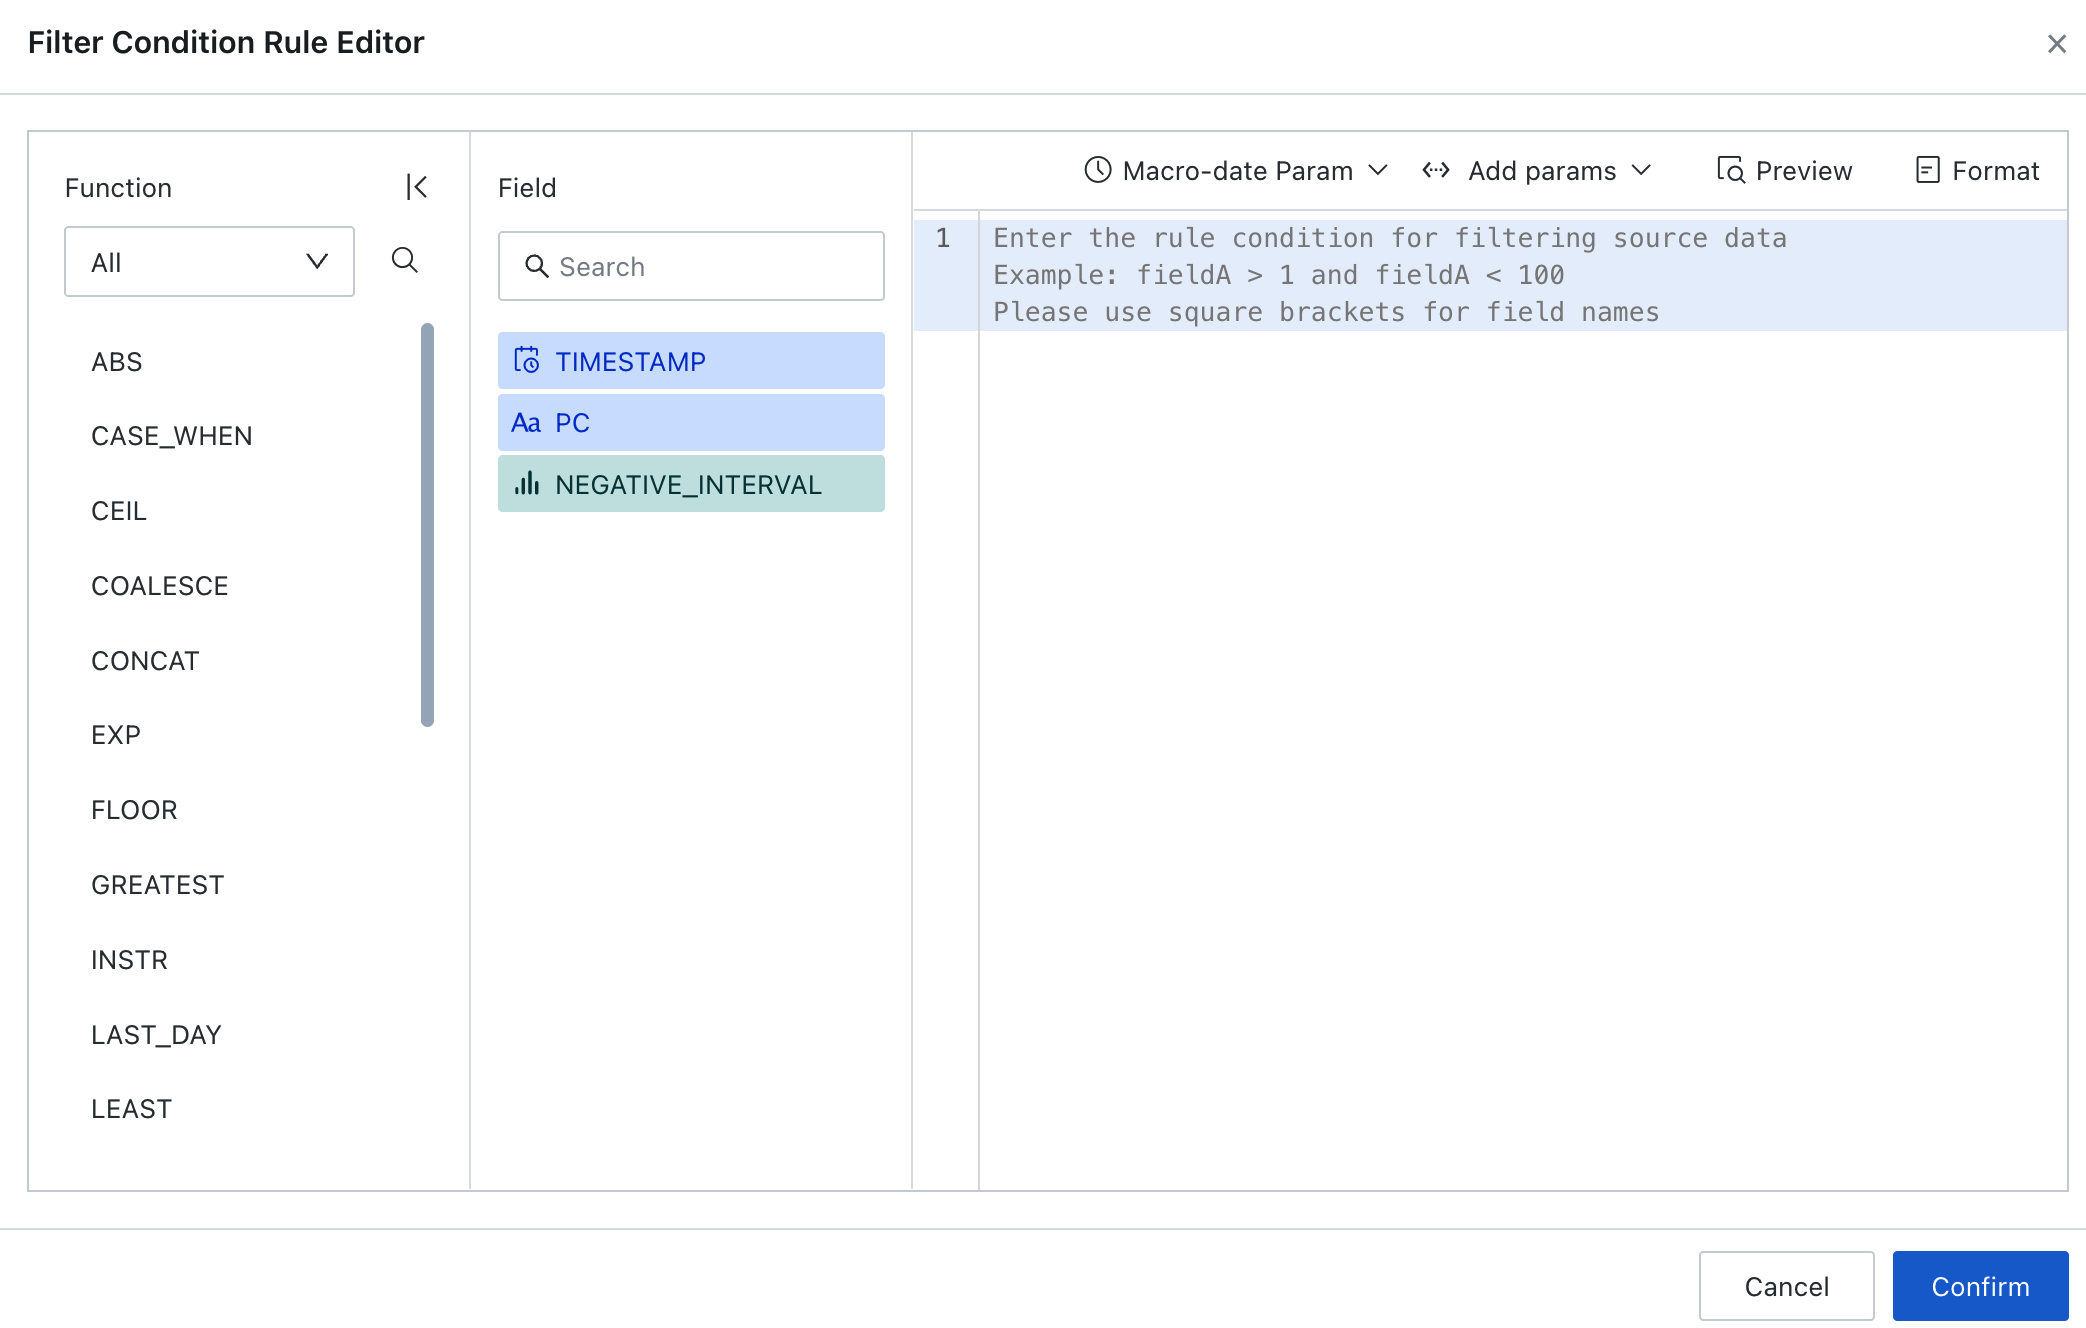
| Filter Condition | Optional. If no conditions are configured, all source data is synchronized. To filter source data, click Edit Rule next to Filter Condition and enter the conditions. You can insert global parameters, task parameters, dynamic parameters, and time macros. Click Preview to check the results. The system displays the first 30 rows based on the selected source table and filter conditions. |
2. Configure the target table
| Setting | Description |
|---|---|
| Target Account Type | Select the account type for the target database. |
| Target Data Account | Select the target data account. Regular users can select only accounts they have permission to use. |
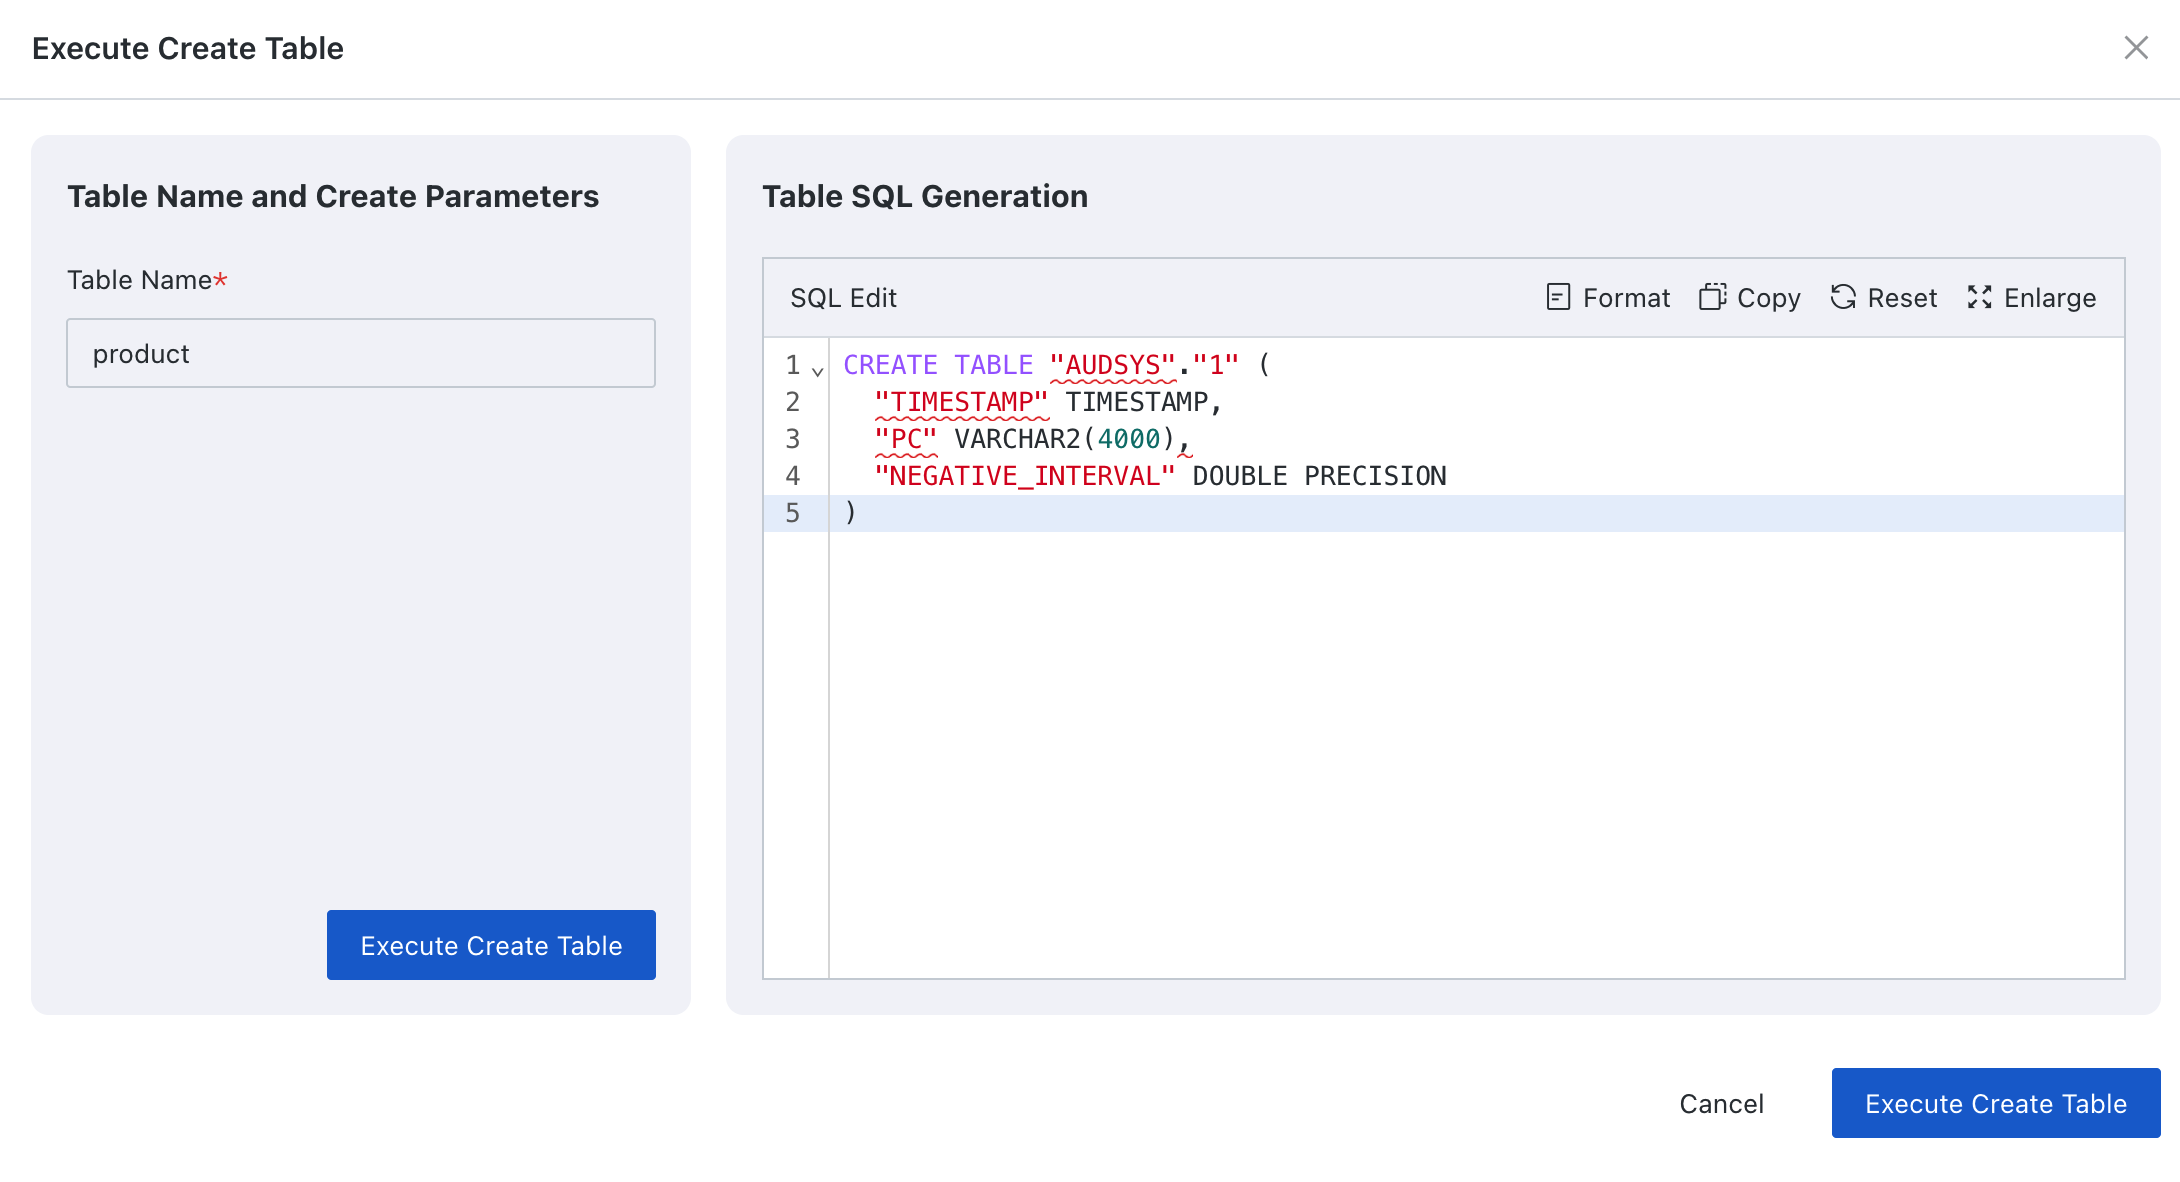
| Target Table | Select an existing table to receive the synchronized data. To create a target table, click Create Table next to Target Table. On the Execute Create Table page, enter a table name and review or edit the table creation SQL, then click Execute Create Table. Once the table is created, use it as the target table for this synchronization. |
3. Select an update mode
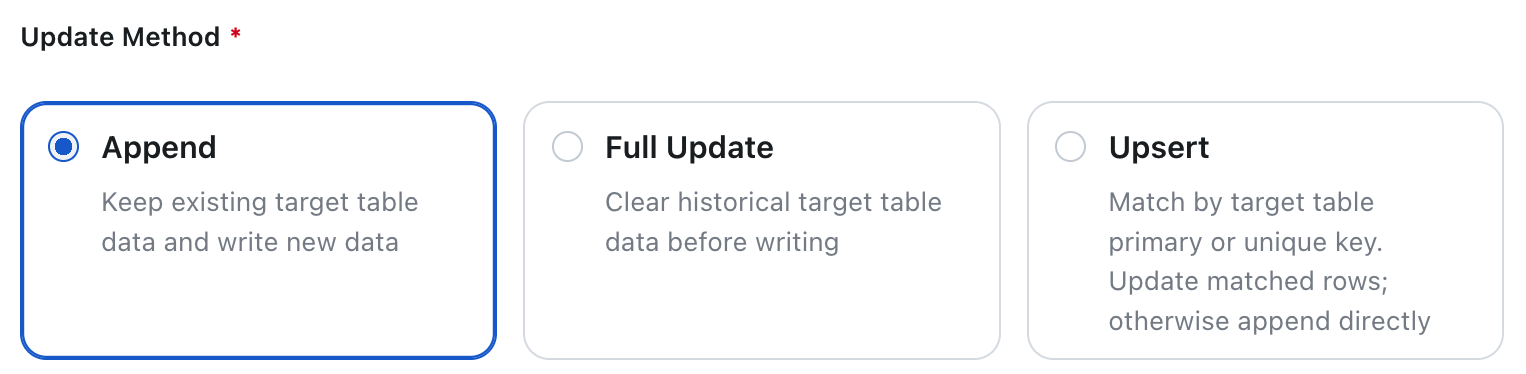
Choose how to write data to the target table:
- Append: Keep existing data in the target table and append the data from this synchronization.
- Full Update: Clear existing data from the target table, then write the data from this synchronization.
- Upsert: Match source and target rows using comparison fields. Update matching rows in the target table and append rows that do not match. For this mode, select at least one field under Comparison Fields.
4. Proceed to field mapping
Click Next to open Select Target Table.
Configure Field Mapping
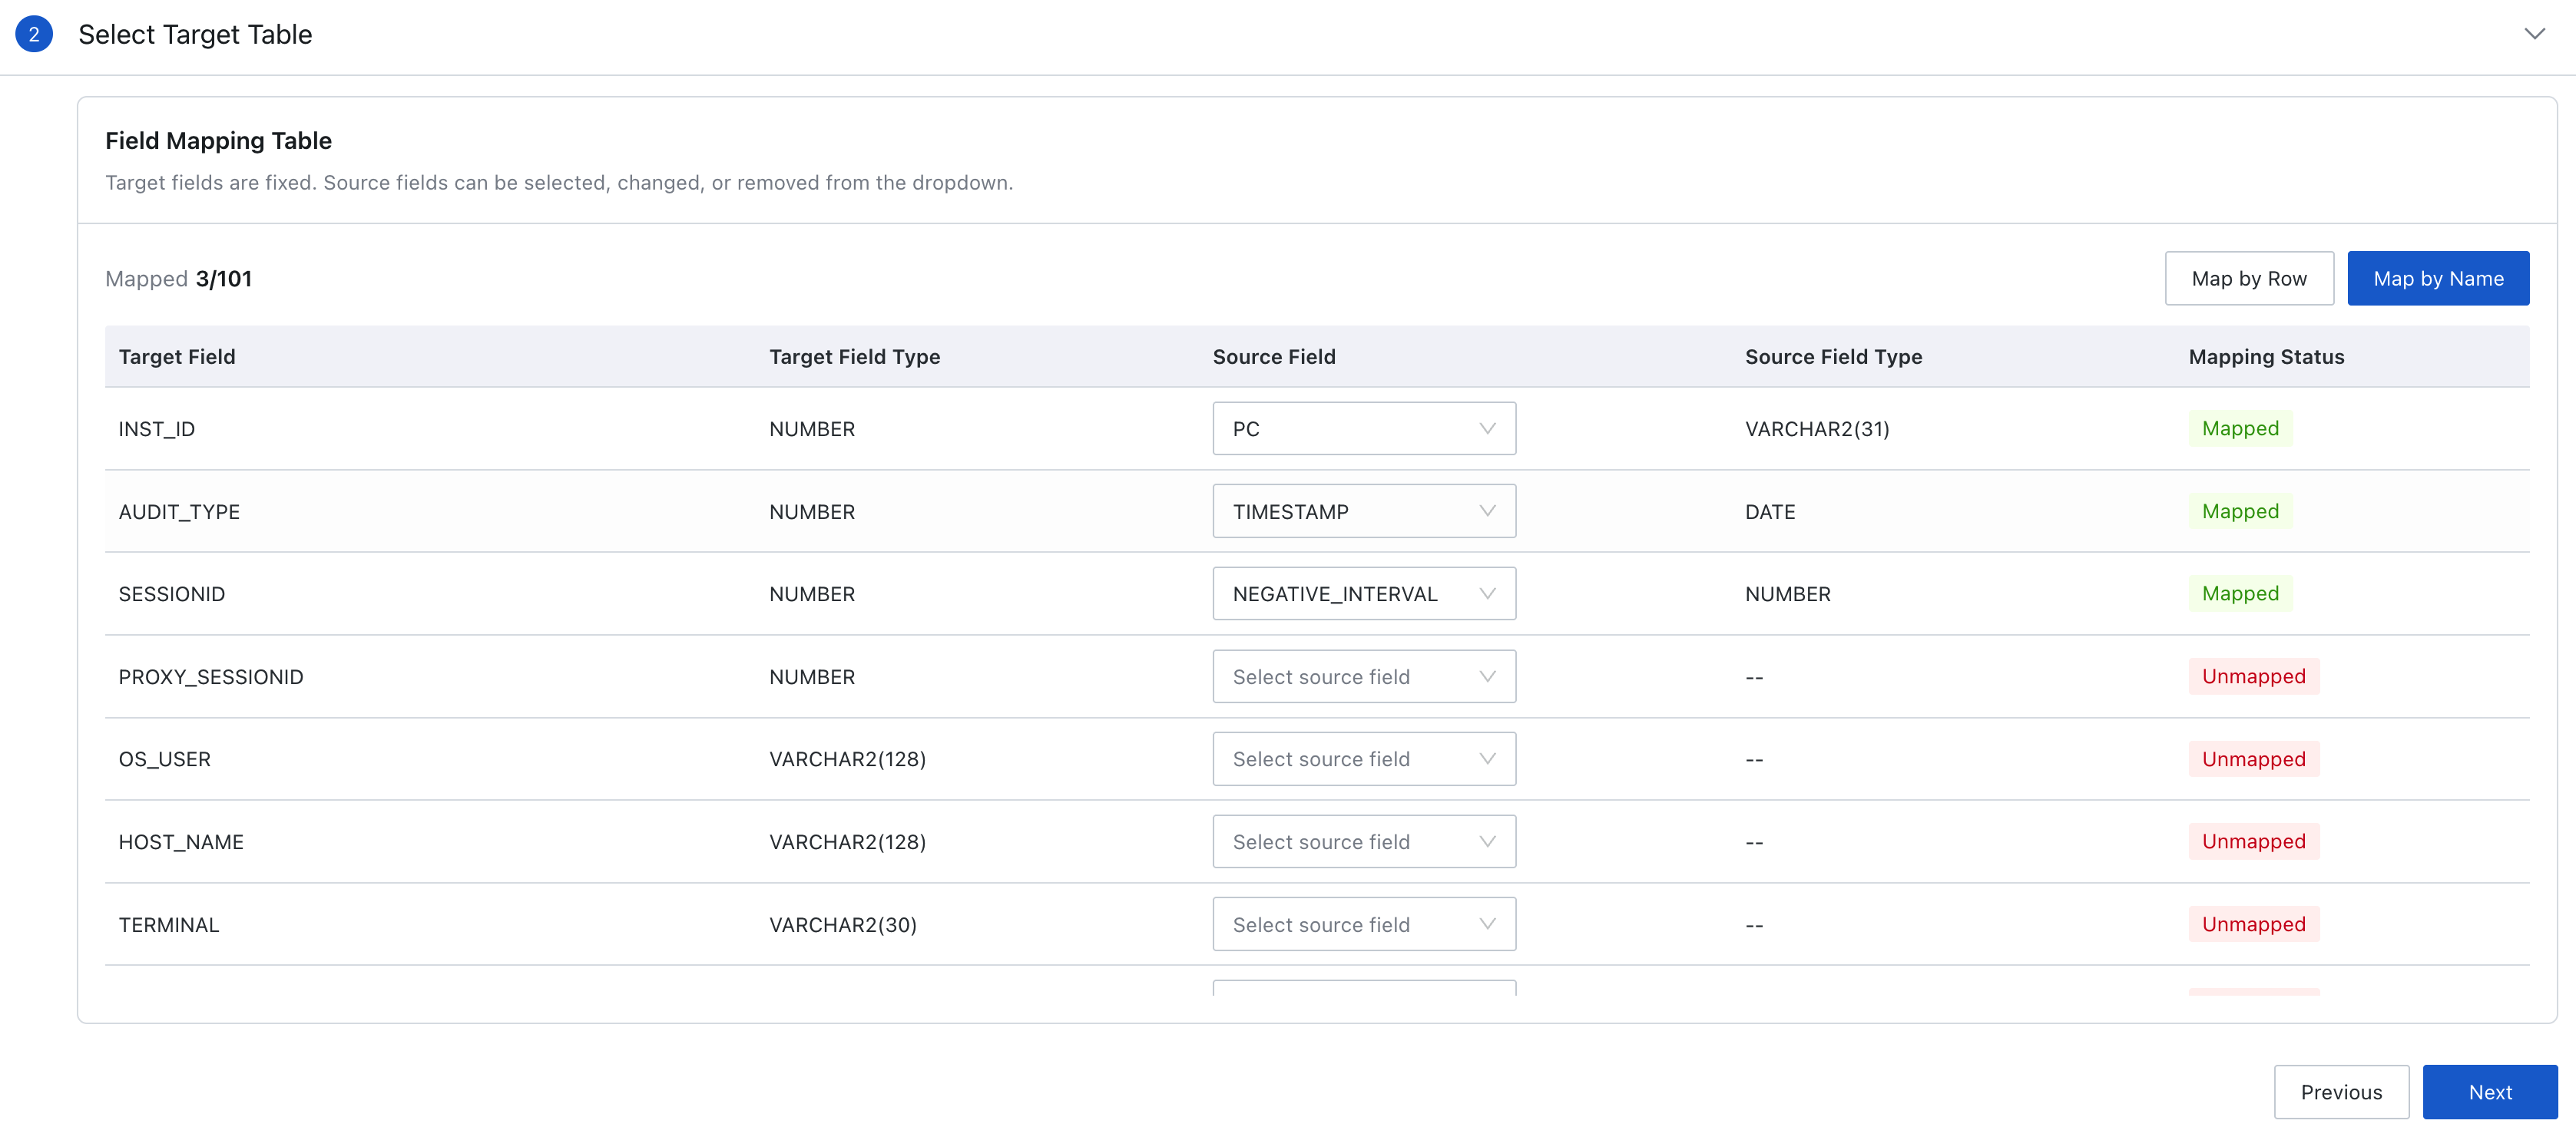
The Field Mapping Table shows target fields and their corresponding source fields. Use Map by Name to match fields with the same name.
- Review Target Field, Target Field Type, Source Field, Source Field Type, and Mapping Status for each row.
- To match fields by name again, click Map by Name.
- For fields that were not mapped automatically, select the corresponding Source Field. Target fields are fixed; source fields can be selected, changed, or removed. Source fields that do not need to be synchronized can remain unmapped.
- Ensure that at least one field mapping exists, then click Next to open Advanced Config.
Configure Advanced Parameters
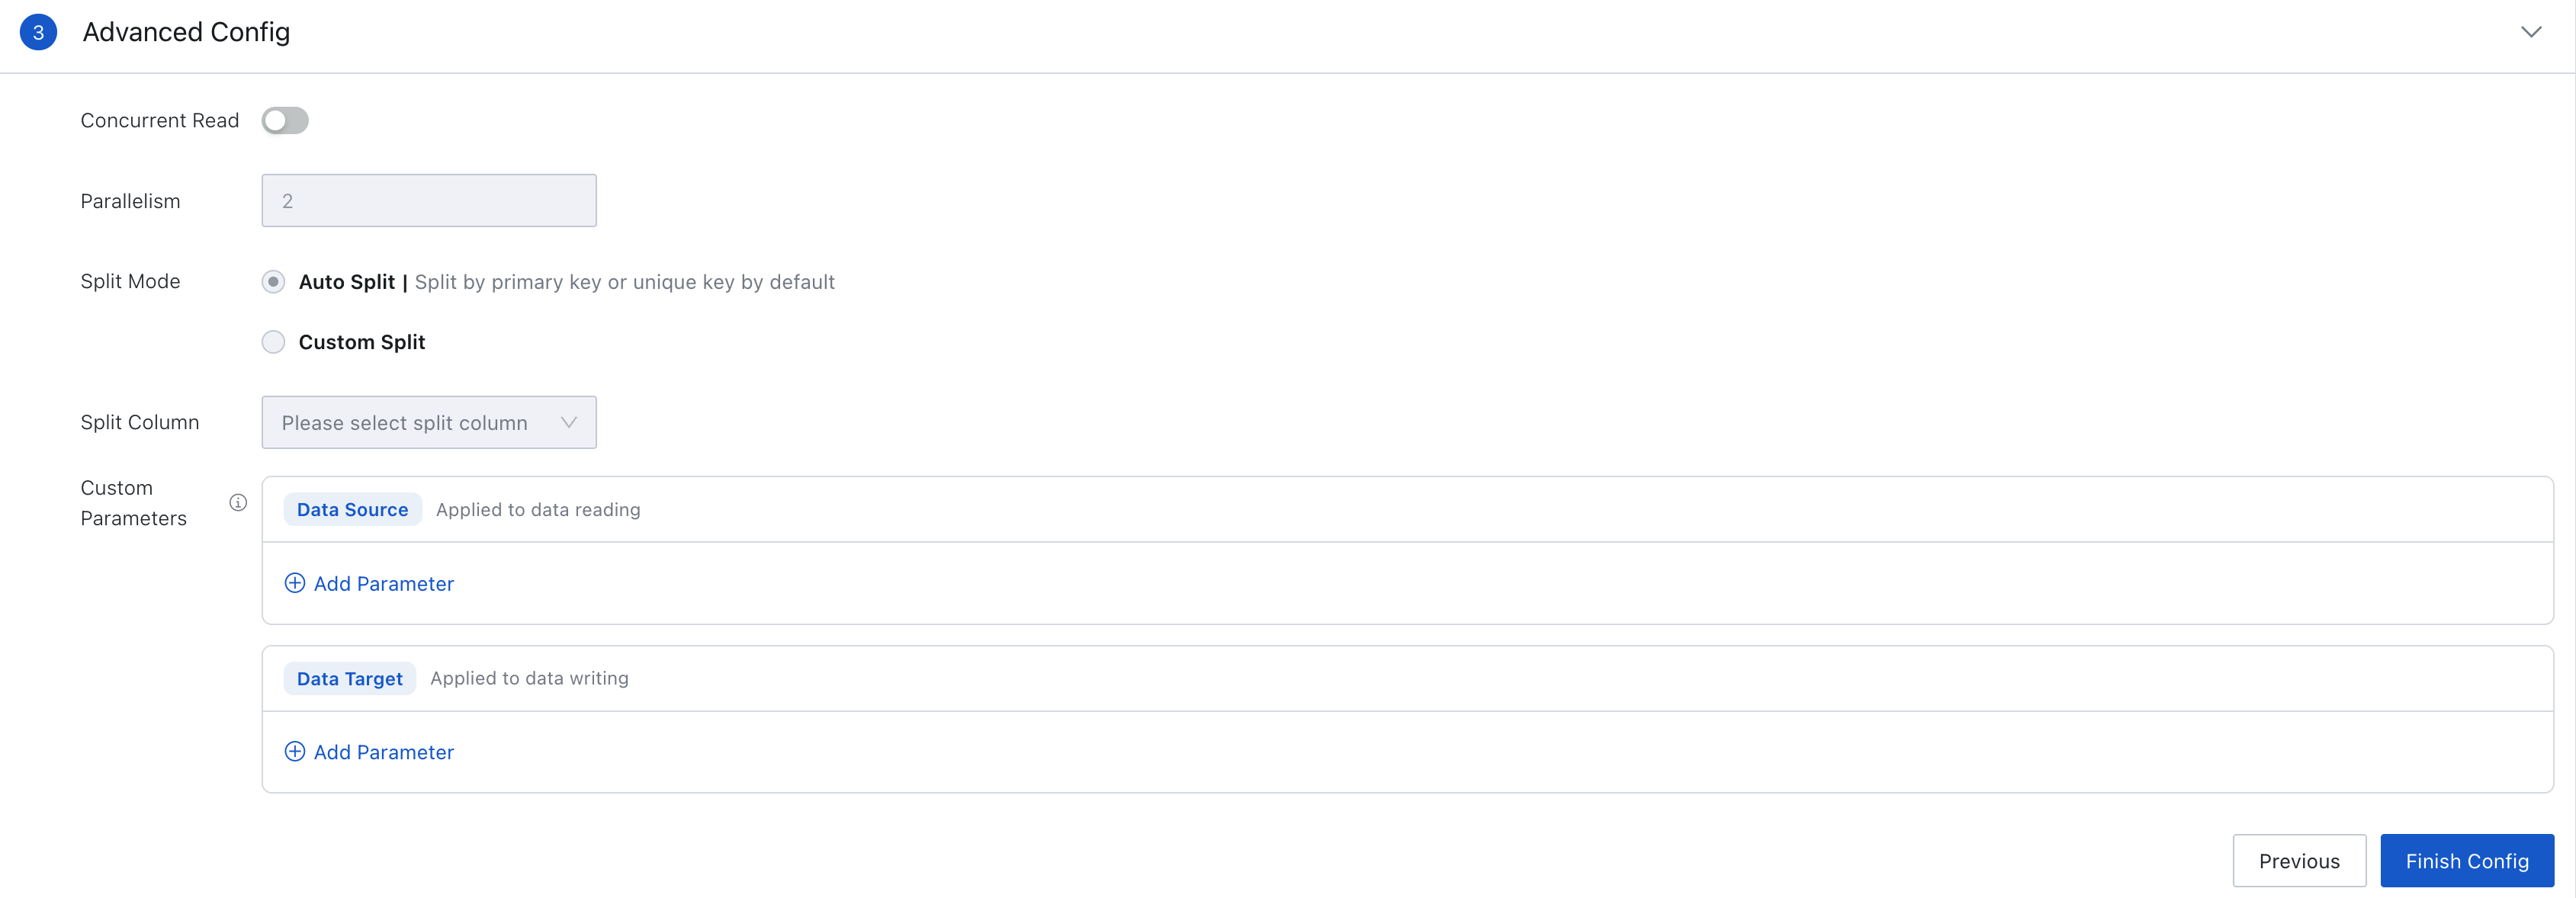
Under Advanced Config, configure concurrent reads and custom parameters for reading and writing data.
| Setting | When to configure | Description |
|---|---|---|
| Concurrent Read | Enable as needed | Choose whether to read source data concurrently. When enabled, configure Parallelism and Split Mode. |
| Parallelism | Required when Concurrent Read is enabled | Set the number of concurrent reads. |
| Split Mode | Required when Concurrent Read is enabled | Auto Split splits data using the source table's primary key or unique key by default. For Custom Split, select a split field manually. |
| Split Column | Required only for Custom Split | Select a field from the source table to split the data. This setting is not required for Auto Split. |
| Custom Parameters > Data Source | Optional, regardless of the split method | Click Add Parameter to configure custom parameters for reading data. Leave this unconfigured if no custom parameters are needed. |
| Custom Parameters > Data Target | Optional, regardless of the split method | Click Add Parameter to configure custom parameters for writing data. Leave this unconfigured if no custom parameters are needed. |
Complete Configuration
After configuring the advanced parameters, click Finish Config. The system validates the configuration and saves the Data Sync Node.
Runtime Options
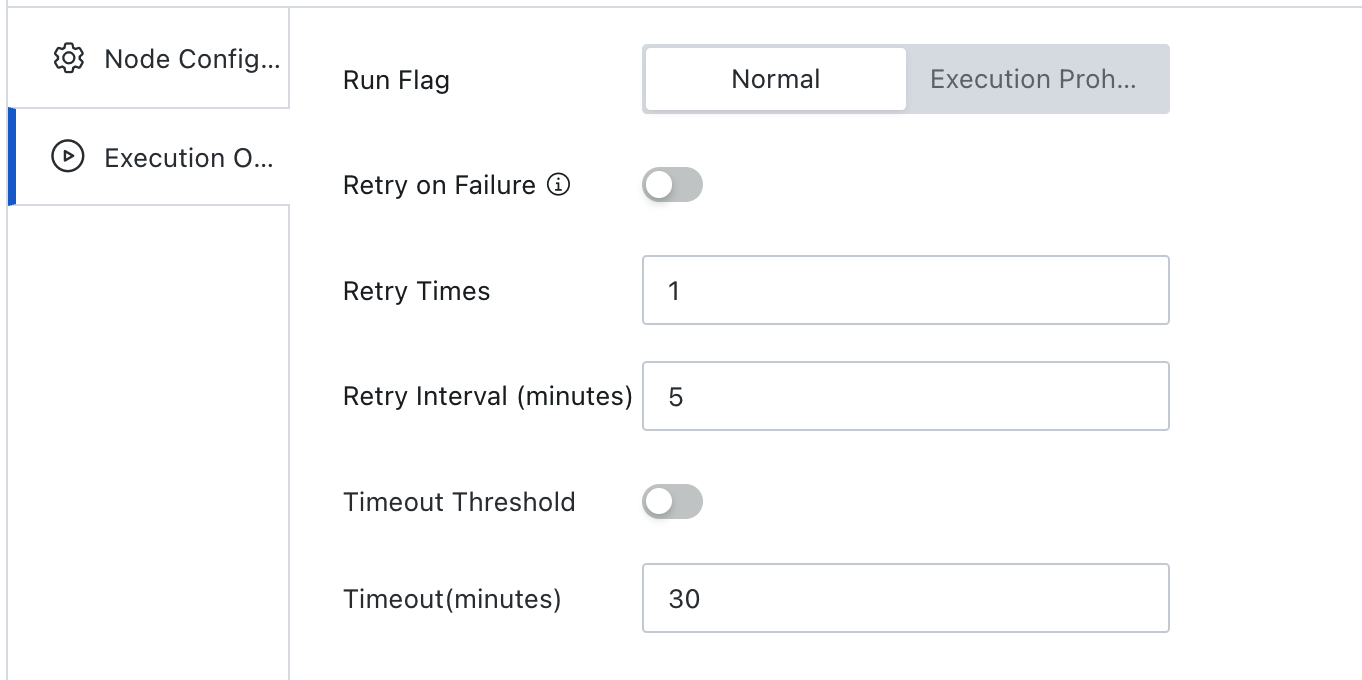
- Run Flag
- Disable execution to skip this node when the workflow reaches it. Use this option for temporary troubleshooting or to control which parts of a task run.
- Normal: Run the node according to the existing scheduling strategy. This is the default.
- Retry on Failure
- Retry Times: The number of automatic retries after the node fails. The default is 1.
- Retry Interval (minutes): The interval between retries. The default is 5 minutes.
- Timeout Threshold
- Timeout(minutes): The time limit for a single node. The node fails automatically if it exceeds this limit.
View Run Logs
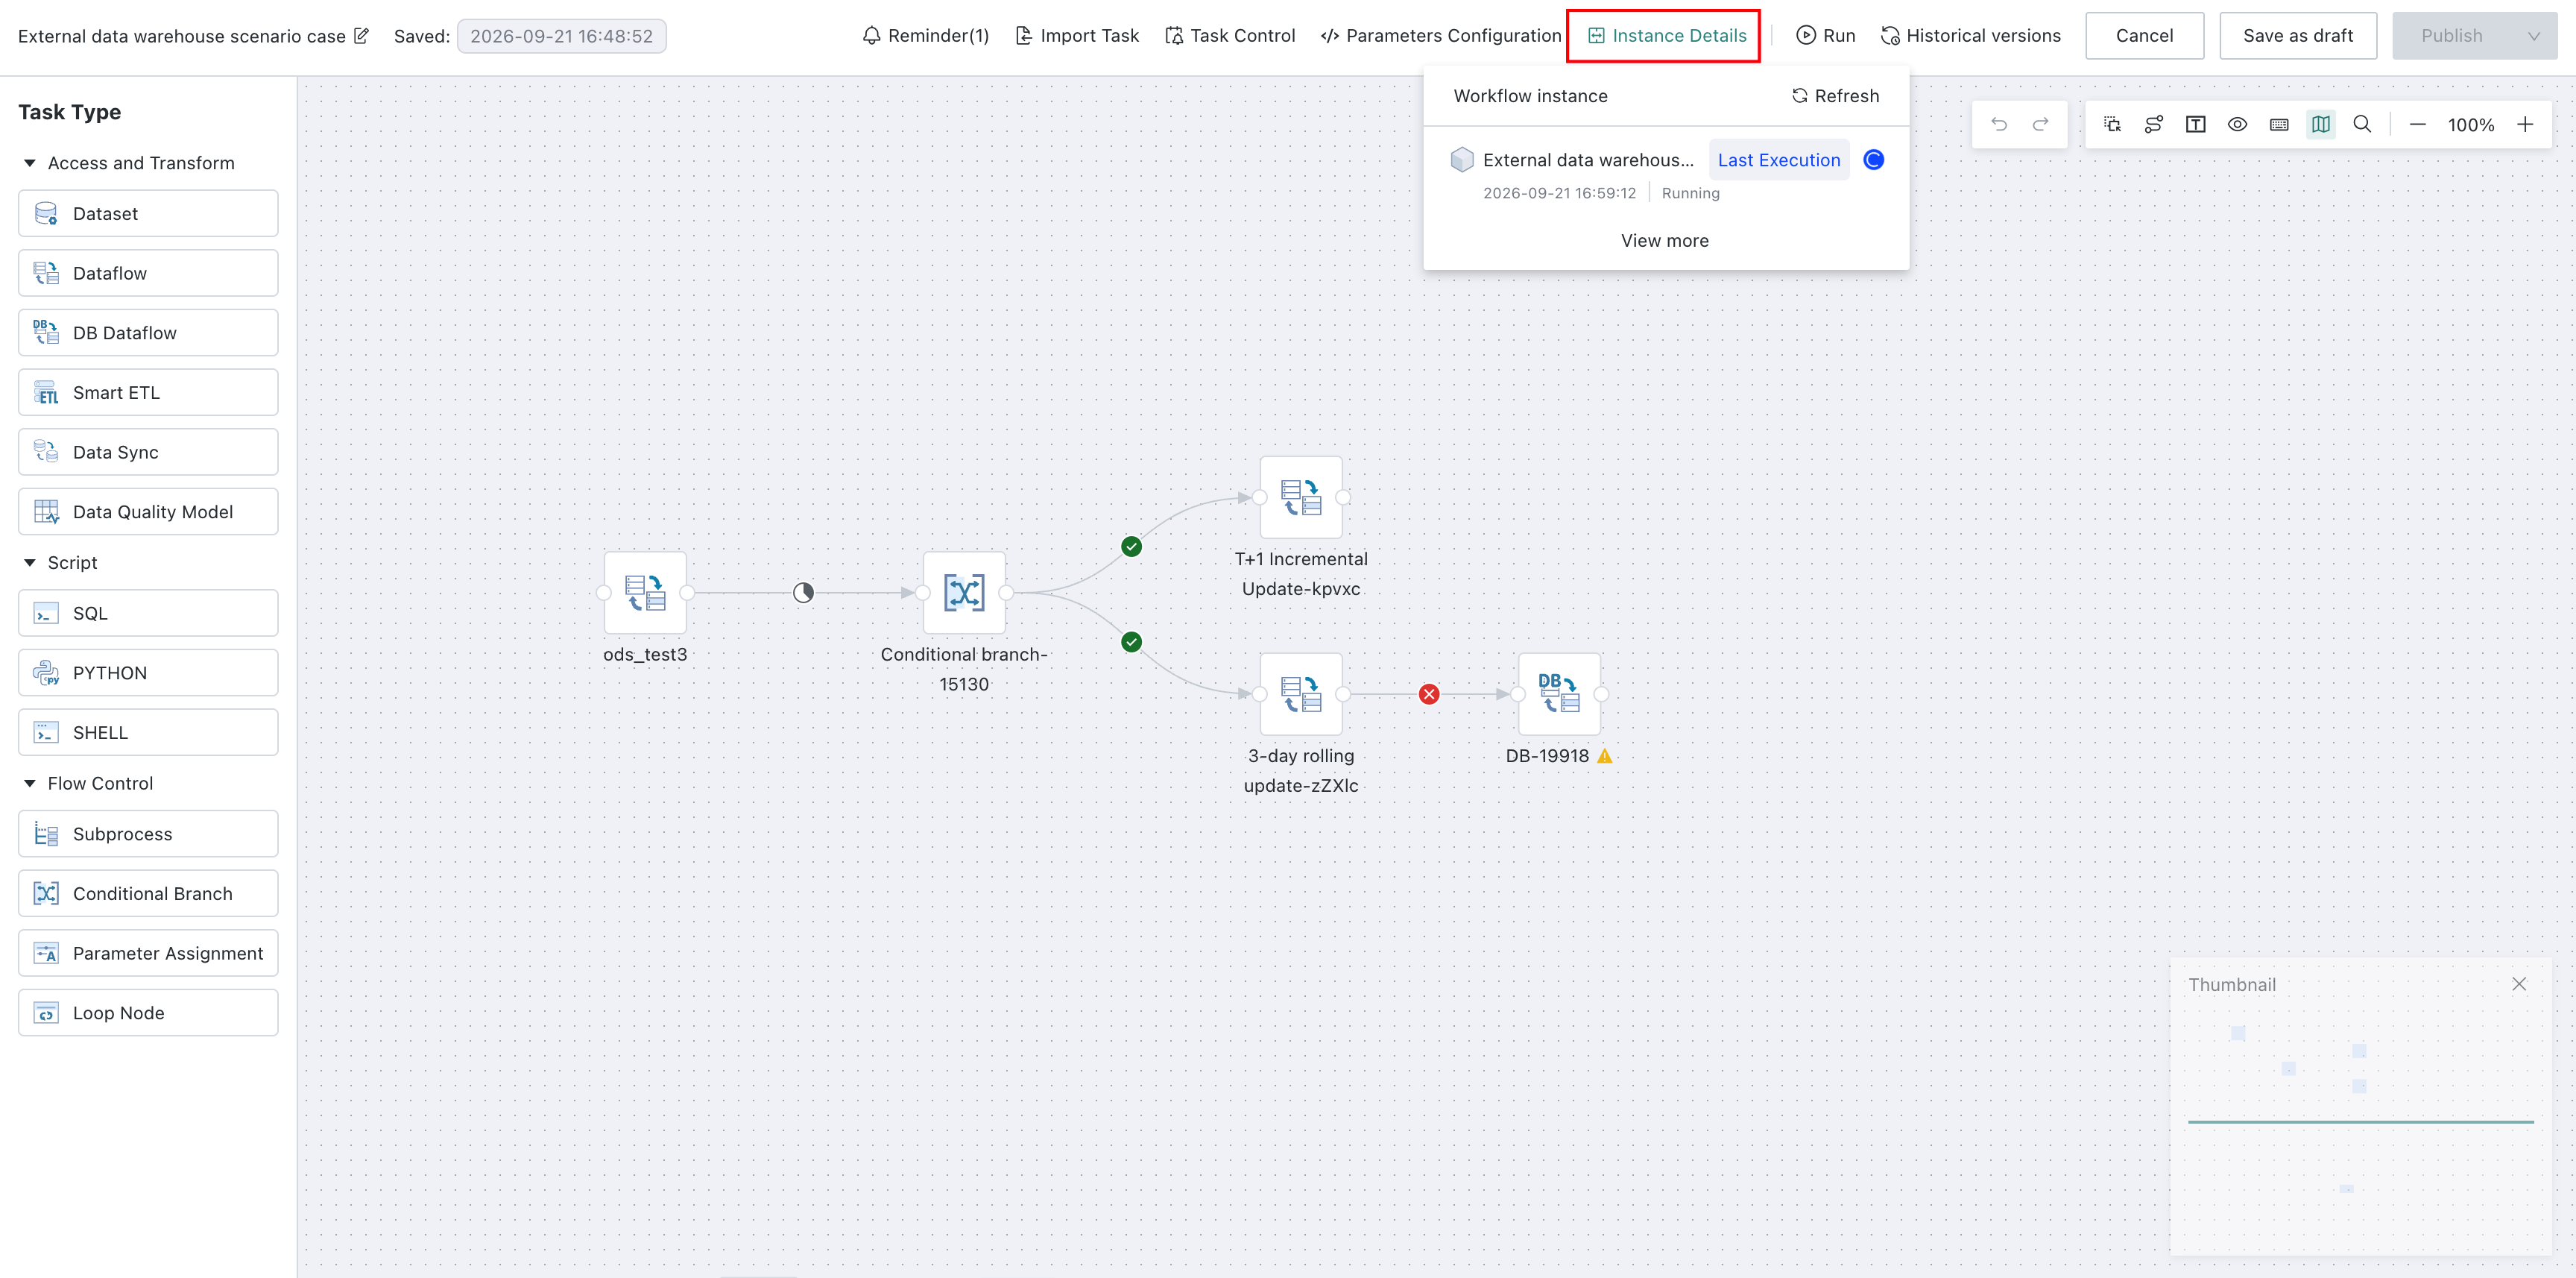
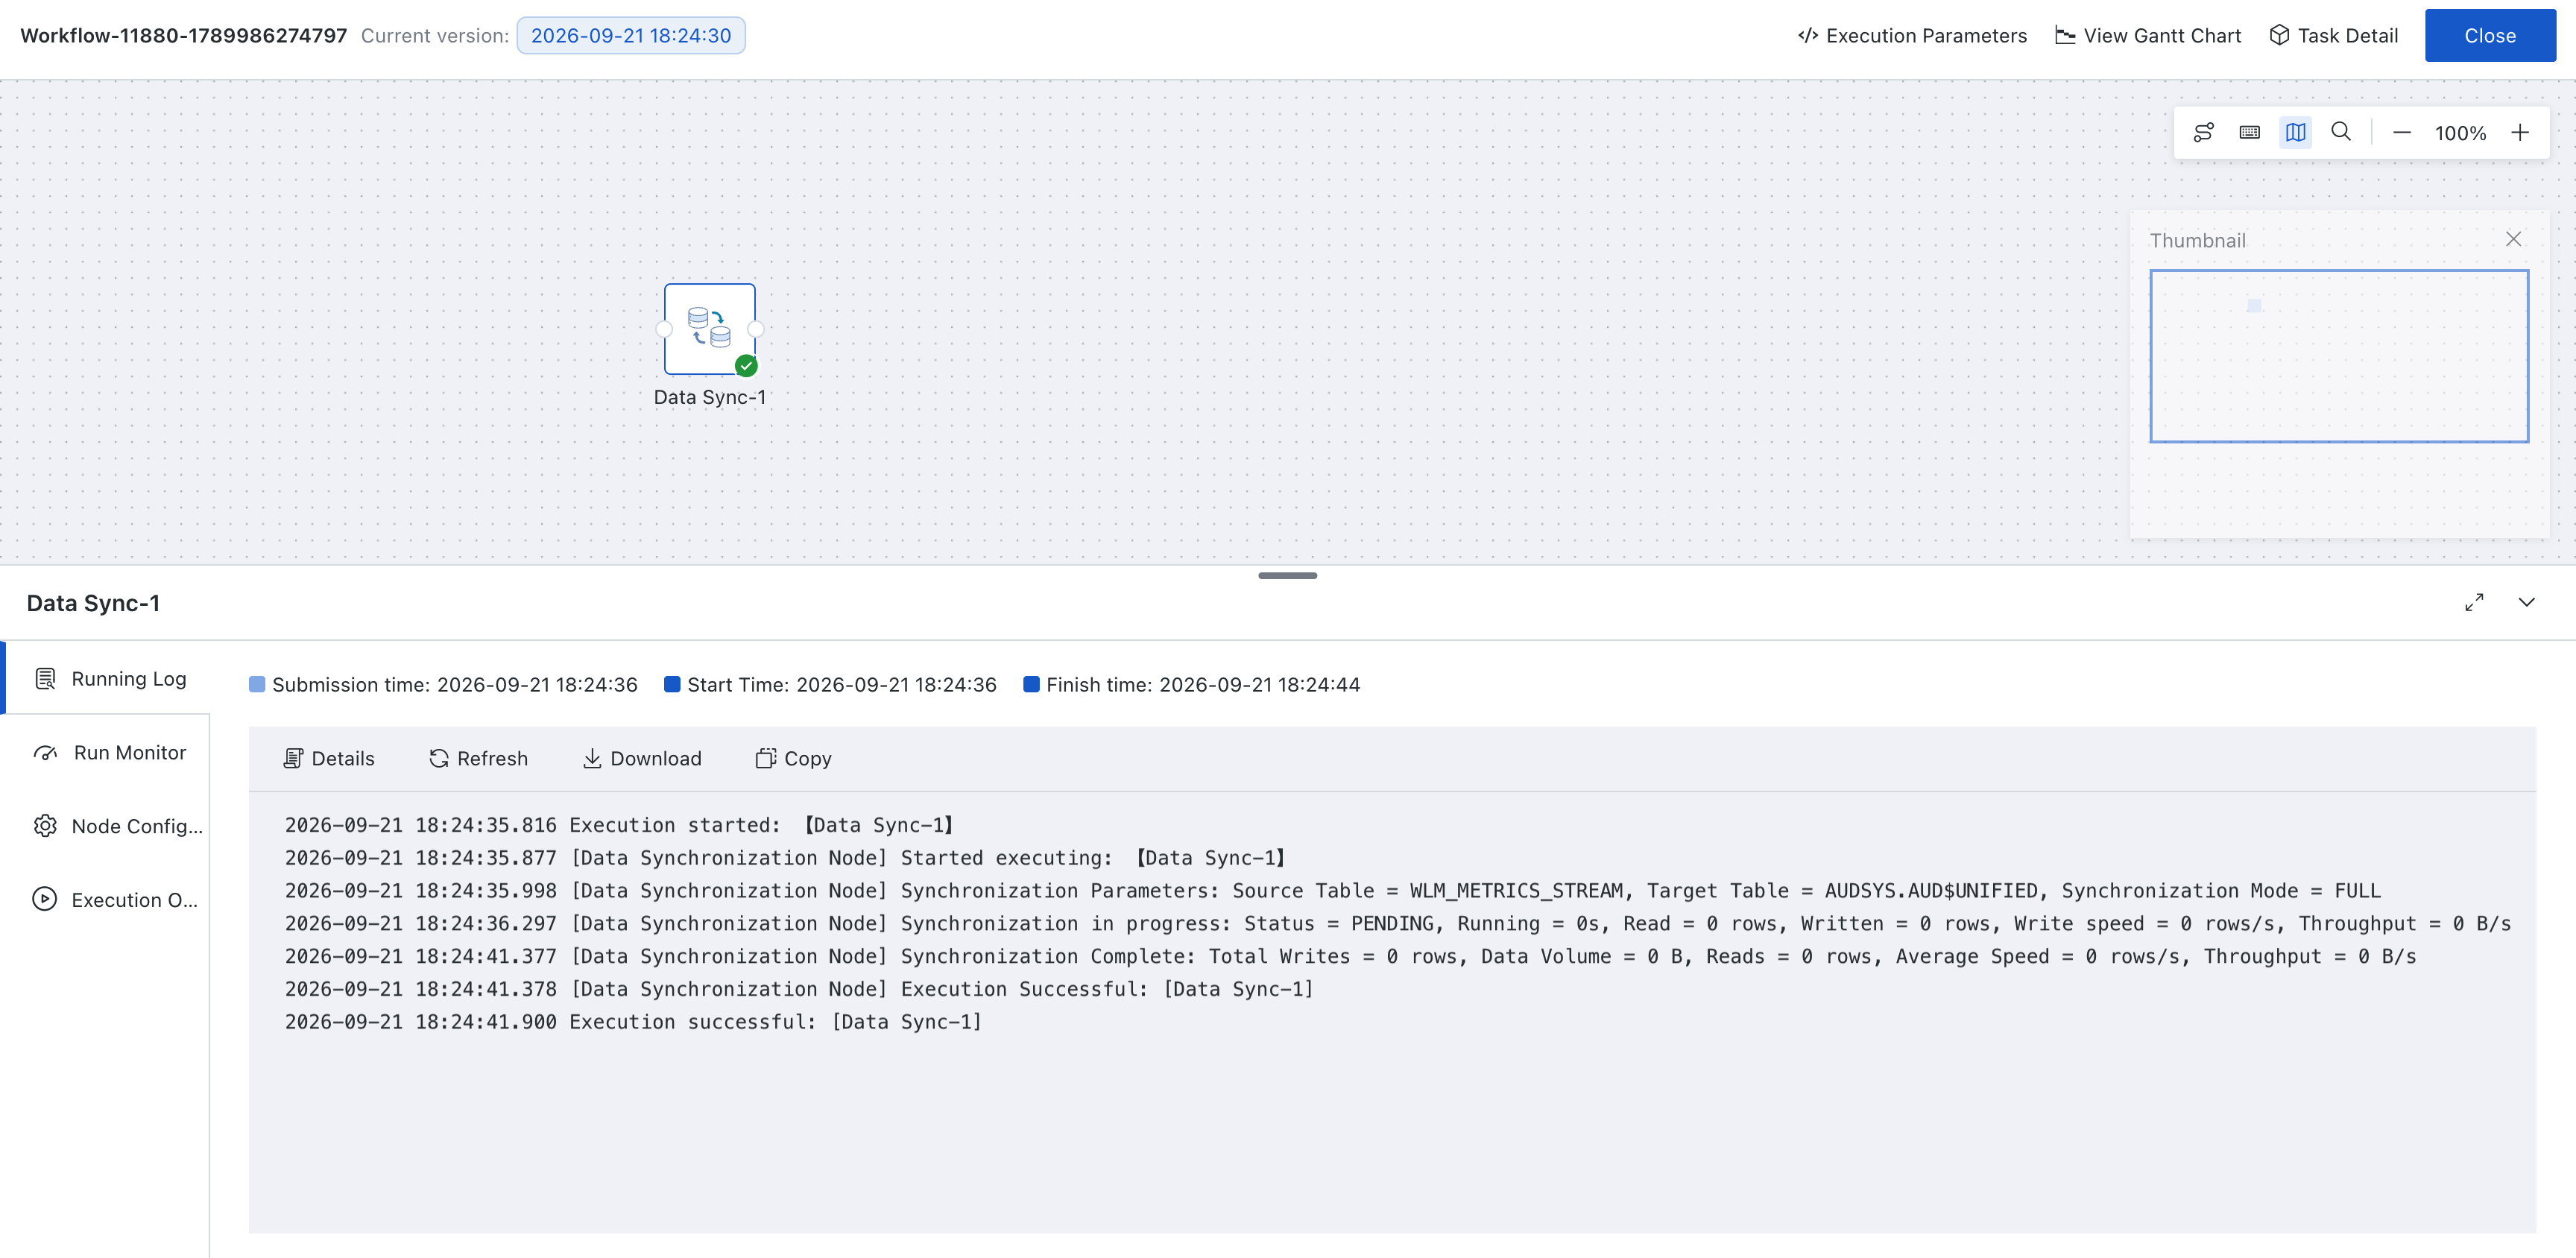
After the task runs, open the workflow instance and select the Data Sync Node. View the results under Running Log at the bottom of the page.