Smart ETL Node
Overview
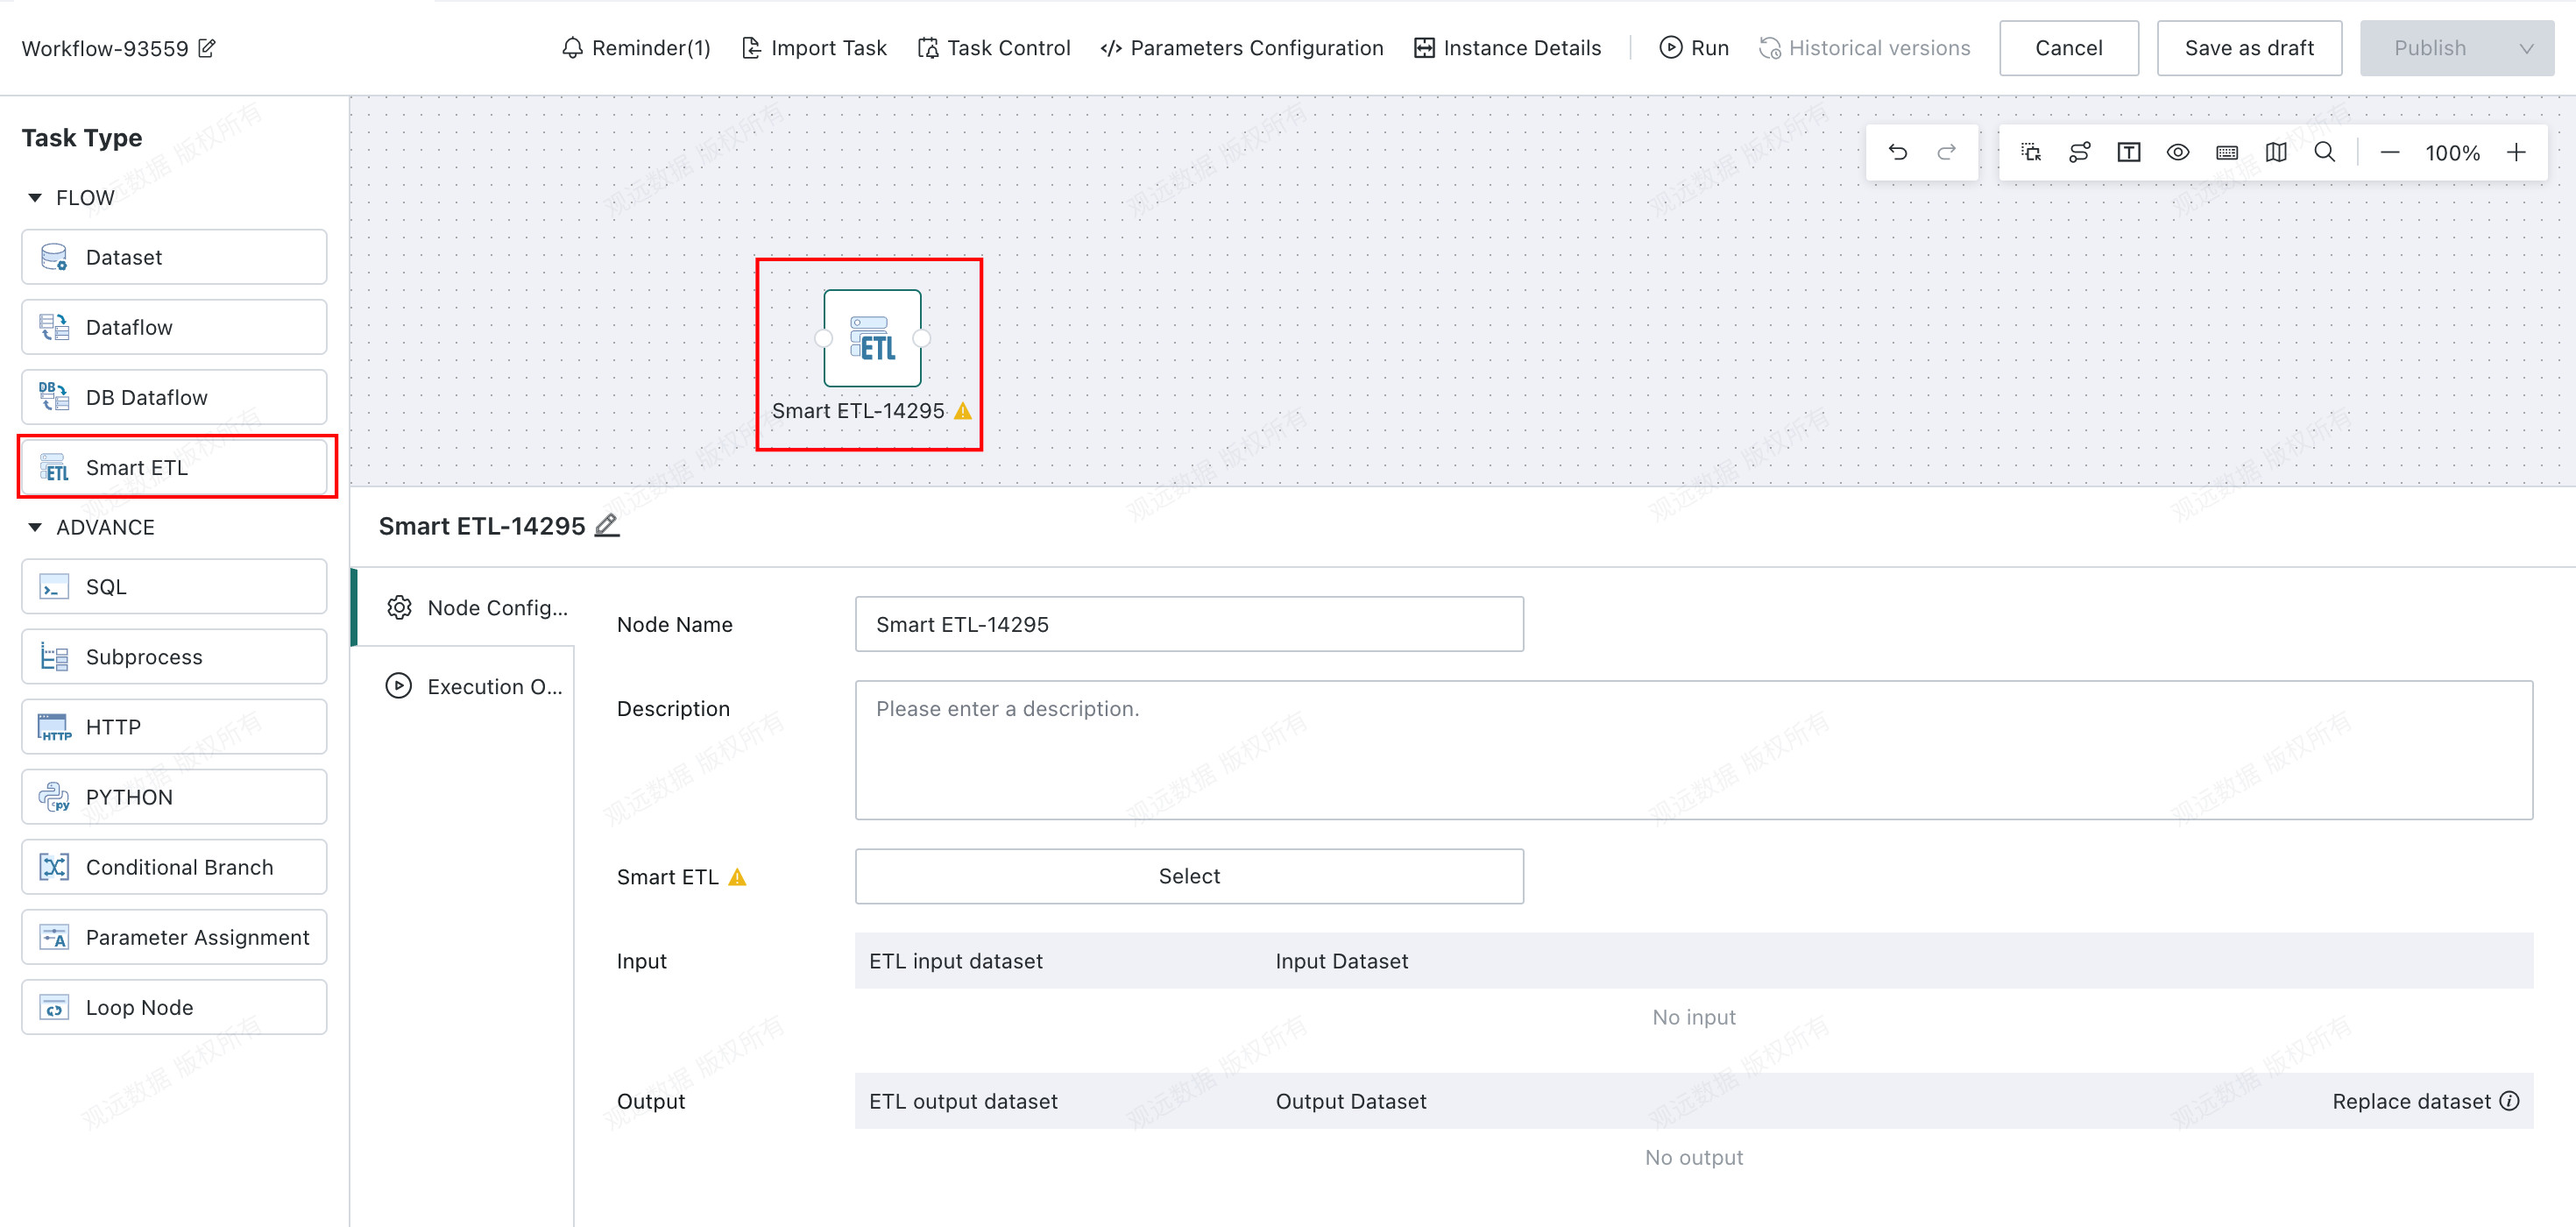
On the Offline Dev task editing page, you can drag the Smart ETL node from the left panel onto the canvas and configure it.
This section describes the configuration options of the Smart ETL Node.
Node Configuration
Fill in the basic information for the current task node. Node Name and Description are optional, but they help you understand and manage the node more effectively and make the overall Offline Dev workflow easier to maintain.
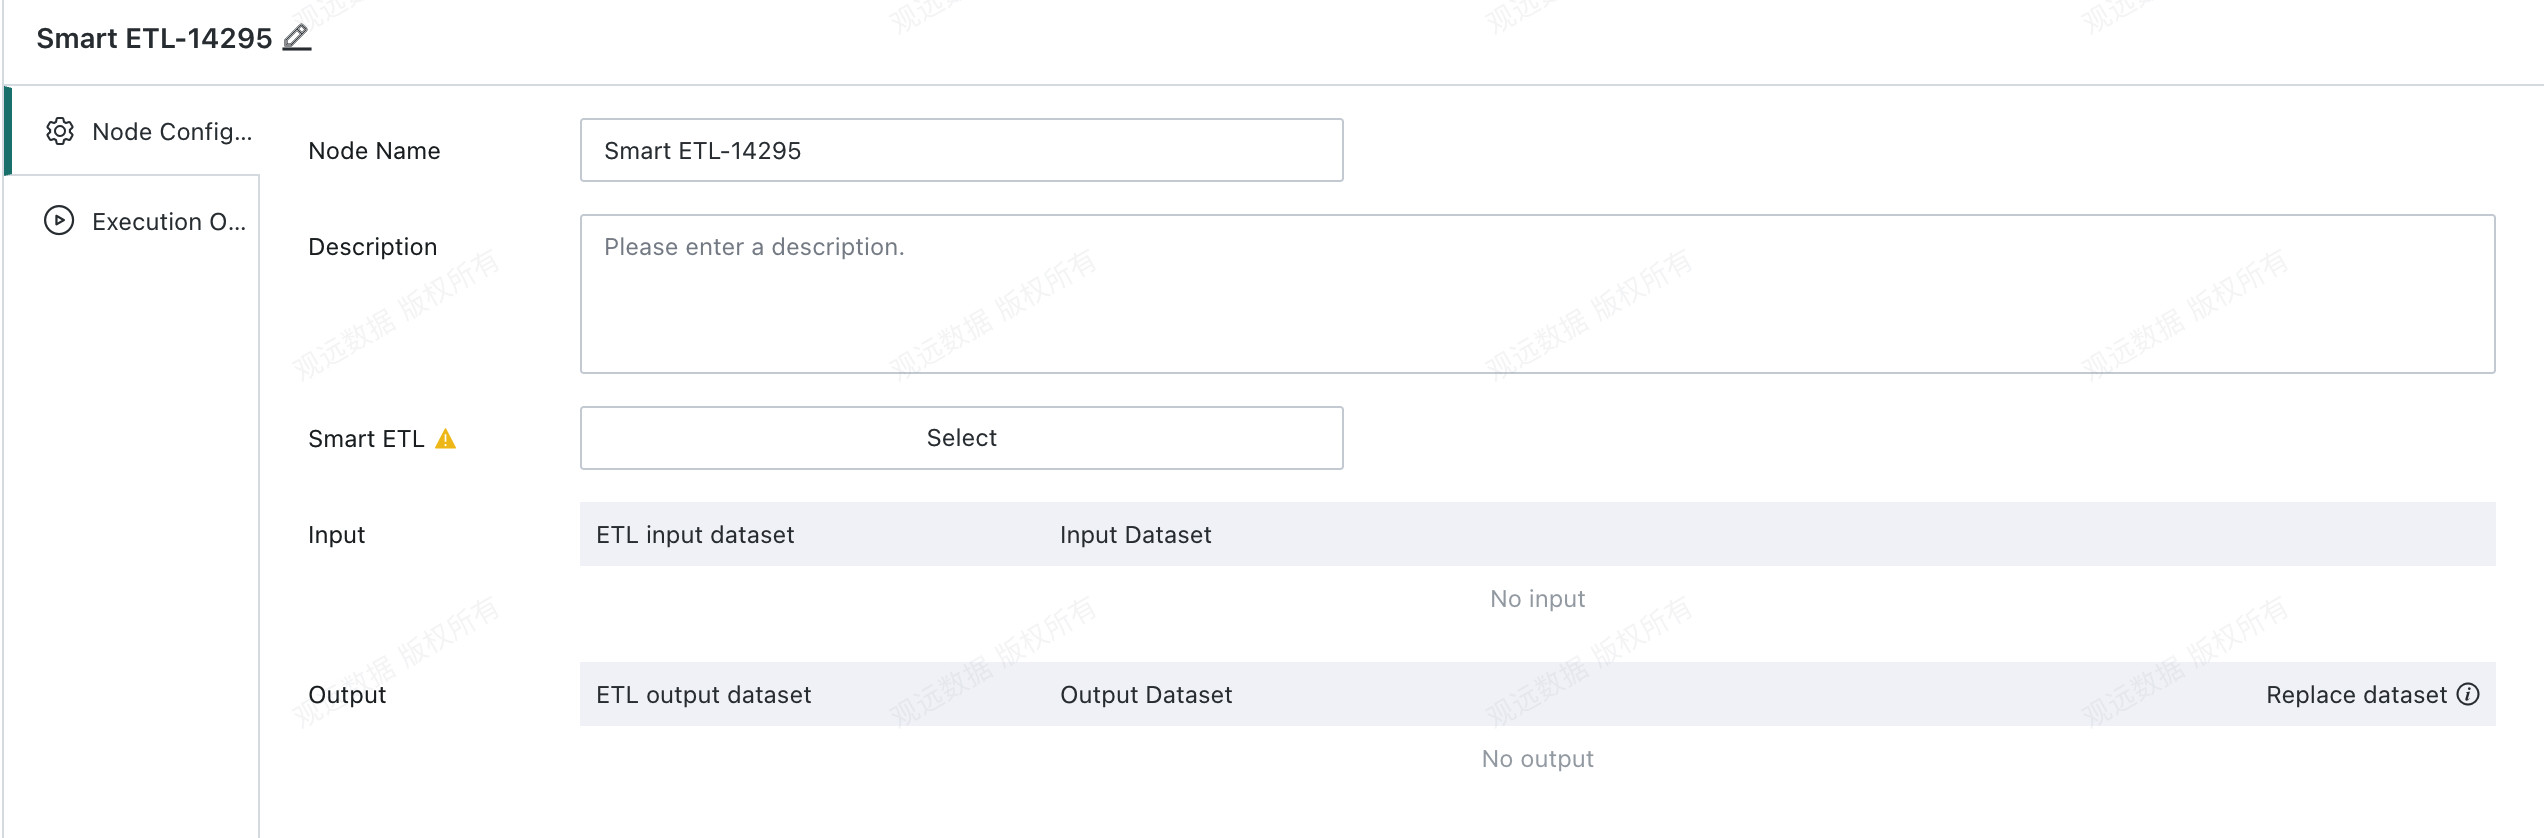
Select the Smart ETL to Schedule
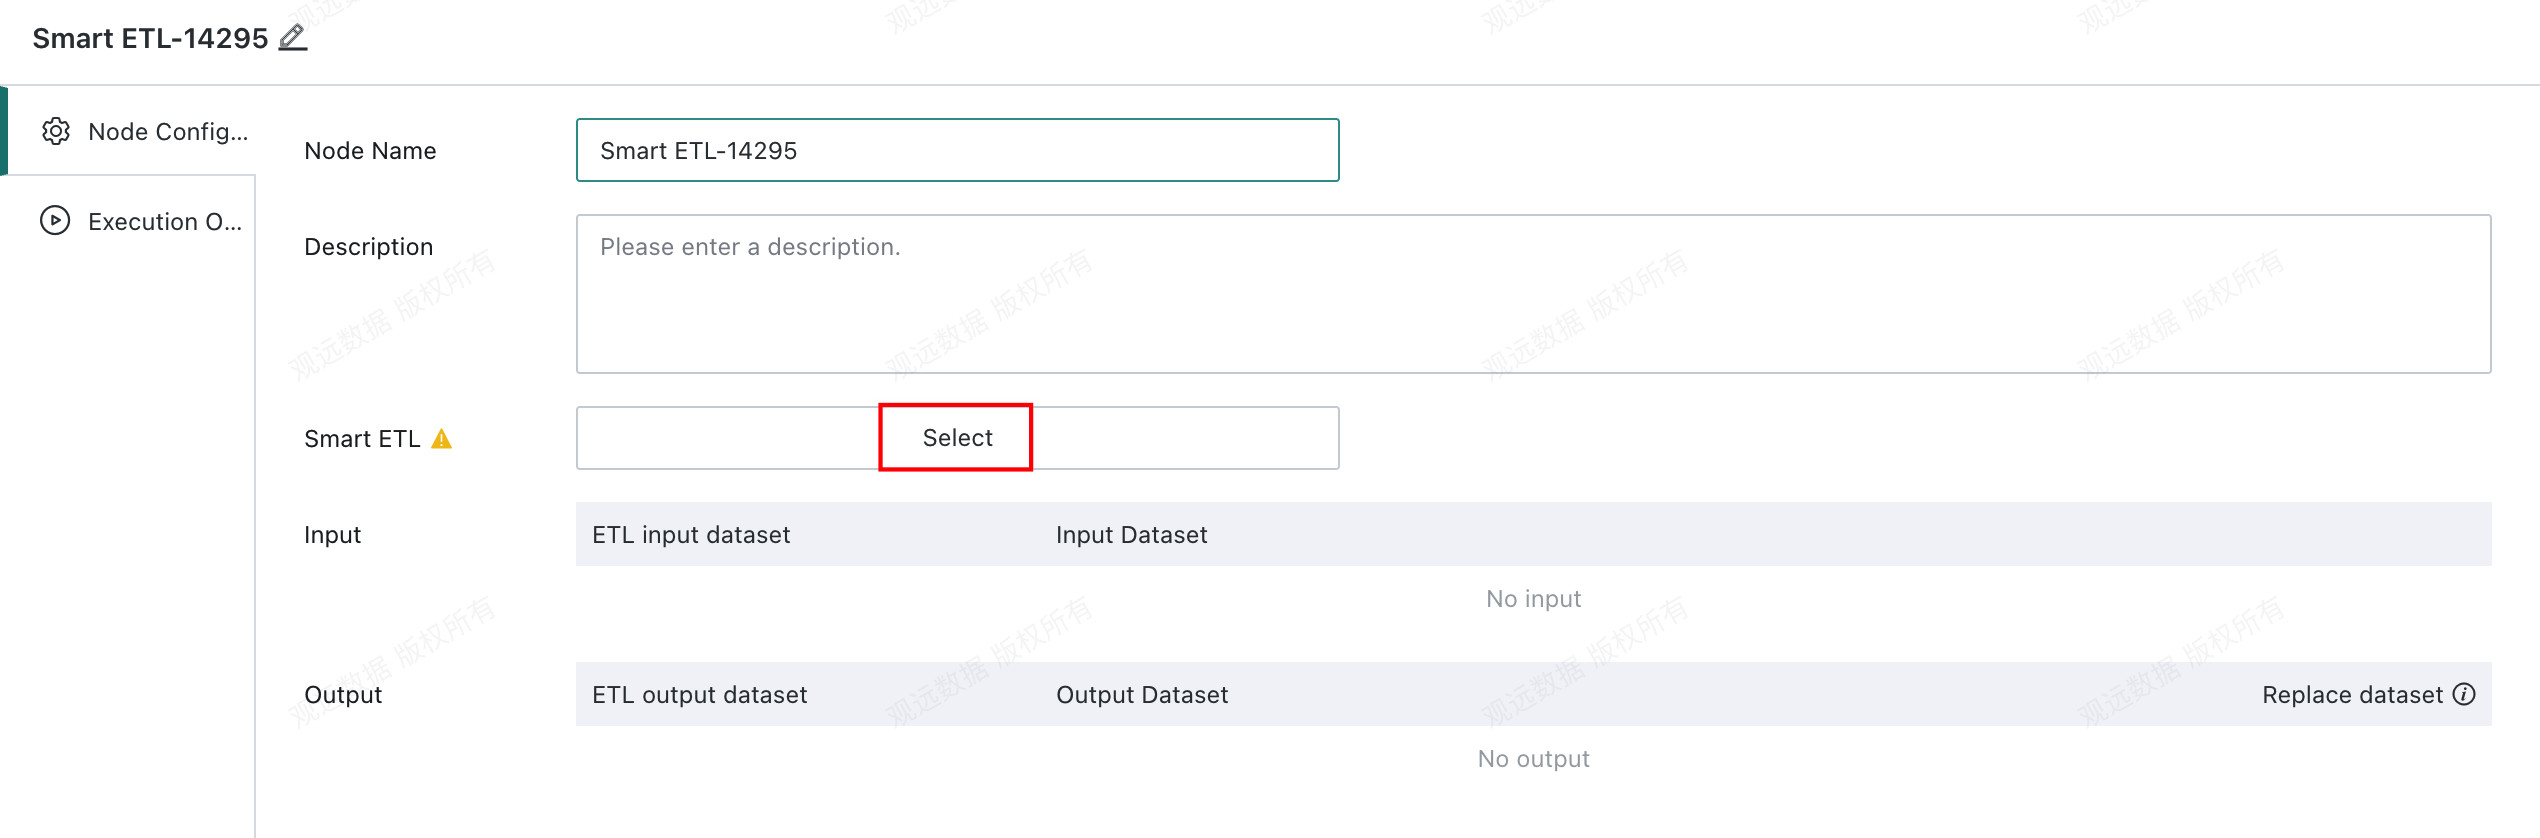
You can view or replace the ETL referenced by the node:
- View ETL: Click the task name under
Smart ETLto open the ETL task page. - Replace ETL: Click
Replaceto the right ofSmart ETLto assign another ETL as the workflow task node.
Notes
- The ETL owner must be the same as the current workflow owner, and the ETL must not be referenced by other workflows before it can be selected or replaced.
- If the workflow owner is a standard user, the ETLs shown in the selection dialog are those for which the user has owner permission.
- If the workflow owner is an administrator, or an administrator is editing a workflow owned by a standard user, the dialog still shows all ETLs. In this case, you must choose an ETL for which the workflow owner has owner permission.
- After an ETL is referenced by a workflow, its original update strategy becomes invalid automatically and changes to
Follow Workflow Update.
Configure Input and Output
After you select an ETL, the platform automatically parses and displays the ETL's input and output dataset list. You can then filter or replace the original ETL inputs and outputs based on business requirements.
Input Configuration
Node input dataset: The actual input data passed to the ETL when it runs in the workflow. By default, the node input dataset is the ETL's original input dataset.
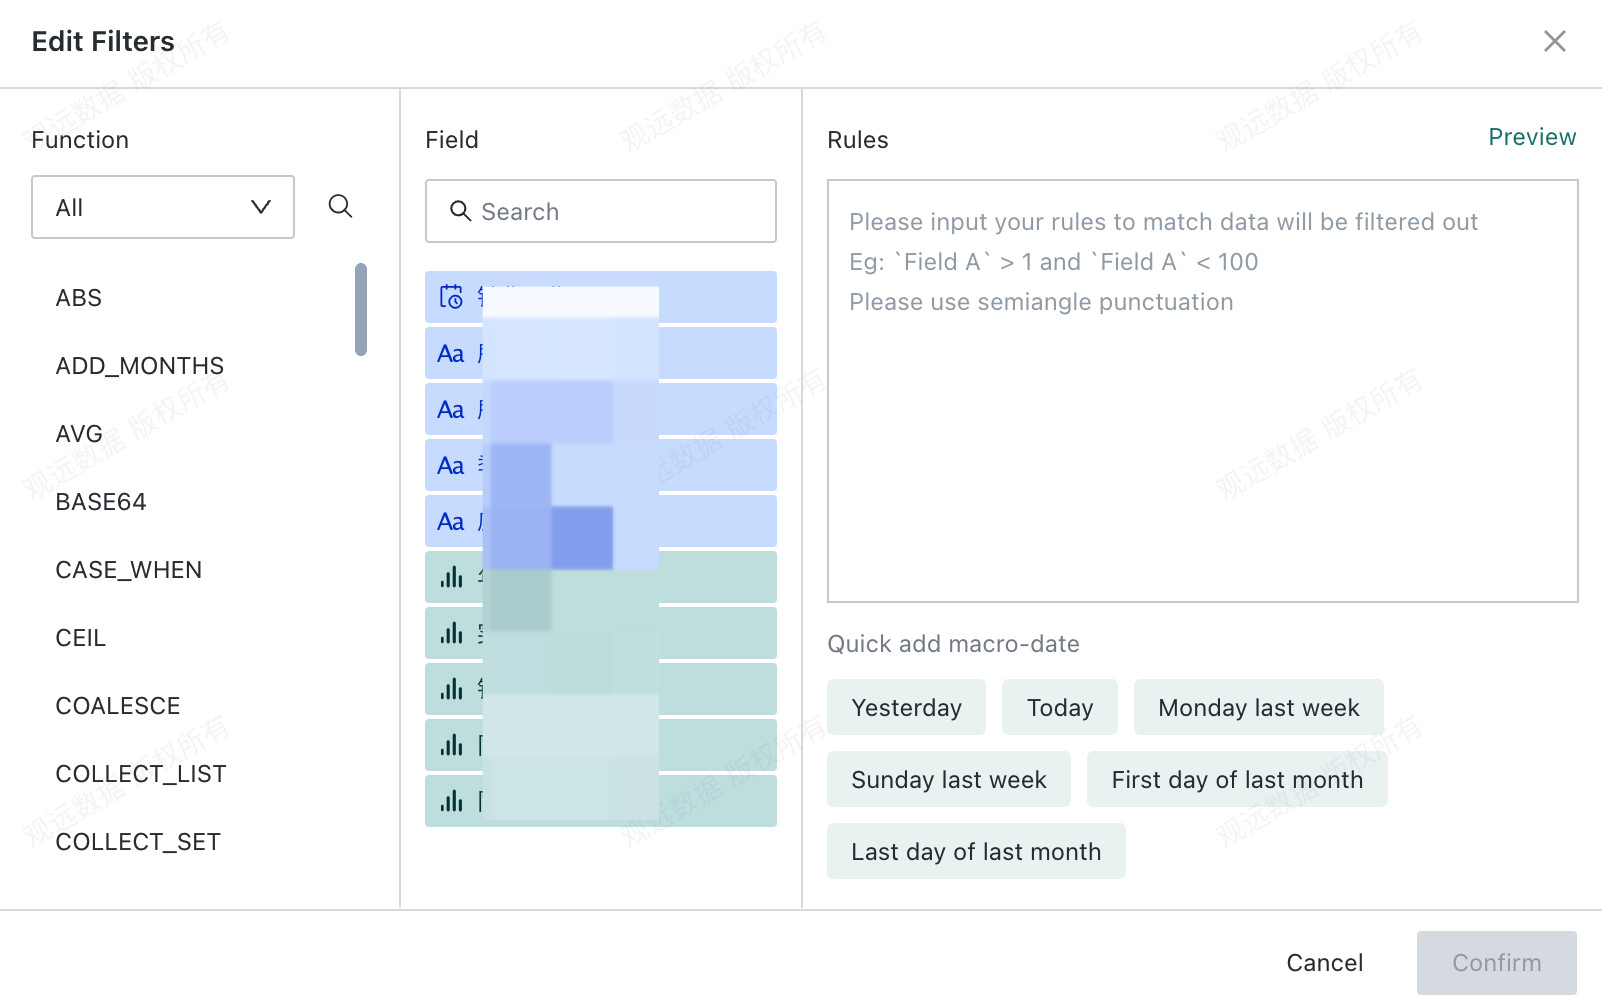
To replace the node input dataset or filter data as needed, click Input > Modify:

-
Replace: Replace the node input dataset. The selectable range includes all
Guan-indexdatasets for which the current workflow owner has owner or user permission. -
Edit rule: Filter the current dataset using filter conditions. You can reference Global Parameters, Time Macro Parameters, and Workflow Parameter.
Output Configuration
Node output dataset: The Offline Dev dataset that actually stores the ETL execution result when the ETL runs in the workflow.
By default, the node output dataset is the ETL's original output dataset, and ETL results are written directly to that dataset.
If you need to perform incremental updates to the output dataset, or a full update while keeping the dataset structure unchanged, enable Output Replacement and configure the replacement output dataset:
After Output Replacement is enabled, the ETL result data is written to the replacement dataset according to the configured incremental or full update mode. The original ETL output dataset is no longer written to.
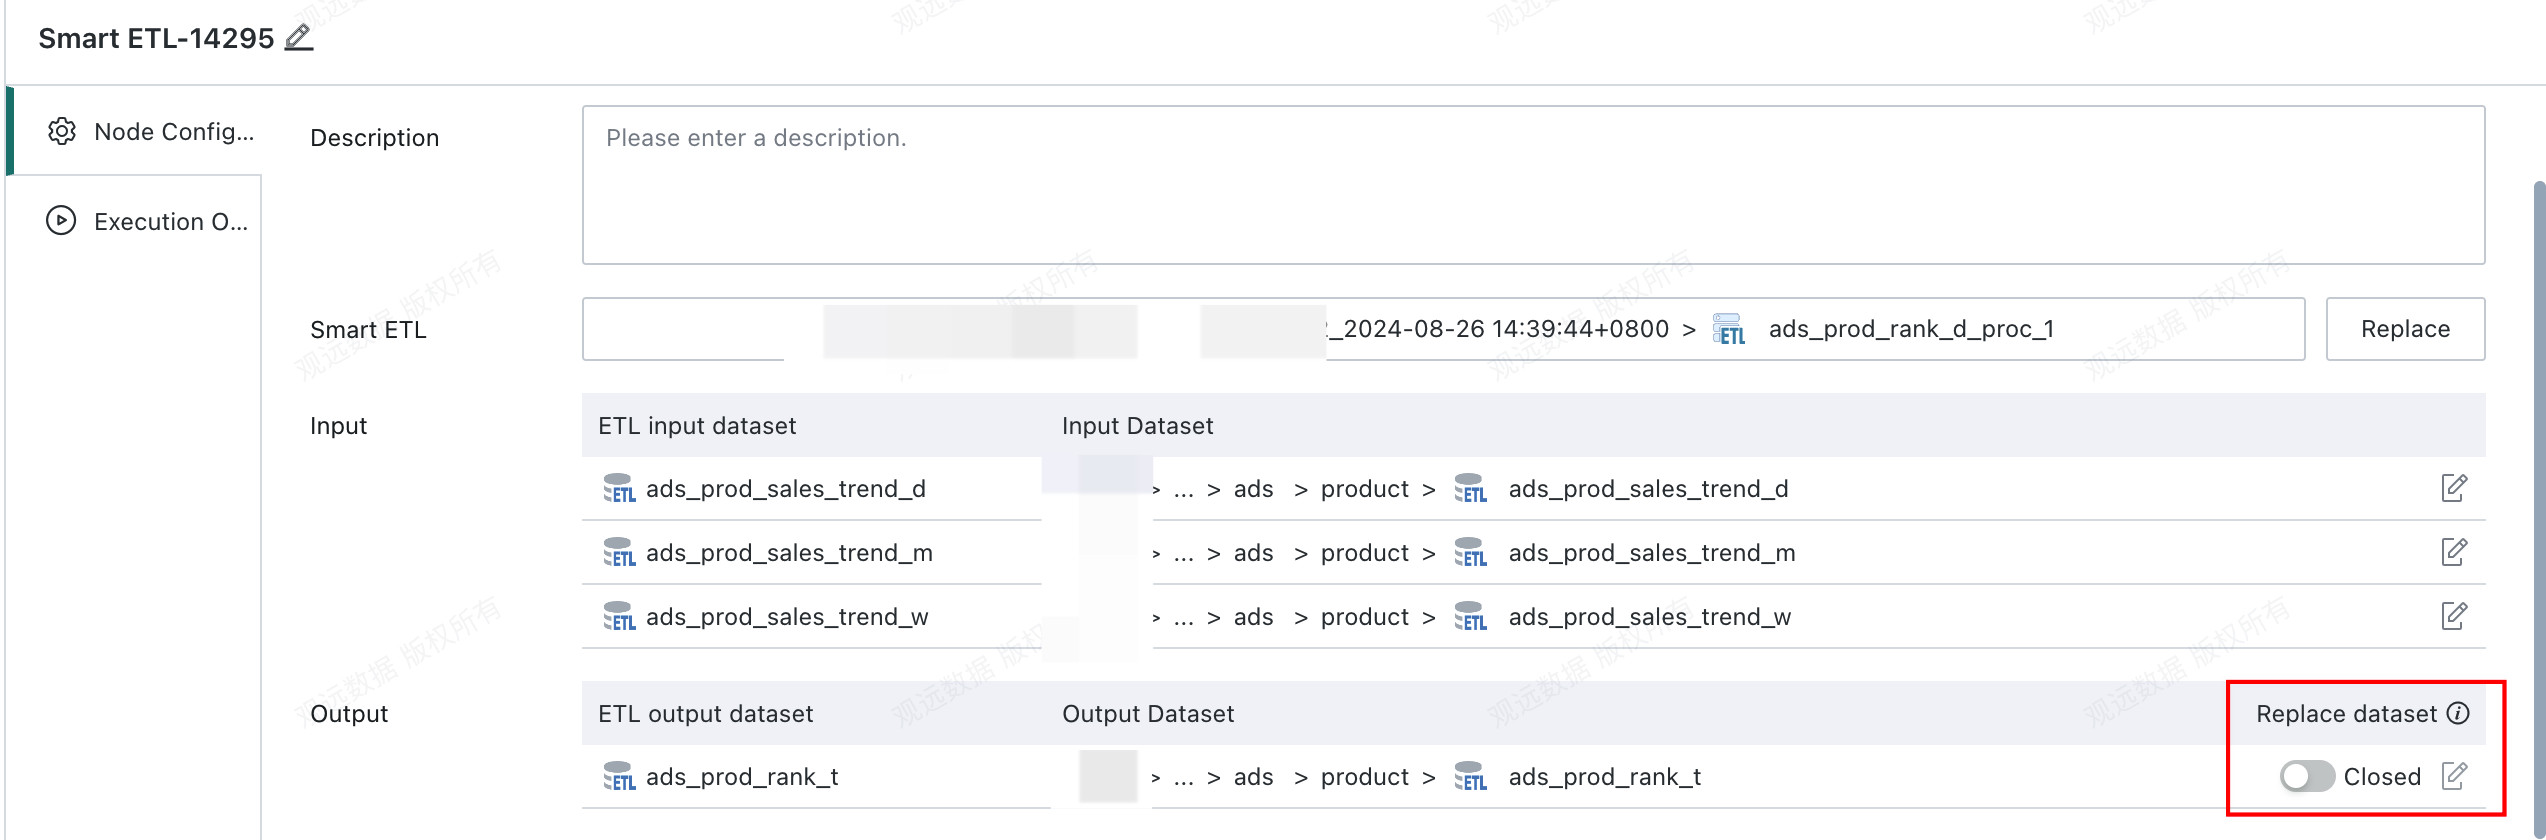
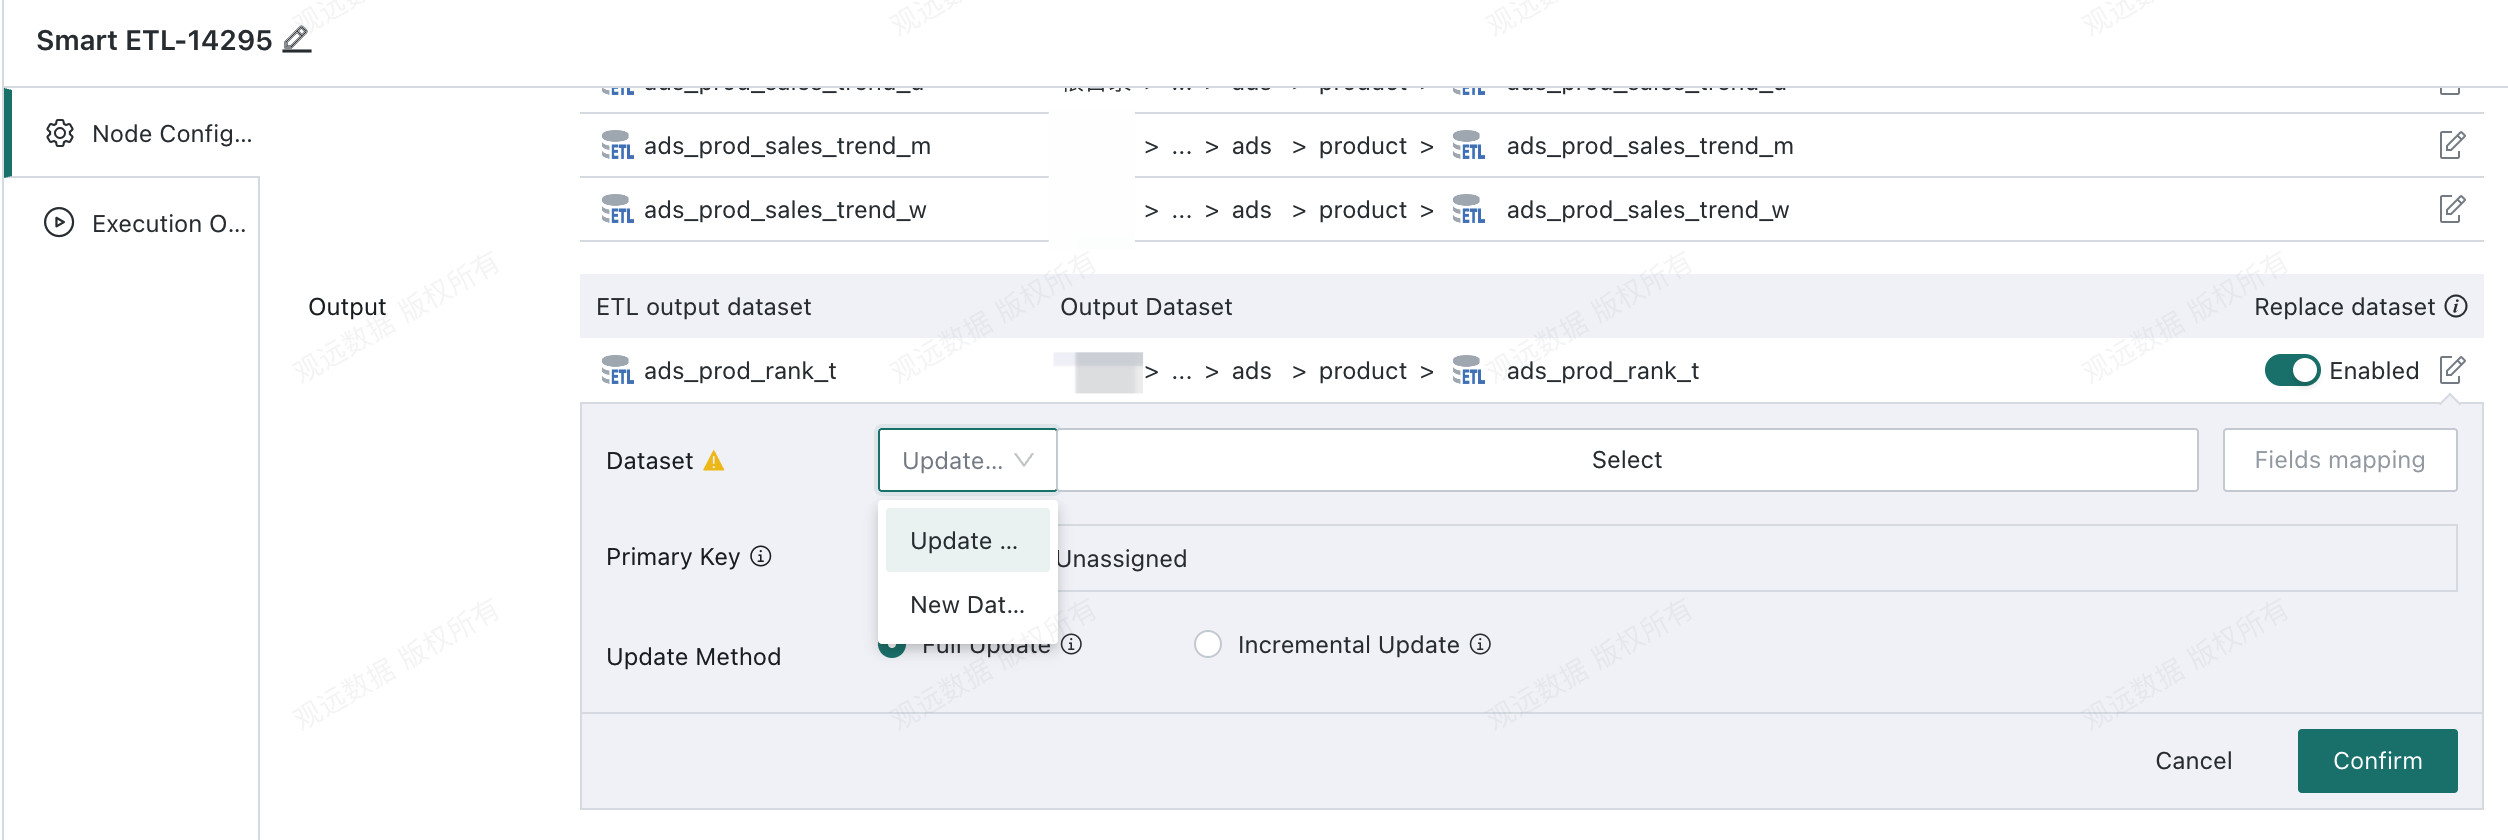
Select the target output dataset
-
New Dataset: If the target output dataset does not exist, choose
Register Data, fill in the dataset name, storage path, and optional primary key, then create a new advanced scheduling dataset. Subsequent runs will update this dataset.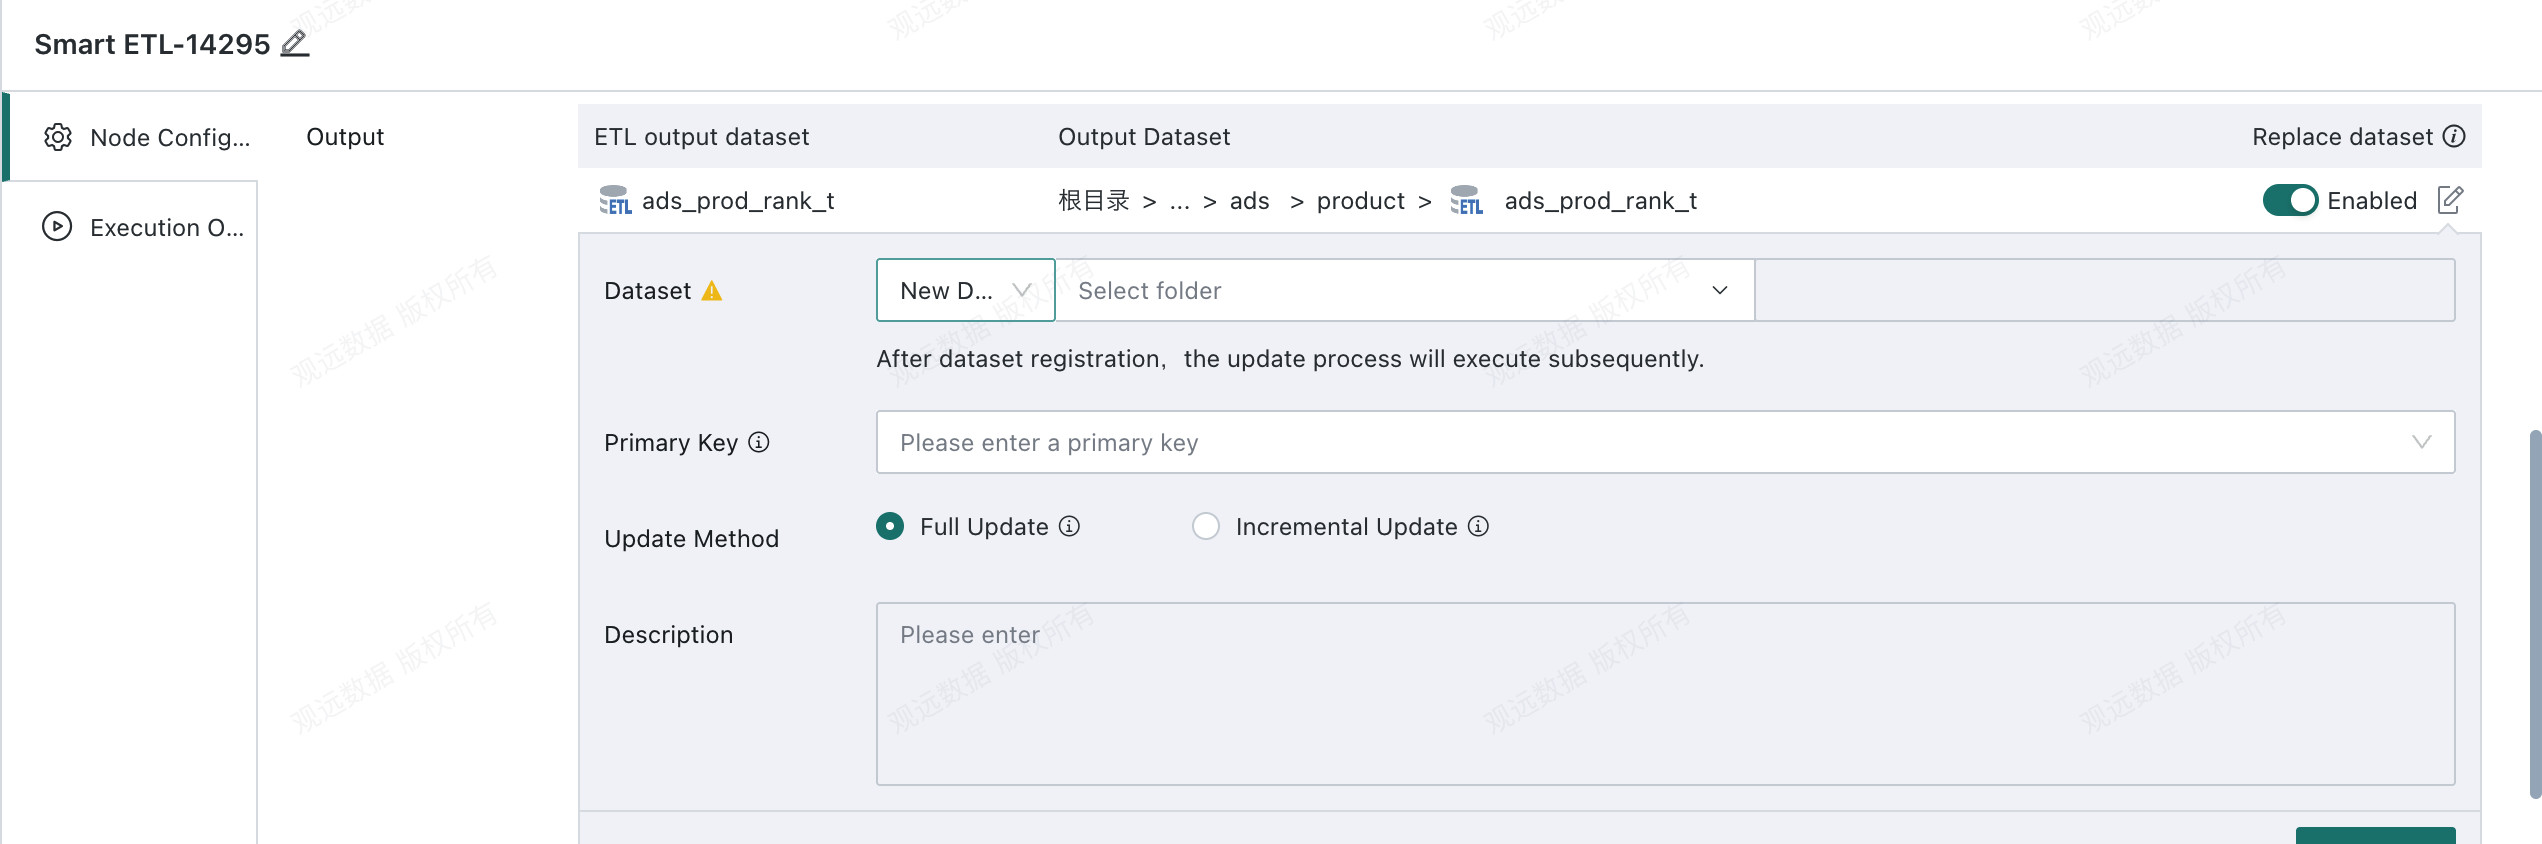
-
Update Data: If the target output dataset already exists, choose
Update Data, reference the replacement target dataset directly, and update it.-
Field Mappingis supported. Fields in the ETL output can be mapped to fields in the target dataset by name, and the mapping can be adjusted manually.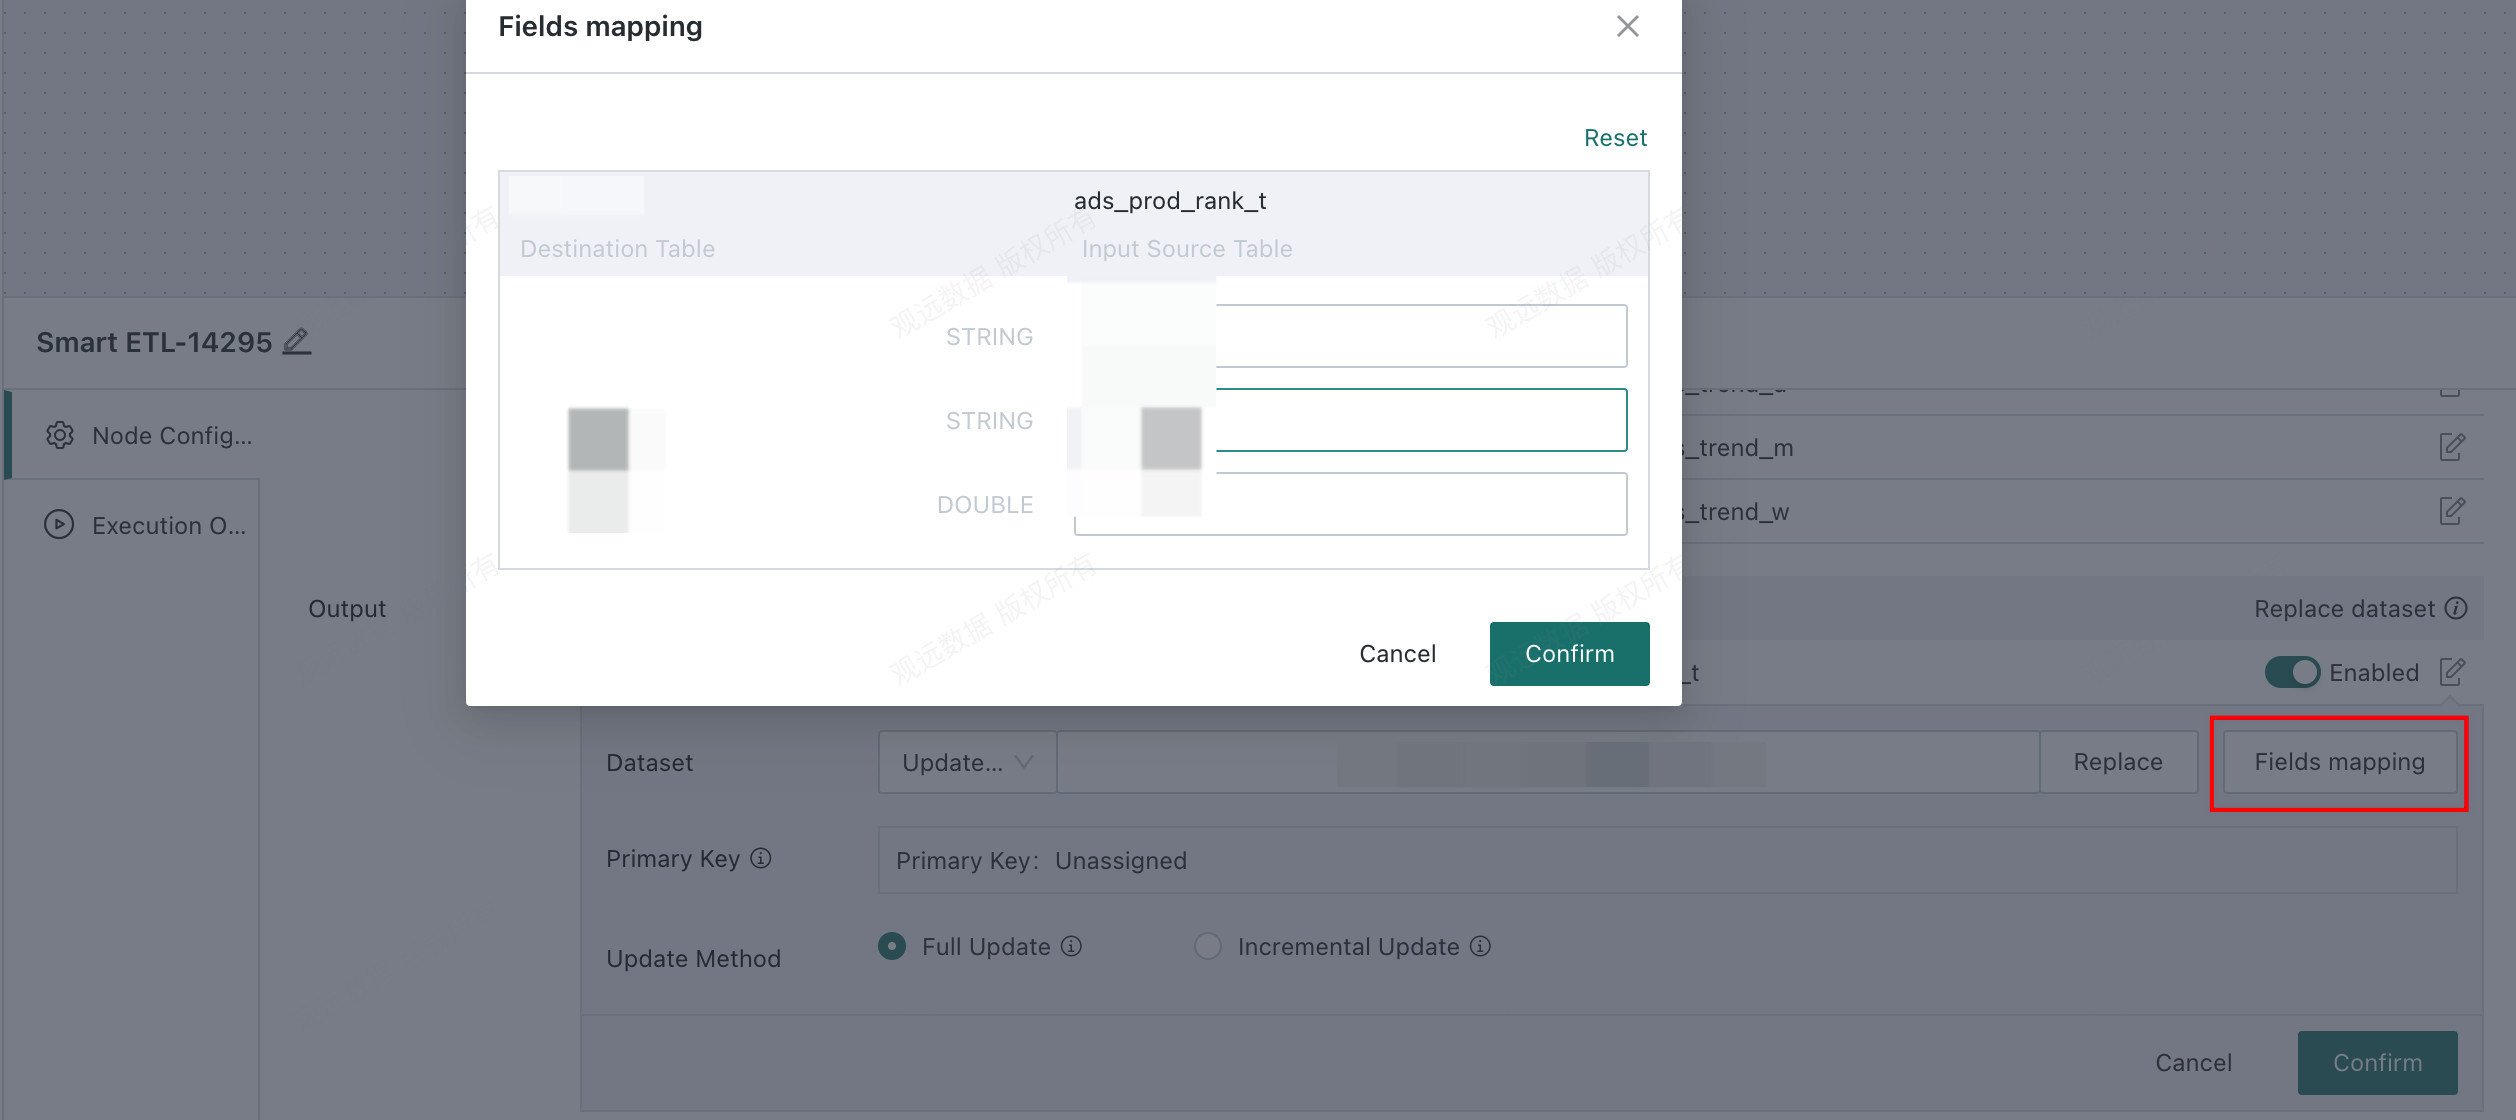
-
Selectable output datasets:
Offline Devdatasets for which the workflow owner has owner permission.
-
-
Subsequent update mode: Defines how the dataset will be updated after the node output dataset is selected or created.
- Full update: Clear historical data in the target dataset before writing new data.
- Incremental update: Keep existing data in the target dataset and append new data.
-
If the dataset has a primary key, deduplication is performed based on that key during writing.
-
Pre-cleanup Rulesare supported. Before writing data, the system cleans data according to the configured rules and then performs the incremental update.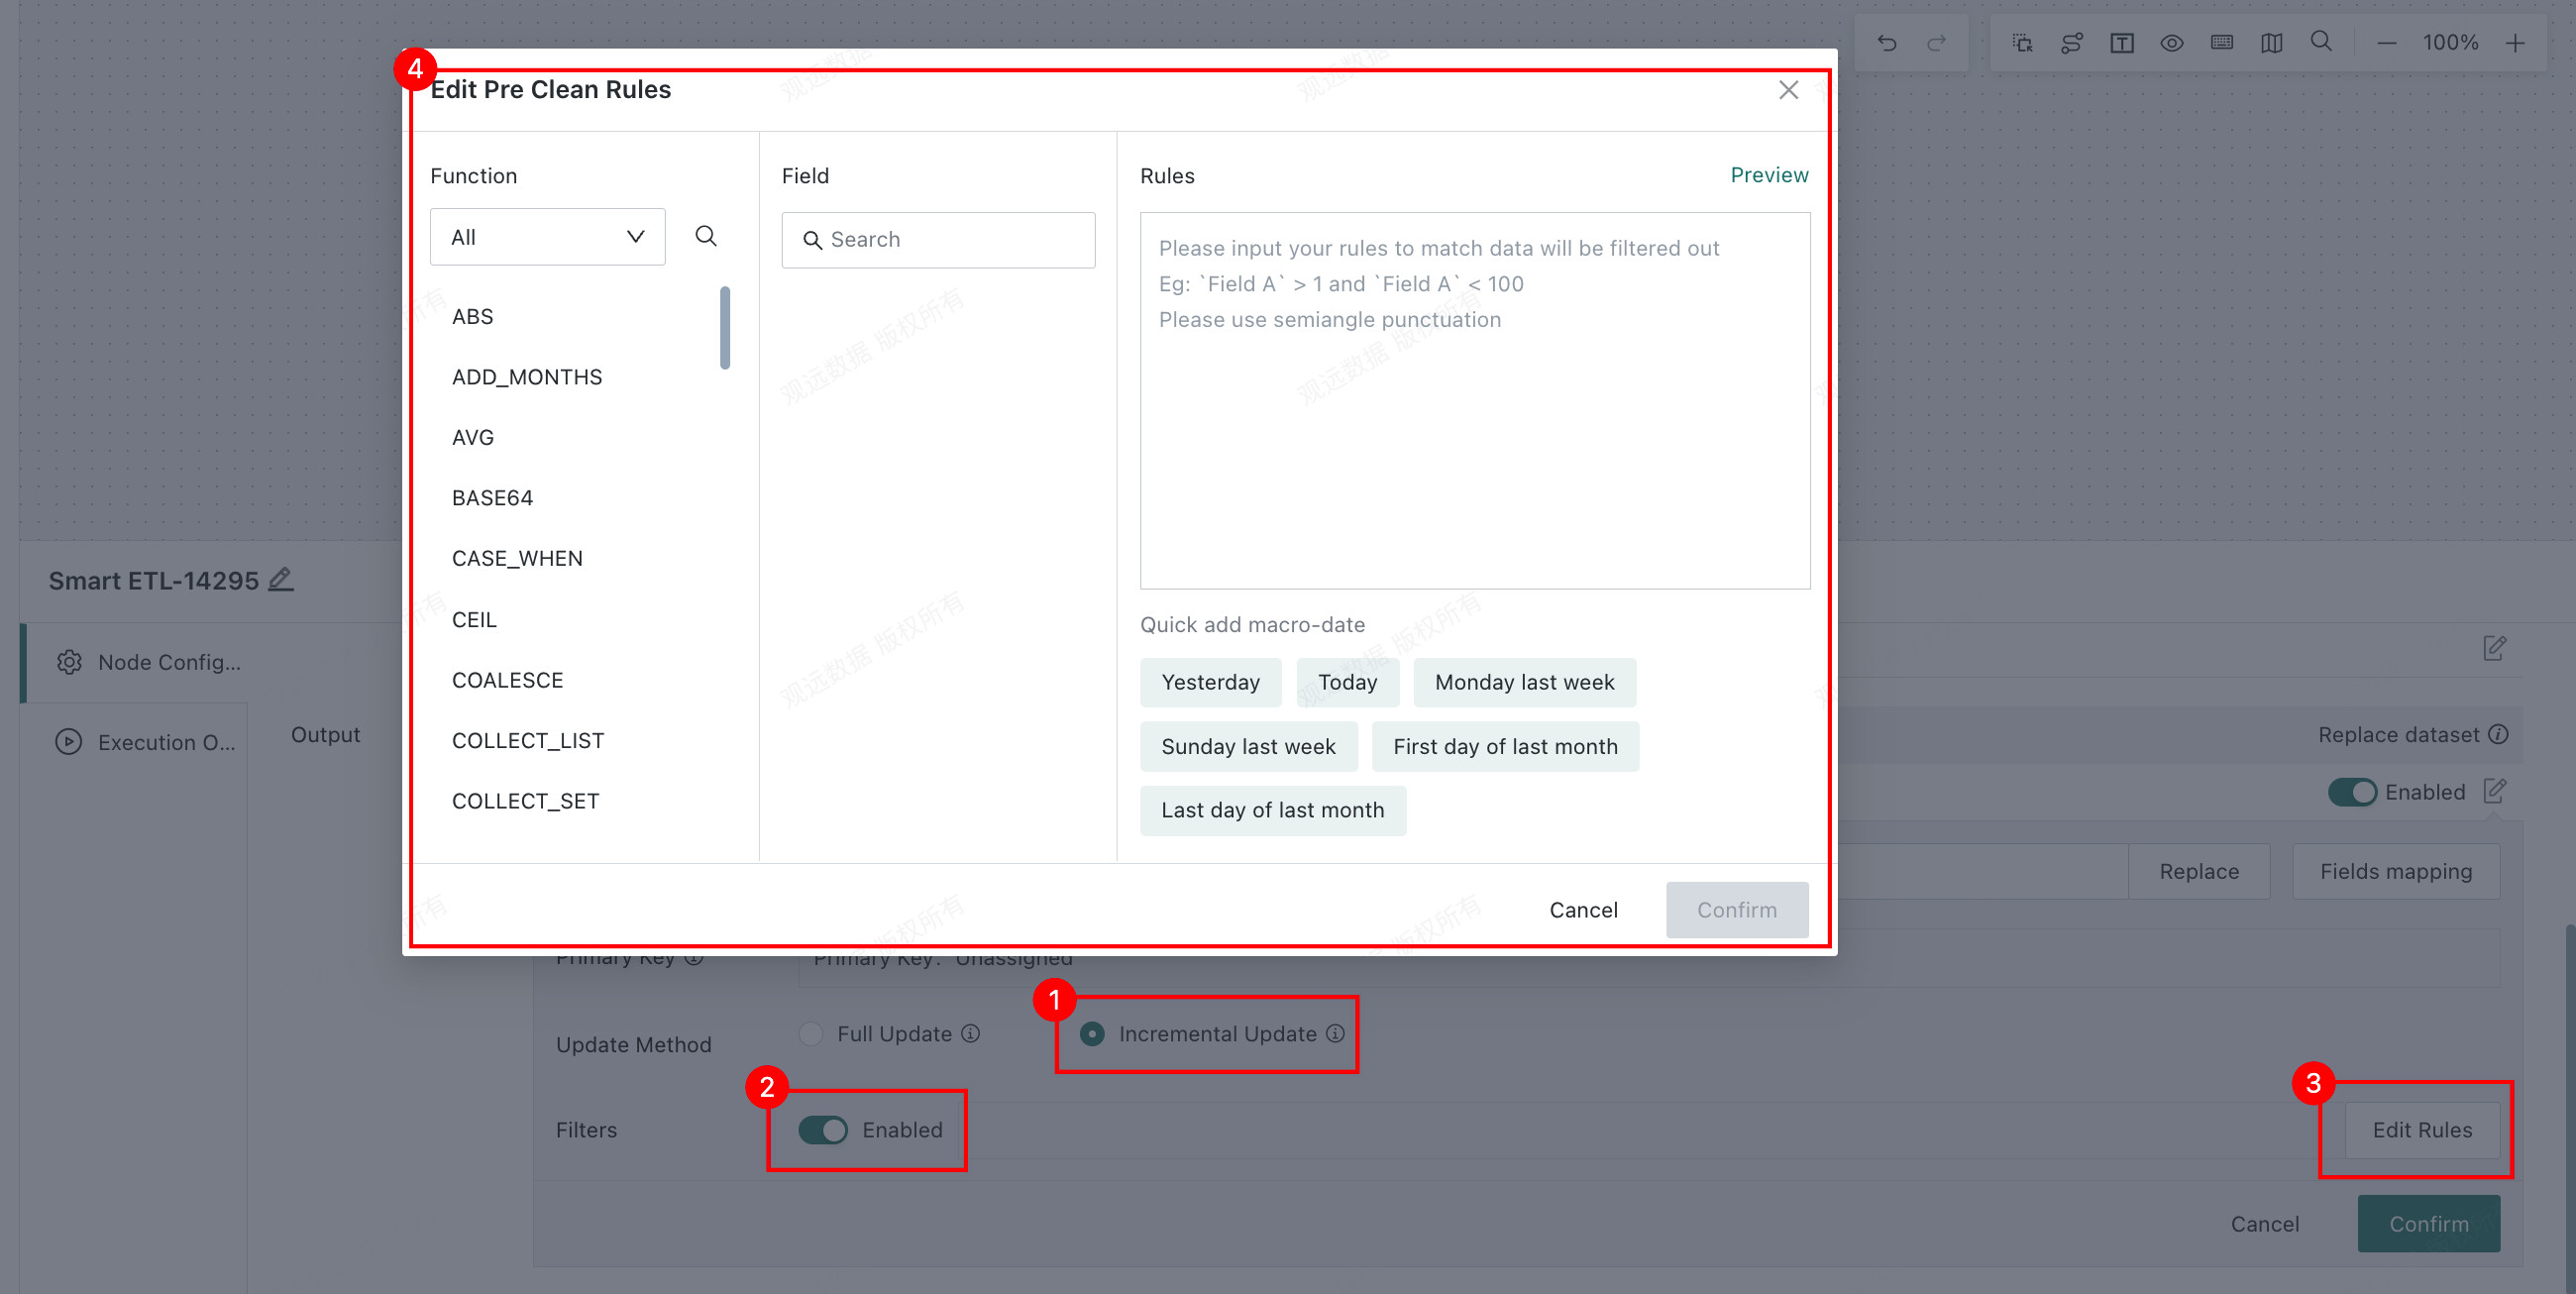
-
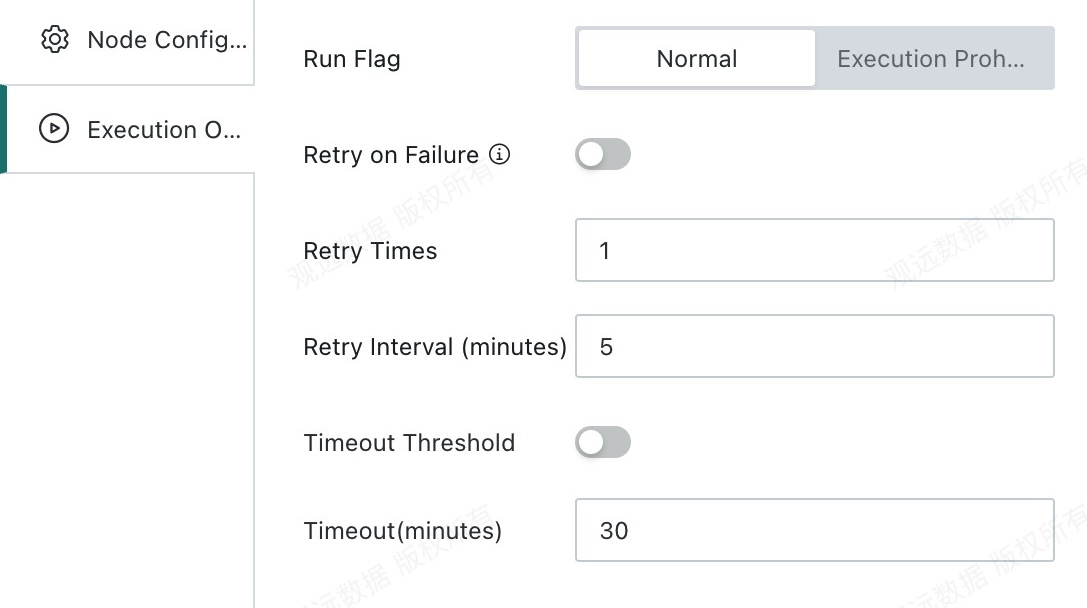
Runtime Options
Choose appropriate Run Status and timeout settings based on task complexity and the actual runtime environment to improve execution efficiency and reliability.
- Run status: Defines the execution strategy of the node during workflow scheduling.
Do Not Execute: When the workflow reaches this node, execution is skipped directly. This is commonly used for temporary data troubleshooting and partial task execution control.Normal: The node runs according to the existing scheduling strategy. This is the default run status.
- Timeout setting: You can define a custom timeout or follow the global timeout. If the ETL does not finish within the configured period, it is terminated automatically to avoid occupying task queues or compute resources for too long and blocking other tasks.