Offline Development Task
Overview
The Offline Dev module provides low-threshold visual ETL and Dataflow Node orchestration capabilities, and supports extended task types such as Python scripts and Shell commands to improve development efficiency. It also supports multiple node types such as dataflow processing nodes, provides graphical data integration and processing capabilities, and supports efficient task orchestration through loop control, Conditional Branch, and Subprocess.
Folder Management
Users can create folders to manage and search Offline Development Tasks.
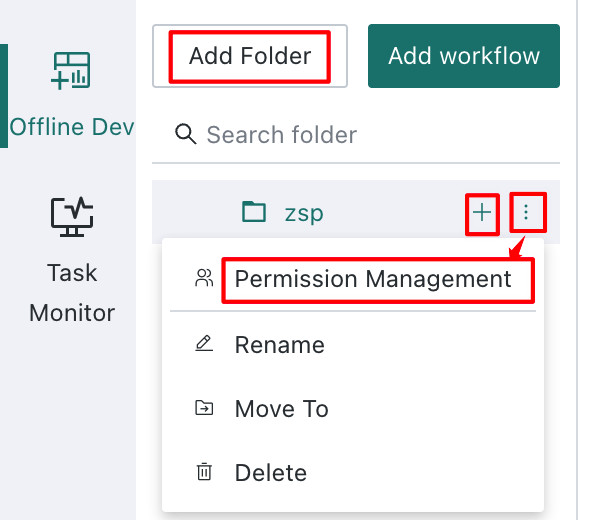
On the Offline Dev list page, users can create a new folder or a multilevel folder, assign different permissions to different users, rename folders, and move them to other folders.
Folder permissions can be assigned to different users. Folder permissions are divided into owner and user permissions.
- Folder owner
Can view, delete, and rename folders, createOffline Development Tasks, create subfolders, moveOffline Development Tasks into the folder, move folders to other folders where they have owner permissions, and manage owner/user permissions. - Folder user
Can view the folder, createOffline Development Tasks, and moveOffline Development Tasks into the folder.
Create an Offline Development Task
Create an Offline Development Task on the Offline Dev page. After creation, manage it from the task list.
-
Go to the
Offline Devpage and clickCreate Offline Dev.
-
Click the edit button, modify the workflow name, configure the description, choose the save path, and click
Confirm.
-
Drag nodes from the left into the canvas as needed, connect nodes, and orchestrate the
Offline Development Task.- For
Dataset Node, see Dataset Node. - For
Dataflow Node, see Dataflow Node. - For
Smart ETL Node, see Smart ETL Node. - For
SQL Node (Advanced), see SQL Node (Advanced). - For
HTTP Node, see HTTP Node. - For
Python Node, see Python Node. - For task orchestration, see Task Orchestration.
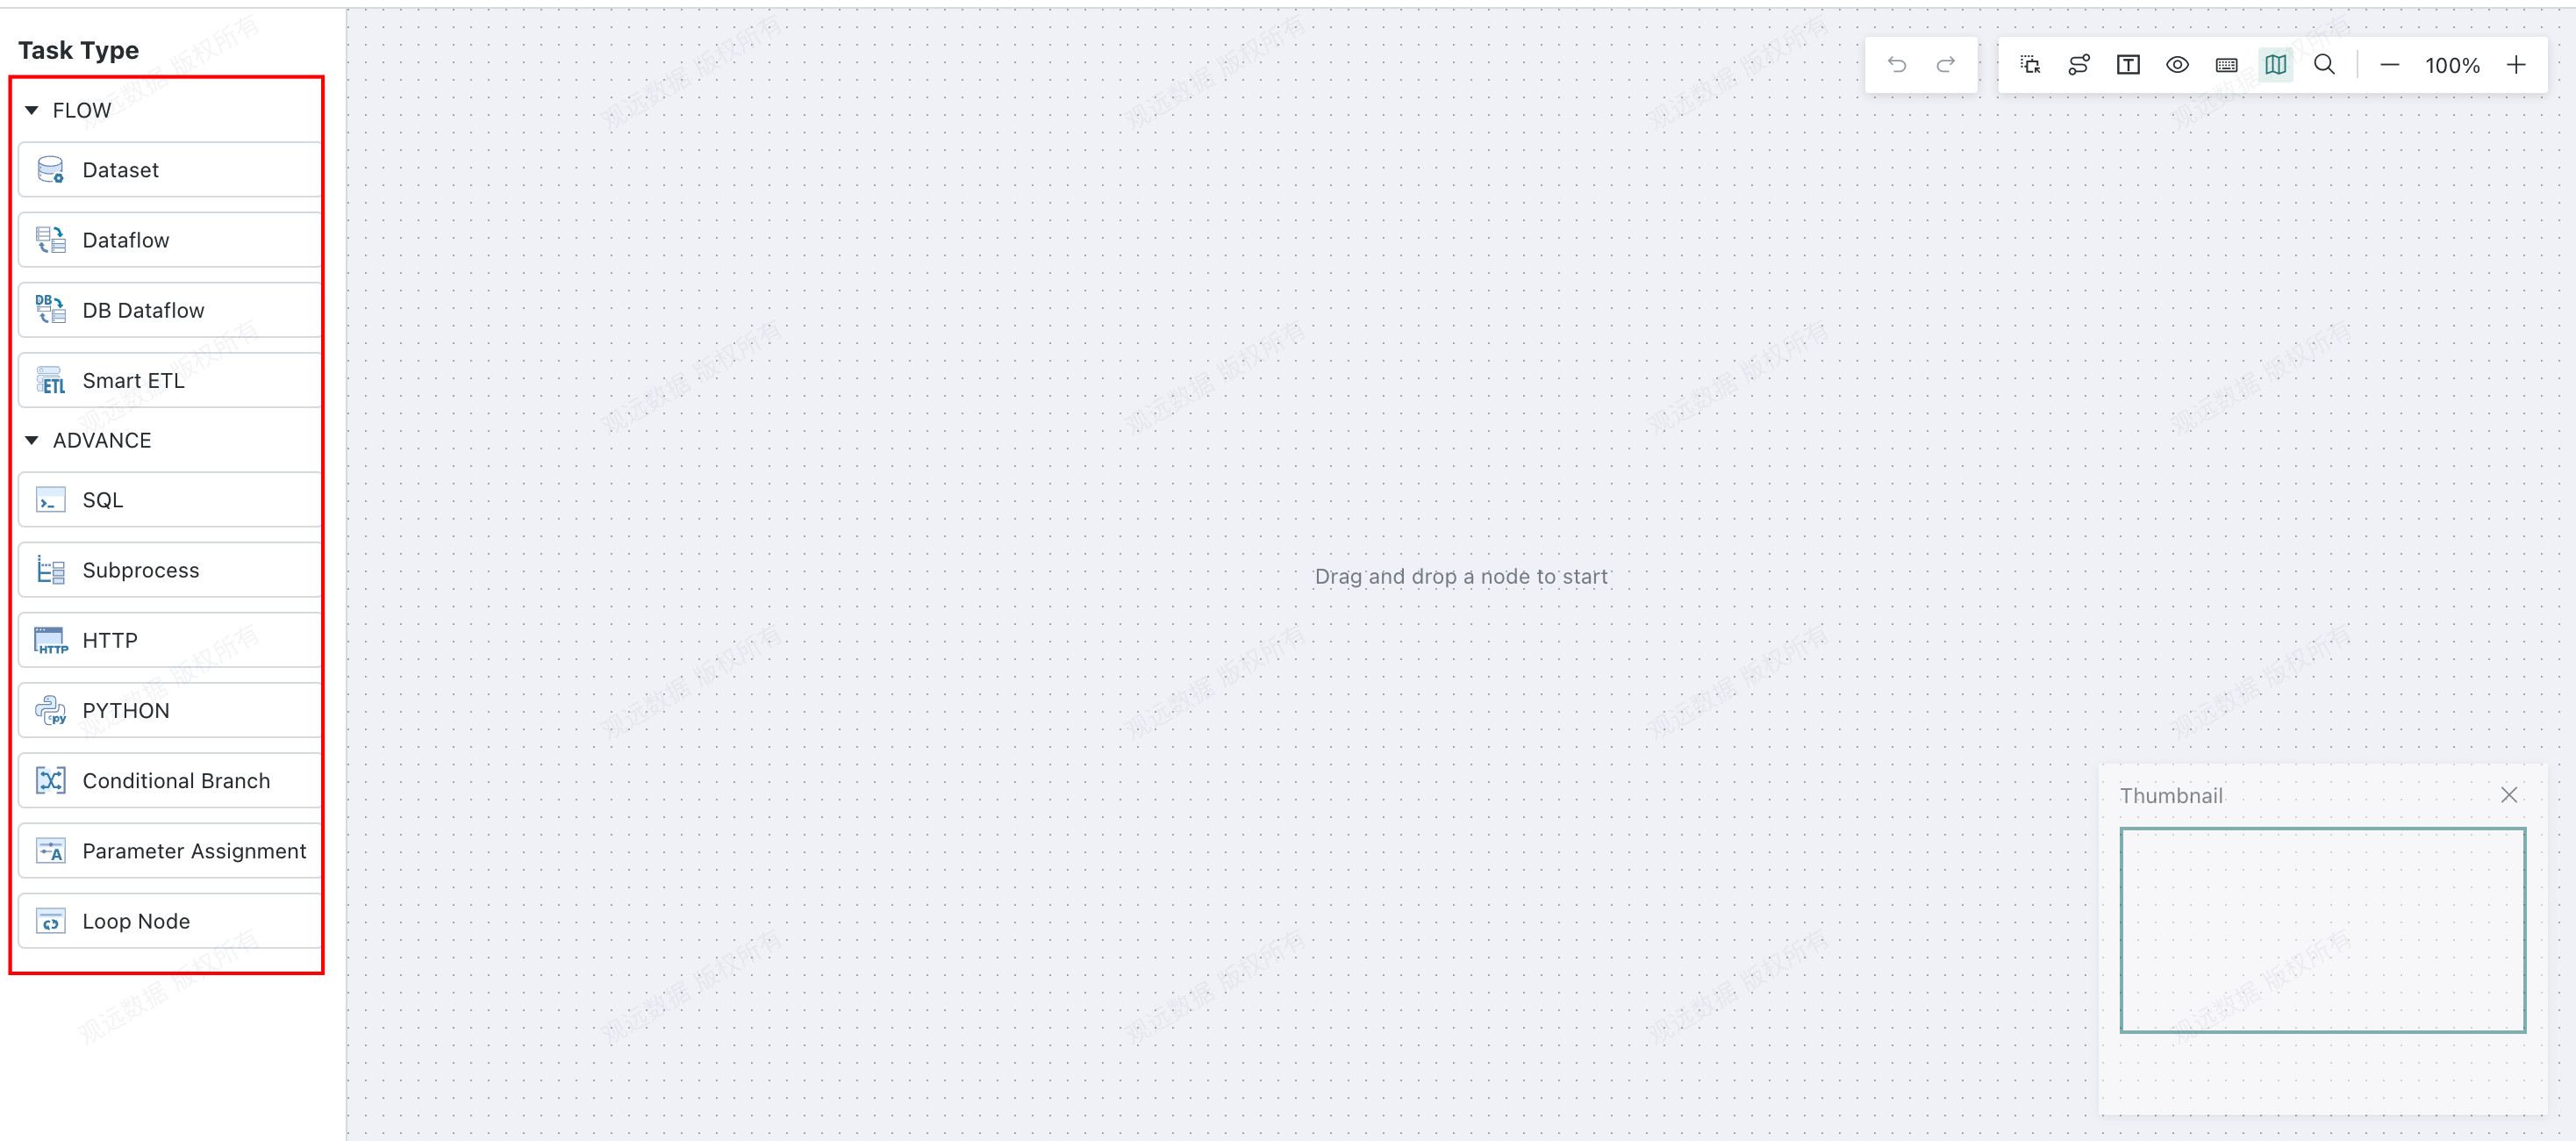
- For
-
Optional: If you need to create
Workflow Parameters, clickParameter Settingsin the upper-right corner to configure them. When the workflow runs, these parameters are dynamically replaced with their corresponding values and take effect in steps such as data filtering. For details, see Parameter Configuration.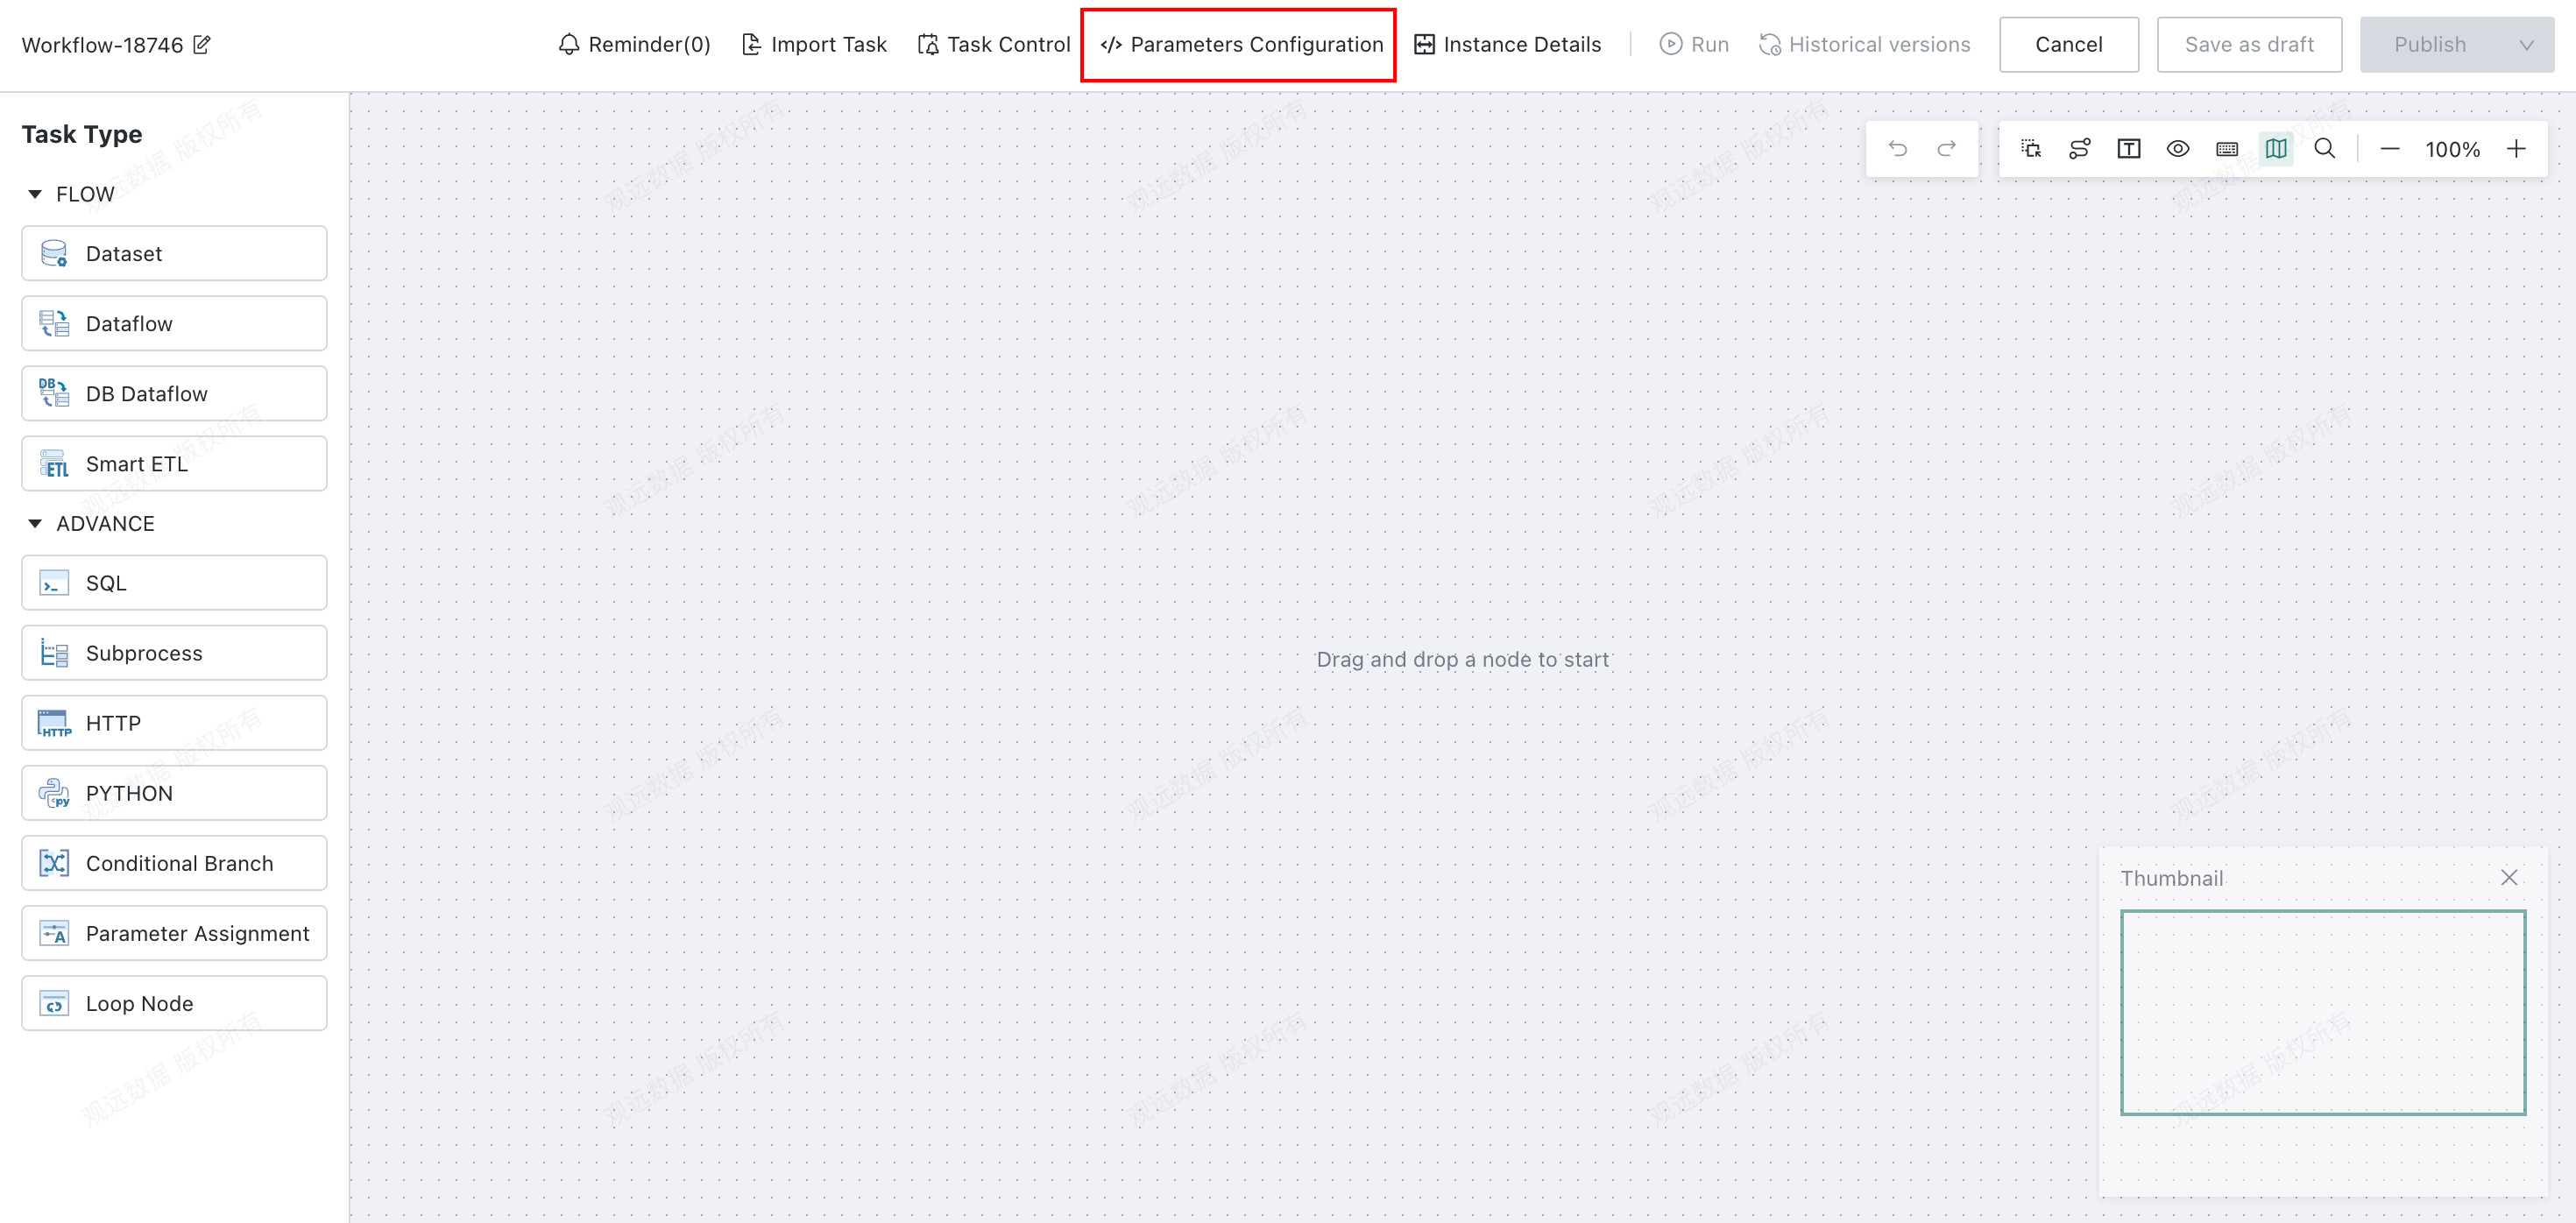
-
Offline Development Tasks support import and overwrite. After selecting anOffline Development Taskthat you have permission to access, you can import its node configuration, task parameters (optional), andSubprocessrelationships. The configuration insideSubprocesstasks, task-level timeout control, scheduling configuration, and alert configuration are not migrated.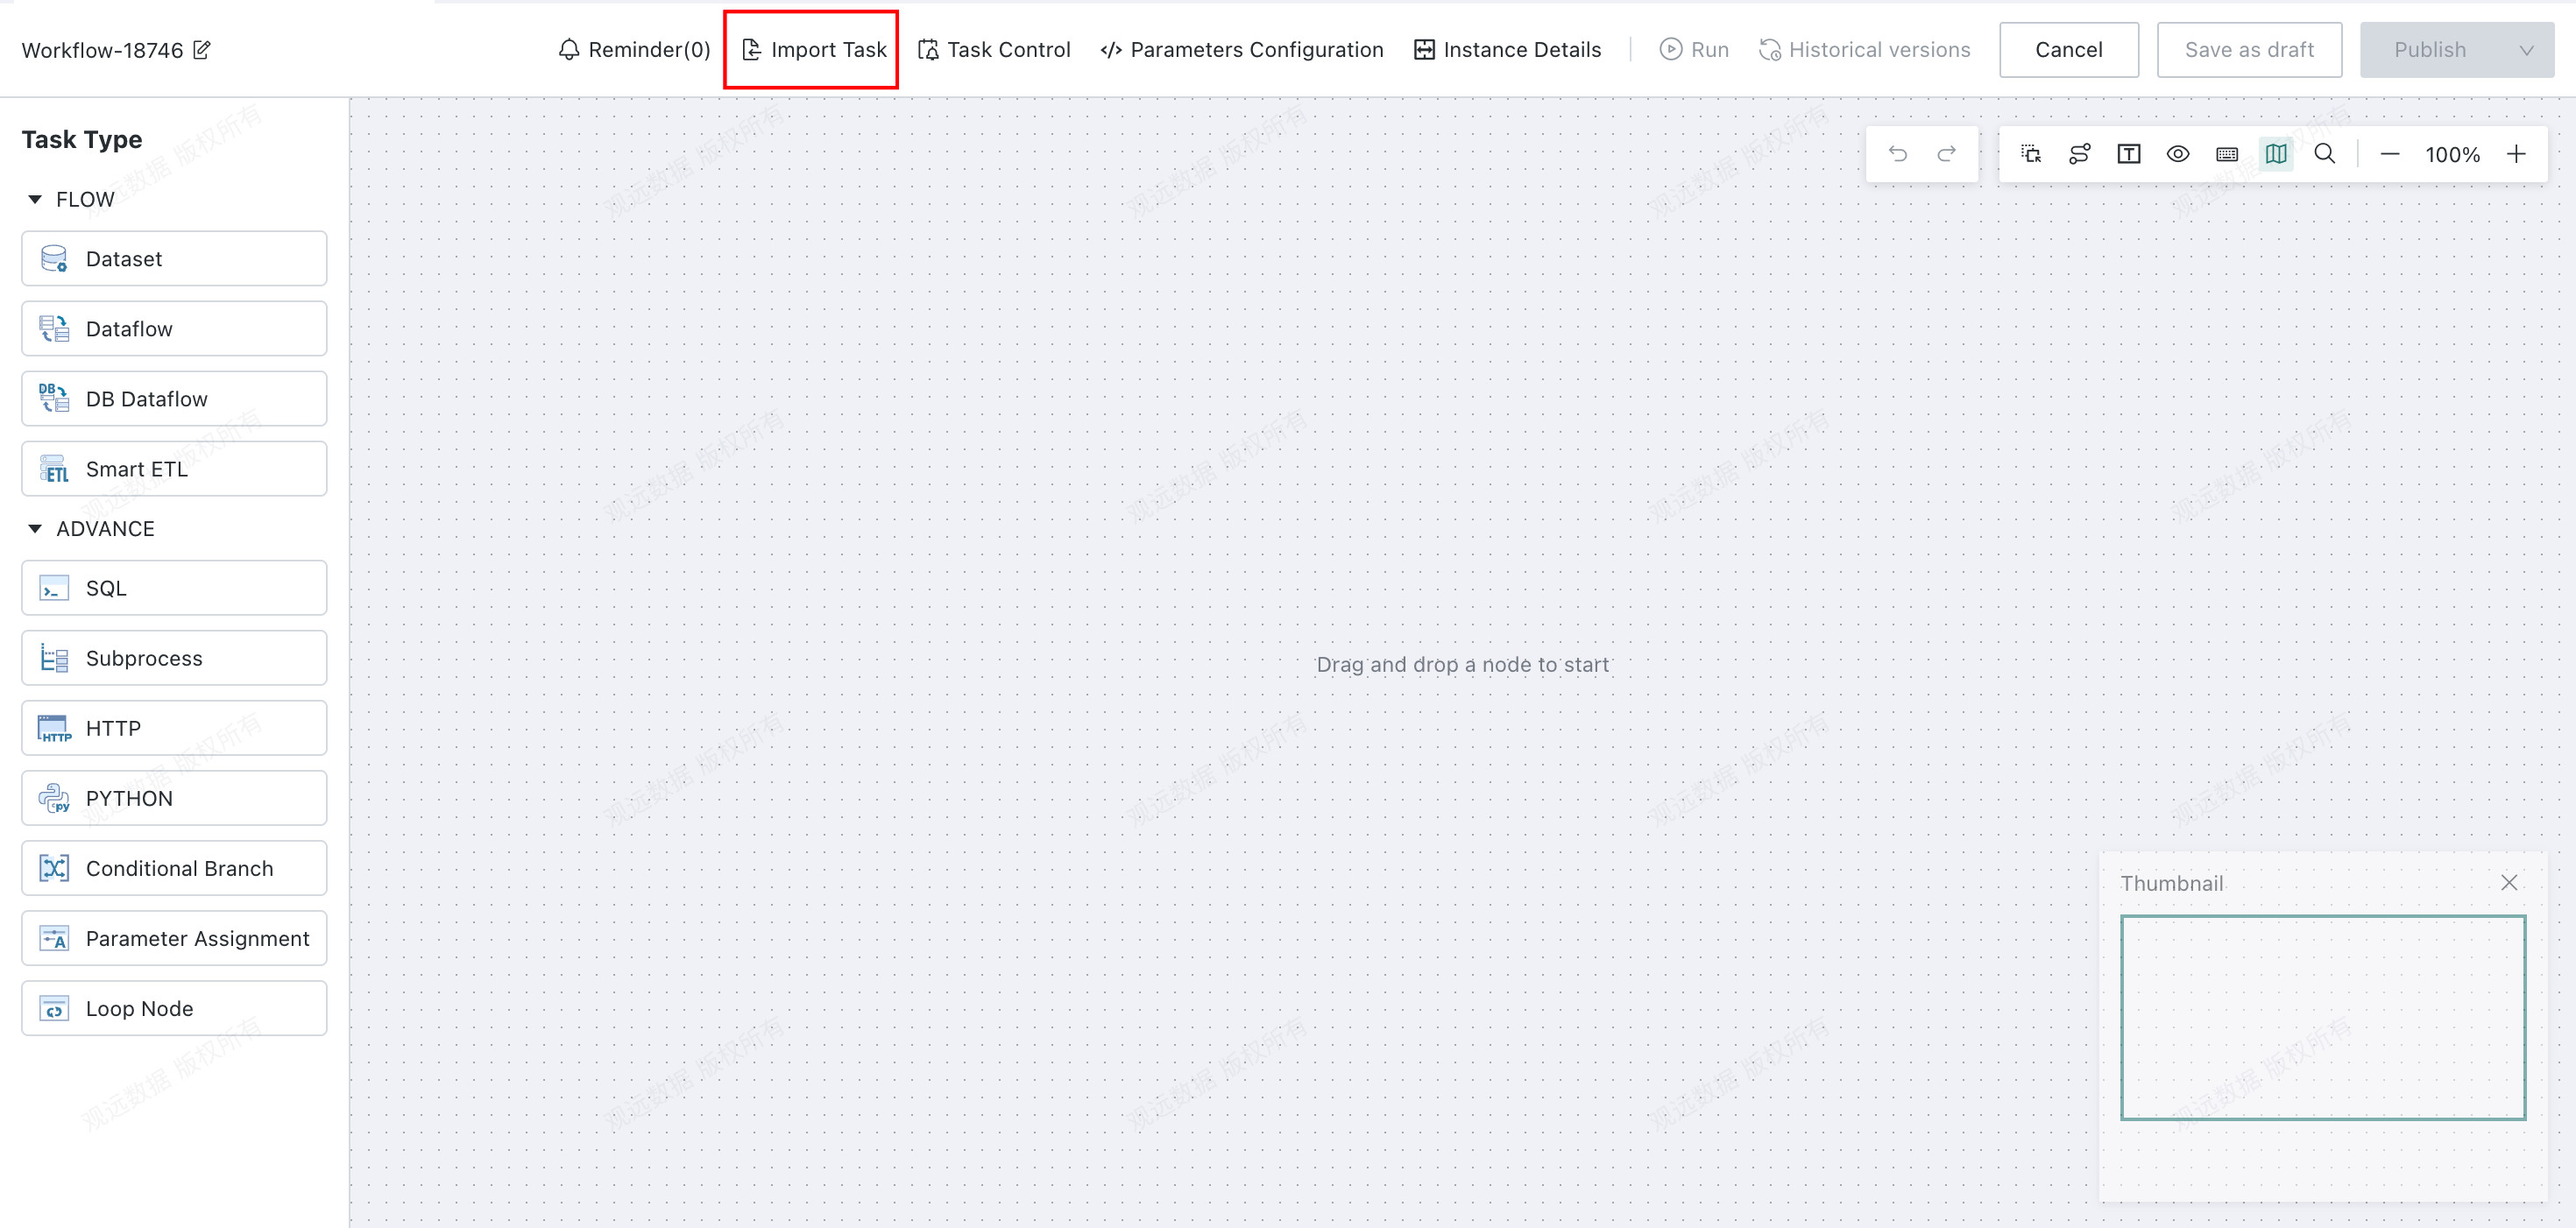
-
After completing the
Offline Development Taskconfiguration, clickSavein the upper-right corner.
-
Debug the nodes in the
Offline Development Task.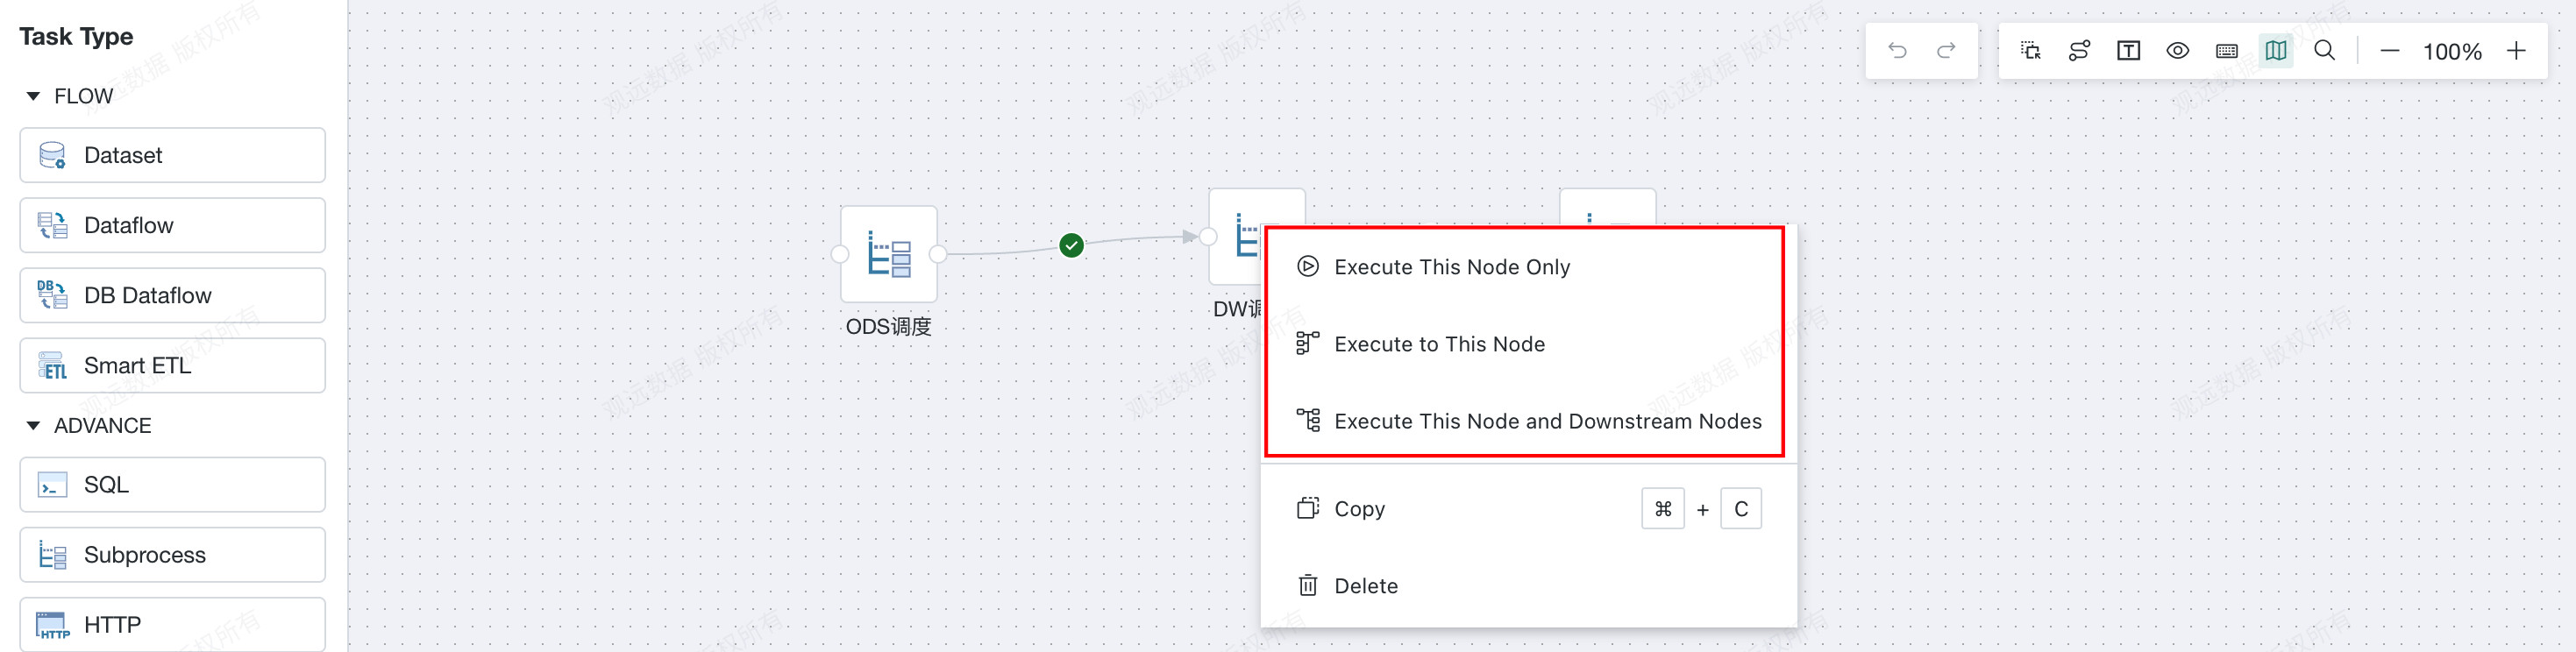
Manage Offline Development Tasks
After an Offline Development Task is created, you can view created tasks and their basic information, including task name, description, creator, and creation time, in the task list. You can then manage them centrally, including operations such as run, edit, and delete.
View a Task
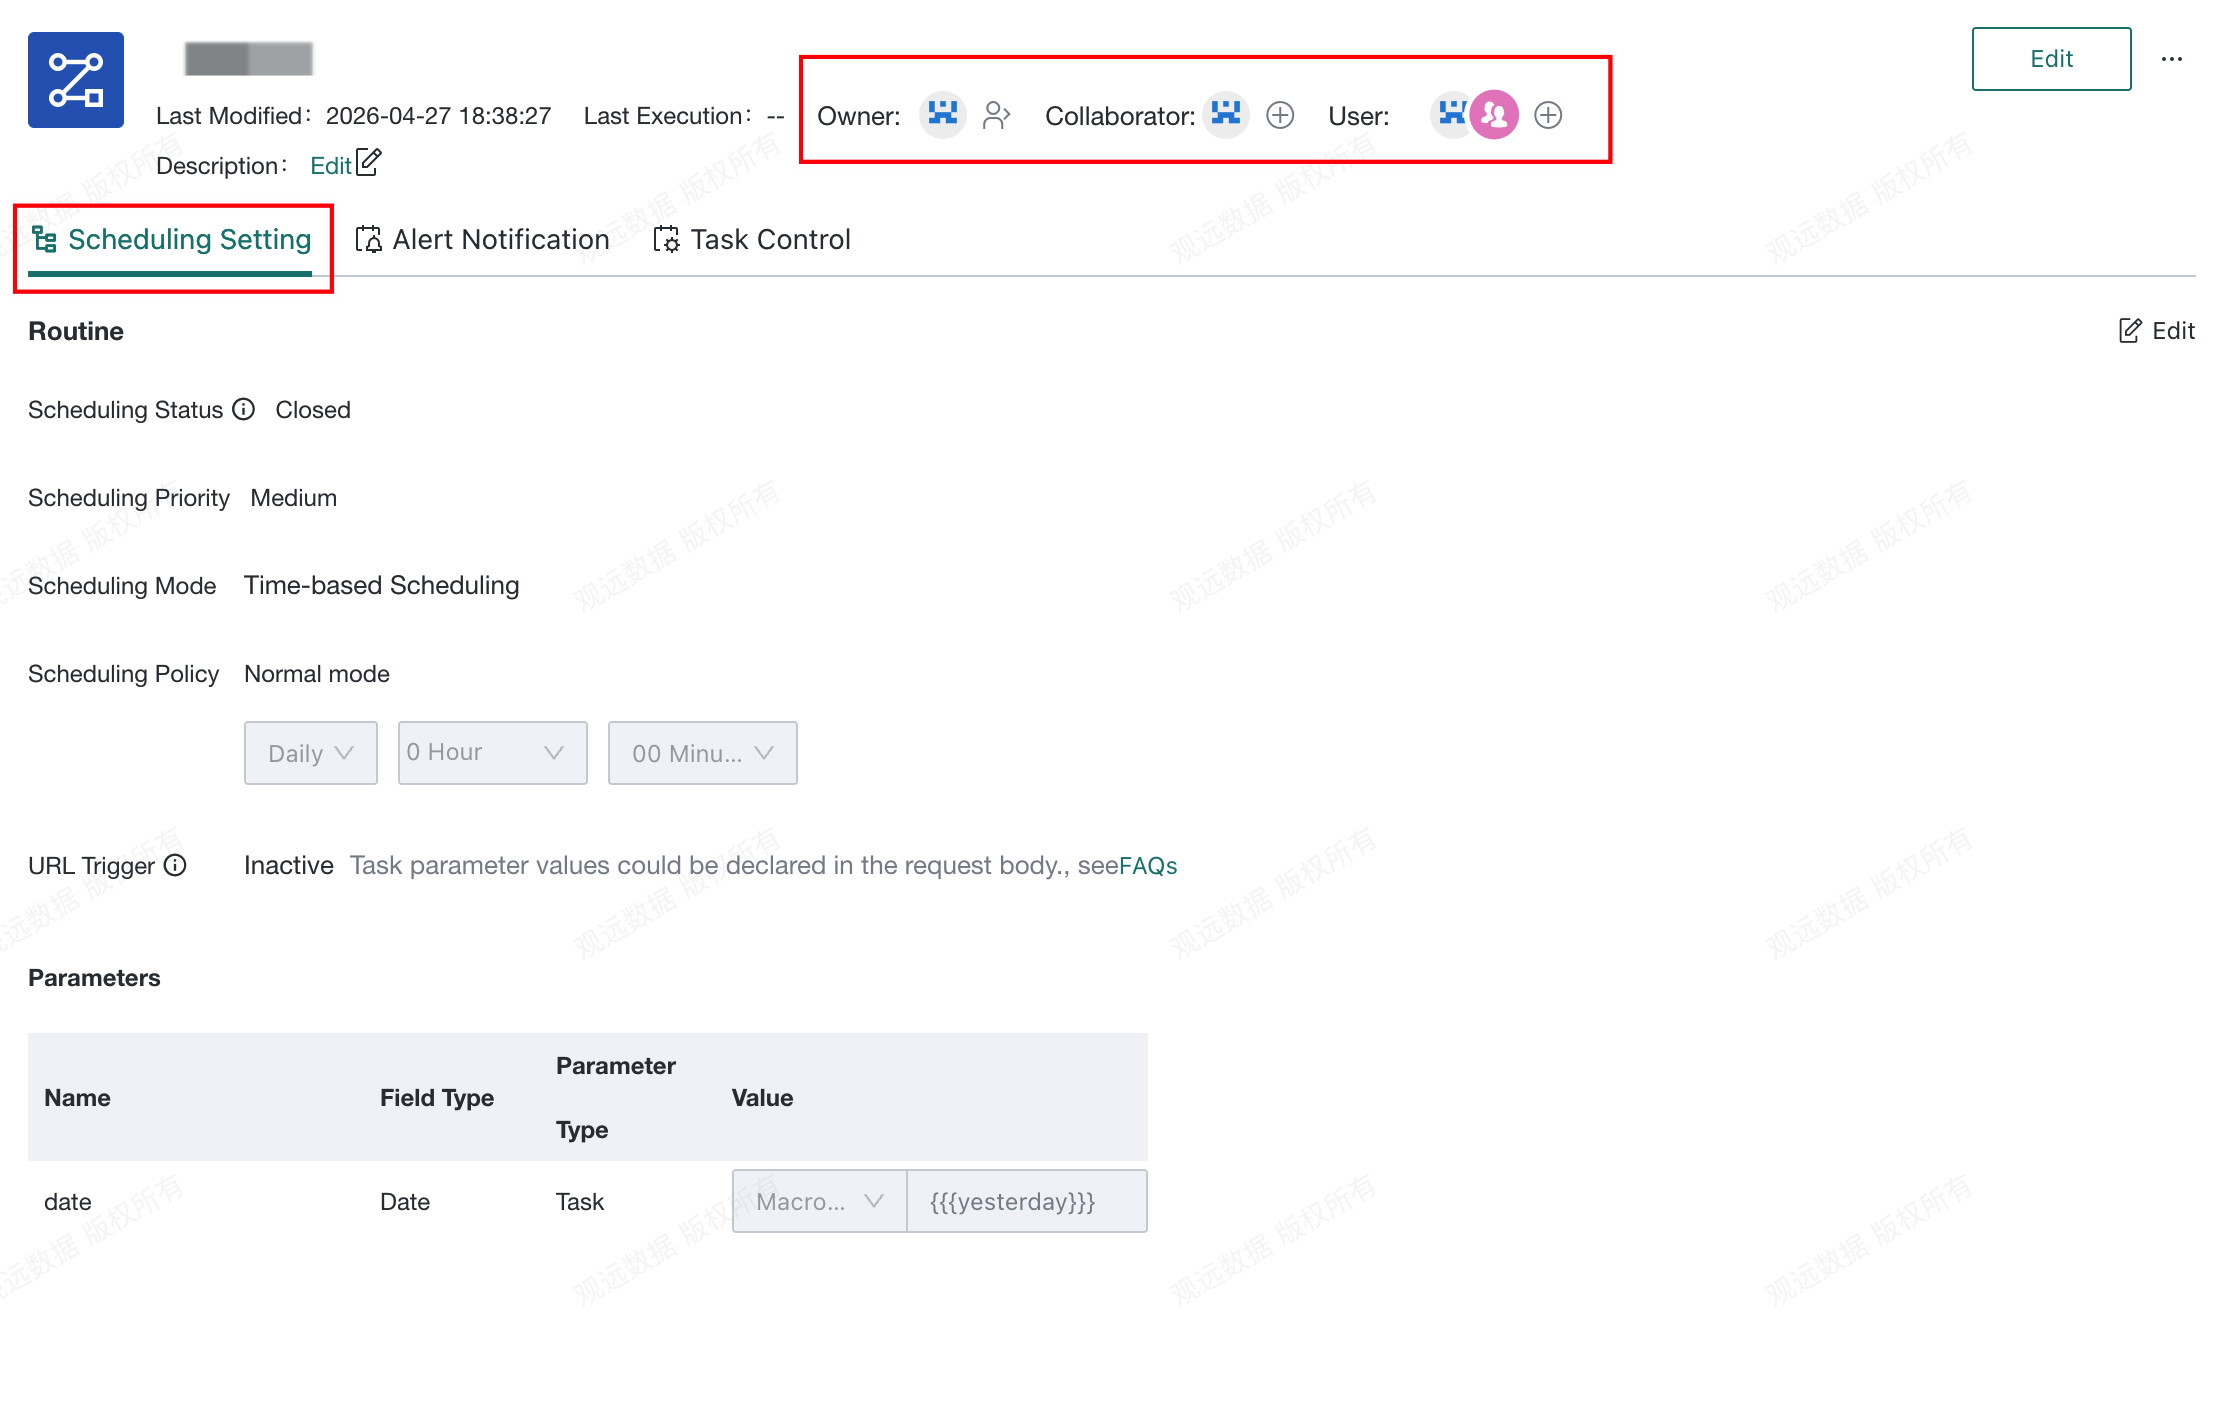
Click a target task in the list to open the task details page. This page displays task details and supports workflow property configuration such as permission management and Scheduling Setting.
- Permission management: view or manage the workflow
Owner,Collaborator, andUser. Scheduling Setting: modify scheduling status, scheduled execution strategy, scheduling parameters, and related settings.
Edit a Task
Modify an existing task. Click the Edit button to open the task editing page.

Run a Task
Run an existing task. Each run generates a task instance, which is used to view node status and perform operations management for that run.

Rename a Task
Rename the task. Workflows under the same path cannot have duplicate names. At present, this is supported only in the root directory.

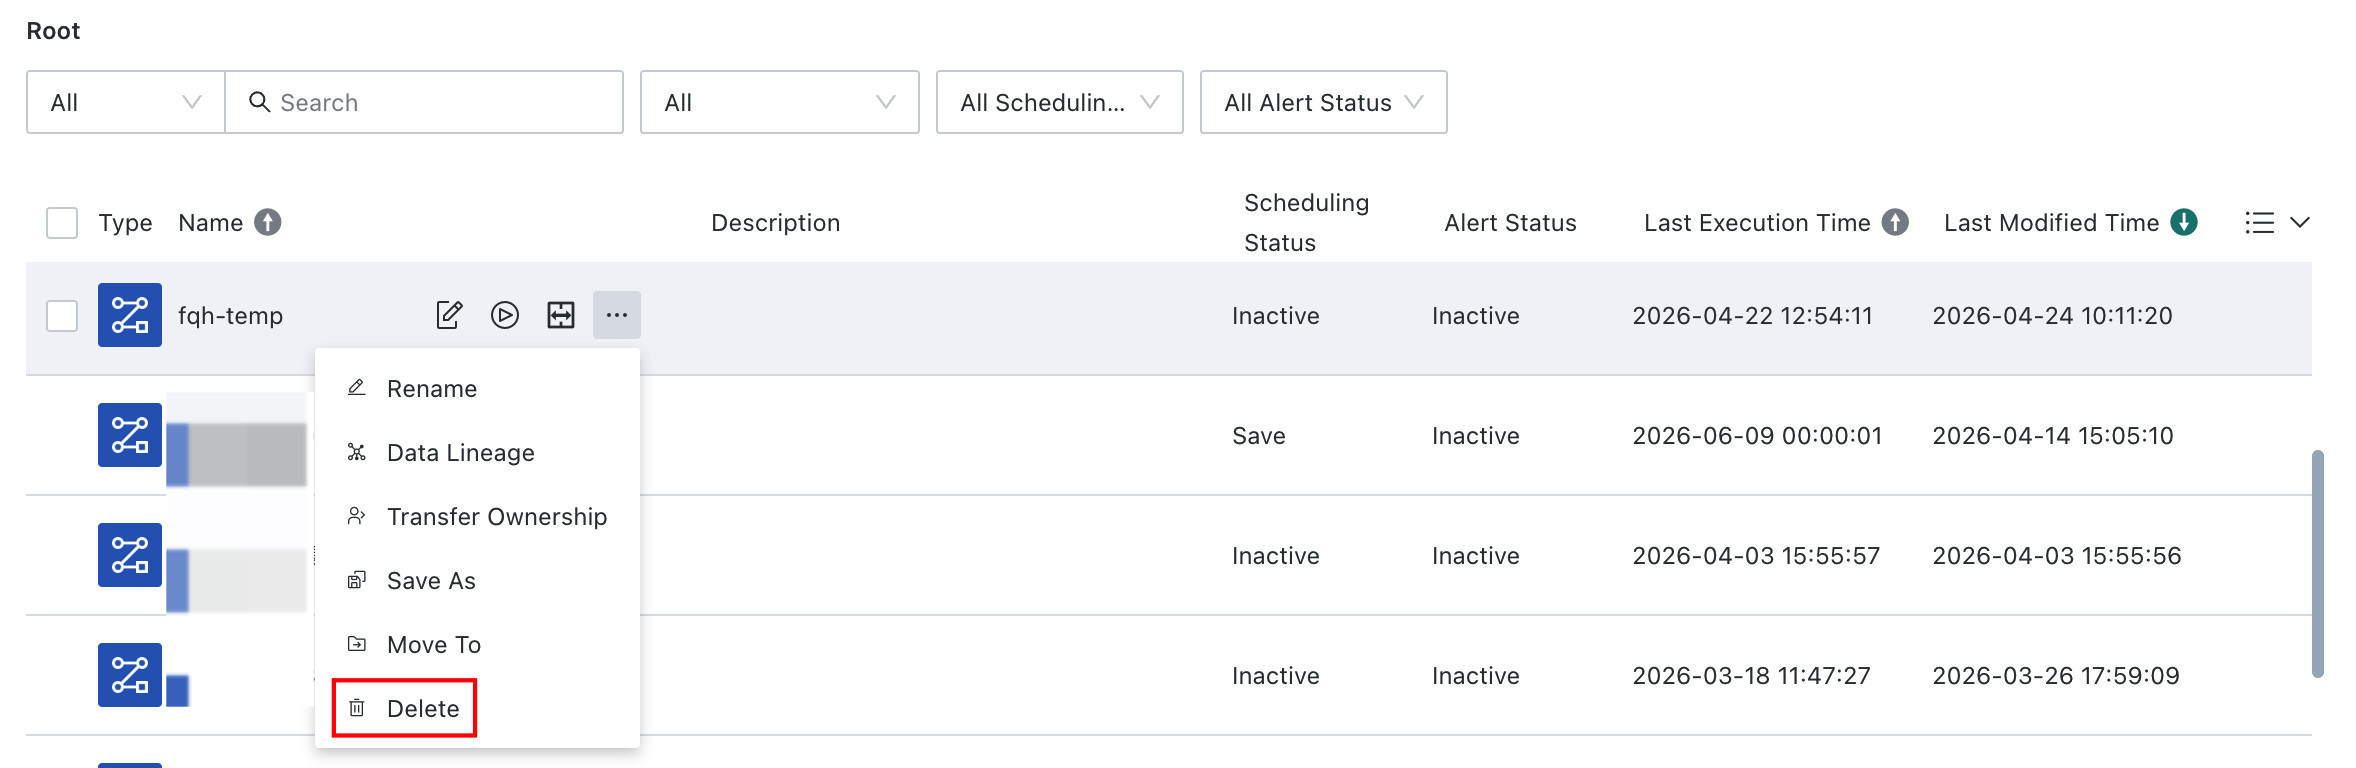
Delete a Task
Delete an existing task. After deletion, ETL resources referenced in the task revert to manual execution mode and can still be referenced by other tasks.
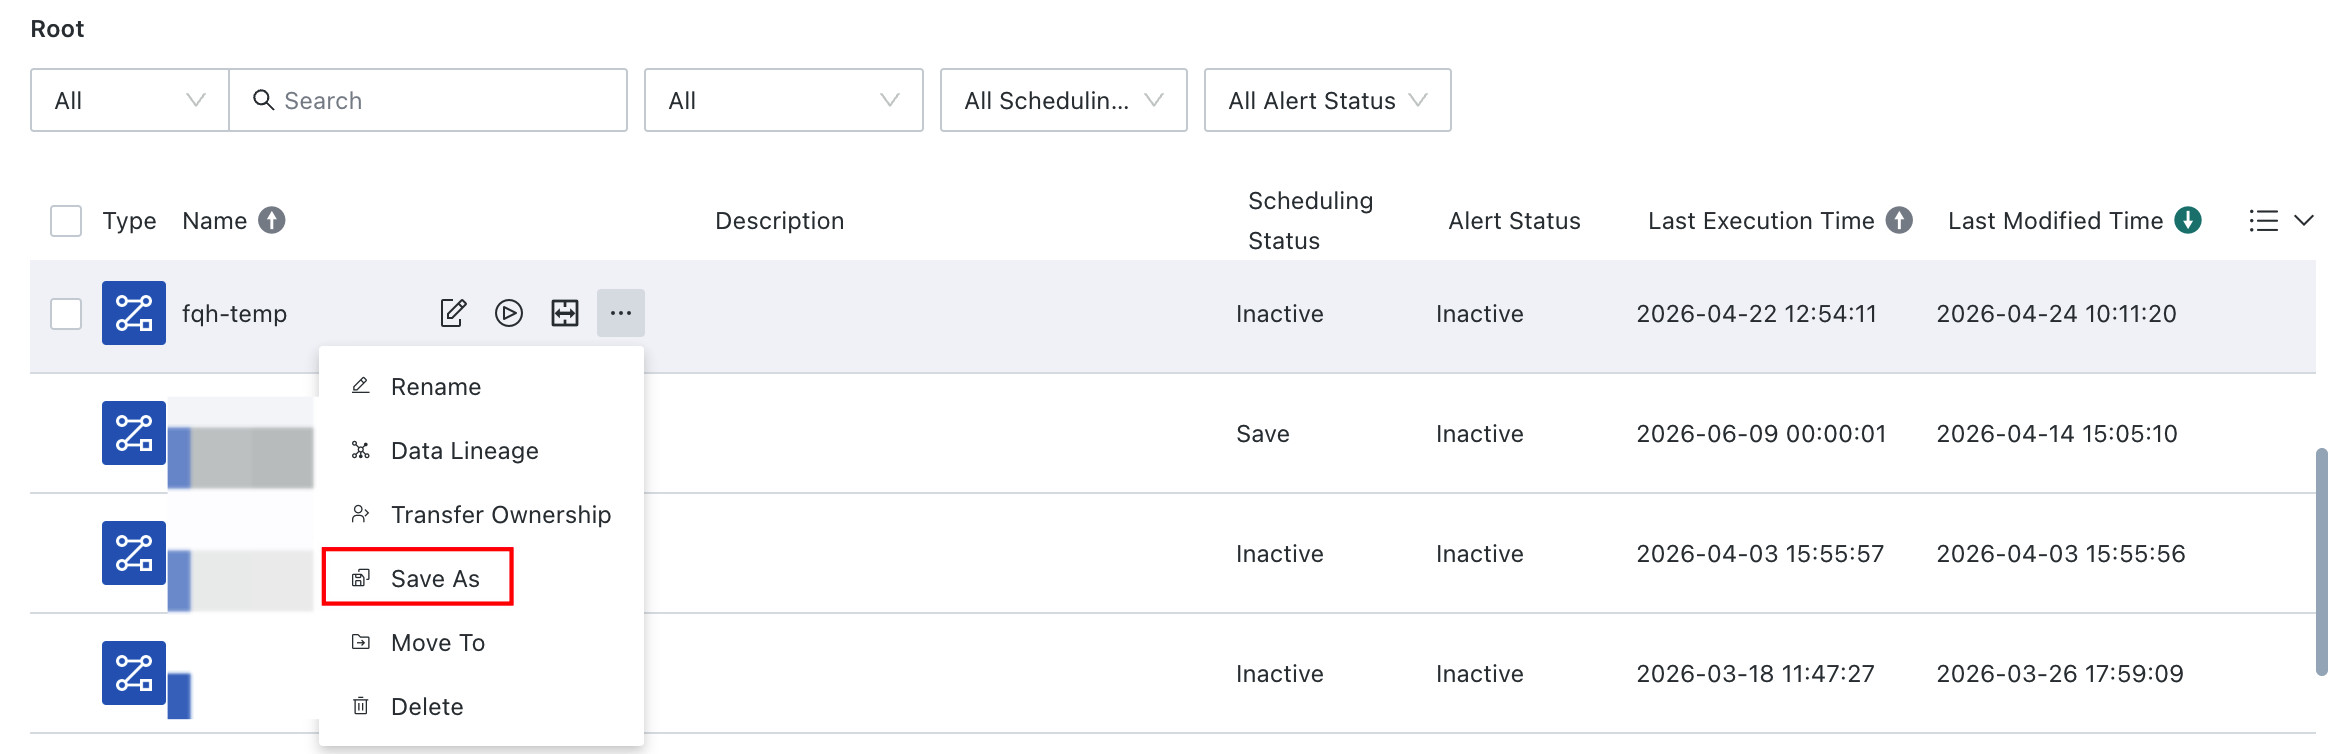
Save As
Save the task as an identical copy. The copy carries over node configuration and task parameters, but scheduling configuration, alerts, and task-level timeout control are not carried over. If the original task includes a Subprocess, the subtask itself is not recreated. The copy and the original task continue to reference the same Subprocess.
Change Permissions
In practical data development scenarios, to support collaboration, you can transfer the owner permission of an Offline Development Task to another user or grant access permission to other users.
-
Add access permission for another user: On the task details page, click the plus icon shown in the figure. In the
Manage Usersdialog, select the required user as needed.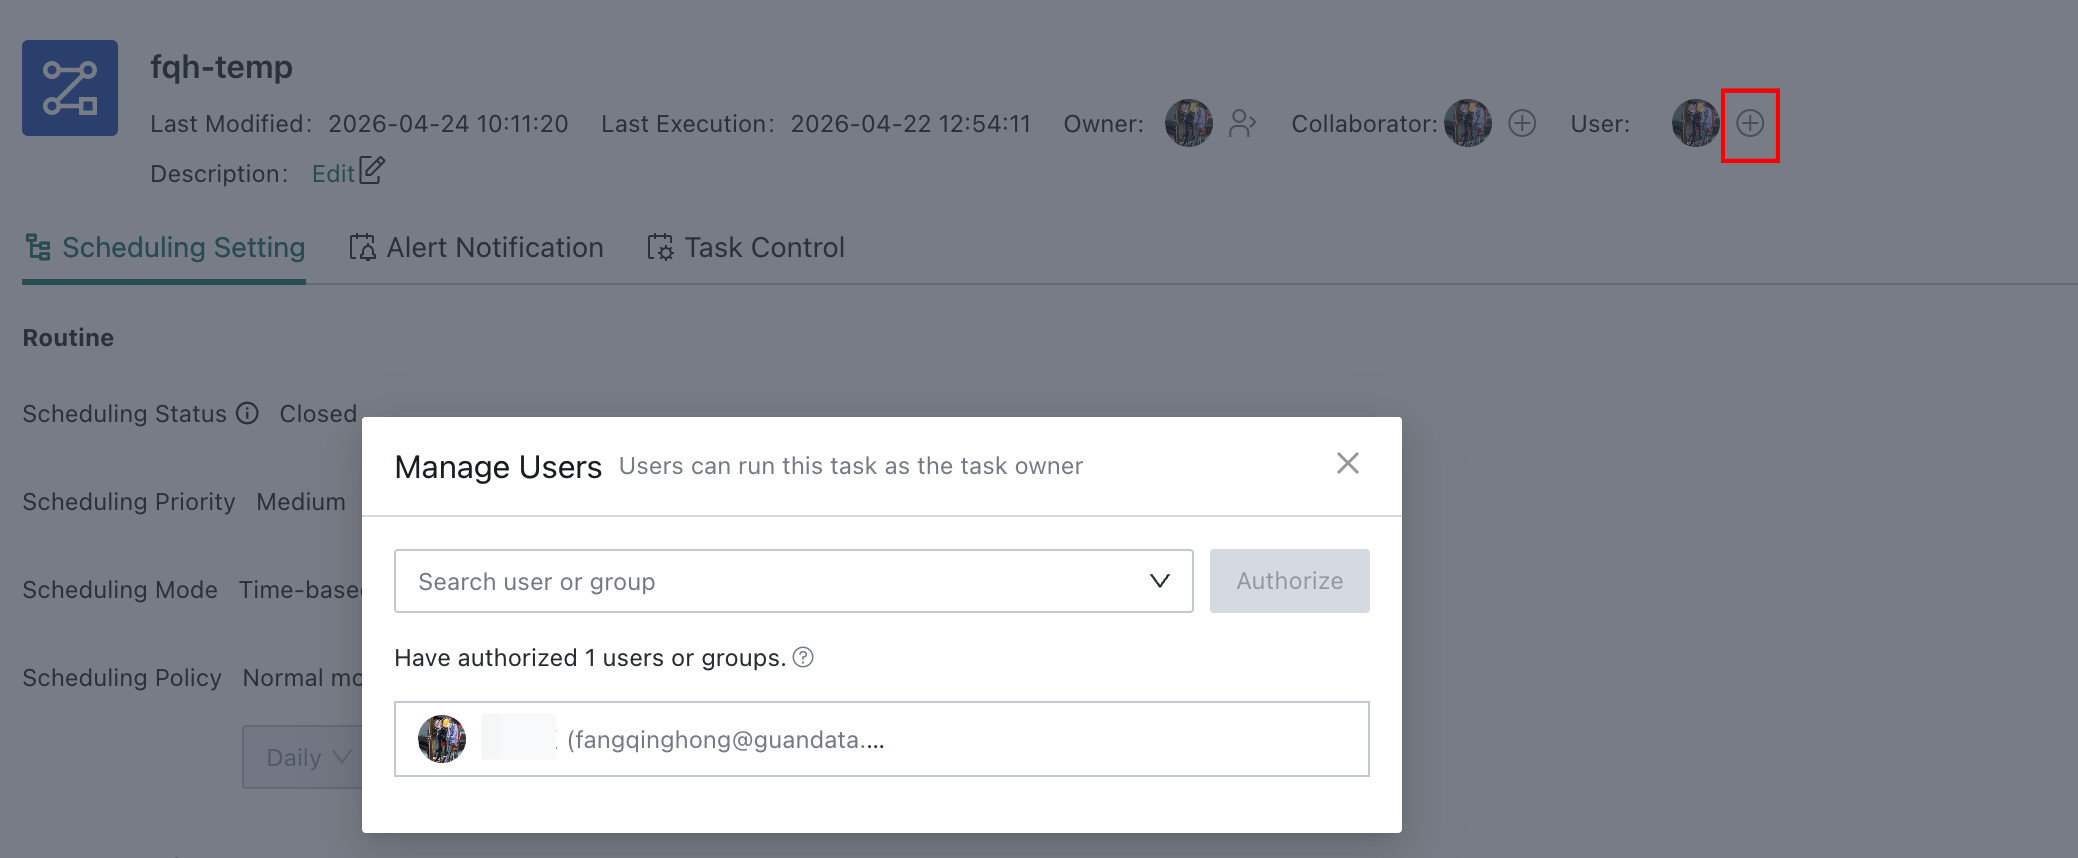
-
Transfer the owner of an
Offline Development Taskto another user: On the task details page or task list page, click owner transfer, select the user, and transfer the ownership of the task. To ensure the task continues running properly, referencedSubprocesstasks are transferred together, and corresponding permissions are added for the datasets andData Accounts used by the task.NoteIf a
Subprocessis also referenced by otherOffline Development Tasks, transferring ownership may cause those other tasks to fail at runtime. It is recommended to avoid task execution periods and perform the transfer in a coordinated maintenance window.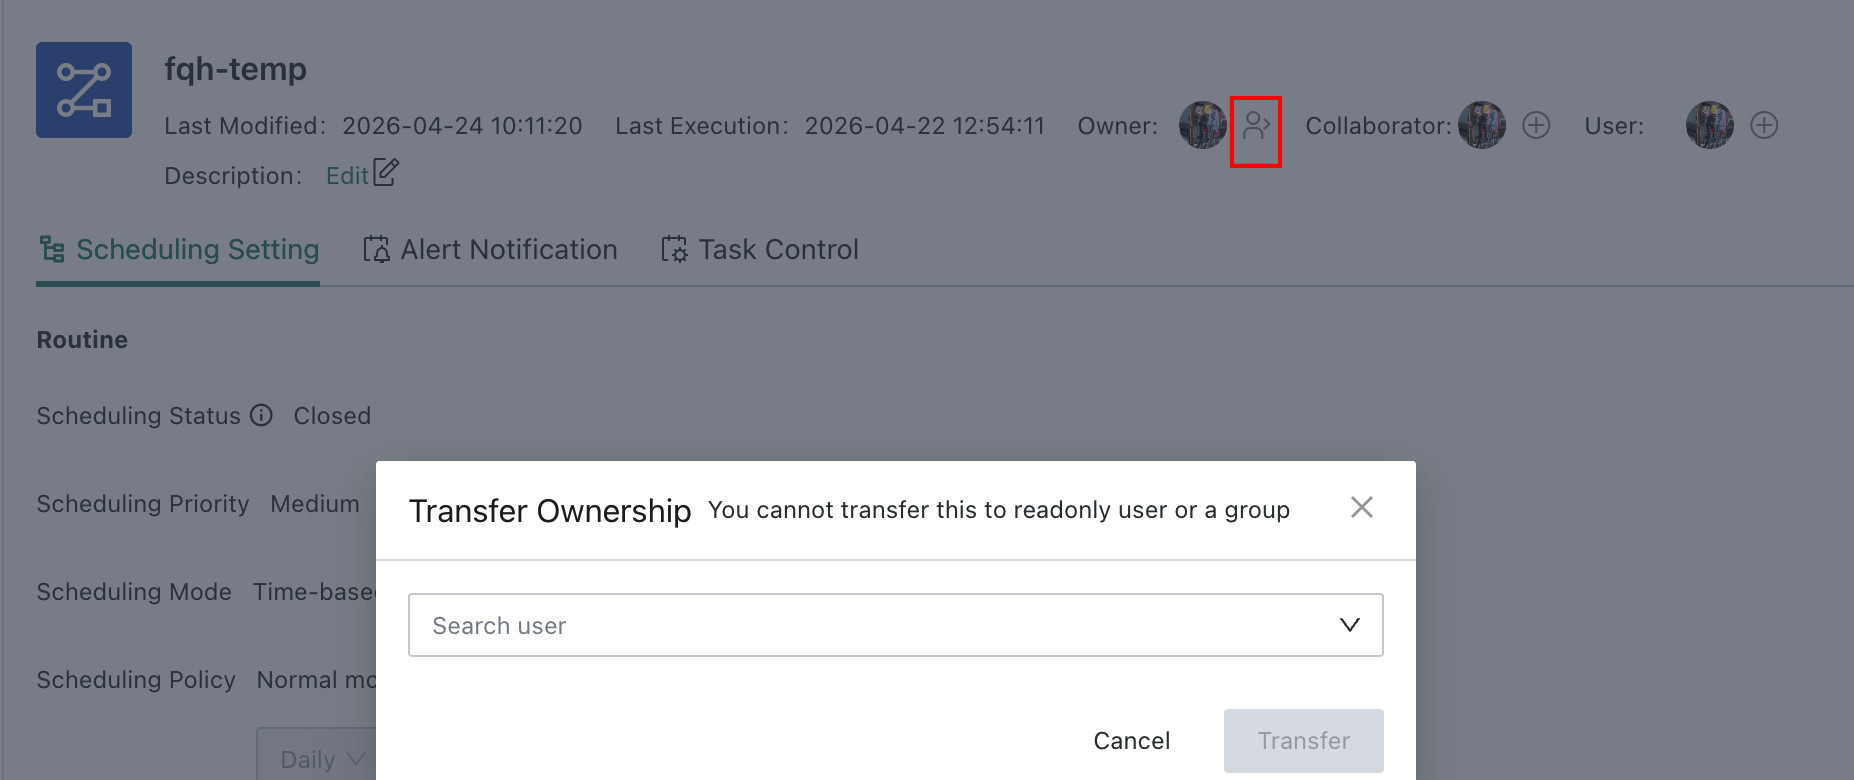
Run an Offline Development Task
After a workflow task is configured and saved, it can be run manually, through platform scheduling, or through a URL trigger. Users can specify parameter values for task parameters and global parameters under the corresponding run mode. If no values are specified, the default parameter values are used.
Manual run entries:
-
Workflowedit page >Save, Run, and Exit
-
Workflowdetails page >... > Run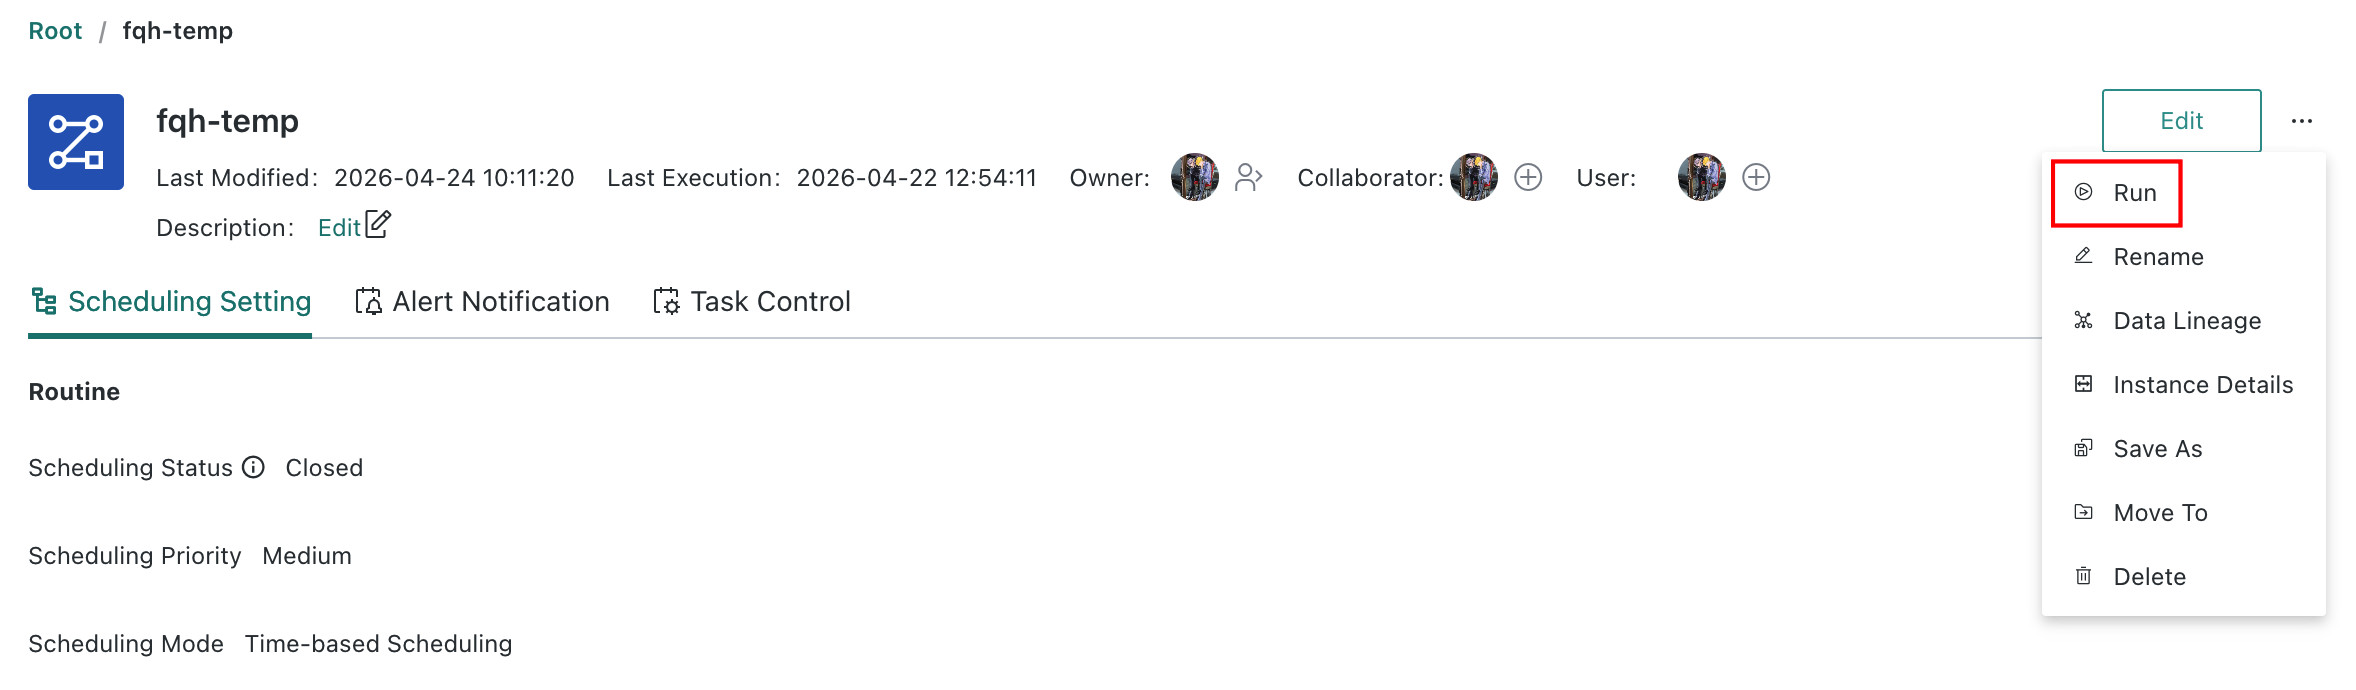
-
Workflowlist page >Run
Batch Backfill
When the processing logic of an Offline Development Task changes and historical data needs to be reprocessed with the new logic, users can enter multiple sets of parameter values at the manual run entry point to trigger multiple backfill task instances.
-
Click
Run.
-
Select
Batch Backfill.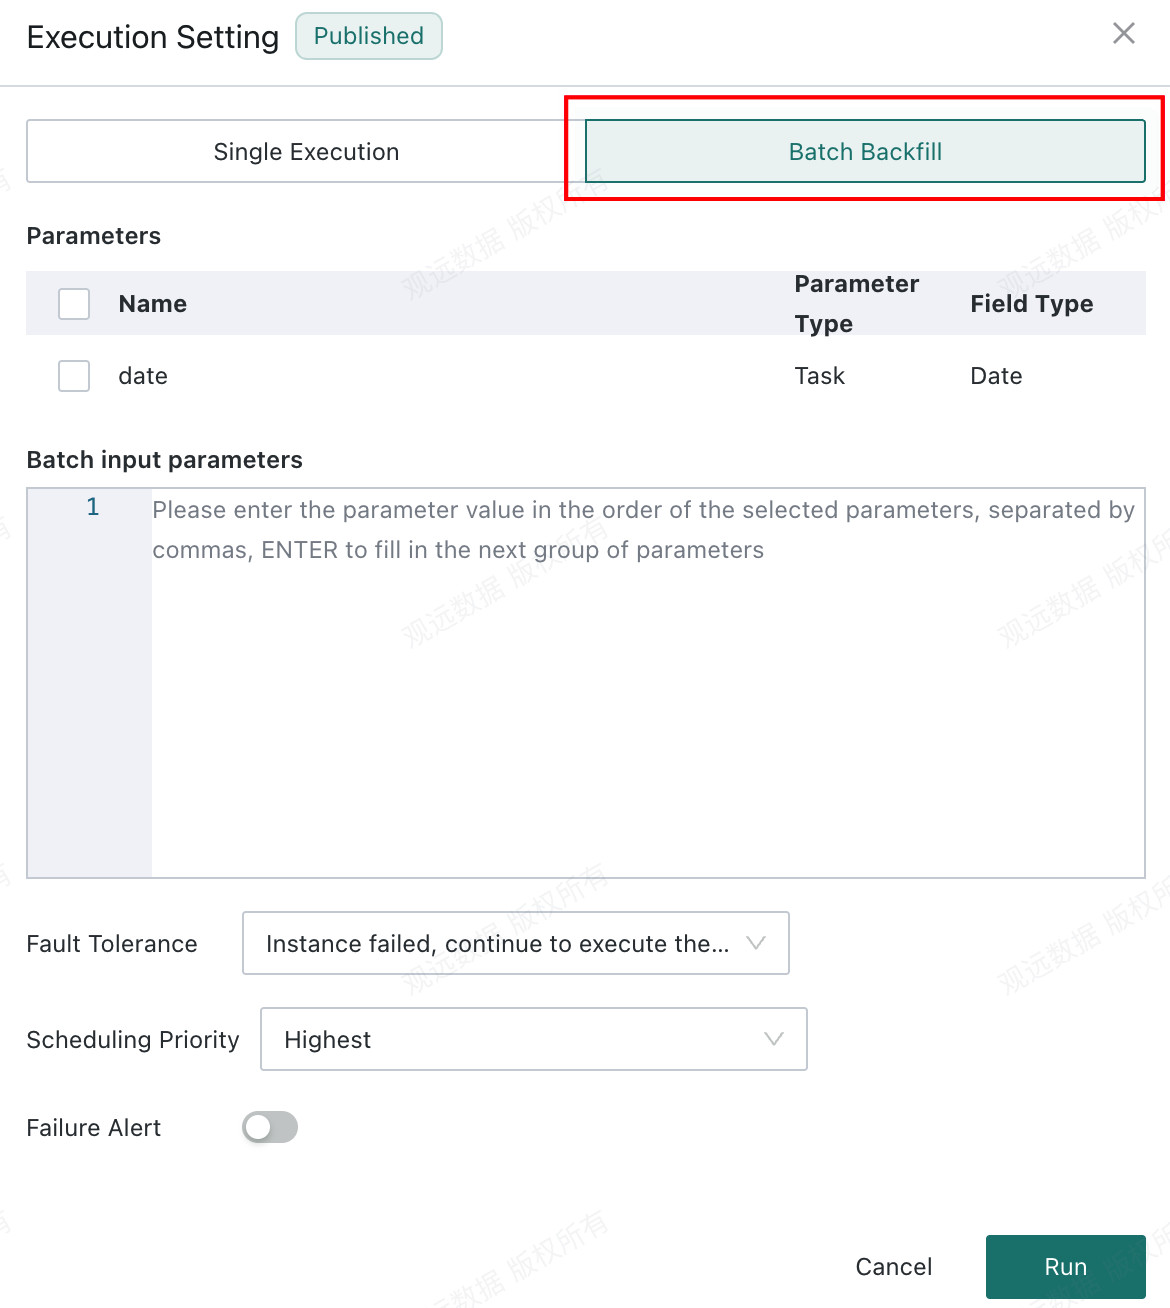
-
Select the parameters that need to receive multiple input values. Parameters that are not selected use their default values.
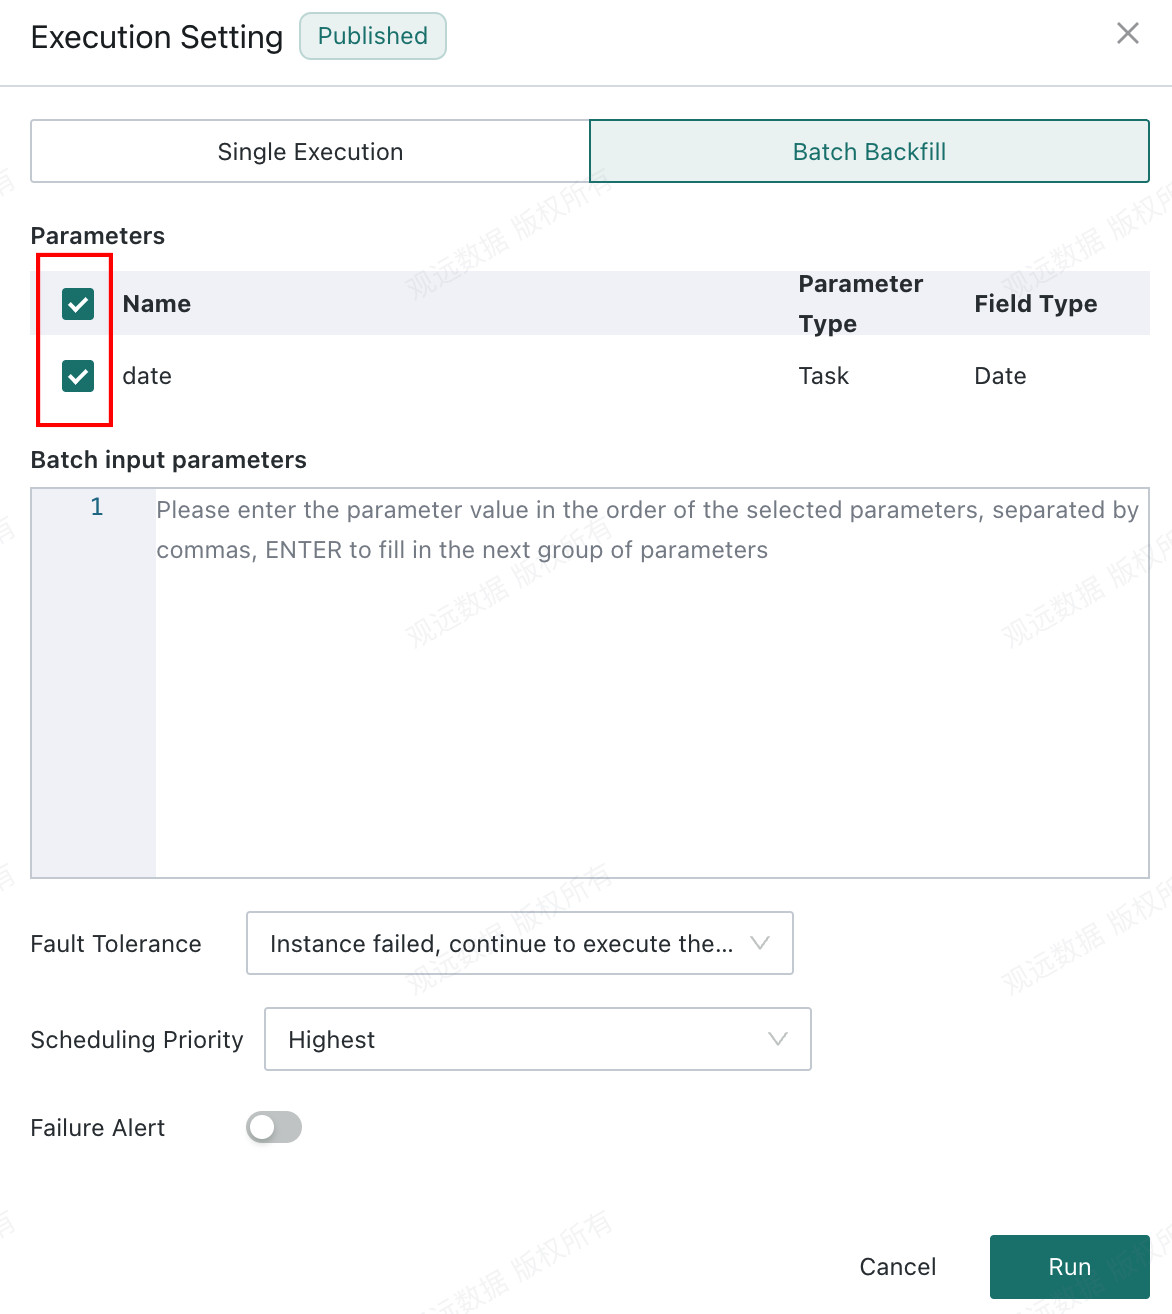
-
Enter parameter values once in the order of the selected parameters, separating values with commas. Use a new line for each group of parameters.
Example:
20251001,120251002,220251003,3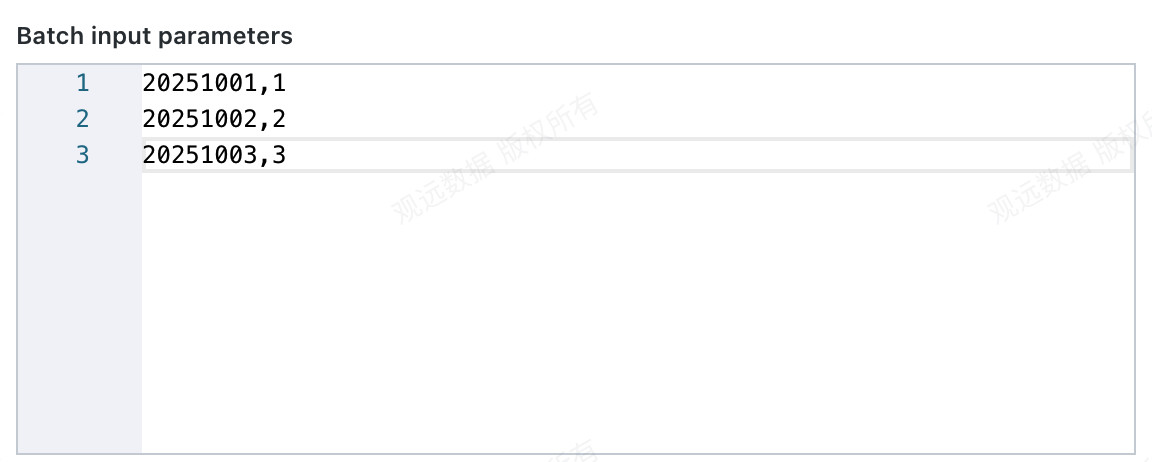
-
Click
Runand view the batch-backfill task instances on theTask Monitorpage.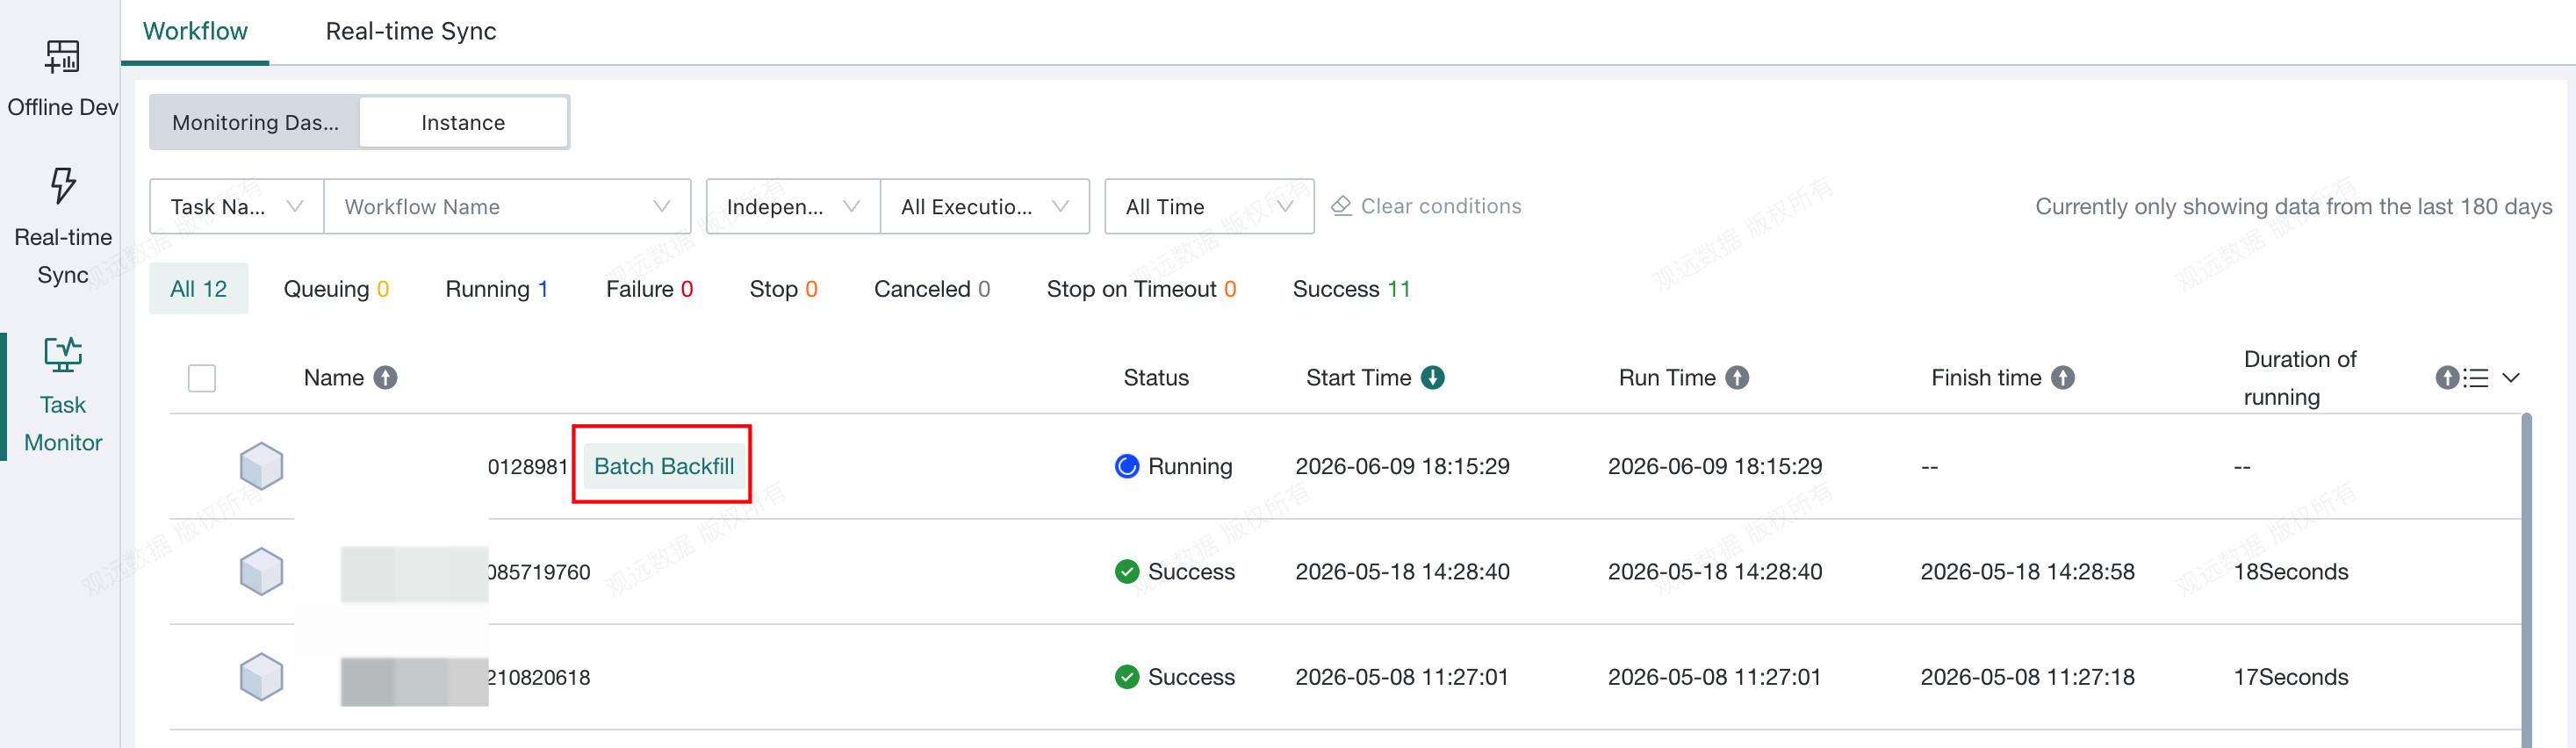
-
Open the task instance and switch between batch-backfill instances. By default, the most recent instance is displayed. After the run is complete, you can rerun a specific backfill instance.

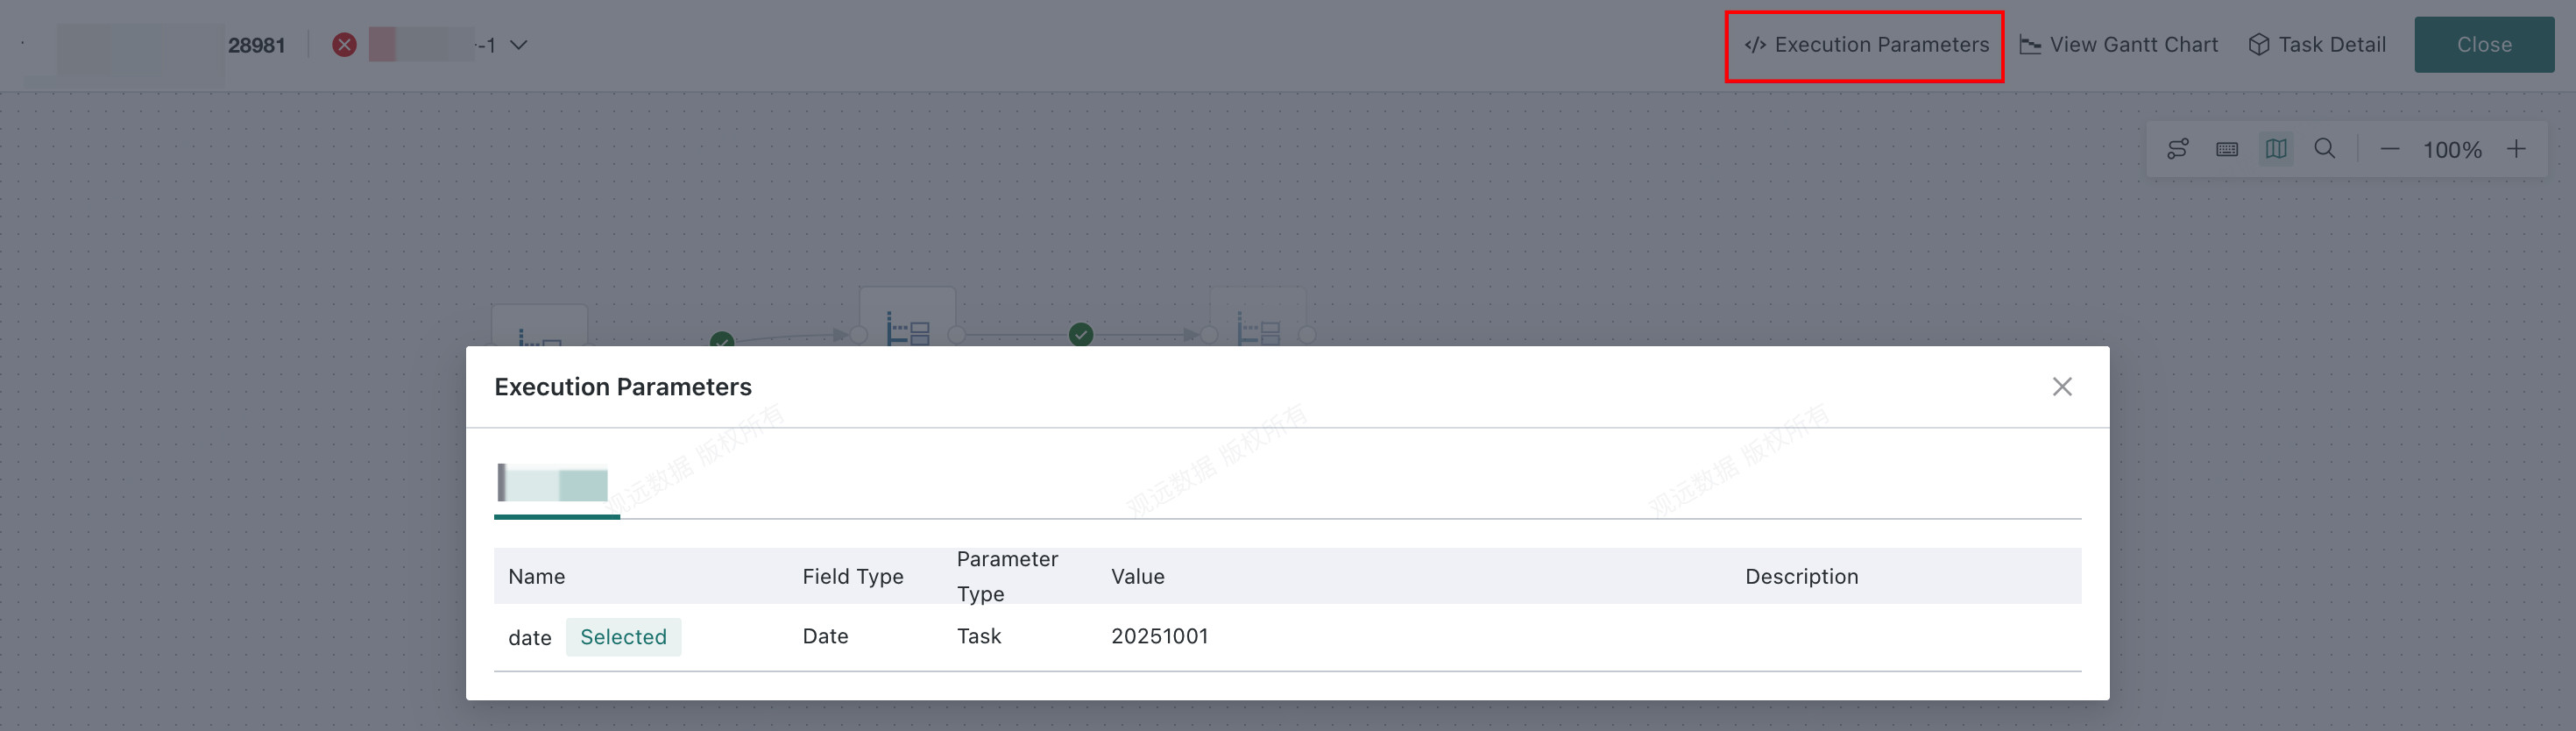
-
View the parameters passed into a specific batch-backfill instance.
Parameter Configuration
You can create Workflow Parameters based on actual business needs. Their scope is the current Workflow. When the workflow is executed, the parameters are dynamically replaced with their corresponding values and take effect in steps such as data filtering.
Workflow parameter definition:
Click Parameter List > Settings to add, edit, or delete Workflow Parameters.
- Name (required): the name of the workflow parameter. Chinese characters, numbers, letters, and underscores are supported. The name cannot be empty, and duplicate parameter names are not allowed.
- Type (required): the storage type of the workflow parameter. Supported types are text, numeric, and date.
- Value (optional): the default value of the workflow parameter, which can be specified dynamically at runtime.
- Description (optional): used to explain the usage of the current workflow parameter.
In addition, workflow parameter definitions can directly reference global parameters.
Workflow parameter reference format: [DYNAMIC_PARAMS.ParameterName]. If no parameter value is dynamically passed in, the default value defined in the workflow parameter is used.
Task Orchestration
Task orchestration refers to the process of arranging tasks involved in a business scenario according to their execution order and dependency relationships.
In Offline Development Task orchestration, connection lines are used to connect different task nodes in order to define execution order and scheduling logic. The arrow direction indicates task run order, while the line style indicates the upstream/downstream scheduling relationship. Currently, three scheduling relationships are supported: success scheduling, failure scheduling, and sequential scheduling. The overall logic is as follows:
- Success scheduling: when the upstream task completes successfully, the downstream task is triggered immediately. If the upstream task fails or ends in another non-success state, the downstream task is not executed.
- Failure scheduling: when the upstream task completes with a failed result, the downstream task is triggered immediately. If the upstream task succeeds or ends in another non-failure state, the downstream task is not executed.
- Sequential scheduling: once the upstream task completes, the downstream task is triggered immediately regardless of whether the upstream result is success, failure, or another status.
- If a downstream task has multiple upstream dependencies, the downstream task is triggered only after all dependency conditions are satisfied.
- If a task has no upstream dependency, it is triggered immediately after the workflow starts running.