Custom Webhook
Overview
To send subscription and alert messages to enterprises through multiple channels, the platform supports Custom Webhook. You can configure the delivery endpoint as needed, and subscription or alert messages will be sent to the configured address. This article explains how to configure Custom Webhook.
Procedure
-
On the Admin Center > Enterprise Configuration > Custom Webhook page, click Create Custom Webhook.

-
Fill in the Custom Webhook information.
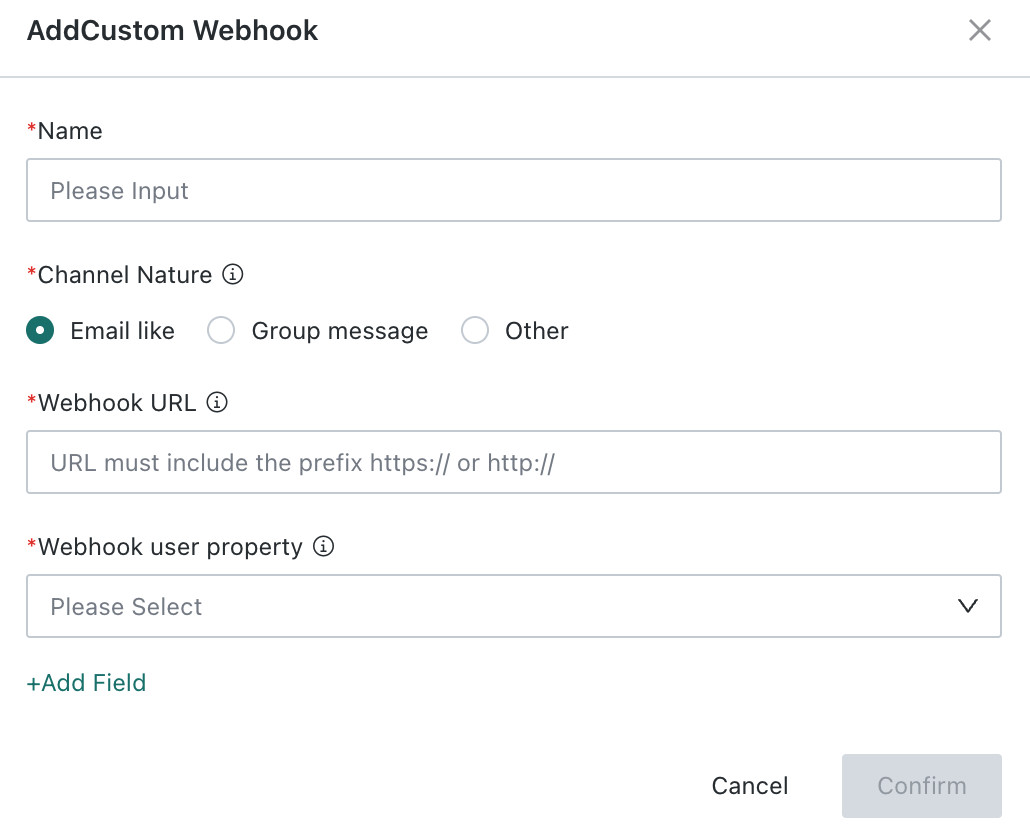
- Required > Name: enter the identifier name of the channel, for example, Customer Service Notification Channel, for easier management and recognition later.
- Required > Channel Type: choose the message delivery format of the channel.
- Email-like: supports configuration of recipients, CC recipients, and BCC recipients. Recipients are required.
- Group Message: does not support configuration of specific recipients.
- Other: supports configuration of specific recipients. Recipients are required.
- Required > Delivery Address: enter the target endpoint address for receiving pushed messages.
- Required > User Attribute for Delivery: choose the target user group attribute associated with the channel.
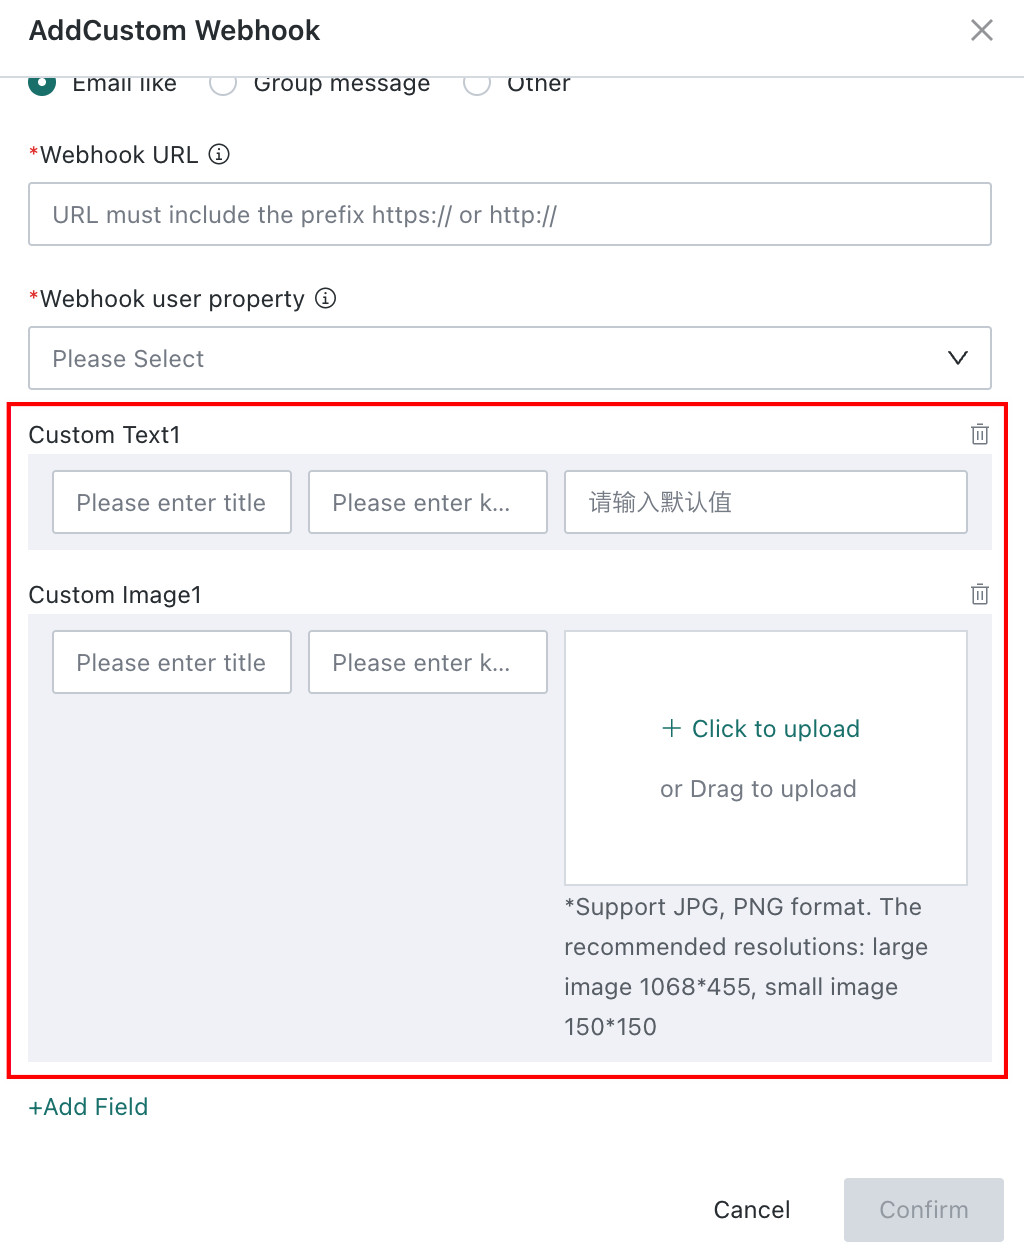
- Optional > Add Fields: add extra configuration fields for the channel. Both text and images are supported, and multiple fields can be added.
-
After completing the configuration, click OK to create the channel. The Custom Webhook can then be selected later on the subscription or alert configuration page.