Quick Date Range Filter
1. Overview
Quick date range type filters can provide several date range filtering options without configuring datasets and date fields, enabling quick date range selection.

2. Operation Steps
2.1. Create Filter
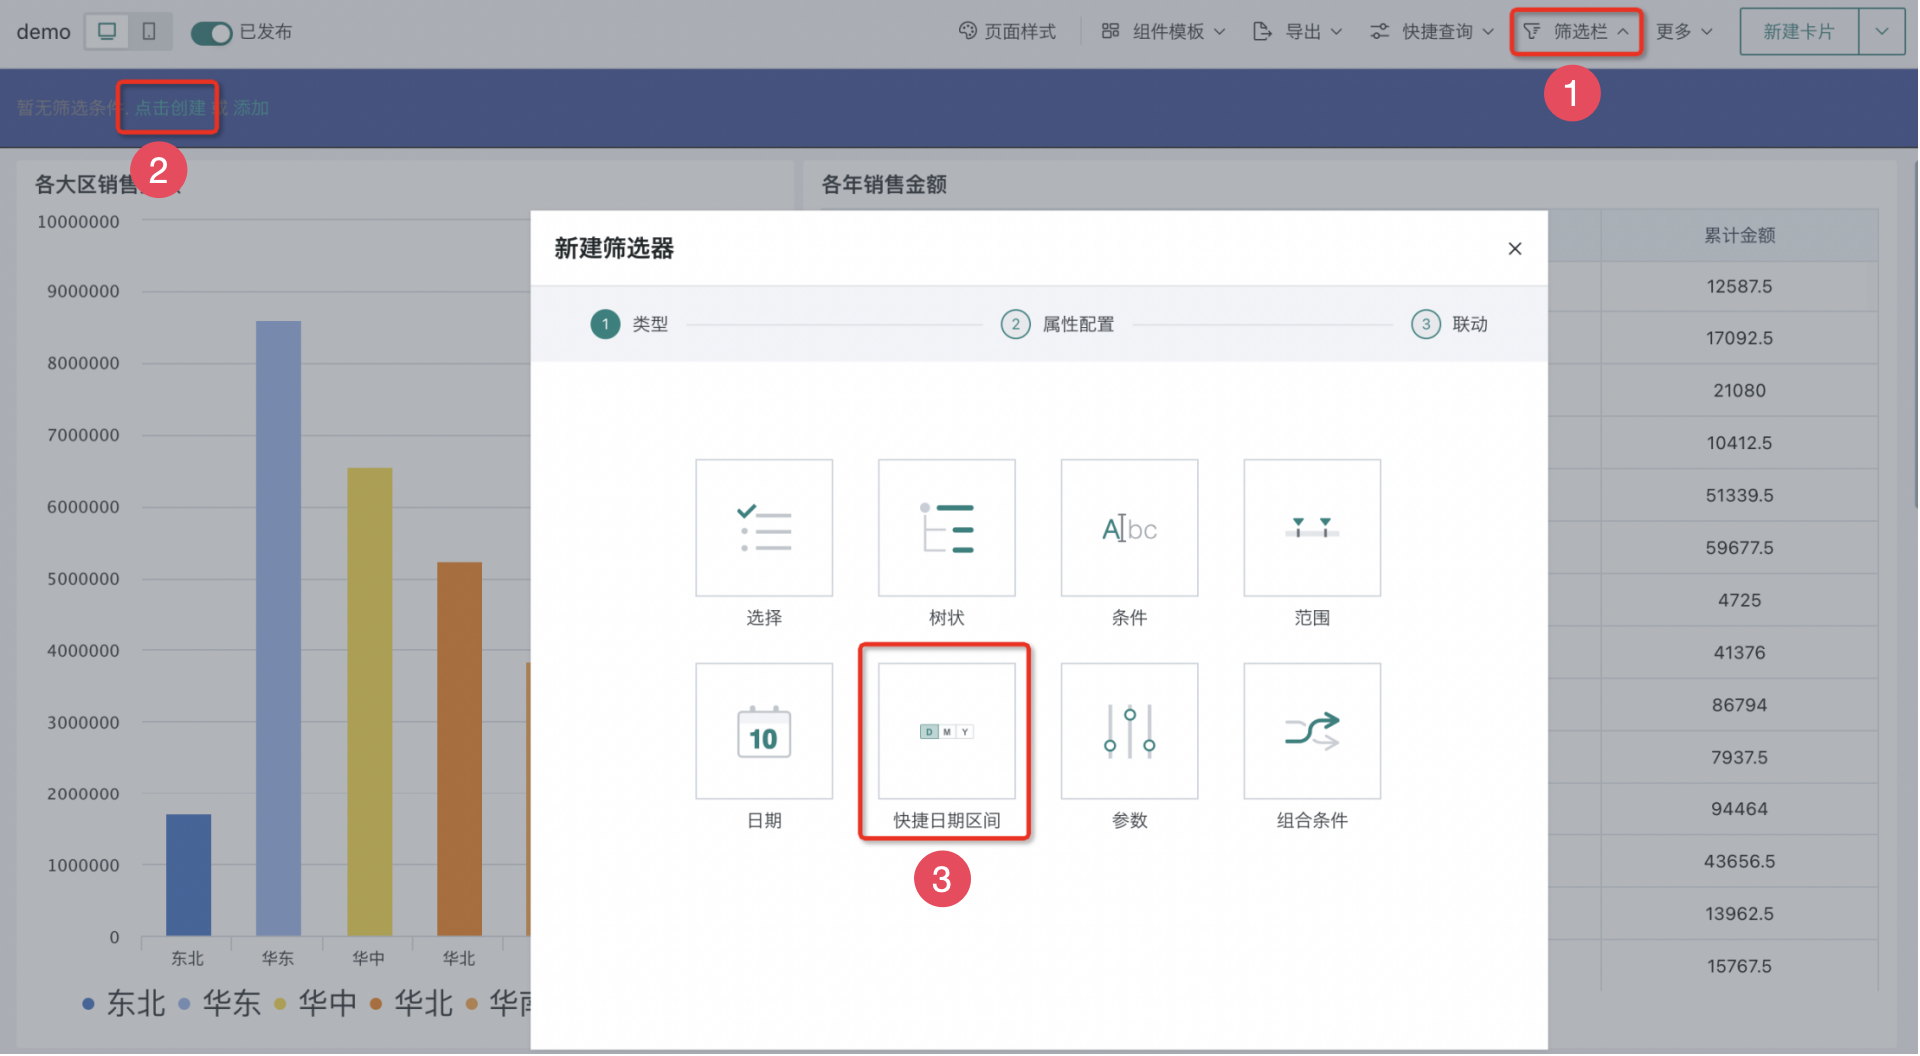
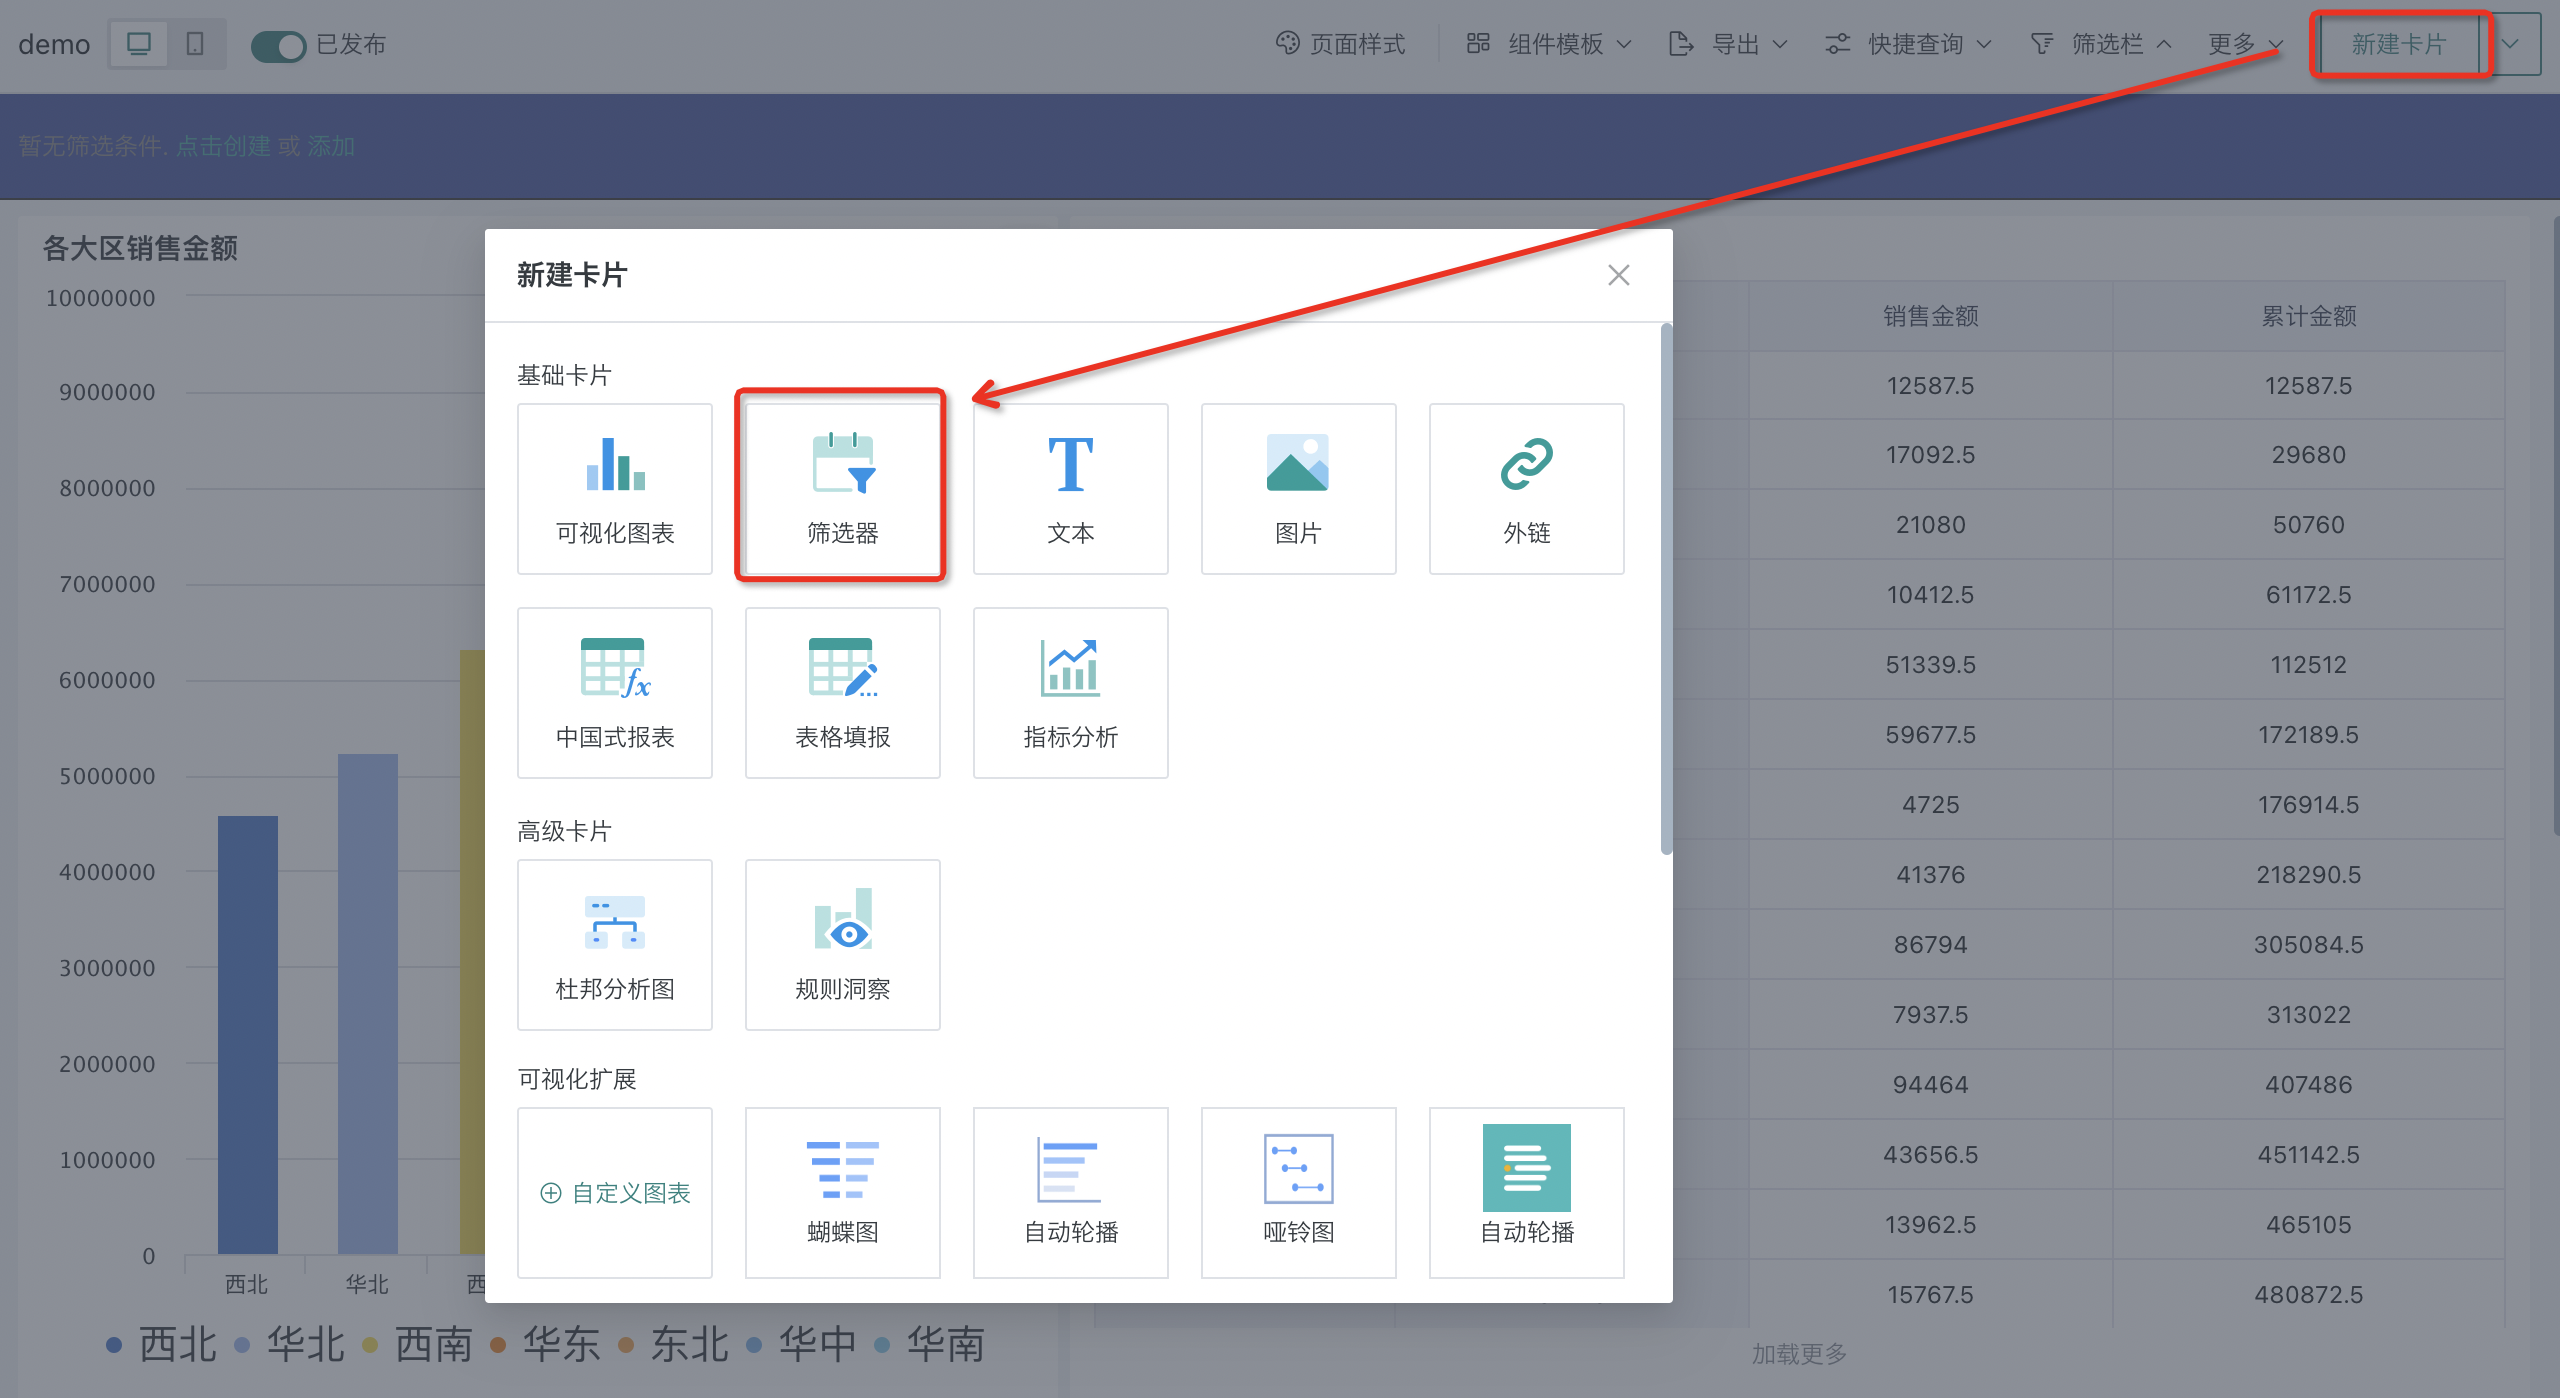
On the page, you can create a quick date filter in the filter bar, or create a quick date filter in the "New Card > Select Card Type" page.
- Filter bar > New filter:
- Page > New card > Select new filter:
2.2. Configure Quick Date Range Filter
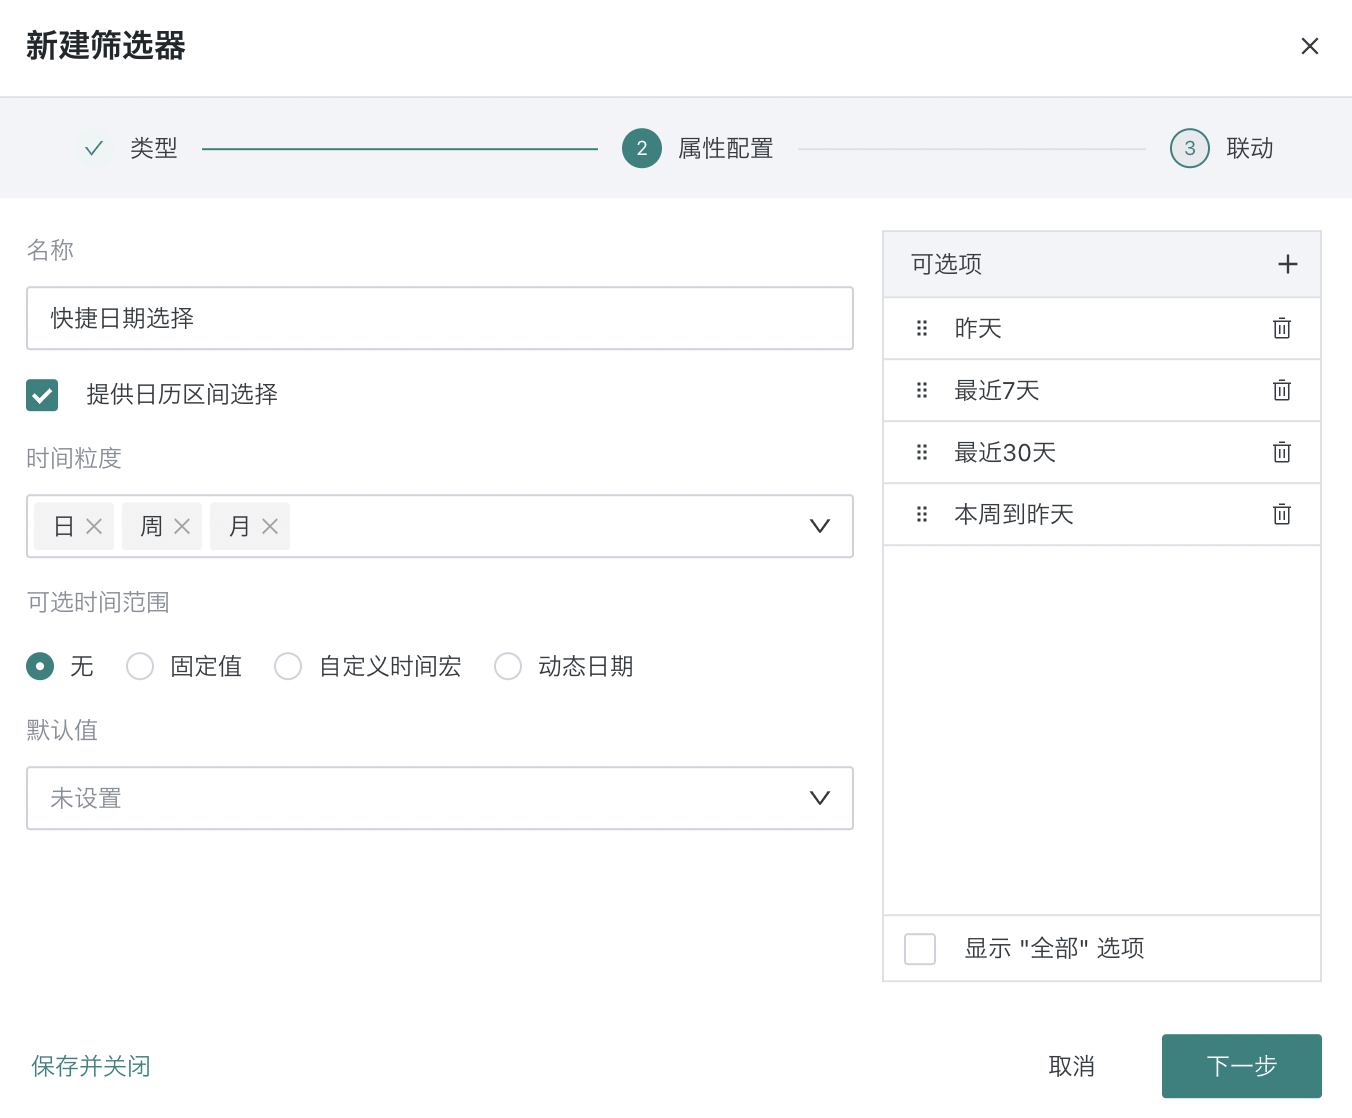
After selecting the quick date range filter, enter the filter attribute configuration interface to configure the filter attributes.
| Configuration Item | Description |
| Name | Set the filter name. |
| Provide Calendar Range Selection | Choose whether to provide date range selection on the filter. |
| Time Granularity | If calendar range selection is provided, you can set the time granularity when selecting the date filter. Options include second, day, week, month, quarter, year, supports multiple selection. For example, when selecting week, month, quarter, the effect is as follows. |
| Selectable Time Range | If calendar range selection is provided, you can configure the selectable time range. None: Do not set selectable time range. Fixed value: Define a fixed selectable time range. Custom time macro: Set custom time macro. For description of dynamic time macros, see [Dynamic Time Macro](../../../0-Basic Card Creation/0-Visualization Charts/3-Chart Configuration/1-Fields and Drawing/4-Dynamic Time Macro.md). Dynamic date: Select dynamic time intervals from the dropdown, such as yesterday, last 7 days, last 30 days, etc. |
| Default Value | Select the default value displayed by the date range filter, options include yesterday, last 7 days, last 30 days, this week to yesterday. |
| Options | Configure the options for the quick date filter. Click the plus sign to the right of the options area to add options. |
2.3. Set Linkage Target Card
Check the linkage target card and configure the corresponding date-related field in the linkage card.
After setting, changes in the filter will link and change the data presented by the associated card.
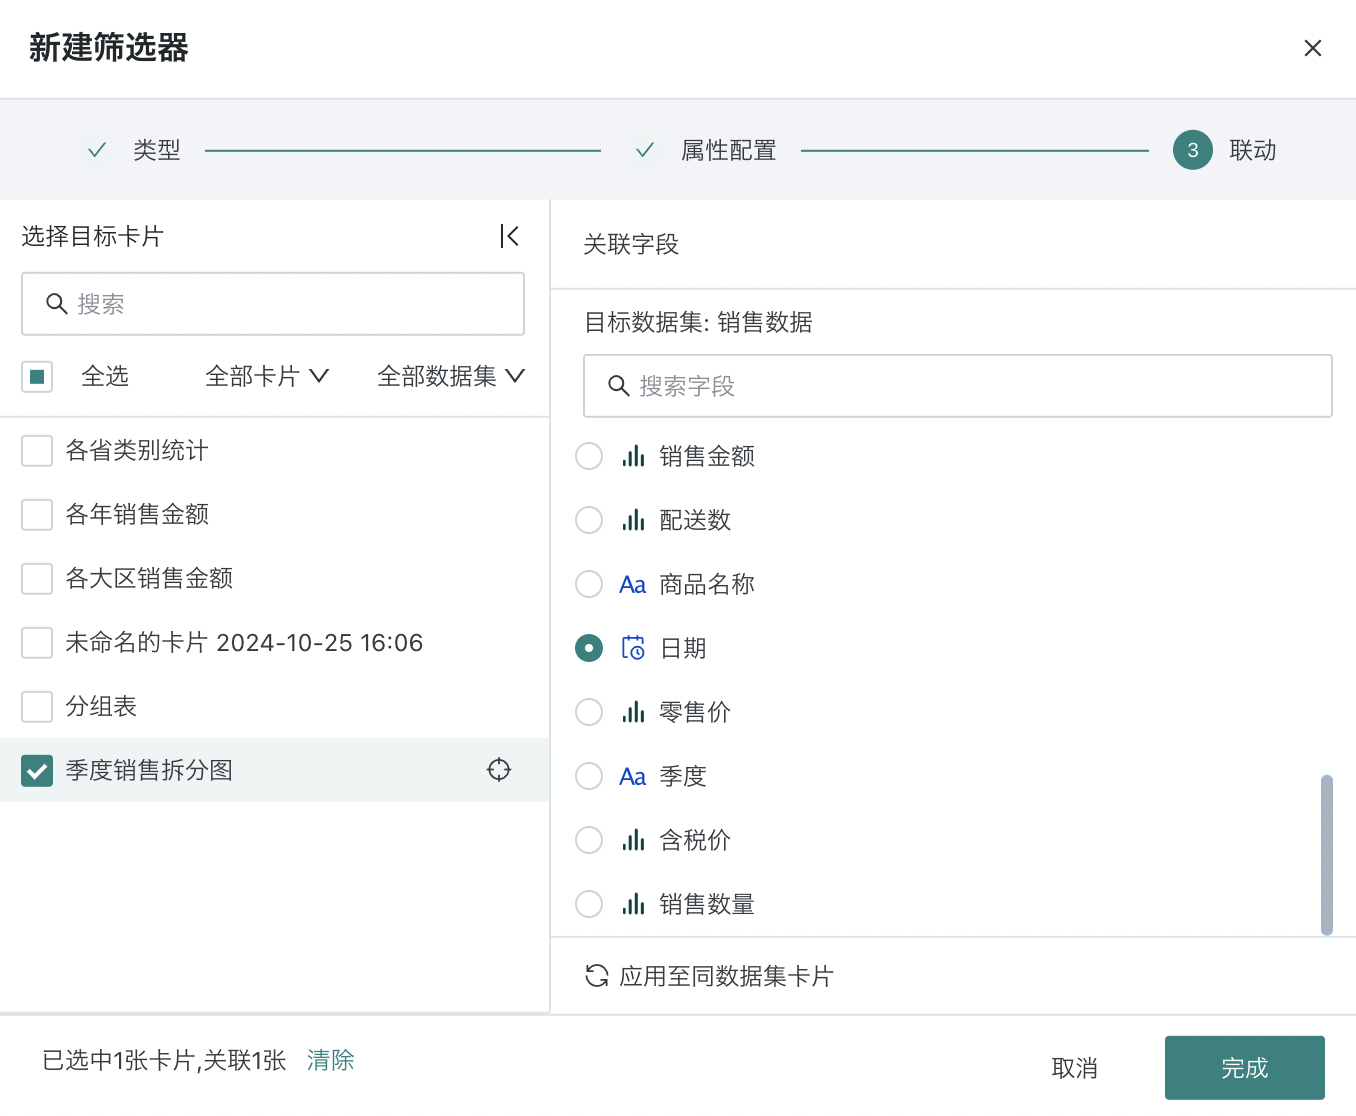
Tips: Locate card: When hovering over the target card, click the locate button to the right of the card name to locate the target card.
Apply to cards with the same dataset: Click to apply to cards with the same dataset, and it will automatically link other cards under the same dataset with the corresponding field. Cards applied to the same dataset can be manually unlinked.
Expand/collapse linkage configuration window: Click the expand/collapse button to the right of "Select Target Card" to adjust the display of the linkage configuration window.
2.4. View Quick Date Range Filter Effect
After the quick date range filter configuration is completed, it will take effect on each linked card, and the card will present the data after filtering.