Dataset Preview and Editing
Overview
To help users better understand and use data, Guandata BI supports previewing dataset content and metadata and allows a certain level of editing on top of that. This article explains those capabilities in detail.
User Guide
Preview
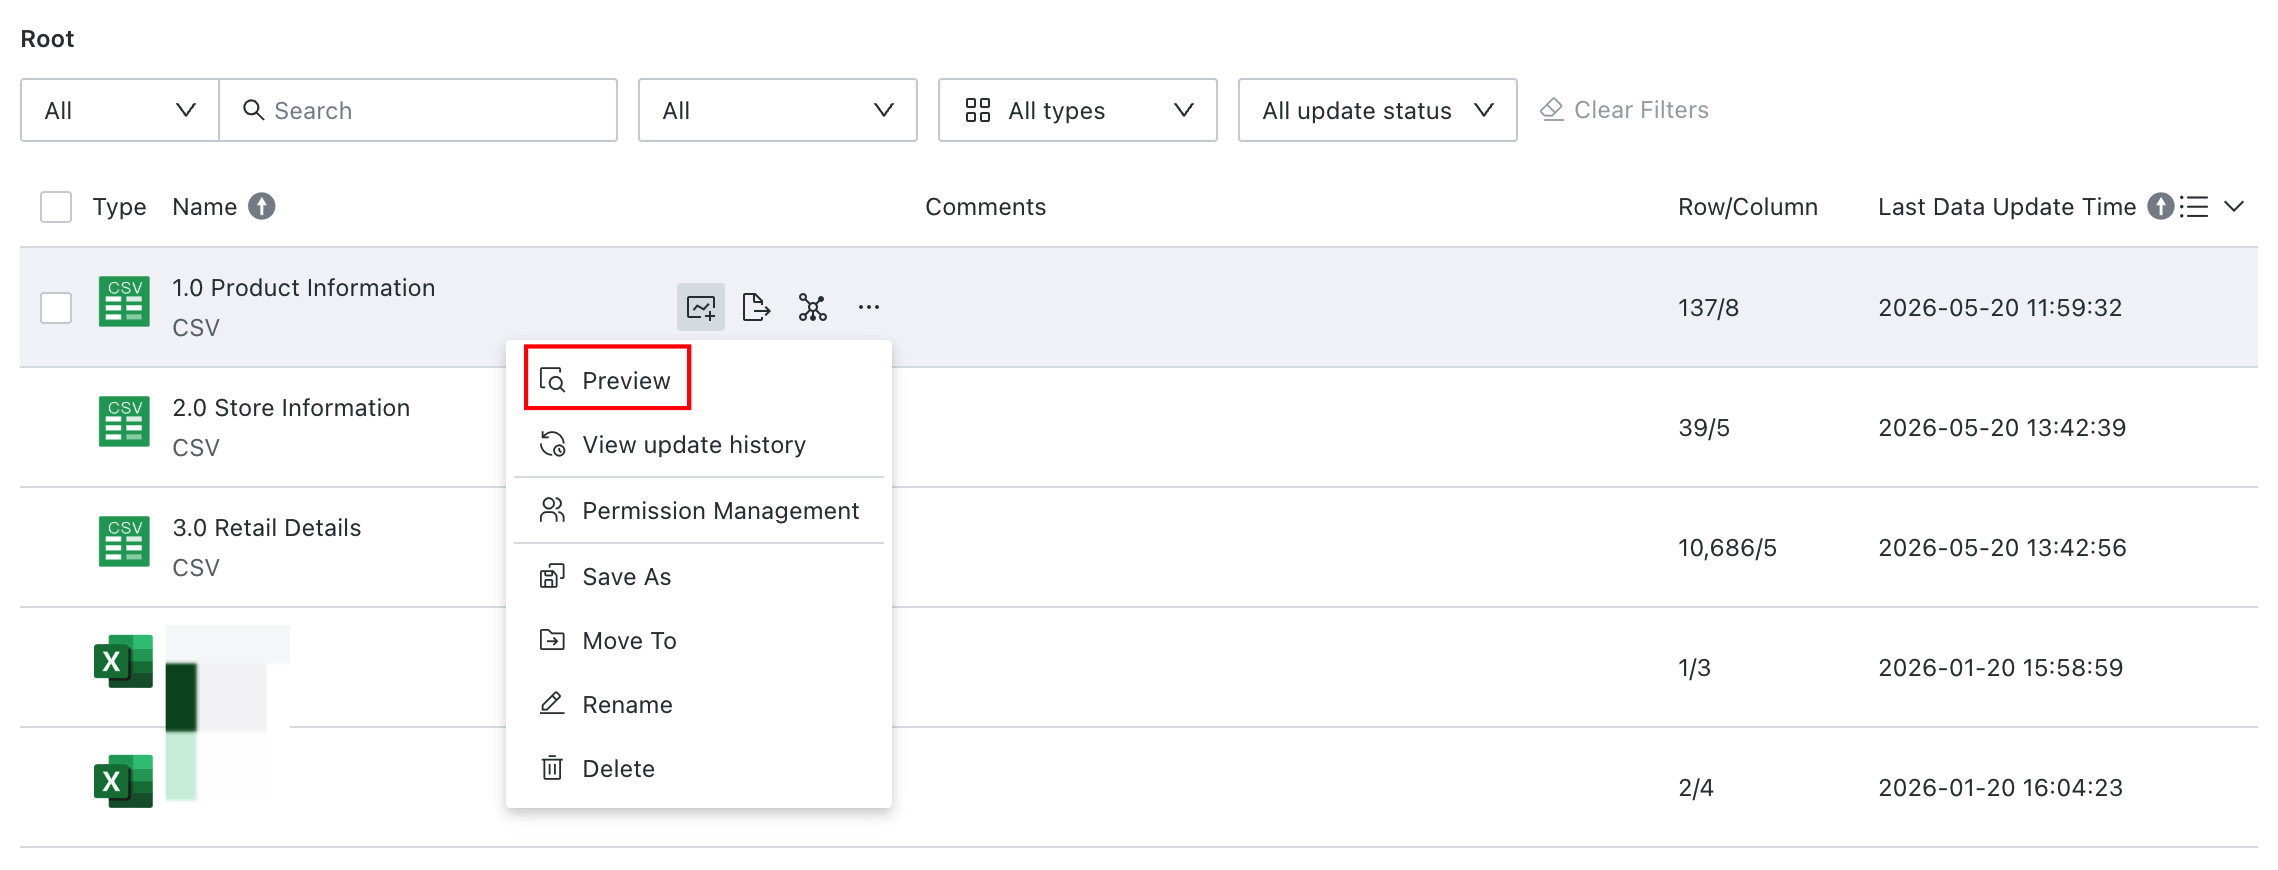
On the dataset list page, click the ... button for any dataset and choose Preview to view the current dataset data, with up to 30 rows shown. In addition to the Preview feature, users can also go to Overview > Data Details on the dataset details page. See Data Details.
Dataset preview supports canceling execution during loading.
- Manual Cancel: During preview loading, click
Cancel Previewto stop the running SQL preview task manually. - Automatic Cancel: The system automatically cancels the preview task when:
- the preview window is closed
- the preview page is exited or the current tab is switched
Description
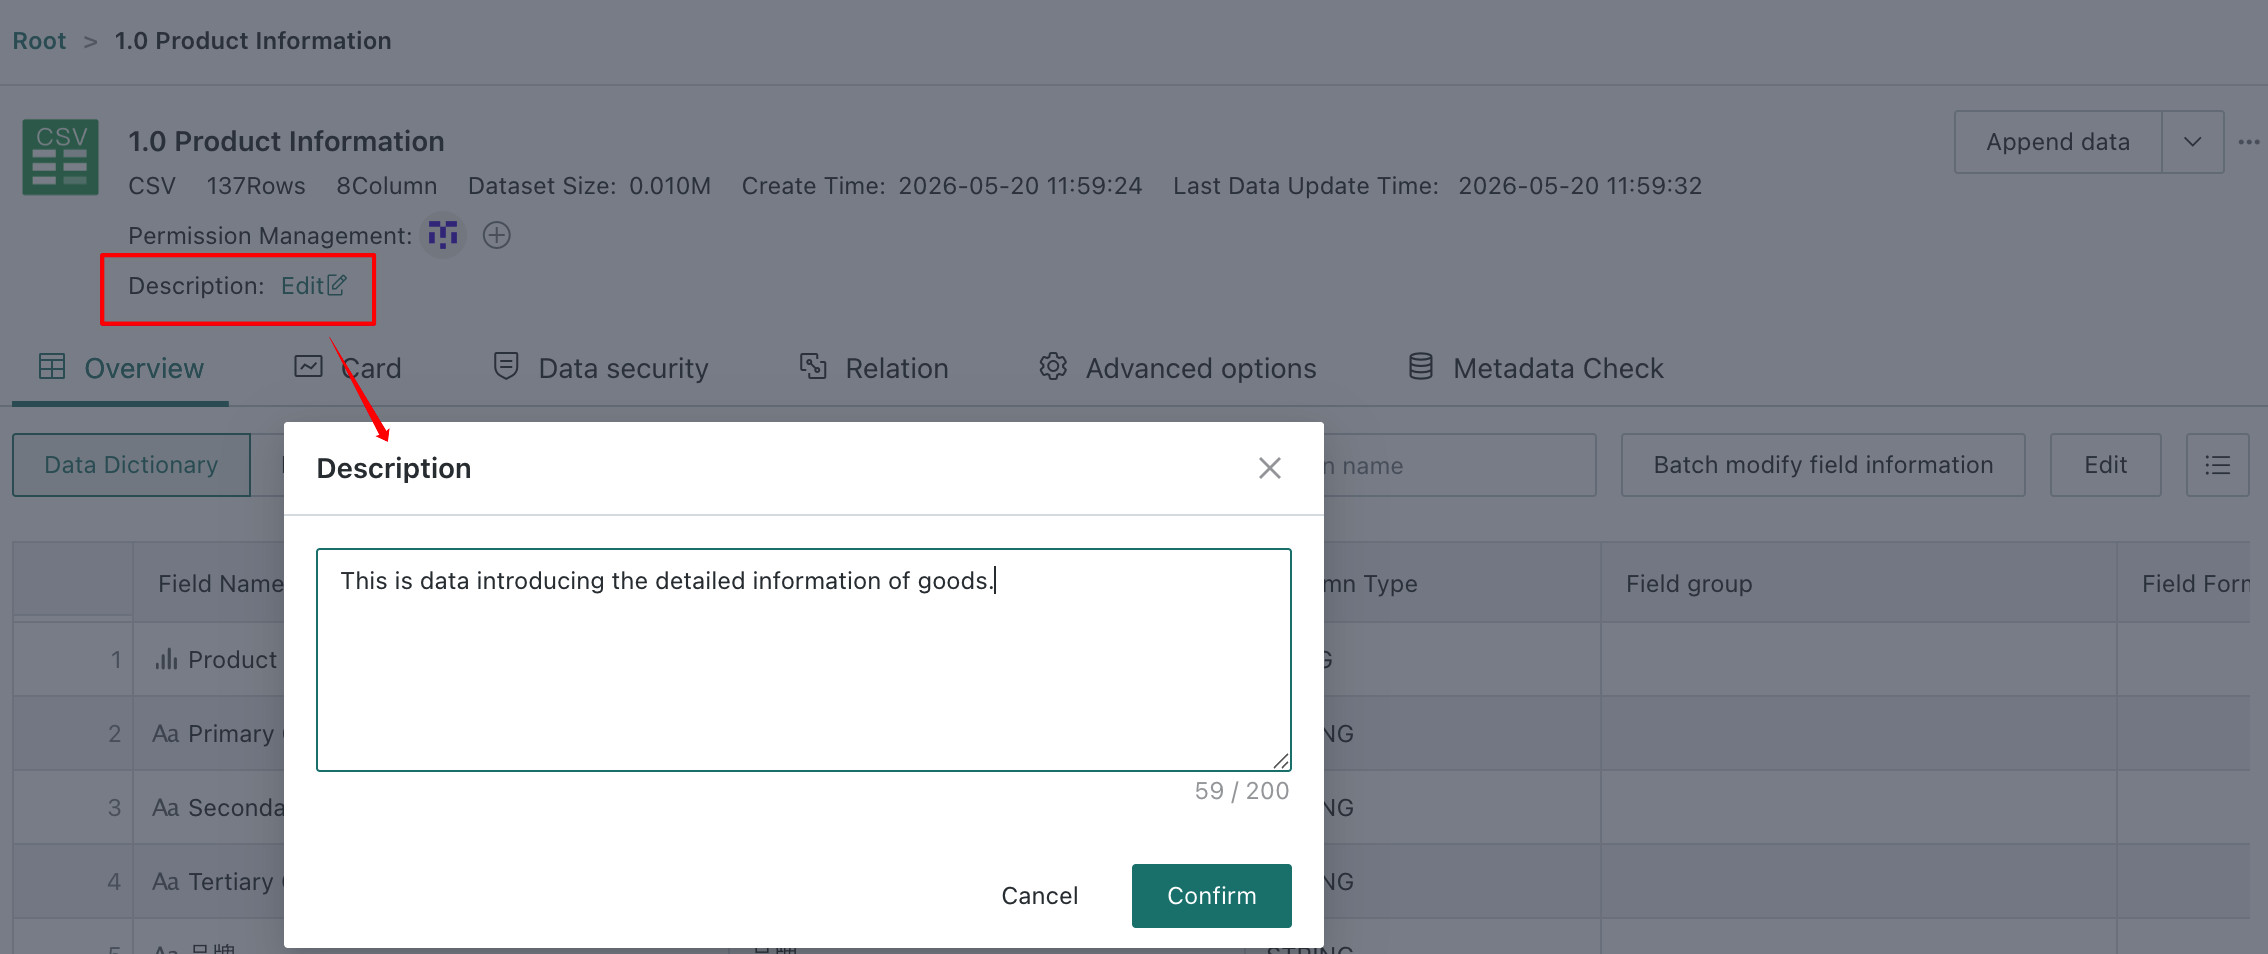
During dataset creation, a description can be added on the Confirm Data Table Information step. On the dataset details page, the added description can be viewed and edited.
After descriptions are added, the data center list page includes a description column. In the search bar at the upper-left corner of the page, users can choose to search by name, description, or both, and matching keywords are highlighted in the results.

Overview
On the Overview page of the dataset details view, users can see detailed dataset information, including Data Structure and Data Details, and perform a series of editing operations.
Data Dictionary
After clicking Data Structure, users can view the dataset description and field information and perform field editing and batch modification.
Edit
Click Edit in the upper-right corner to configure the following:
- Use Comments as Field Names, for database datasets only
- Field Groups
- Field Formula for newly created calculated fields or grouped fields
- Comments for each dataset field, up to 250 characters
- Existing non-calculated and non-grouped fields cannot be edited through the Field Formula column.
Use Comments as Field Nameshere refers to synchronizing from comments already configured in the source database, not to comments entered manually on the Overview page.- For calculated fields, the field name shown is the original field name, and the original field name column also displays it.
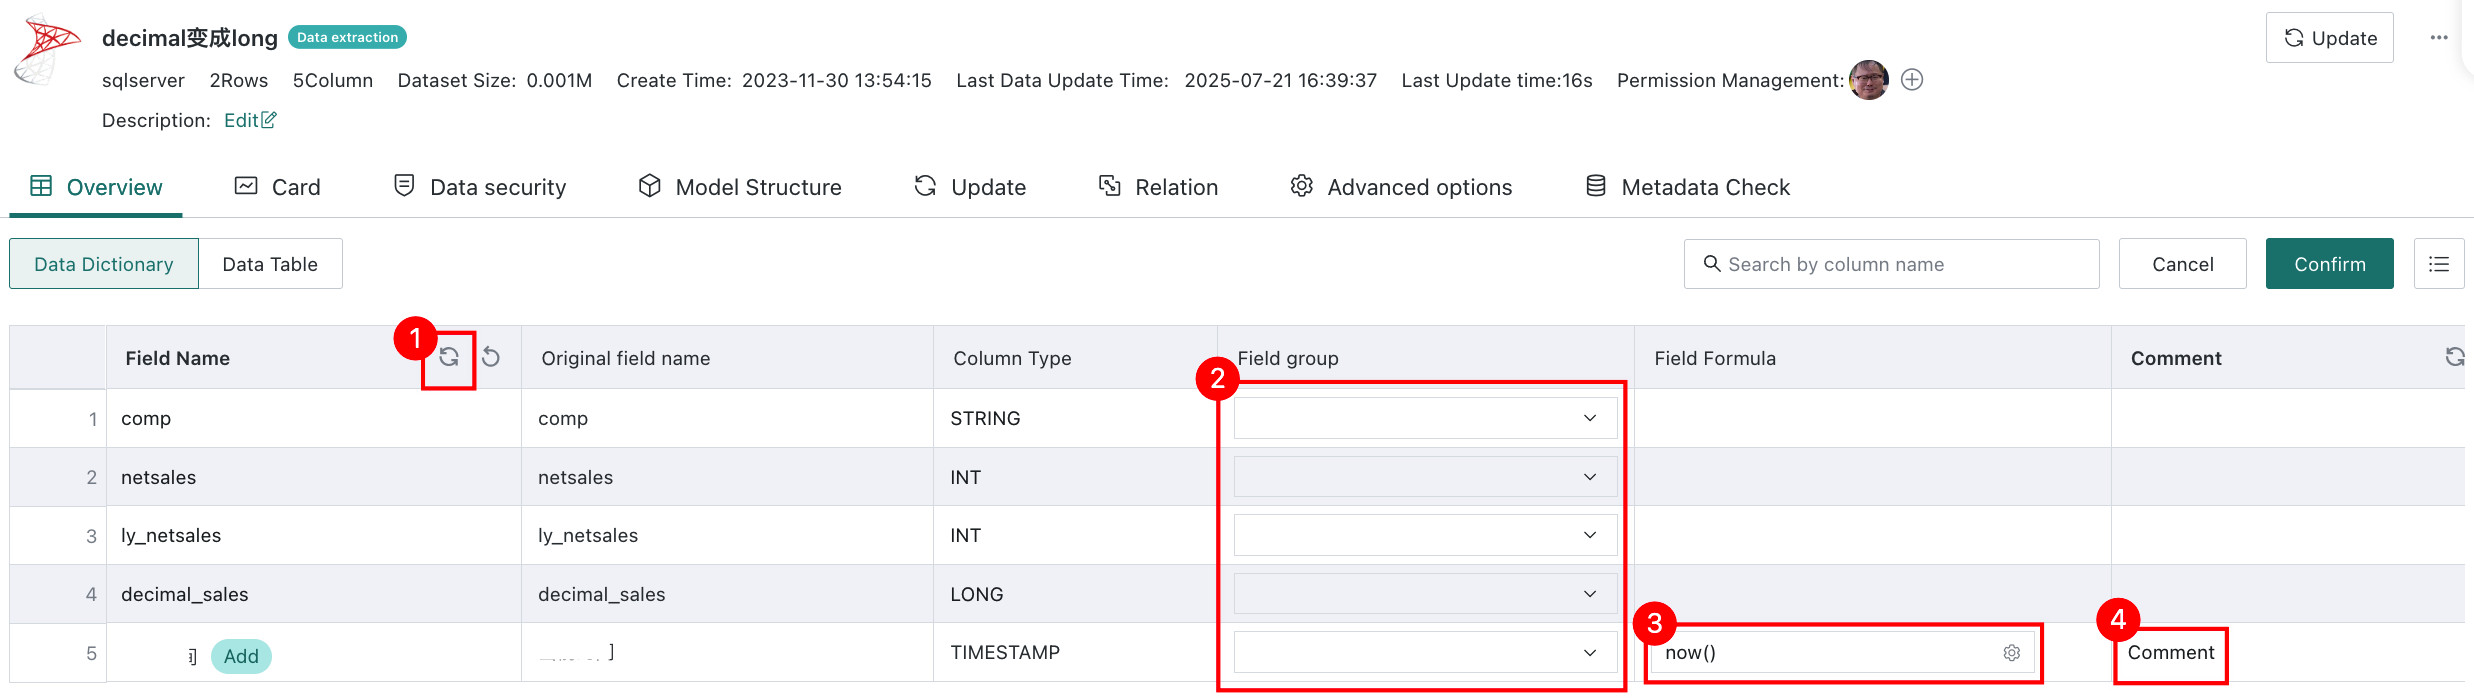
Batch Modify Field Information
Batch modification of field information is supported.
-
Click
Batch Modify Field Informationto open the corresponding dialog.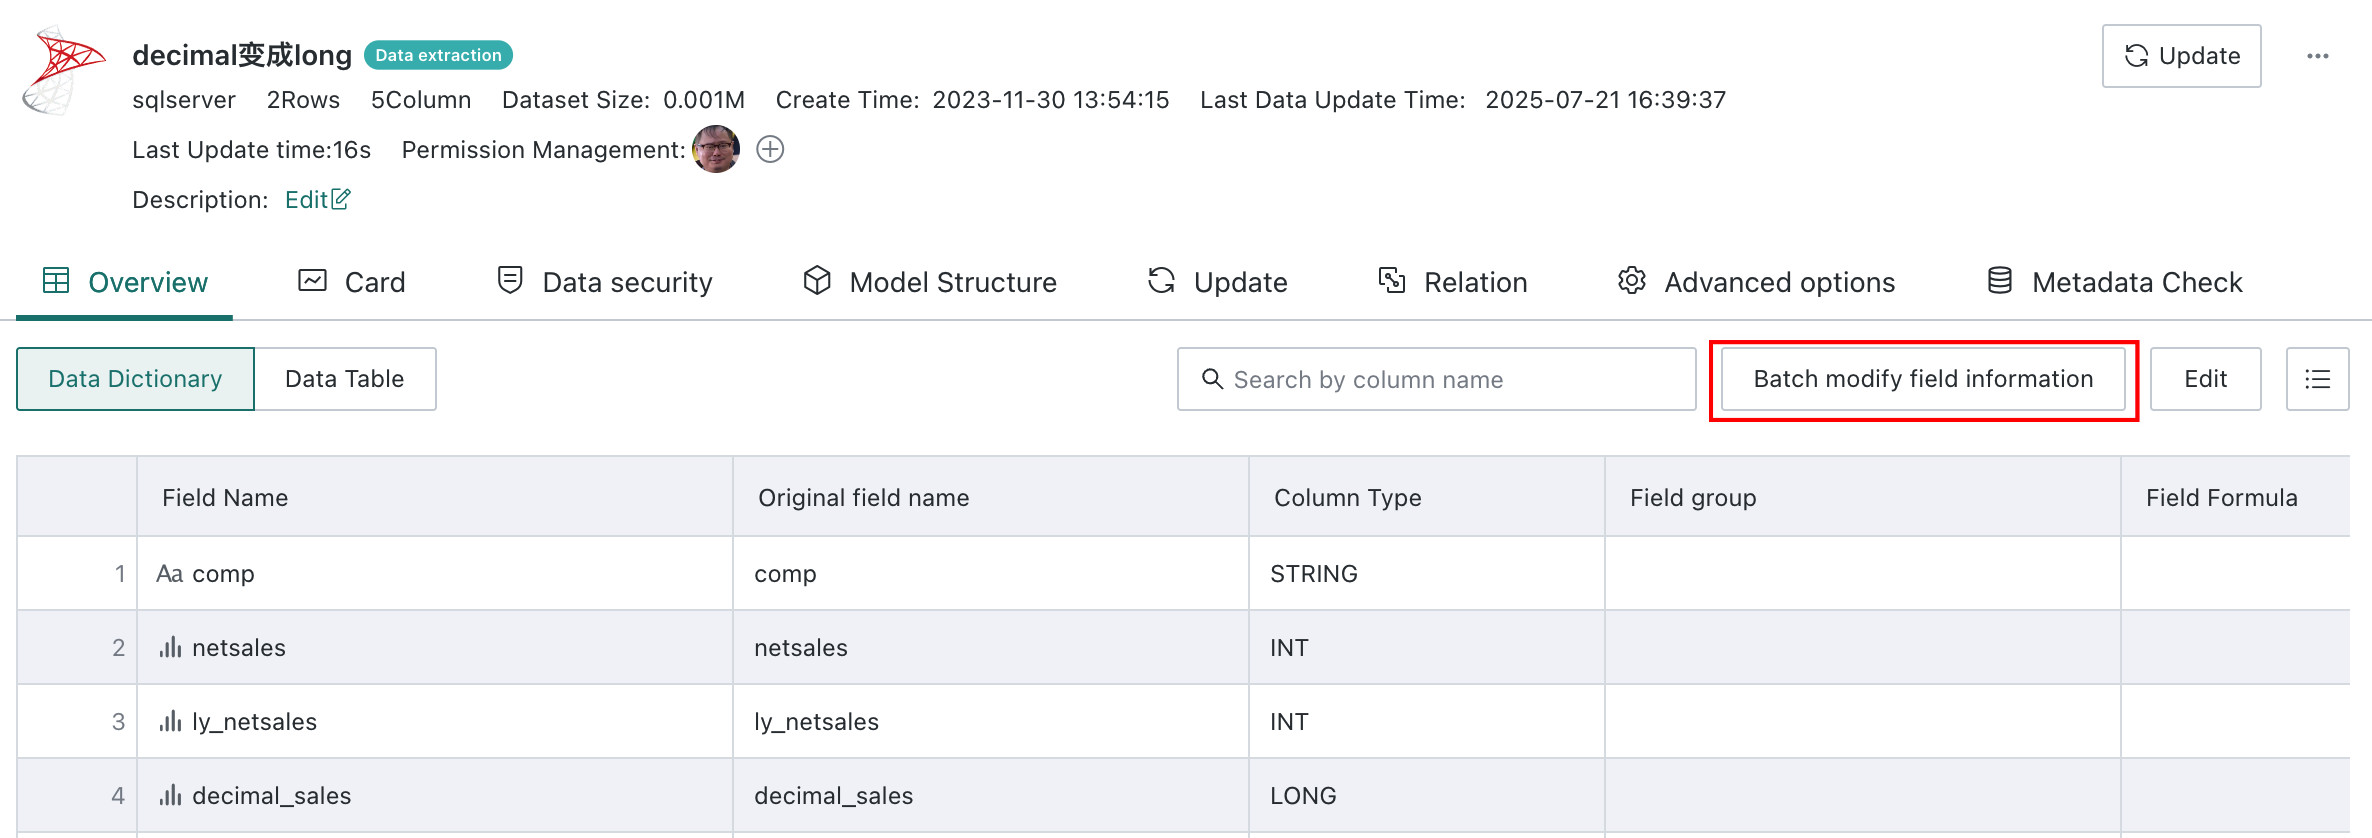
-
Click
Export Current Field Template, update the template file, then clickUpload Fileto apply the changes.After upload, calculated fields and ETL nodes downstream that reference this dataset inherit the updated field names automatically.
Note- When filling in the field template, the original field name is required and corresponds to the
Original Field Namein the data structure. - If only the field name is being changed, the comment may be left empty.
- If only the comment is being changed, the field name may be left empty, and an empty comment does not overwrite the existing one.
- Comments are limited to 250 characters.
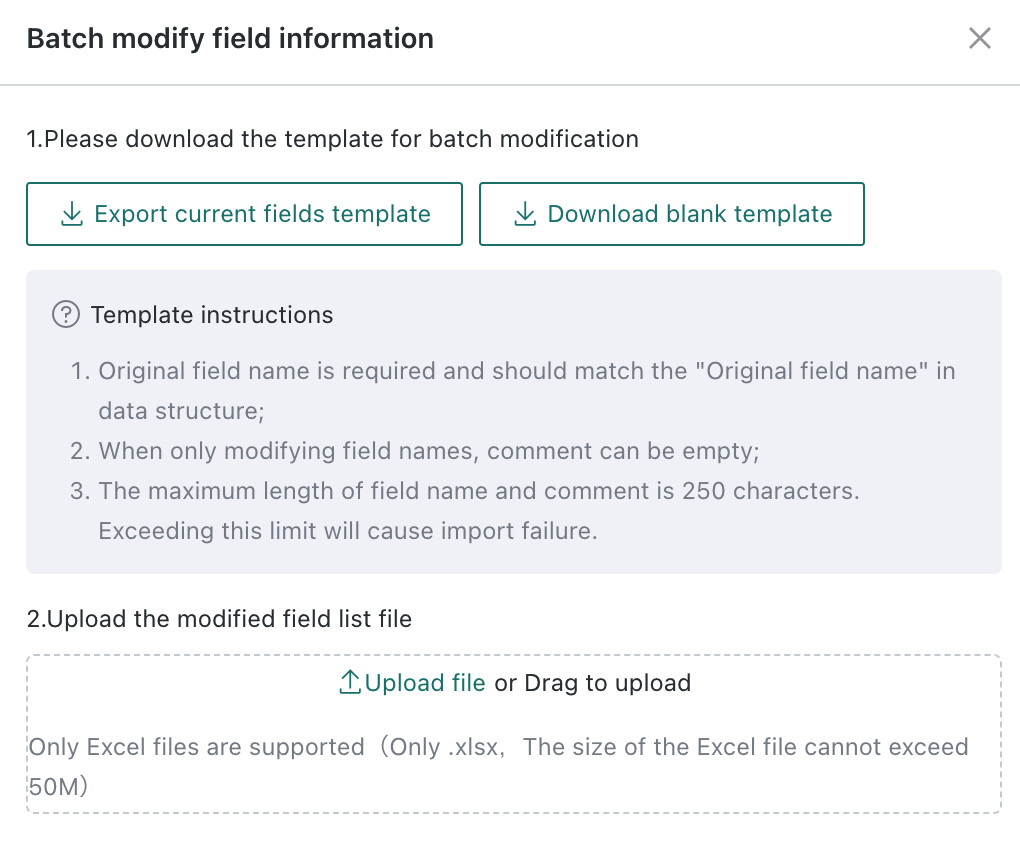
- When filling in the field template, the original field name is required and corresponds to the
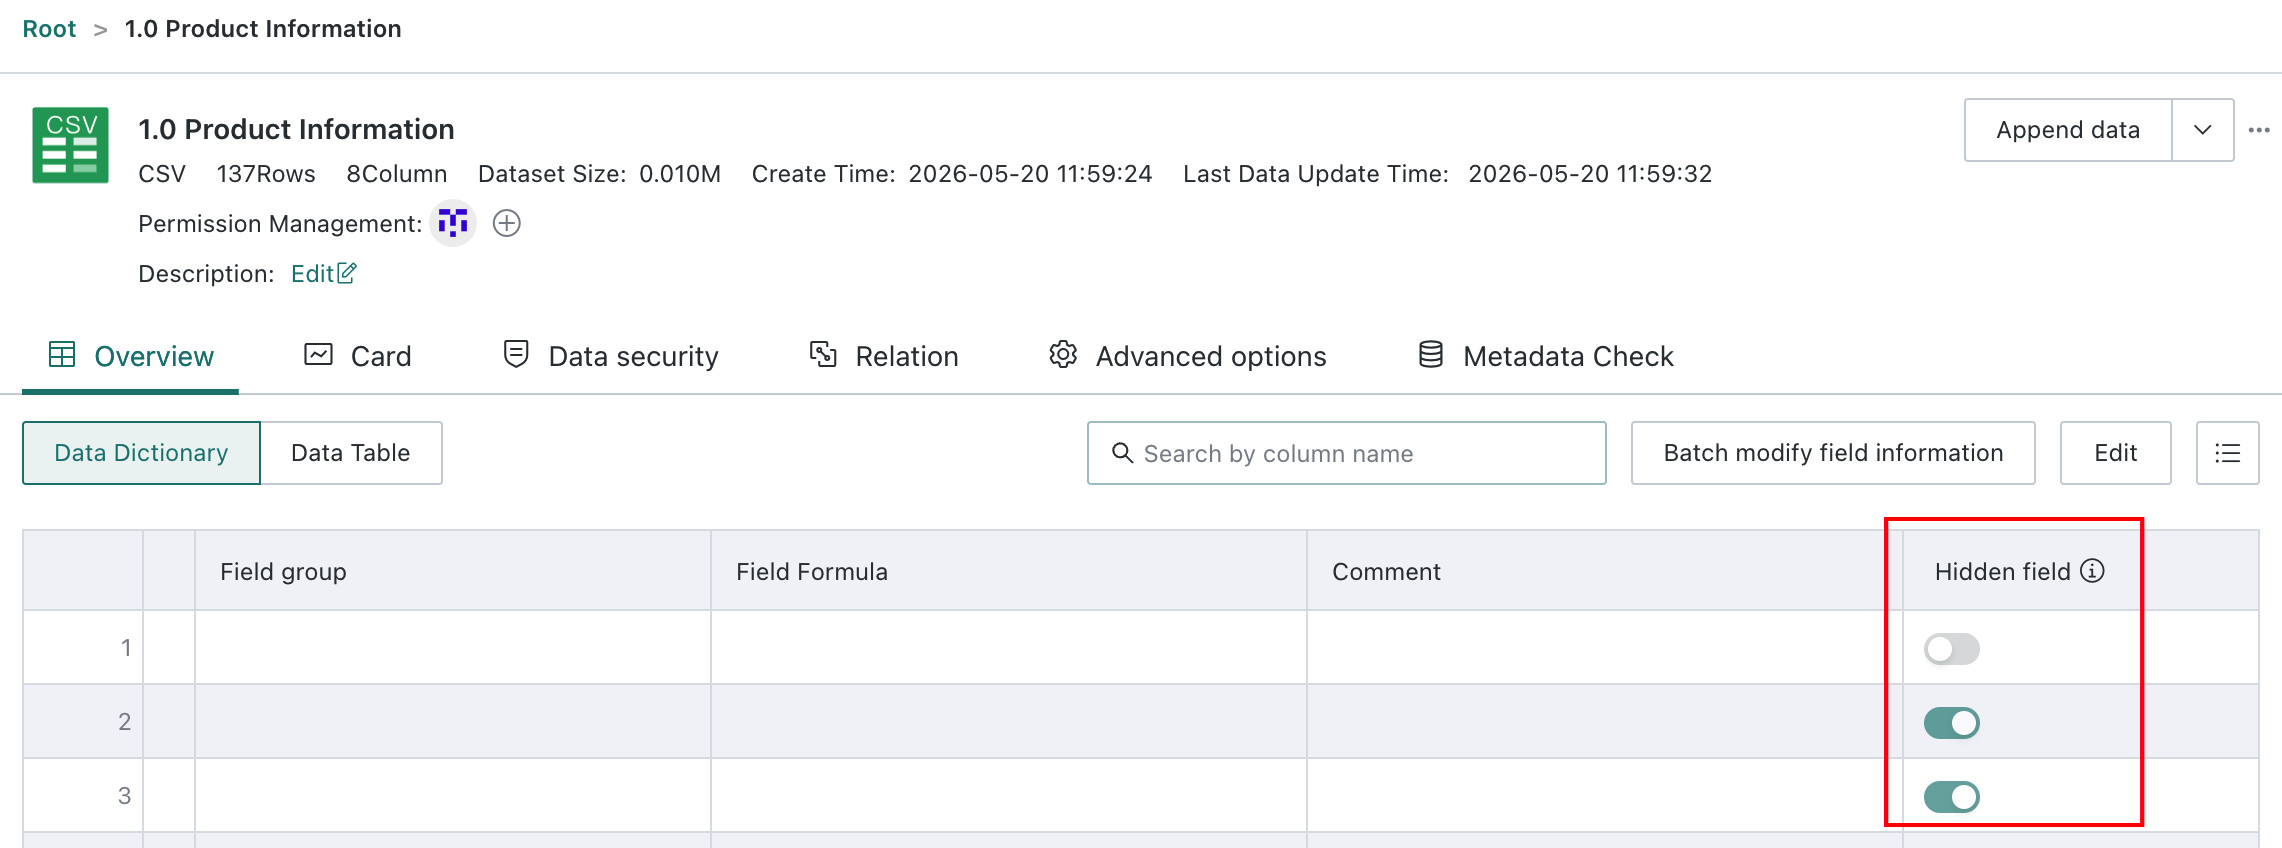
Set Hidden Fields
Dataset developers can hide fields to improve both security and usability, for example by preventing direct use of sensitive fields or hiding redundant fields in a very wide table from business users.
Click Edit in the upper-right corner, enable the switch for the fields that should be hidden, and click Confirm.
After configuration, hidden fields are not shown when selecting datasets for new Cards, in the field list on the Card editing page, or in related field-creation scenarios.
Special Case
If a hidden field such as Sales Amount was already being used by a Card before it was hidden, it no longer appears in the field list on the left, but it is still visible in the Card drawing area with an exclamation icon indicating that the field has been logically hidden.

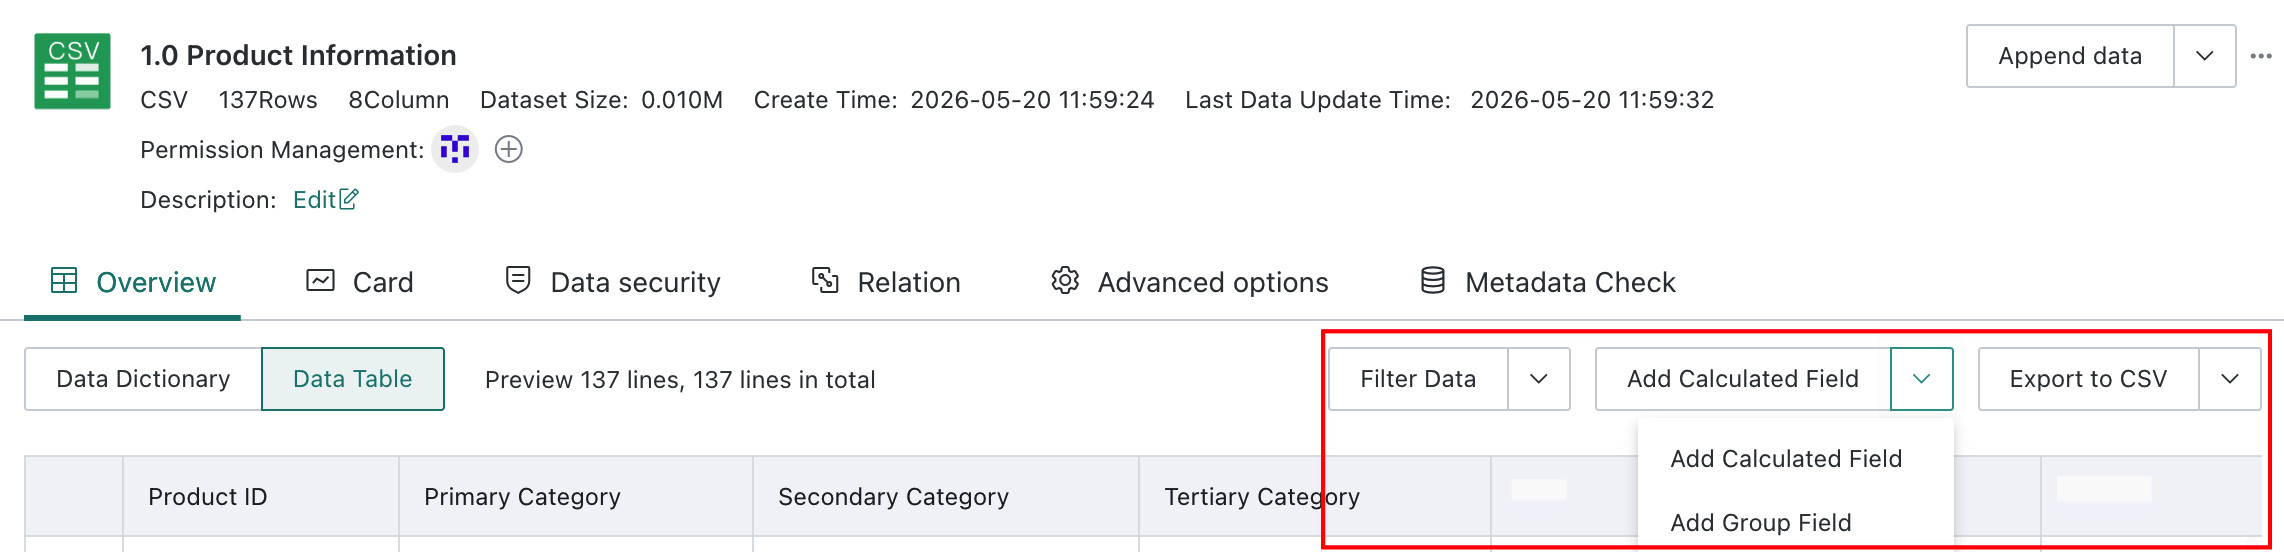
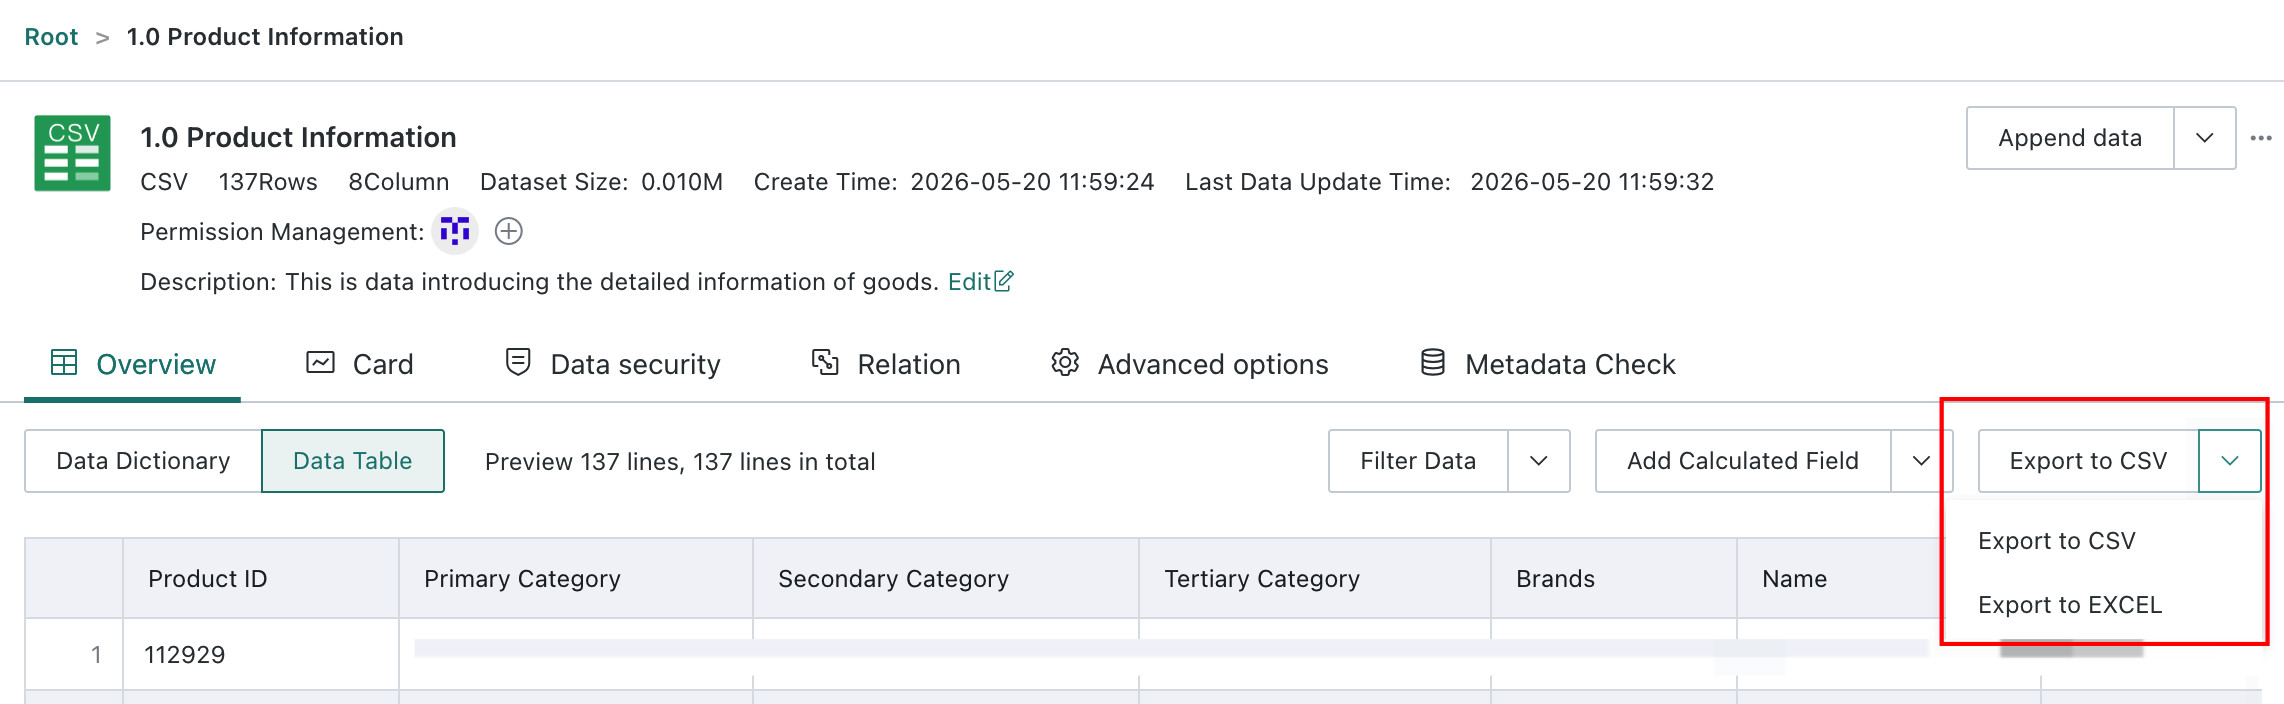
Data Table
Users can preview actual dataset data on the Data Details page, with support for previewing up to 1,000 rows. On top of that, users can filter data, create calculated fields or grouped fields, and export the dataset.
Data Details preview also supports canceling execution. When the user switches to another tab, the current preview request is canceled automatically.
Filter Data
Two methods are supported:
- Method 1: Configure Filter Rules
-
Click
Filter Datain the upper-right corner, enter theFilter Rulesdialog, and clickNew.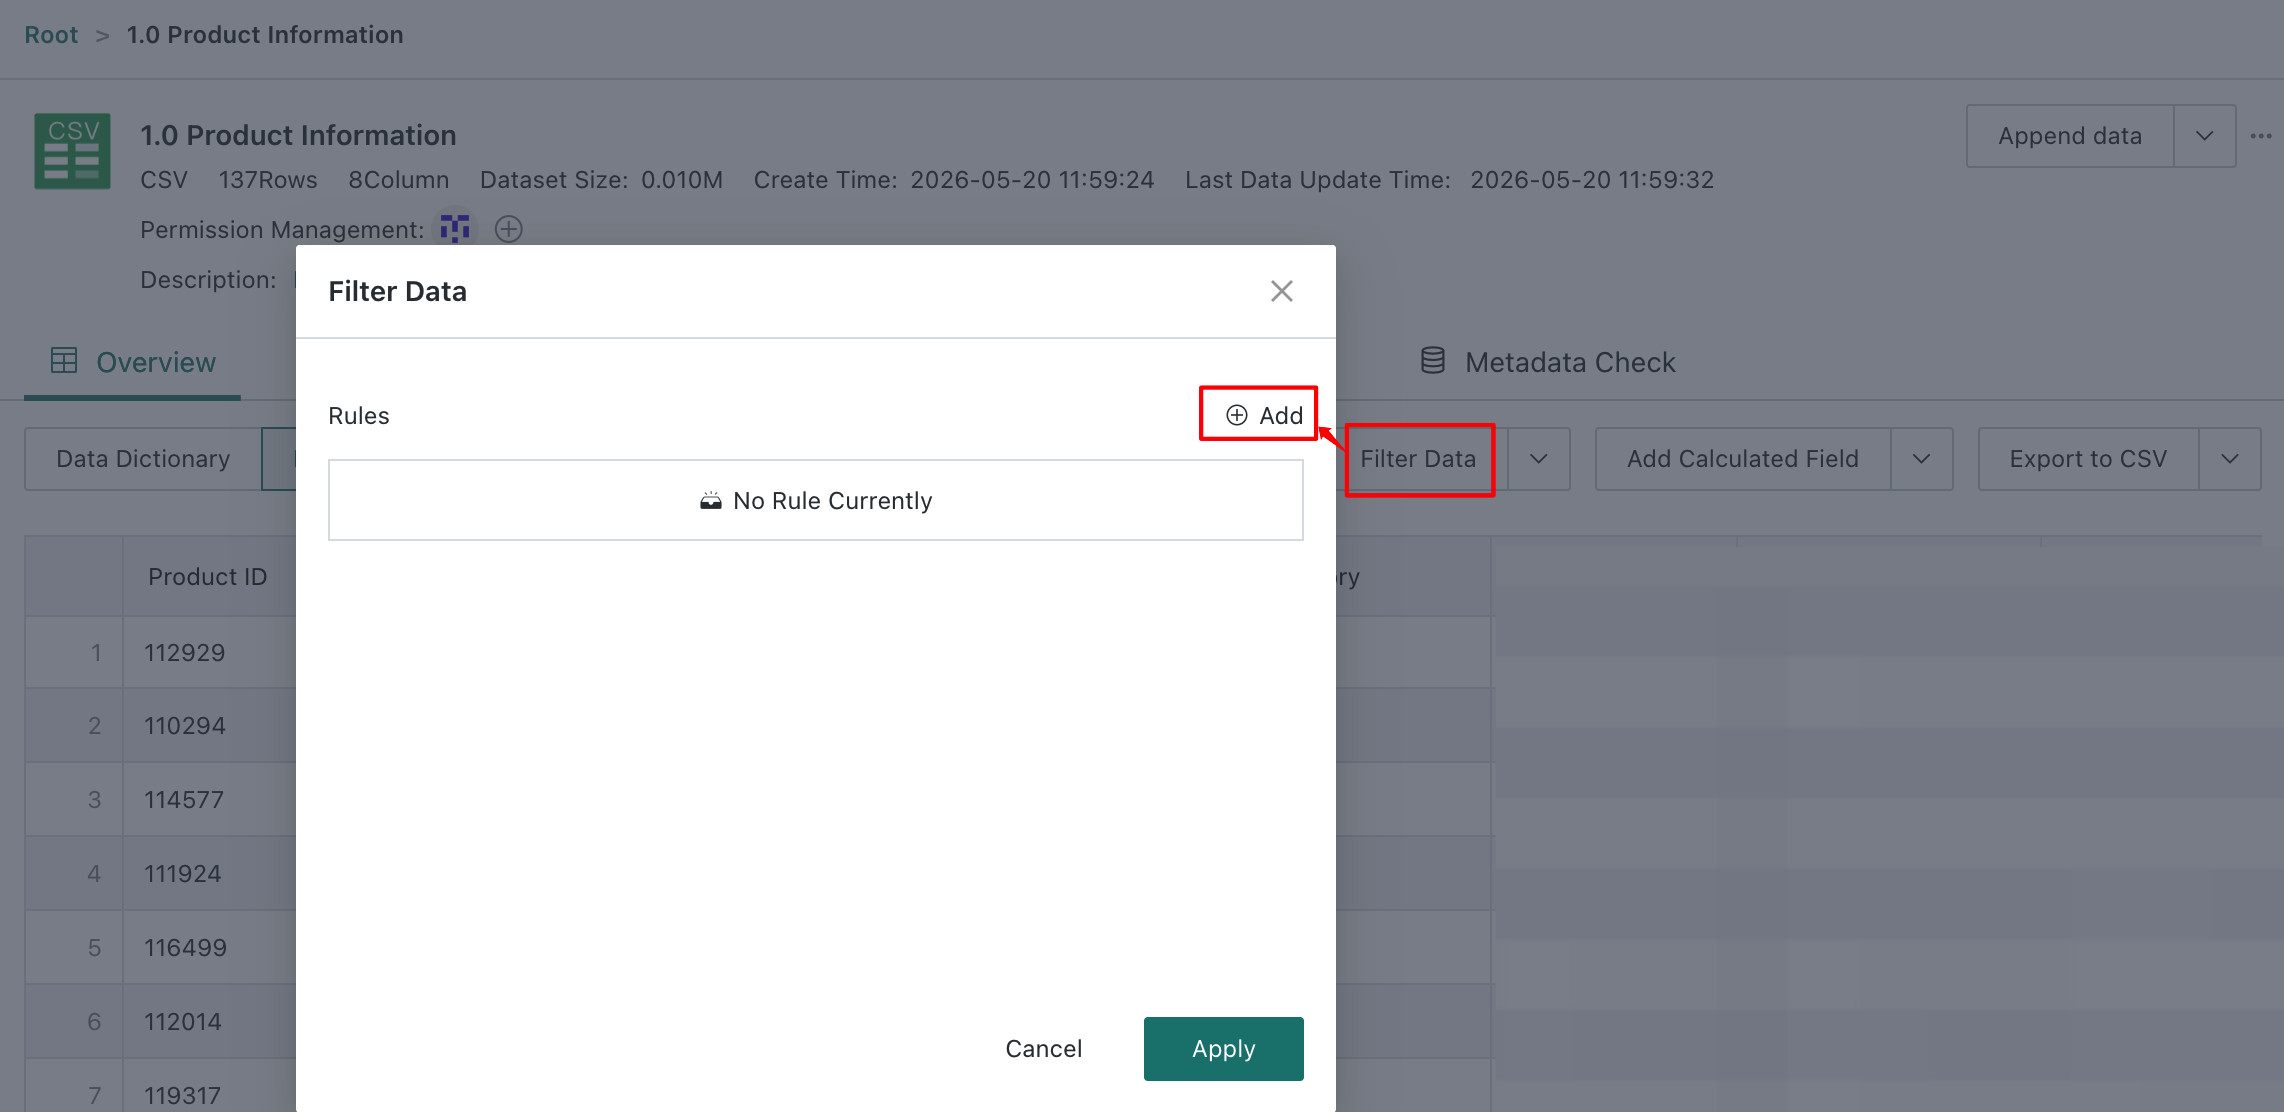
-
In the
Rule Editor, choose a field and then define the filter type, of which three are supported: Auto, Selection, and Range.
-
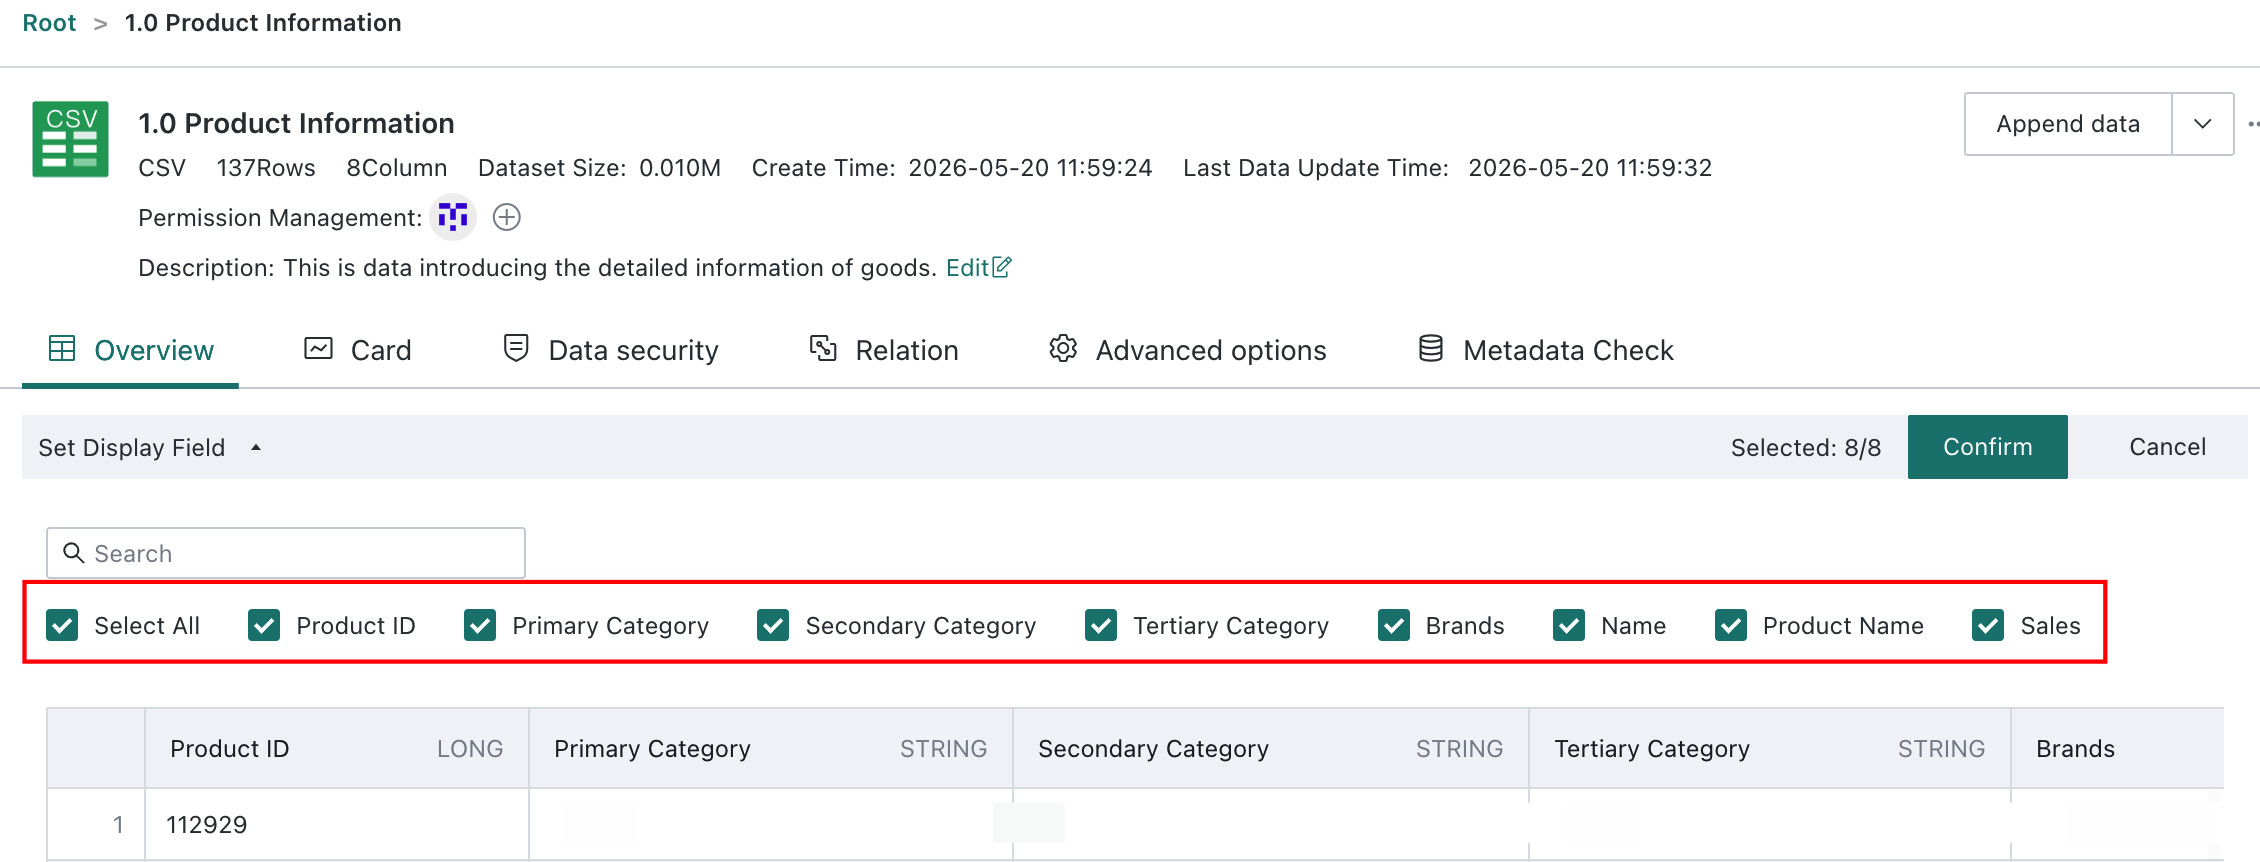
Method 2: Select Columns
Click the small arrow next to
Filter Data, chooseSelect Columns, and check the columns you want to filter.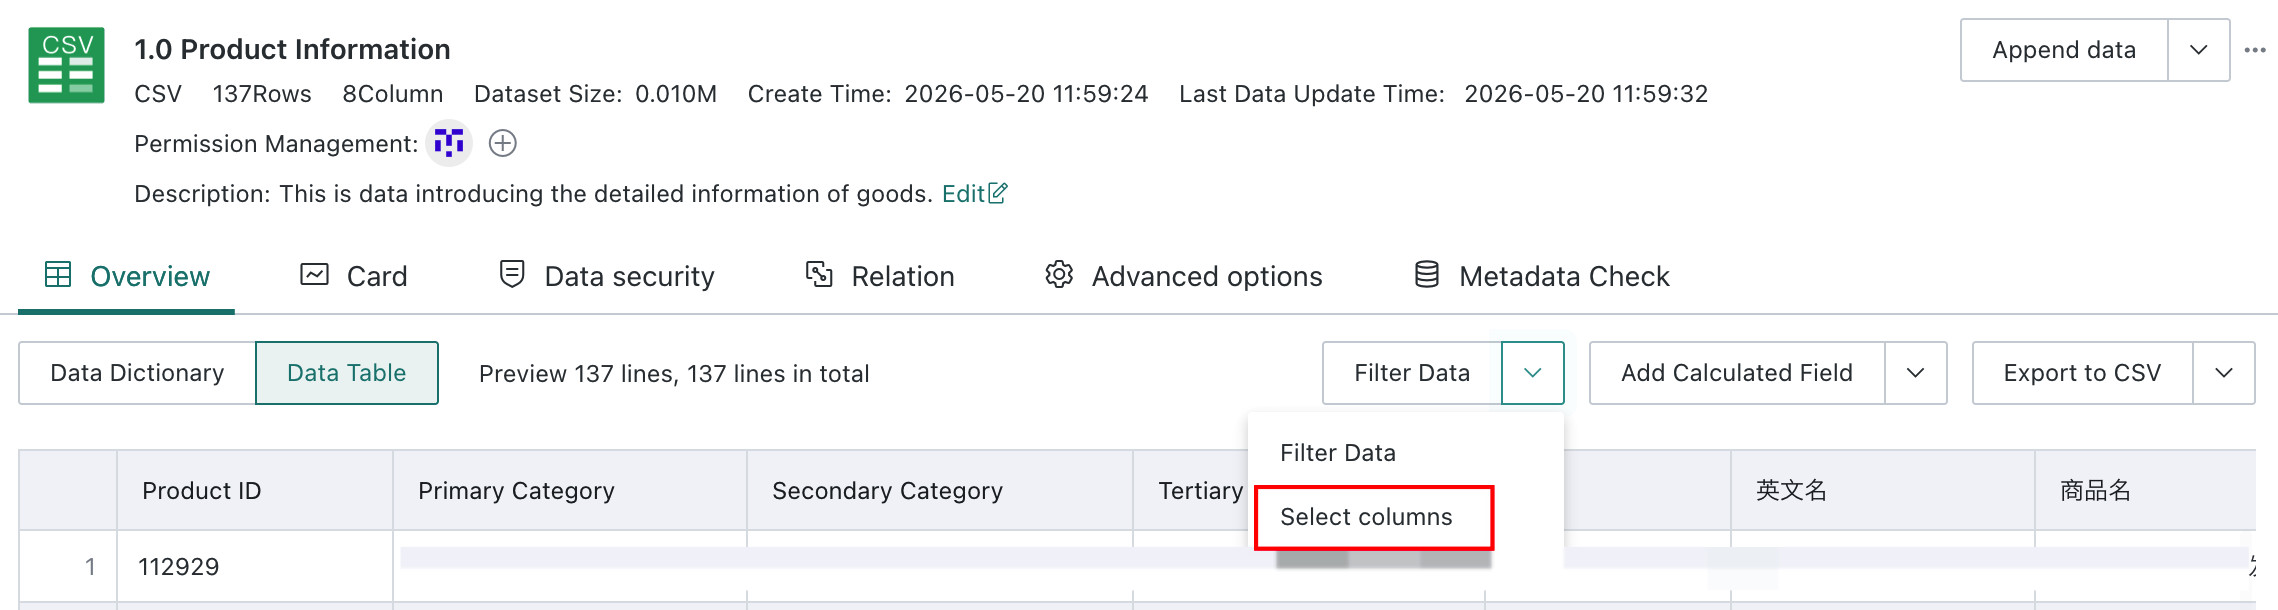
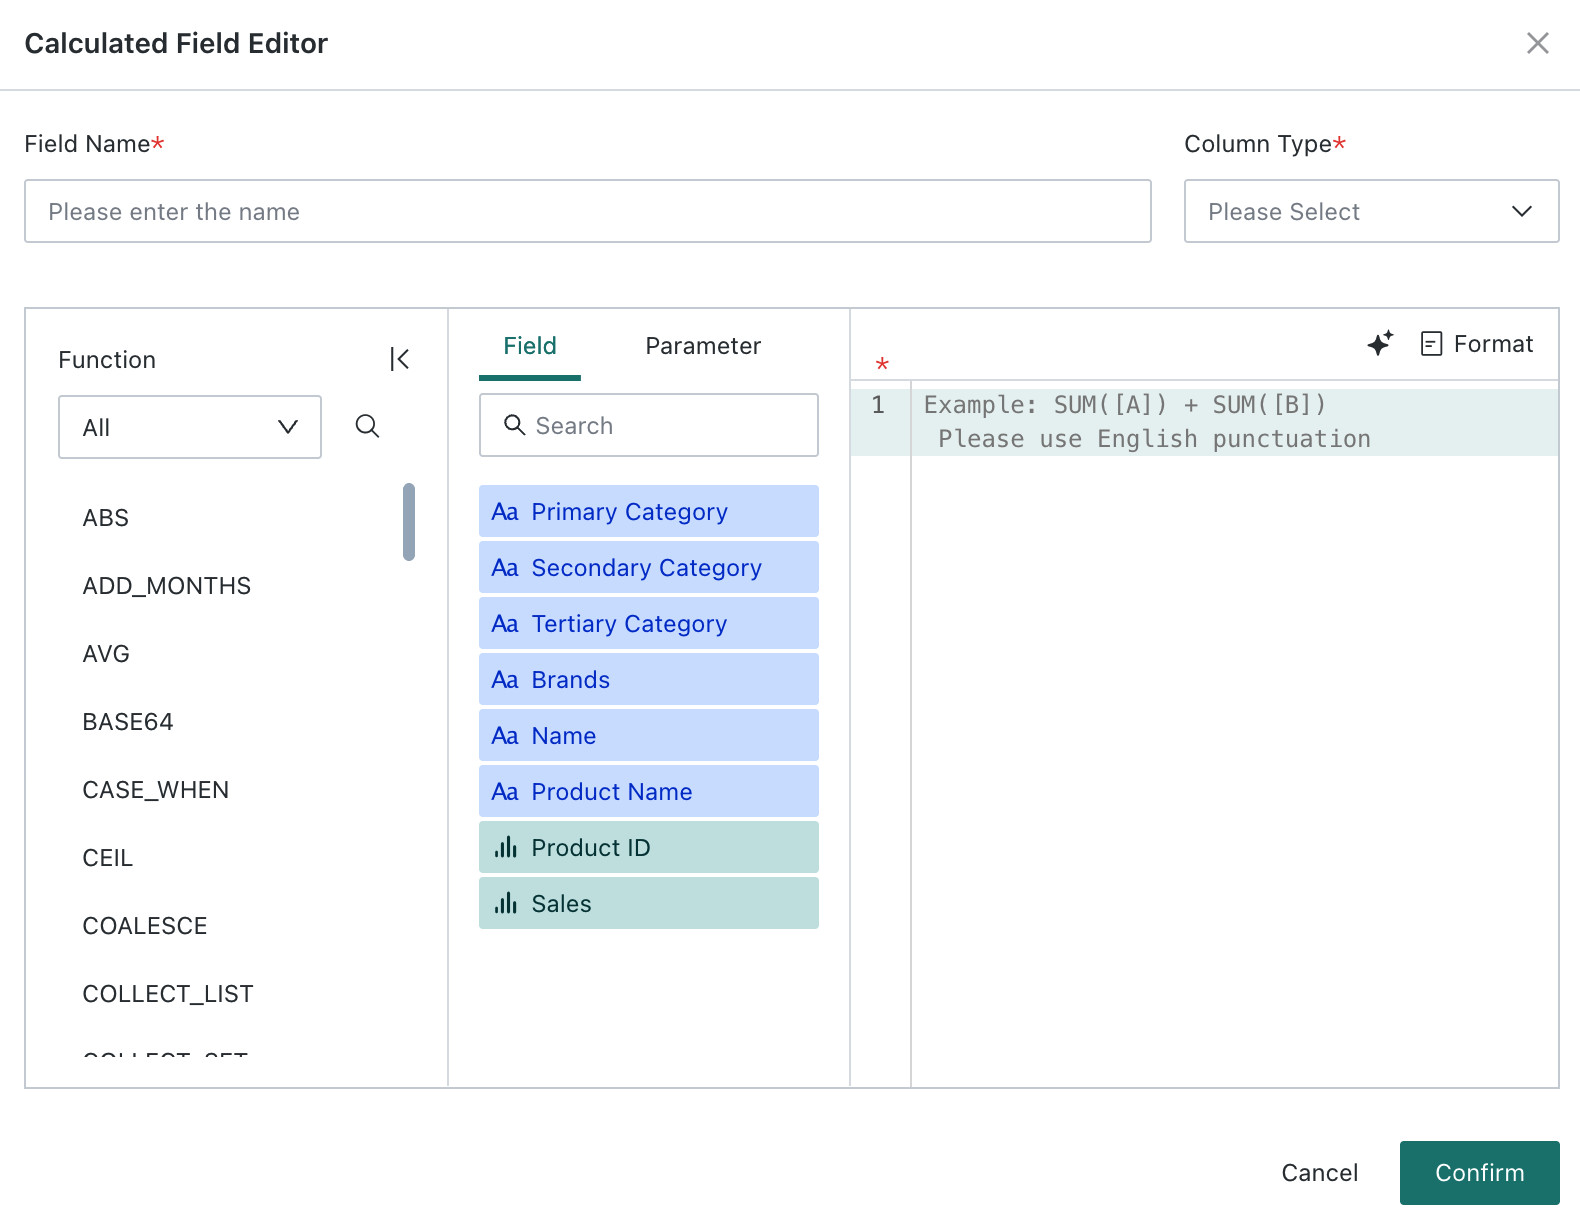
Create a Calculated Field
Click Create a Calculated Field in the upper-right corner to open the Calculated Field Editor. Users can choose functions and fields or parameters and define a new field name. For more details, see Create a New Field.
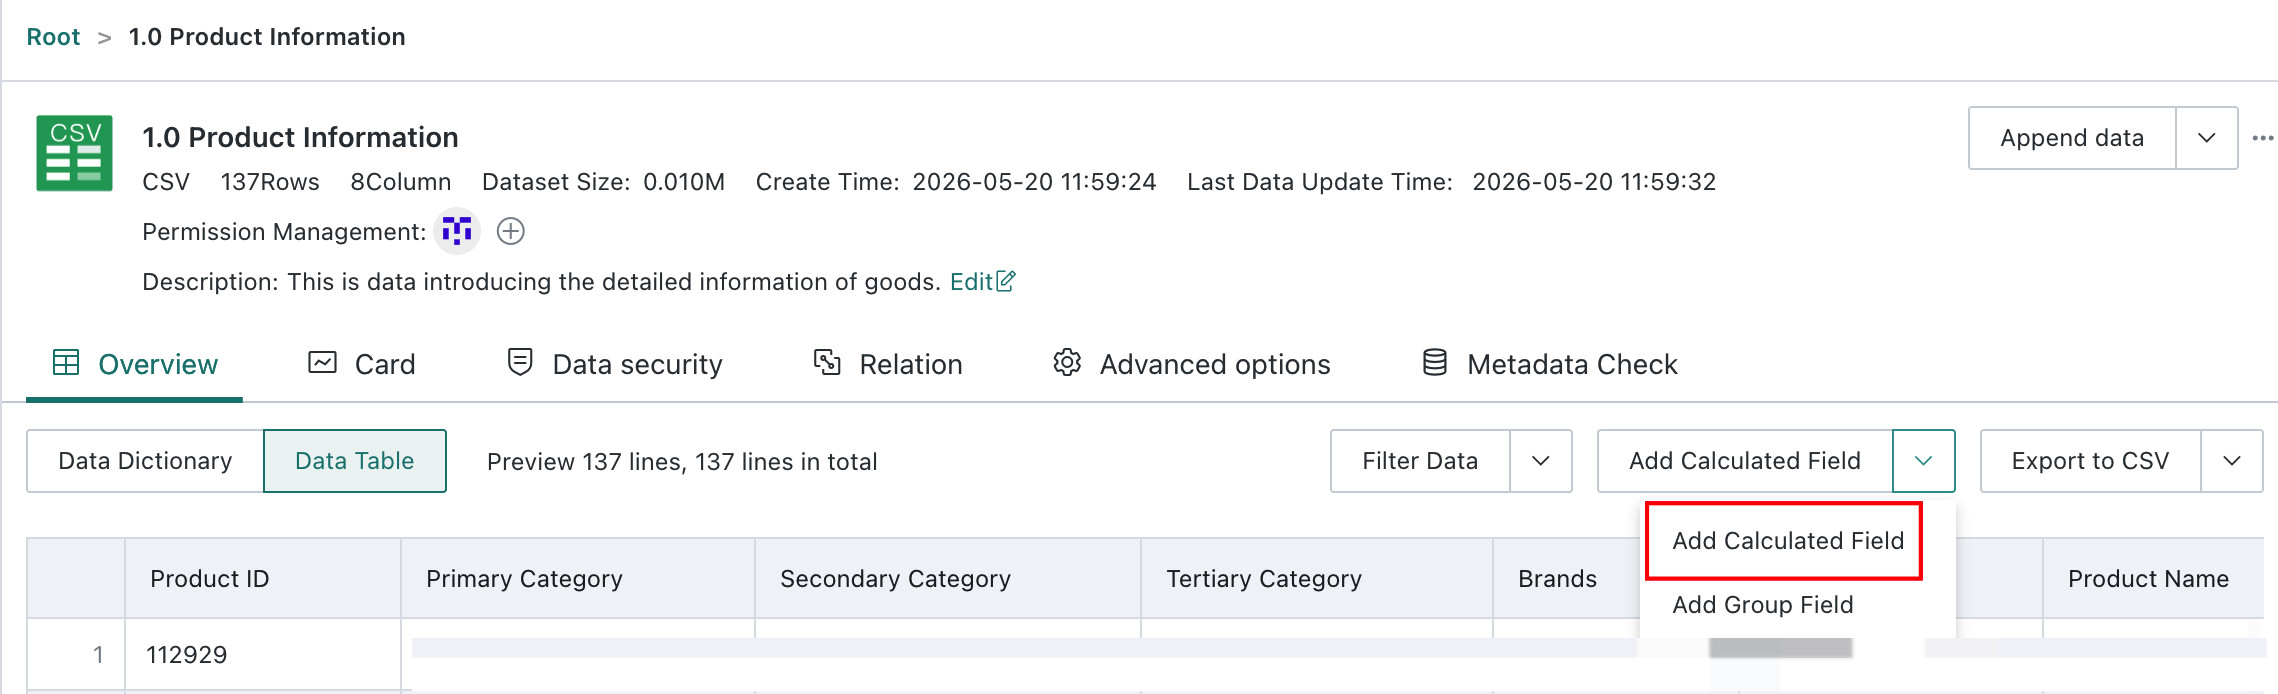
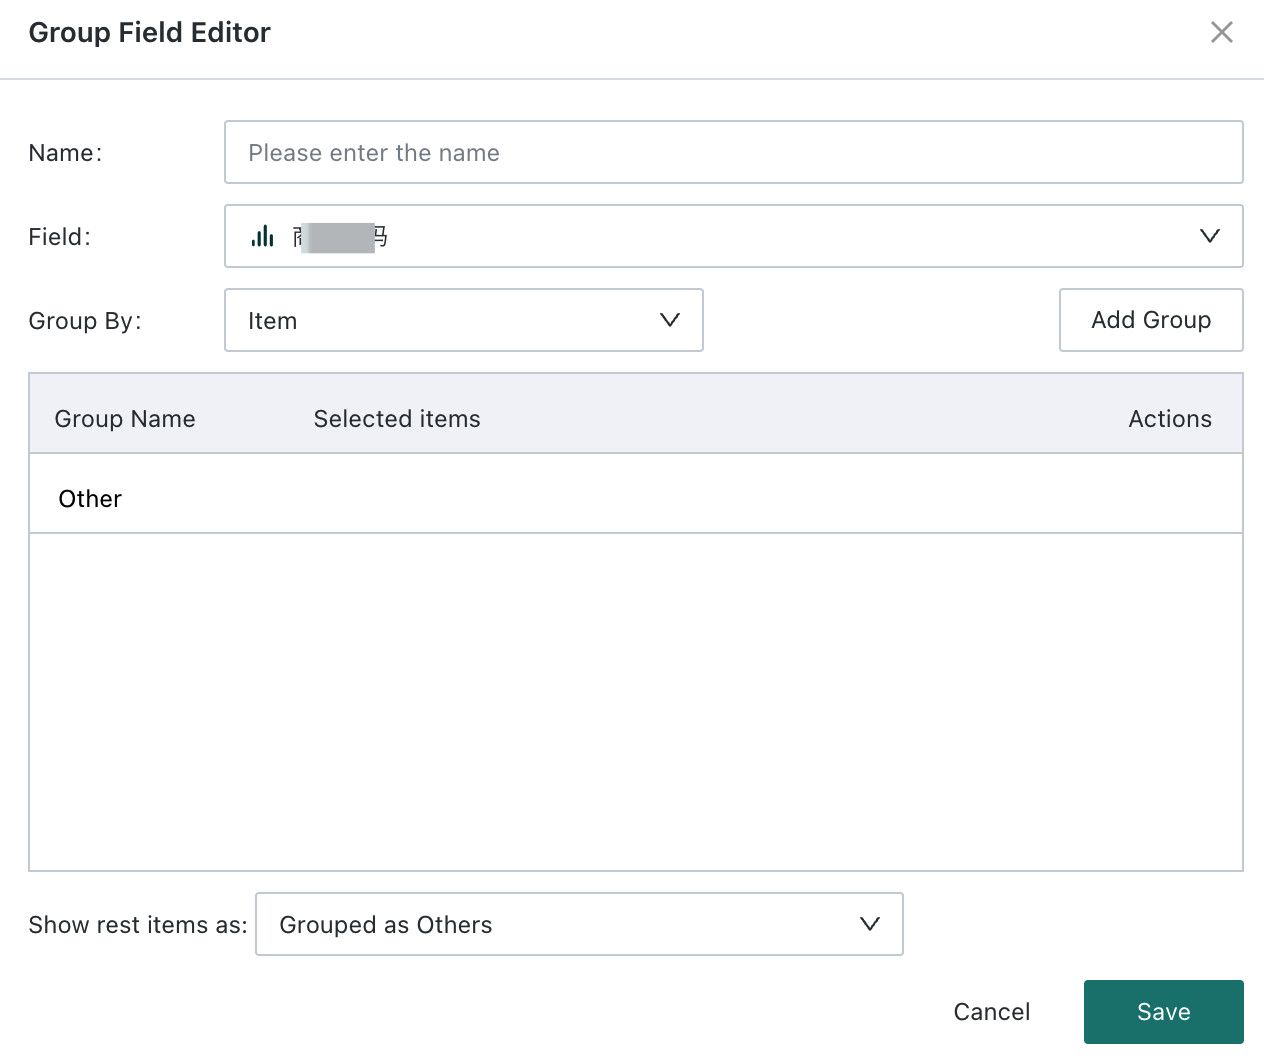
Create a Grouped Field
Click the dropdown arrow next to Create a Calculated Field and choose Create a Grouped Field. In the Group Editor, enter the new field name, choose the field to group, and define the grouping method. Users can also choose whether ungrouped elements appear as merged items or separate items, then click Save. For more details, see Create a New Field.

Export Data
Two export formats are supported: CSV and Excel. For details, see Basic Common Operations.
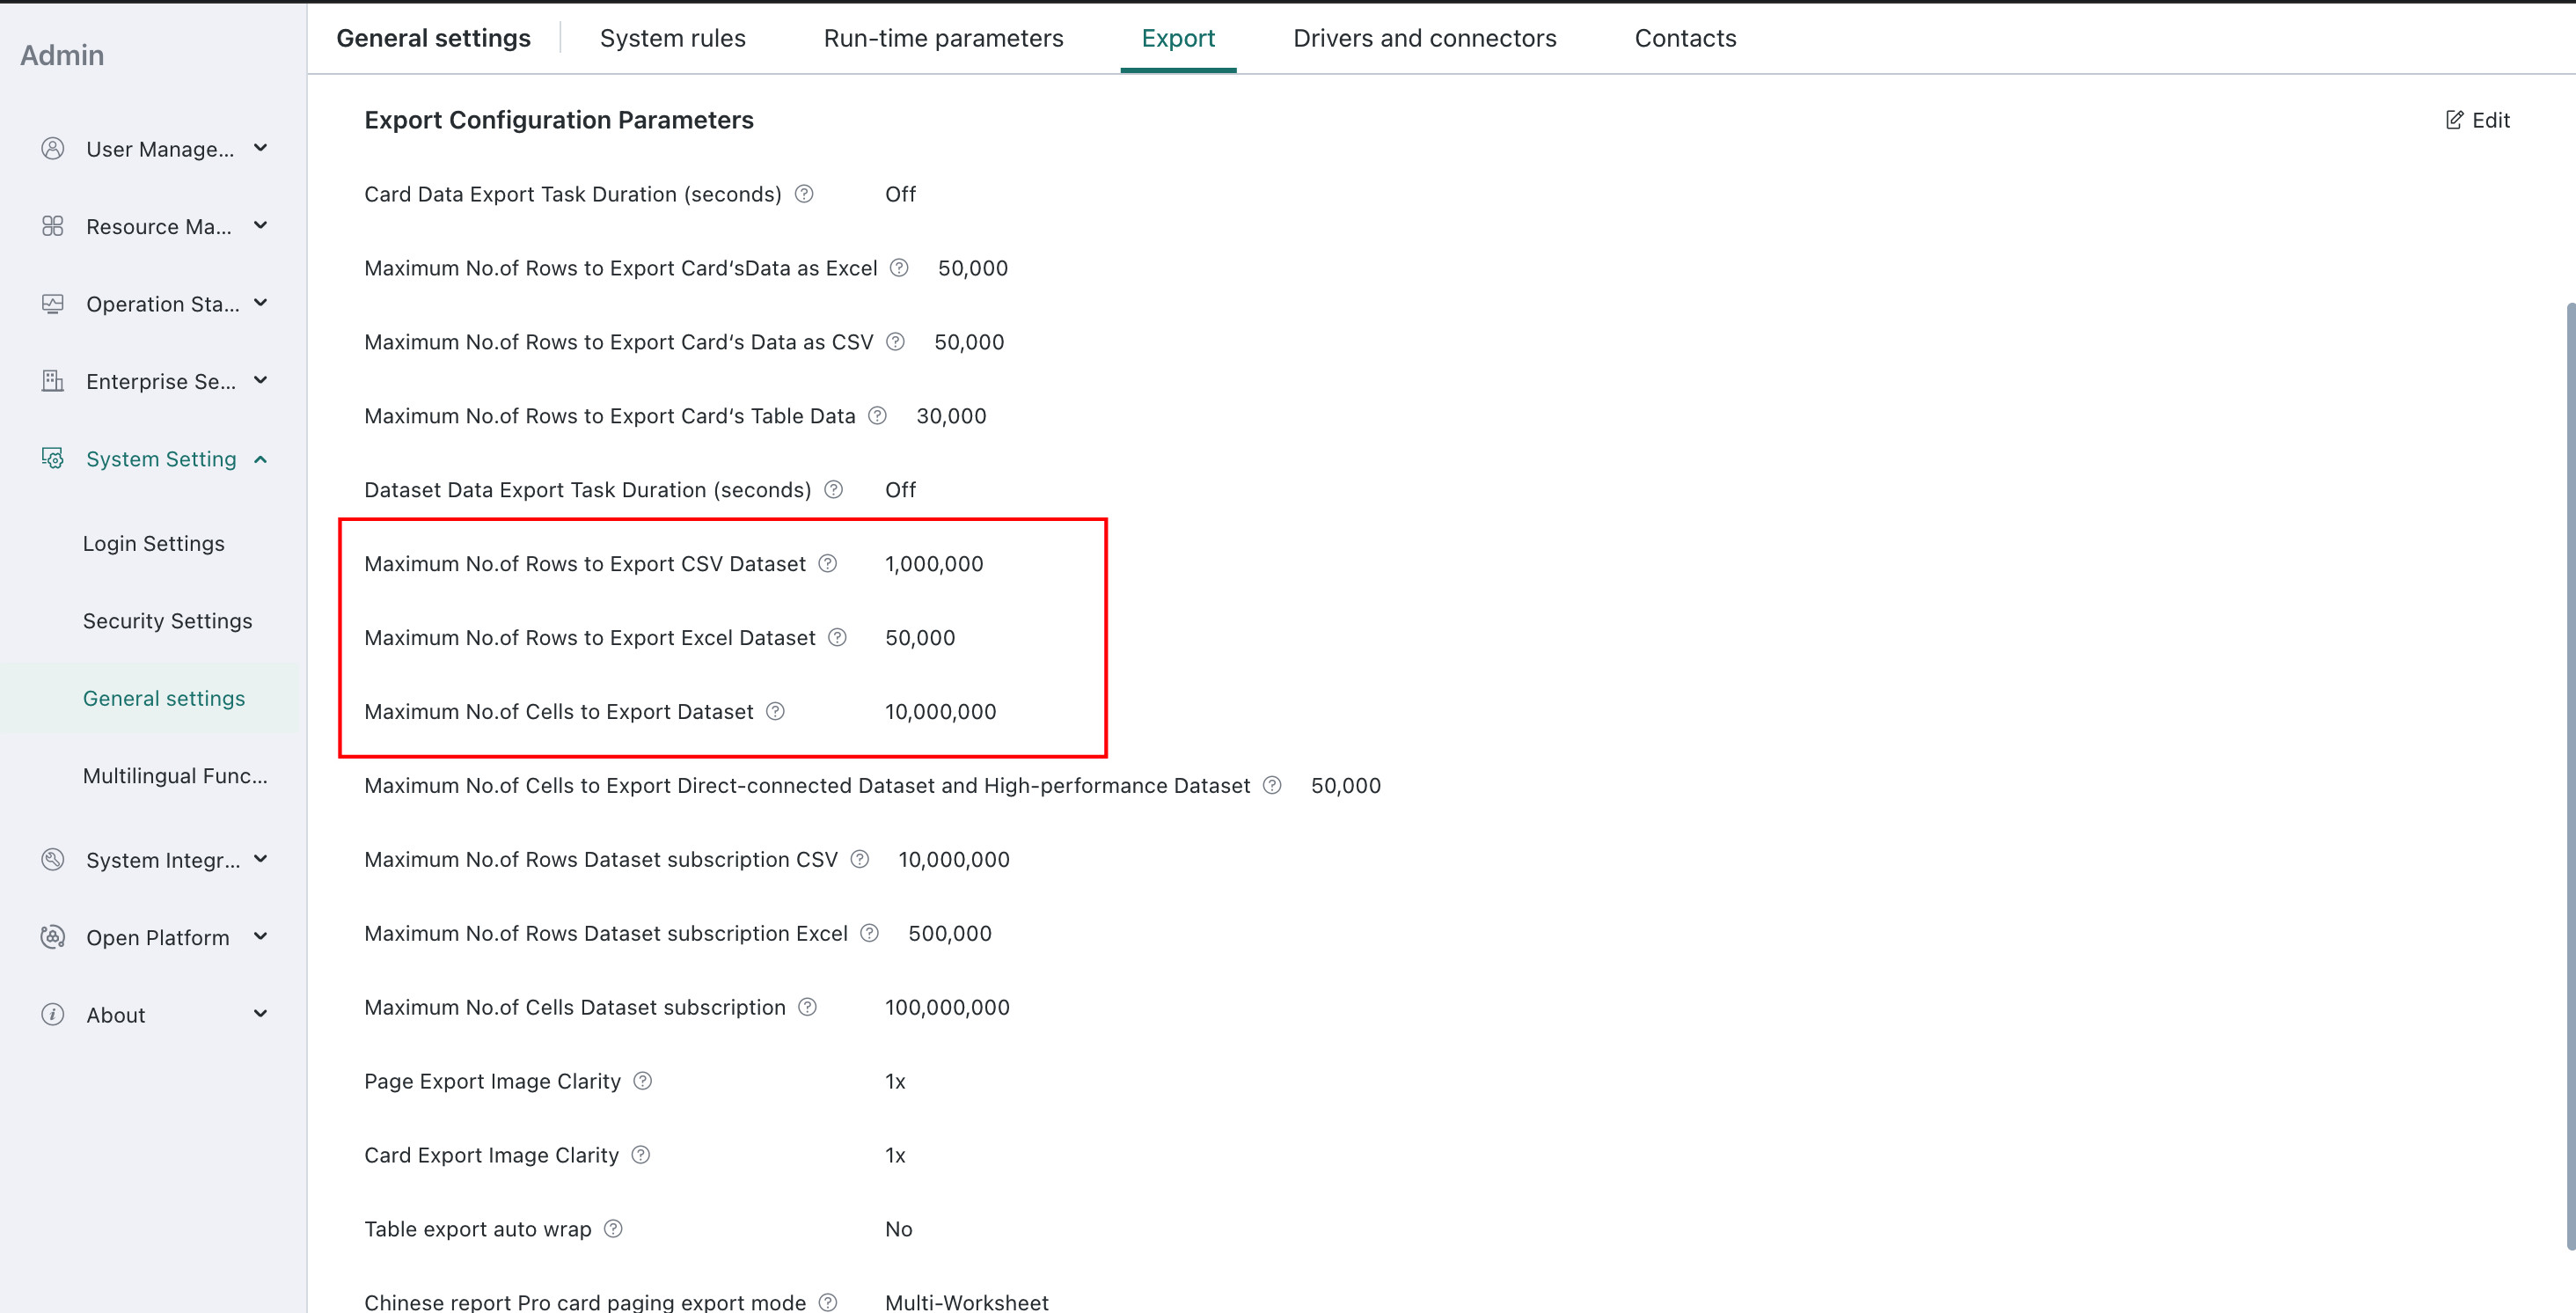
The amount of exported data is controlled by the row limit configured under Admin Center > System Setting > General Settings > Export.
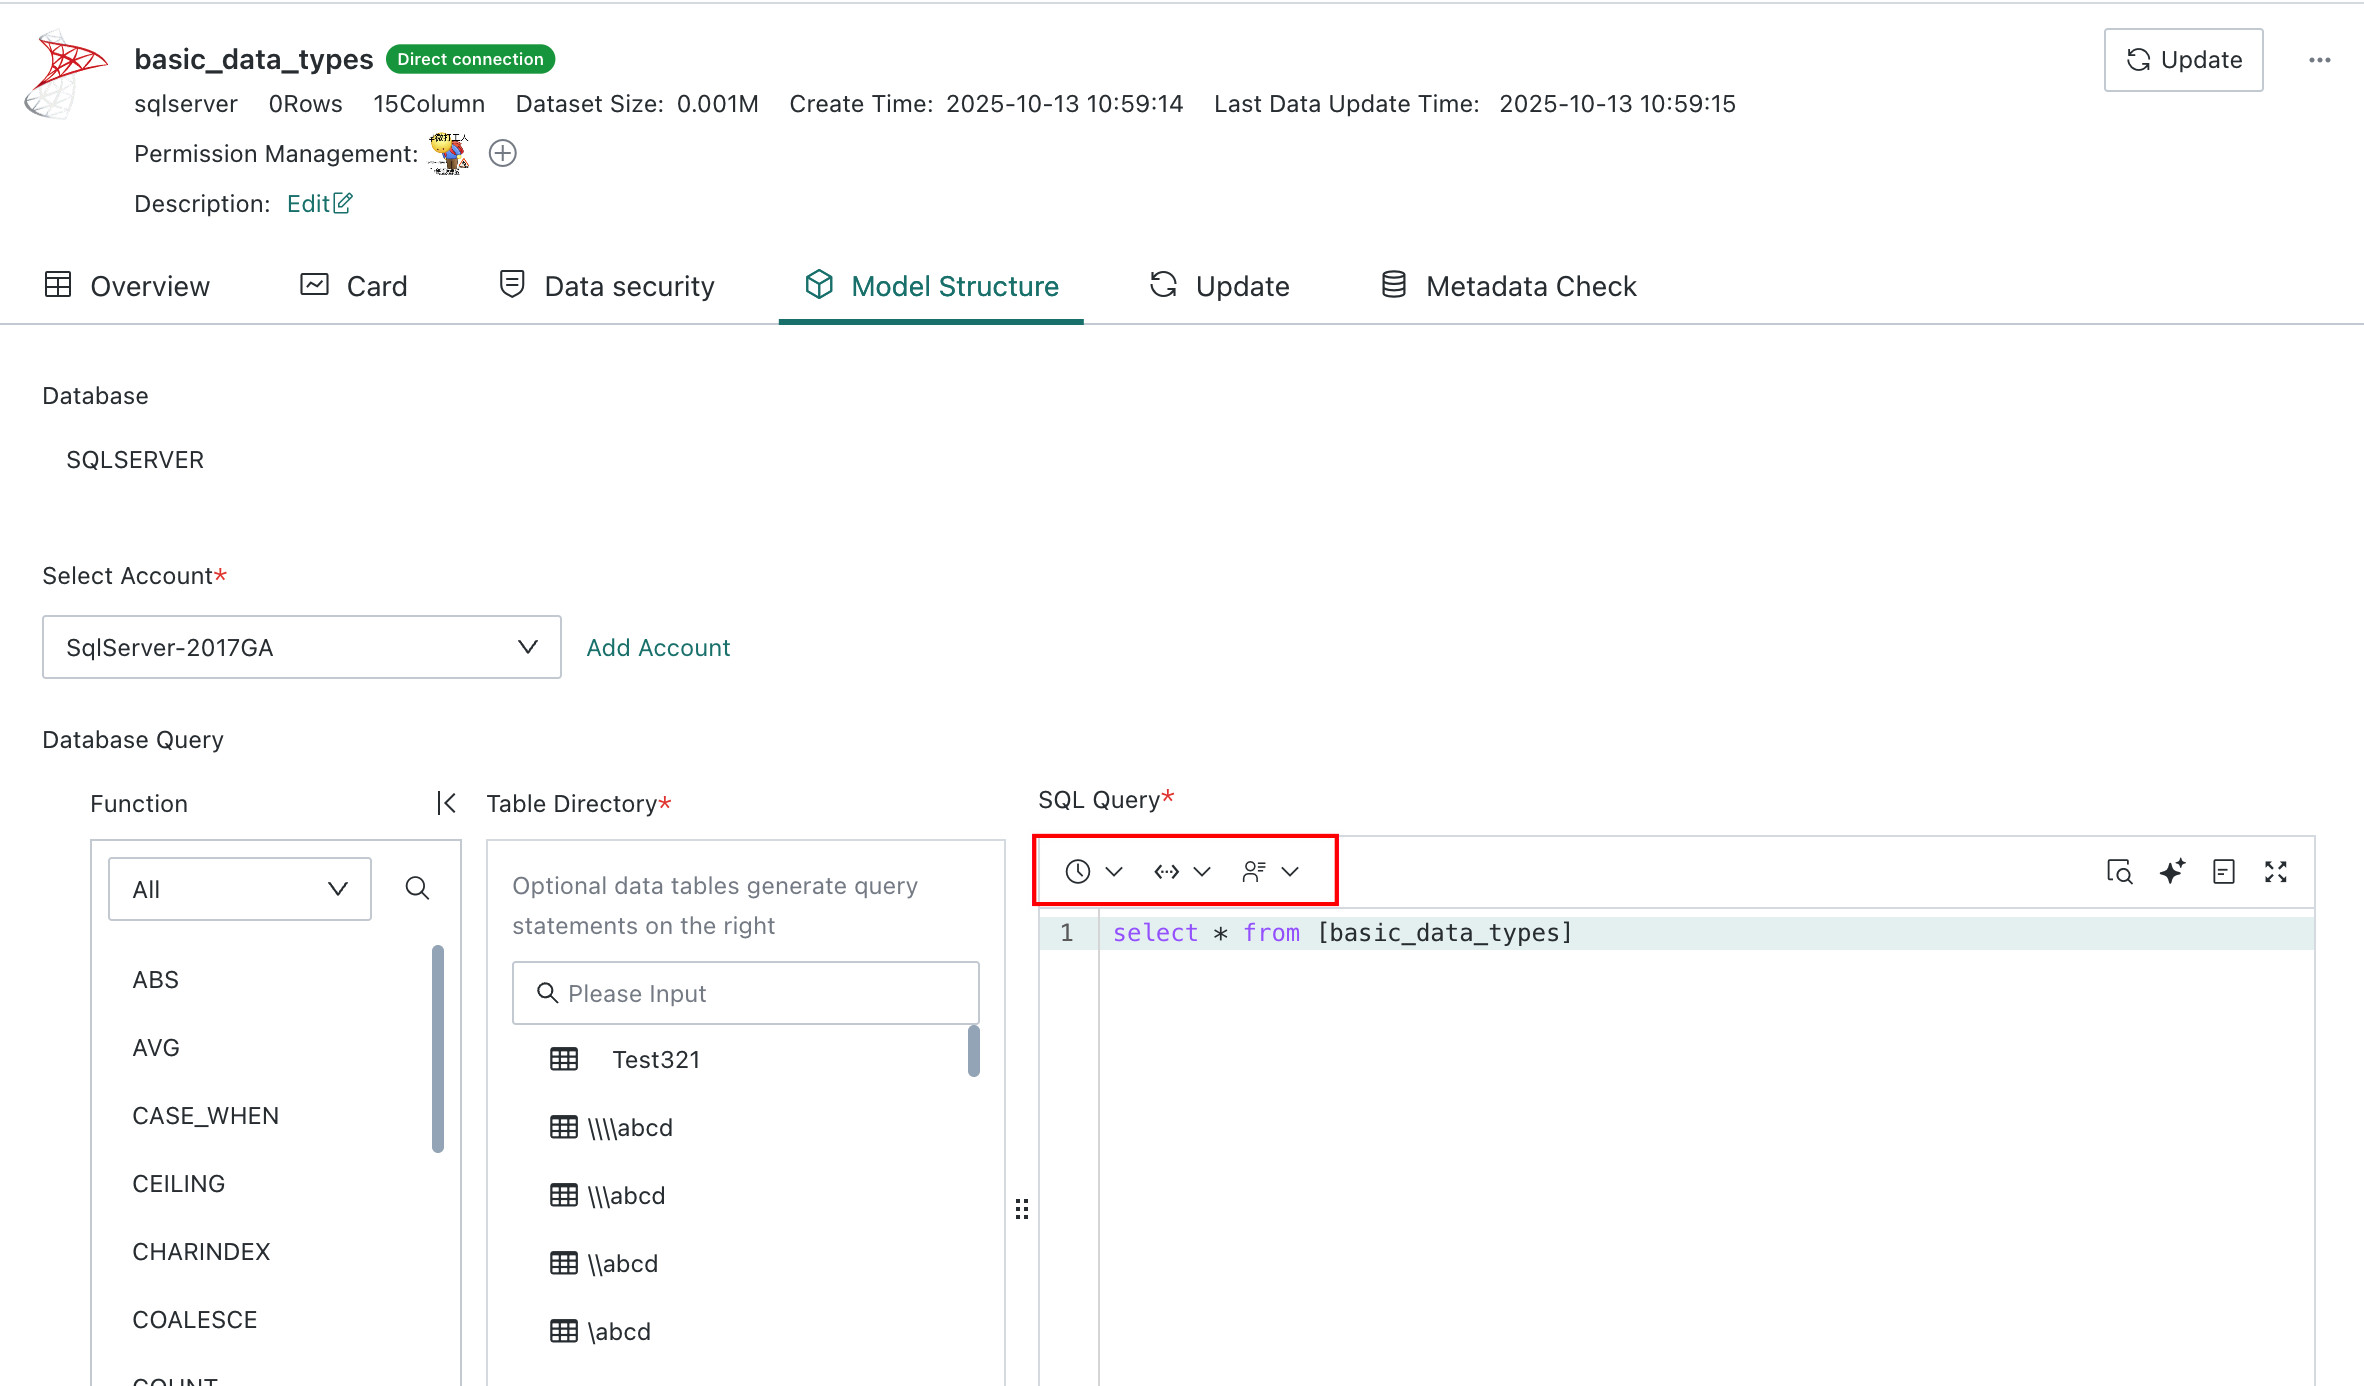
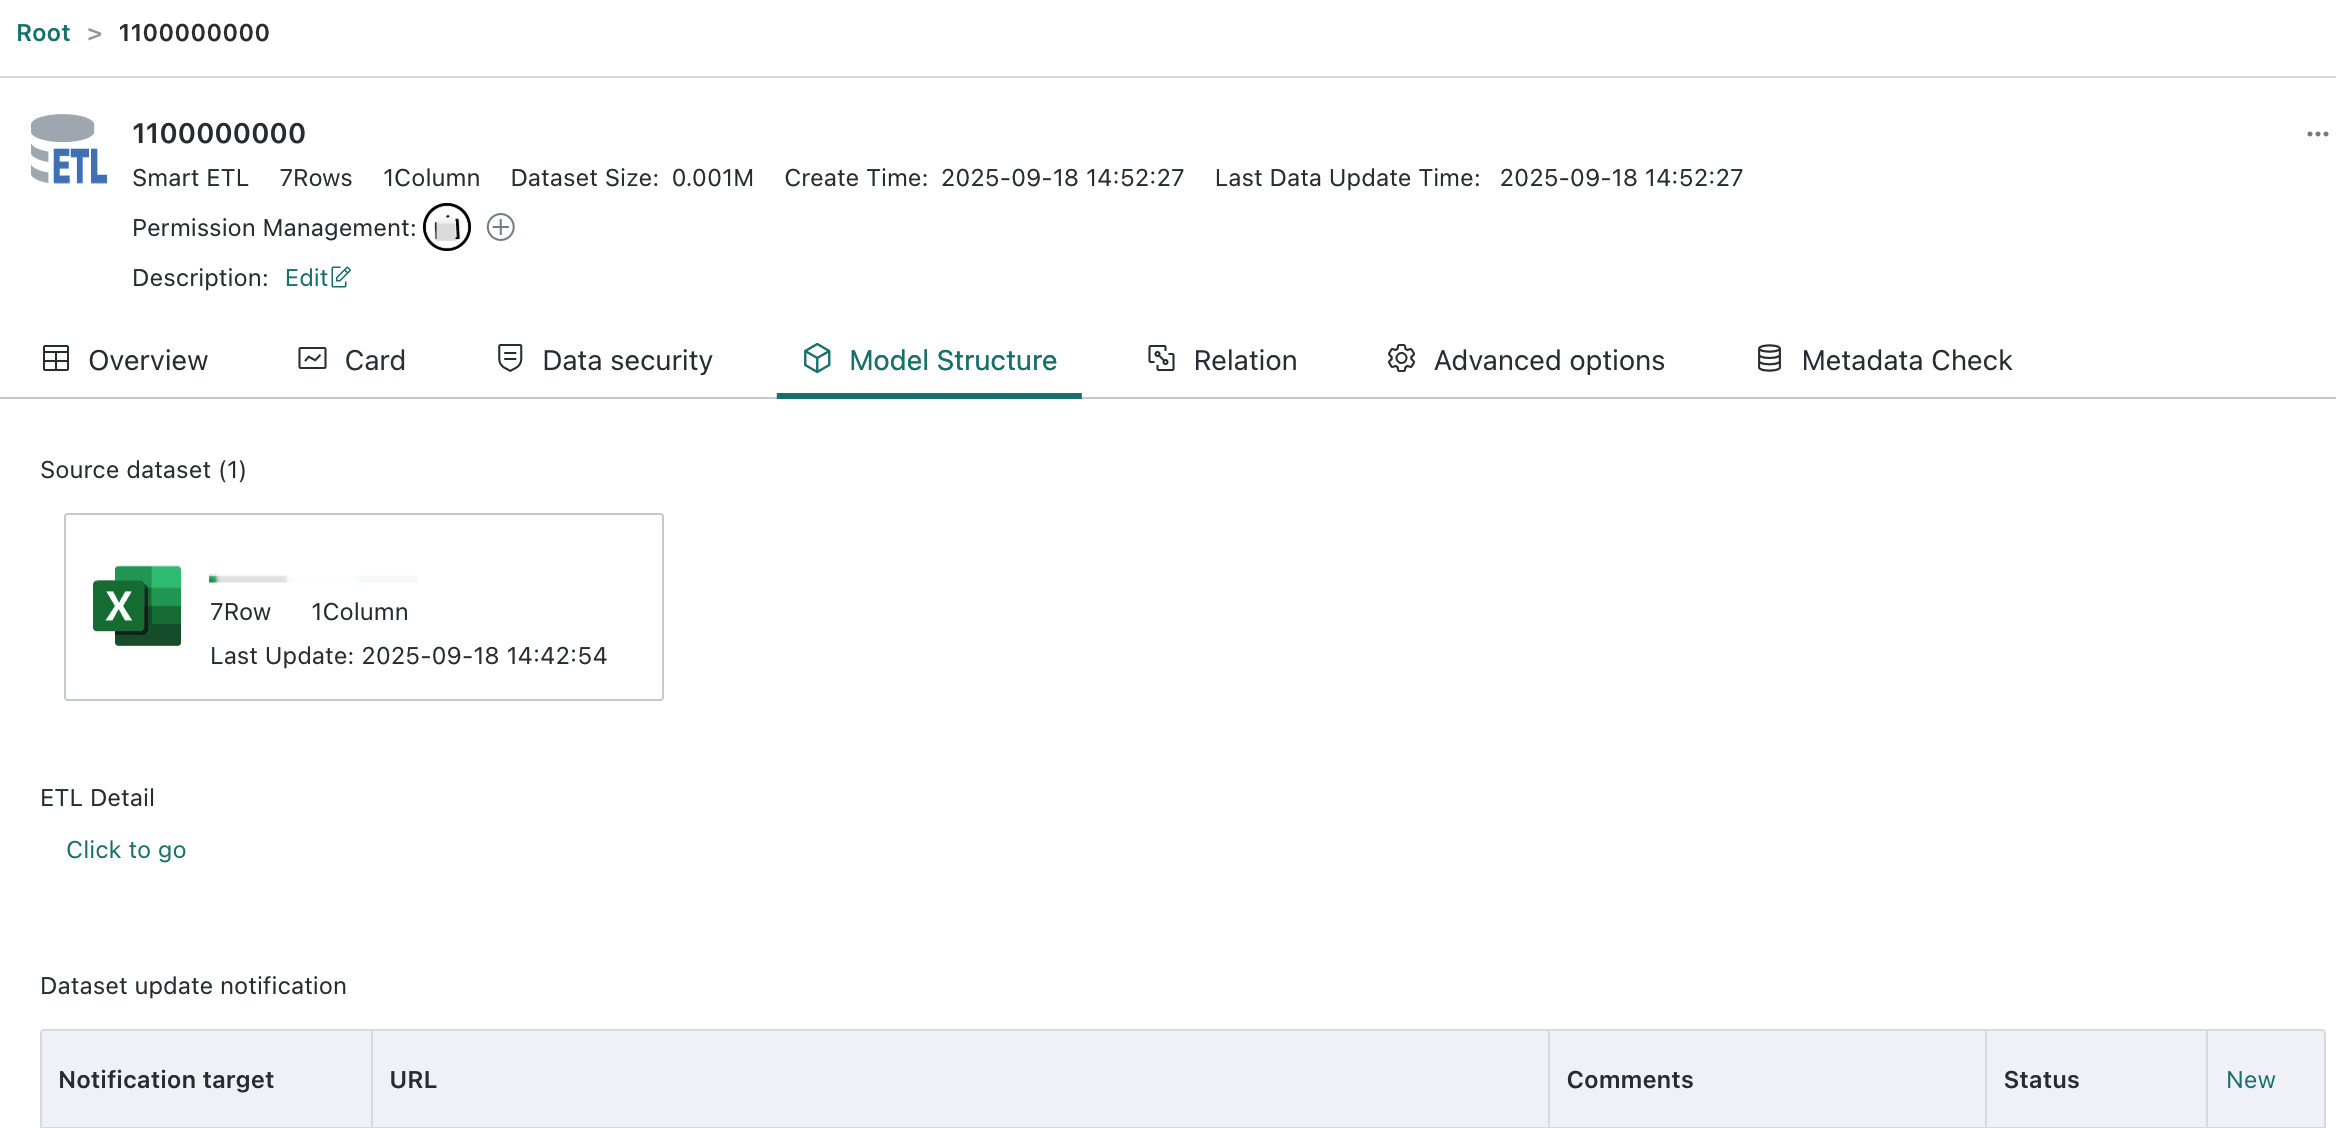
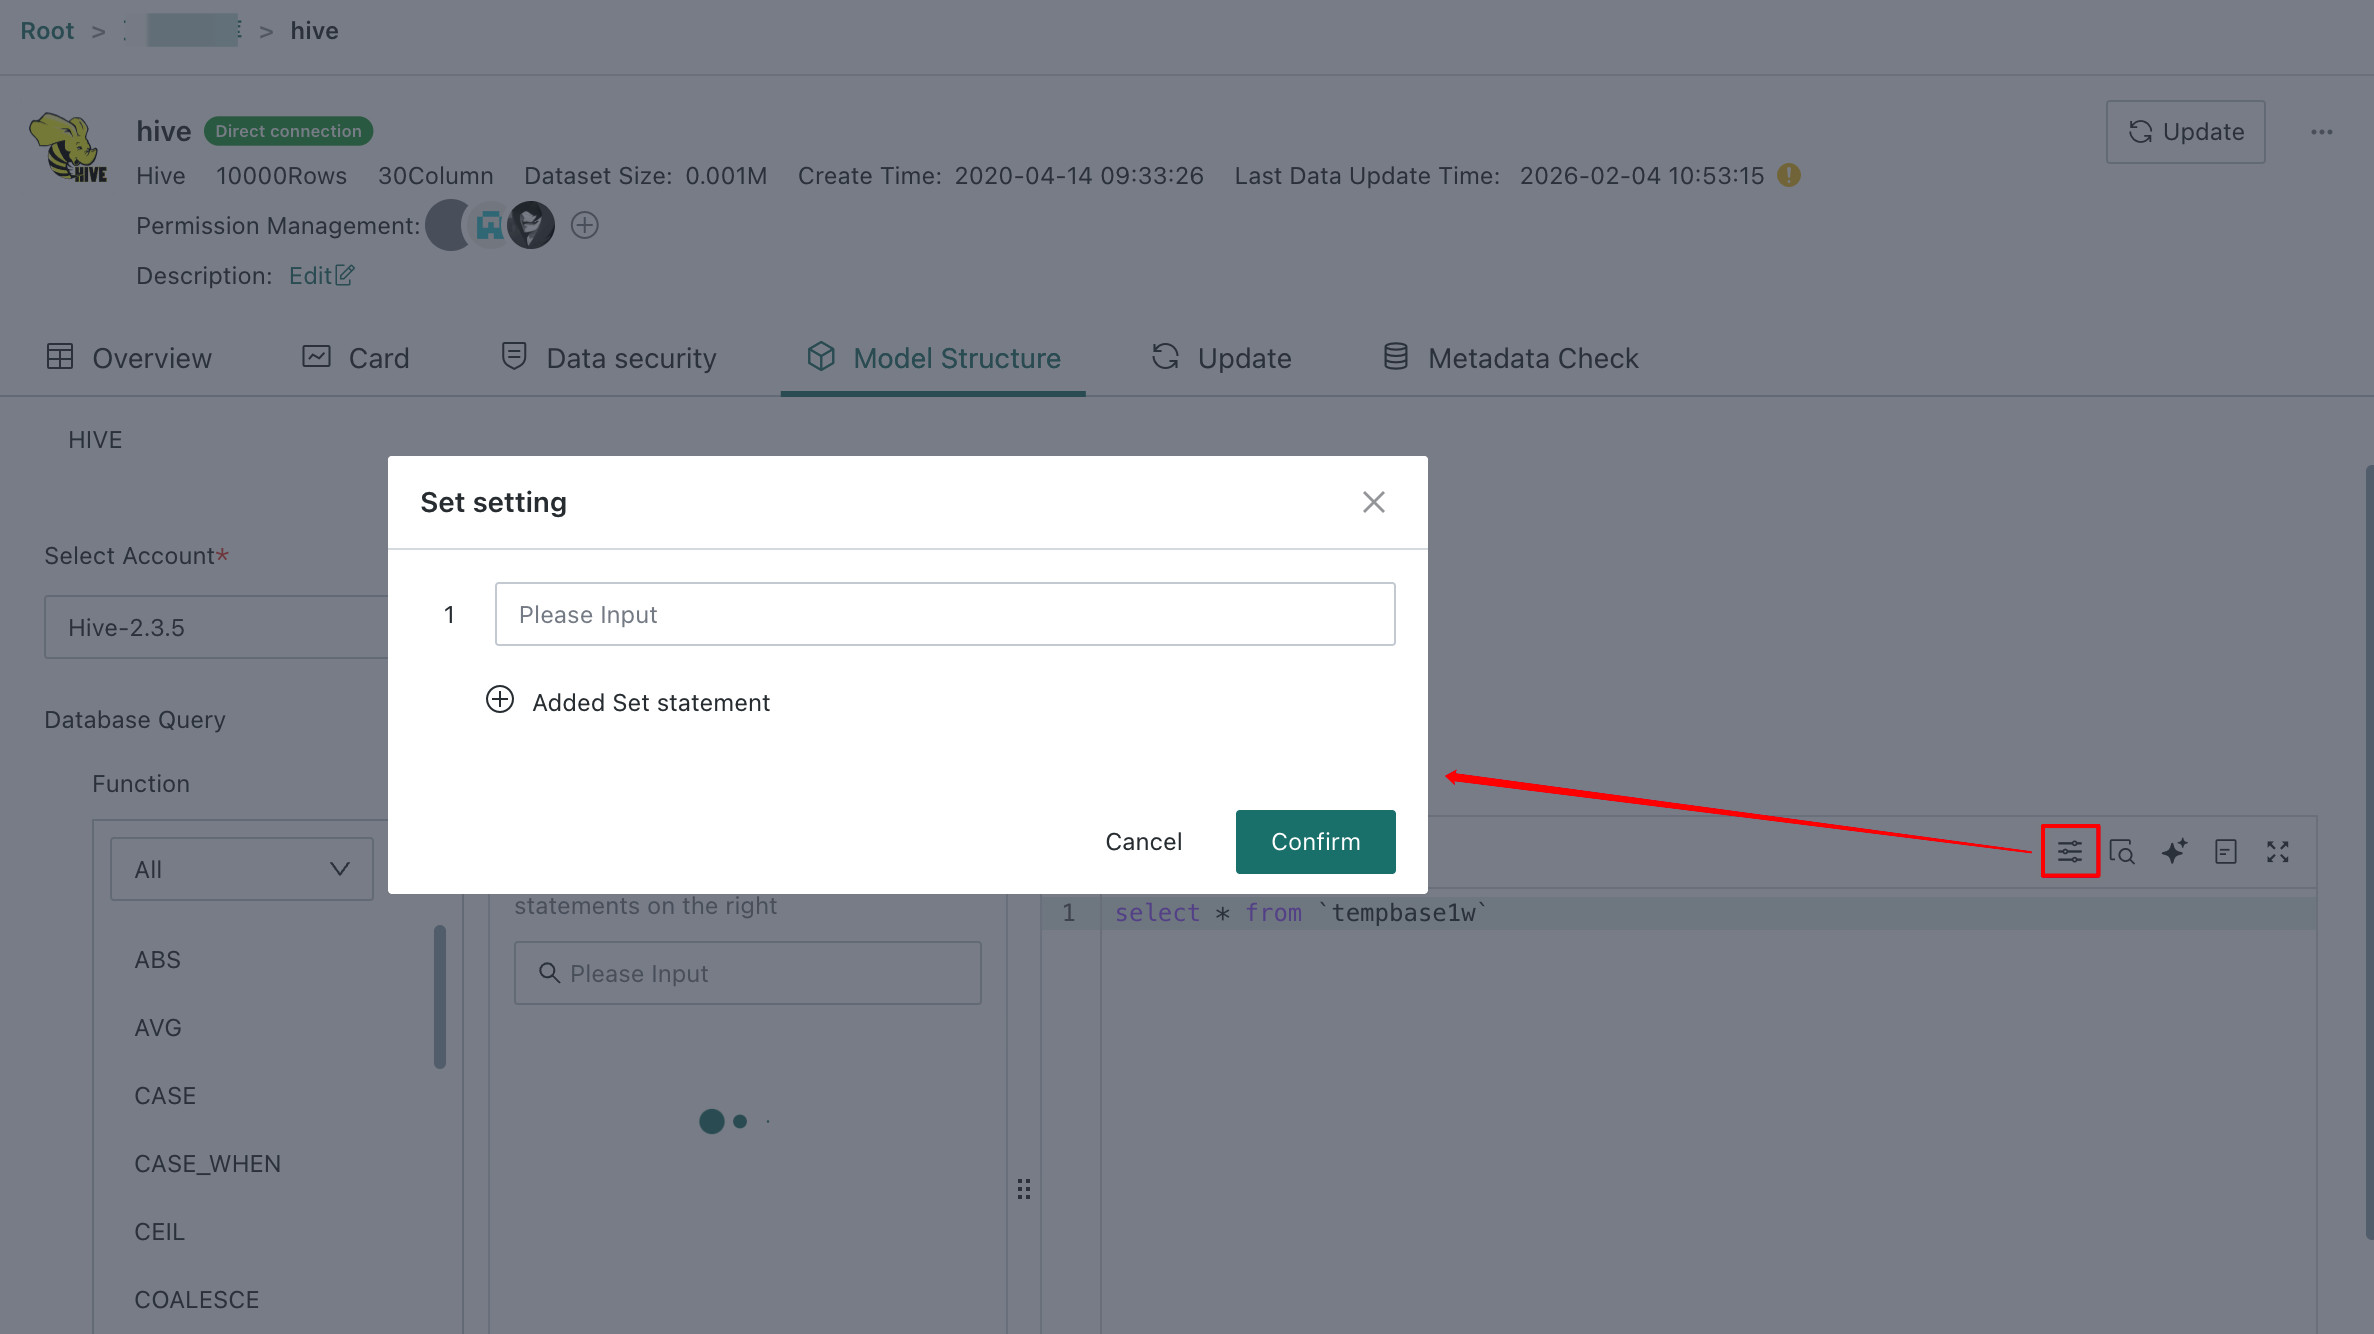
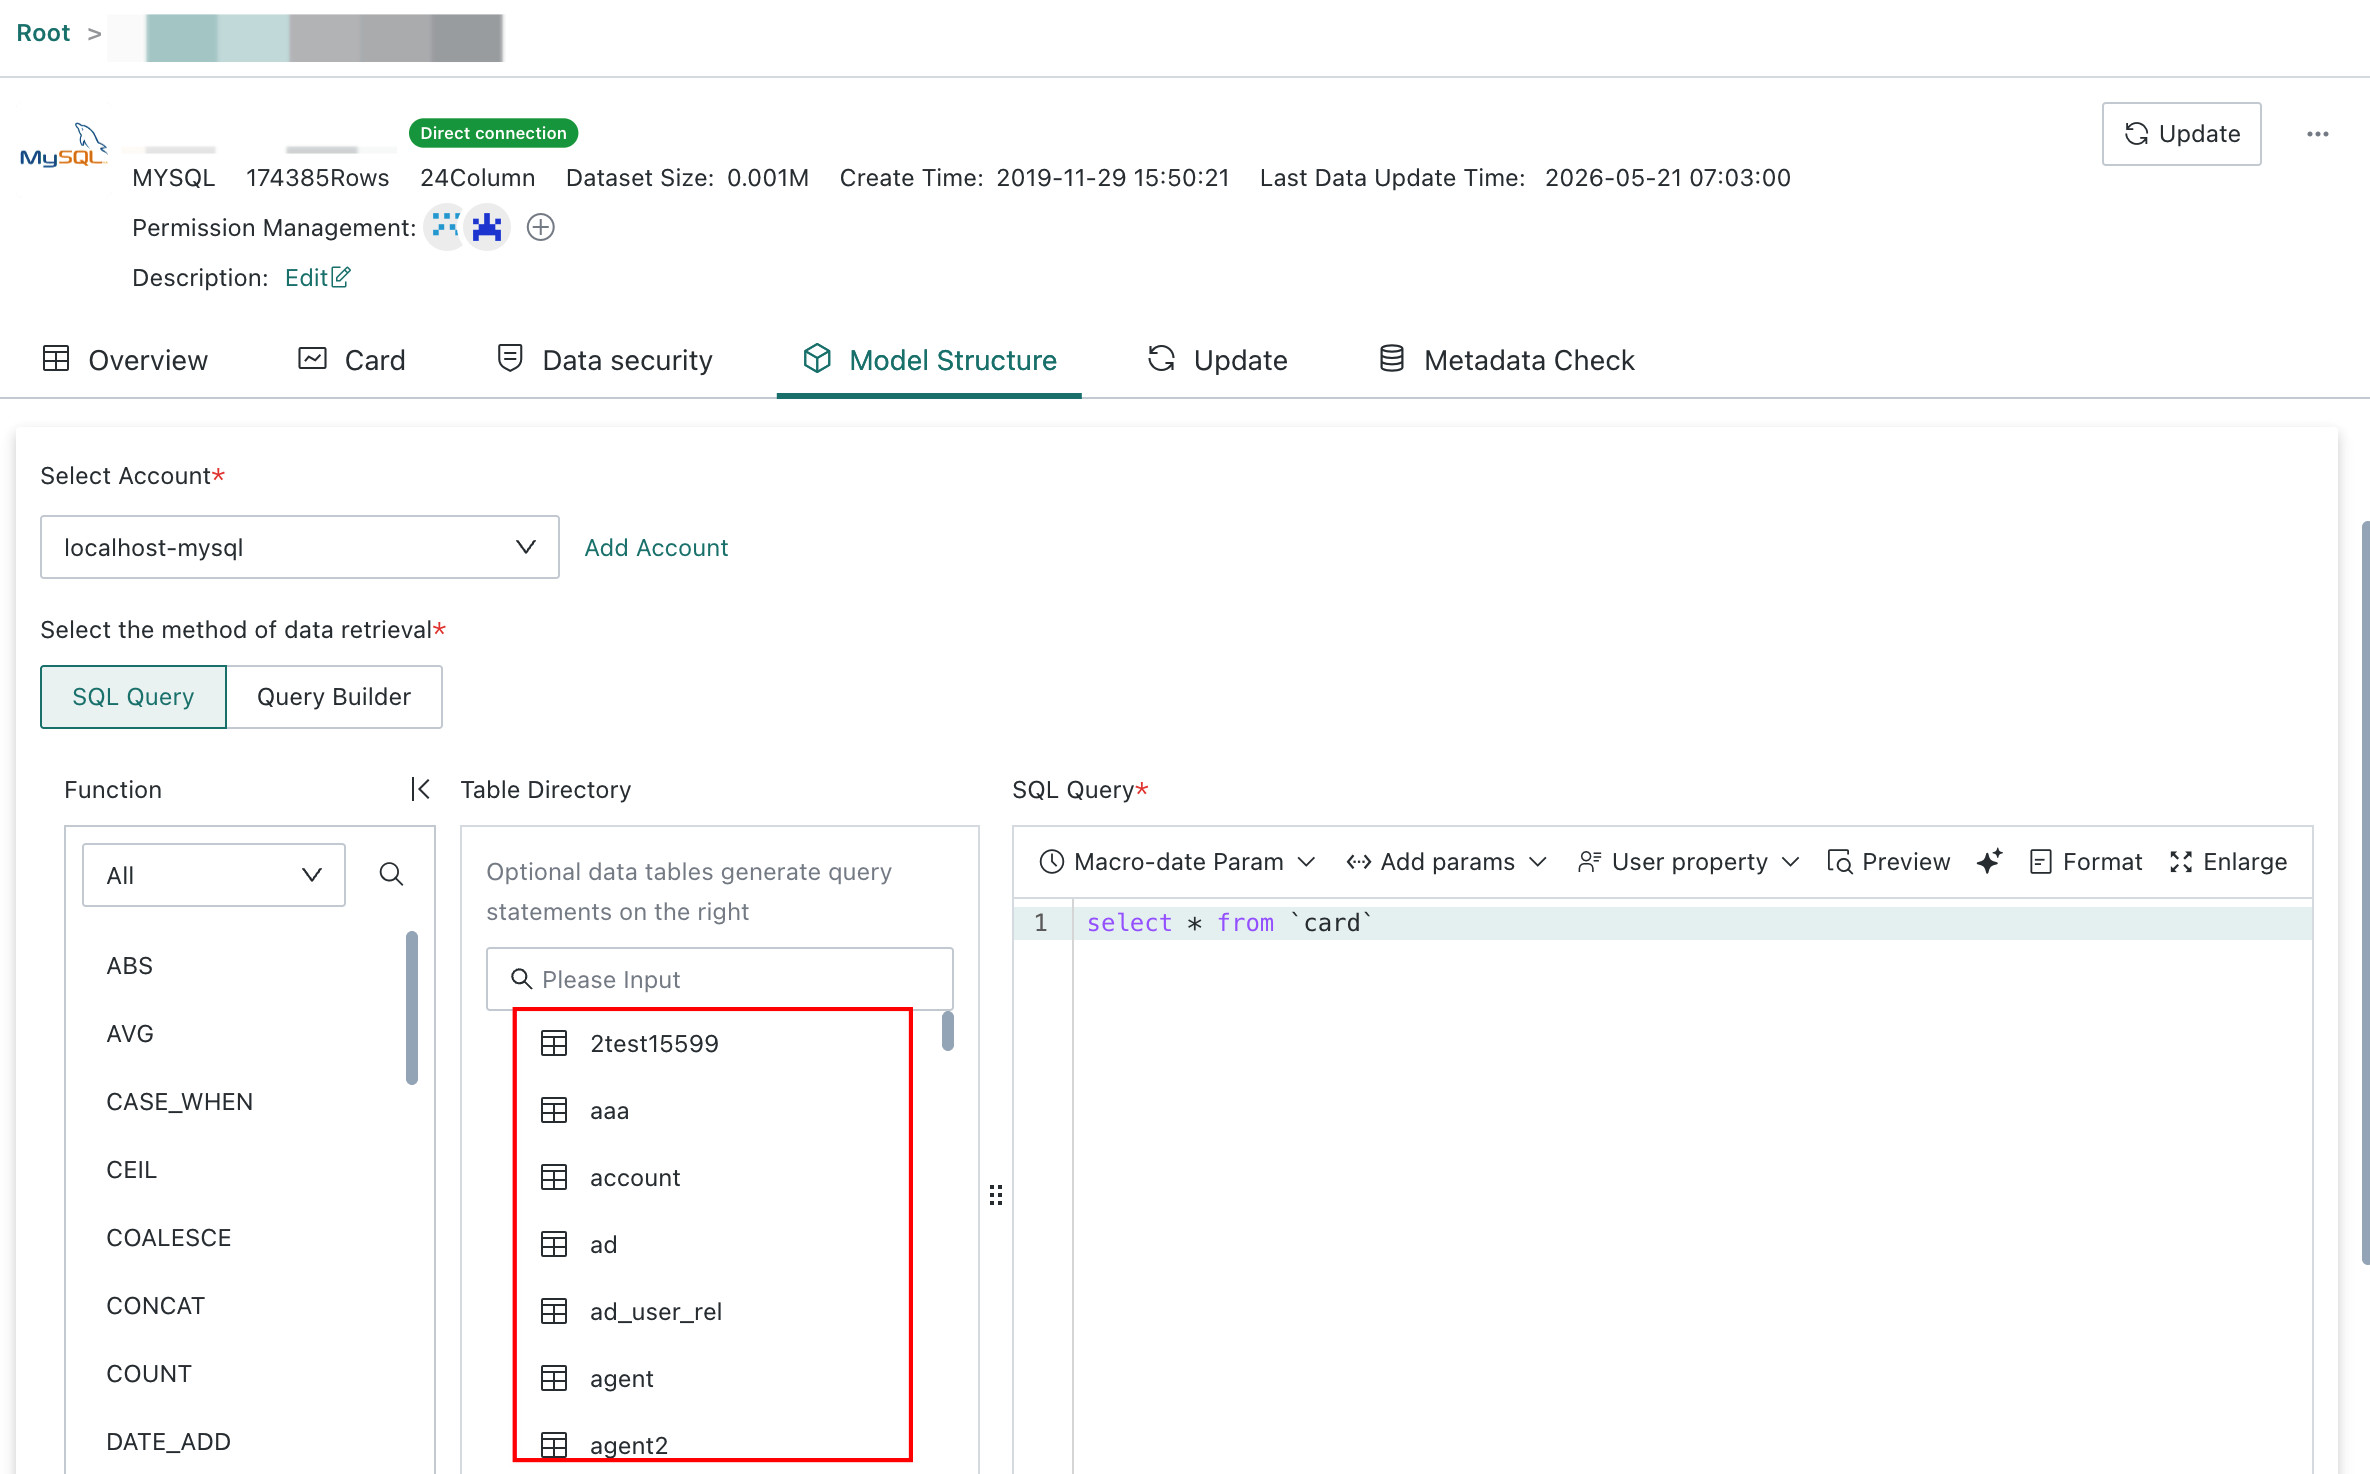
Model Structure
Model Structure refers to the hierarchical data relationships and data flow logic of a dataset. Different dataset types have different model structures. After entering the dataset details page, users can click Model Structure to view items such as data source, data account, ETL flow, database query SQL, and dynamic metrics.
-
For a database dataset, users can review the query SQL and click
Editin the upper-right corner to enter the model structure update workflow.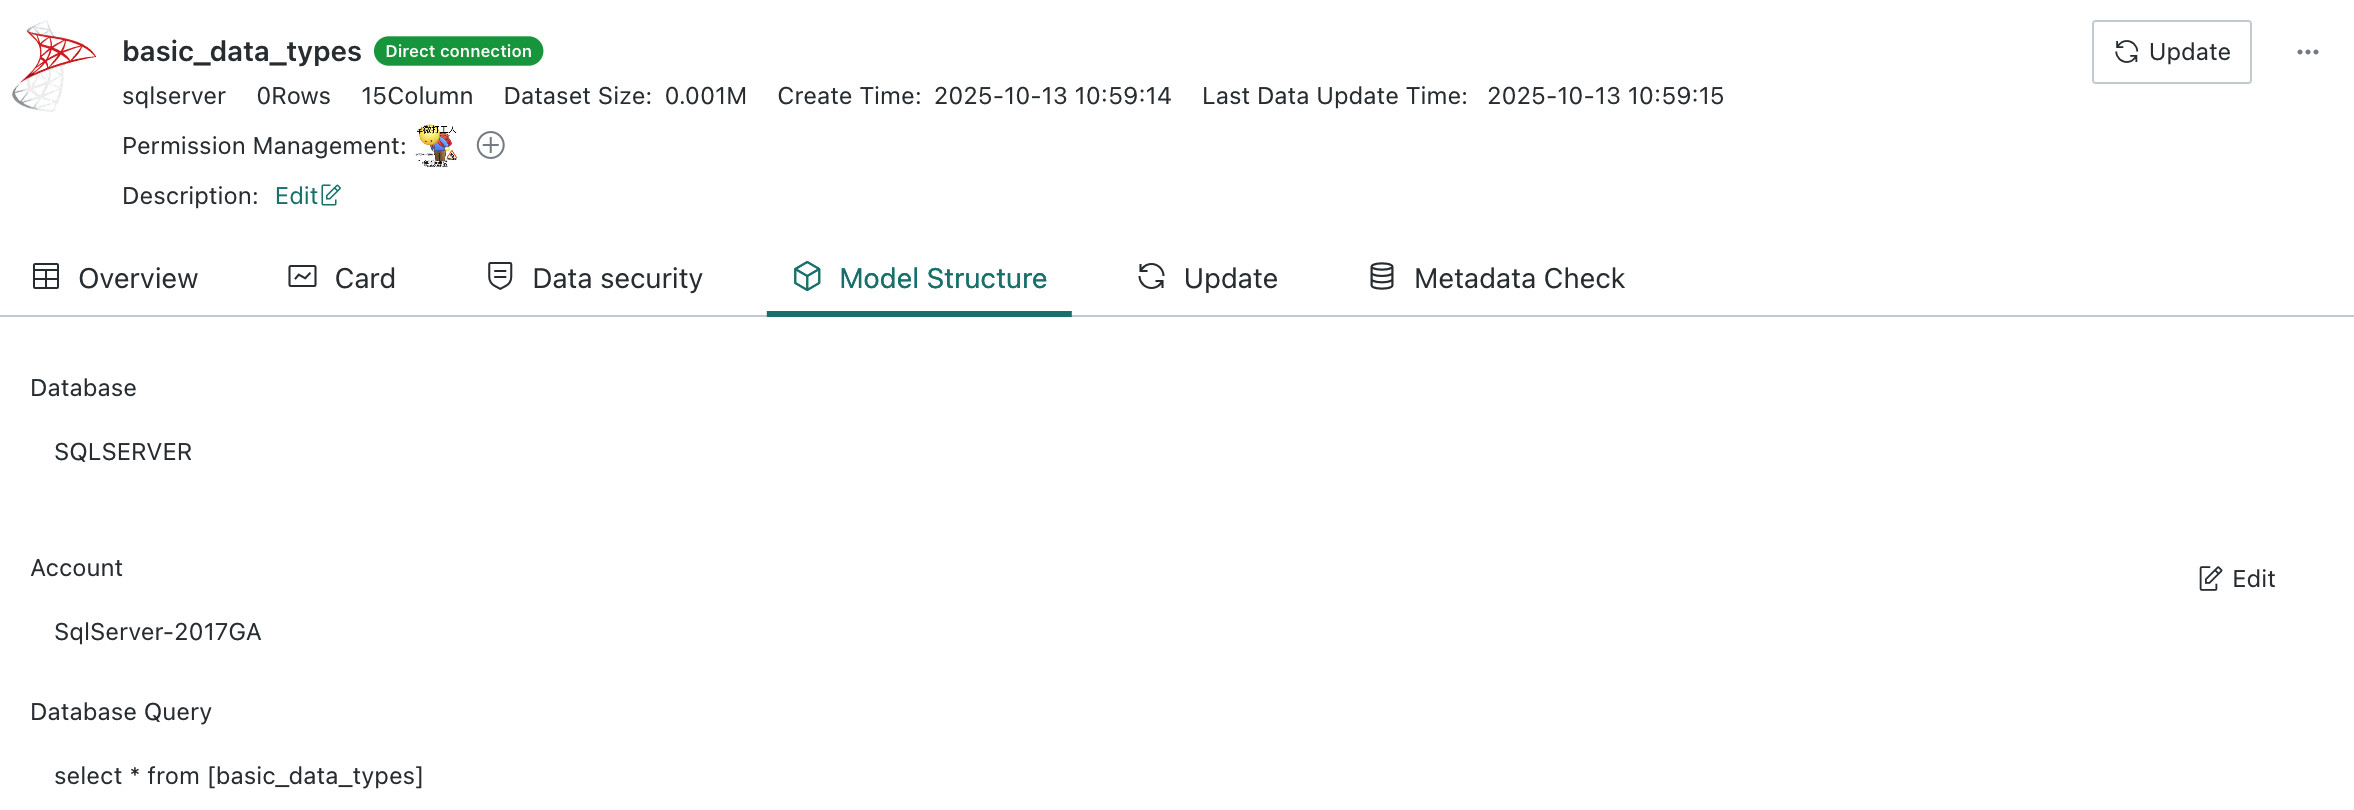
For Direct Connection datasets, time macros, global parameters, and user attributes can be introduced into SQL queries. See Standard Database Connection Guide.
-
For an ETL dataset, users can review the original dataset, and from the ETL details section they can also jump to the ETL model information.
-
For a Direct Connection Hive dataset, clicking
Editin the upper-right corner enters the model structure update workflow, which focuses on changing the data source.-
Optional: Select another account or create a new Data Account.
-
Optional: Query Variables. Multiple query variables are supported and are executed before the main query SQL is submitted.
Note- Query Variables currently support MaxCompute, Impala, and Hive. For other database engines, contact Guandata support.
- Because Query Variables are pushed down and executed on the underlying data platform, the supported parameter scope and syntax must follow the target platform.
-
Required: Choose the query table. Users can enter or select the SQL used to query the target table, or use Visual Modeling. The workflow is the same as during dataset creation.
After switching the table or data source, the model structure of the current dataset changes. The system opens an
Update Model Structure Confirmationdialog where the user must manually confirm the field mapping between the old and new structures. If fields are left unmatched, data loss may occur.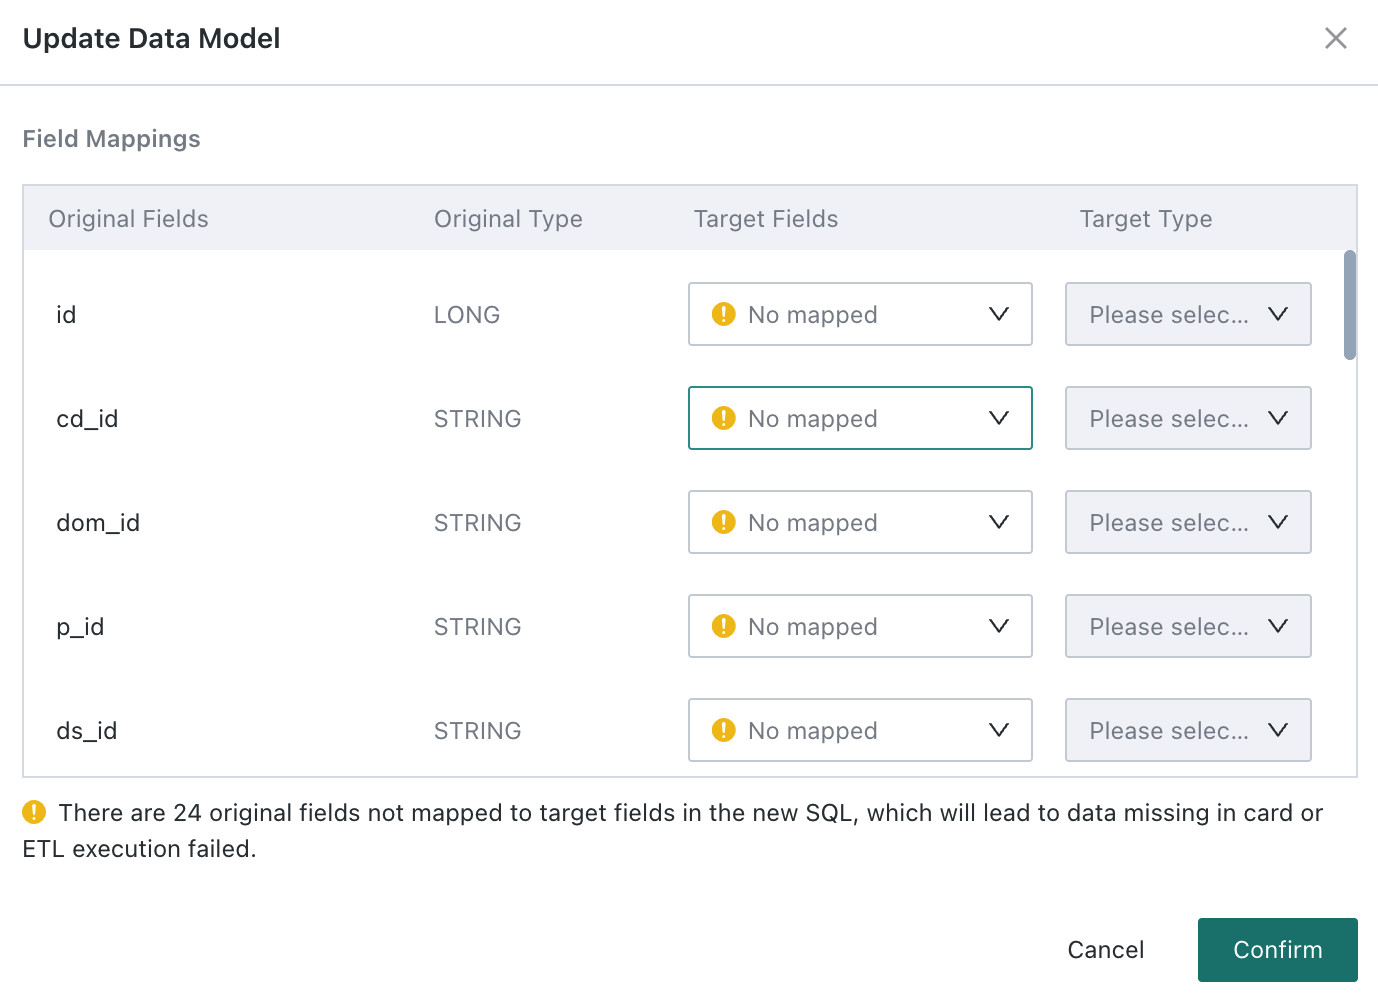
Two update modes are supported:
Update Structure OnlyandReset Dataset. Choose the appropriate option to finish the model structure update. -
- When
Update Data Structure Onlyis selected and confirmed, the target dataset structure is updated according to the schema parsed from the model SQL, without performing a full dataset refresh.- If the source has new columns compared with the target, those columns are added automatically, but contain no historical data.
- If the source schema matches the target schema, neither structure nor data changes.
- If the source is missing columns compared with the target, those columns and their data are removed from the dataset.
- If a column name changes, the dataset column name is updated but the data remains unchanged.
- If
Update Data Structure Onlyis not selected, the system follows the existing behavior: it performs a full data refresh and updates the schema.