Basic Common Operations
Overview
Users can perform a series of common operations on datasets, such as Save As, renaming, and deletion. This article explains those common workflows in detail.
User Guide
Search for Datasets
Guandata BI provides an efficient search experience for finding datasets, including locating folders in the global directory tree and applying precise filtering on the dataset list page within a specific directory.
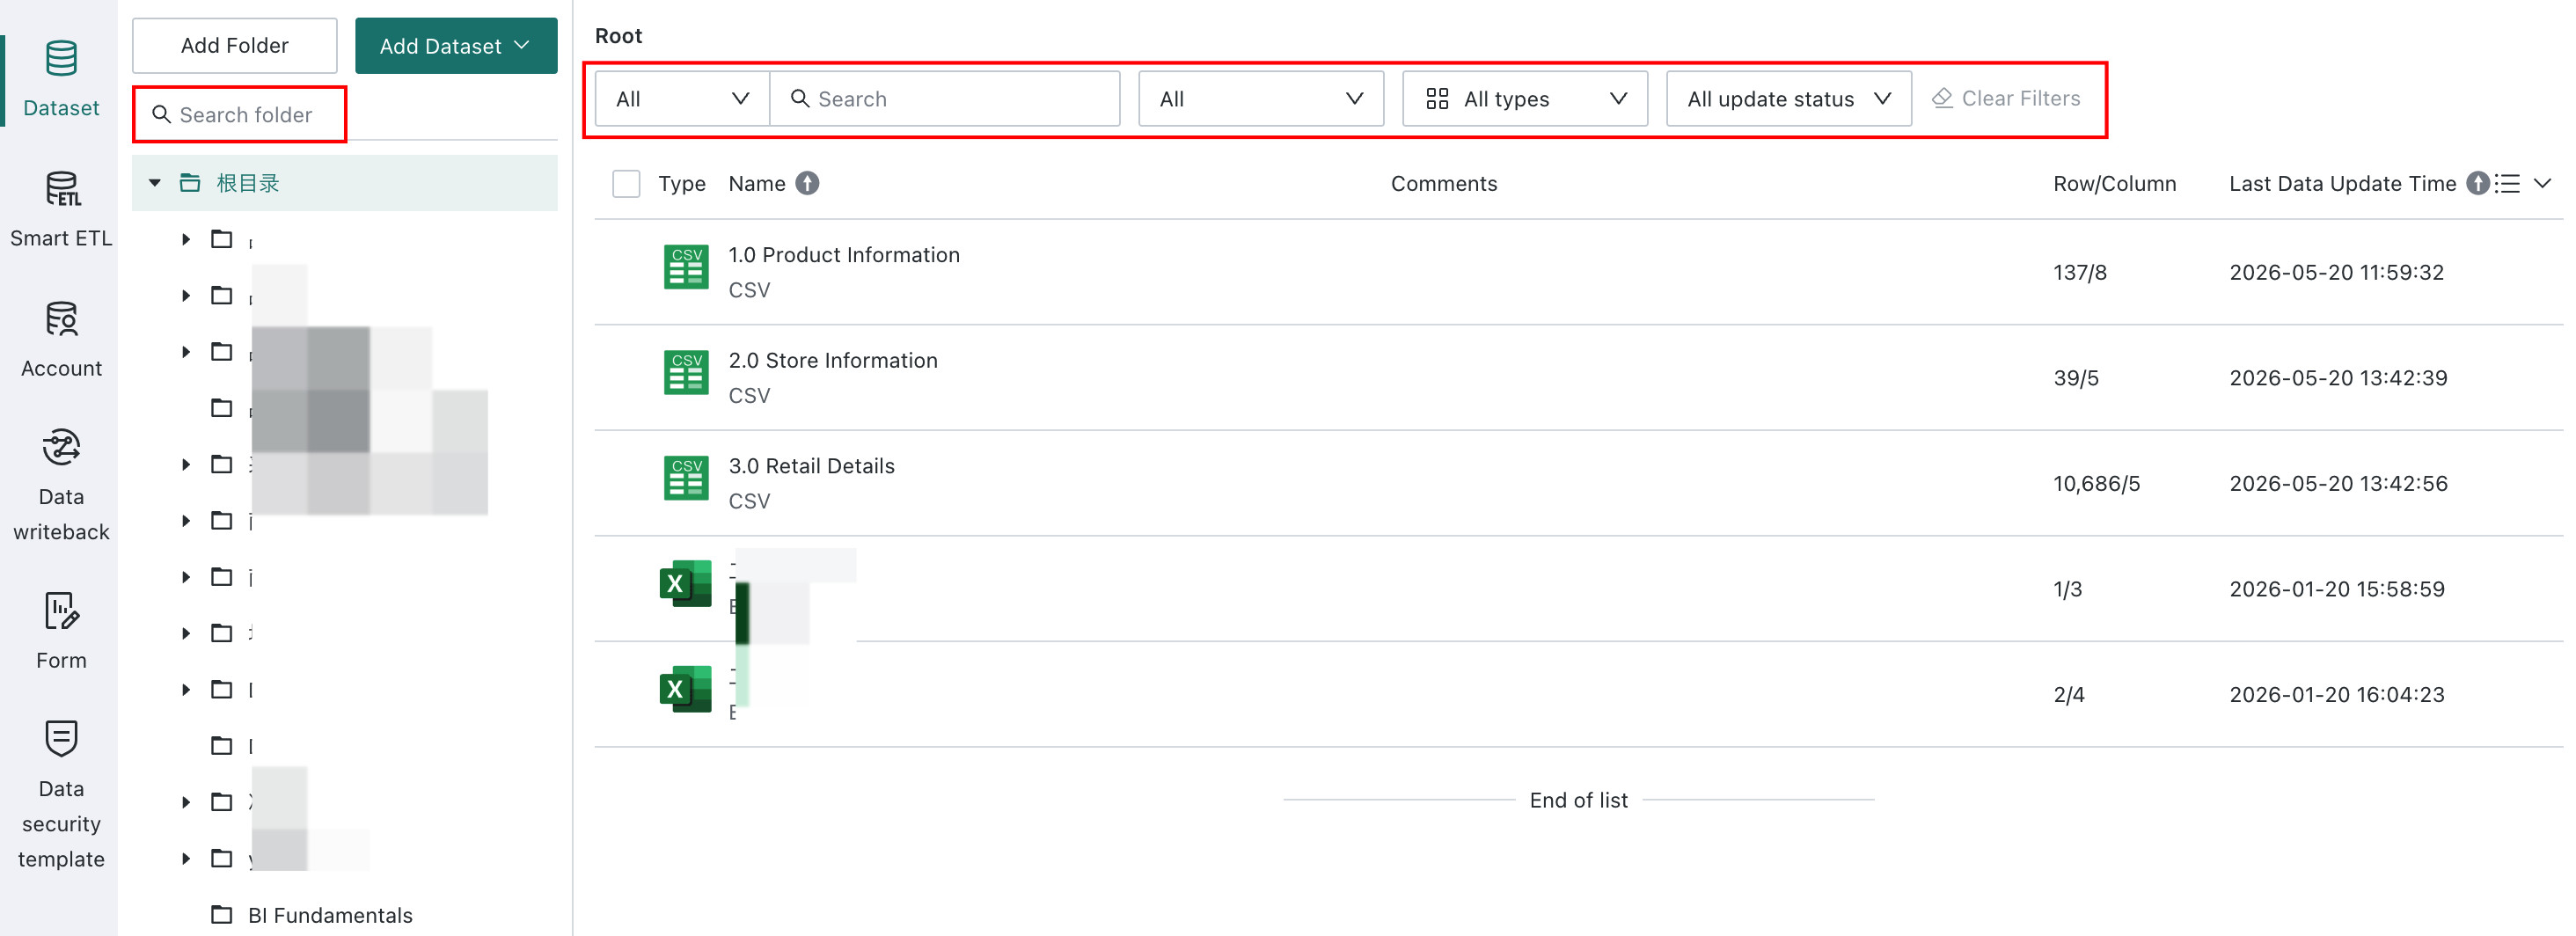
- Global Directory Tree: Clearly shows dataset categories and hierarchy in a tree structure. Users can click directory nodes and drill down level by level into a specific category. This structured navigation helps users understand the overall layout and quickly locate the target dataset directory.
- Dataset List Page in a Specific Directory: After locating a target directory through the global directory tree, users can further refine the search on the dataset list page. The page usually displays key information such as dataset name, description, and update time, and allows sorting, searching, and filtering by conditions such as permissions, dataset type, or update status.
These two methods can be used together for a more efficient search experience.
For example, users can first use the global directory tree to narrow the scope, then refine the search from the dataset list page in that directory. If they need to switch to another directory during filtering, they can click the global directory tree directly without restarting the search from the top level.
Export Datasets
Guandata BI supports exporting datasets in CSV or Excel format through either of the following entry points:
Entry 1: Select the current dataset, click Export Dataset, and choose the export format.
If the user does not have dataset ownership, data export is not allowed.
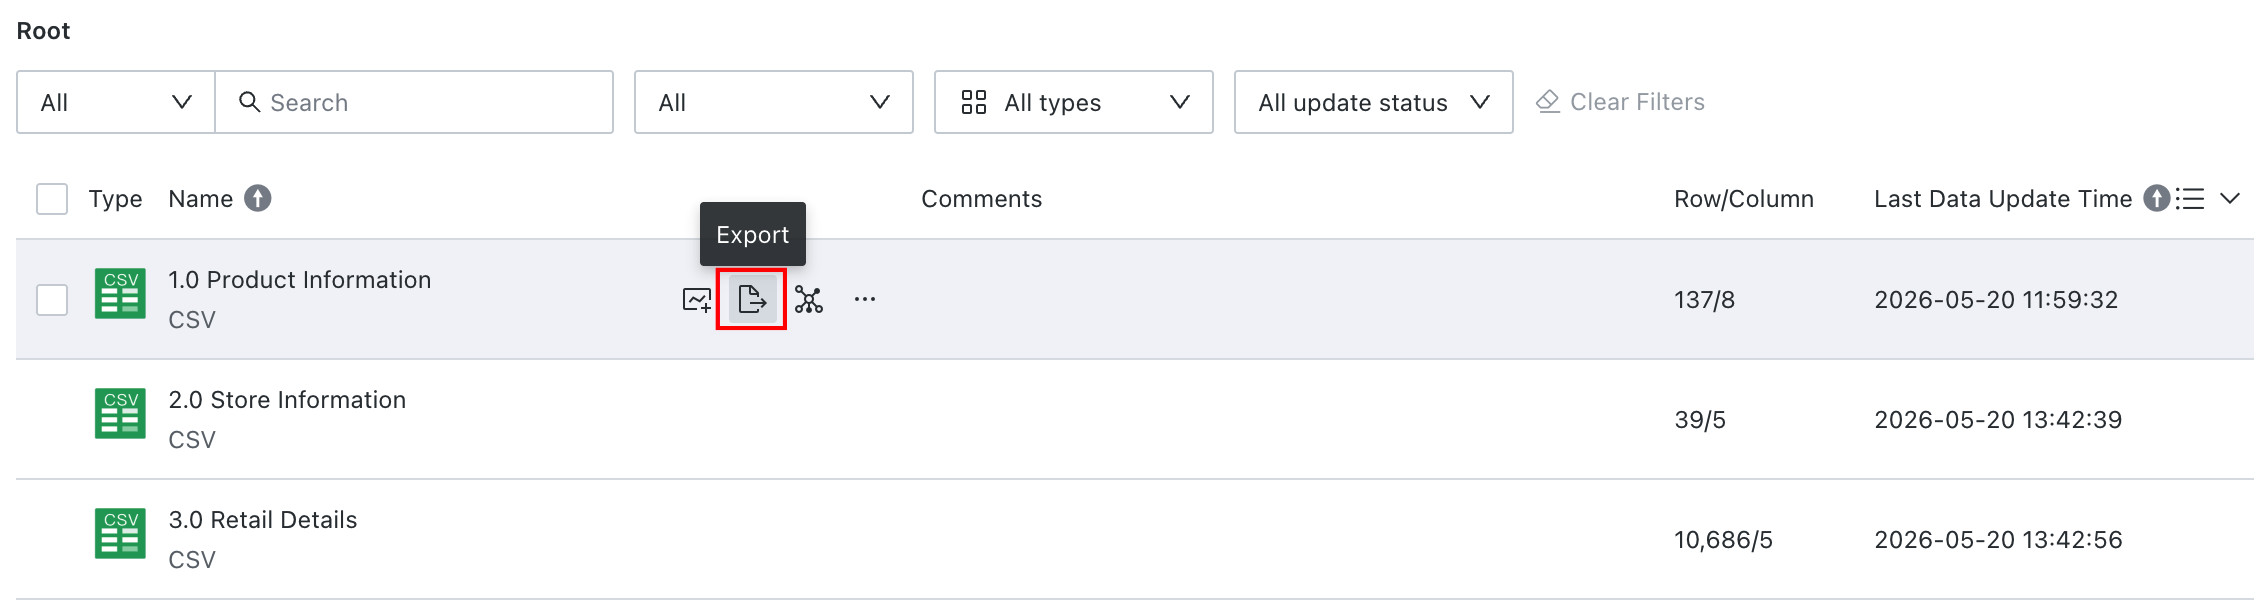
Entry 2: Open the dataset details page, click Overview > Data Details, and use Export as CSV/EXCEL in the upper-right corner.

- If the user does not have dataset ownership, data export is not allowed.
- If filters are configured, clicking
Exportexports the filtered data. - If no filters are configured, clicking
Exportexports the original dataset content. - Direct connection datasets can export up to 3,000 rows or 3,000,000 cells.
Save As
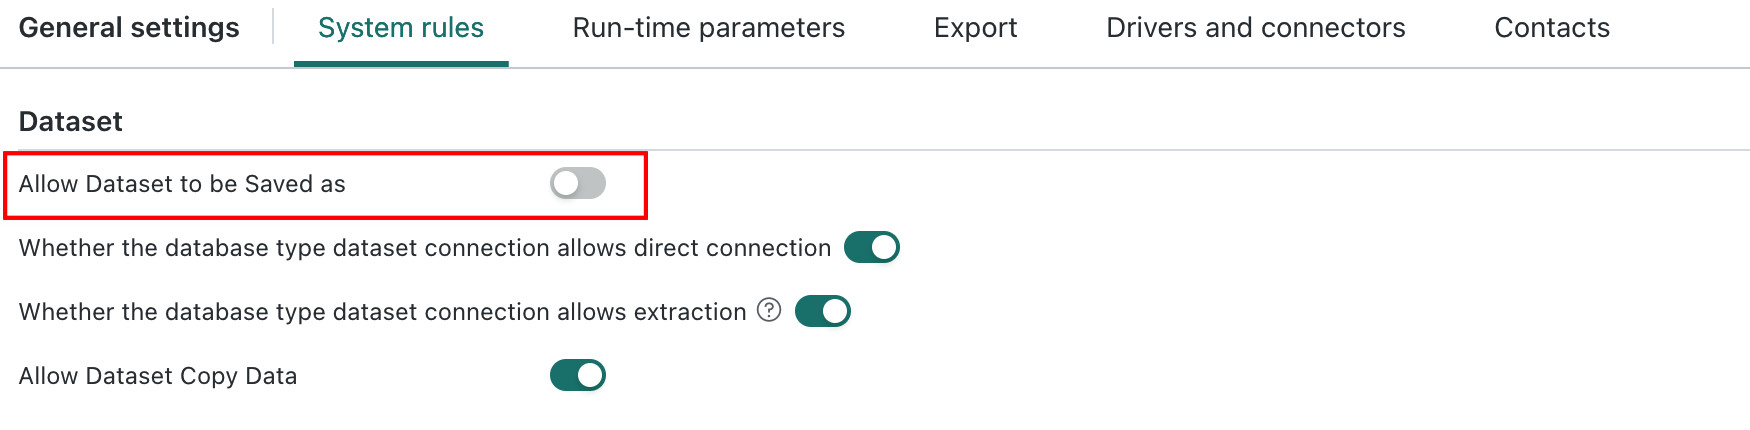
Prerequisite: Before using Save As on a dataset, an administrator must enable the Allow Dataset Save As switch under the Dataset category on Admin Center > System Settings > General Settings > System Rules. If the administrator disables this switch, the Save As entry does not appear.
Using Save As, users create a copy of the original dataset and can edit the new copy without affecting the original dataset. The copied dataset usually retains calculated fields, data structure, comments, and model structure.
Save Asis currently supported for file datasets, ETL output datasets, databases, Card Datasets, Web Service datasets, Account Datasets, FTP/SFTP datasets, stored procedures, Form Datasets, View Datasets, and Universe Datasets.- Administrators can always use
Save As. For data-account-based datasets, only dataset owners with Data Account usage or ownership permissions can use it. - The copied dataset does not include the original dataset data itself.
-
When the user is the dataset owner, and for data-account datasets also has Data Account usage or ownership permission, the dataset can be saved as a new copy through either of the following entry points:
-
Entry 1: On the dataset list page, click the
...button of any dataset and chooseSave As.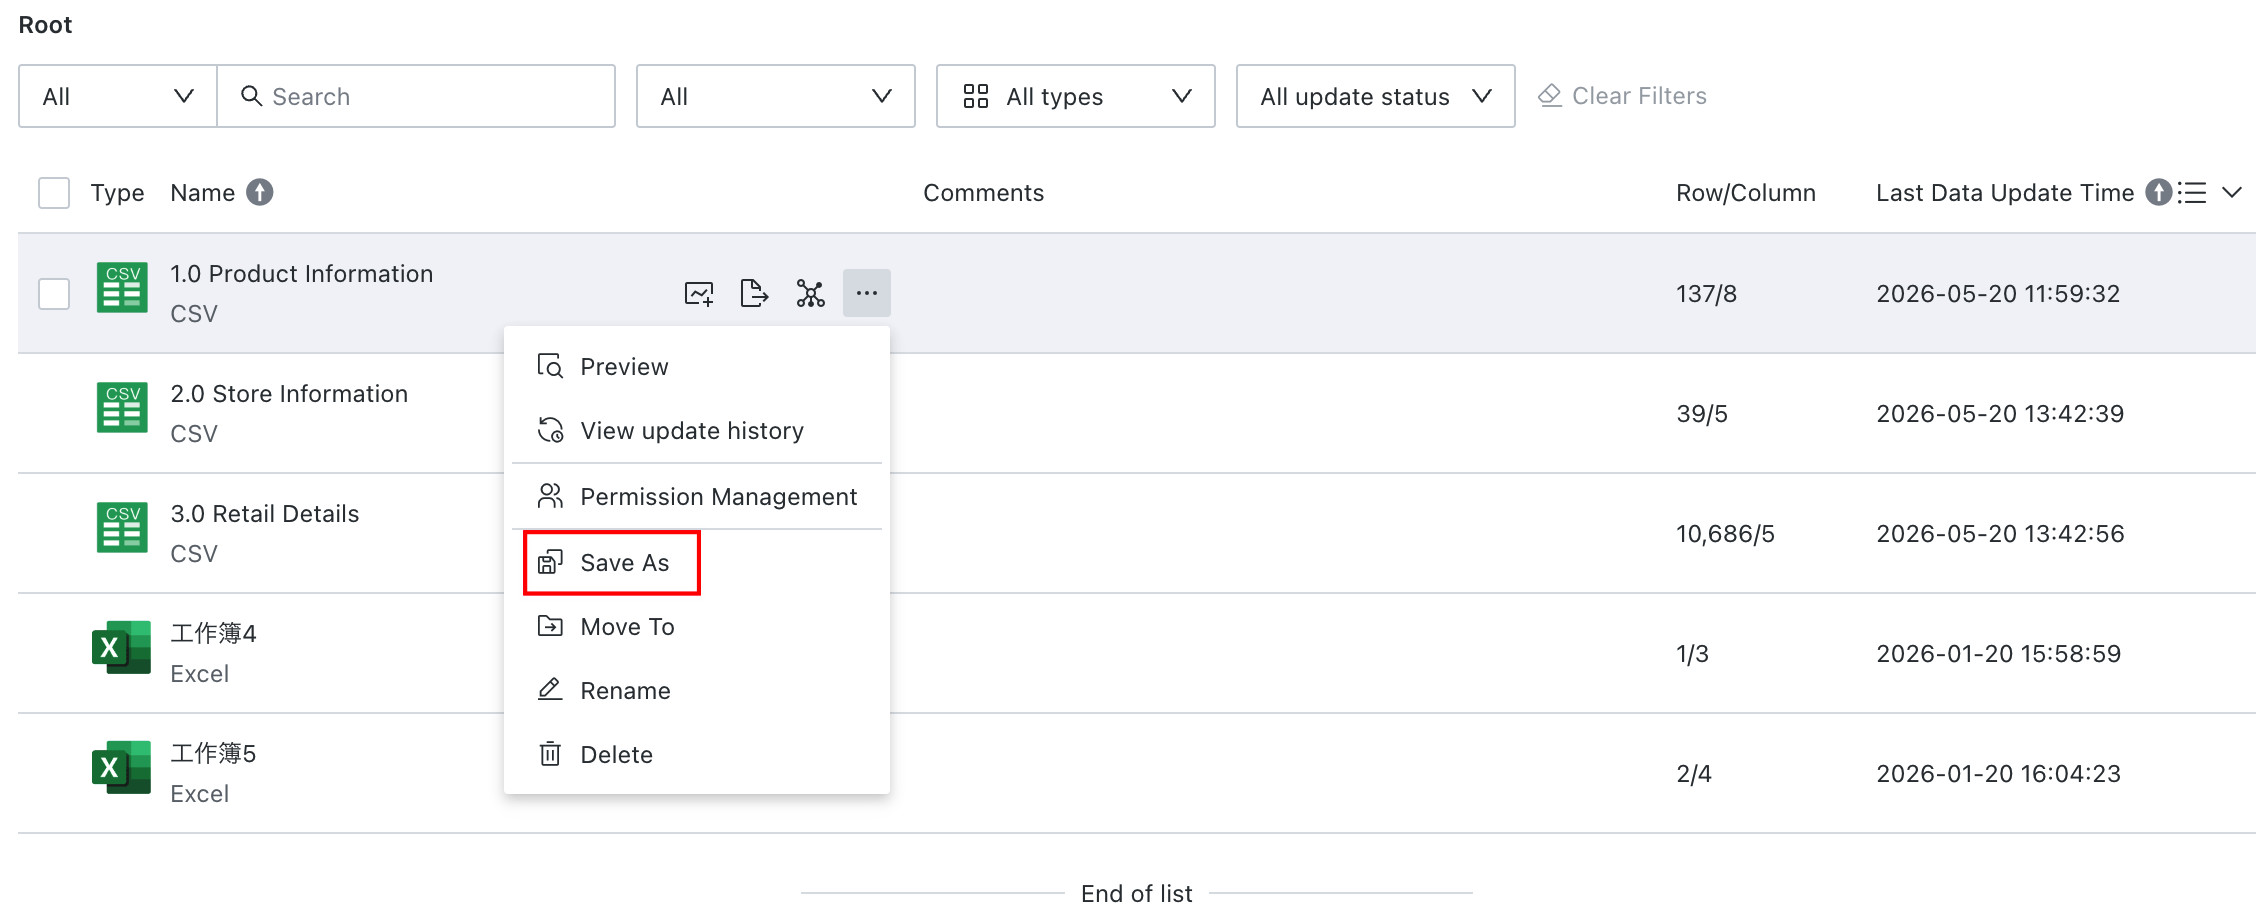
-
Entry 2: On the dataset details page, click the
...button in the upper-right corner and chooseSave As.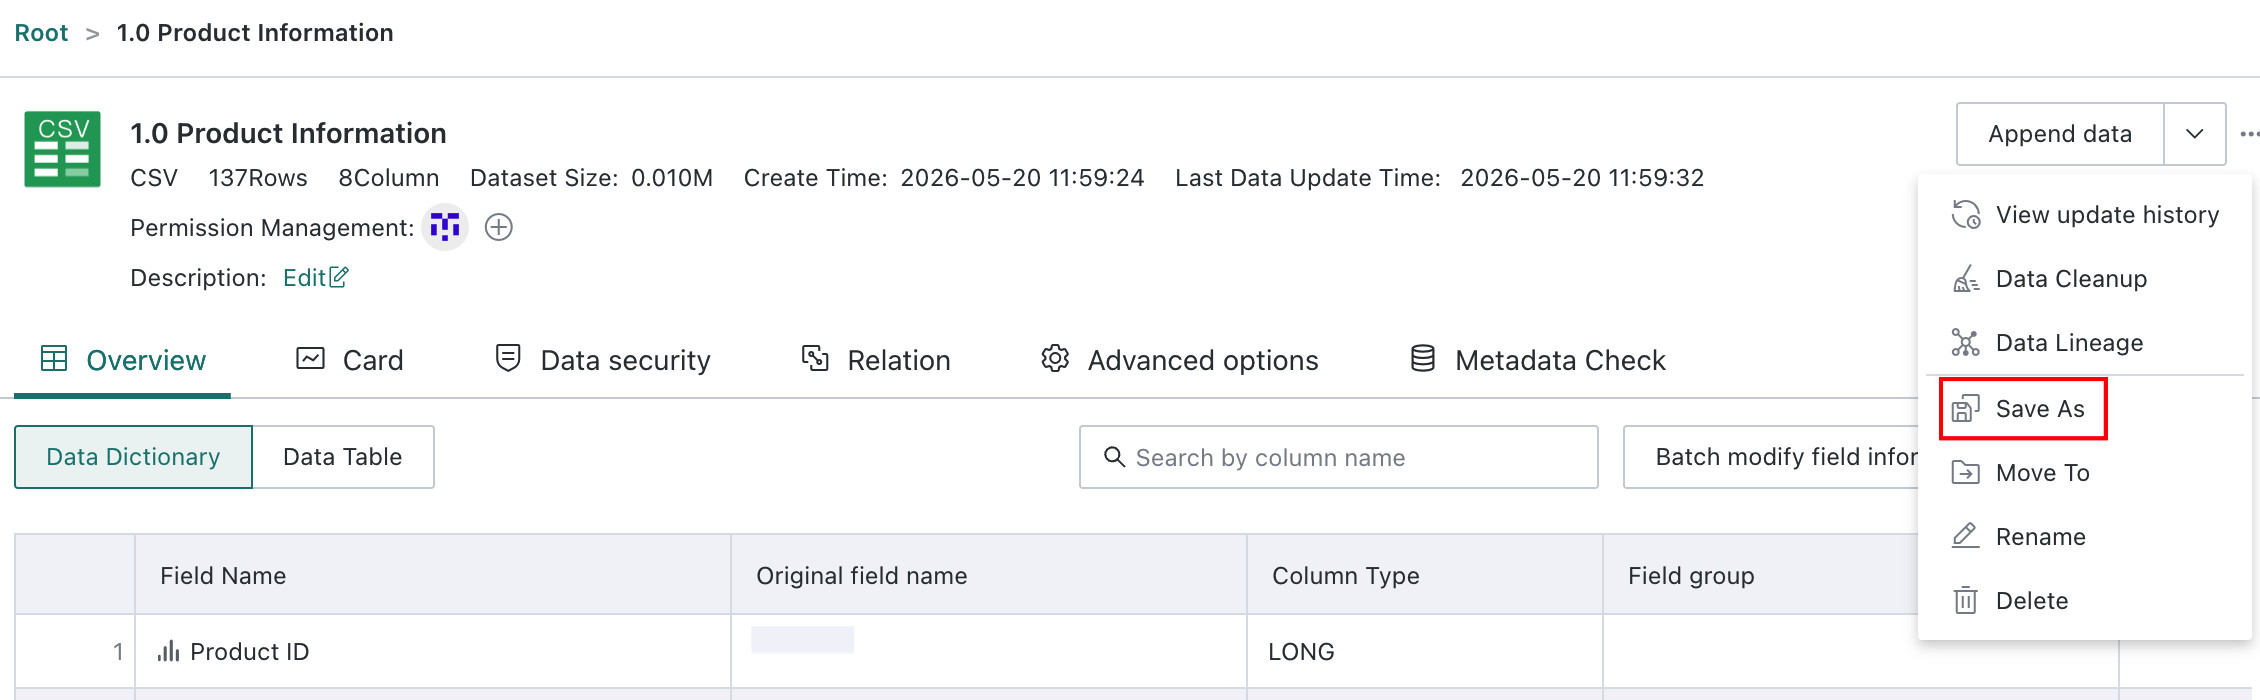
-
-
After clicking
Save As, enter the new dataset name and save directory to complete the operation. Afterward, the current user becomes the owner of the copied dataset by default.- Dataset Name:
XXXXX_Copywhere duplicate names are not allowed in the same path - Save Location:
- Defaults to the current dataset directory
- Can be any folder for which the user has usage or ownership permission
- Dataset Name:
Migration
Datasets can be migrated from a test environment to a production environment. This operation is available only to administrators. For details, see Resource Migration.
-
Entry 1: On the dataset list page, click the
...button of any dataset and chooseMigrate.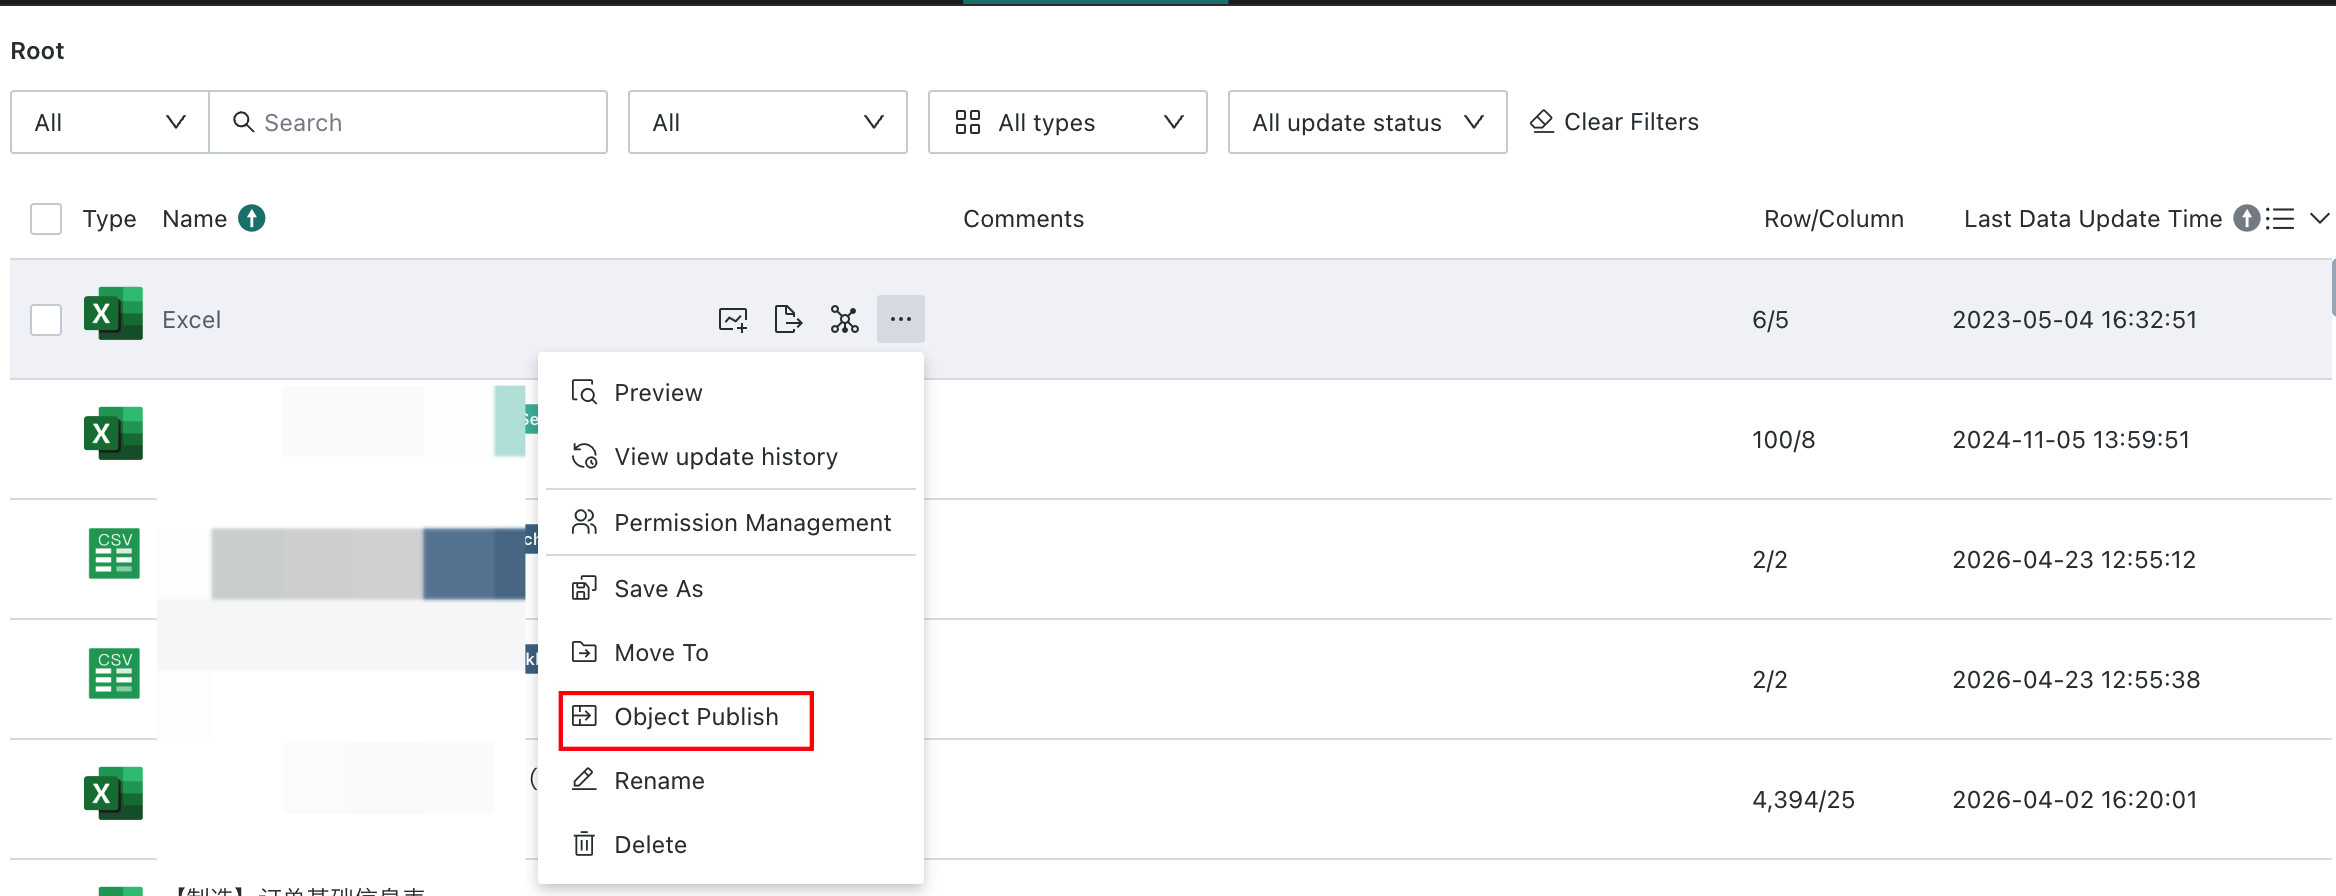
-
Entry 2: On the dataset details page, click the
...button in the upper-right corner and chooseMigrate.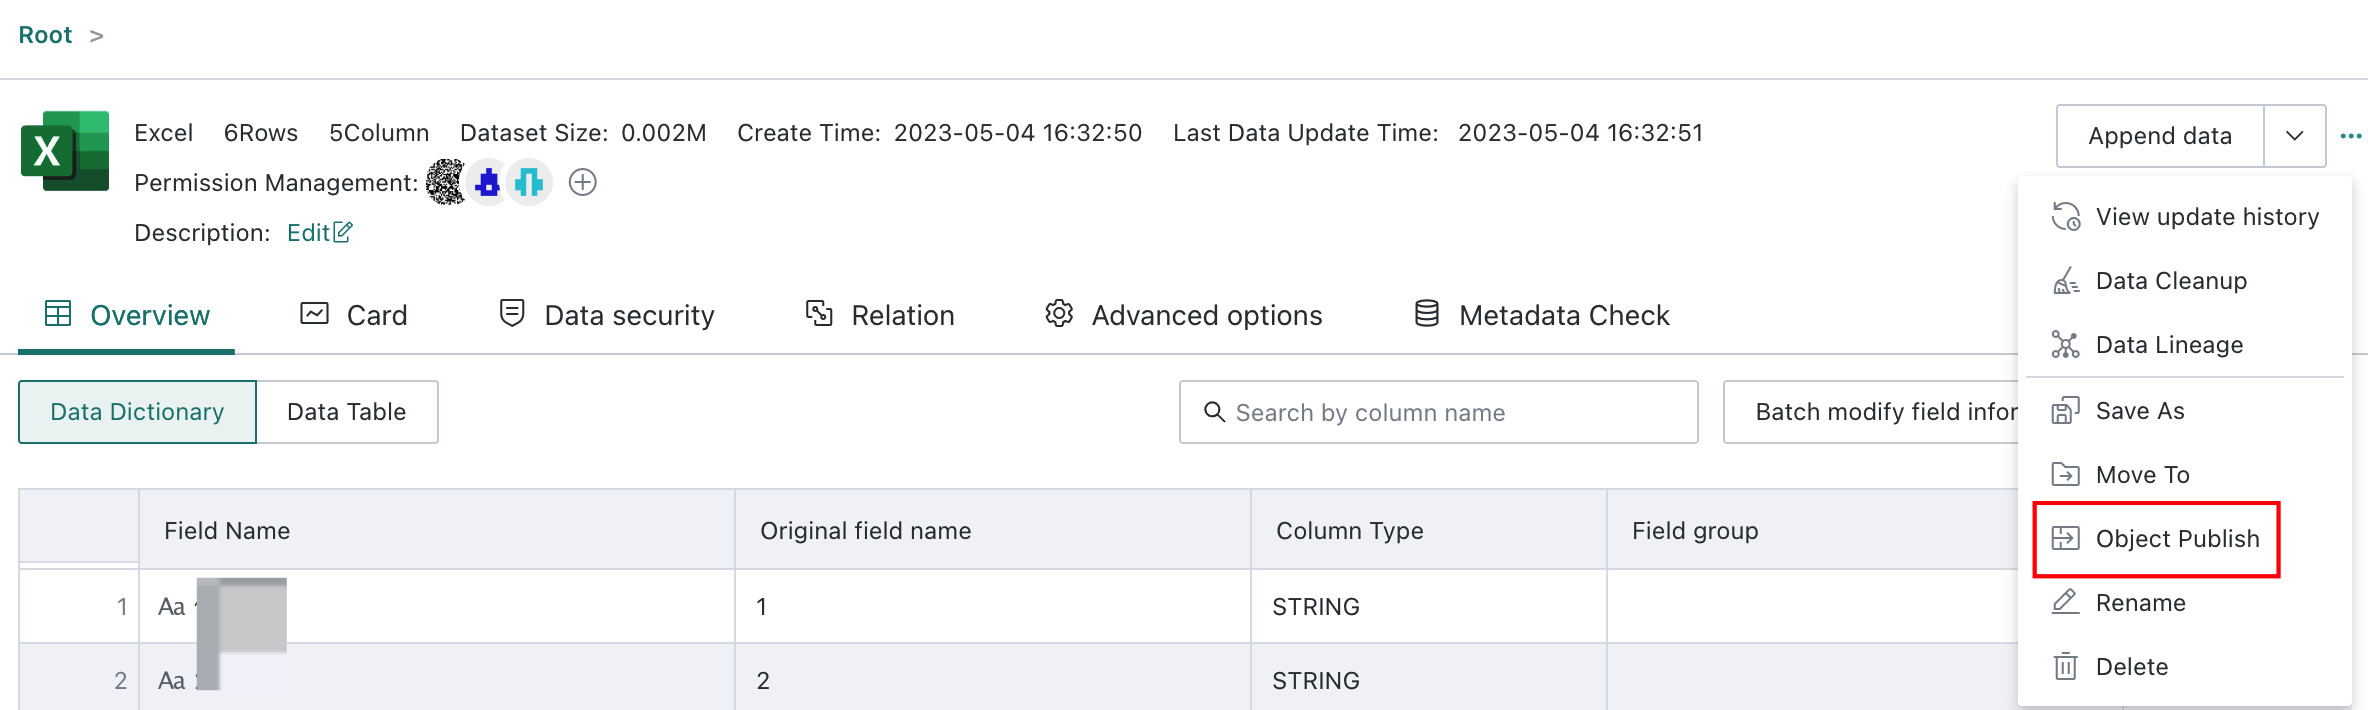
Move To
Users can use Move To to move a dataset from its current location to a specified folder or directory and better organize the dataset hierarchy.
-
Entry 1: On the dataset list page, click the
...button of any dataset and chooseMove To.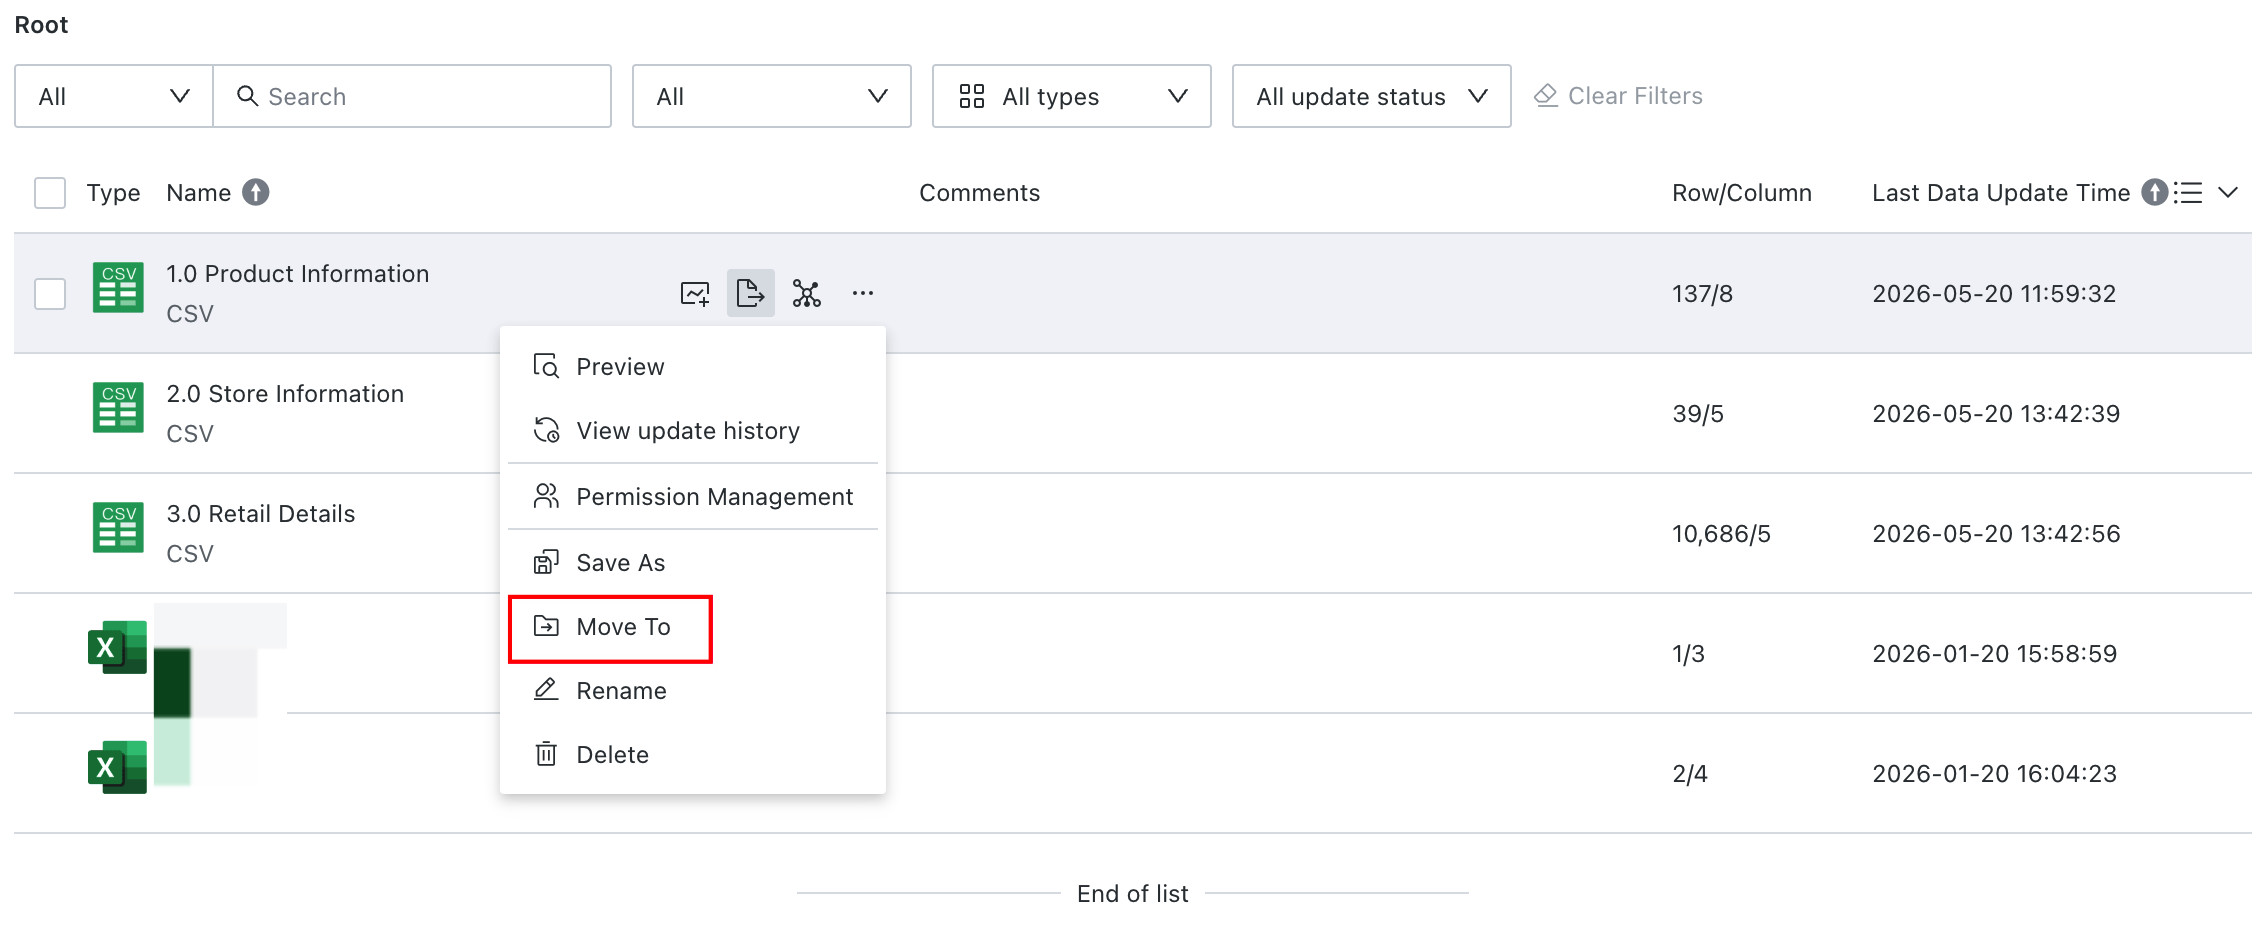
-
Entry 2: On the dataset details page, click the
...button in the upper-right corner and chooseMove To.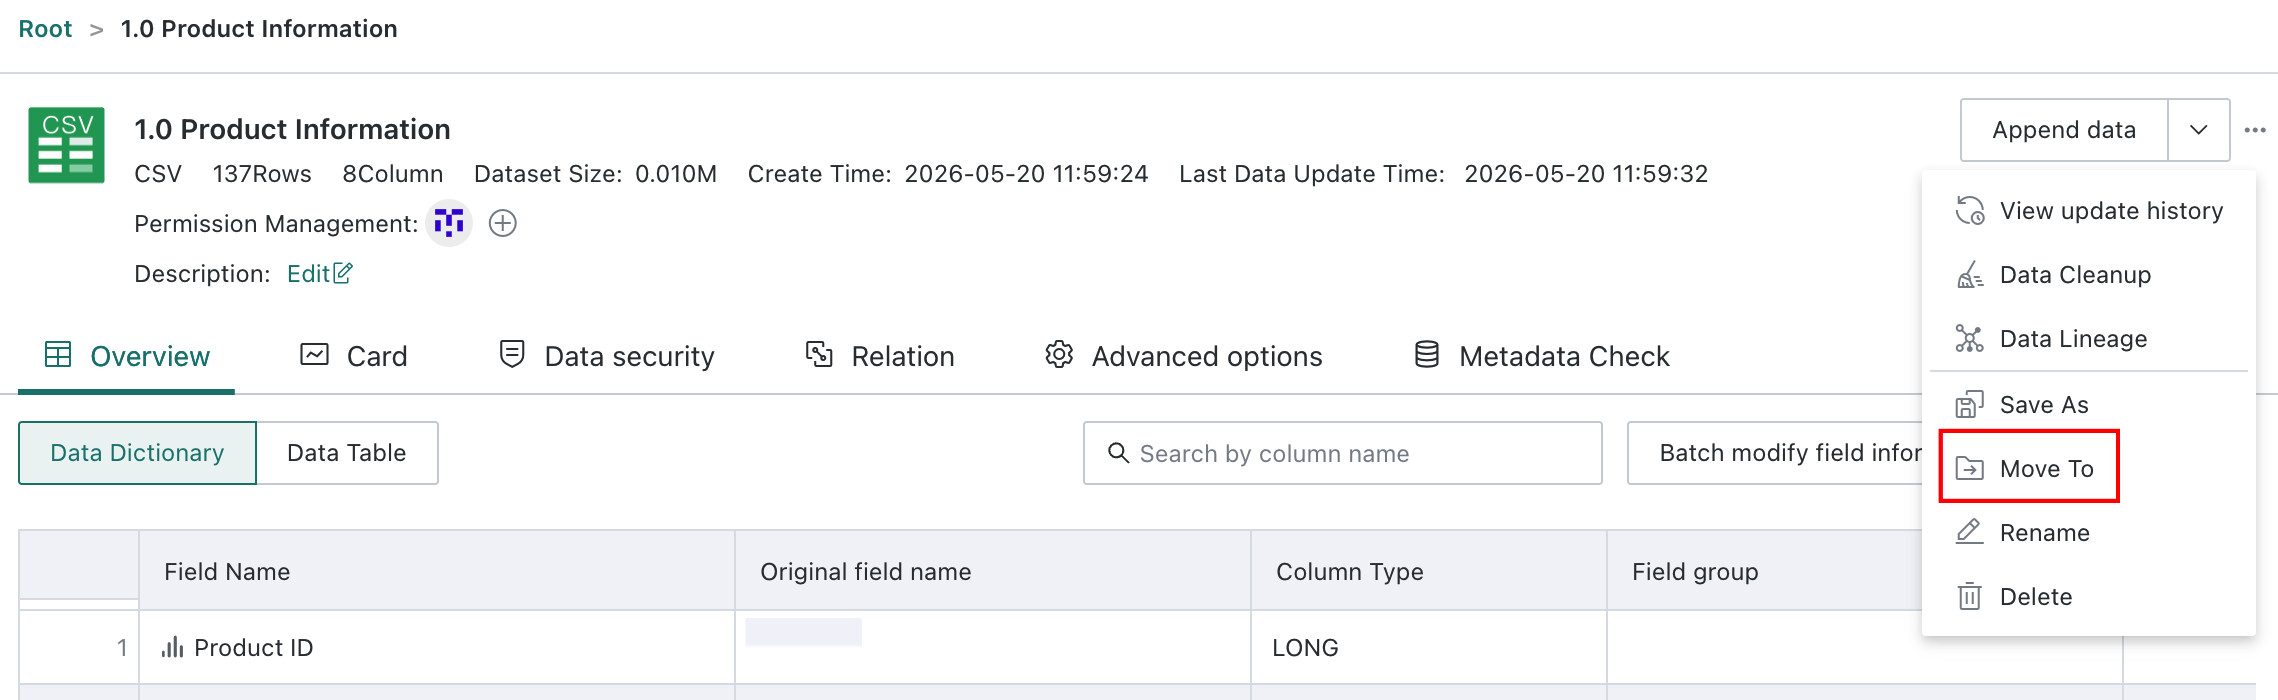
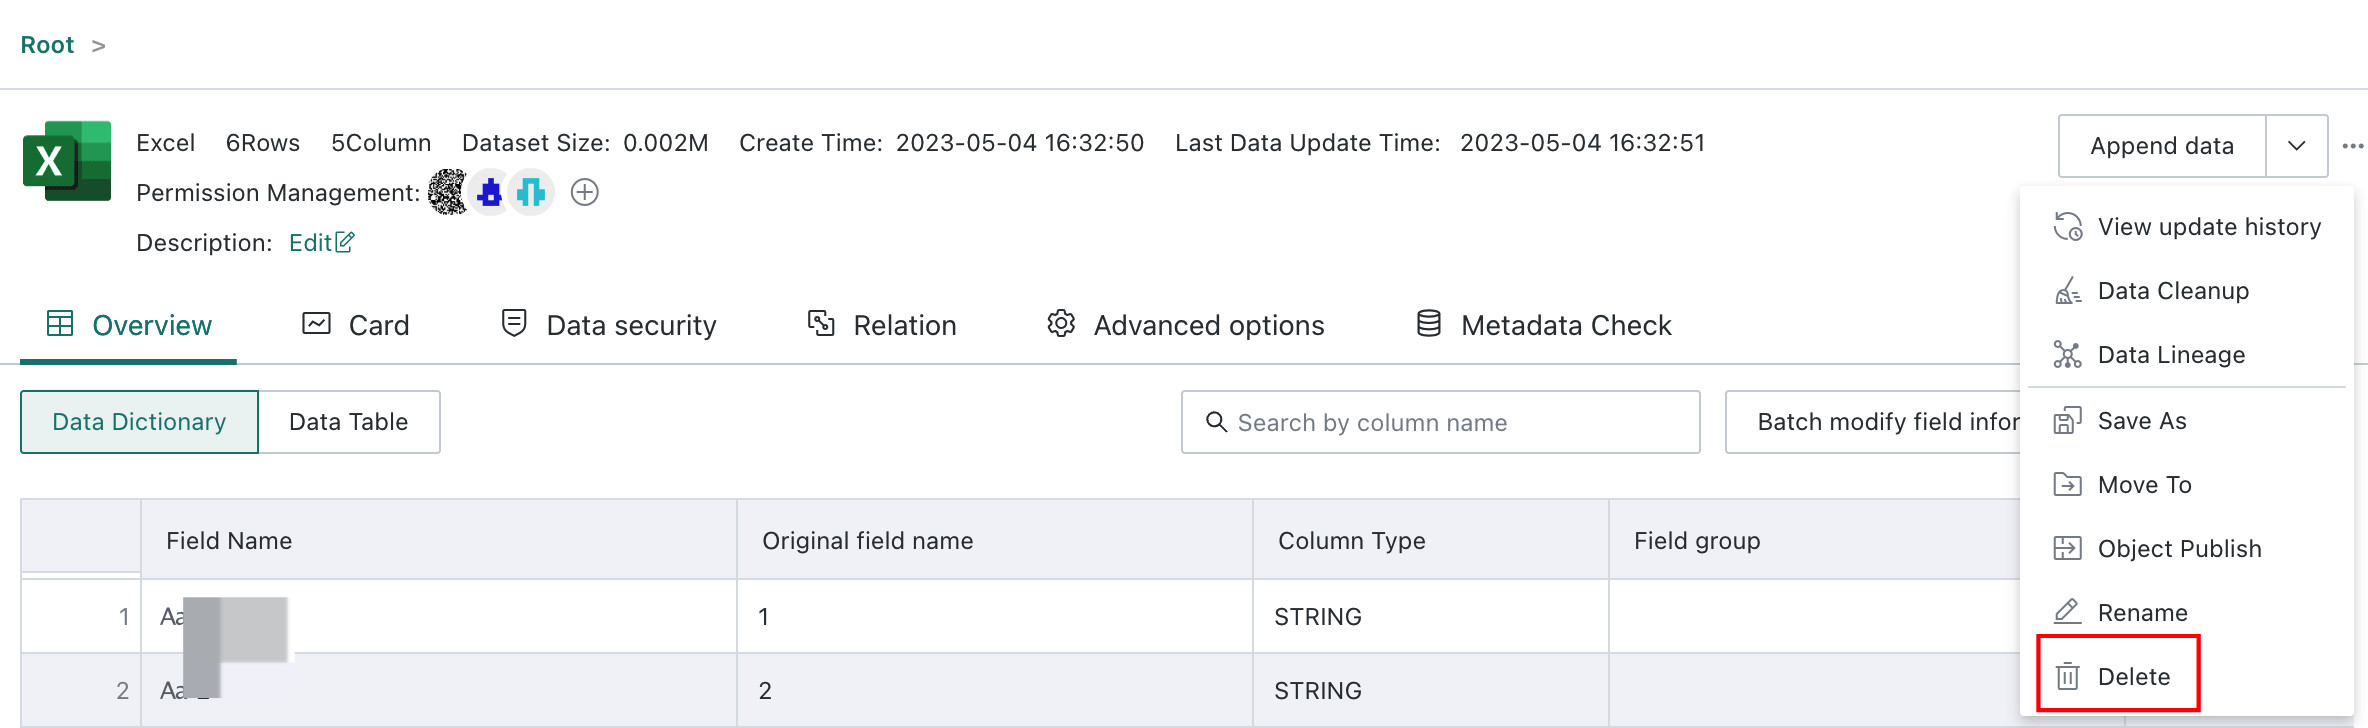
Rename
Users can rename datasets to better reflect their purpose, content, or business scenario.
-
Entry 1: On the dataset list page, click the
...button of any dataset and chooseRename.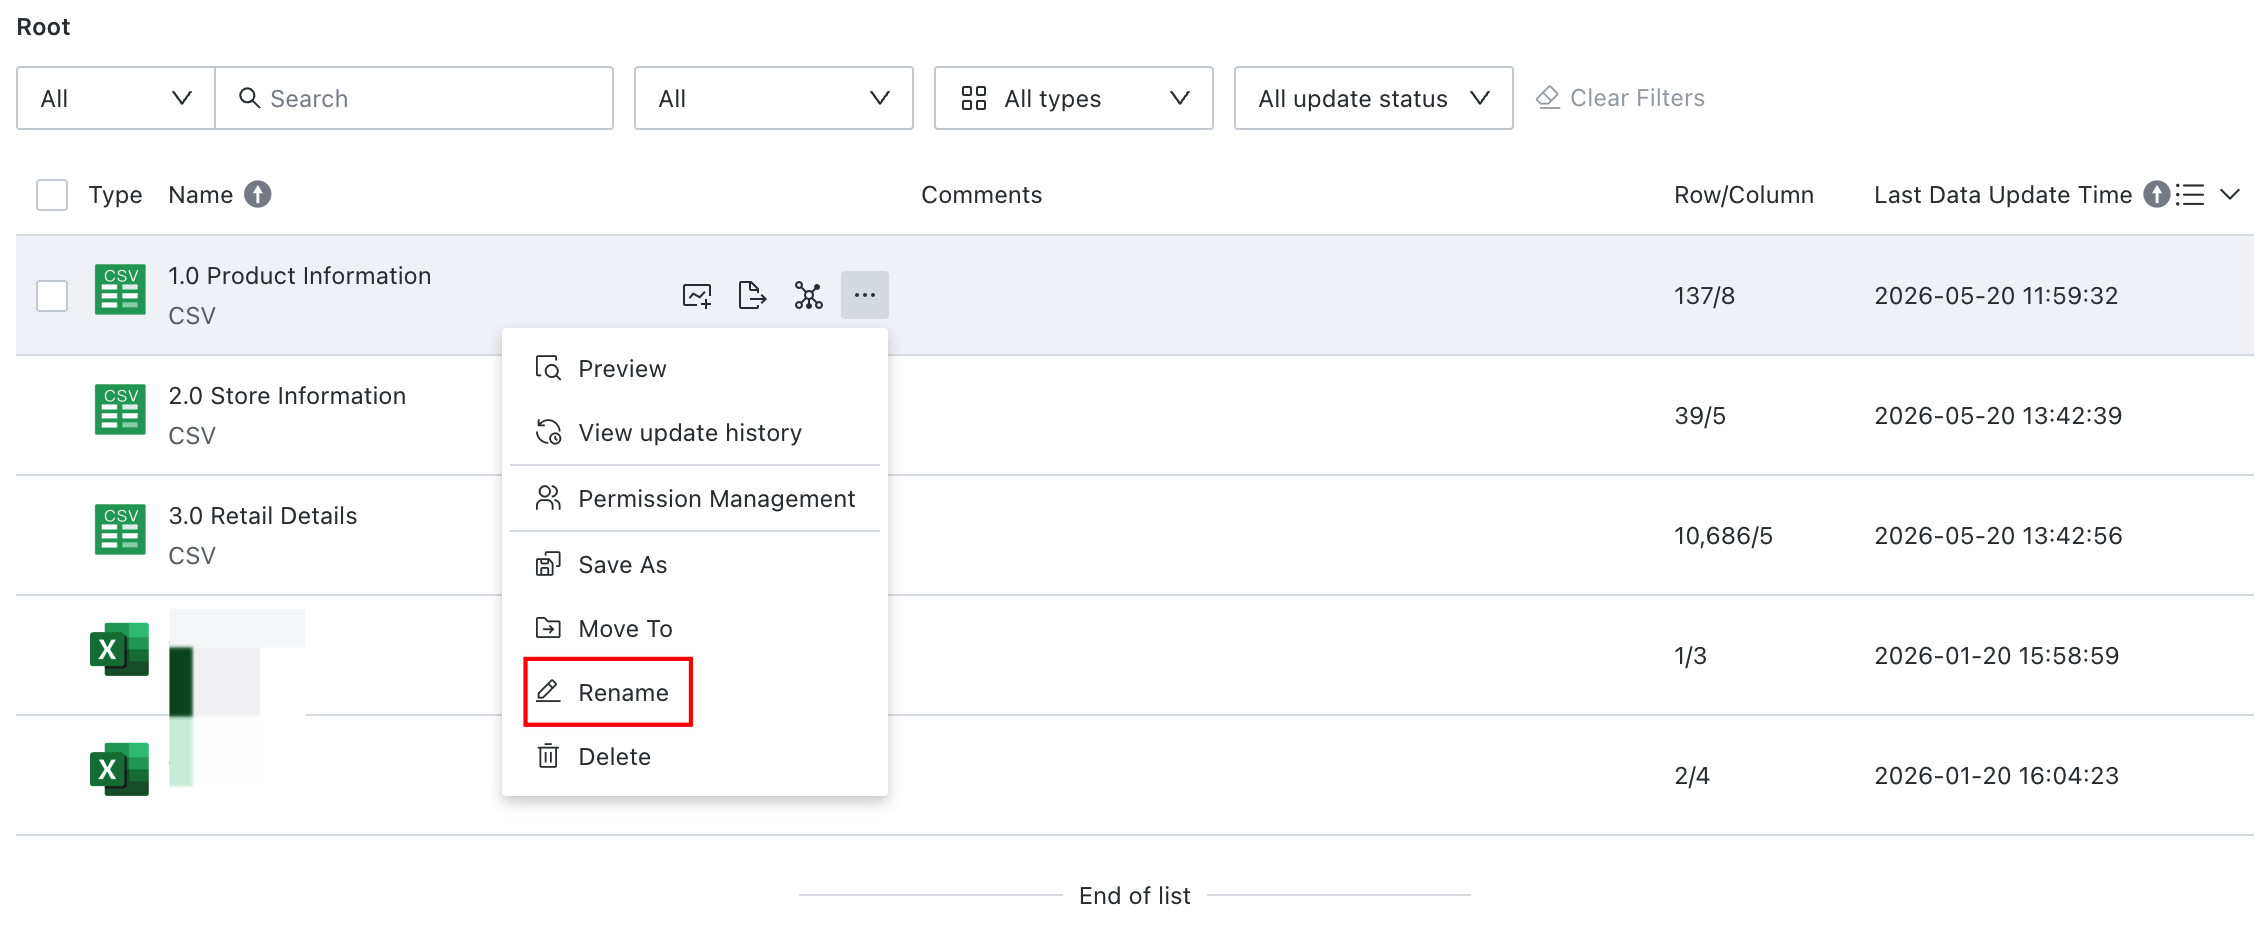
-
Entry 2: On the dataset details page, click the
...button in the upper-right corner and chooseRename.
Delete
Users can delete dataset folders or datasets by clicking Delete in the action area on the right. Note that a folder can be deleted only after all datasets inside it have been deleted first. In other words, non-empty folders cannot be deleted.
-
Entry 1: On the dataset list page, click the
...button of any dataset and chooseDelete.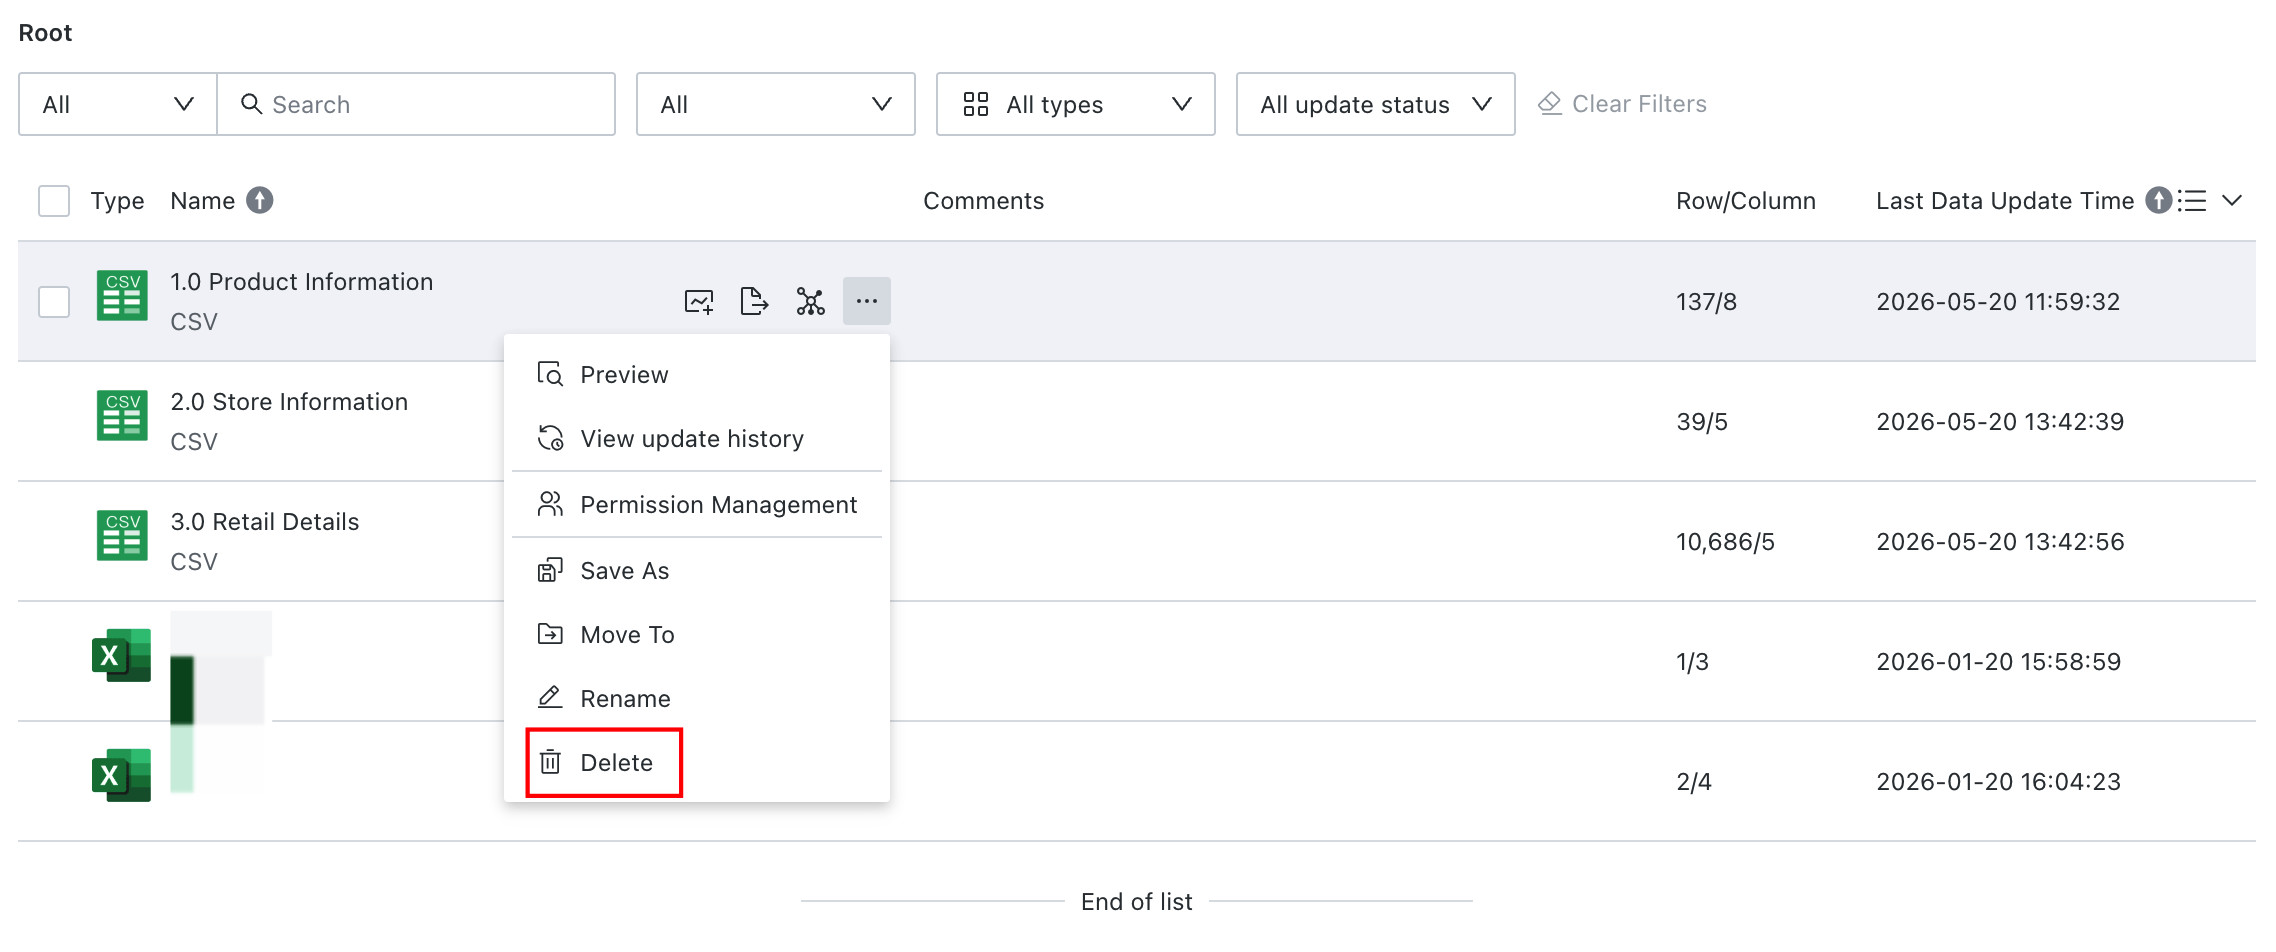
-
Entry 2: On the dataset details page, click the
...button in the upper-right corner and chooseDelete.