Report-Form
Overview
Feature Description
Report-Form is a tabular data collection and modification tool launched by Guandata, enabling users to easily achieve online data entry, with one-click data write-back to the database, ensuring data accuracy and reliability.
- Report-Form can automatically collect scattered enterprise data and achieve data entry preprocessing;
- Report-Form is highly compatible with Excel filling habits, allowing seamless business transition to online submission;
- Report-Form supports rich conditional formatting settings, making incorrect or missing entries immediately visible;
- Report-Form data can be written back to the database with one click, and entered data can continue to the next step of analysis and processing;
- Report-Form has free style and layout, suitable for enterprises with high requirements for table aesthetics.
Application Scenarios
Report-Form is suitable for the following scenarios:
-
As a supplement for personalized, lightweight business processes that business systems cannot support
Business systems usually provide standard processes with strong constraints, while enterprises inevitably have personalized processes that require simple corrections to business system results. In the past, this relied on manual collection and aggregation of data, notification of modifications, and checking data accuracy. In the future, through Guandata's Report-Form, the above process can be designed as a template for long-term reuse after one-time design, without the need for high-intensity manual intervention.
-
Strong demands for table aesthetics, freedom, and other formats
Enterprise Excel entry templates have become mature, and enterprises have demands for table styles that match brand tone and are aesthetically pleasing. Through Report-Form, free layout and full compatibility with all Excel beautification capabilities can be achieved, easily moving offline Excel tables online.
-
Real-time calculation of some data results during filling as reference
In the process of formulating enterprise budgets, a large amount of data changes dynamically based on entered values. For budget officers, they will further adjust entered values based on data results to make the final results meet enterprise expectations. Through Report-Form, after relevant data is confirmed, it can directly enter the database for archiving or participate in other analysis chart calculations.
Usage Guide
Before configuration, please configure the data connection in "Data Preparation > Data Account", and the data connection account needs to have database write and drop permissions.
Versions 6.5.0 and later provide the following features:
- Table data connection, connecting to already processed data sources.
- Table creation and design, supporting 2 basic controls and 2 table controls.
- Table data write-back, supporting direct append and insert update two methods.
The operation process overview is shown in the figure below, and specific introductions will be detailed later.
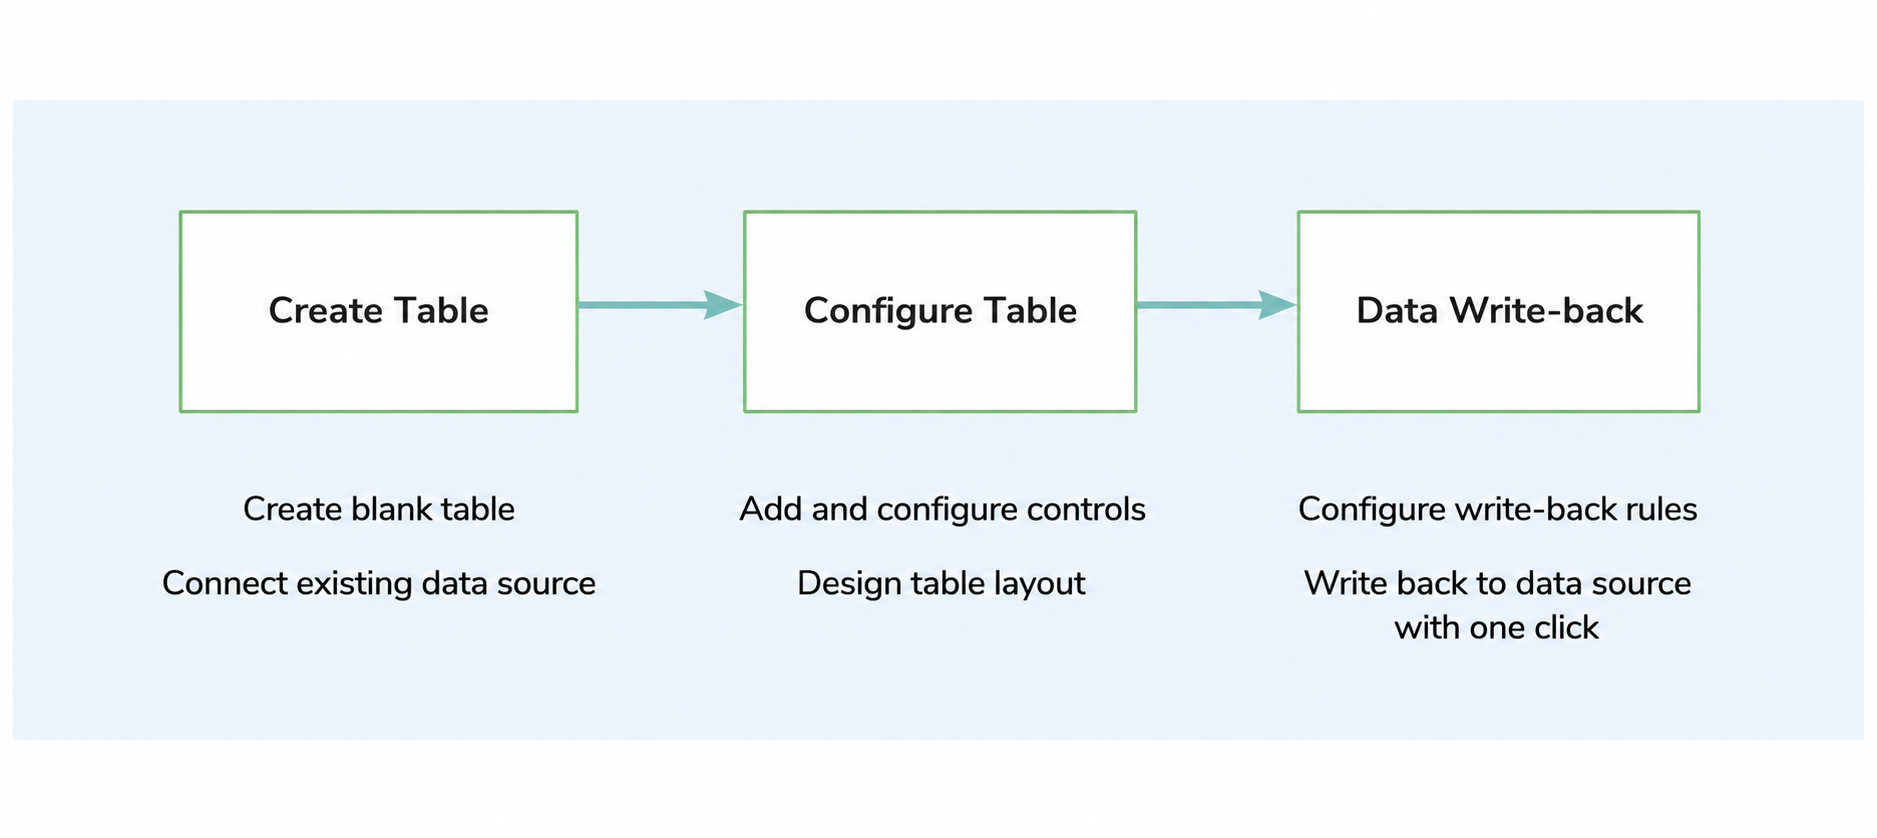
Table Design
Report-Form Creation Process
-
Enter the dashboard page, click "New Card", and select the "Report-Form" card.
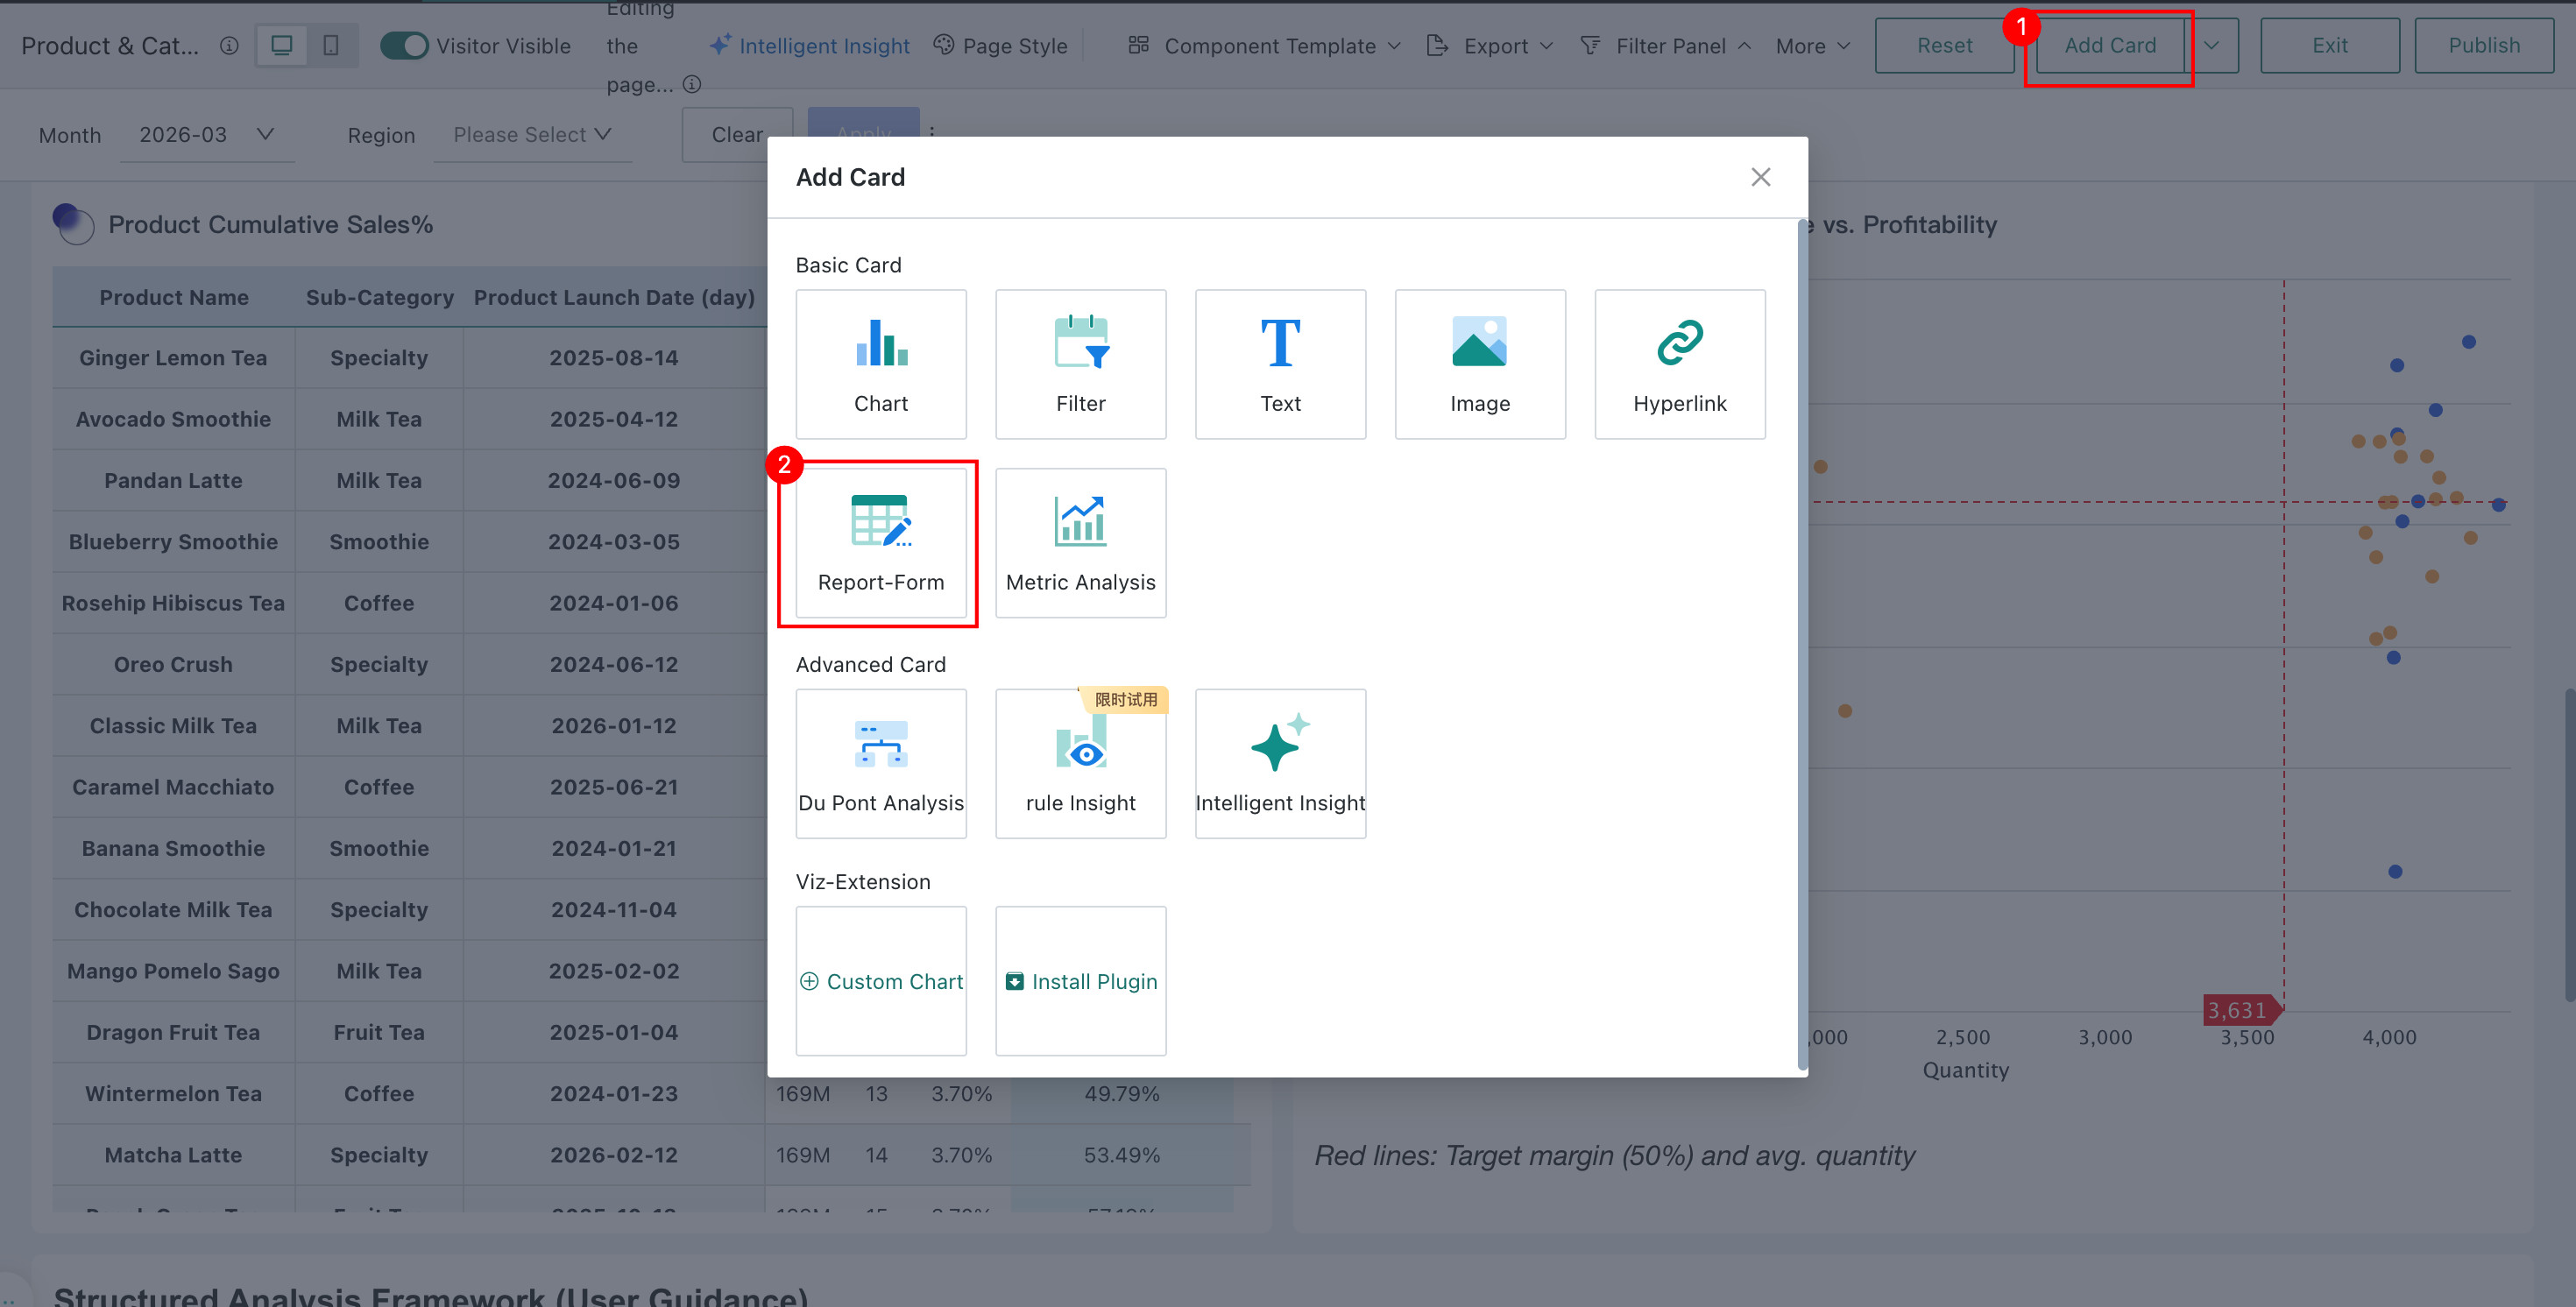
- If creating a new form and no data table needs to be selected, you can directly click "Skip" to enter the form template editing page.
- If modifying an existing dataset (dynamic table needs to be selected during template editing), please select the dataset and click "Confirm".
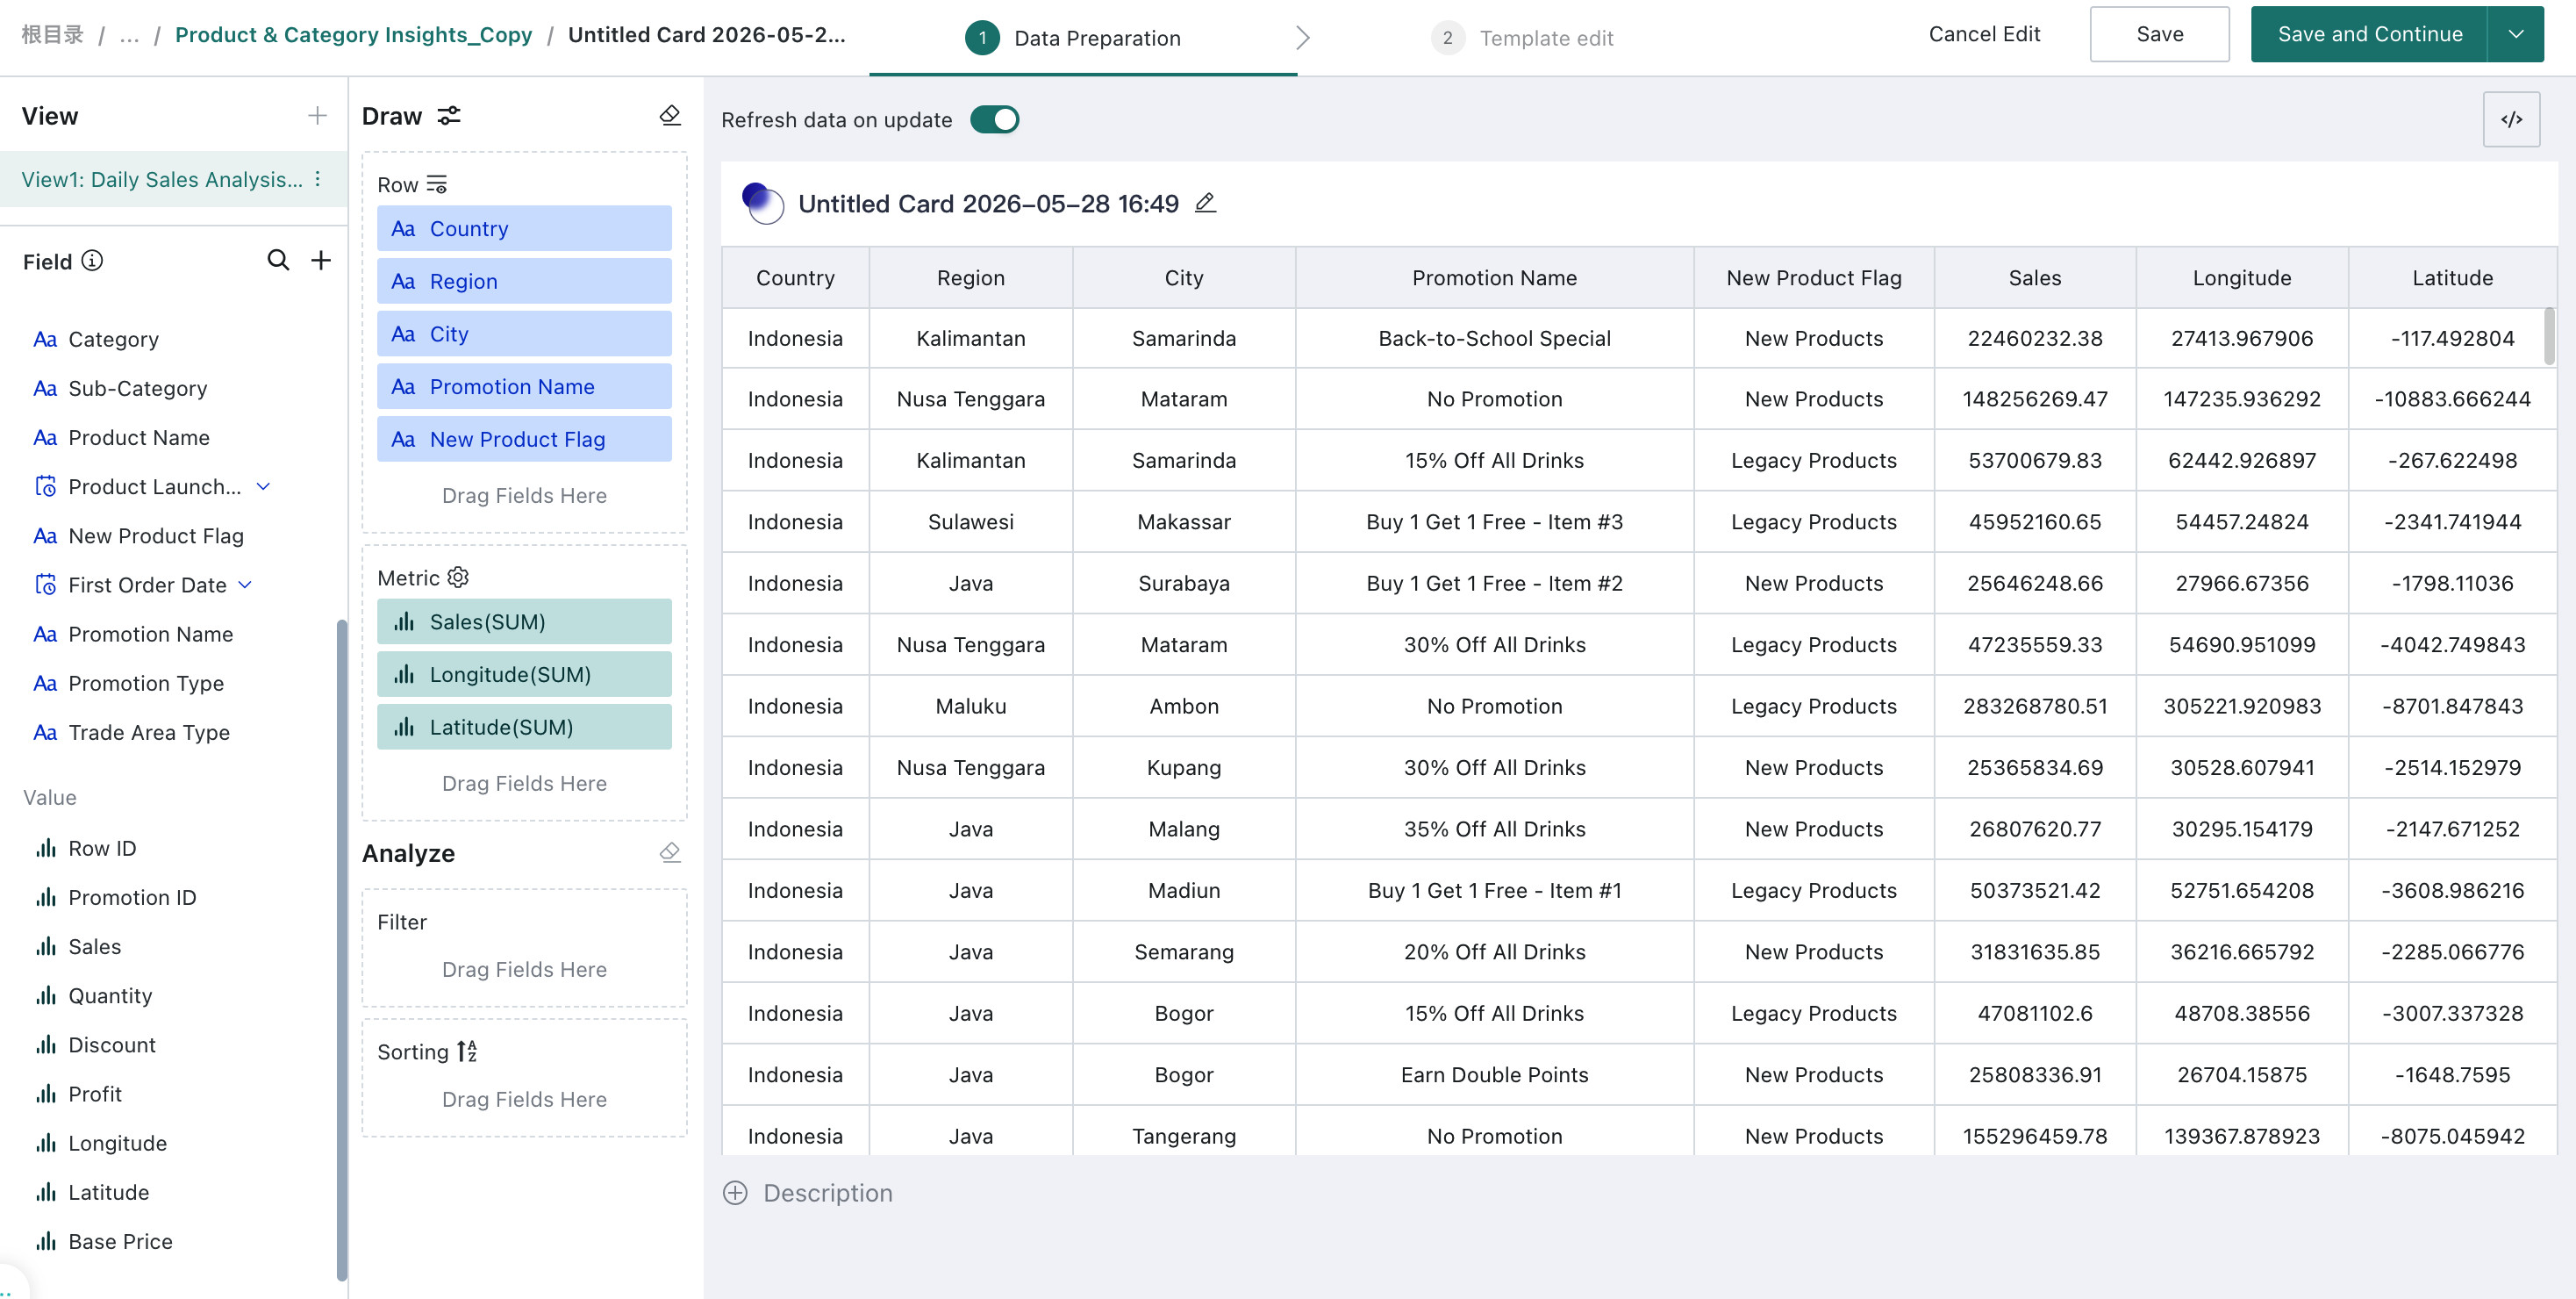
-
Perform data preparation. You can edit the view data, which will be consistent with subsequent dynamic table changes. After completing data preparation, click "Save and Continue".
-
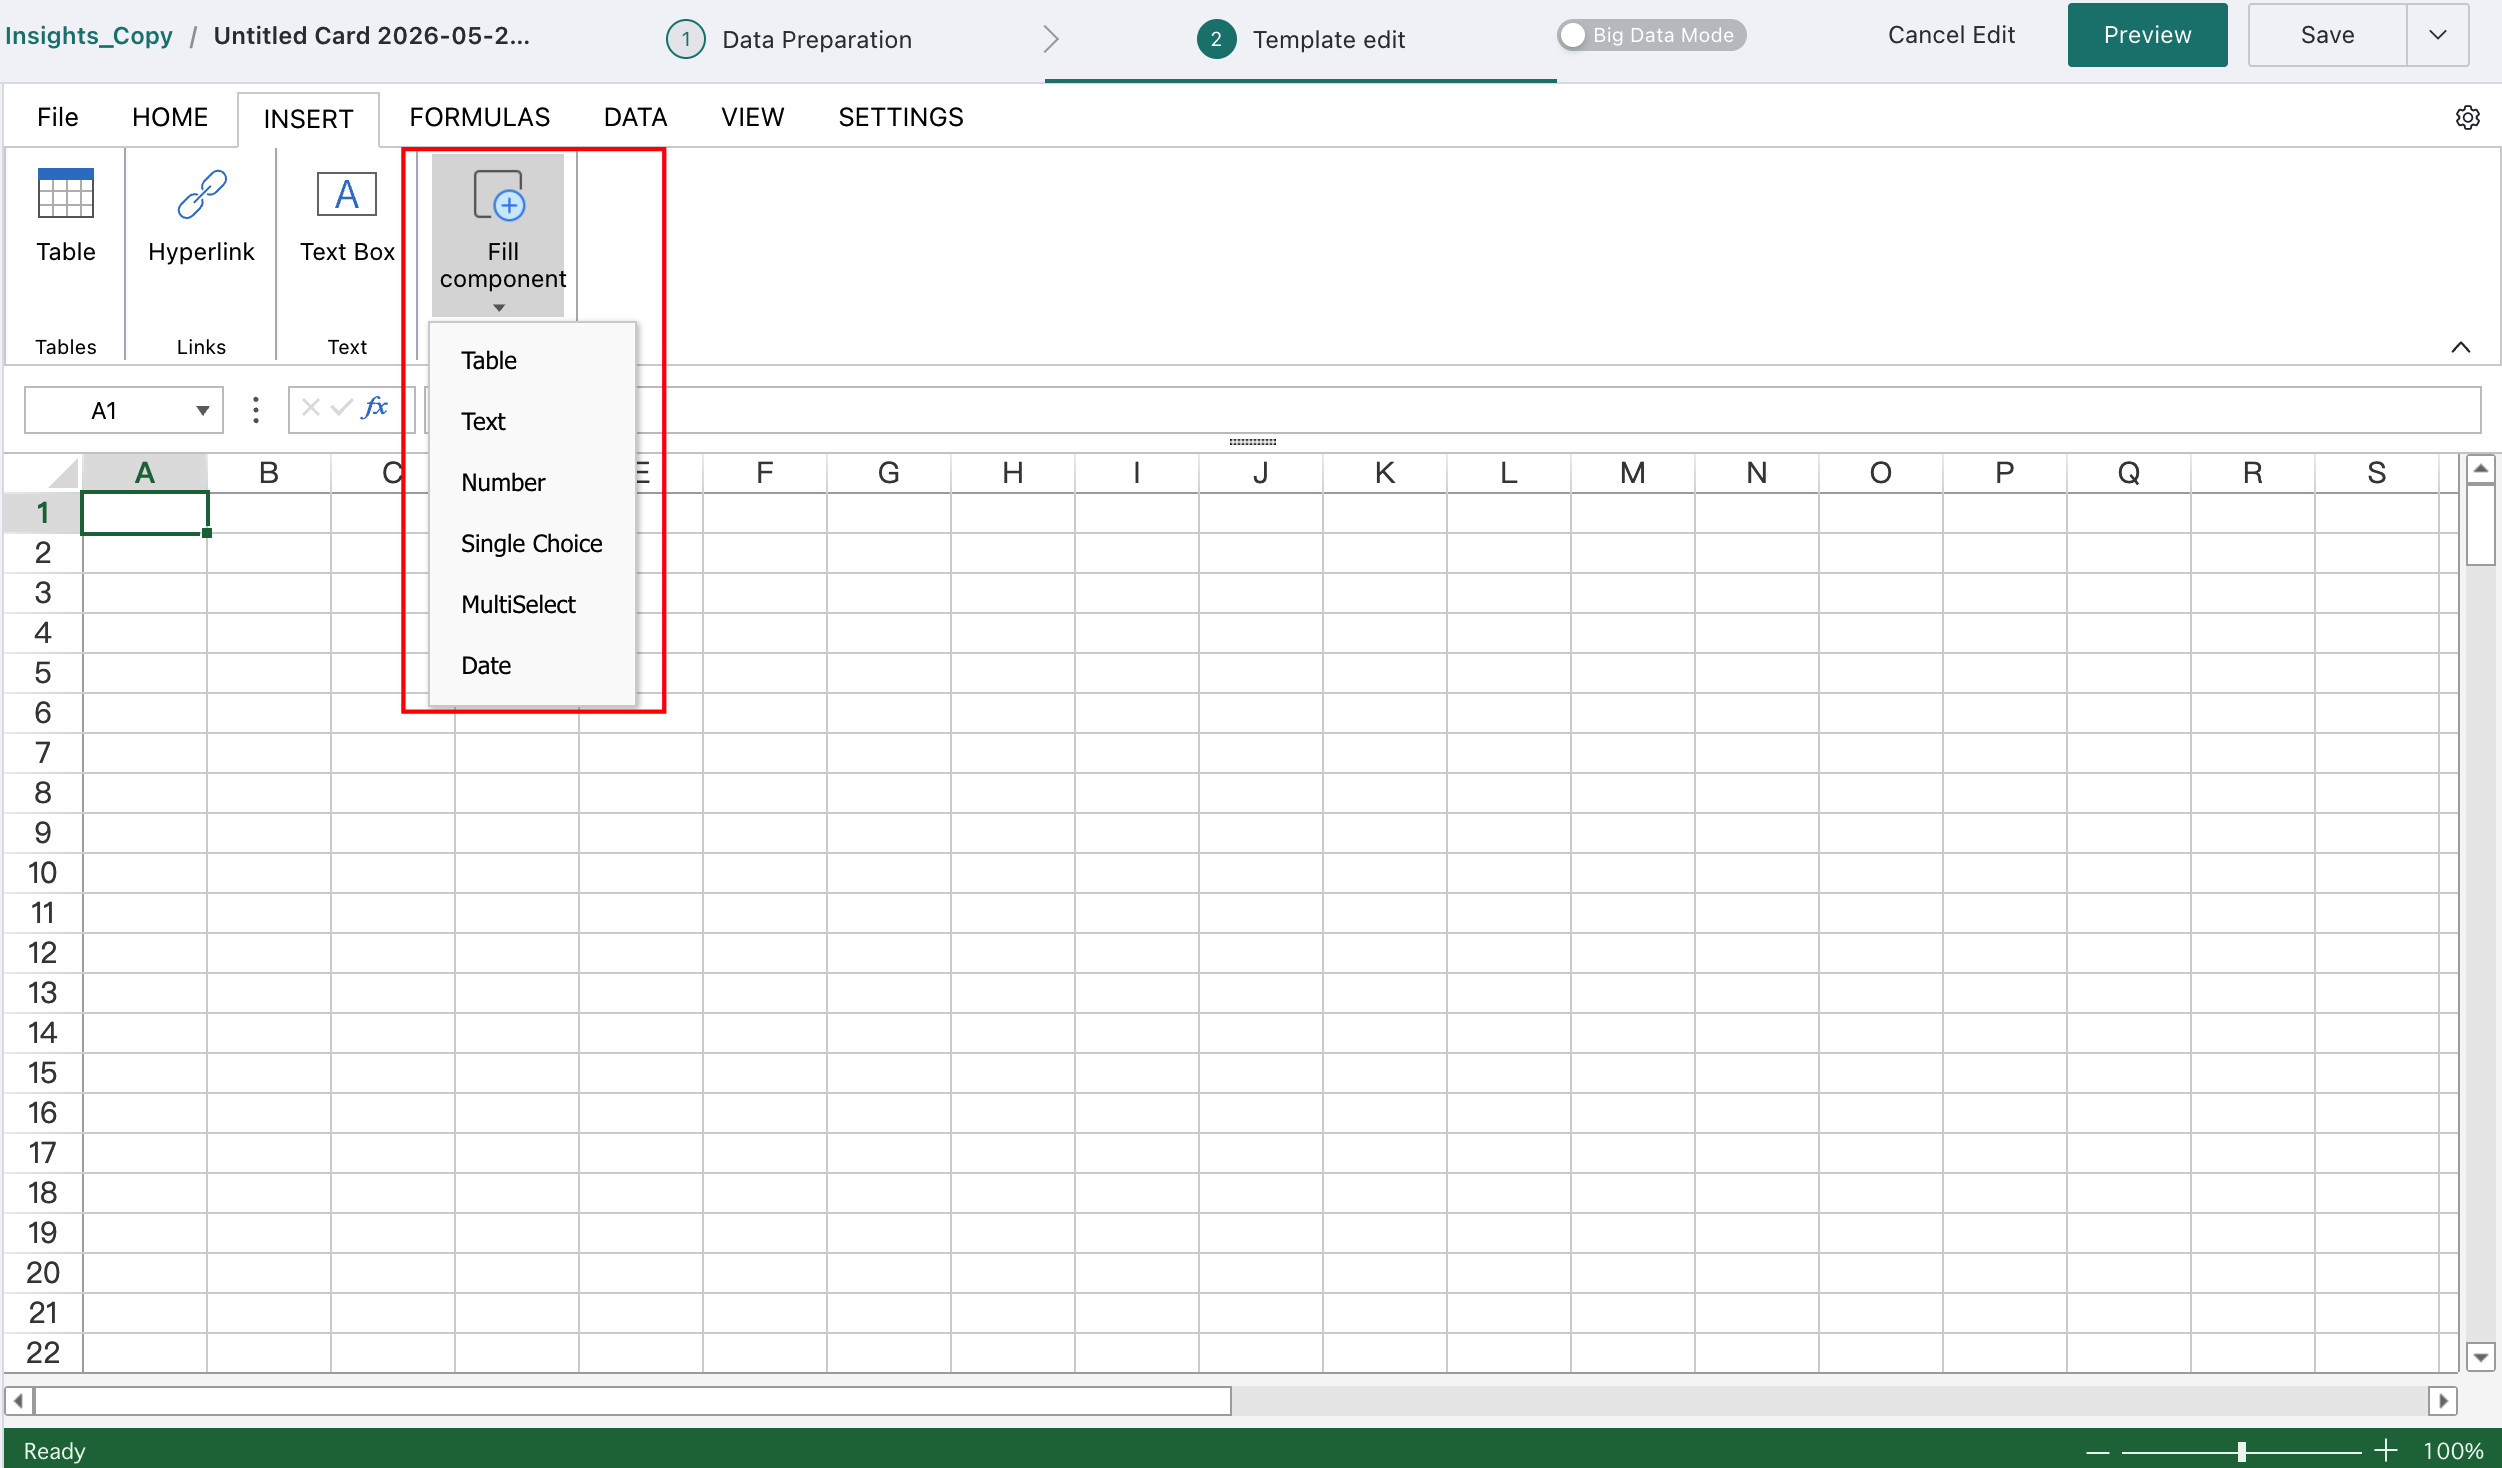
Enter the template editing page to edit the entry template. Under the "Insert" tab, you can add entry controls. Currently supported entry controls are shown in the figure.
NoteDuring style configuration, you can click "Preview" at any time to view the form configuration effect.
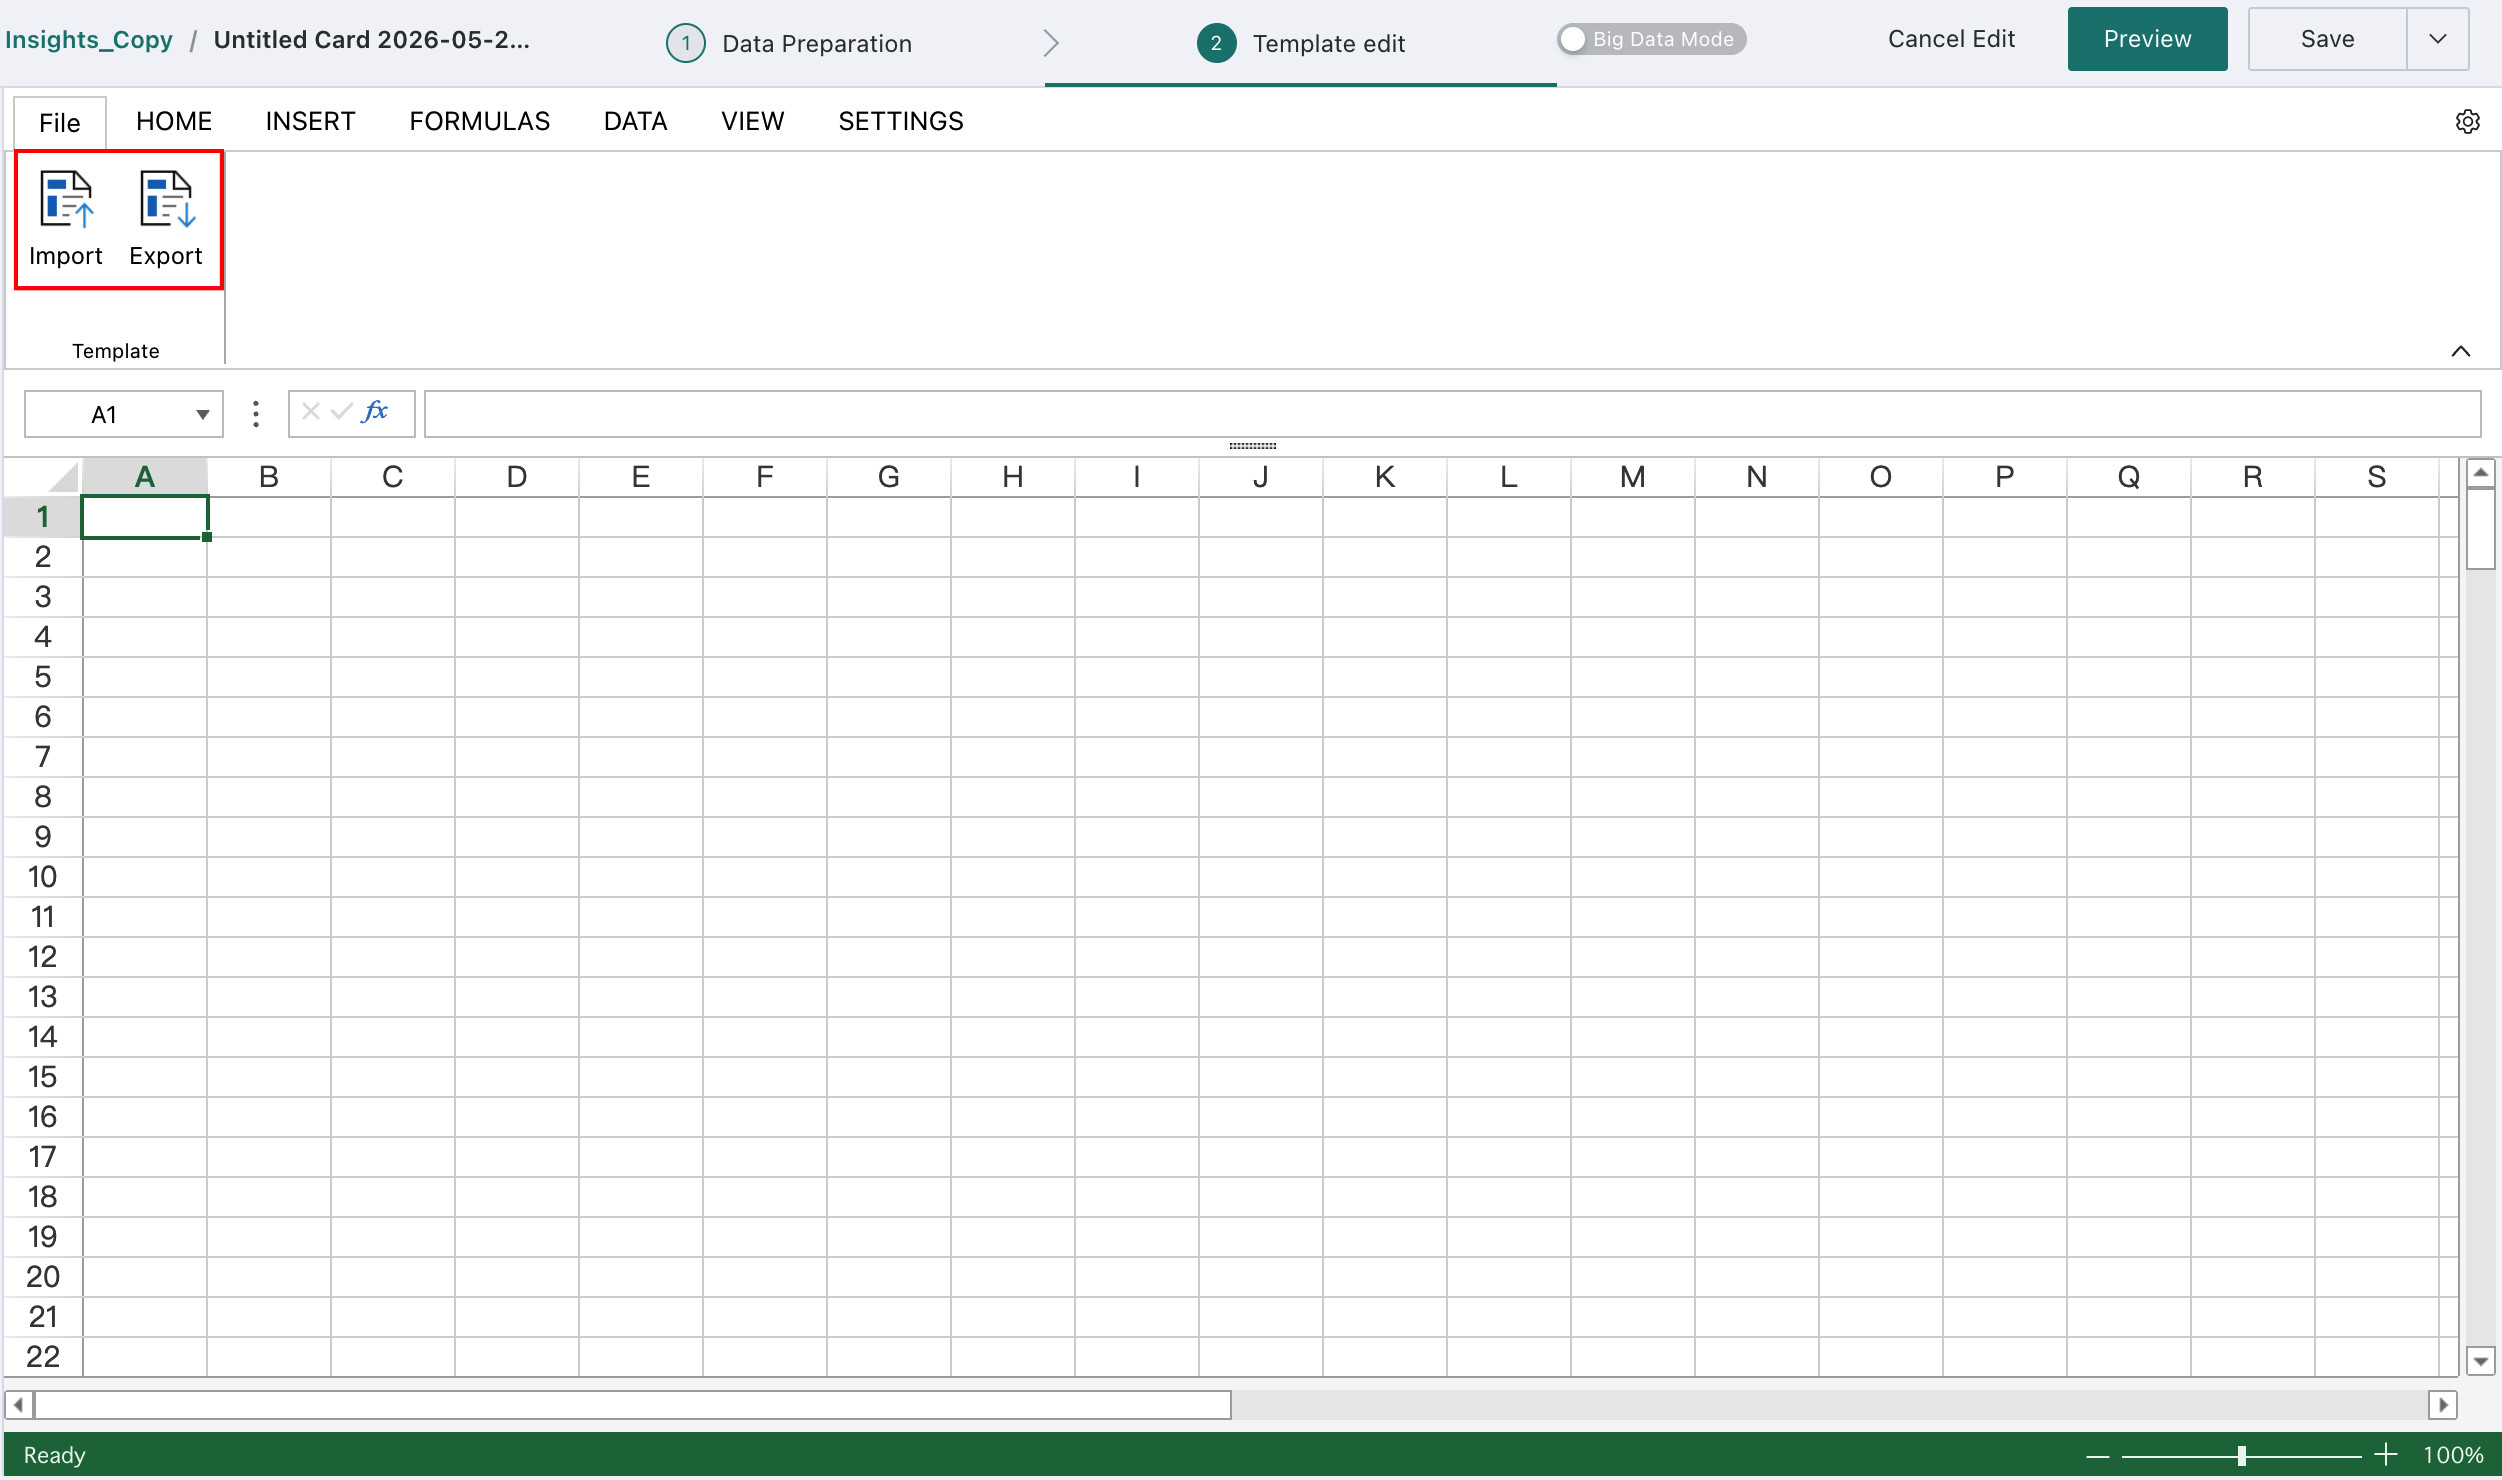
For existing Excel templates, you can import them under the "File" tab to help quickly convert positions that need to be filled into entry controls.
NoteWhen importing tables, it is temporarily not possible to directly convert to Entry Control > Table.
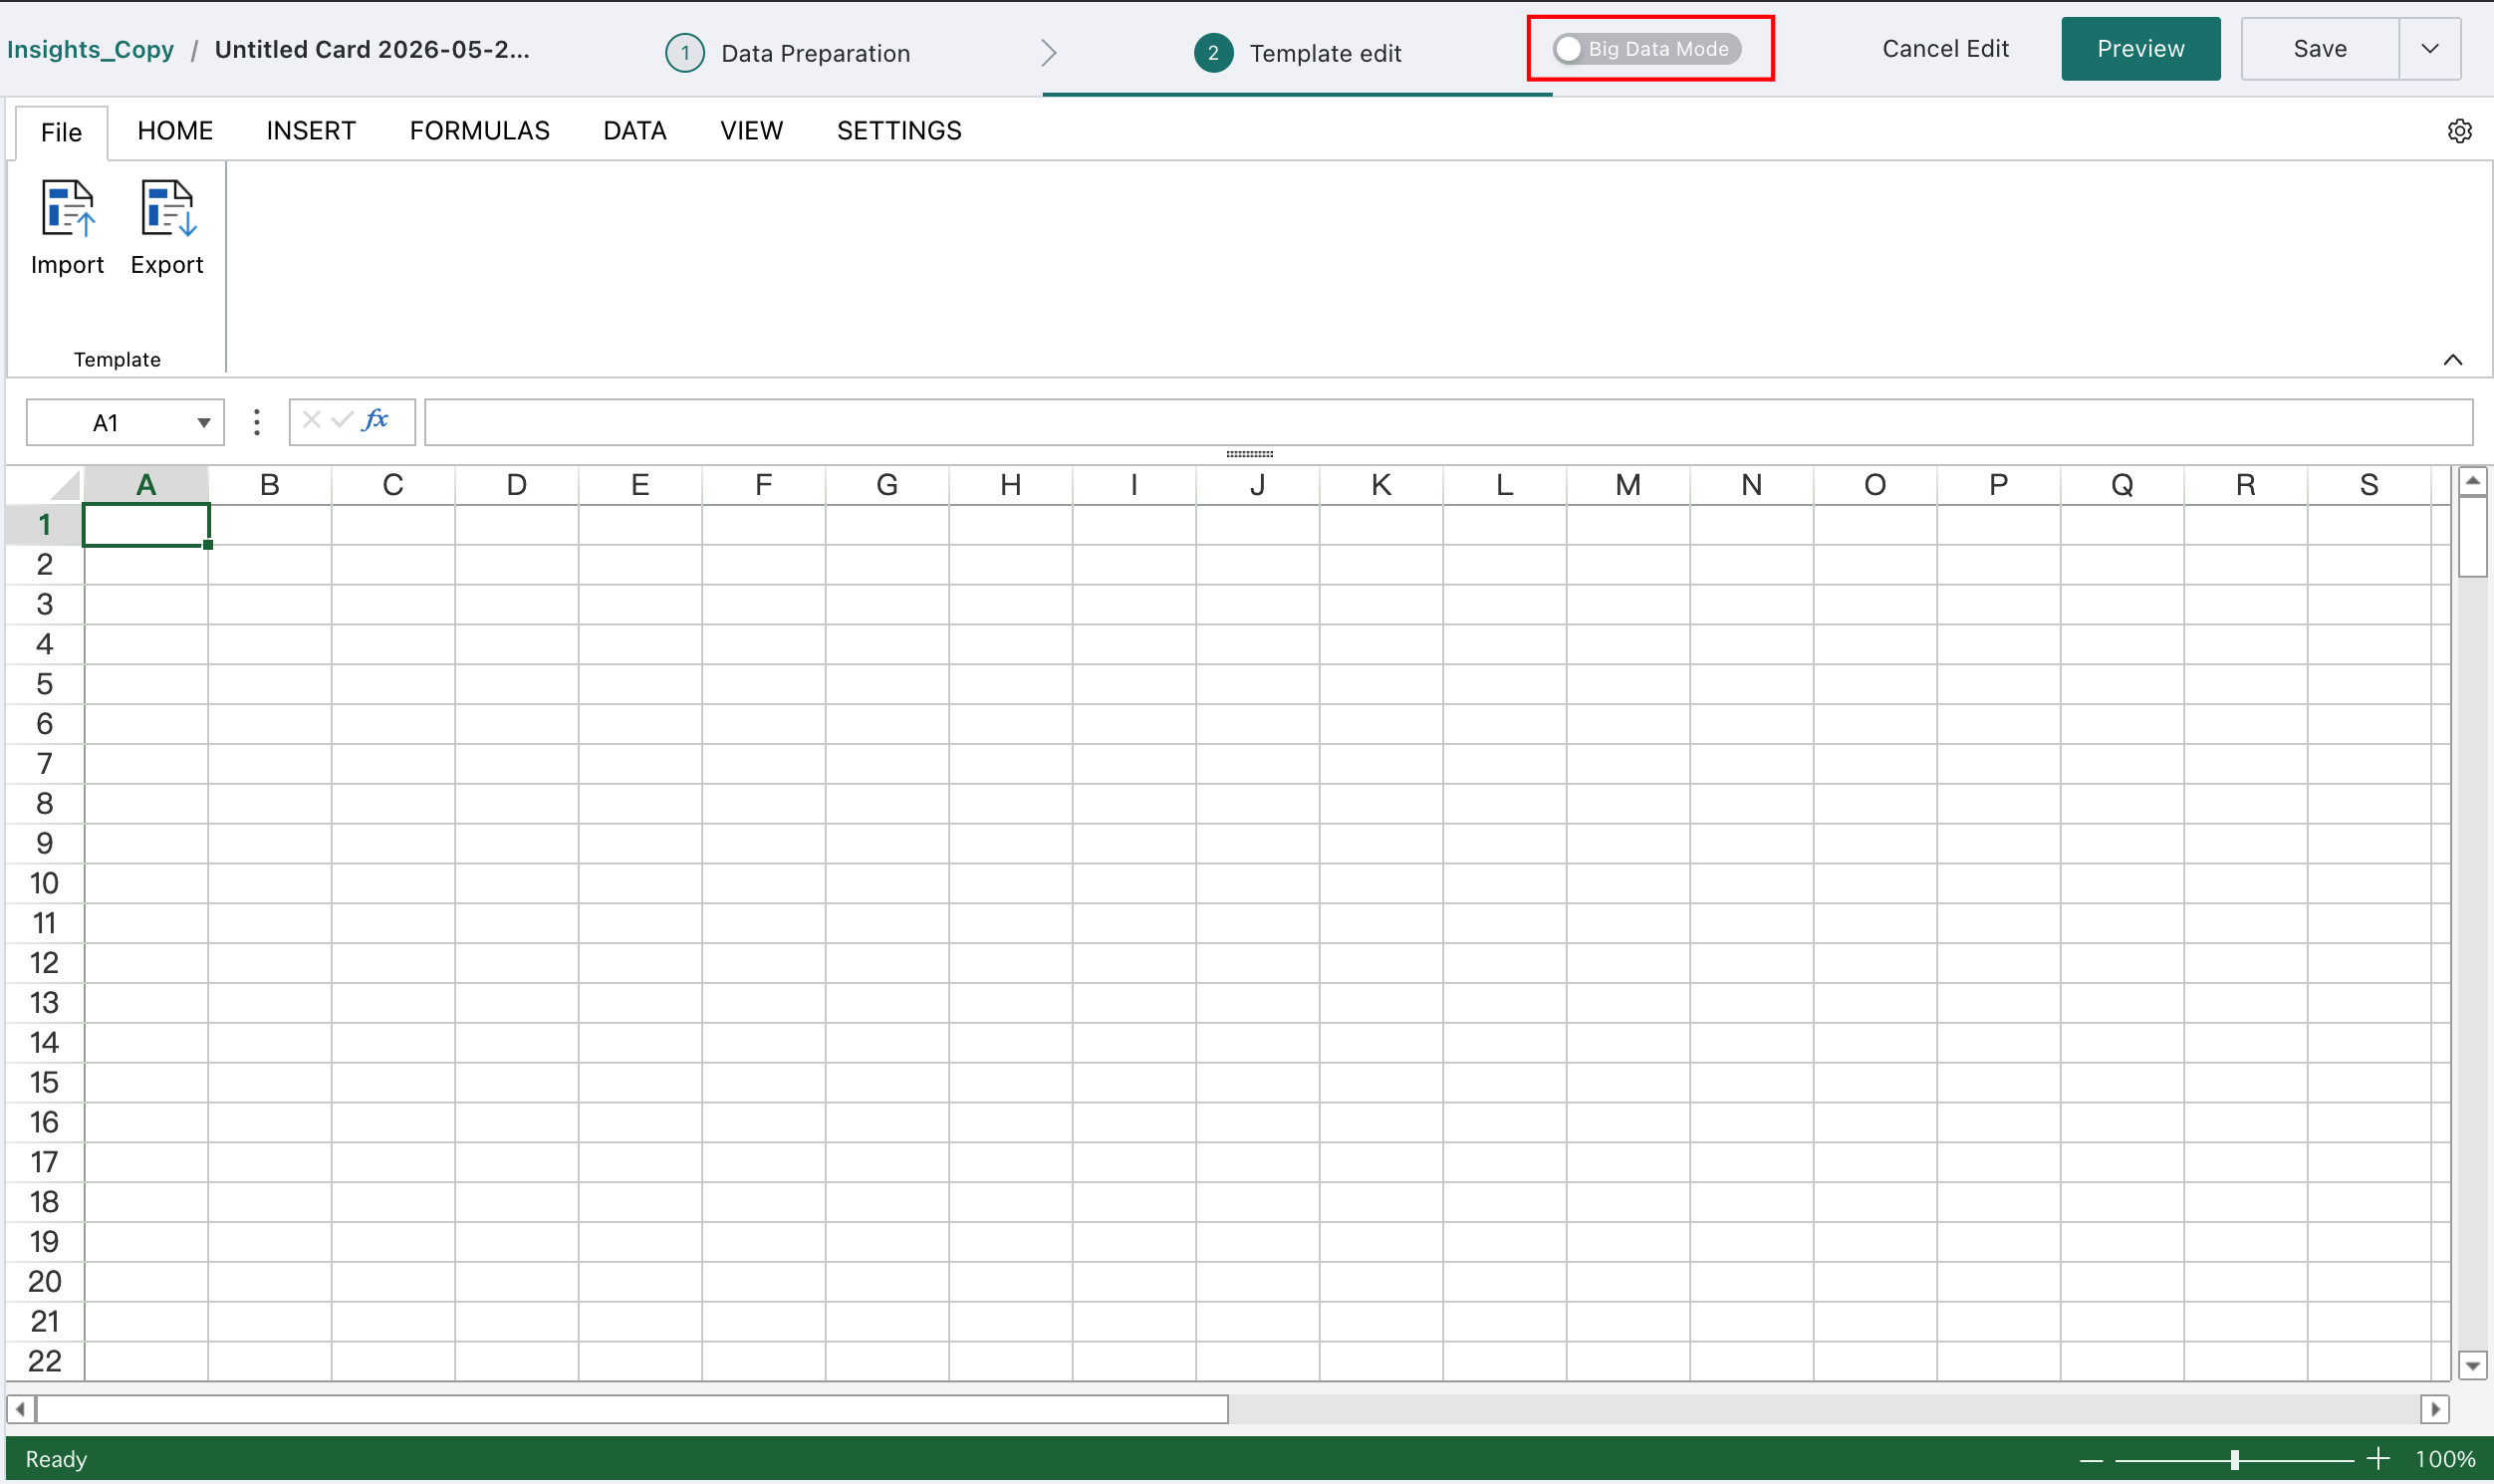
In large data volume entry scenarios, dynamic tables loading large amounts of data rows may experience performance bottlenecks, affecting user operation smoothness. In such scenarios, "Big Data Mode" can be used to alleviate performance pressure.
Note- The table must be a dynamic table.
- After switching to big data mode, only text controls and number controls are retained.
- After the switch is turned on and saved, it cannot be rolled back, that is, big data table entry cards cannot be downgraded to original table entry cards.
-
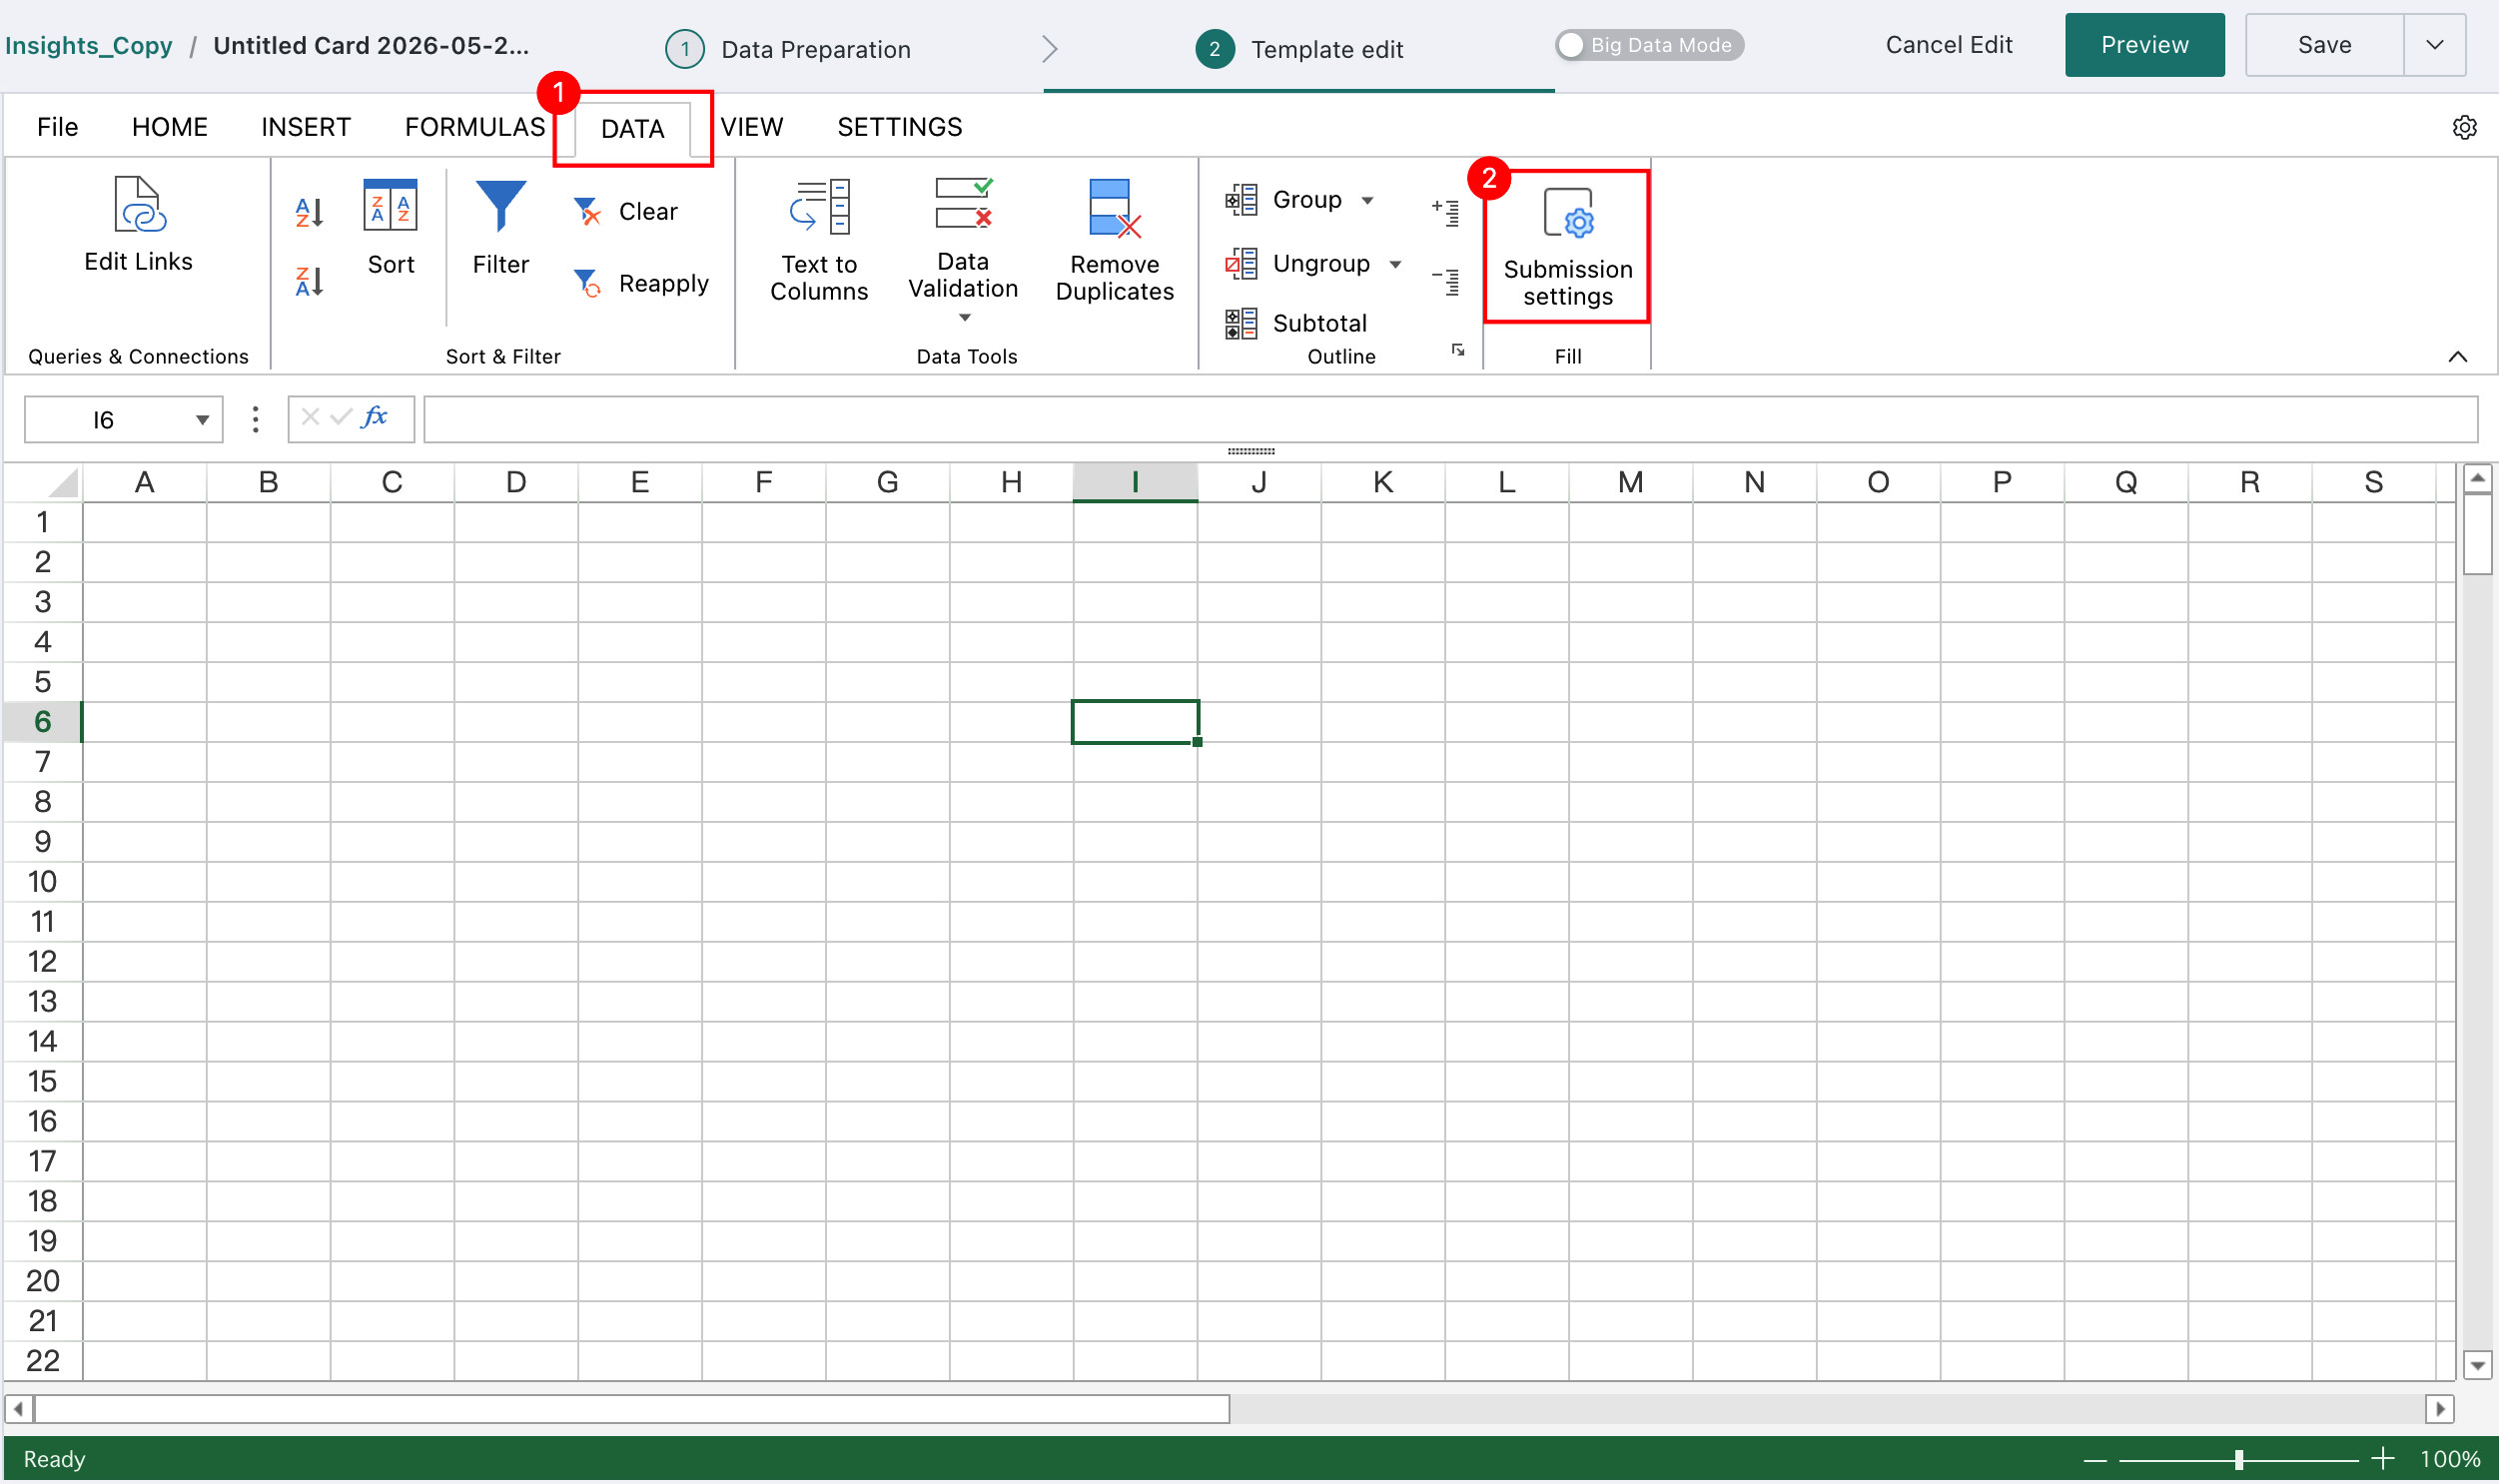
After form configuration is complete, configure data submission settings under the "Data" tab. For detailed instructions, see Data Submission.
NoteIf submission-related settings are not configured, the form cannot be submitted.
-
After all configurations are complete, click "Save and Exit" to complete the entry settings.
Basic Control Instructions
Text Control
Text controls generate text fields.
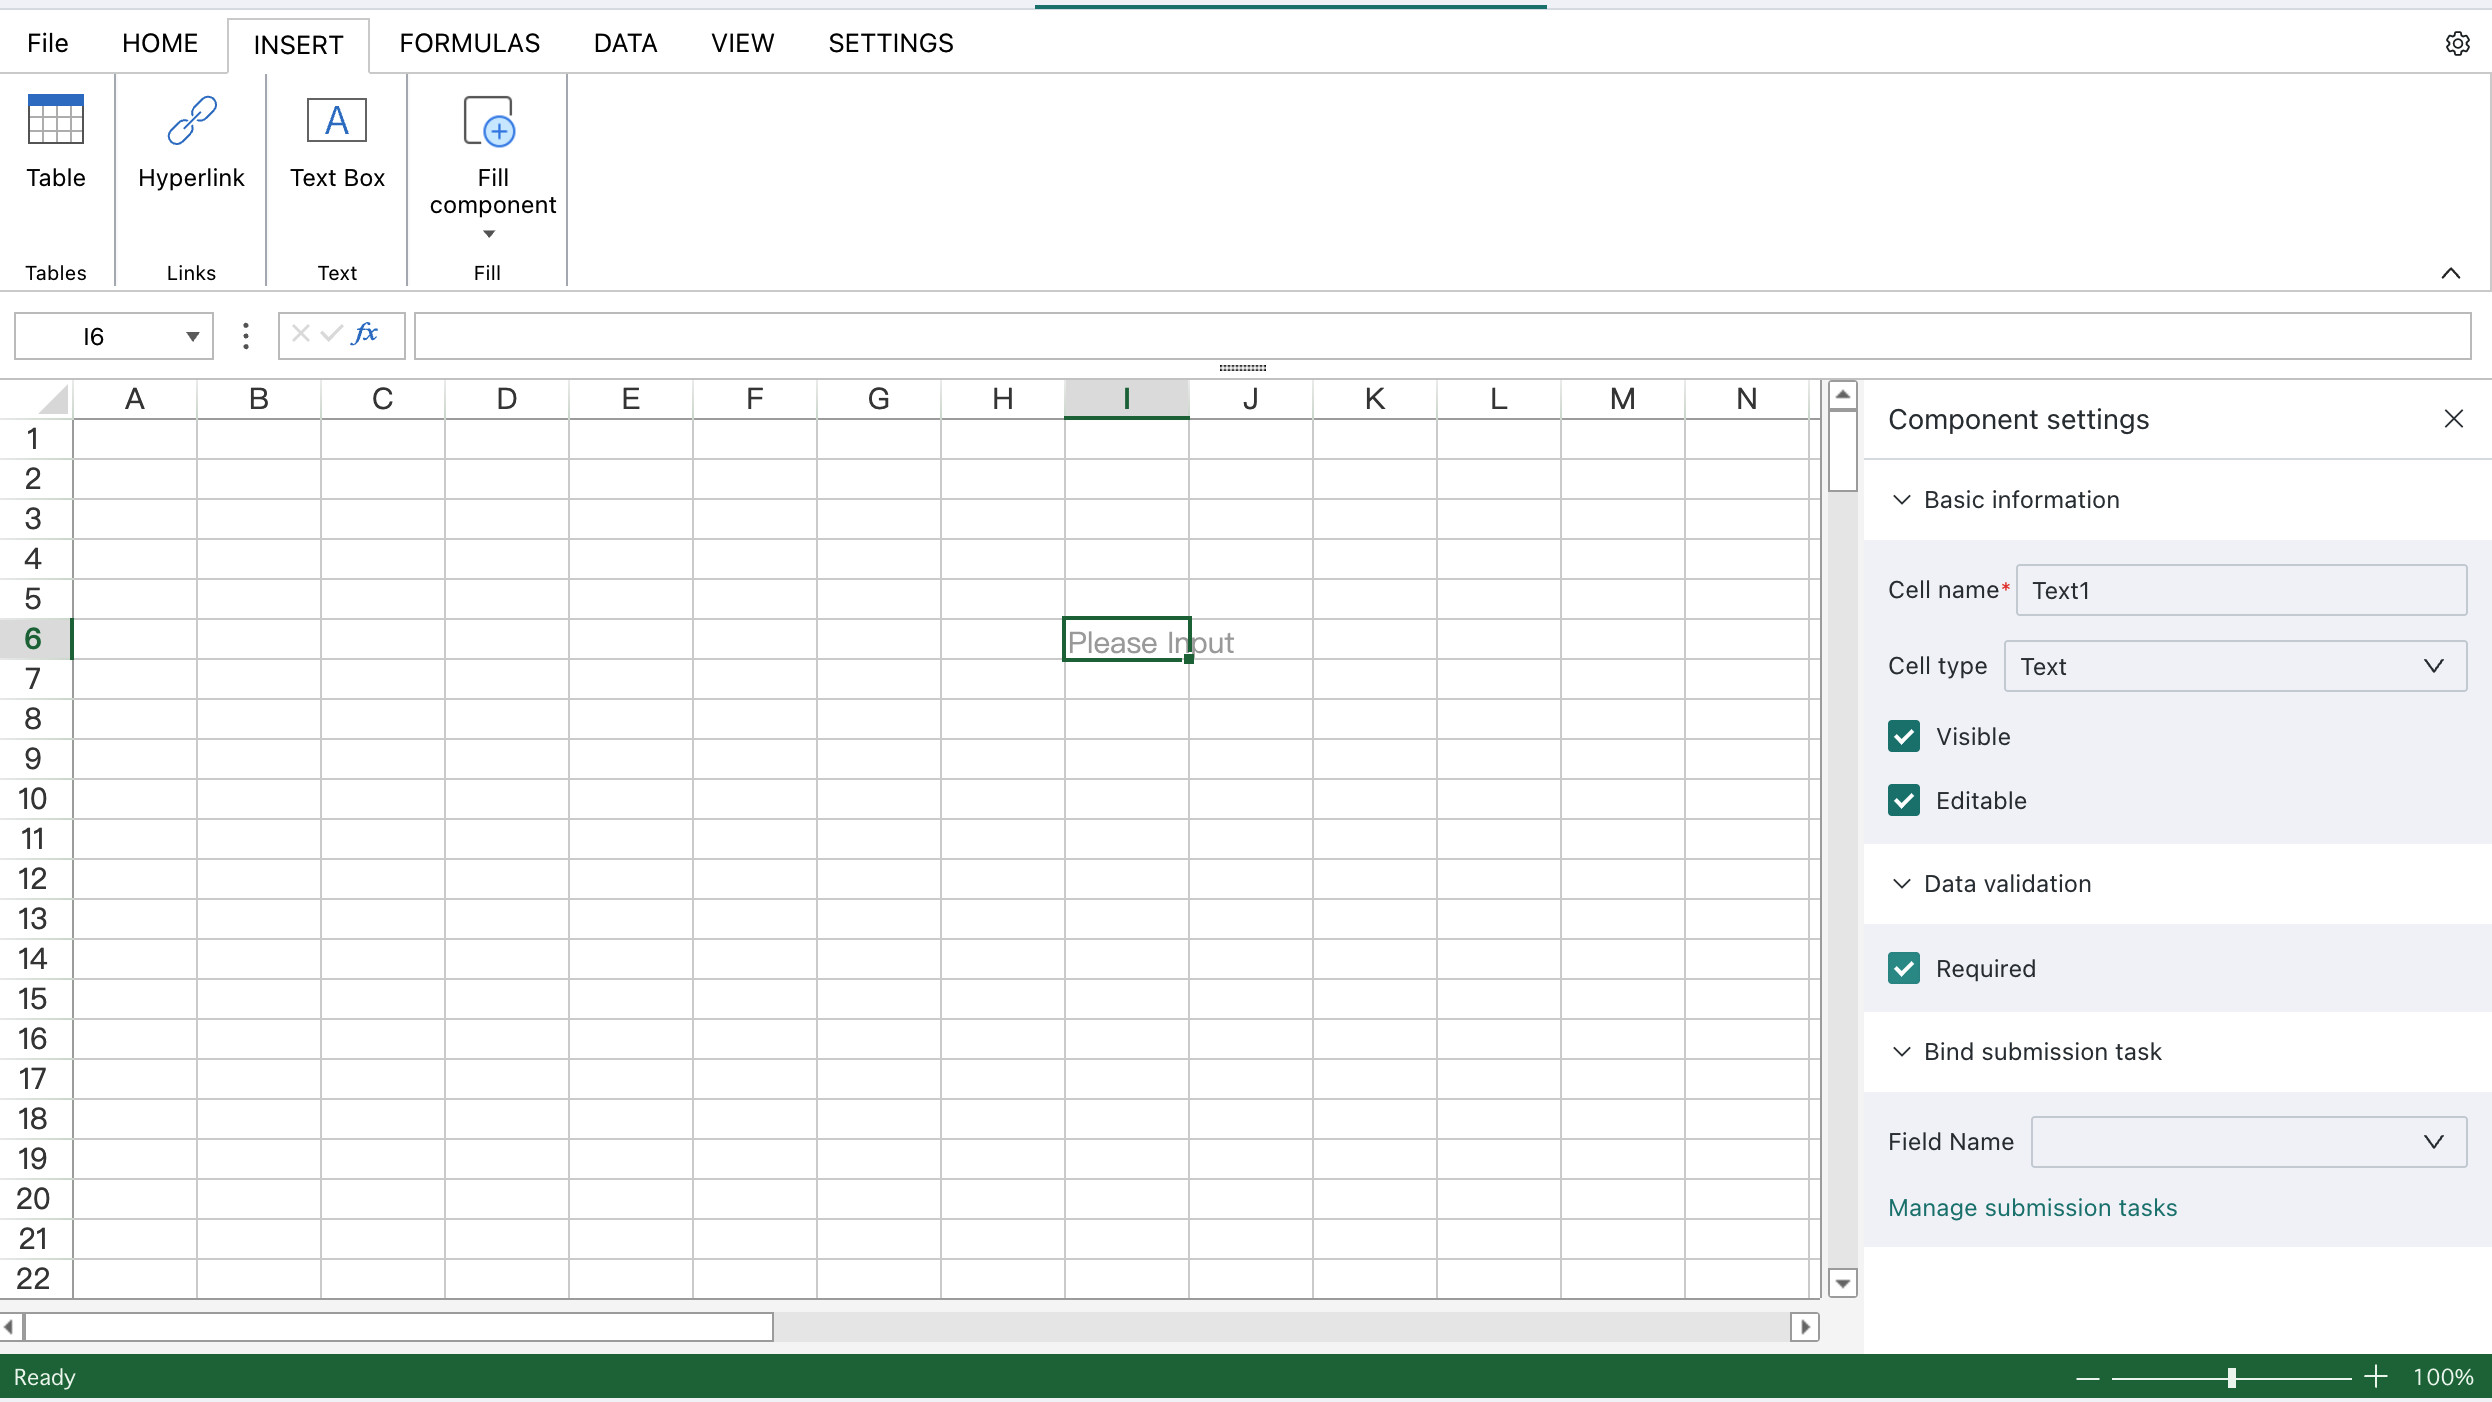
Basic control properties include:
- Cell Name: That is, the form field name.
- Cell Type: That is, the type of the current cell control, which can be directly switched.
- Visible: Whether the current cell is displayed when the user fills in the form. After checking, the user can see this field in the entry interface.
- Editable: Whether the current cell allows the user to modify. After checking, the user can see and modify this field in the entry interface; if not checked, the user cannot see or can see but cannot modify this field.
- Required: Whether it is a required field, default is required. After checking, the user must fill in this field data to submit data.
- Bind Submission Task: The associated field in the write-back table. If the write-back table has not been configured, you can click "Manage Submission Tasks" below to set it.
(Note: The above items are basic properties of controls, and other controls also have these property settings. They will not be repeated when introducing other controls below.)
In addition to the above basic configurations, entry data default values can be directly filled in the cell to take effect.
Number Control
Number controls generate number fields.
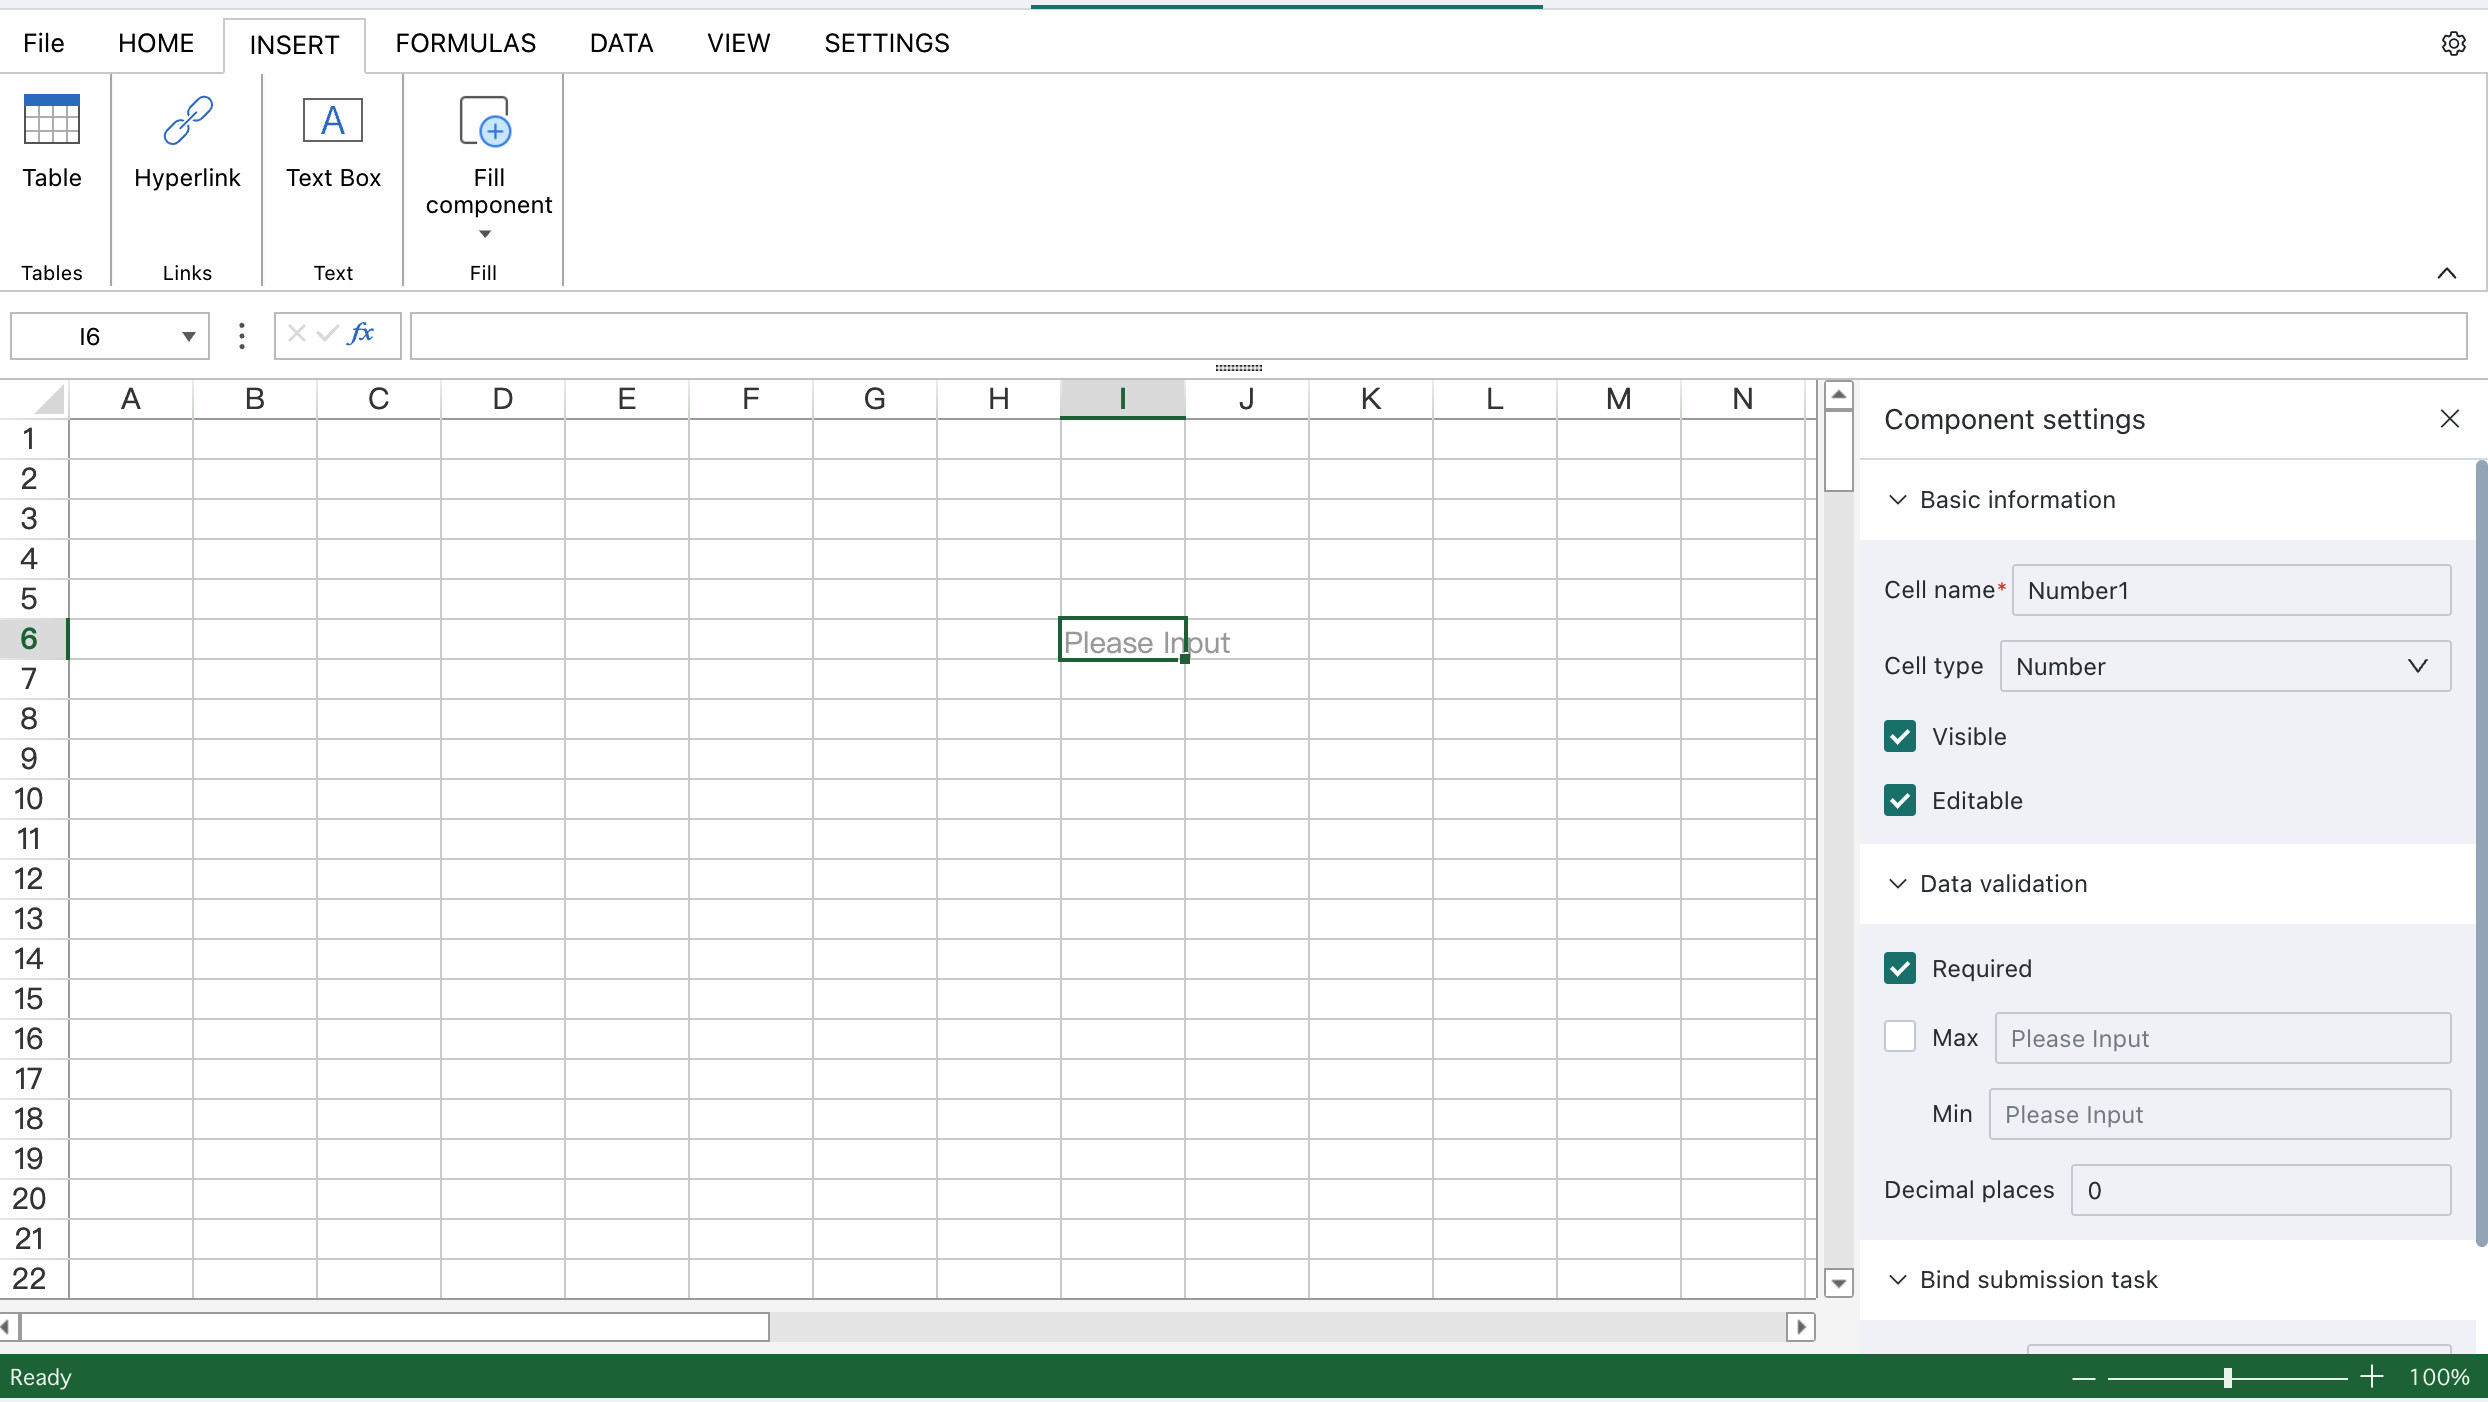
In addition to basic properties, number controls support setting:
- Decimal Places: Can be configured up to 6 decimal places. If the decimal places are set to 0, the entry data is restricted to integers; if decimal places are 1-5, they take effect according to the configured precision.
- Maximum and Minimum Value Range: After checking, data is checked according to the maximum and minimum value range during submission, and data exceeding the range will be reported as errors. If the range is not filled in, it defaults to infinity.
Single Choice & MultiSelect
In addition to basic properties, single select and multiple select control configuration items are basically consistent, supporting configuration of option source and option style.
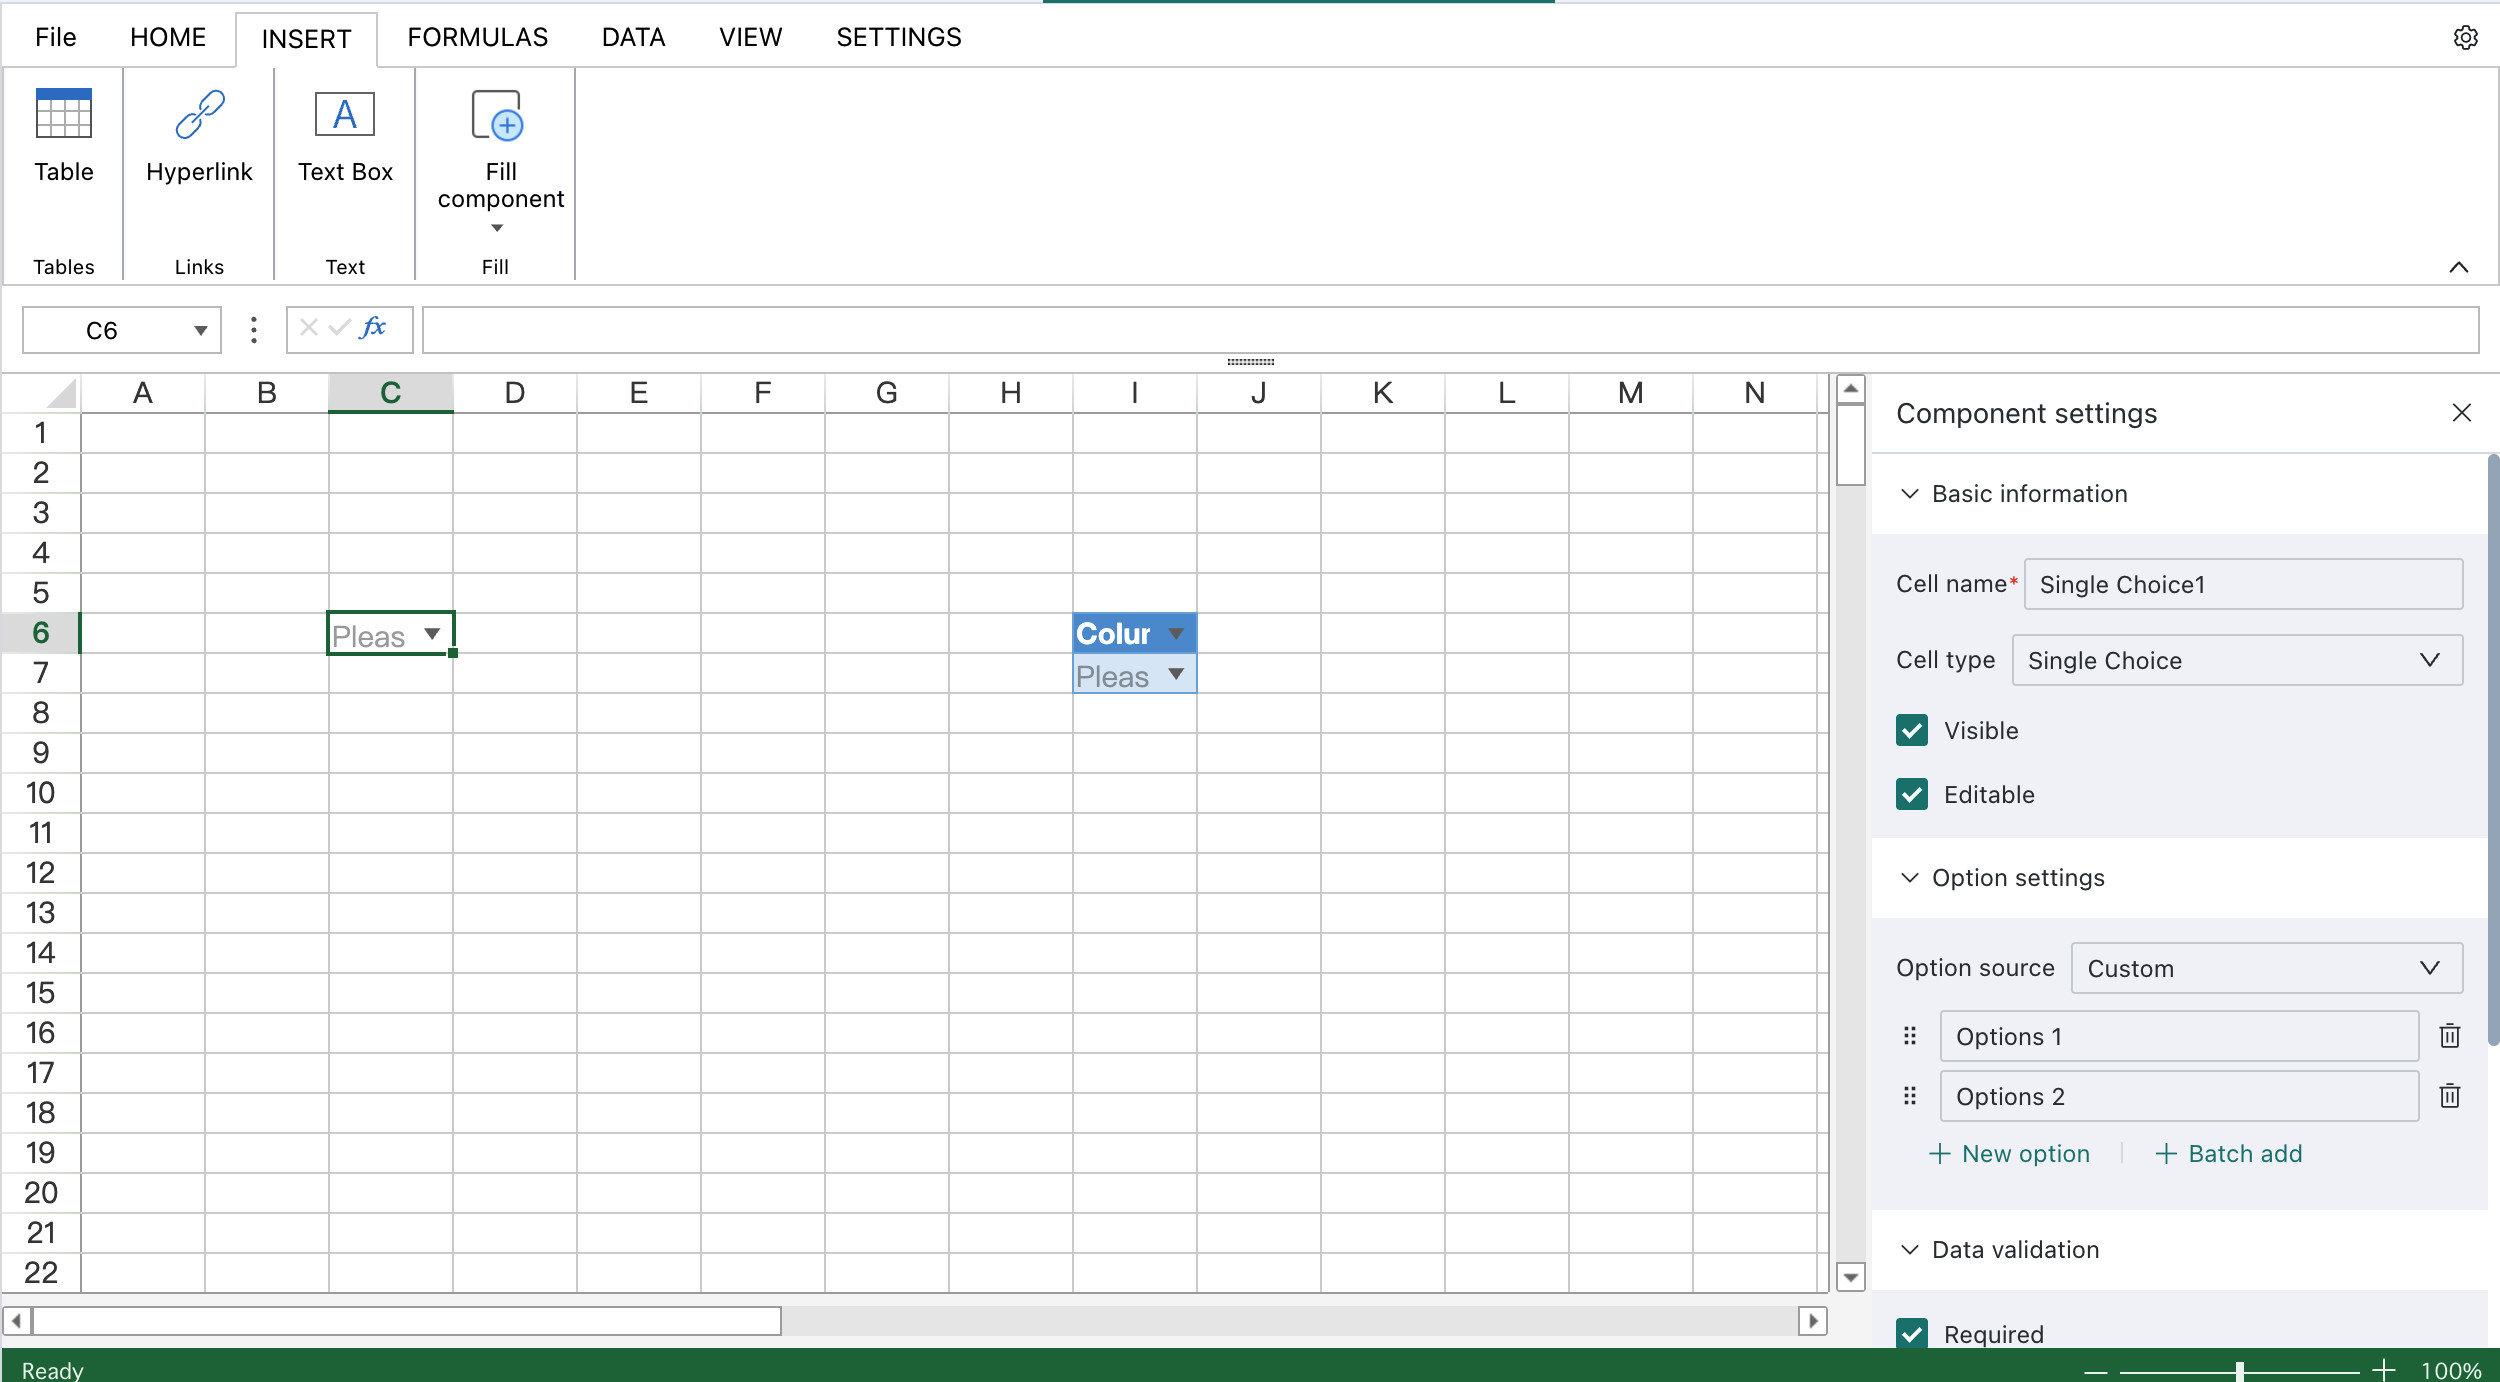
-
Option Source: Supports two option sources: custom and from dataset
-
Custom: Users configure option content themselves, and can exchange option positions by dragging.
-
From Dataset: Options come from field values in the dataset.
NoteWhen users fill in the form, they need to have user permissions for the corresponding dataset, otherwise an error will be reported when submitting data.
At this time, the option linkage configuration can be opened to configure linkage controls. The optional range of linkage controls is other single select/multiple select controls whose option sources are from datasets on the current interface.
-
-
Option Style: Supports two styles: dropdown box and radio button group
- Dropdown Box: Click to expand the dropdown to select options.
- Radio Button Group: All buttons are displayed flat, and option direction and button configuration can be further configured.
Date Control
In addition to basic properties, supports two styles: date and date time, and can configure the weekly start date and calendar page default display state.
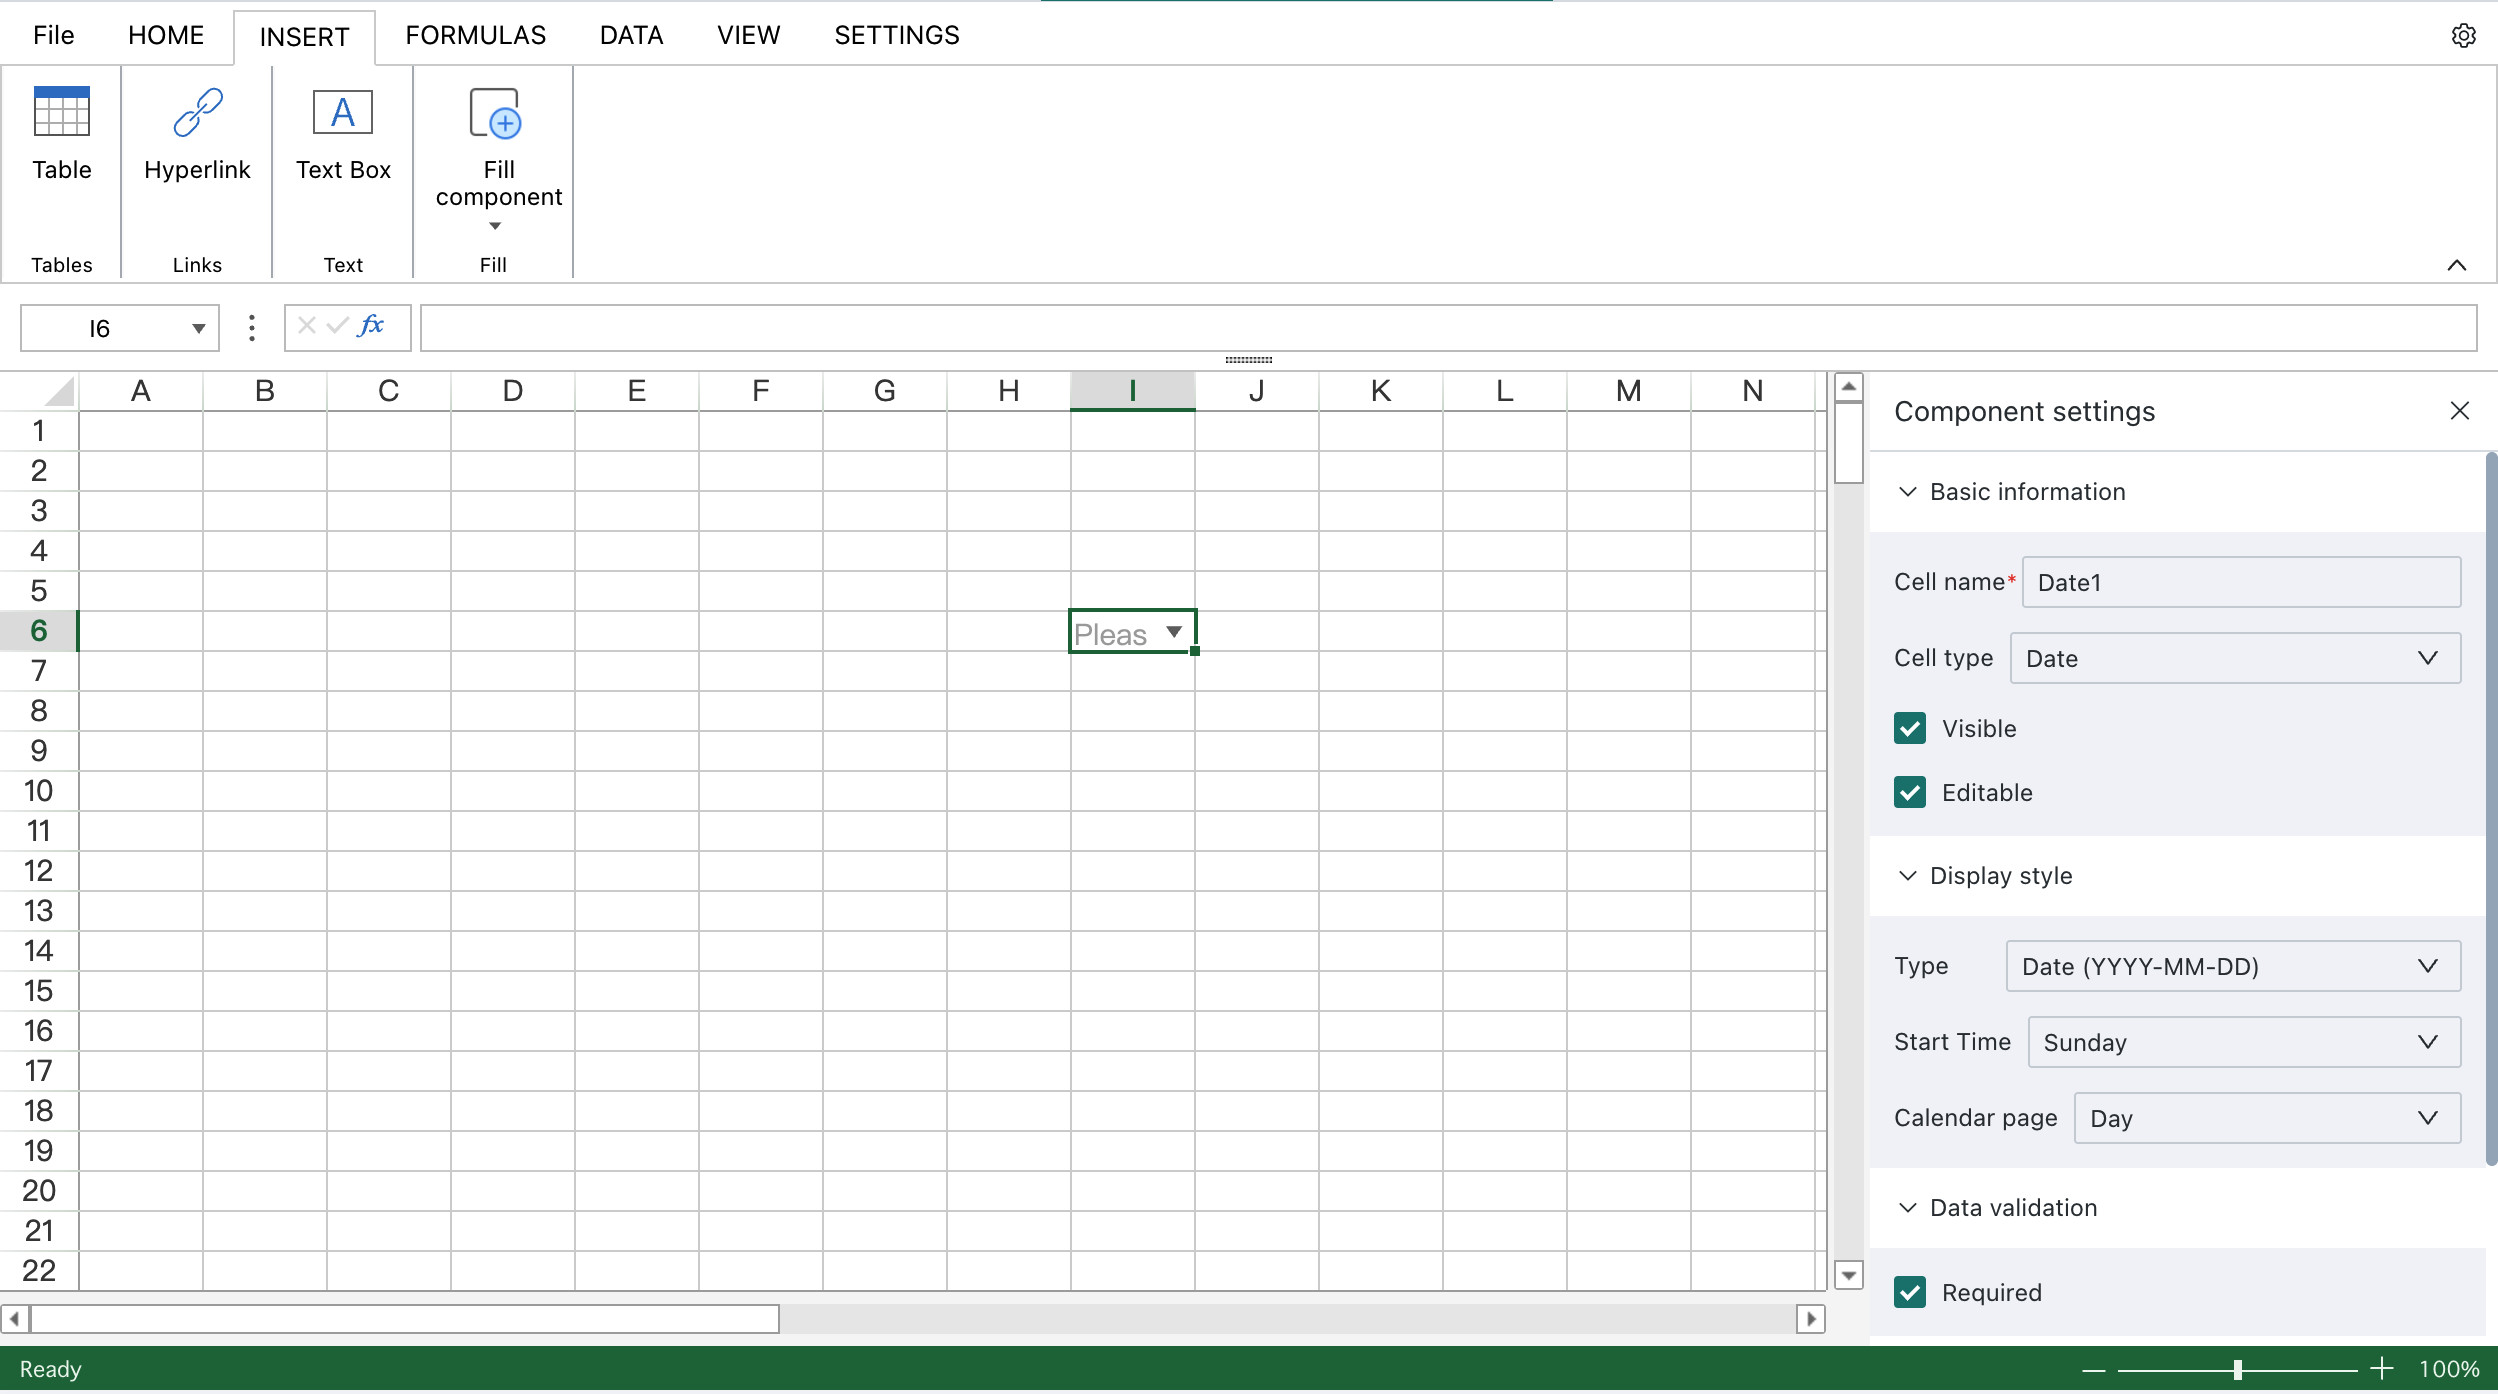
Table Control Instructions
Regular Table
Suitable for blank table entry or fixed data entry, and can be combined with basic controls.
Each entry table currently only supports adding one table component.
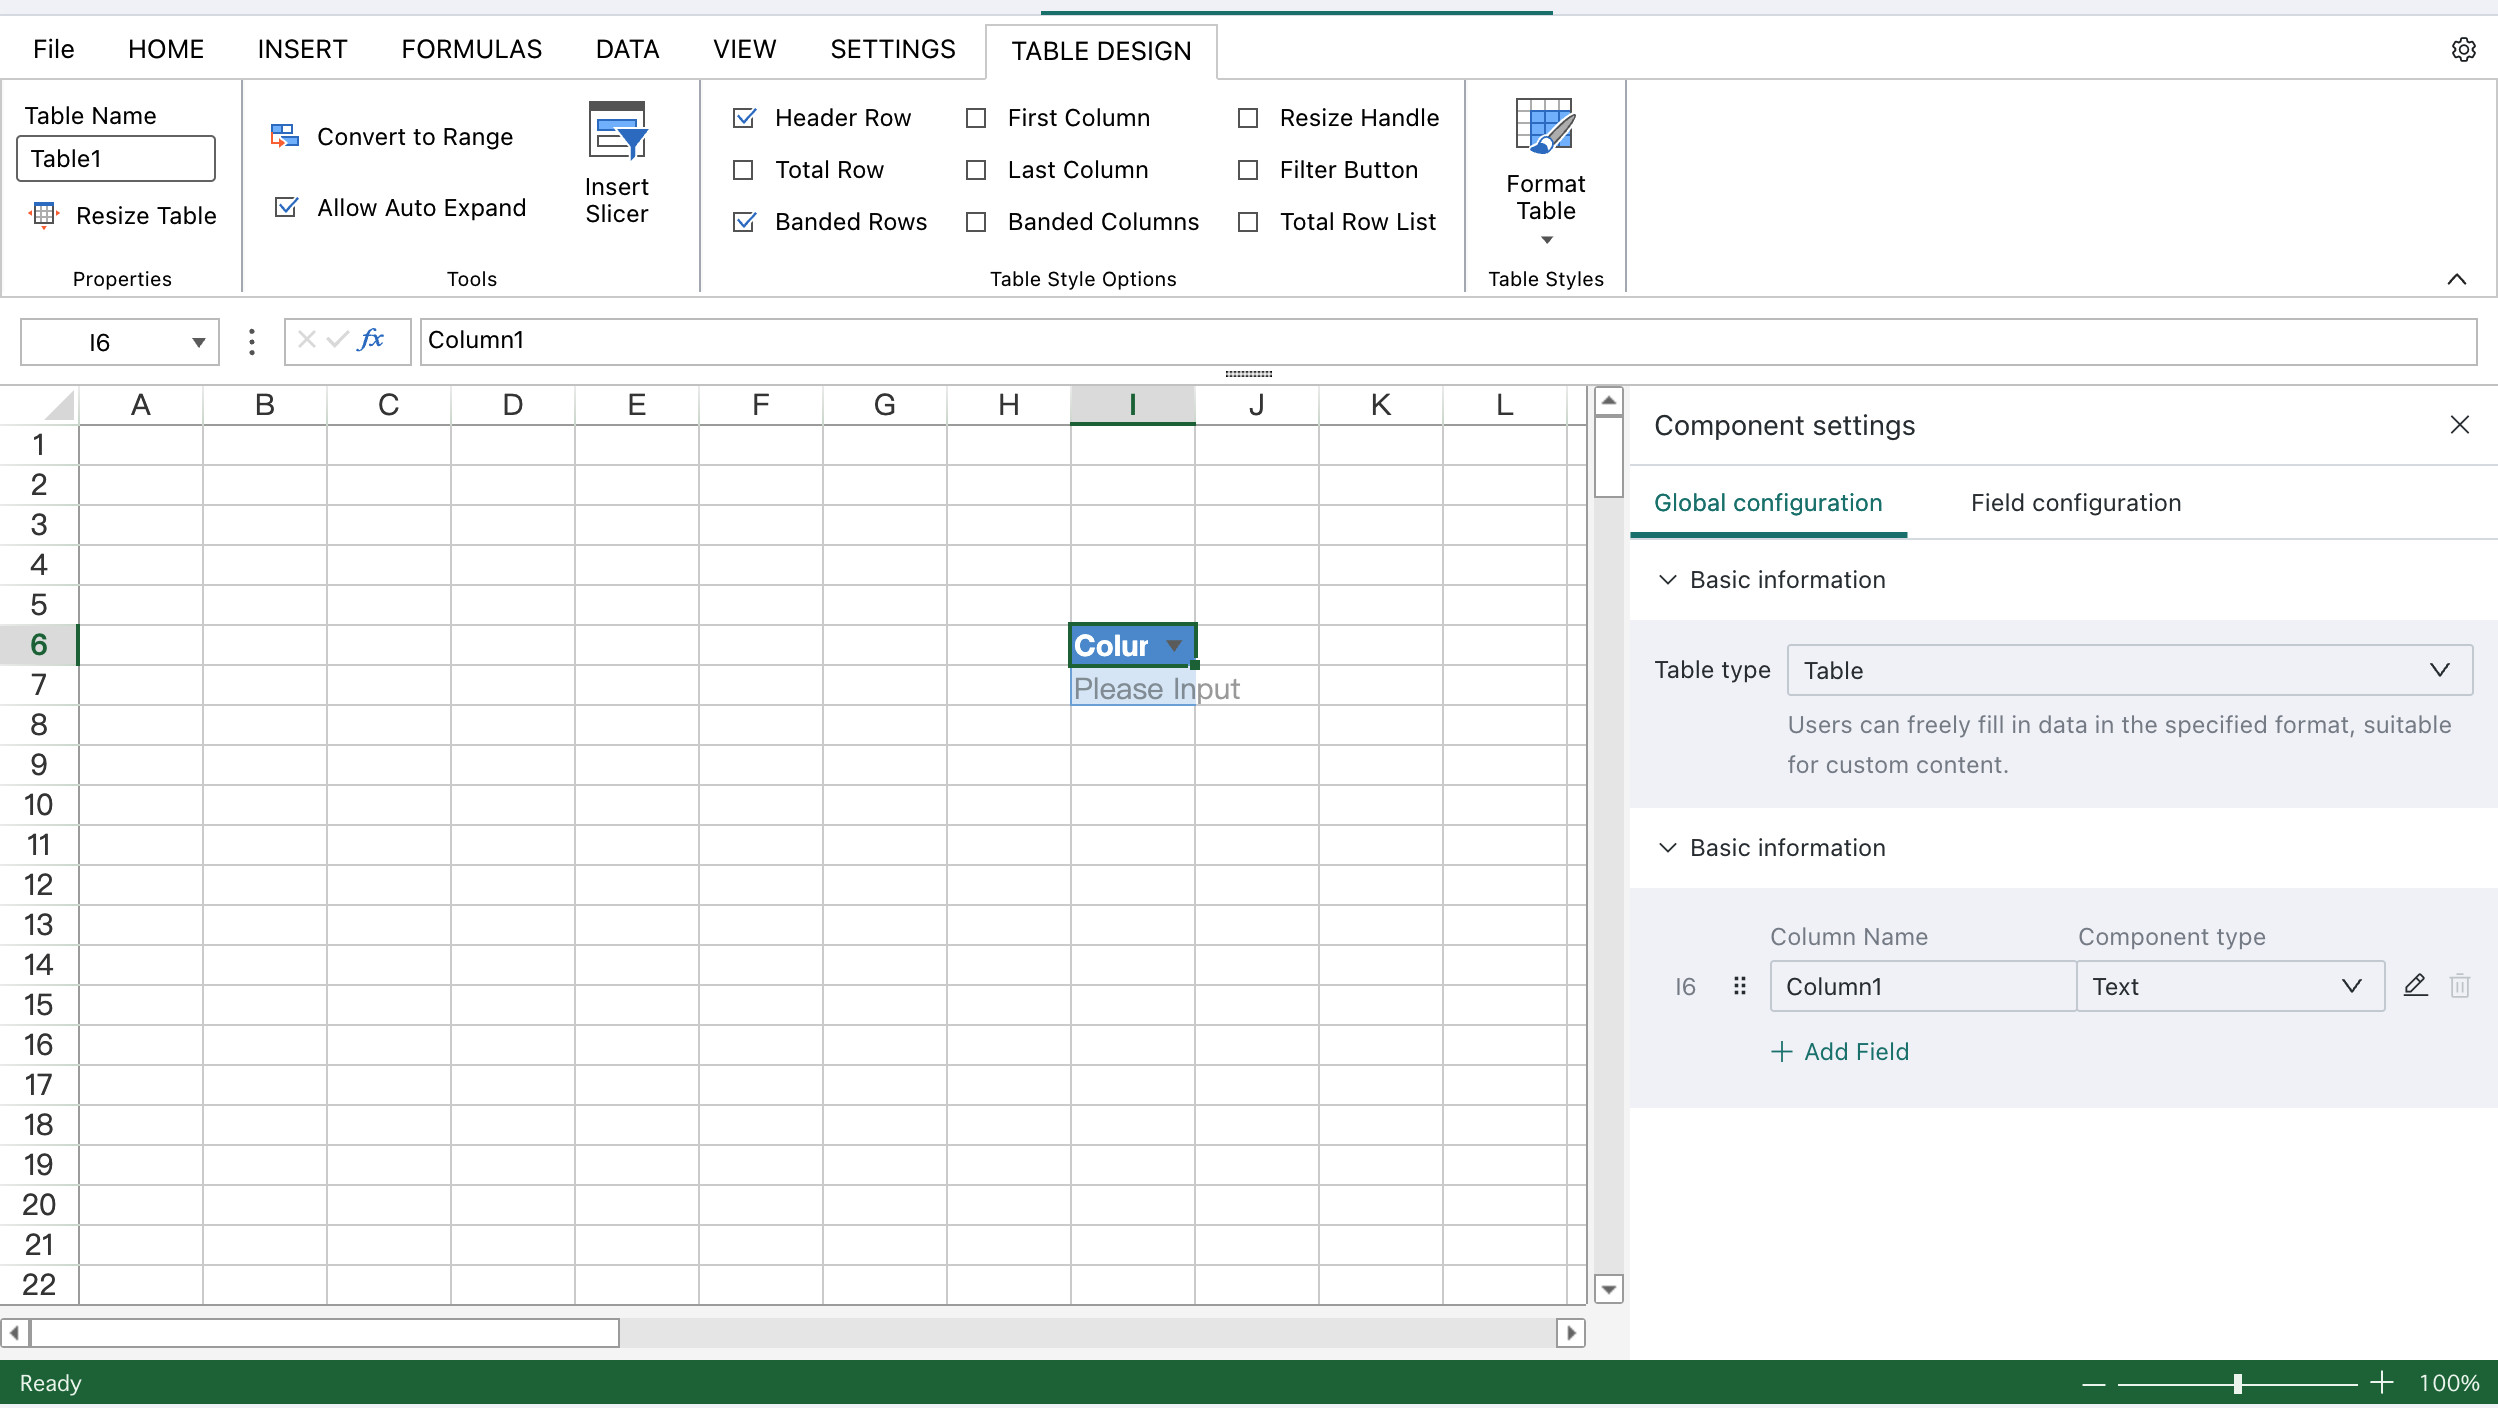
Dynamic Table
Suitable for scenarios of adding new data or modifying data for specific detail tables. Part of the table data comes from the dataset, and can be combined with basic components.
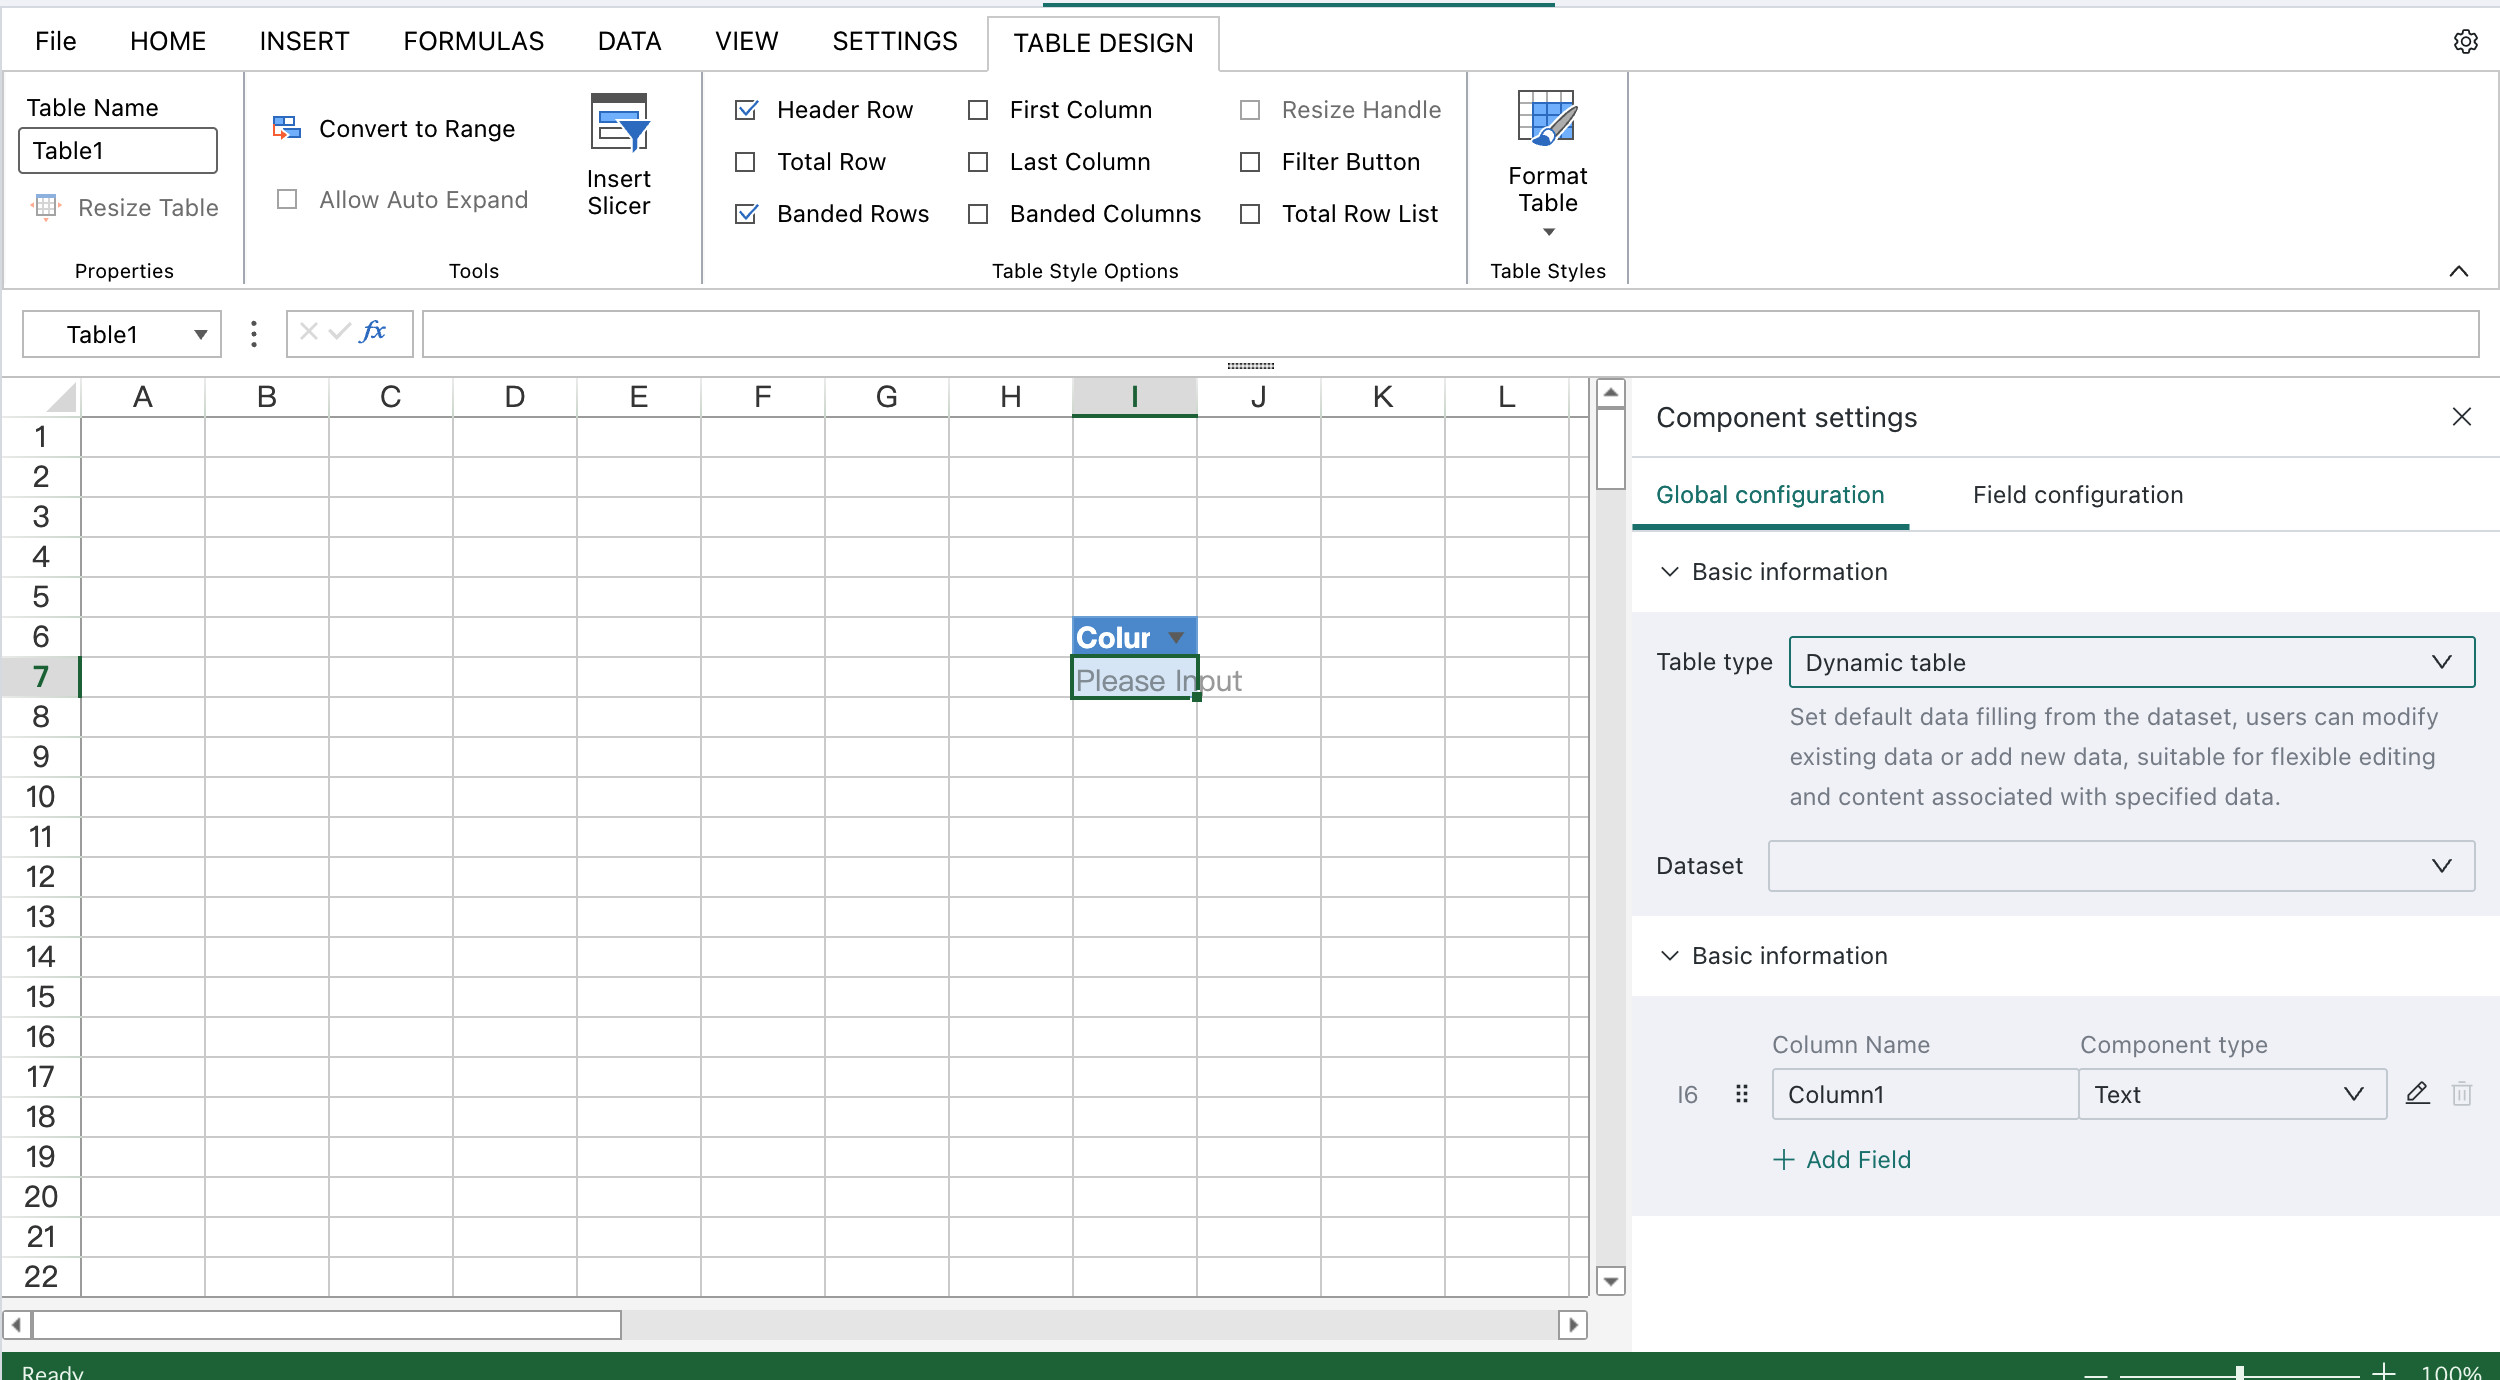
Table Data Validation
Non-editable Style Configuration
For non-editable cells, they will be set to gray by default. If this style does not match the overall table design style, you can change to special colors to make the table visually more coordinated.
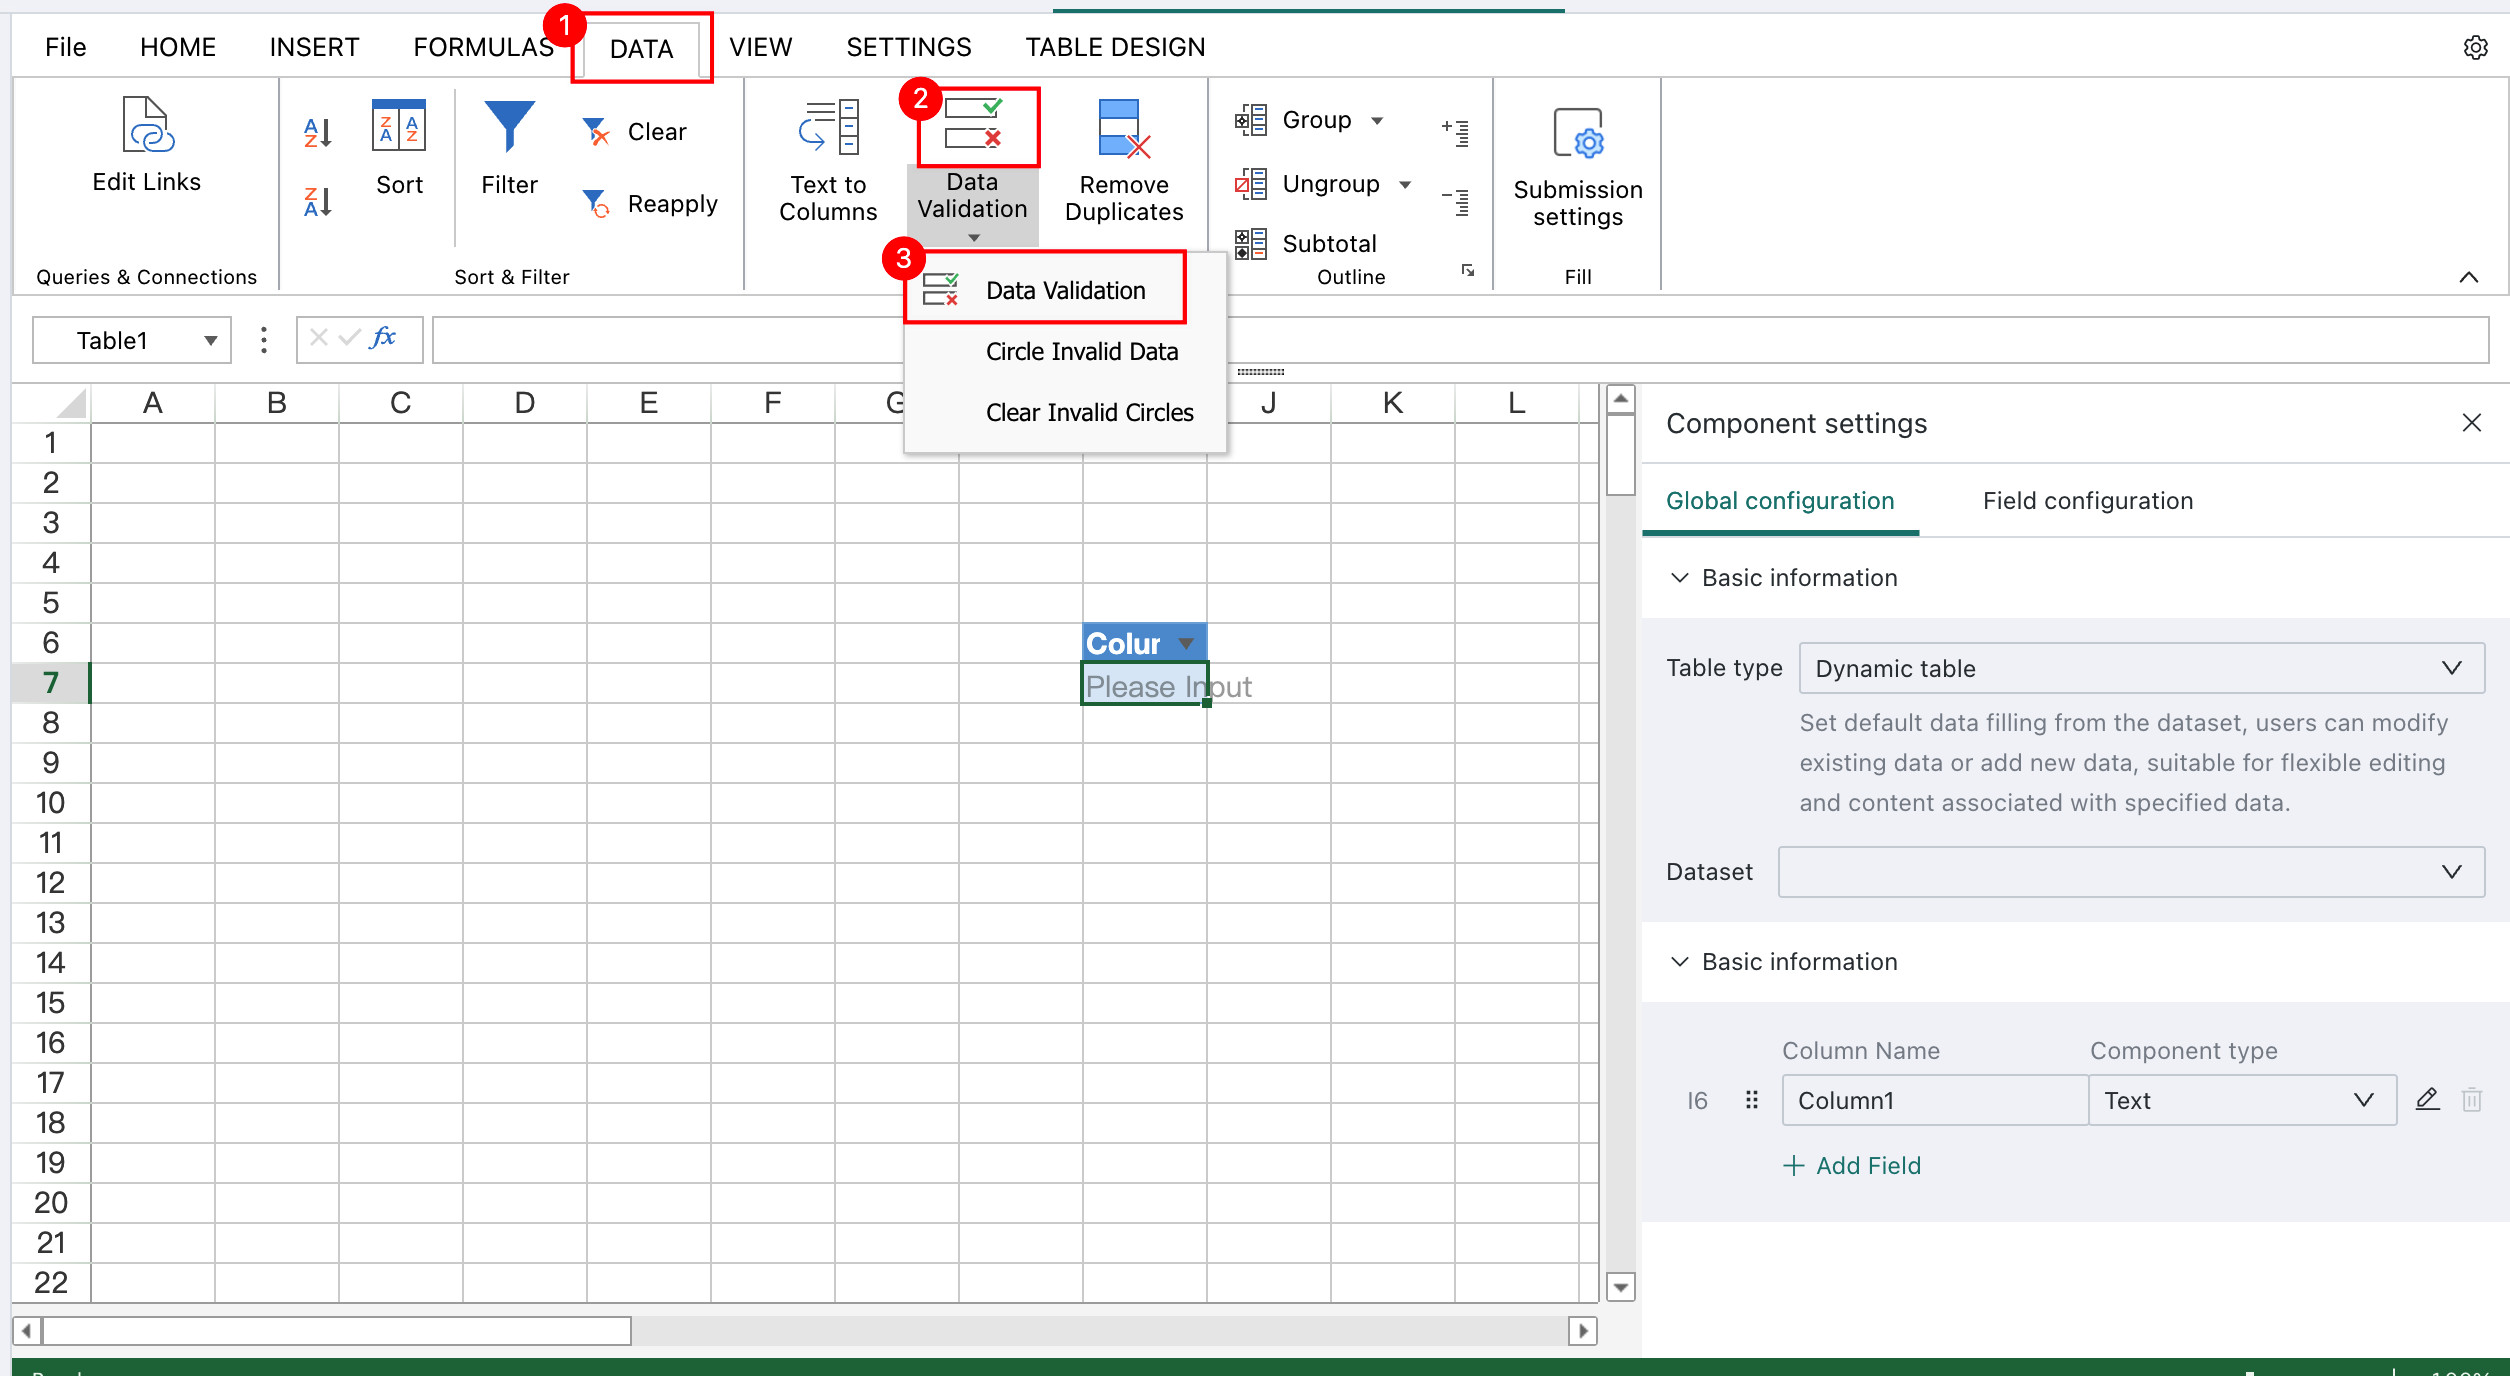
Cell Data Validity
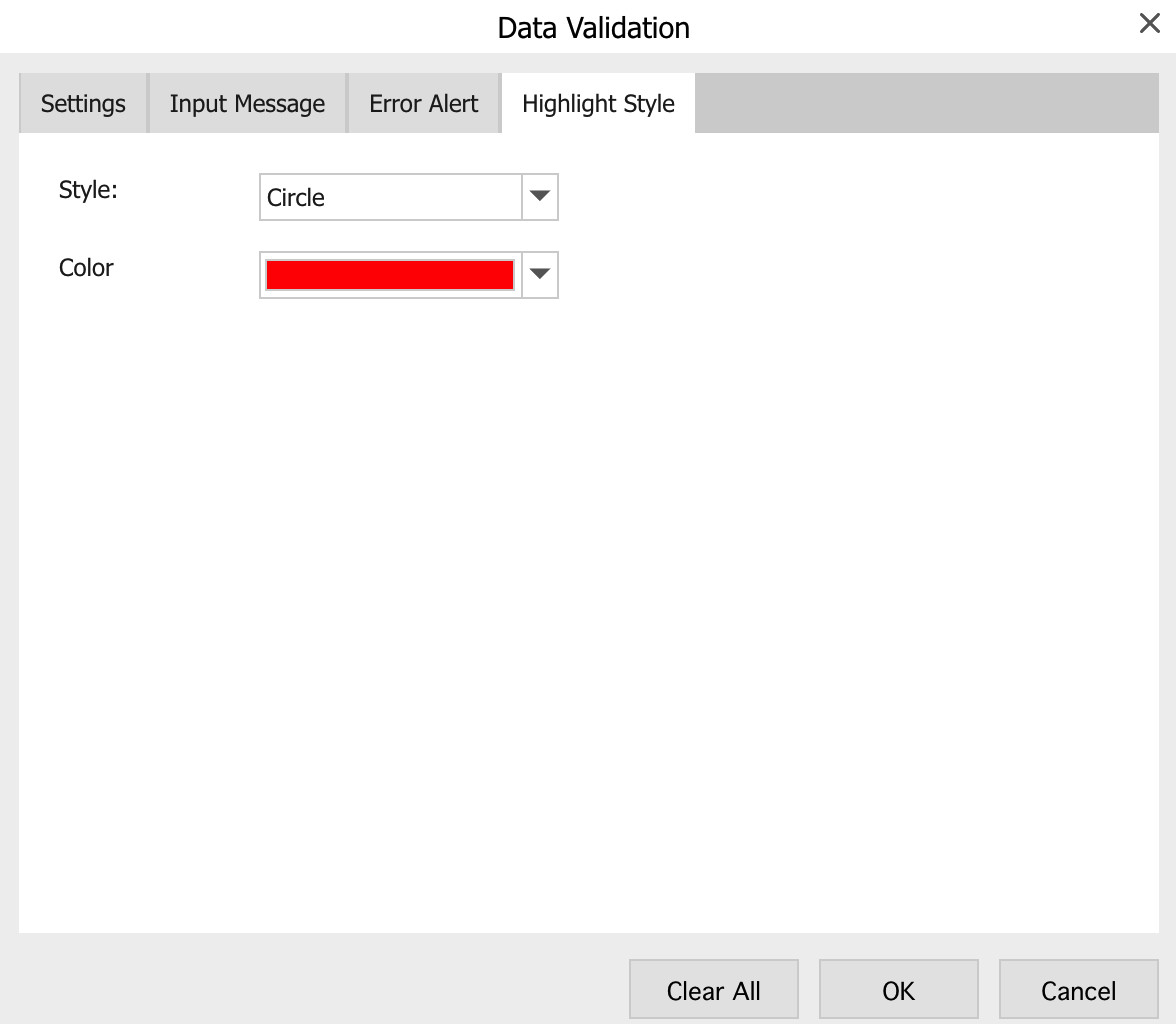
For situations with certain validation rules and wanting to use conditional formatting to remind of incorrect or missing entries, you can go to the "Data > Data Validation" tab and select to set data validity conditions.
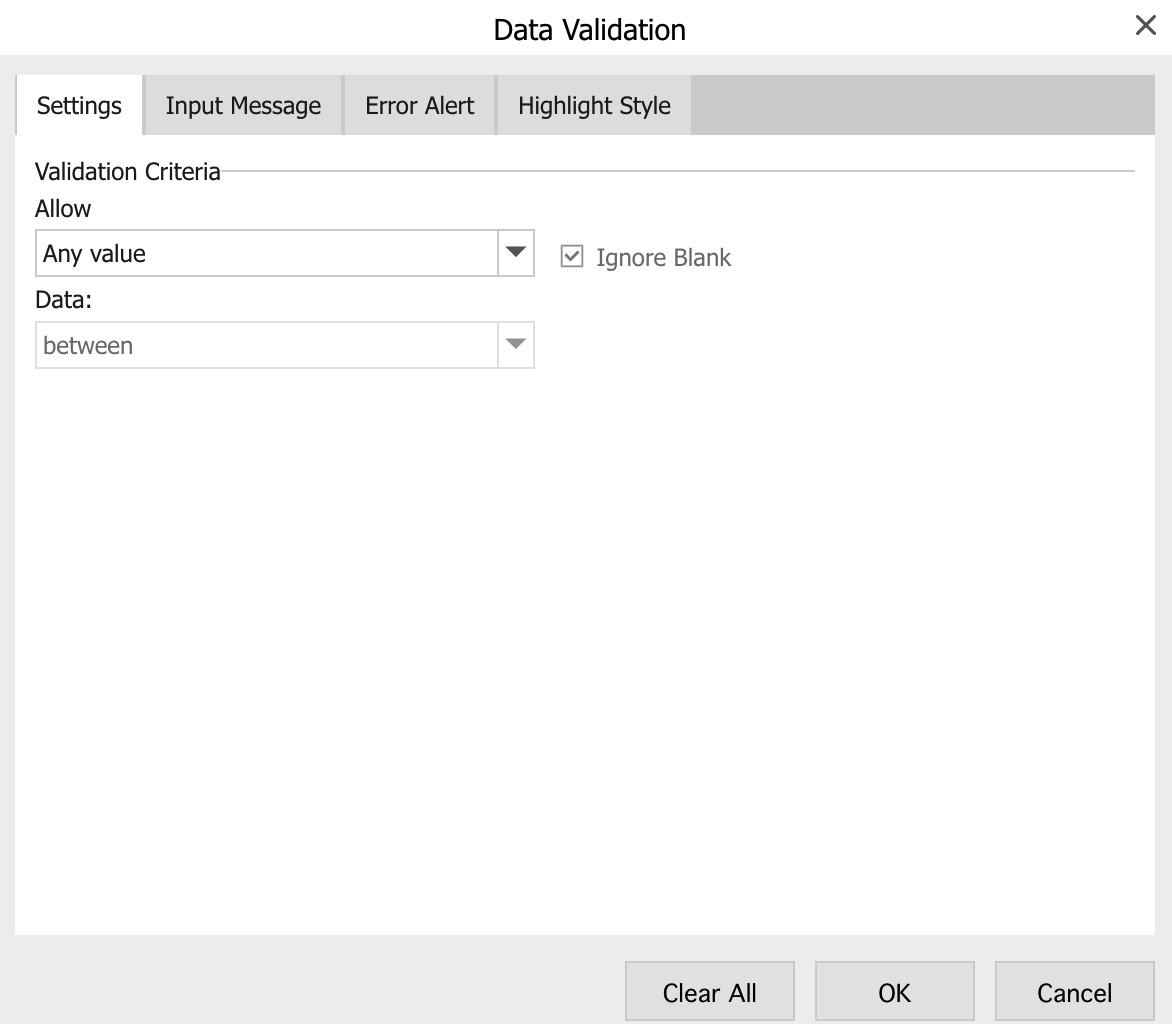
You can customize highlight styles to allow users to clearly locate incorrect or missing positions.
After completing the table configuration, perform write-back table data binding, and users can submit entry data. For write-back table binding related operations, see "Report-Form > Data Submission".
Data Submission
Write-back Table Configuration
After the form is built, configure data submission in Data > Data Submission Settings.
Before configuration, please configure the data connection in Data Center > Data Account, and the data connection account needs to have database write and drop permissions.

Currently supports two methods of writing data: direct append and insert update:
Direct Append: Only adds new data to the database.
Insert Update: Matches according to comparison fields, updates existing data, otherwise adds new data to the database.
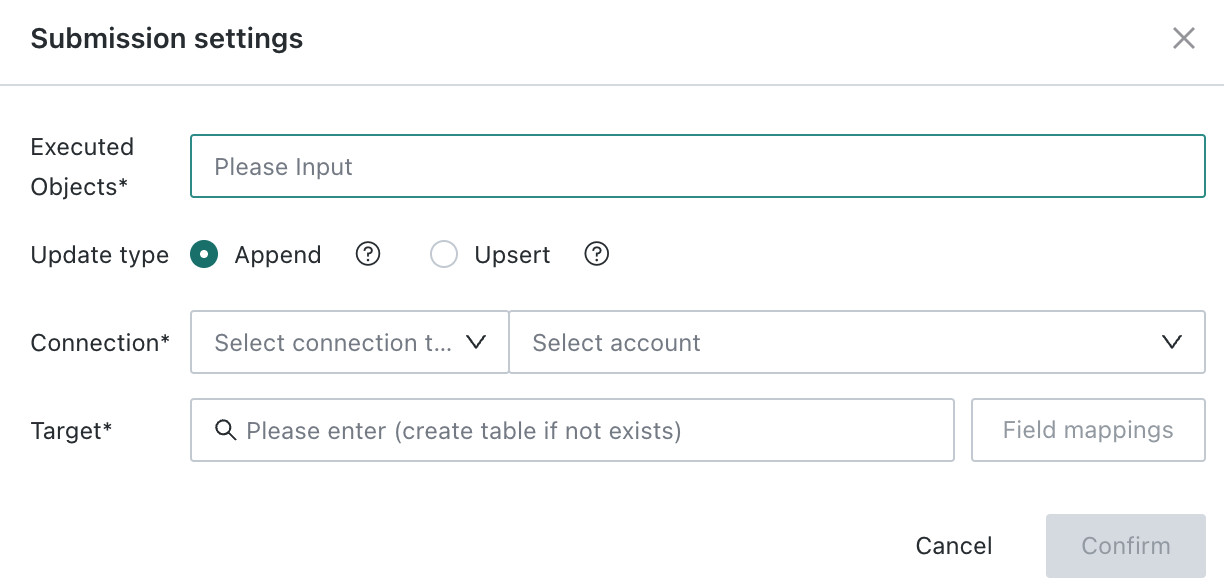
If setting to write to an existing table, you need to configure the mapping relationship between fields.
User Submission
After the table template is completed, it can be handed over to entry personnel for filling. After users fill in and click submit, data is written back to the database with one click.
When filling data in table controls, press the tab key in the last cell of each row to add a new data row in the table.
Batch Import
If there is existing data that needs to be batch imported, you can download the template provided by Guandata, fill in the data, and upload the Excel file. Data will be written back to the database with one click.
If the specified template is not used, although the Excel file can be uploaded successfully, the system cannot recognize the data in the file, and the data will not be written back to the database.
- On the dashboard editing page, click "... > Import" in the upper right corner of the Report-Form card.
- Click "Export Template".
- Paste local data without formatting into the official template.
- After uploading the Excel file, click "Import".
Entry Data Usage
Entry Data View Results
Create a direct connection dataset in BI, and configure it as direct connection without cache (please configure in Management Center > System Management > Real-time Settings > Dataset Data Update > Dashboard Auto Refresh).
After users complete filling, refresh the page to view the filled data.
Entry Data Participates in Downstream ETL Calculation
In BI, extract the entry table to BI, and at the same time set a hyperlink through the text card, copy the dataset's URL trigger update link as the hyperlink.
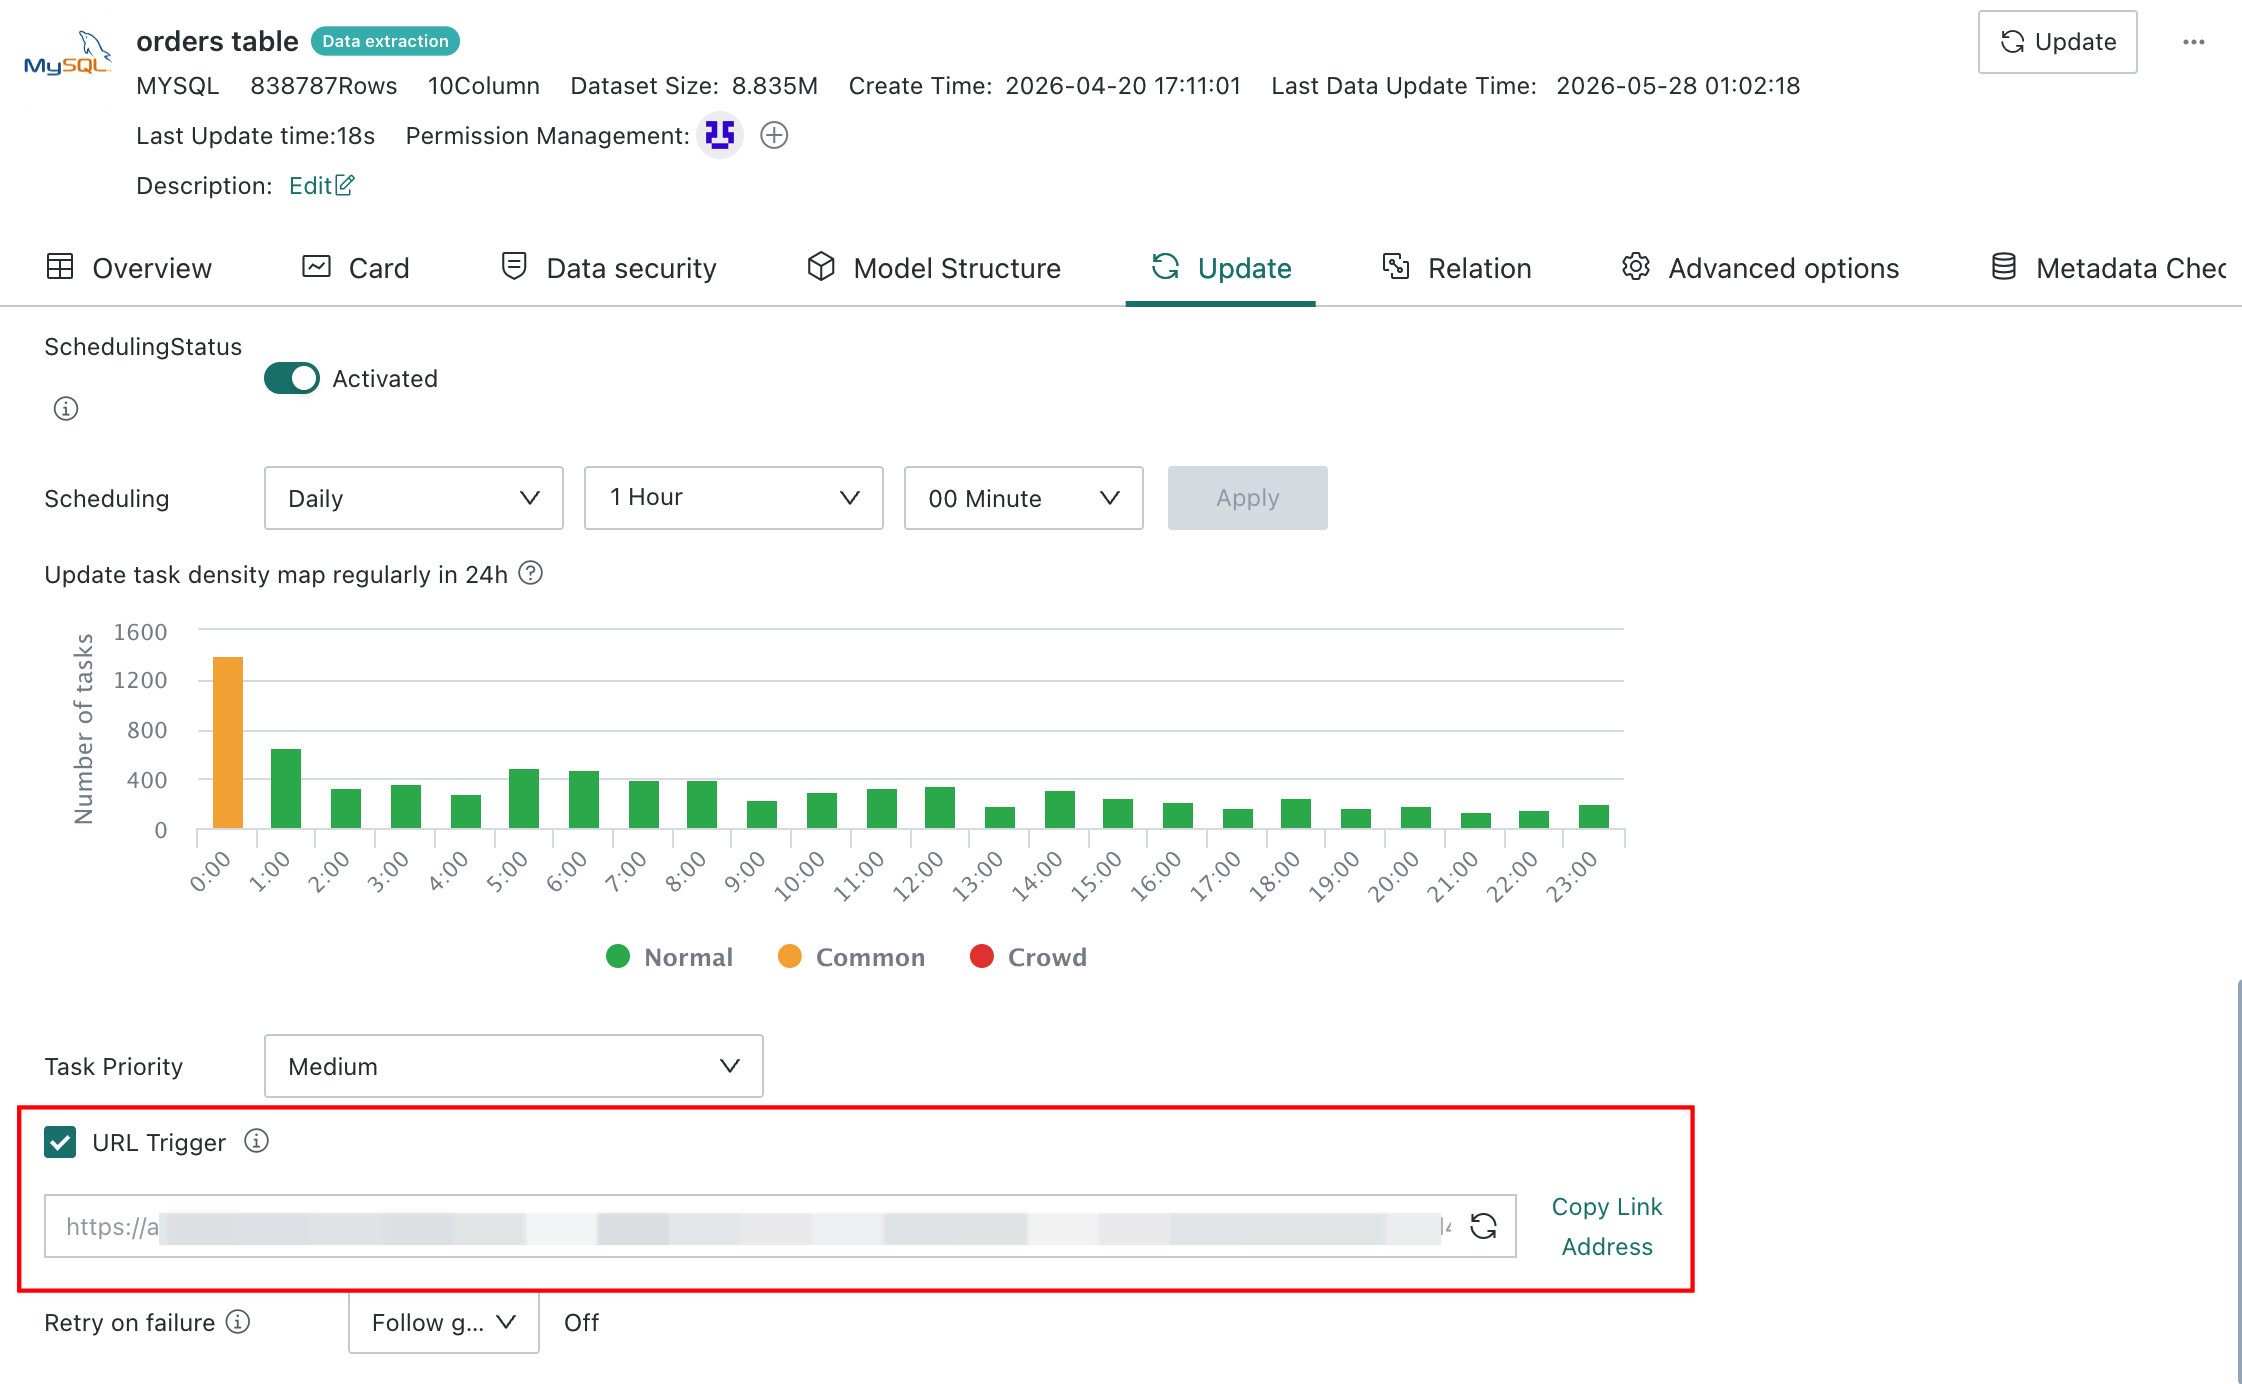
After each data entry is completed, click the dataset URL update button on the page to trigger the extraction dataset update. If downstream ETL is involved, configure the ETL update method as cascade update. After the data calculation is completed, you can view the results.
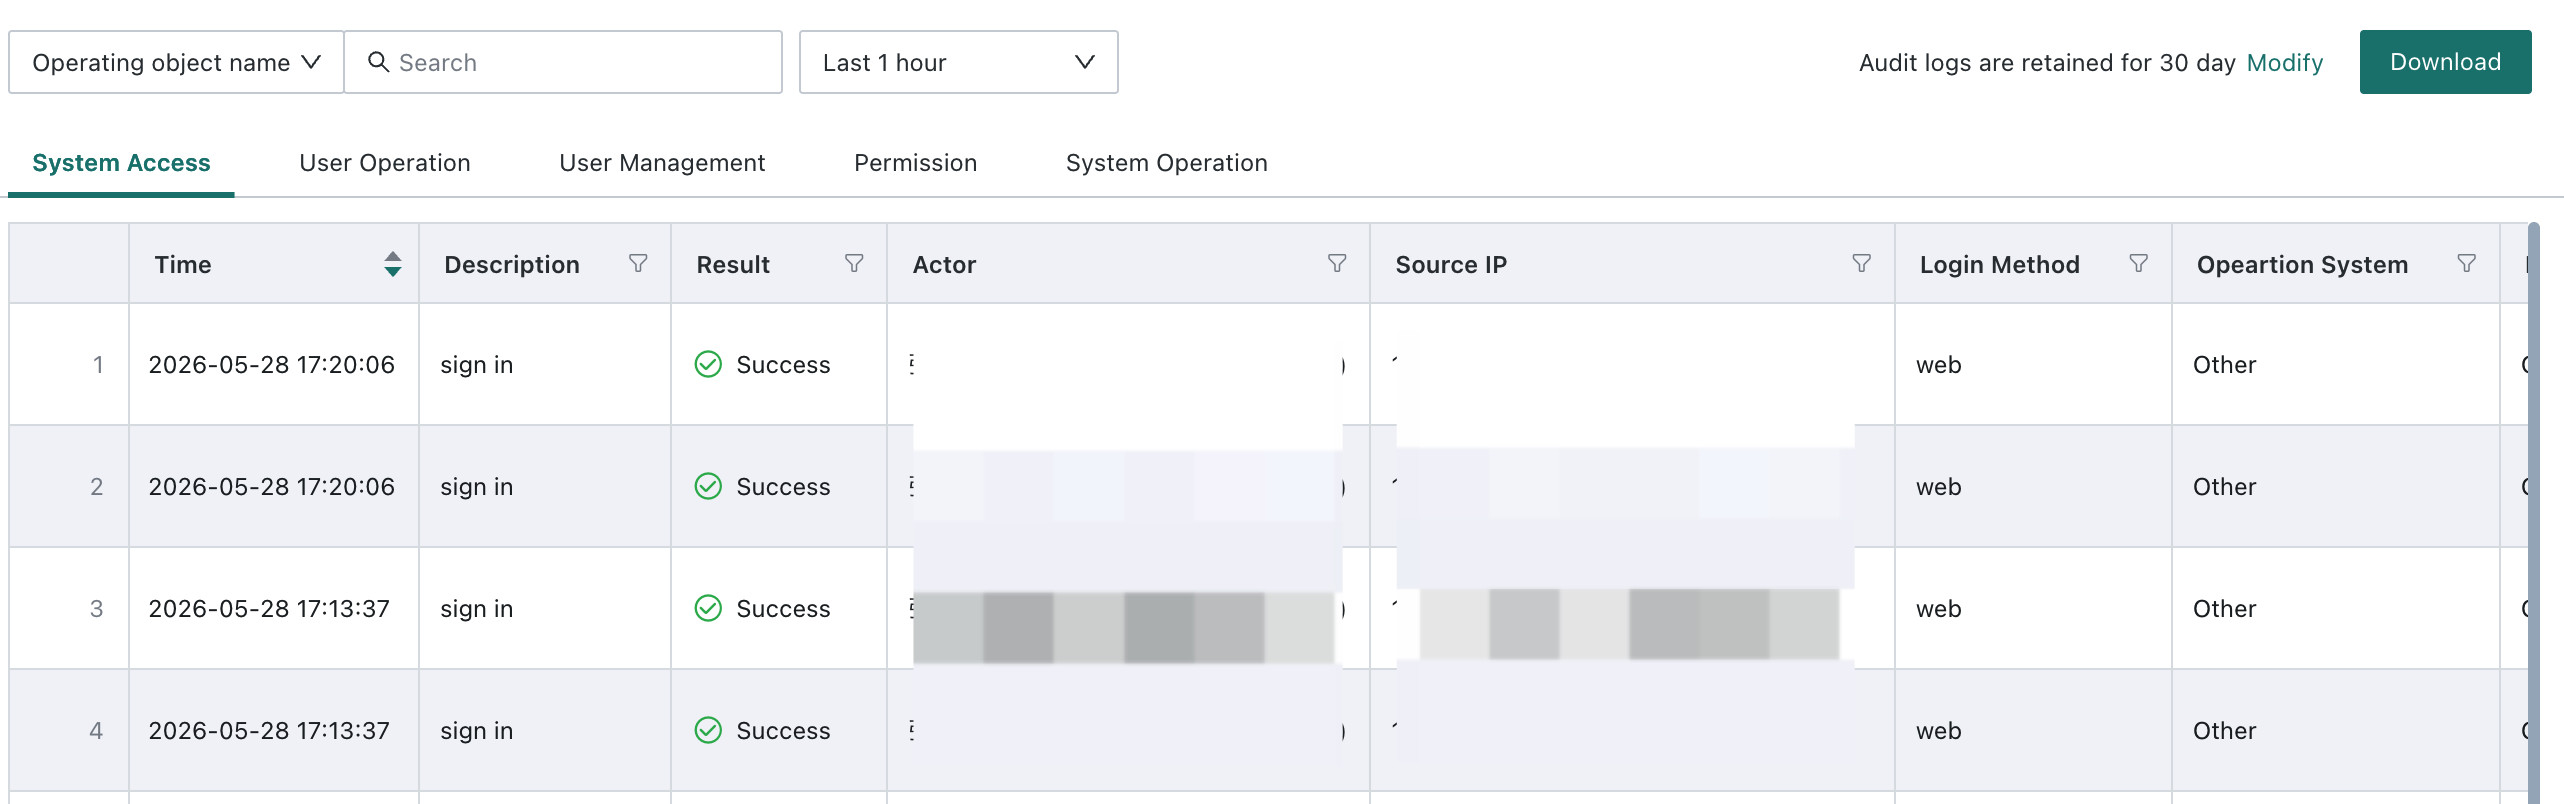
Operation Audit
Every submission action by users can be traced in Management Center > Audit Log, and the remark information can view the data information submitted by users each time.
Modification records follow the audit log retention time and cannot be traced after expiration.