Embed BI Visualizations into Feishu Docs
Prerequisites
-
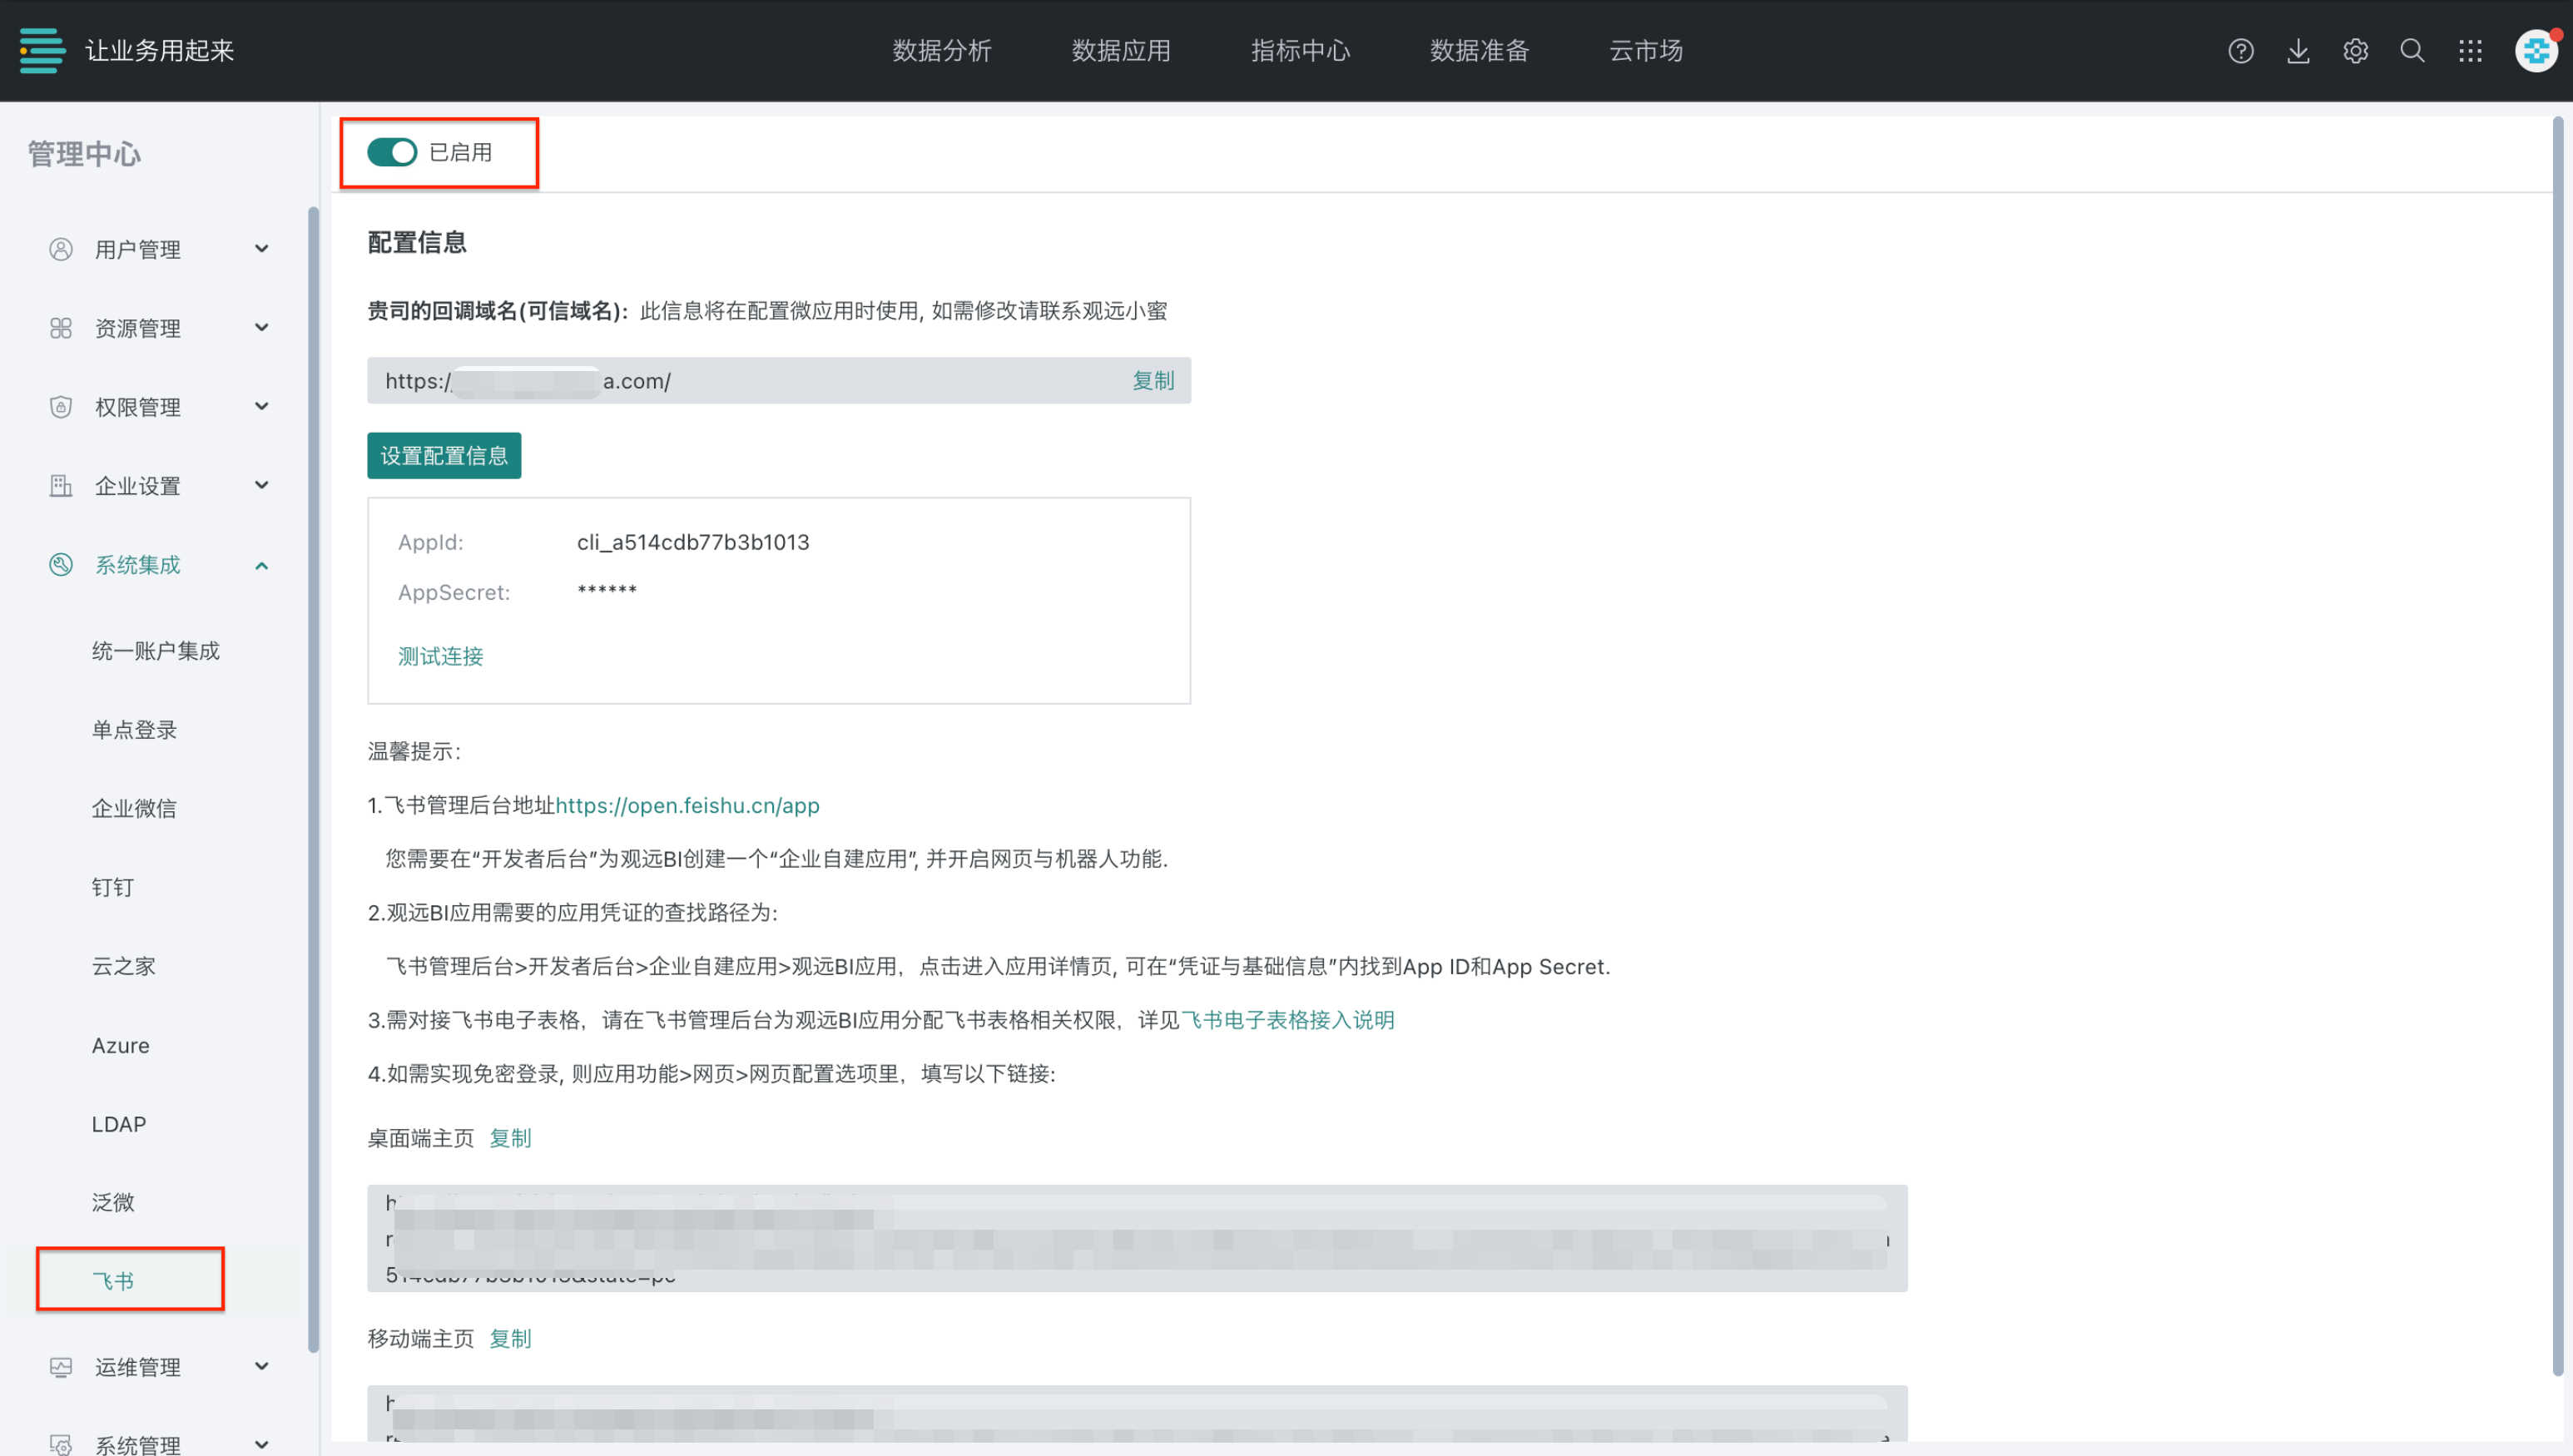
Complete the preparation work for integrating Guandata with Feishu in the Guandata and Feishu admin consoles. For details, see Guandata Feishu Integration Configuration Steps.
-
The Guandata BI platform must enable HTTPS before it can be embedded in Feishu Docs. In addition, operations engineers must modify configuration files to enable cross-origin configuration and ensure the embedded scenario works properly.
-
File location: /home/guandata/Development/guandata-web/guandata-web-configmap.yaml
Modification:
{"CROSS_SITE_HEADER_TOKEN_ENABLED": true}{"COOKIE_ATTRIBUTES": {"sameSite": "none"}}
-
File location: /home/guandata/Development/guandata-web/guandata-nginx-configmap.yaml
Modification: add the following under the root path:
proxy_cookie_path / "/; Secure";
Procedure
Obtain the Feishu Integration Link from the Guandata Platform
- Obtain the link.
- Obtain a dashboard link
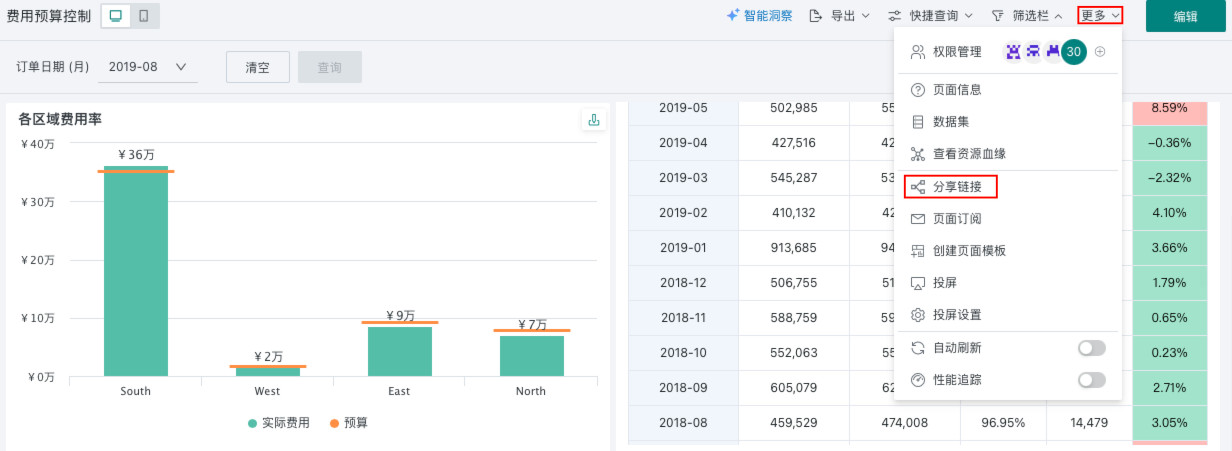
On the Data Analysis page of the Guandata BI platform, click More > Share Link in the upper-right corner of the dashboard, then click the Feishu Integration Link tab to obtain the dashboard's Feishu integration link.

- Obtain a card link
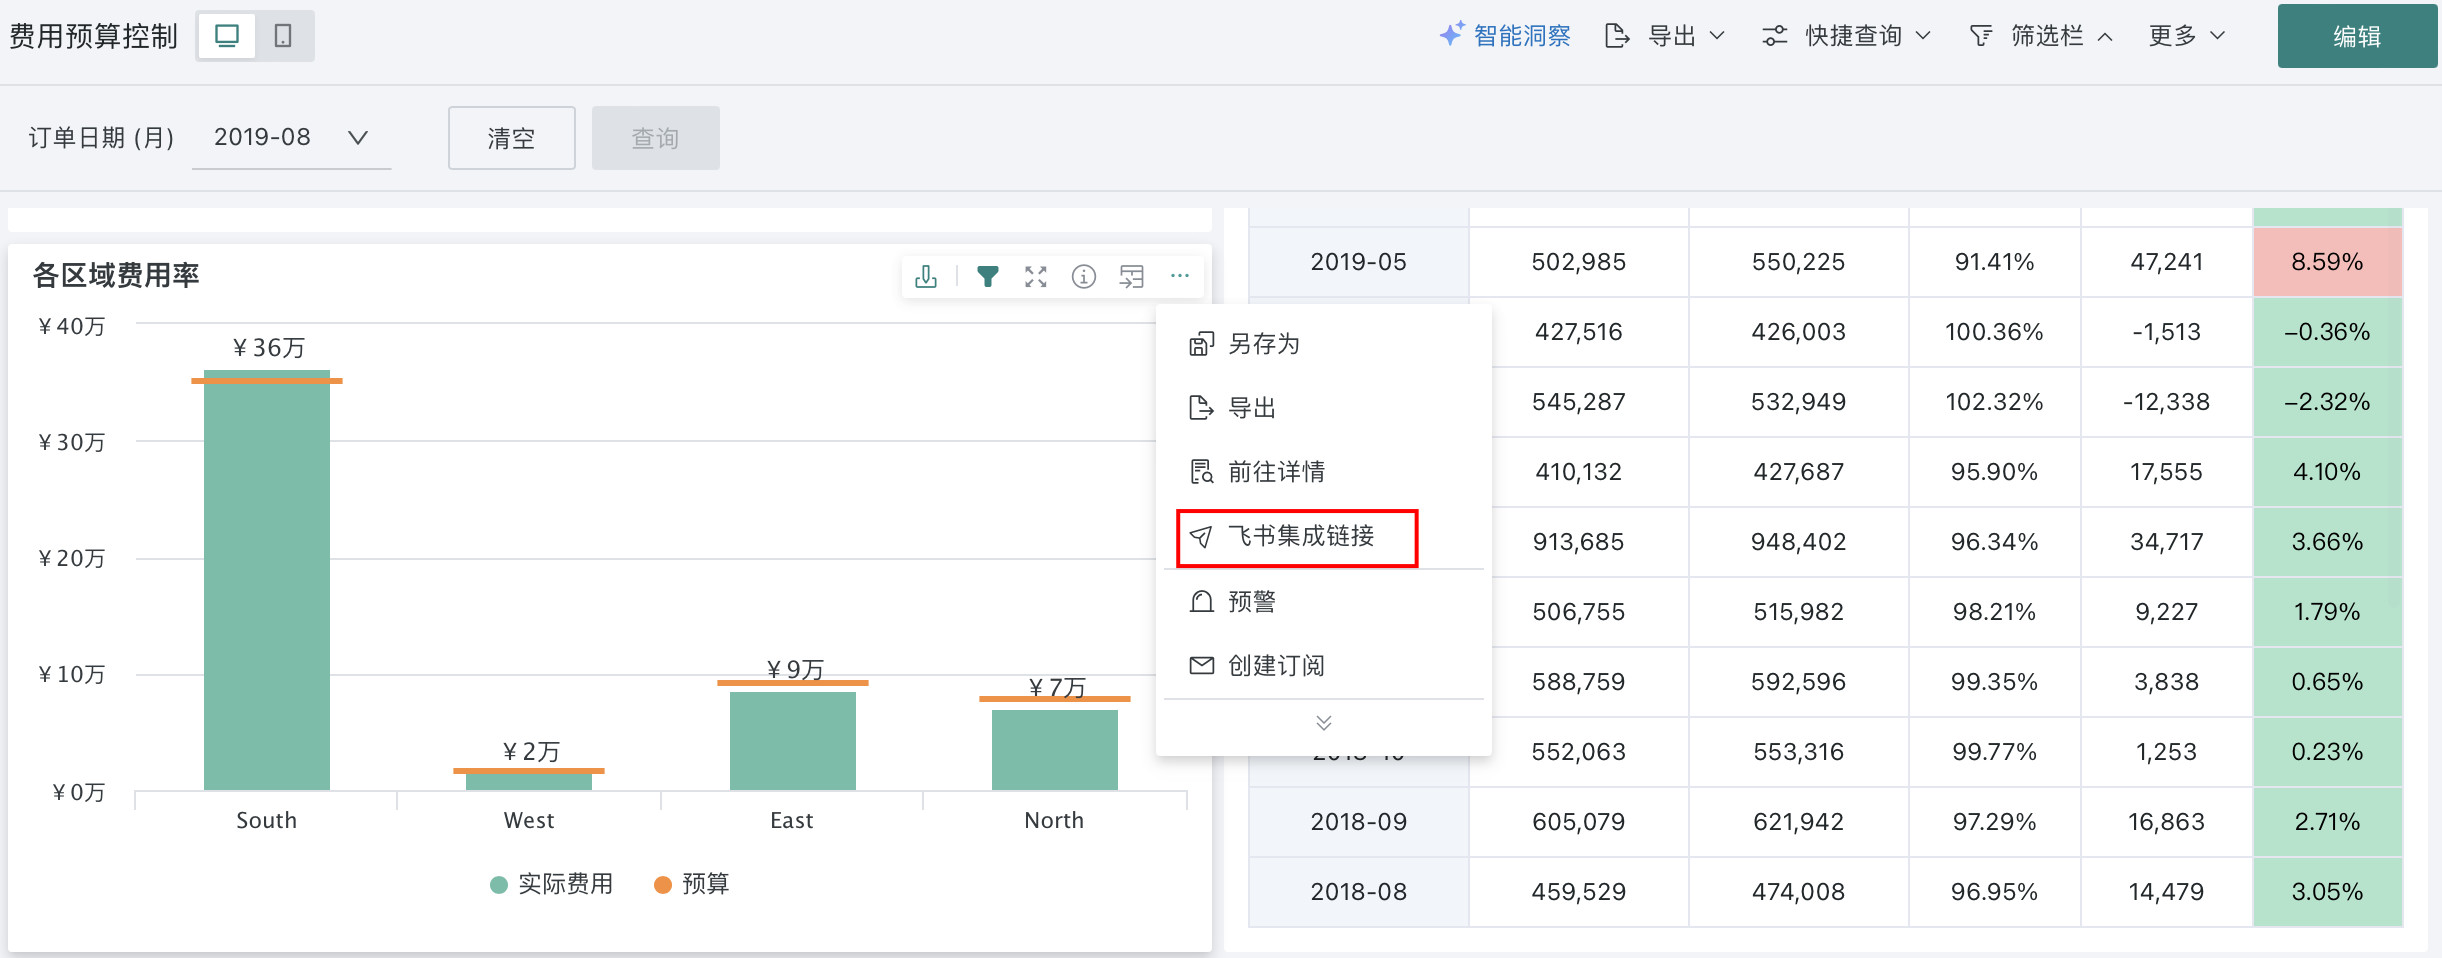
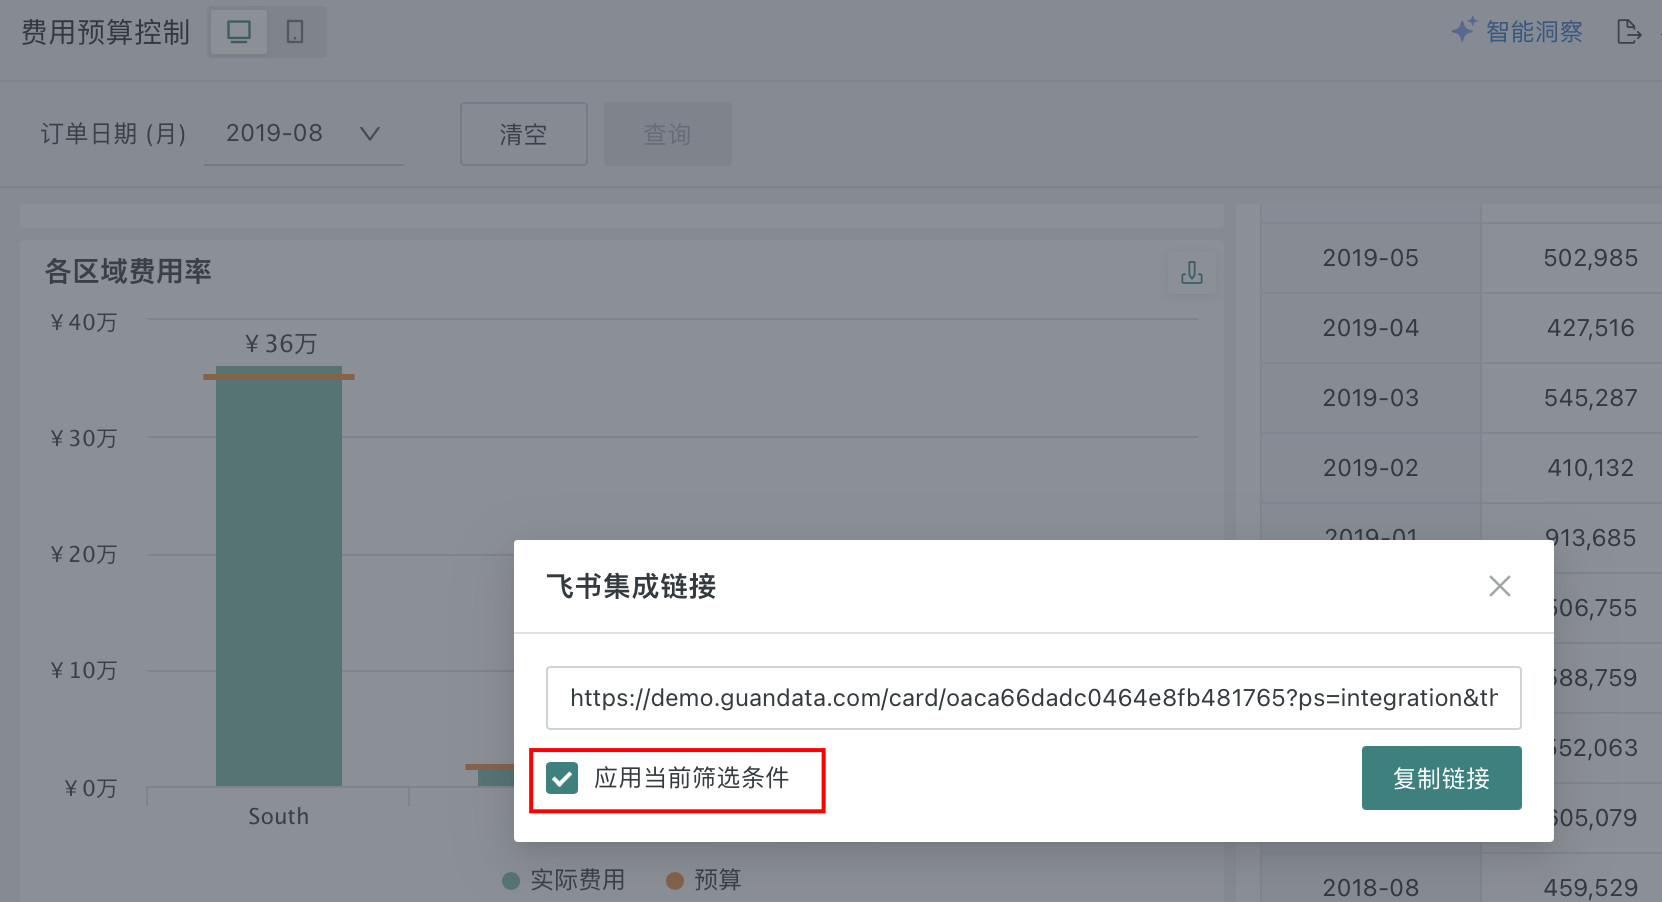
On the Data Analysis page of the Guandata BI platform, click ... in the upper-right corner of the card, then click Feishu Integration Link in the drop-down list to obtain the visualization card's Feishu integration link.
- Click Copy Link for subsequent Feishu Docs configuration.
Note:
- If the current card is being linked and filtered by other cards or filters, an Apply Current Filter Conditions checkbox appears under the link. If you need to add a card with filter conditions in Feishu Docs, select Apply Current Filter Conditions.
- Dashboards do not support carrying filter conditions.
Insert a Visualization Card or Dashboard into Feishu Docs
Insert a visualization card or dashboard into Feishu Docs to write reports that combine text and visuals. There are two insertion methods.
Method 1: Insert the Link Directly
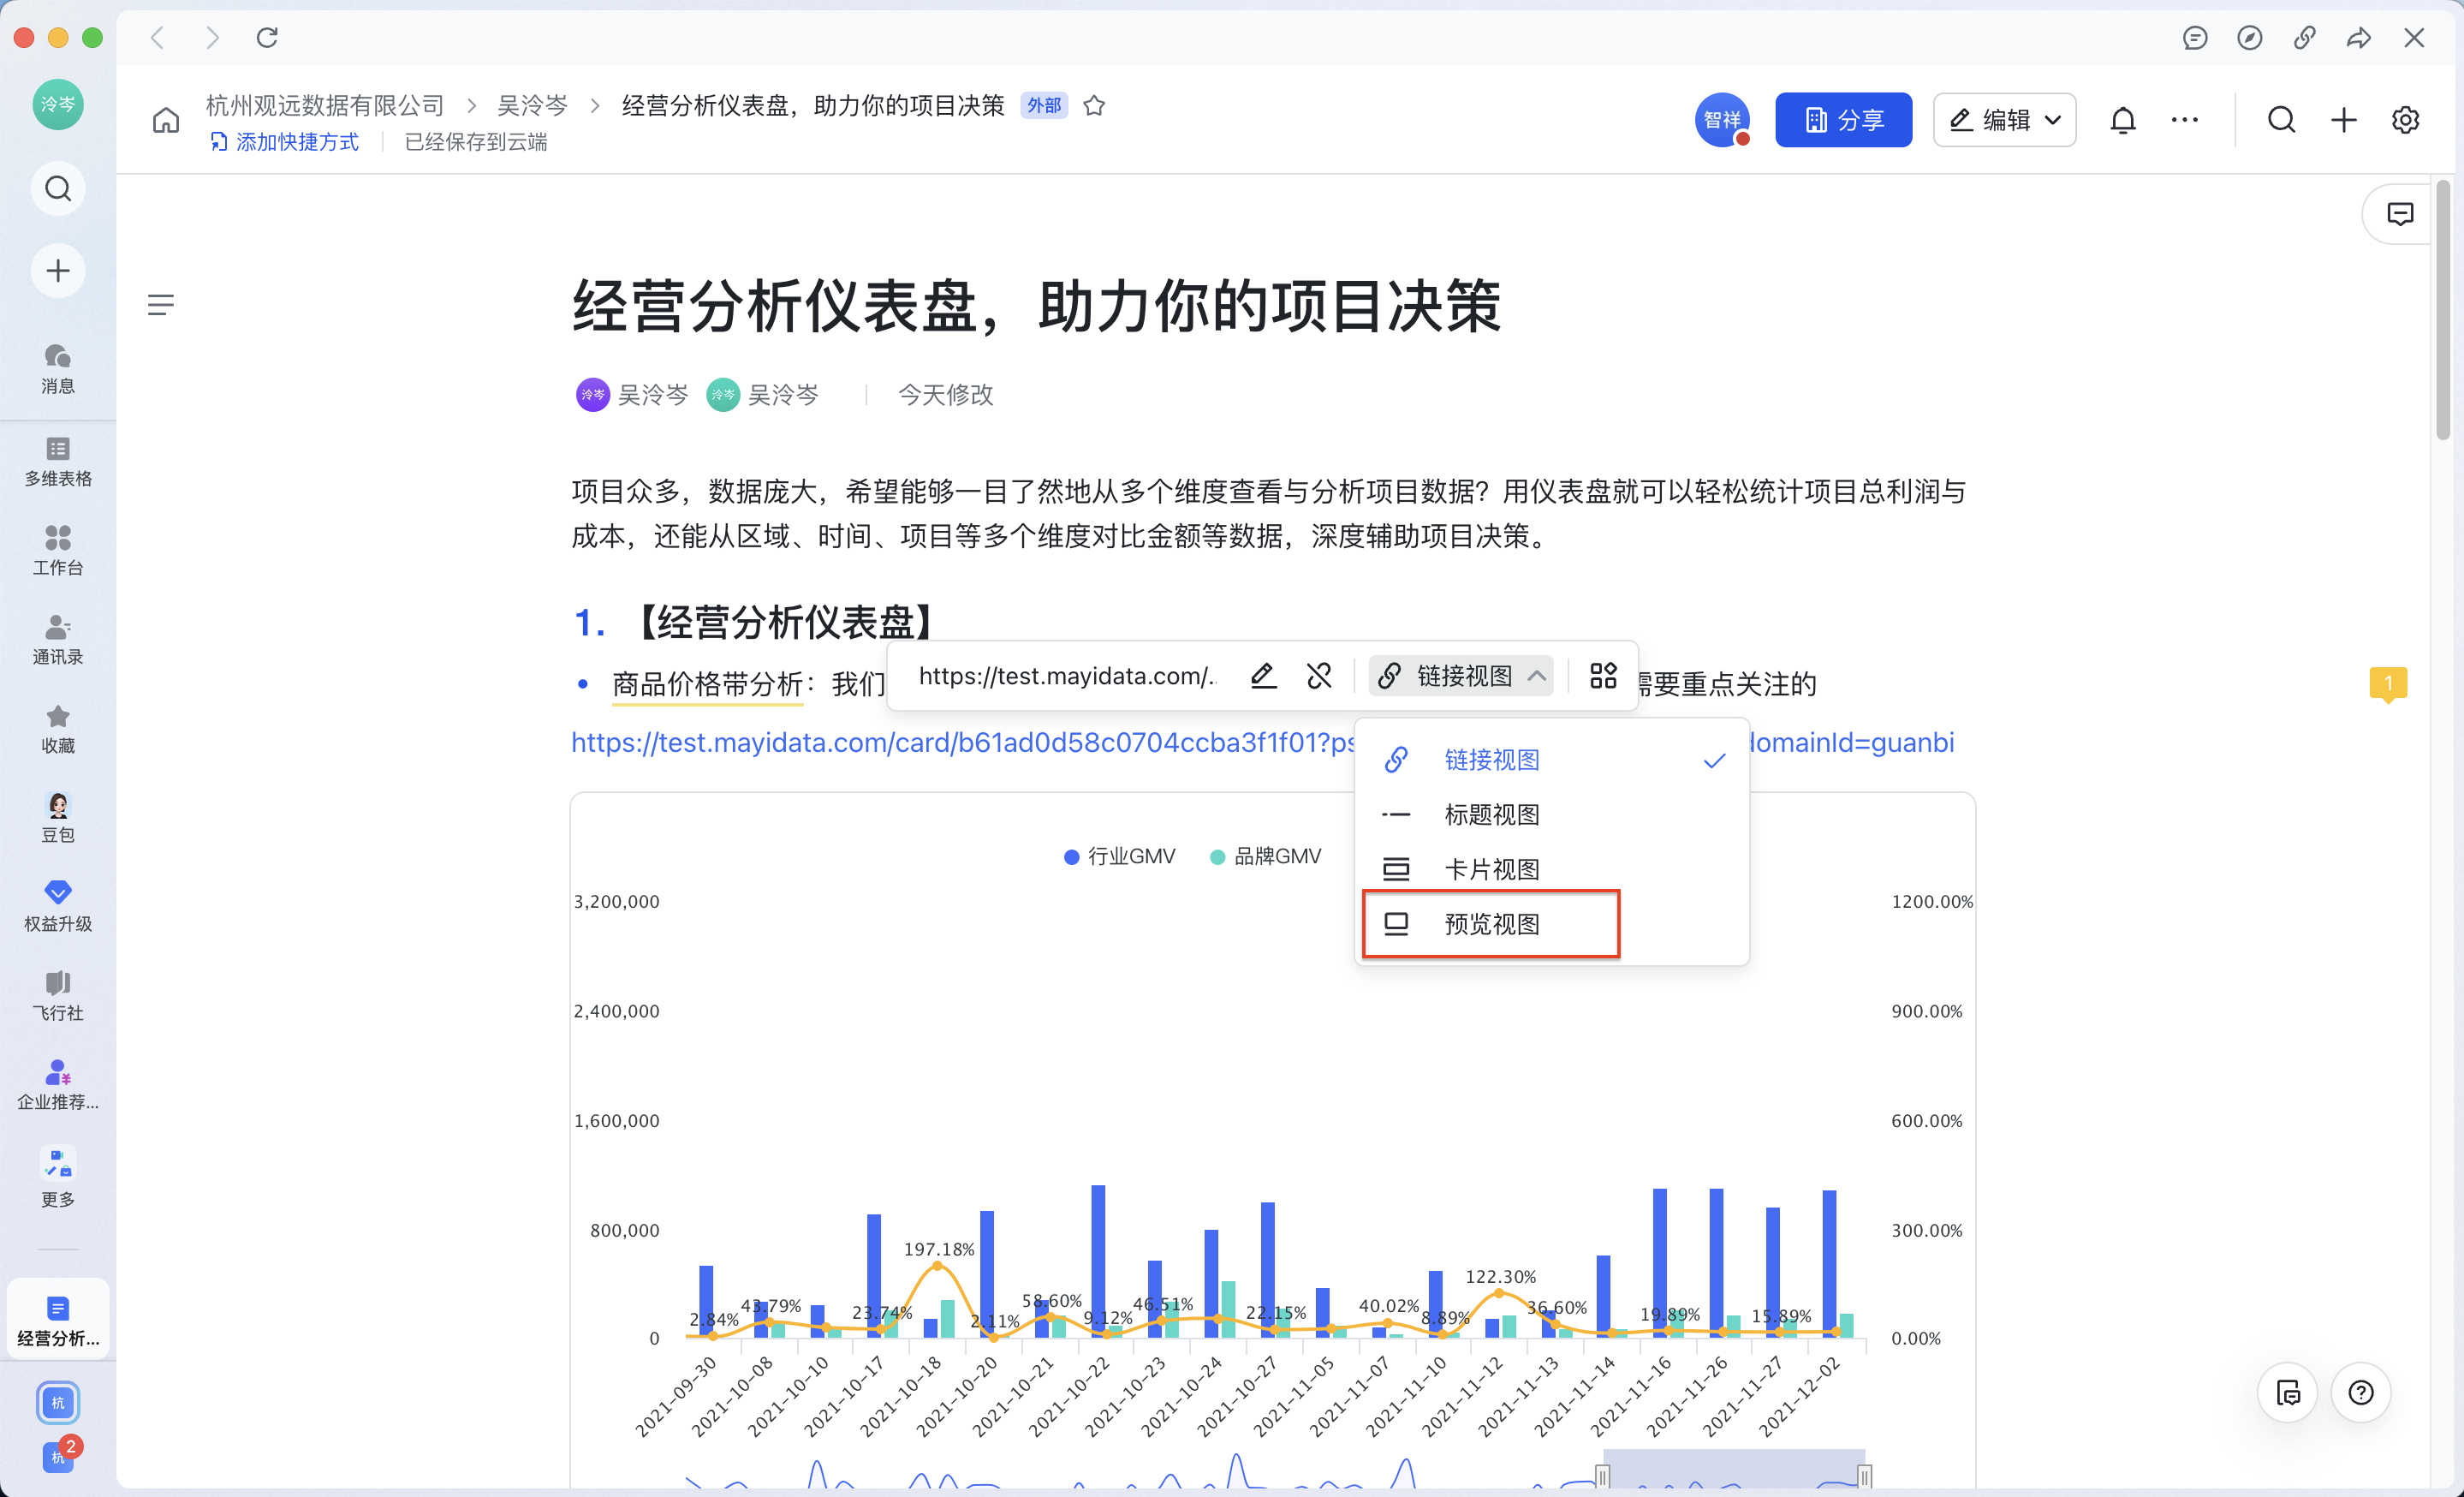
The document editor directly inserts the corresponding link into Feishu Docs and selects Preview View. When users access the doc in the Feishu client or a browser, they can intuitively view the visualization's analytical details.
Note: Embedded blocks inserted this way can display visualizations normally when users access Feishu Docs from the PC Feishu client or a PC browser. However, when users access Feishu Docs from the iOS or Android client on some device models, password-free login may fail because of browser security restrictions.
| Type | Description | Illustration |
|---|---|---|
| PC Feishu client | SSO login can be completed on first login | 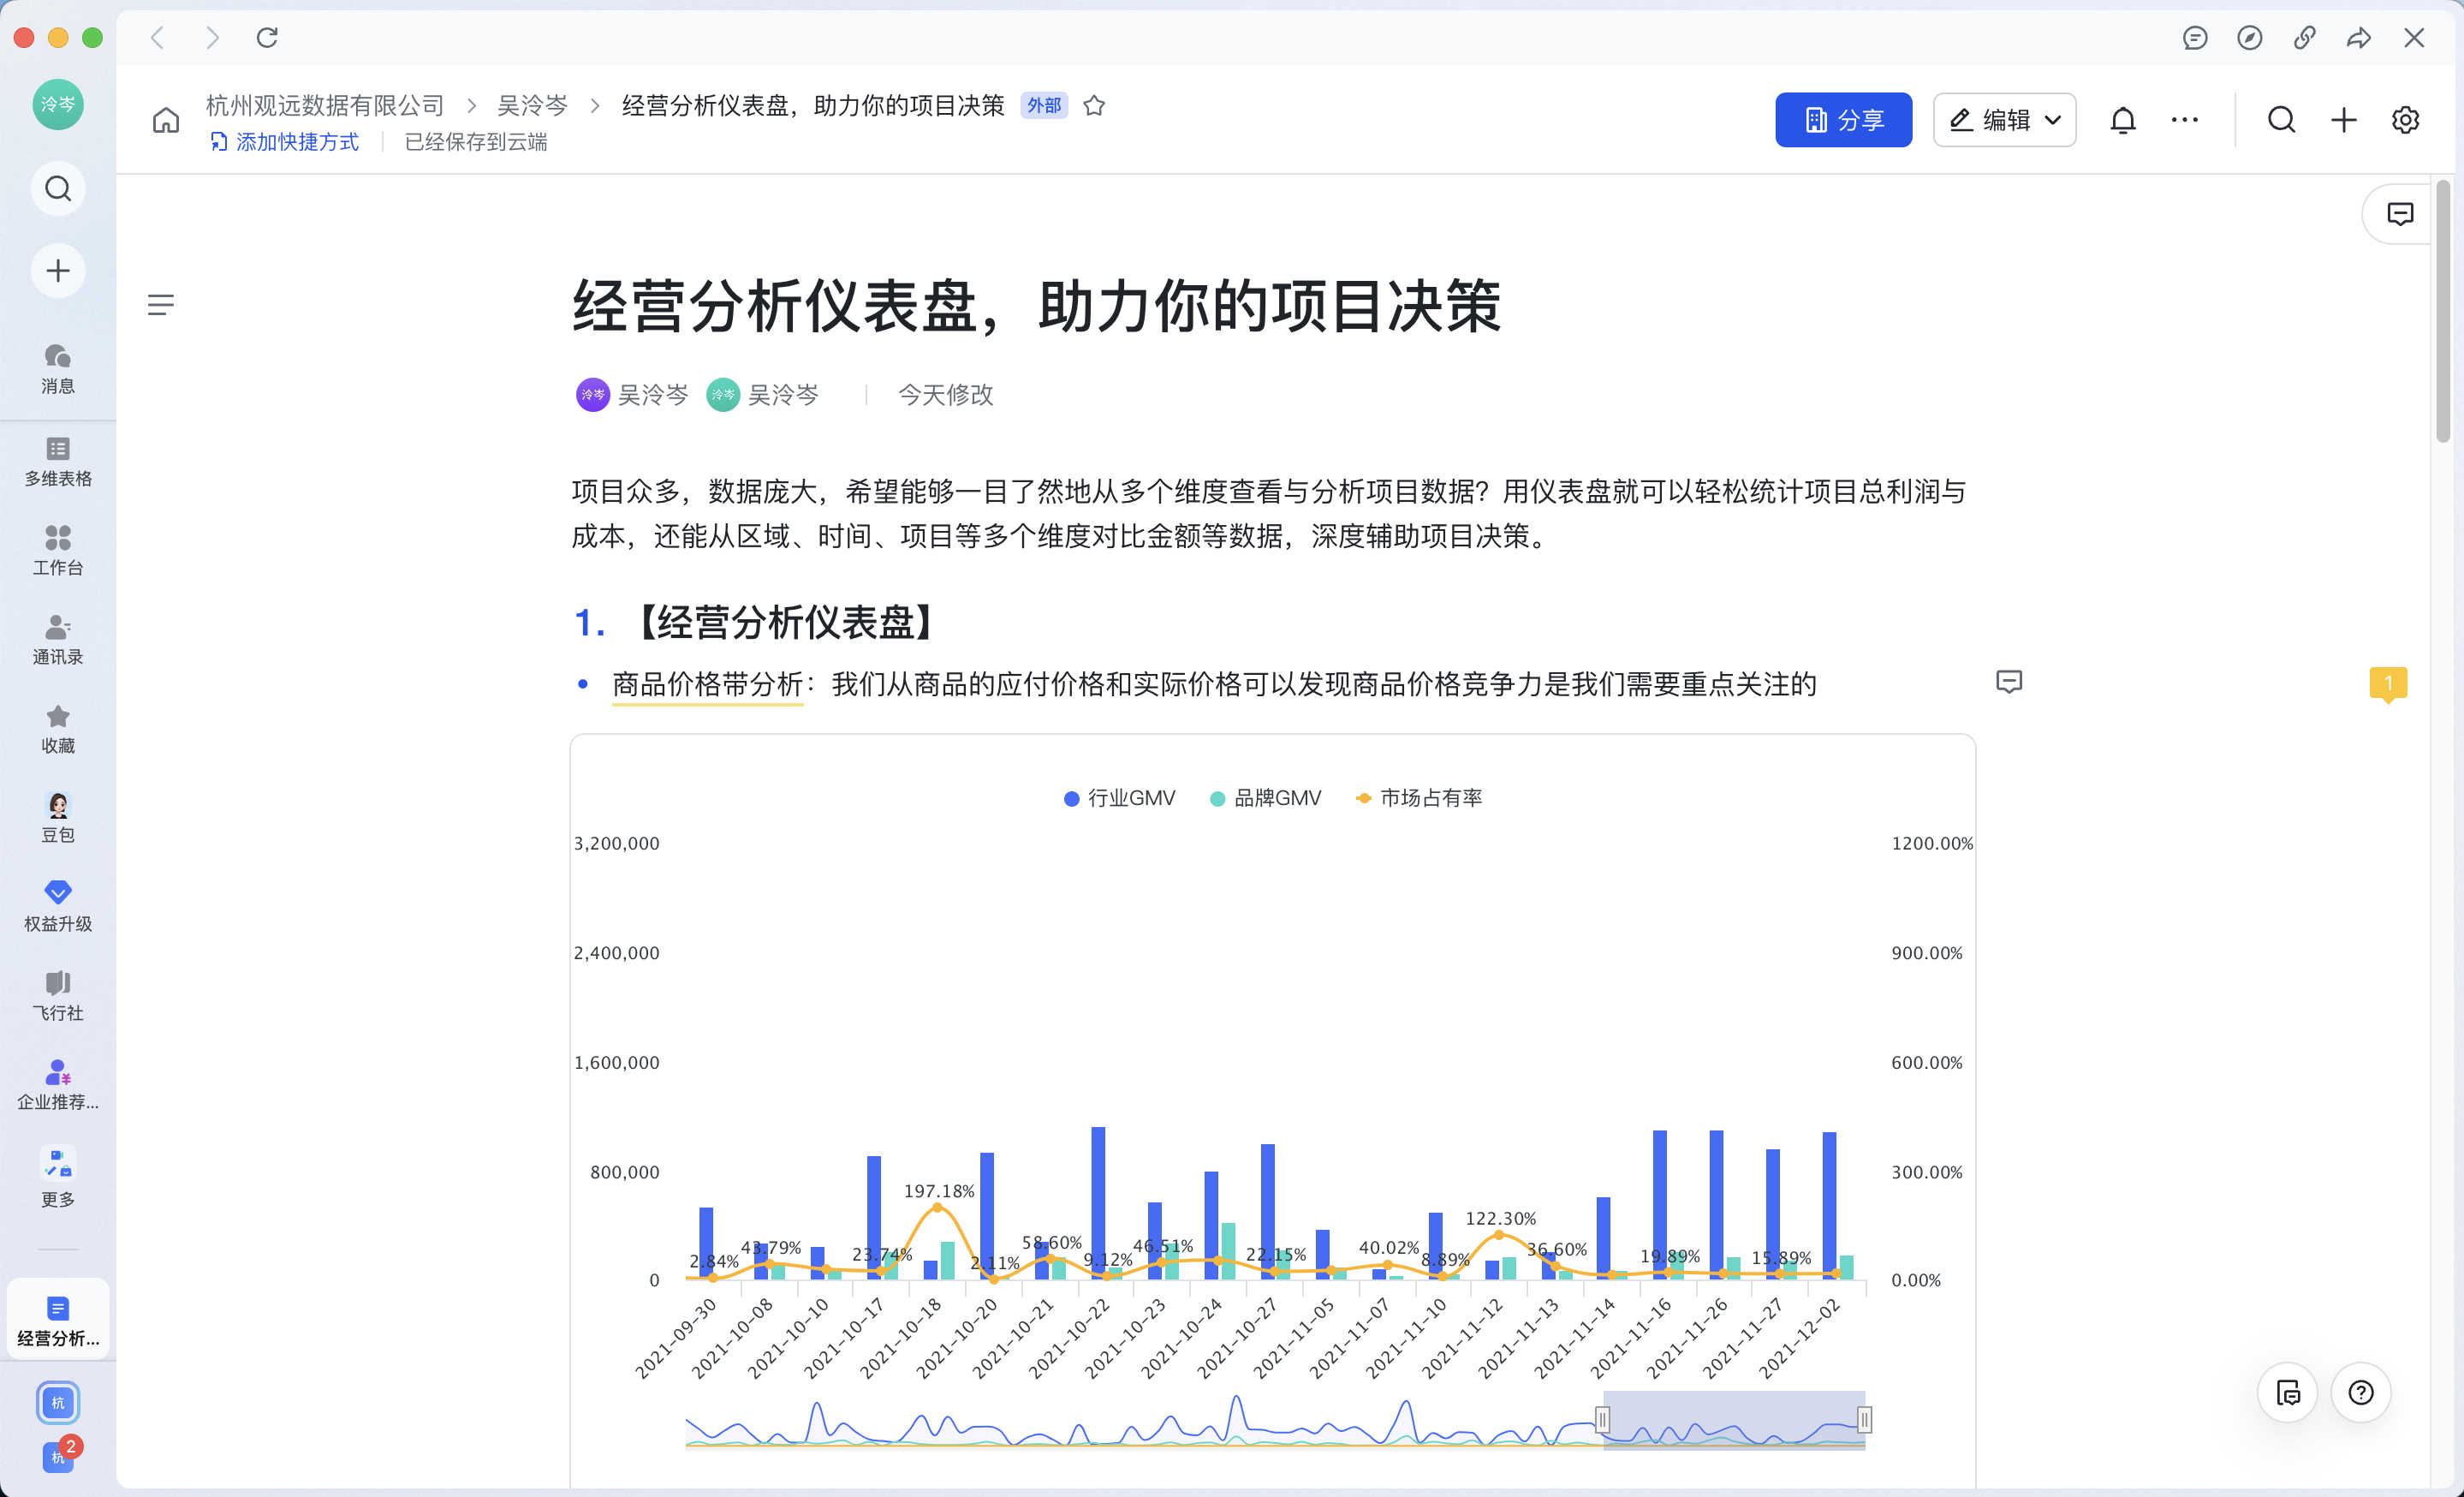 |
| PC browser | Manual authorization is required on first login | 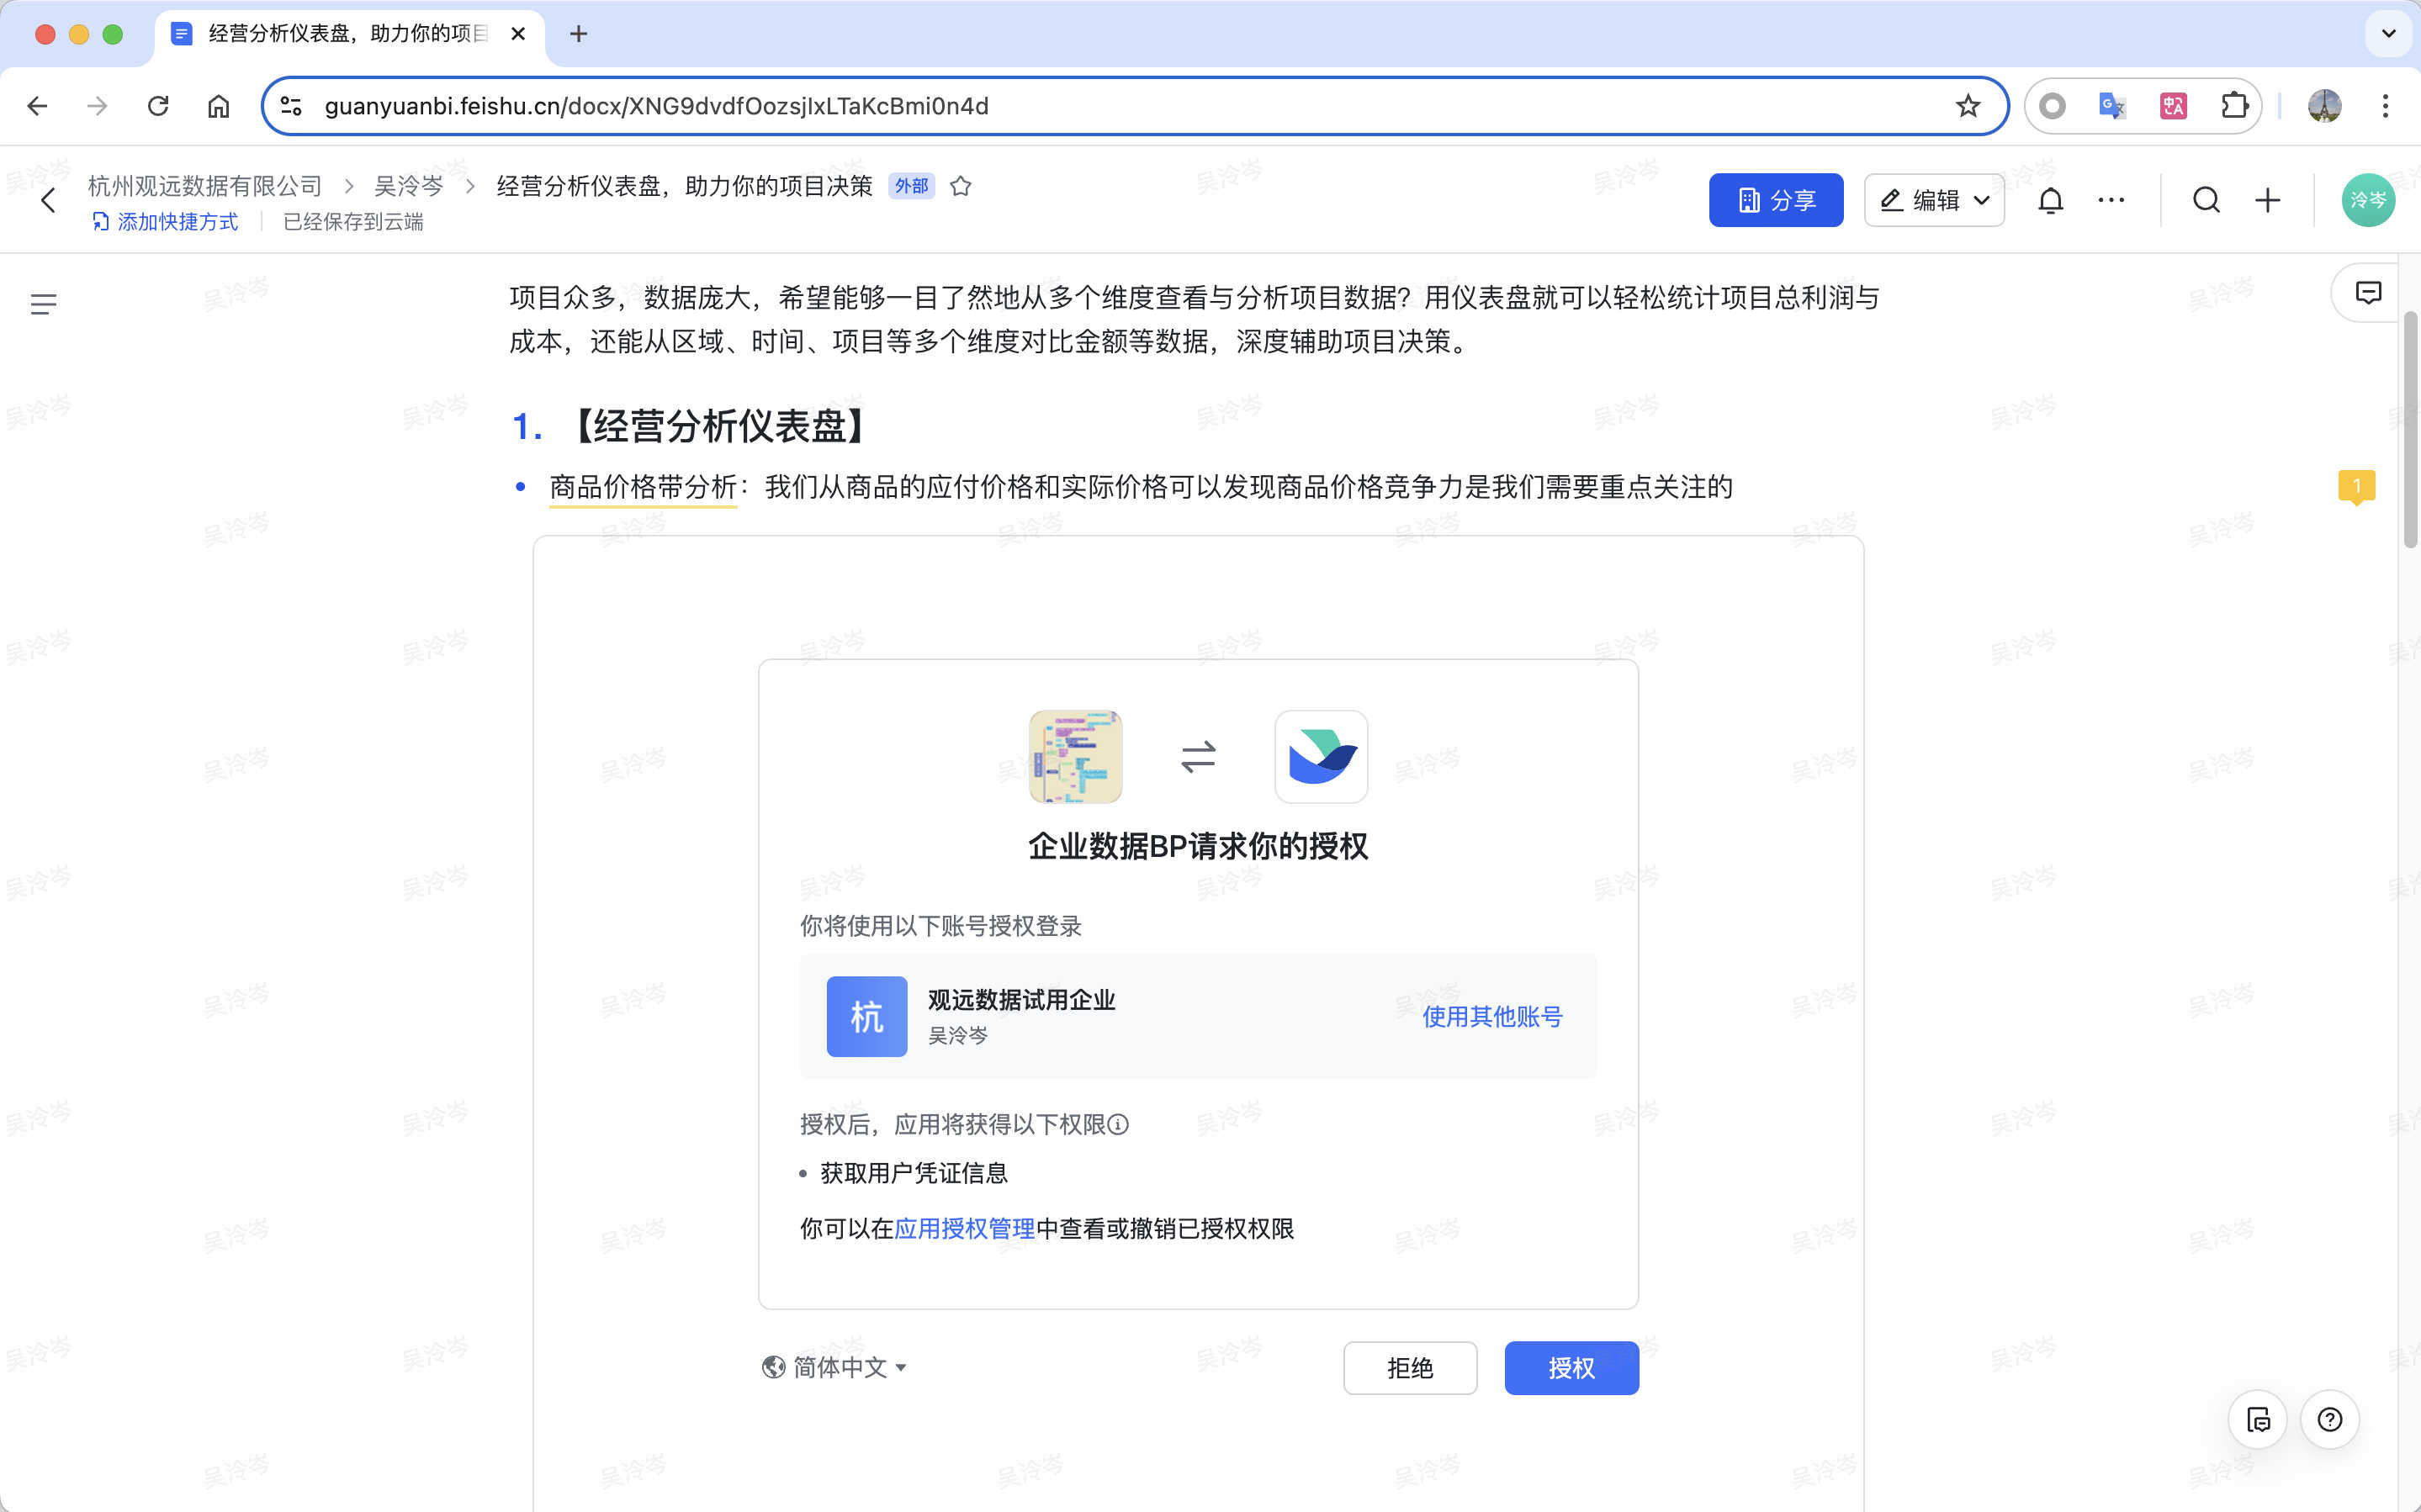 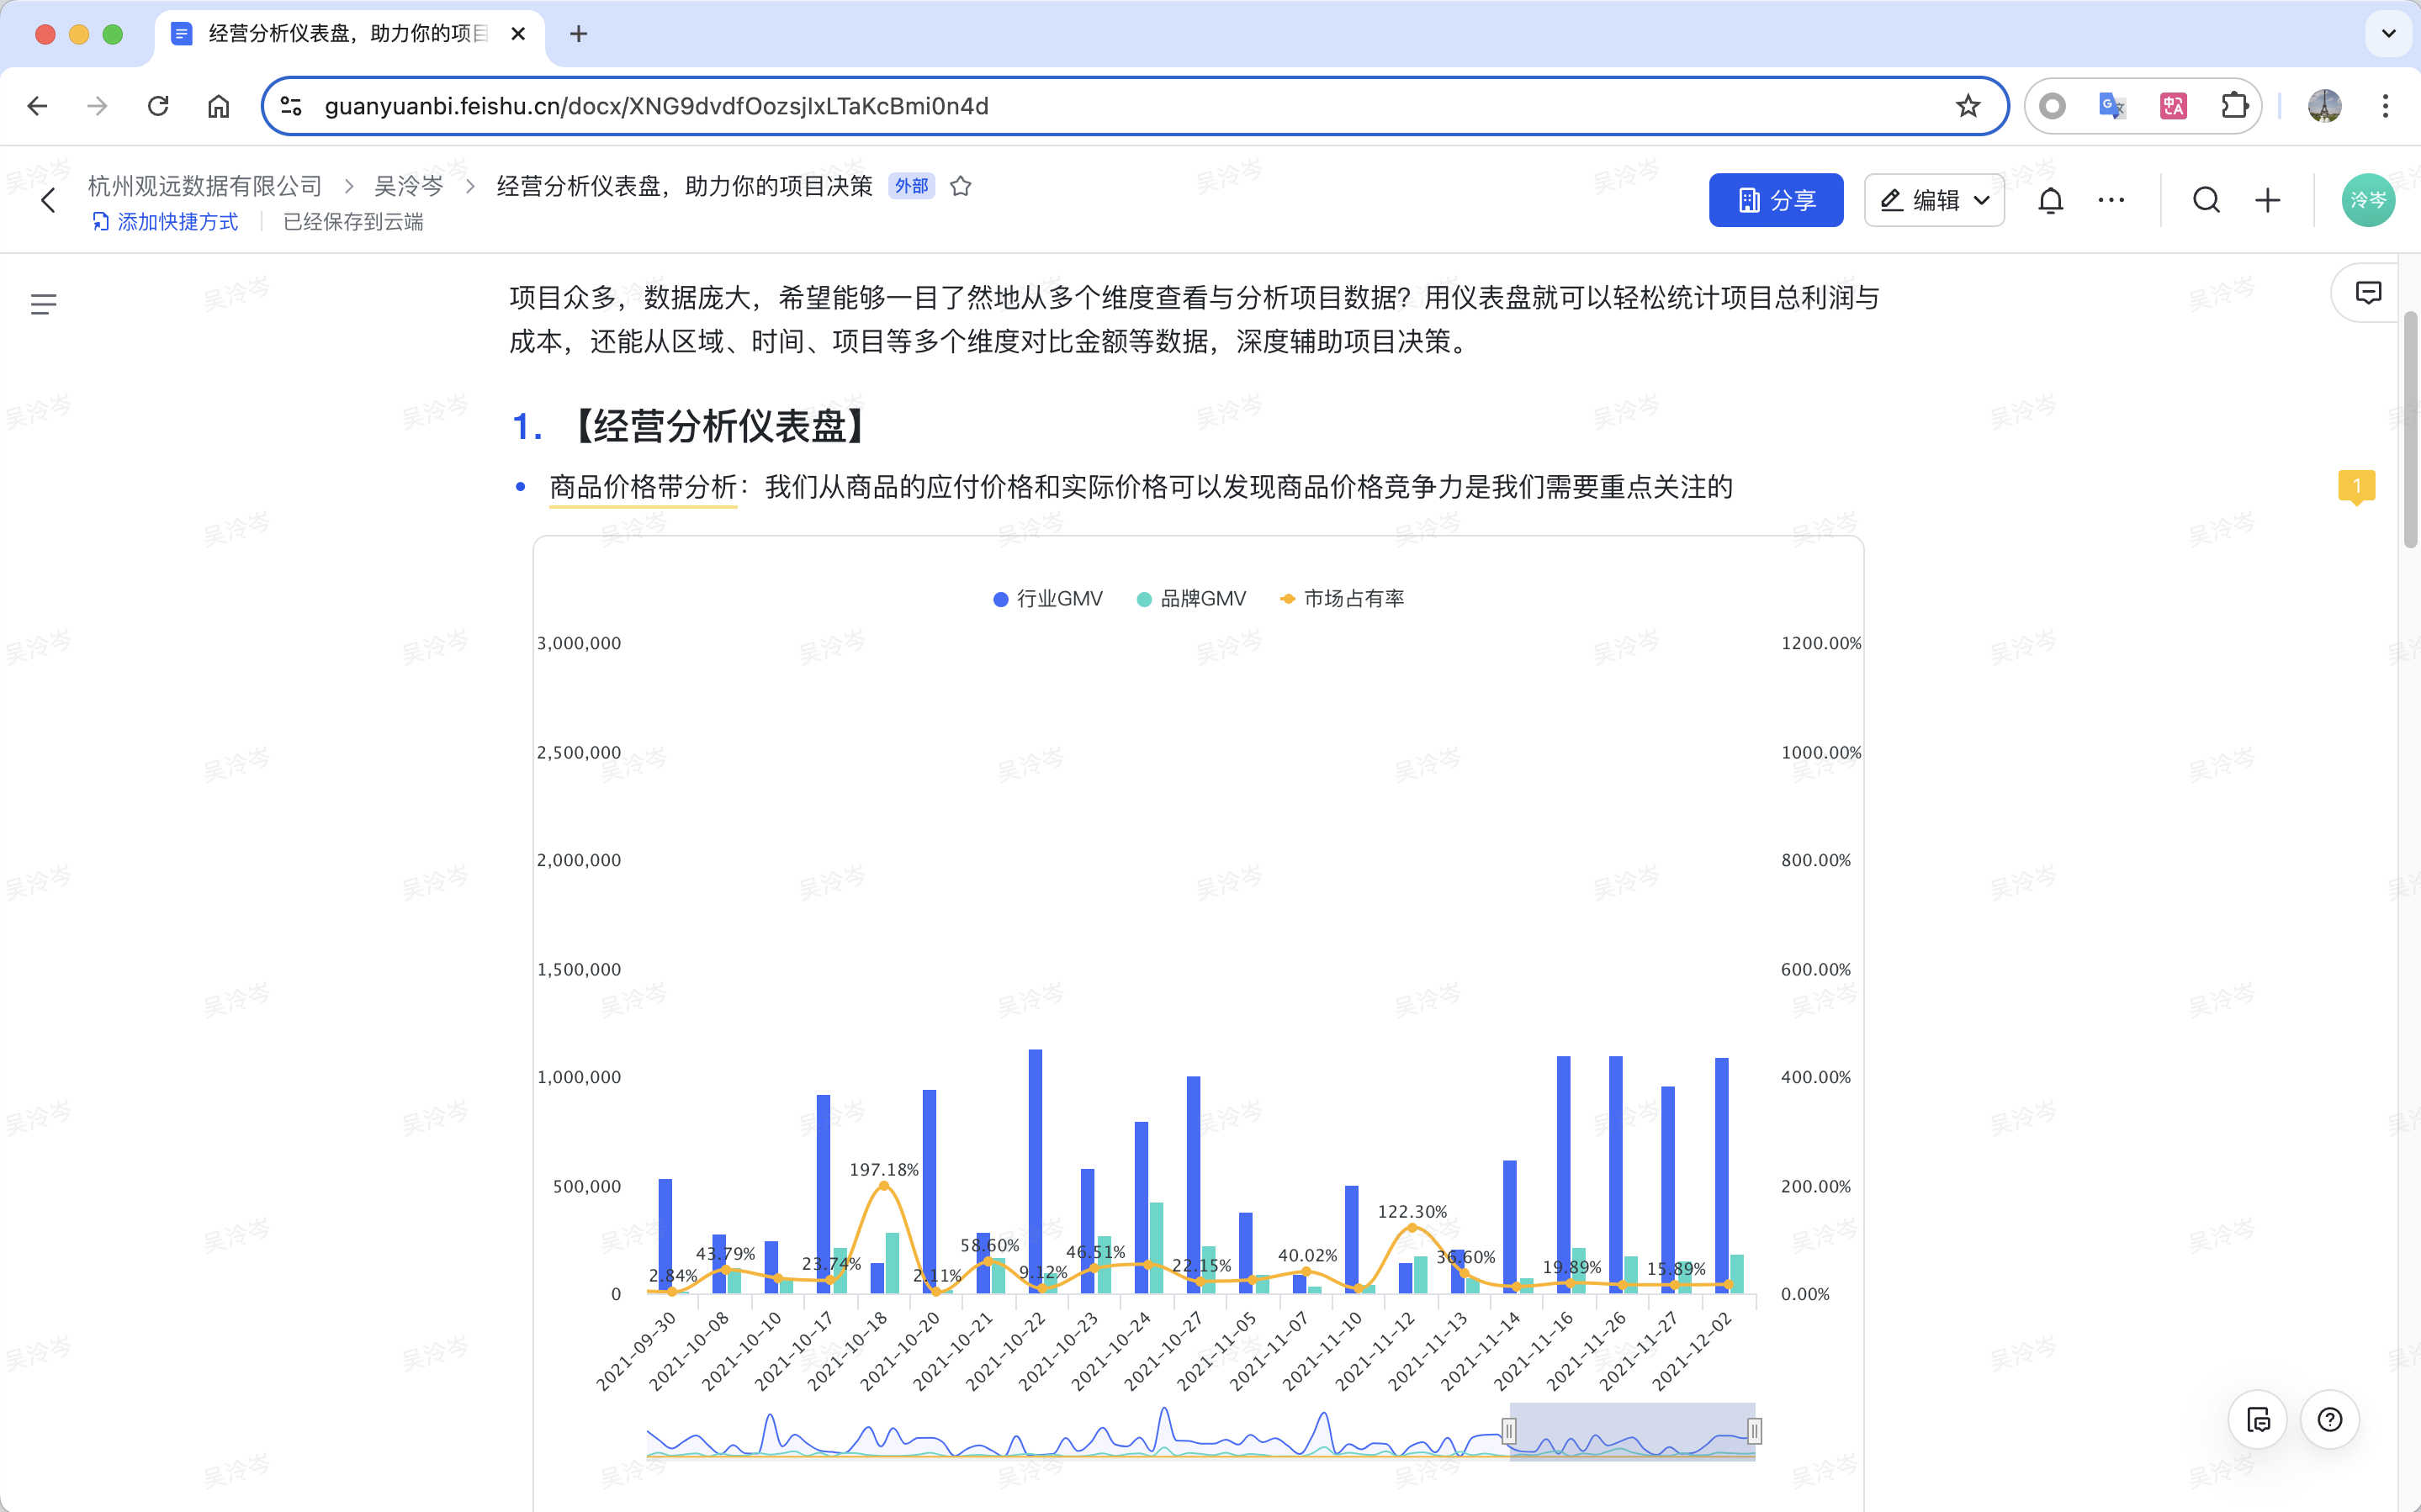 |
| Mobile client on some device models | Password-free login is unavailable | 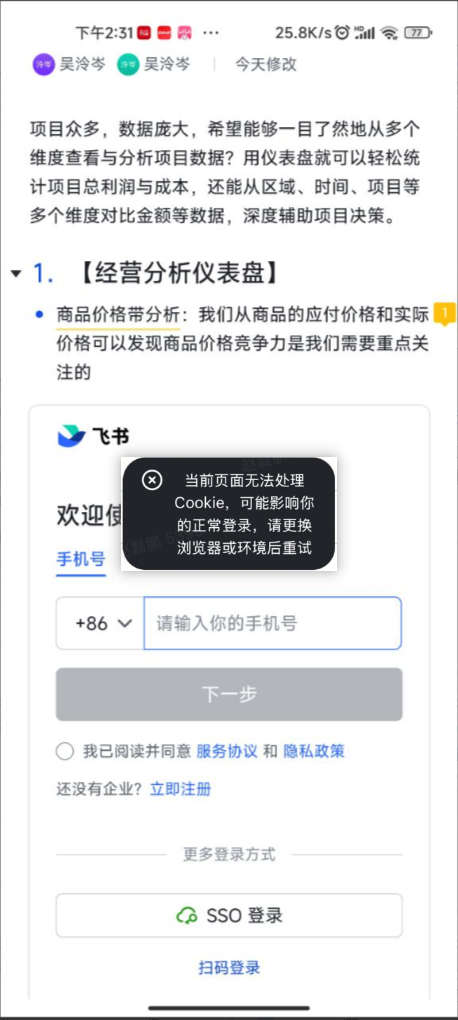 |
Method 2: Insert the Link Through the Guandata Data Widget
Prerequisite:
The Docs Widget has been installed in the Feishu admin console. For details, see Cloud Docs Widget Installation Process.
Procedure:
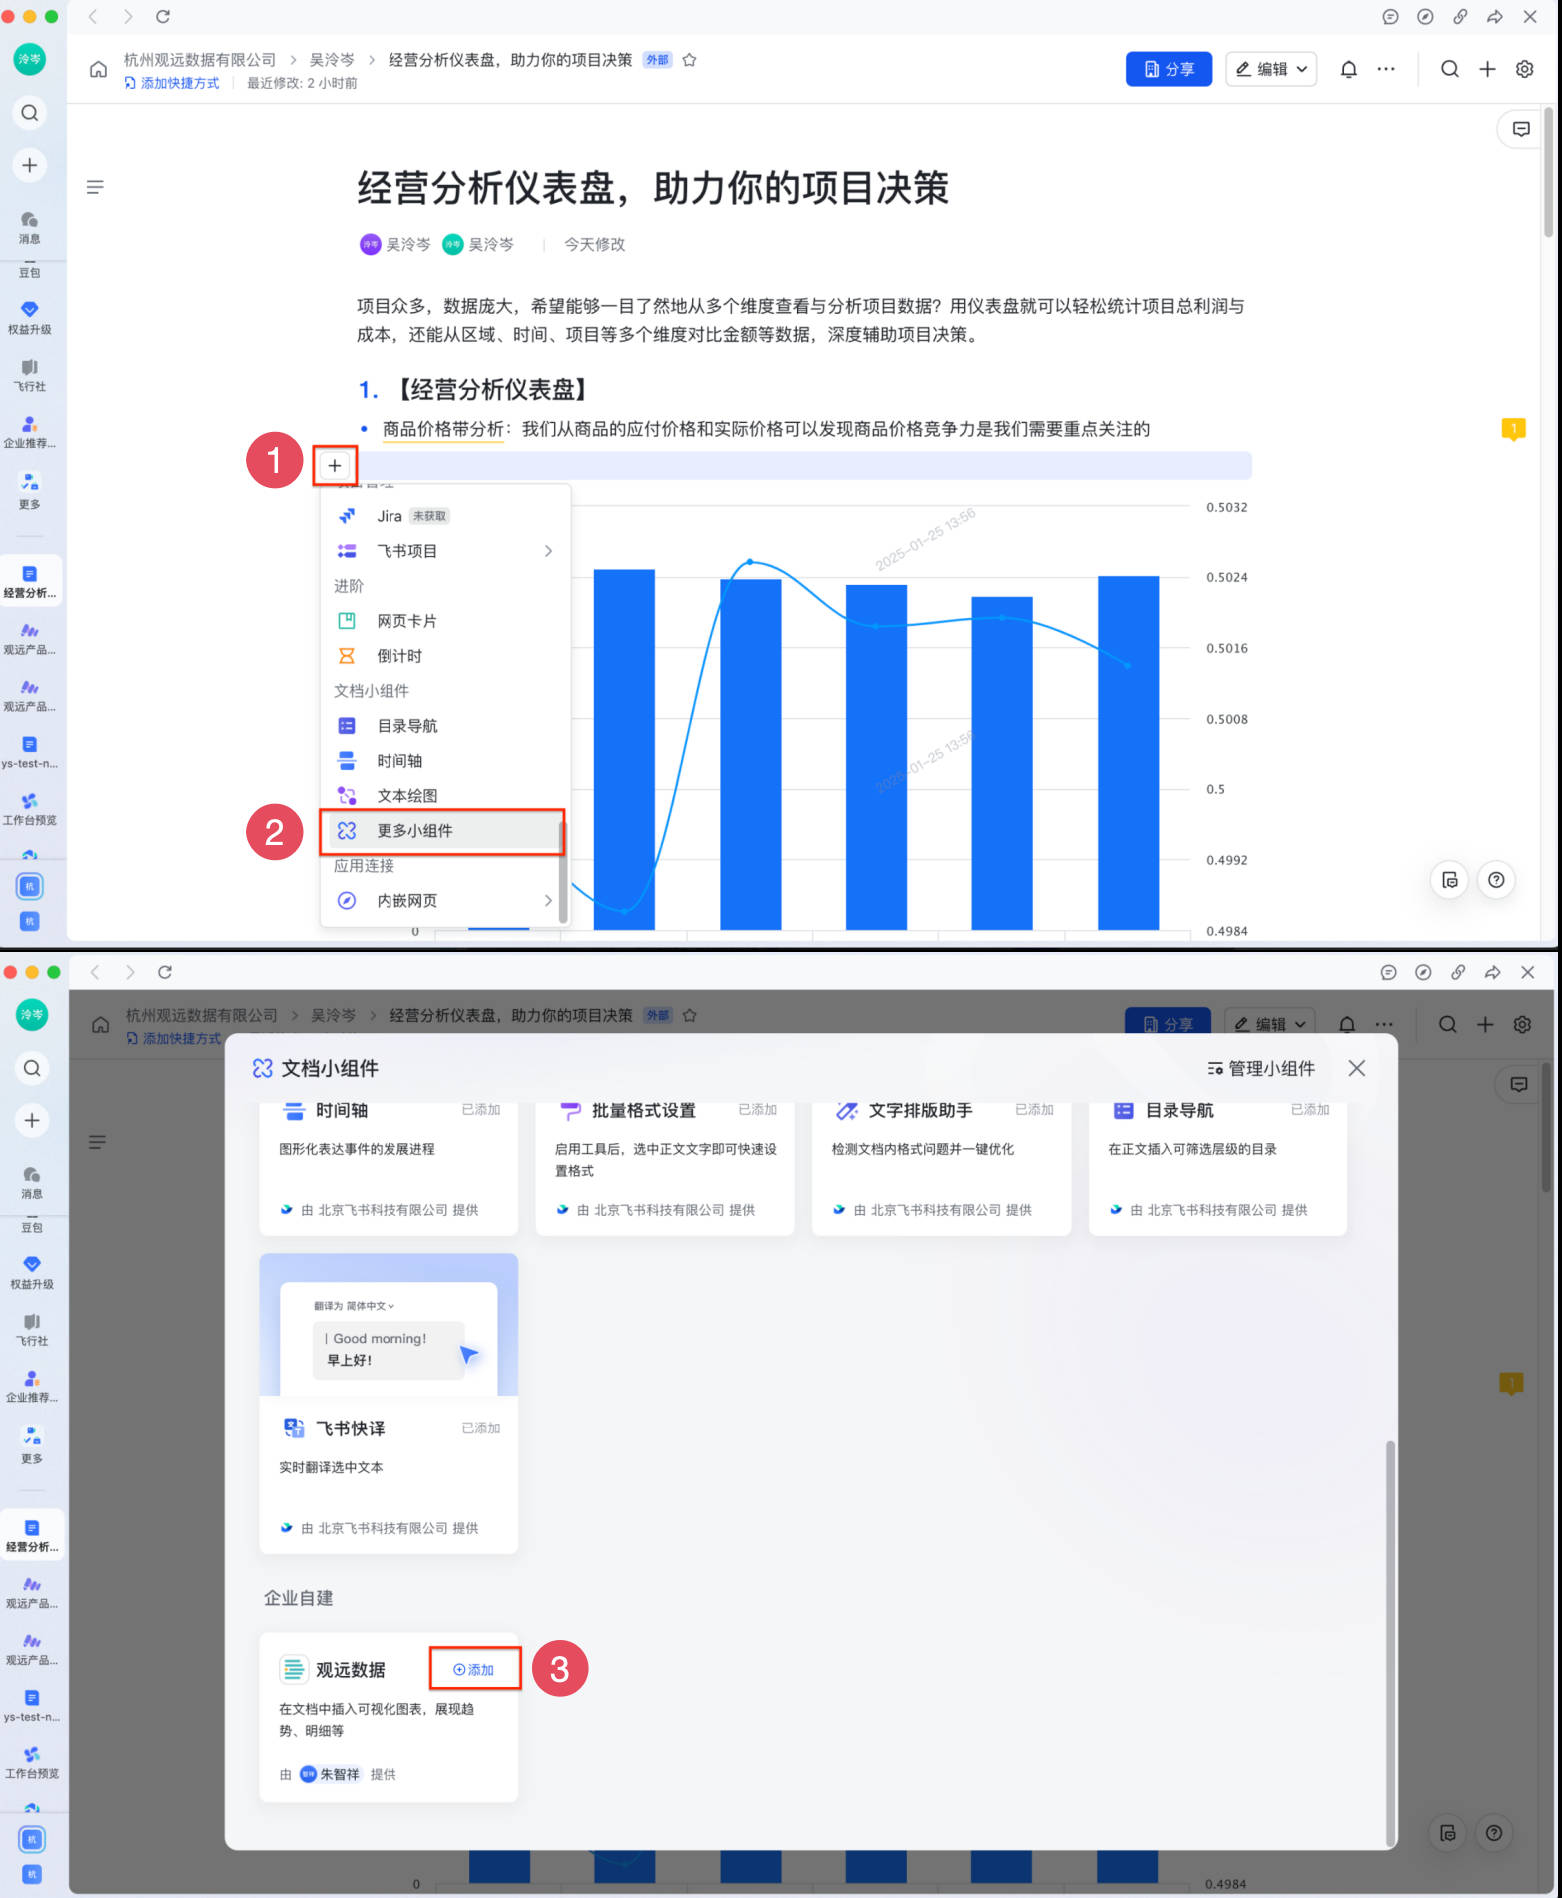
- Add the Guandata Data widget.
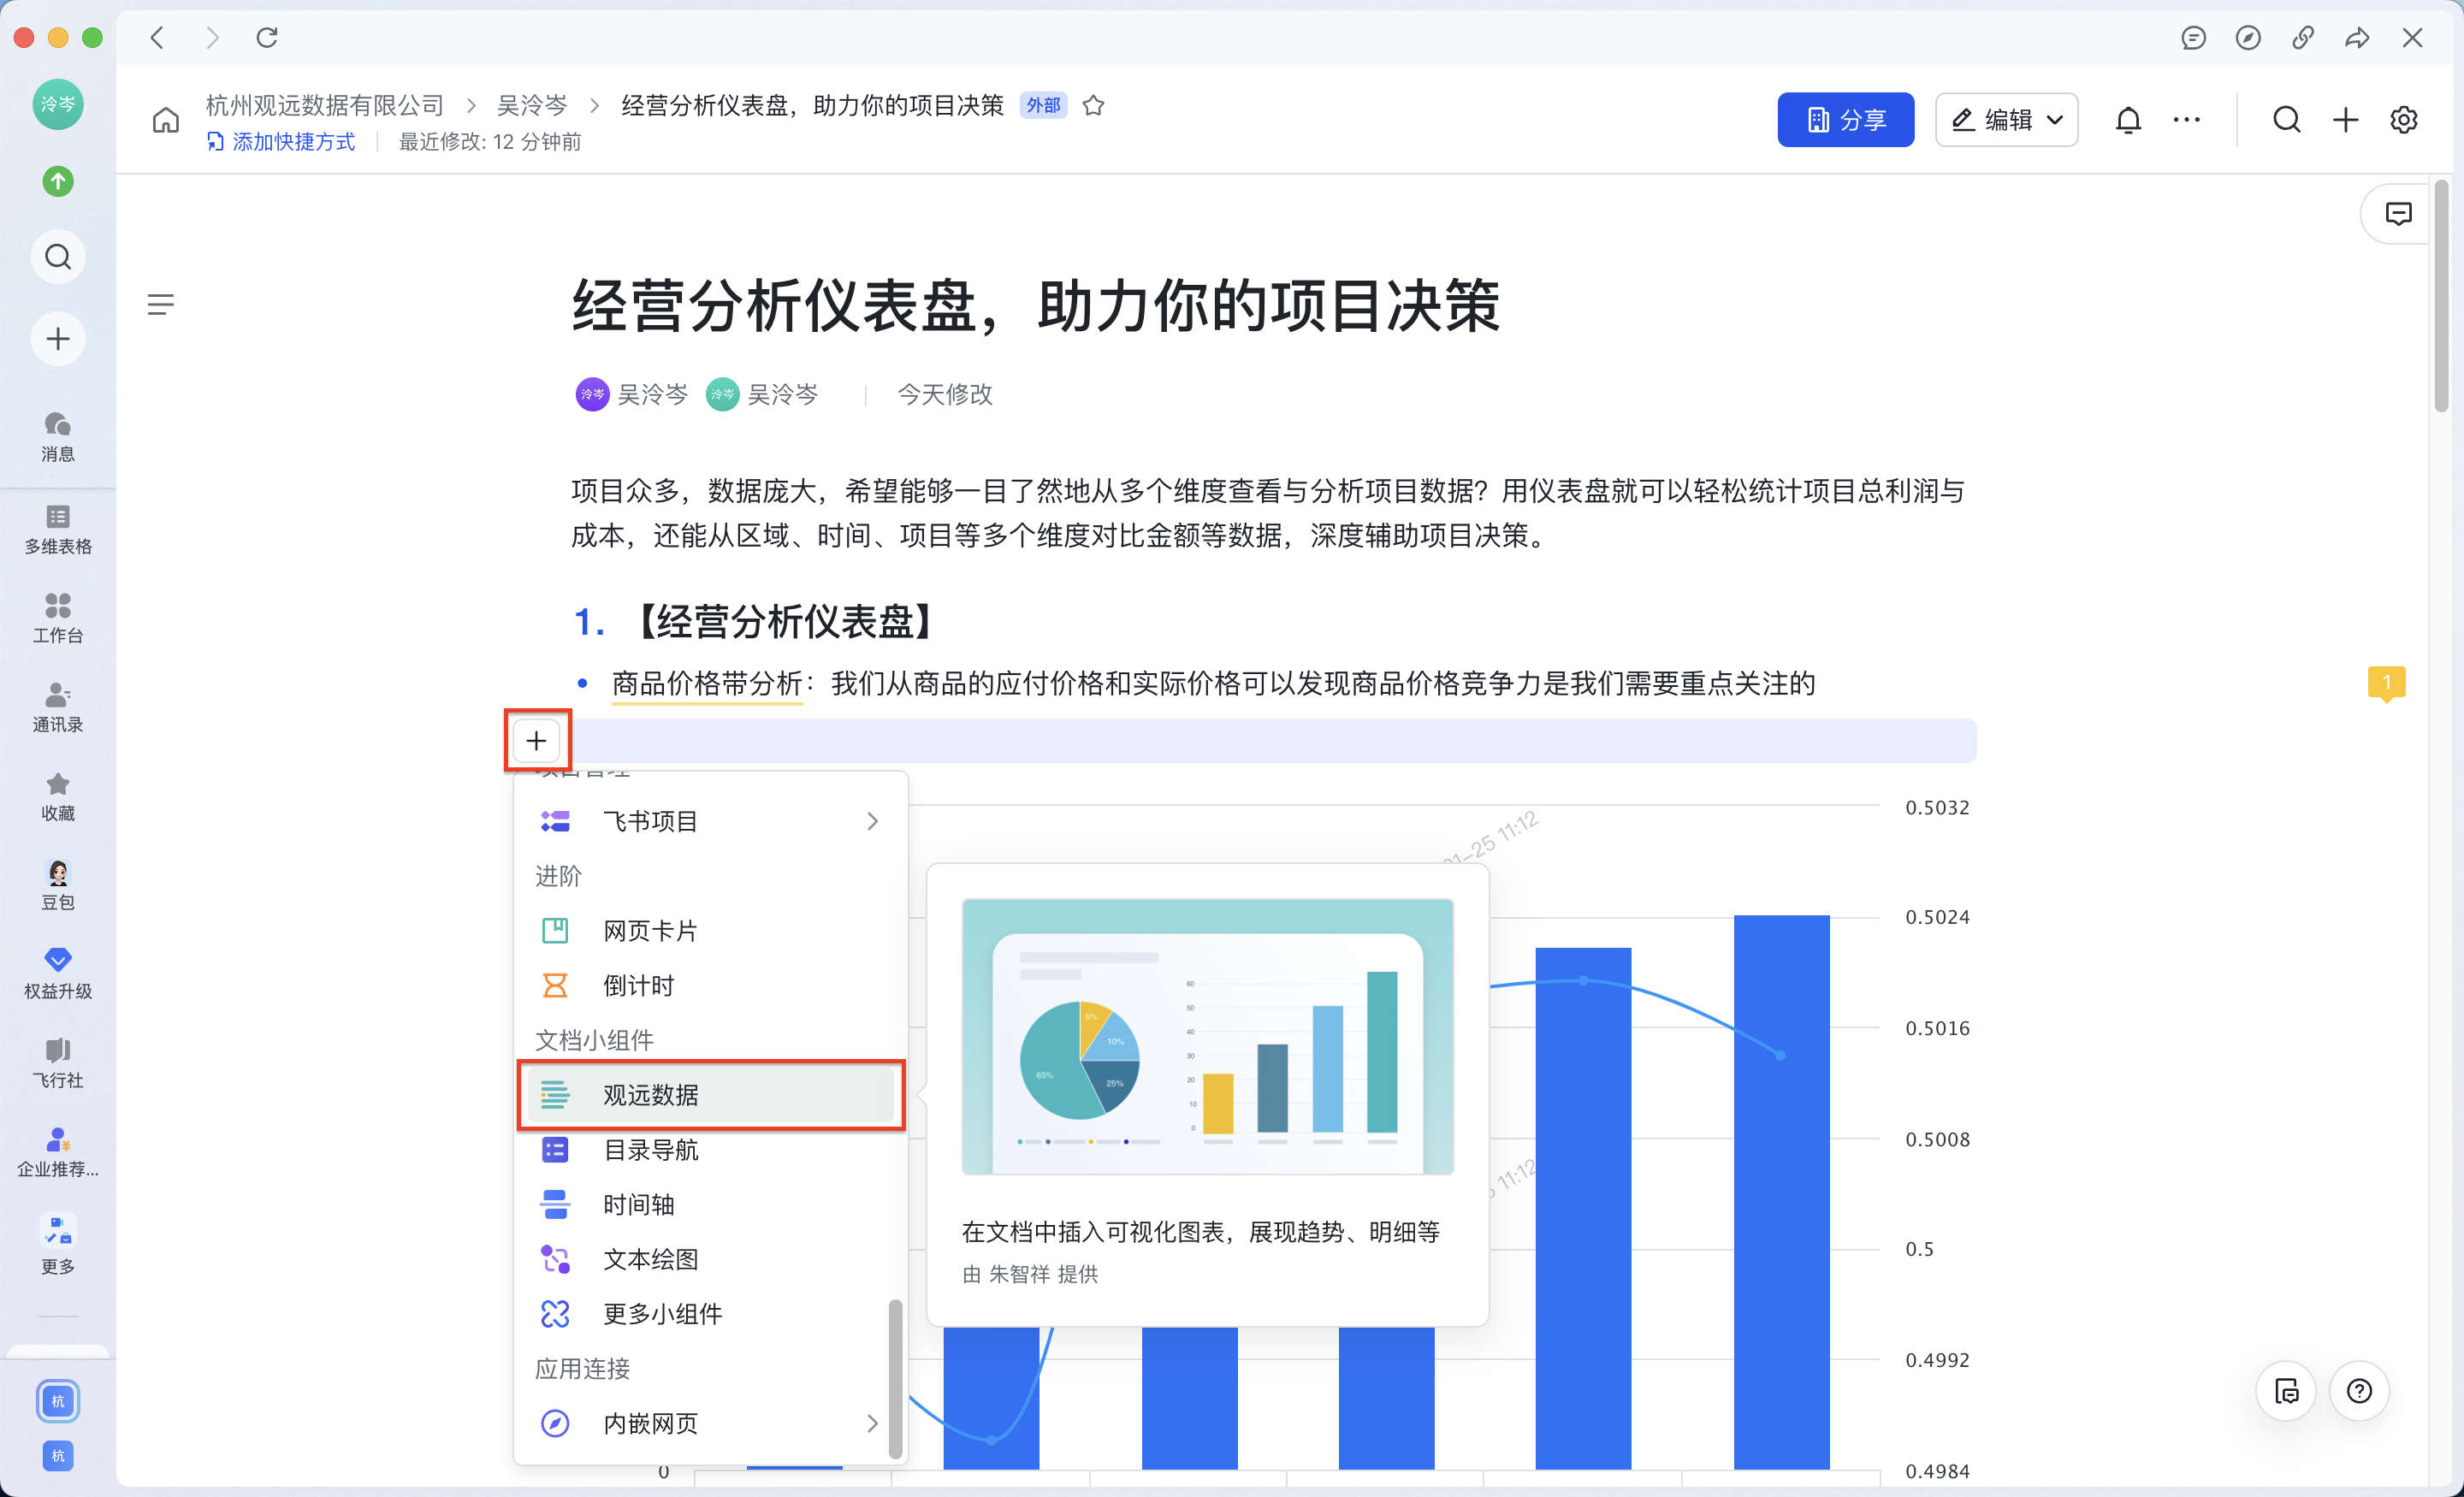
In the editing interface, click the plus sign on the left. Under Docs Widget > More Widgets, find Guandata Data and click Add in the upper-right corner.
Note: The document editor must perform this step the first time they use the Guandata Data widget. After configuration is complete, they can use it directly when writing documents later.

-
Insert the Guandata Data widget in either of the following ways.
- Method 1: In the editing interface, click the plus sign on the left, find Guandata Data on the Docs Widget tab, and click it.
- In the editing interface, enter
/观远数据. The system displays the Guandata Data widget. Click it.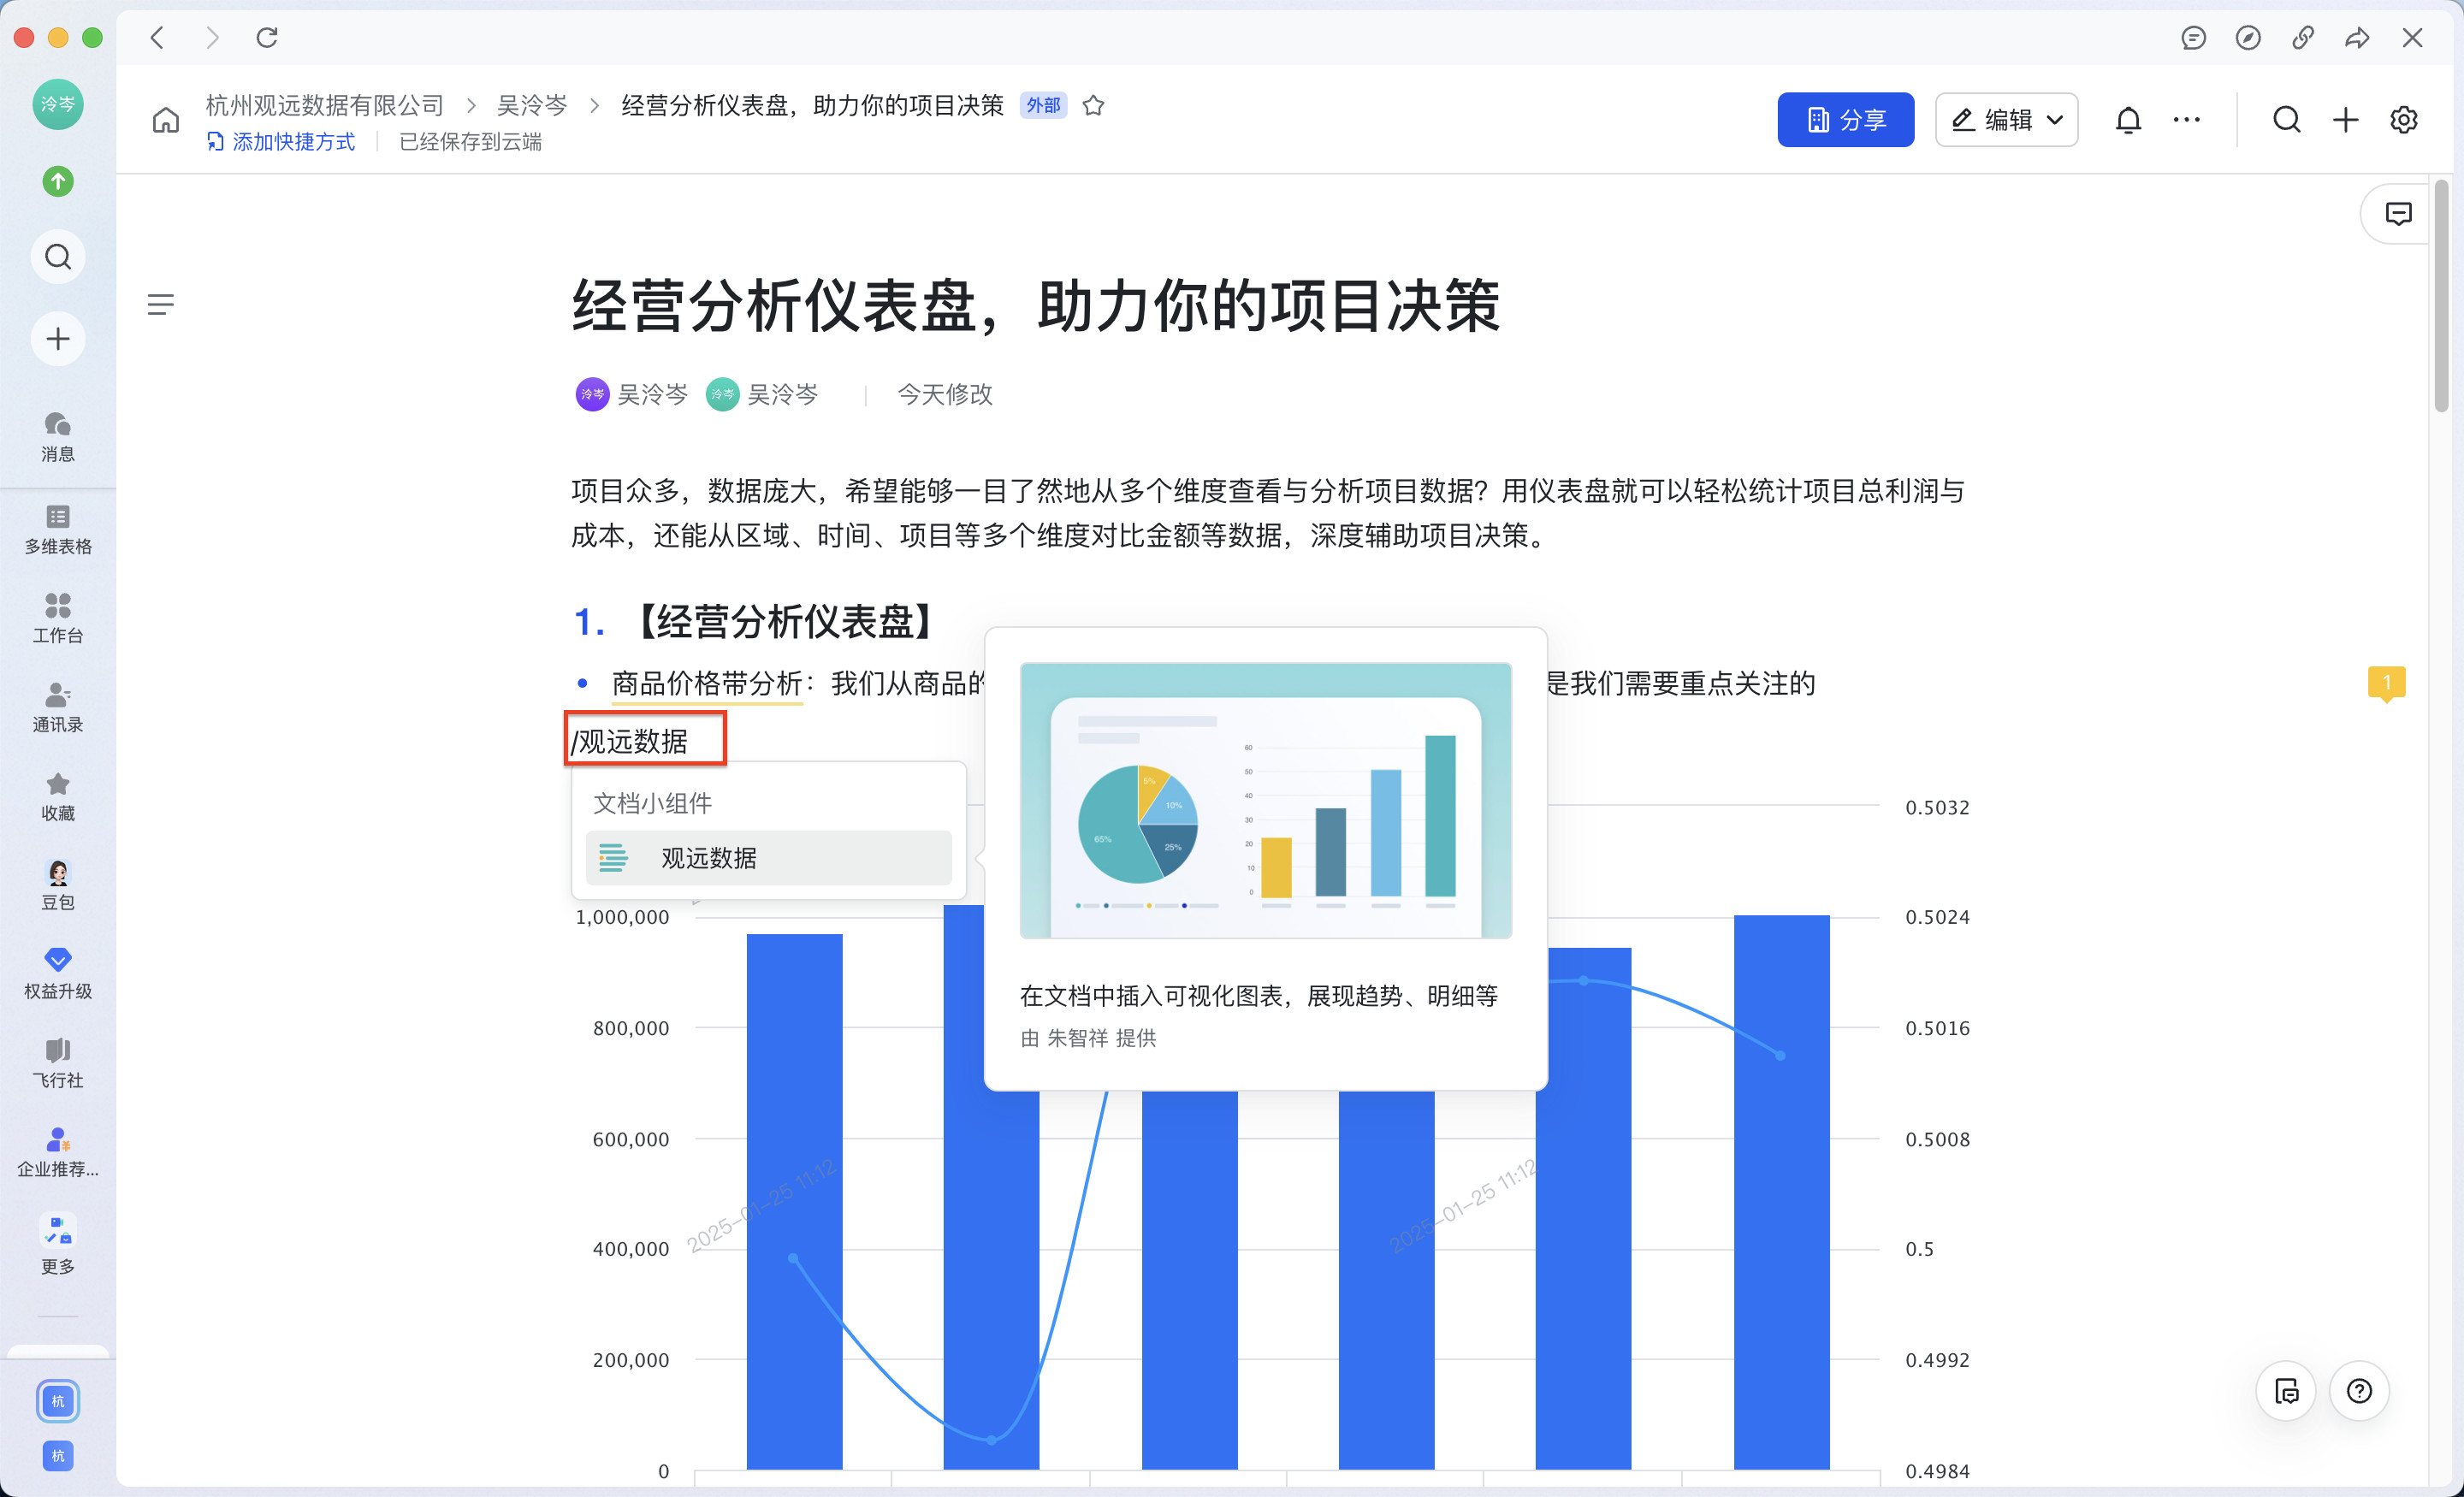
- Method 1: In the editing interface, click the plus sign on the left, find Guandata Data on the Docs Widget tab, and click it.
-
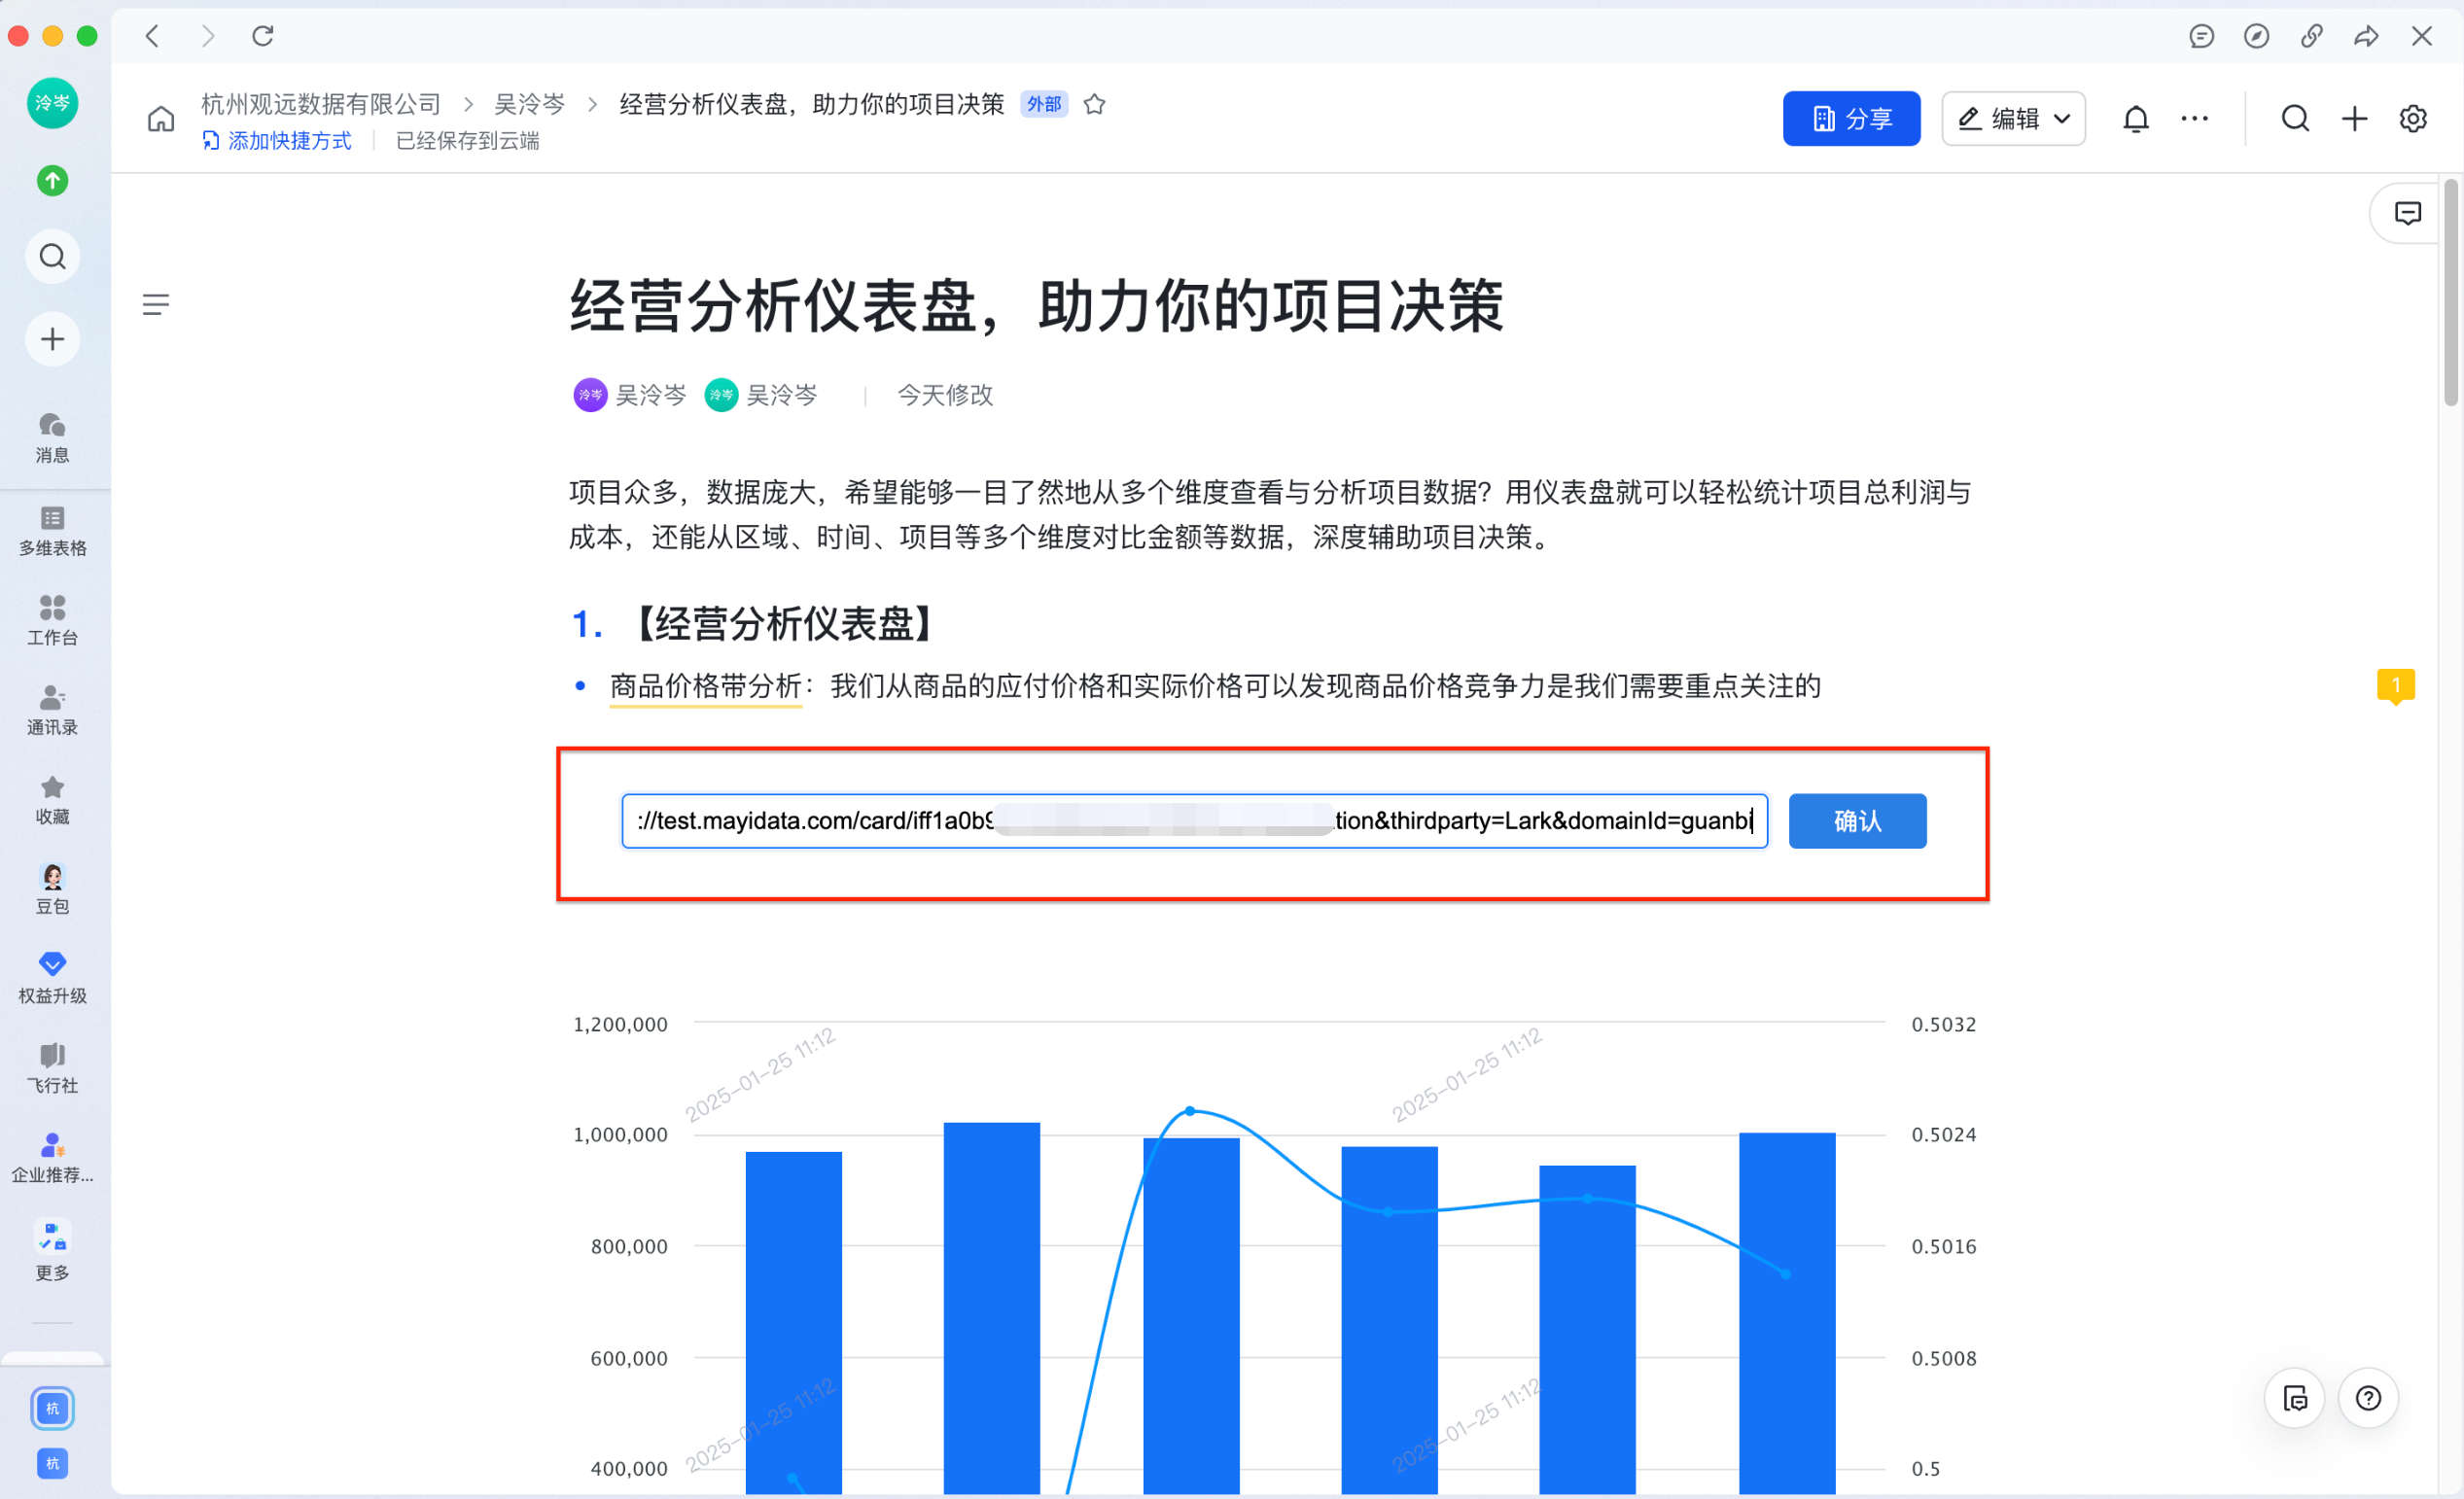
Insert the copied link and click Confirm. The page directly displays the preview view of the card or dashboard. When users access the doc in the Feishu client or a browser, they can intuitively view the visualization's analytical details.
Note: Embedded blocks inserted this way support SSO password-free login and normal visualization display whether users access Feishu Docs from the PC Feishu client/browser or from iOS or Android clients on various device models.
View the Insertion Result
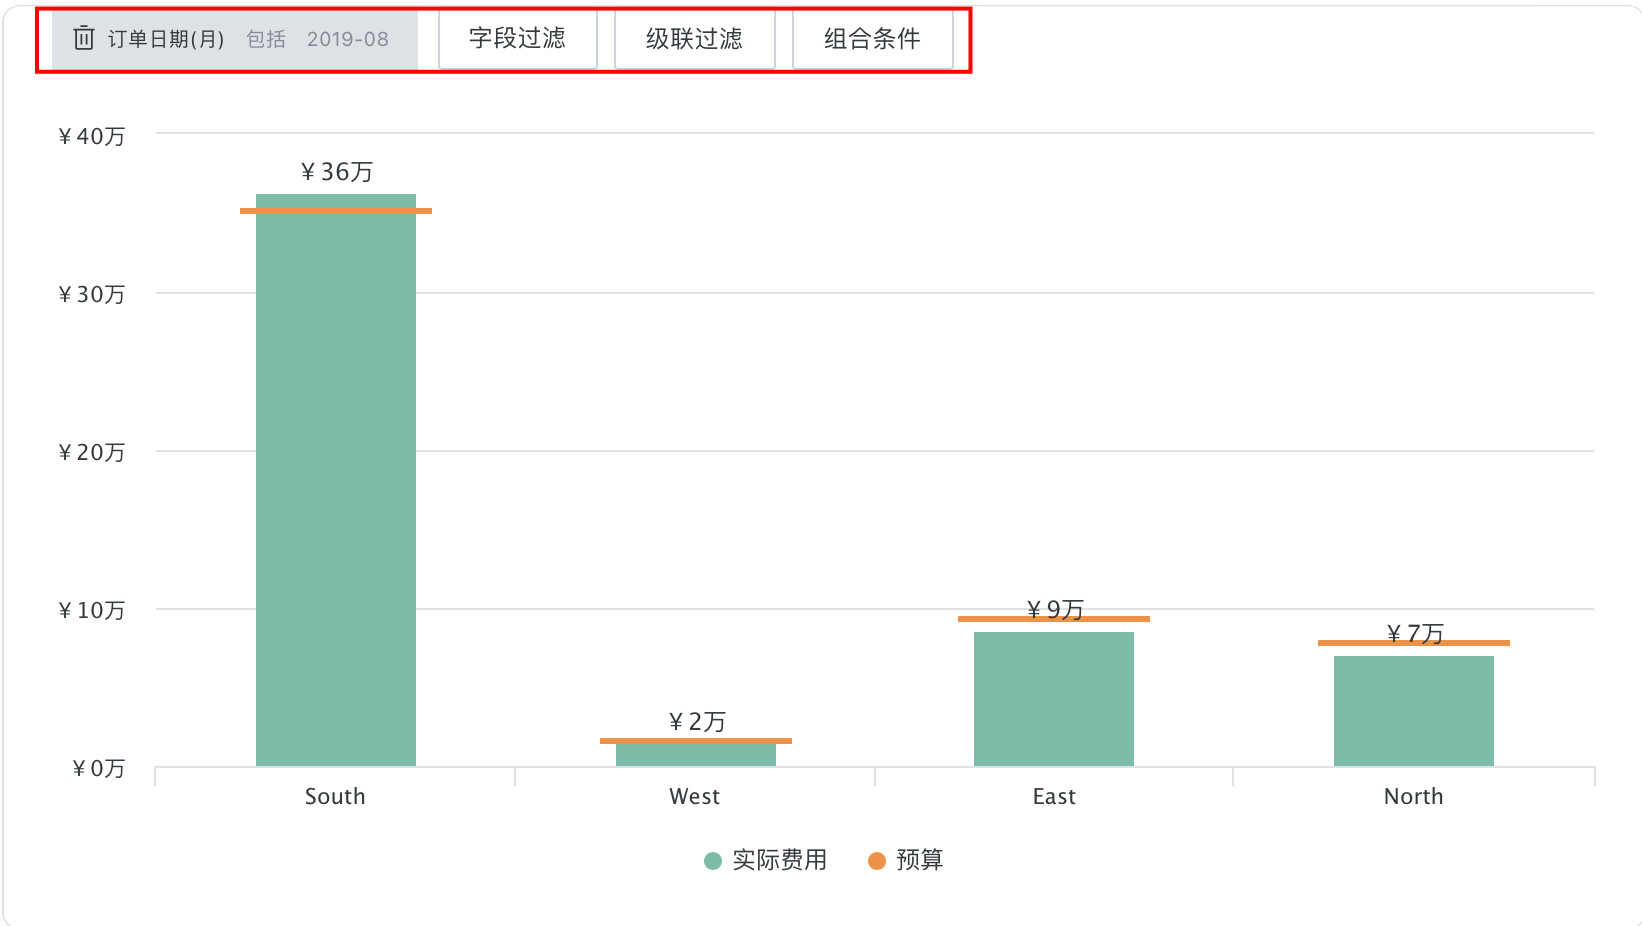
If Apply Current Filter Conditions was selected when copying the link, the copied card shows filter conditions in the upper-left corner.
Filter conditions support reset, and filters work the same way as in Guandata Data.
Cloud Docs Widget Installation Process
-
Create a Cloud Docs widget.
In the Feishu app console, select Add App Capability > Cloud Docs Widget, then click Add.
 Note
NoteThe widget must be created under the Feishu app bound in the Guandata Data backend. Otherwise, SSO login cannot be completed.
-
Install the Cloud Docs widget upload environment in the local console.
If you have installed the developer tool before, first run
npm uninstall @bdeefe/opdev-cli -gto clean the environment, and then install it with the installation package after cleanup is complete. This prevents the path from being overwritten.Command-line installation depends on Node.js. For installation instructions, see Node.js. npm is installed automatically when Node.js is installed.
npm install @lark-opdev/cli@latest -g -
Log in from the command line.
-
Run
opdev loginand select Feishu.
-
After completion, the browser automatically opens the login page. Log in, then run
opdev loginagain. -
Seeing the following output means the login succeeded.

-
Note: Steps 2 and 3 refer to the Feishu documentation: 02 Quick Start
-
Download the installation package.
Download URL: https://guandata-tool.oss-cn-shanghai.aliyuncs.com/1.0.0.zip
-
Modify the corresponding appid (Feishu app ID) and blockTypeID (Cloud Docs widget ID) in the files.
-
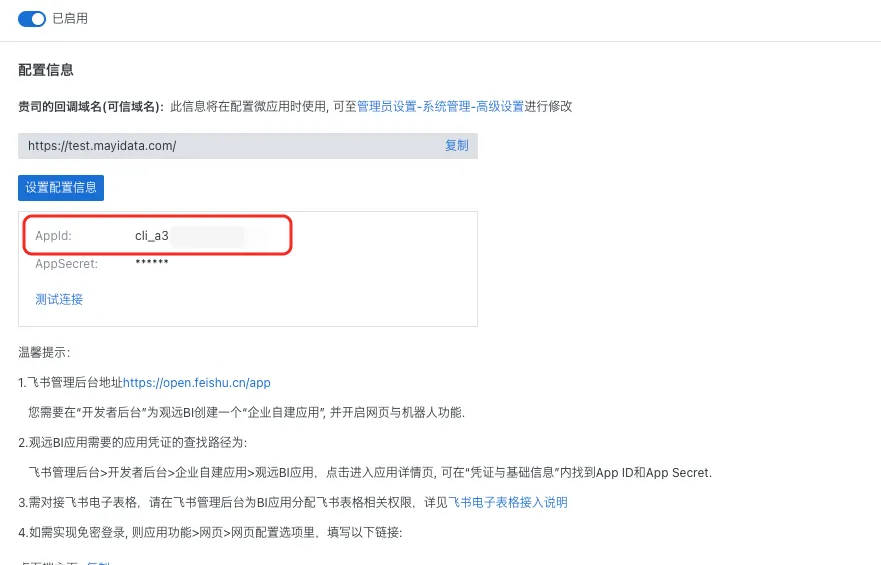
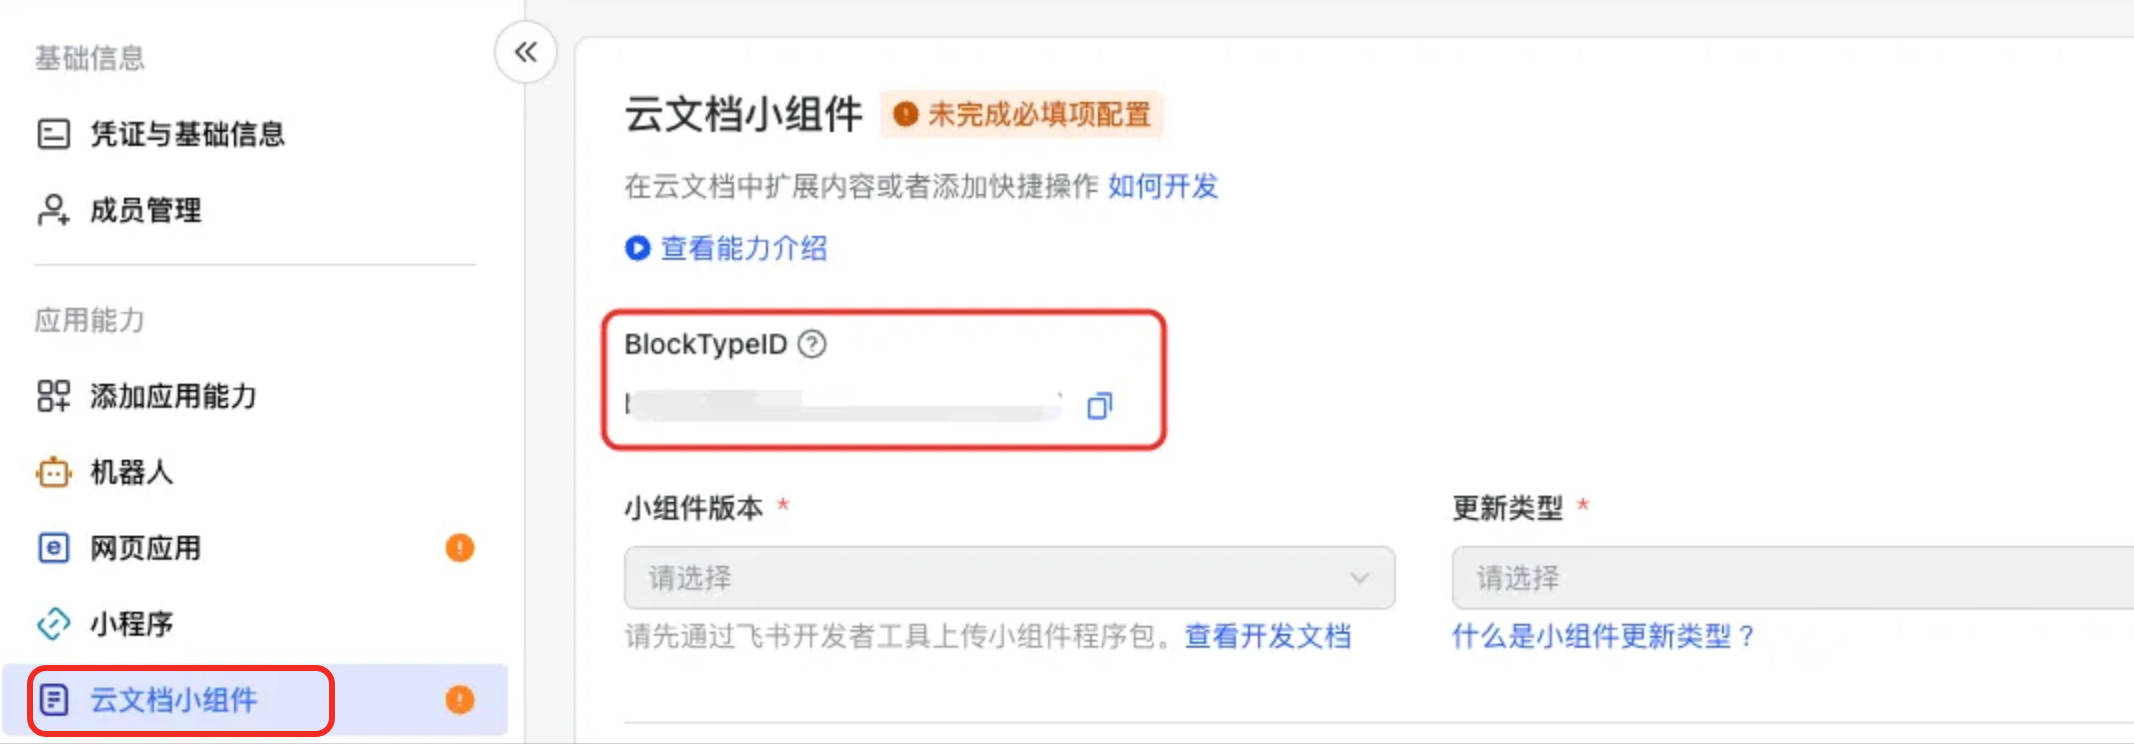
Obtain the APP ID and BlockTypeID from the Feishu app console.

-
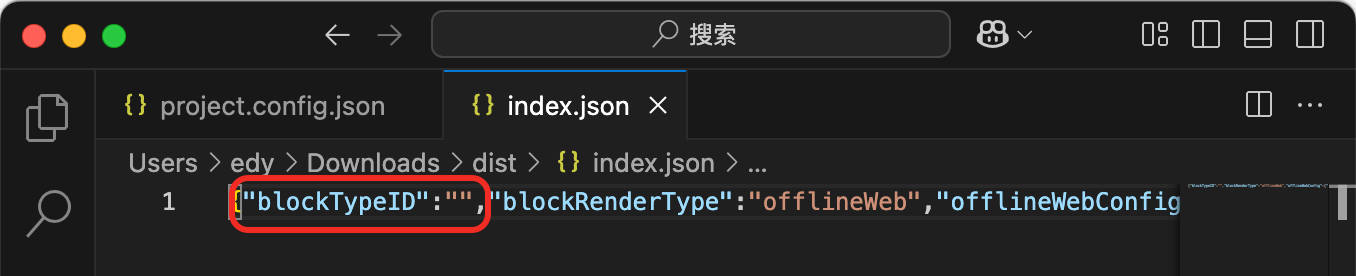
Add the obtained APP ID to the
/dist/project.config.jsonfile in the downloaded installation package. Add the obtained BlockTypeID to the/dist/index.jsonfile in the downloaded installation package.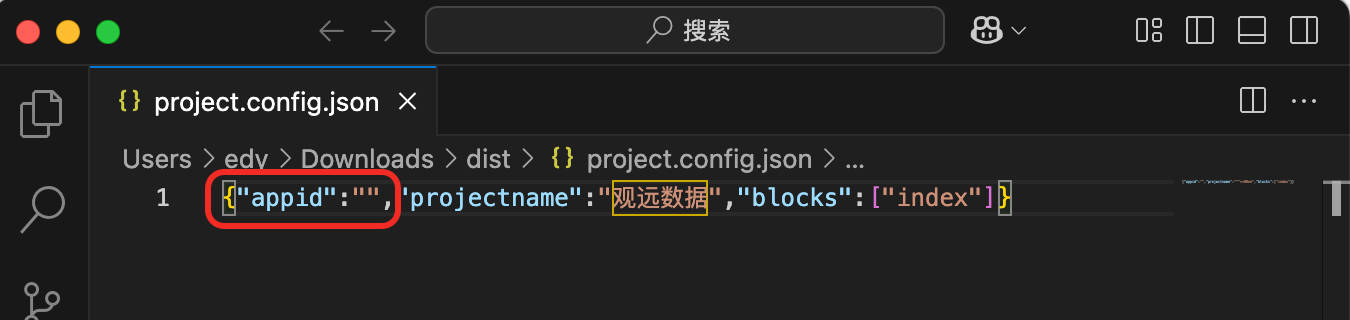
-
-
Upload the installation package.
In the console, move to the directory where the installation package is located, run
opdev upload ./dist, and enter the version number and description (optional) in sequence.
-
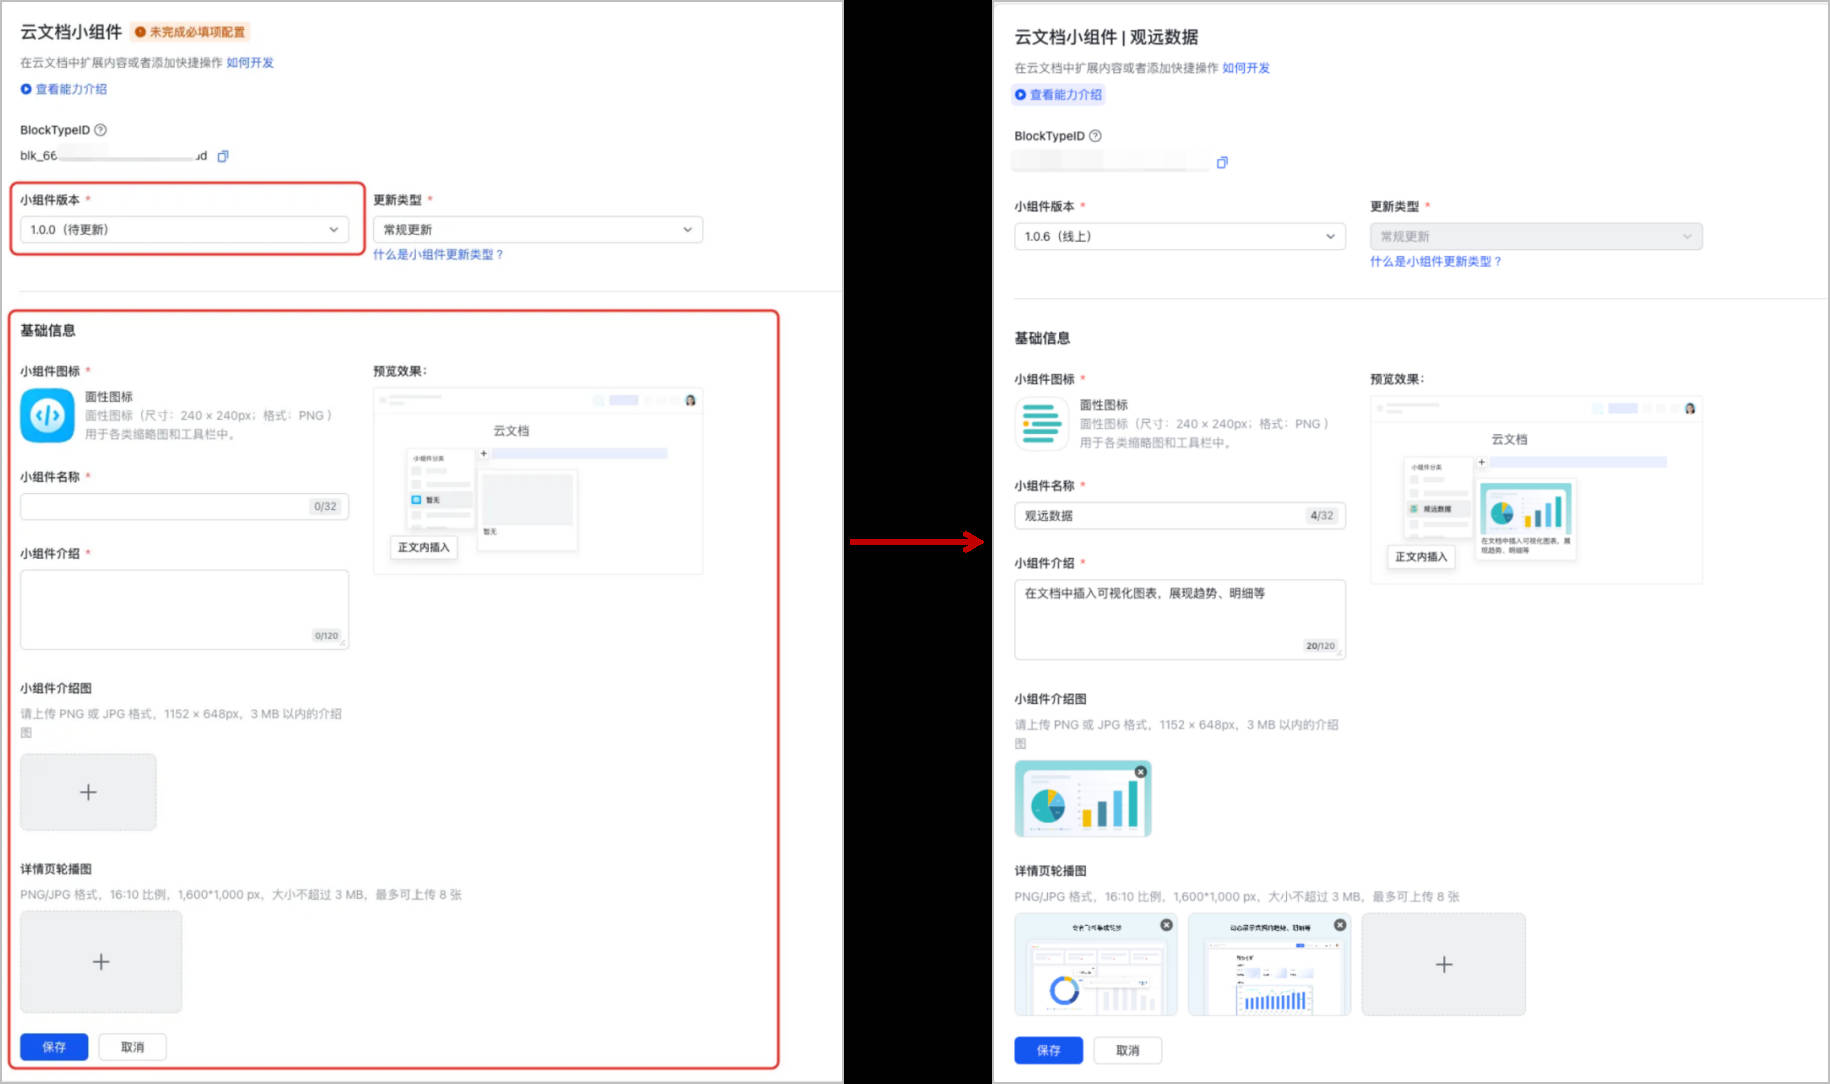
Edit in the app console.
-
Go to App Capability > Cloud Docs Widget in the navigation bar, edit the Cloud Docs widget information, and save it.
-
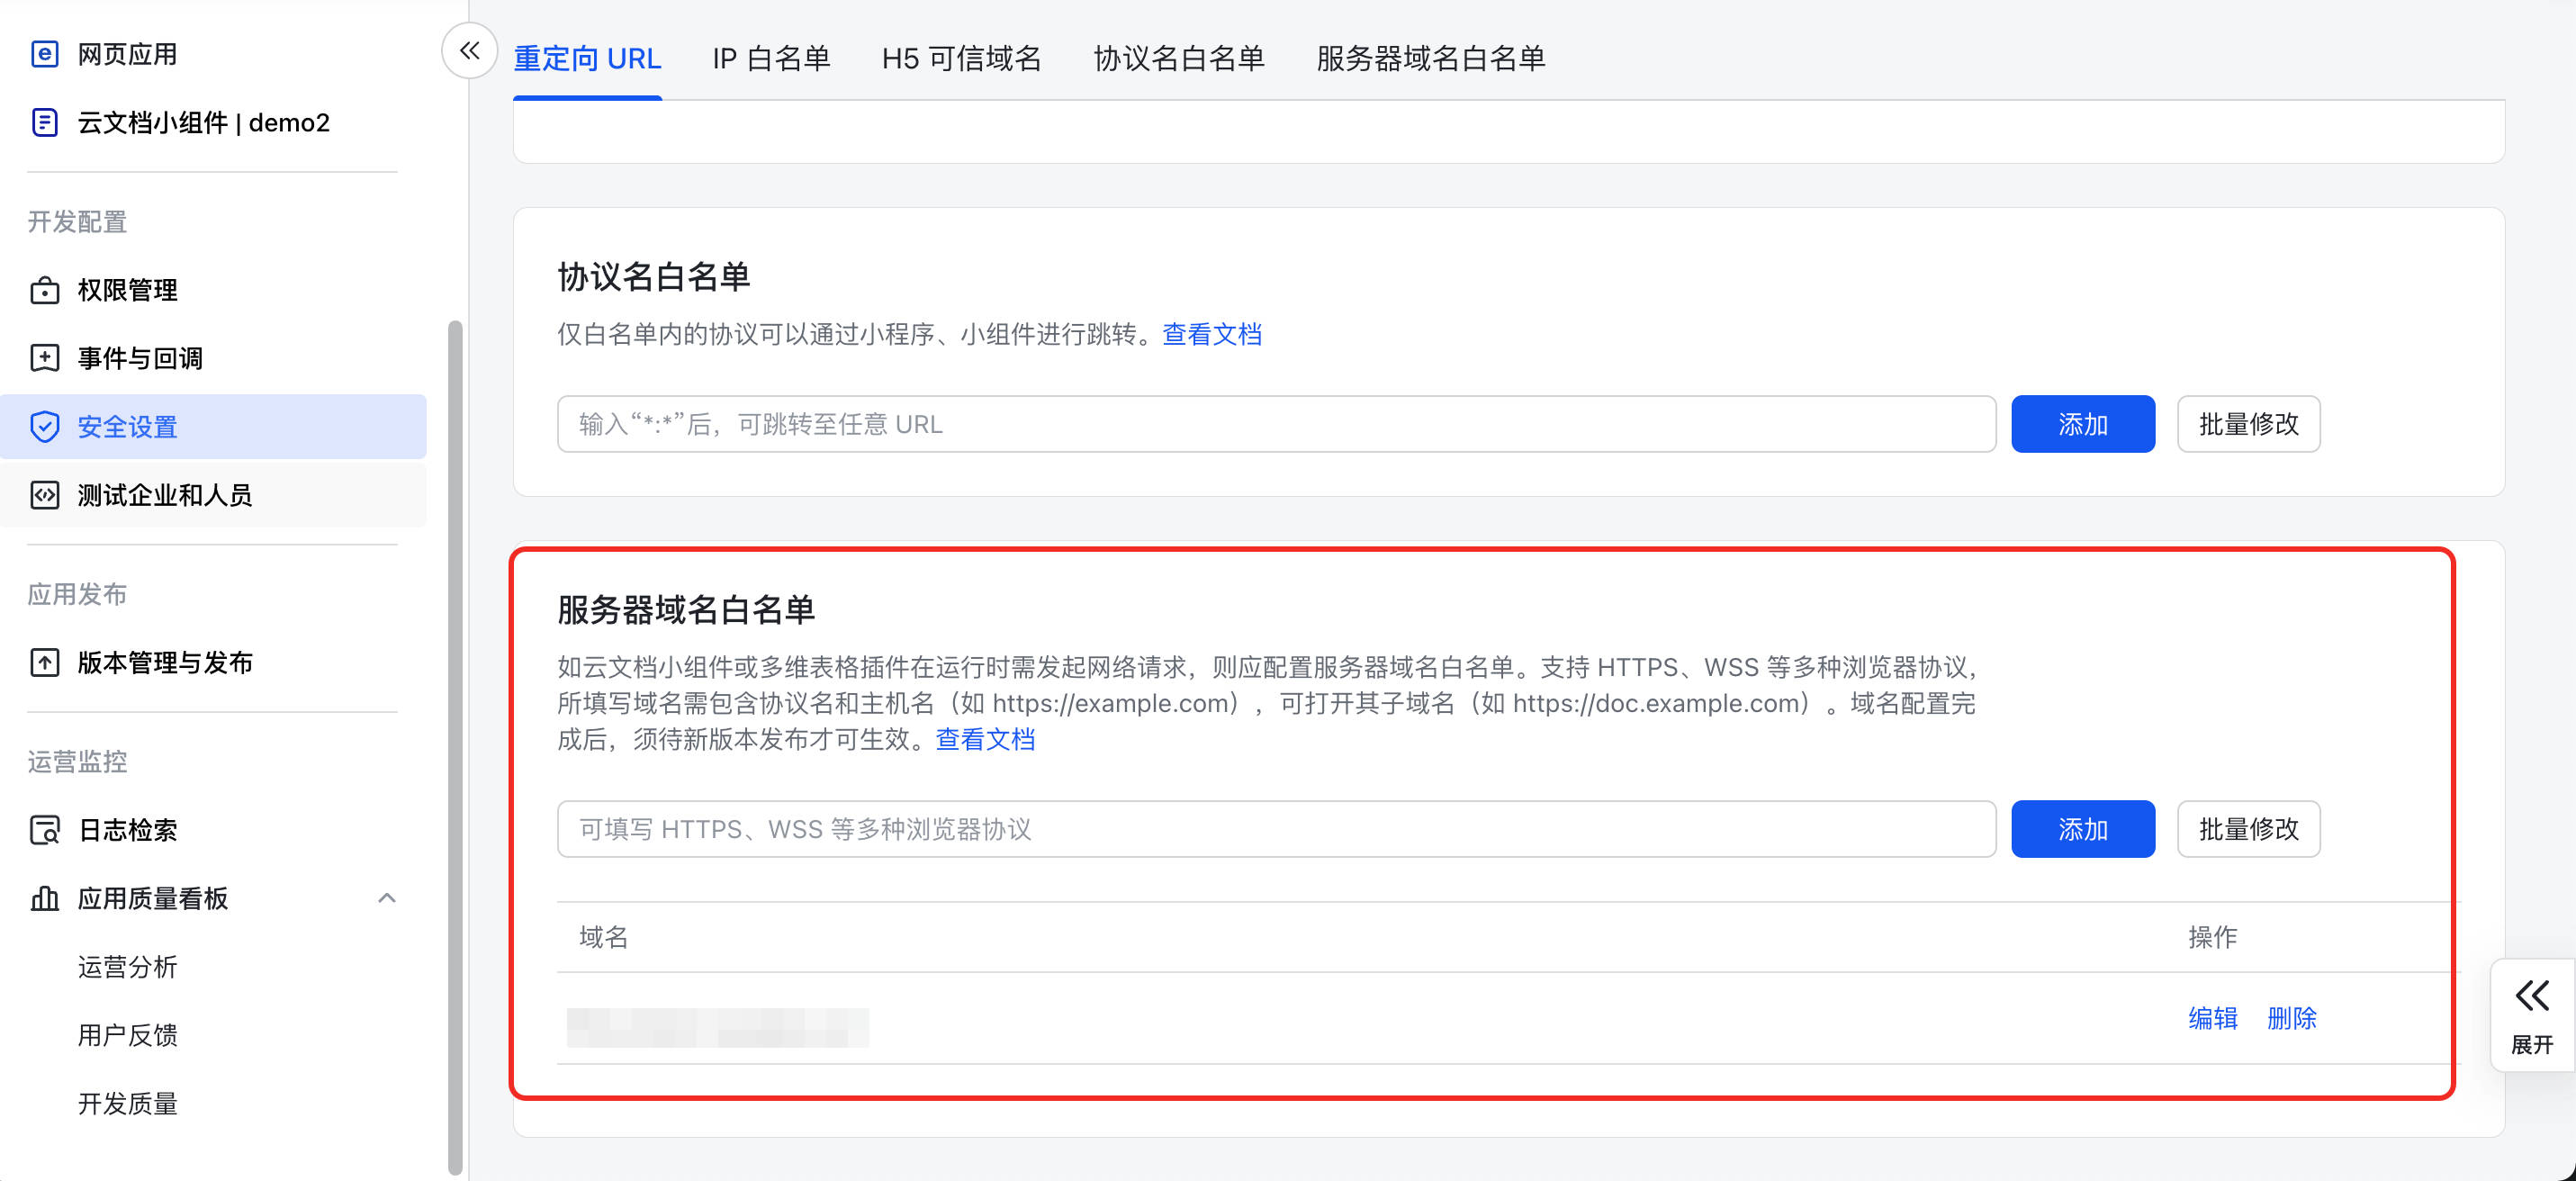
Go to Security Settings > Server Domain Whitelist in the navigation bar and add a server whitelist. The whitelist value is the BI access address.
-
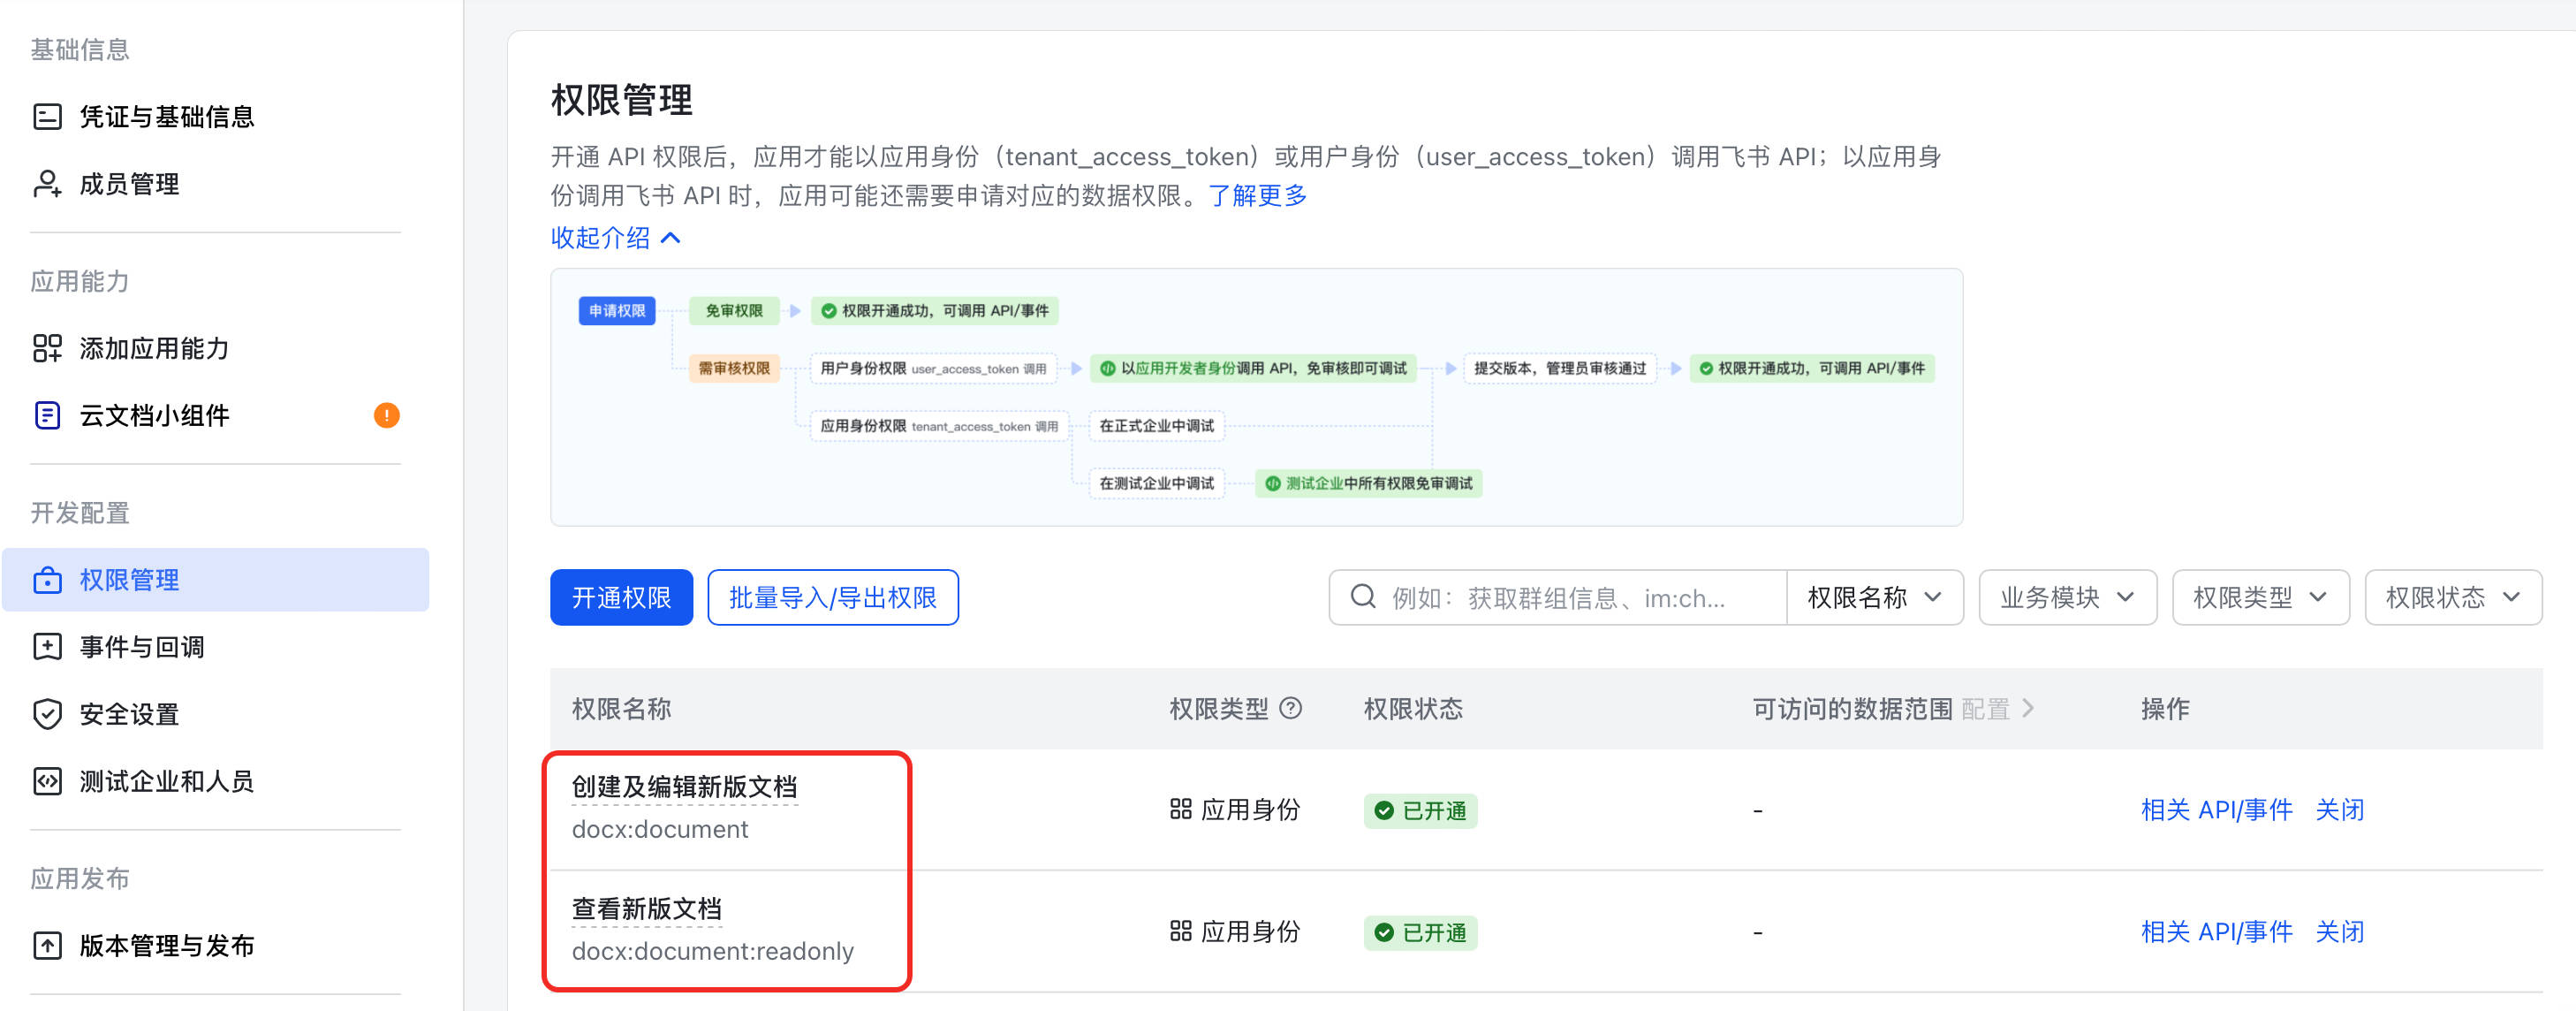
Go to Development Configuration > Permission Management in the navigation bar and add the widget API permissions: Create and Edit New Docs and View New Docs.
-
-
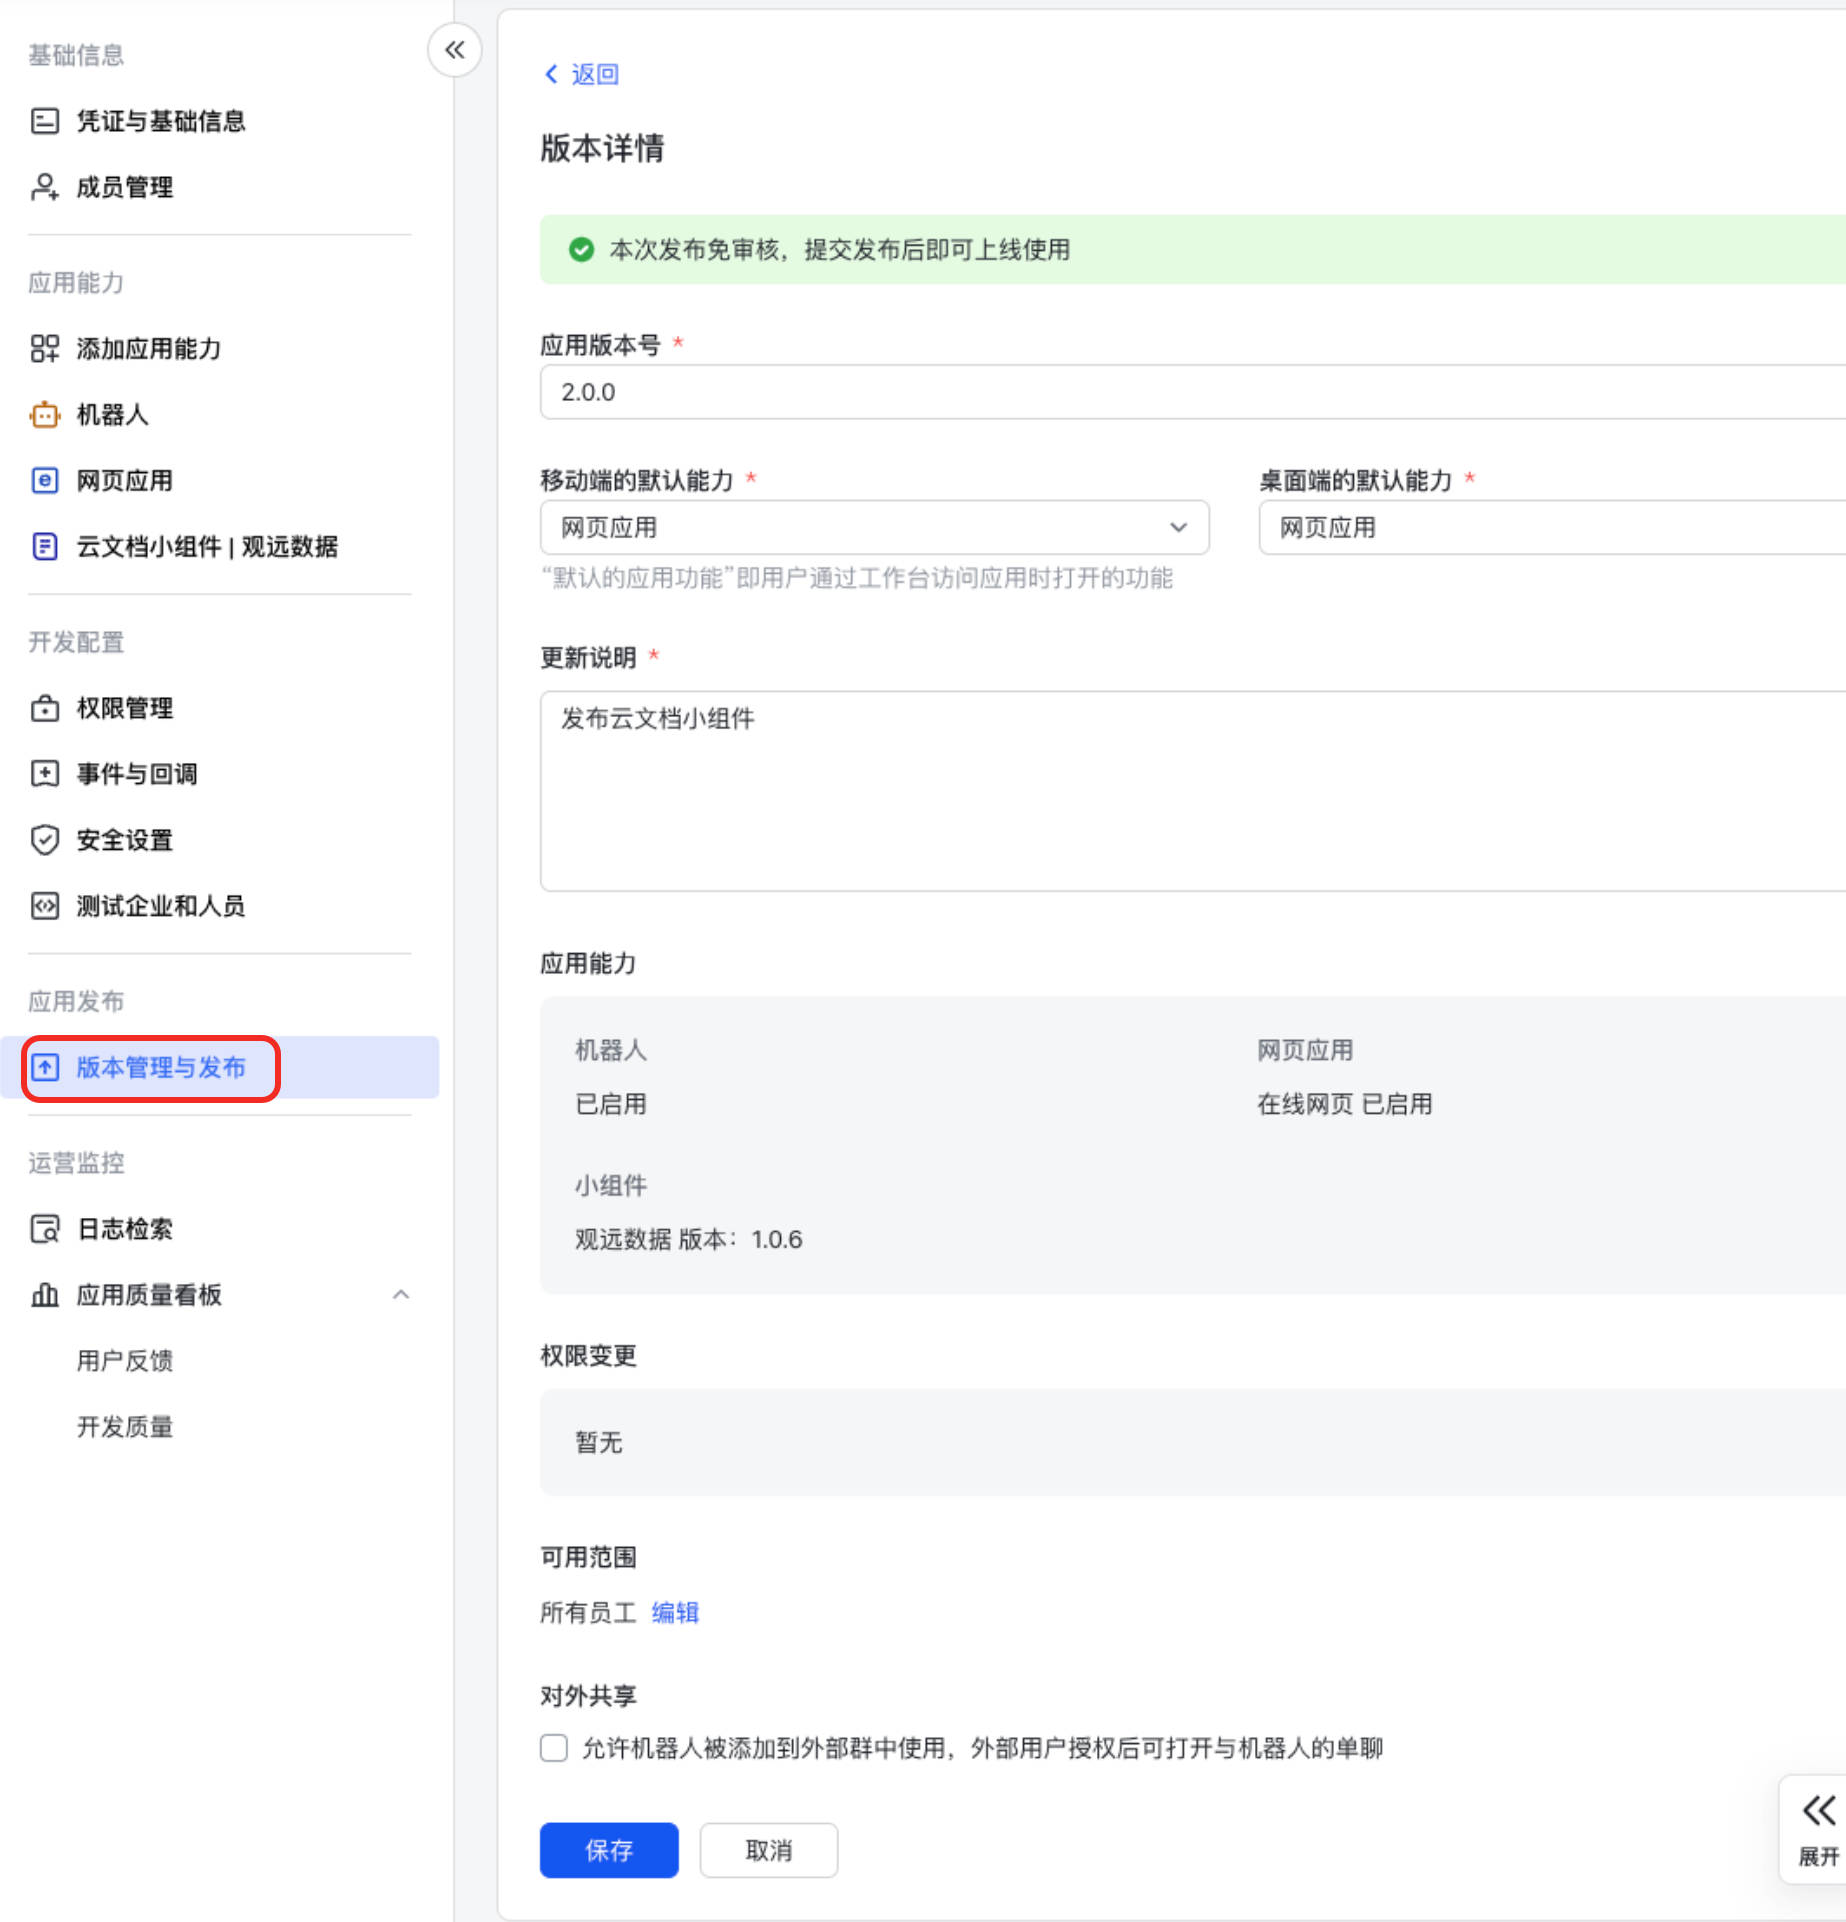
Publish the app version.
Go to App Release > Version Management and Release in the navigation bar and publish the app version.
-
Add the widget in Cloud Docs.
In the Cloud Docs add menu, find More Widgets > Enterprise Custom, and click Add. Each user must add it once when using it for the first time. After adding it, the user can use this widget in all documents.