Row and Column Permissions
1. Overview
Row and column permissions are fine-grained permission controls provided by Guanyuan BI. By configuring row and column permissions for datasets, you can set invisible fields or field values for different associated users/user groups, meeting personalized data security needs.
2. Instructions
2.1 Data Permission Entry
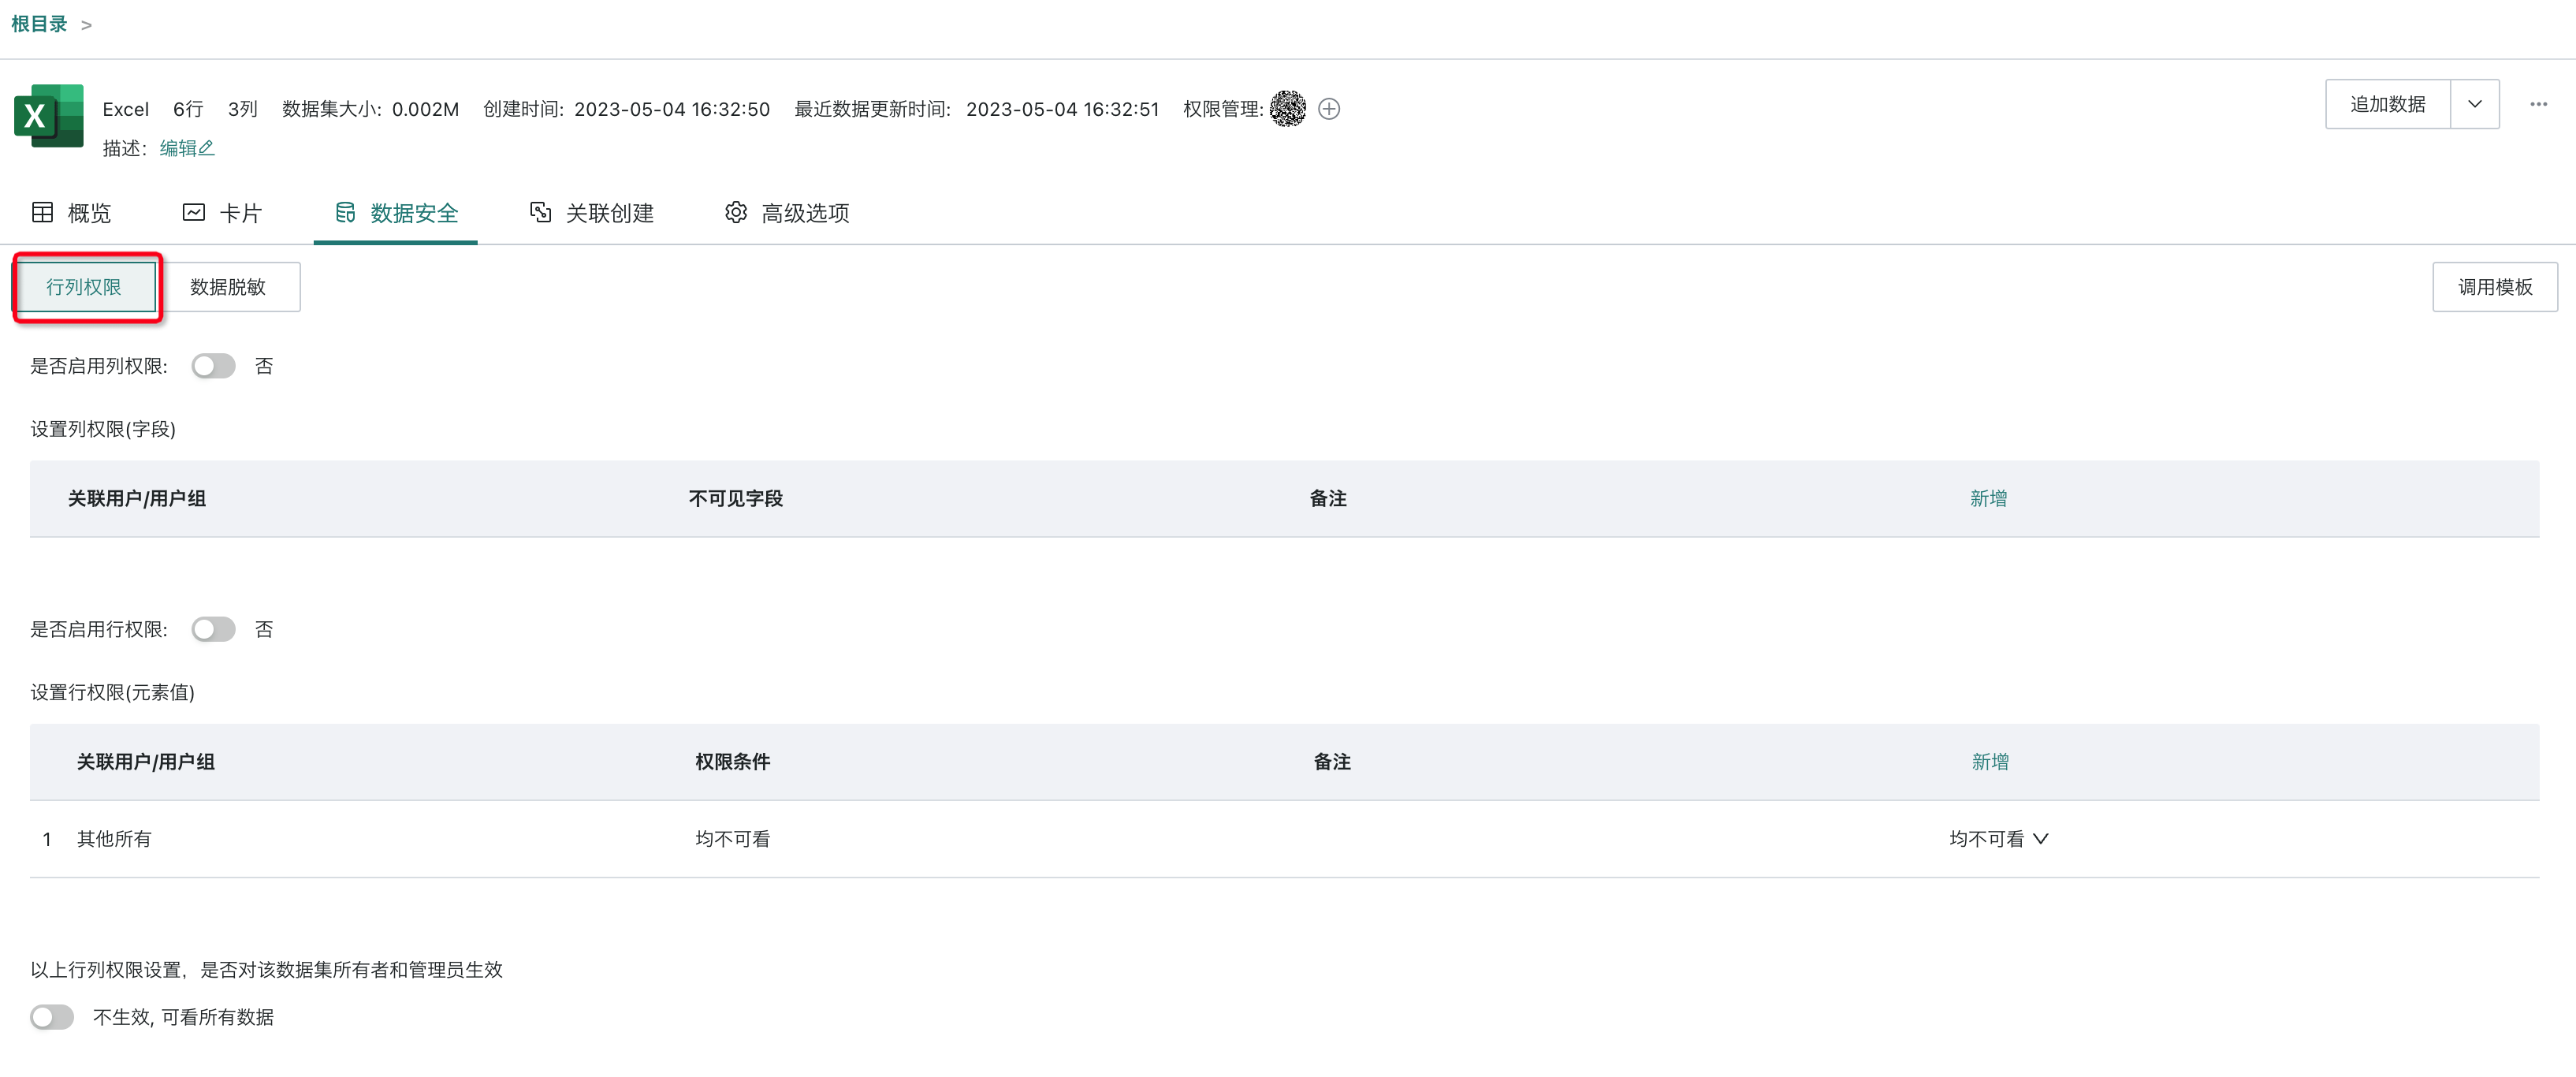
Click Data Center - Dataset, enter the details page of a dataset, and click "Data Security - Row and Column Permissions" to edit permissions.
2.2 Row and Column Permissions for Administrators and Dataset Owners
For administrators and dataset owners, there is a switch to control whether they are affected by row and column permissions. Enterprises can set this according to their needs.
If administrators and dataset owners are included in the applicable objects of row and column permissions, and the switch is off, they can see all data regardless of the permissions set above.
Why do the set row and column permissions not take effect for dataset owners?
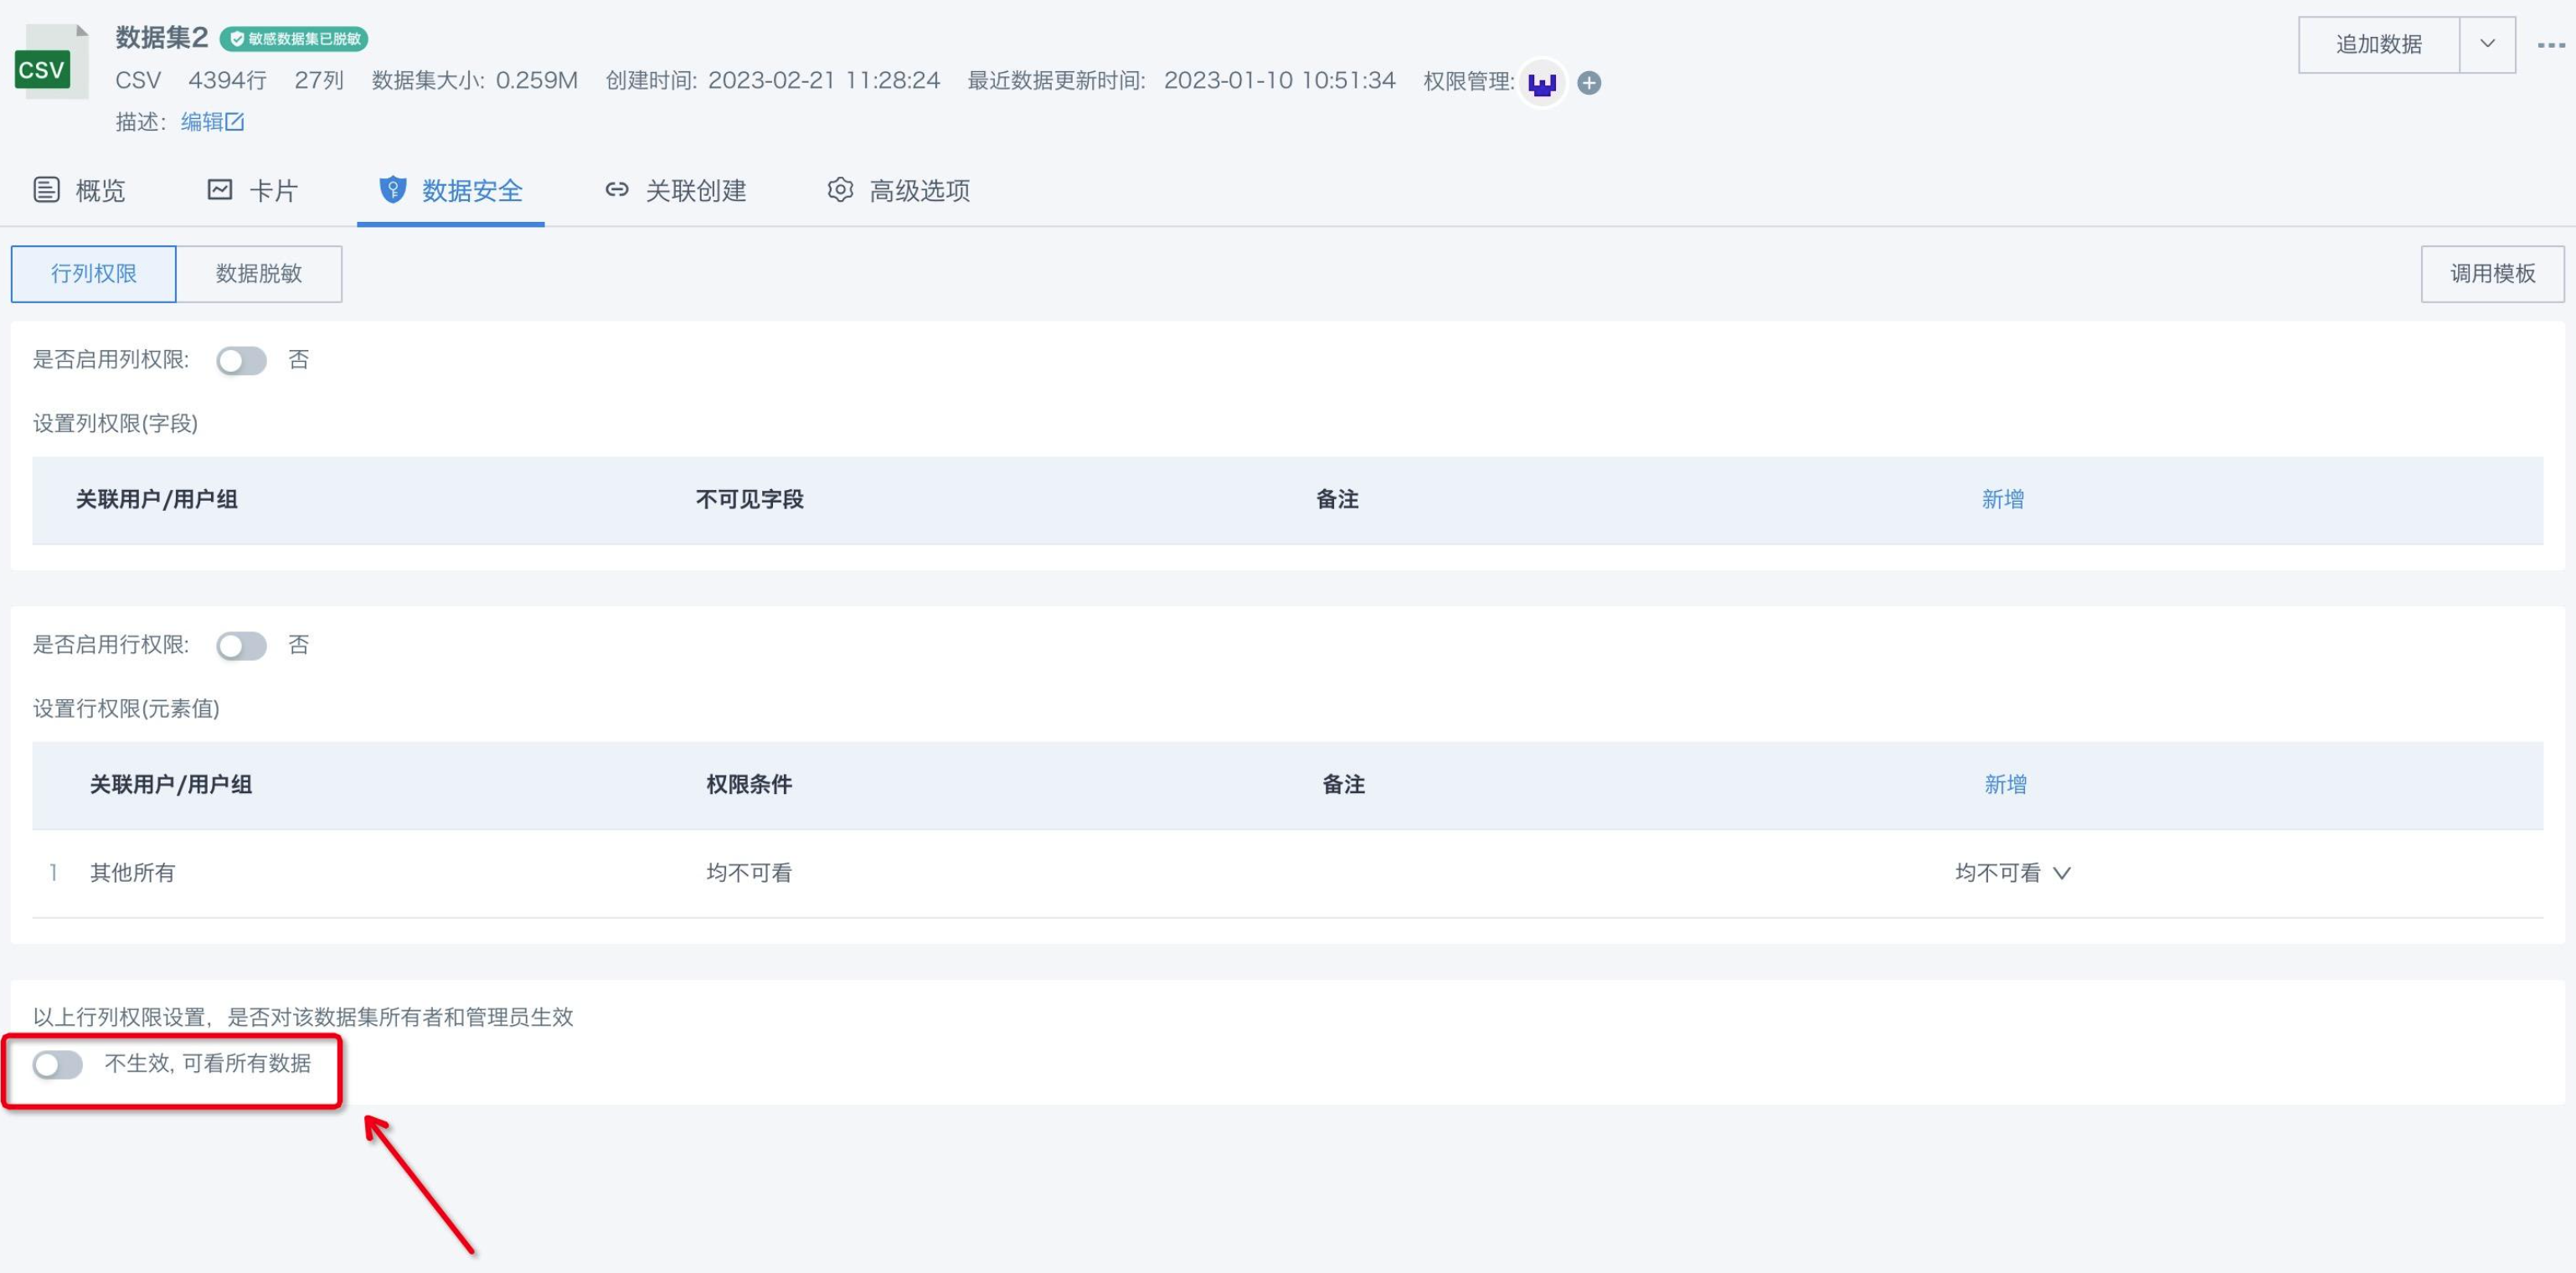
If the switch is on, administrators and dataset owners are also restricted by the above row and column permissions and can only see data within the defined permissions.
.png)
2.3 Custom Function Settings for Dataset Row and Column Permissions
Guanyuan Data supports users to use custom functions for unified permission management, effectively improving control capabilities.
Note: The association between row/column permissions and users, as well as related approval work, is implemented by third-party systems.
- In the main domain environment, open the system-backend maintenance page and enable custom domain functions.
.png)
- Click to add or edit a custom function, select a domain, enter the function name, the interface name to call, select the request method, configure the timeout (default 2s), and list usage, description, and examples for parameters. You can also define a security verification code for interface authentication.
.png)
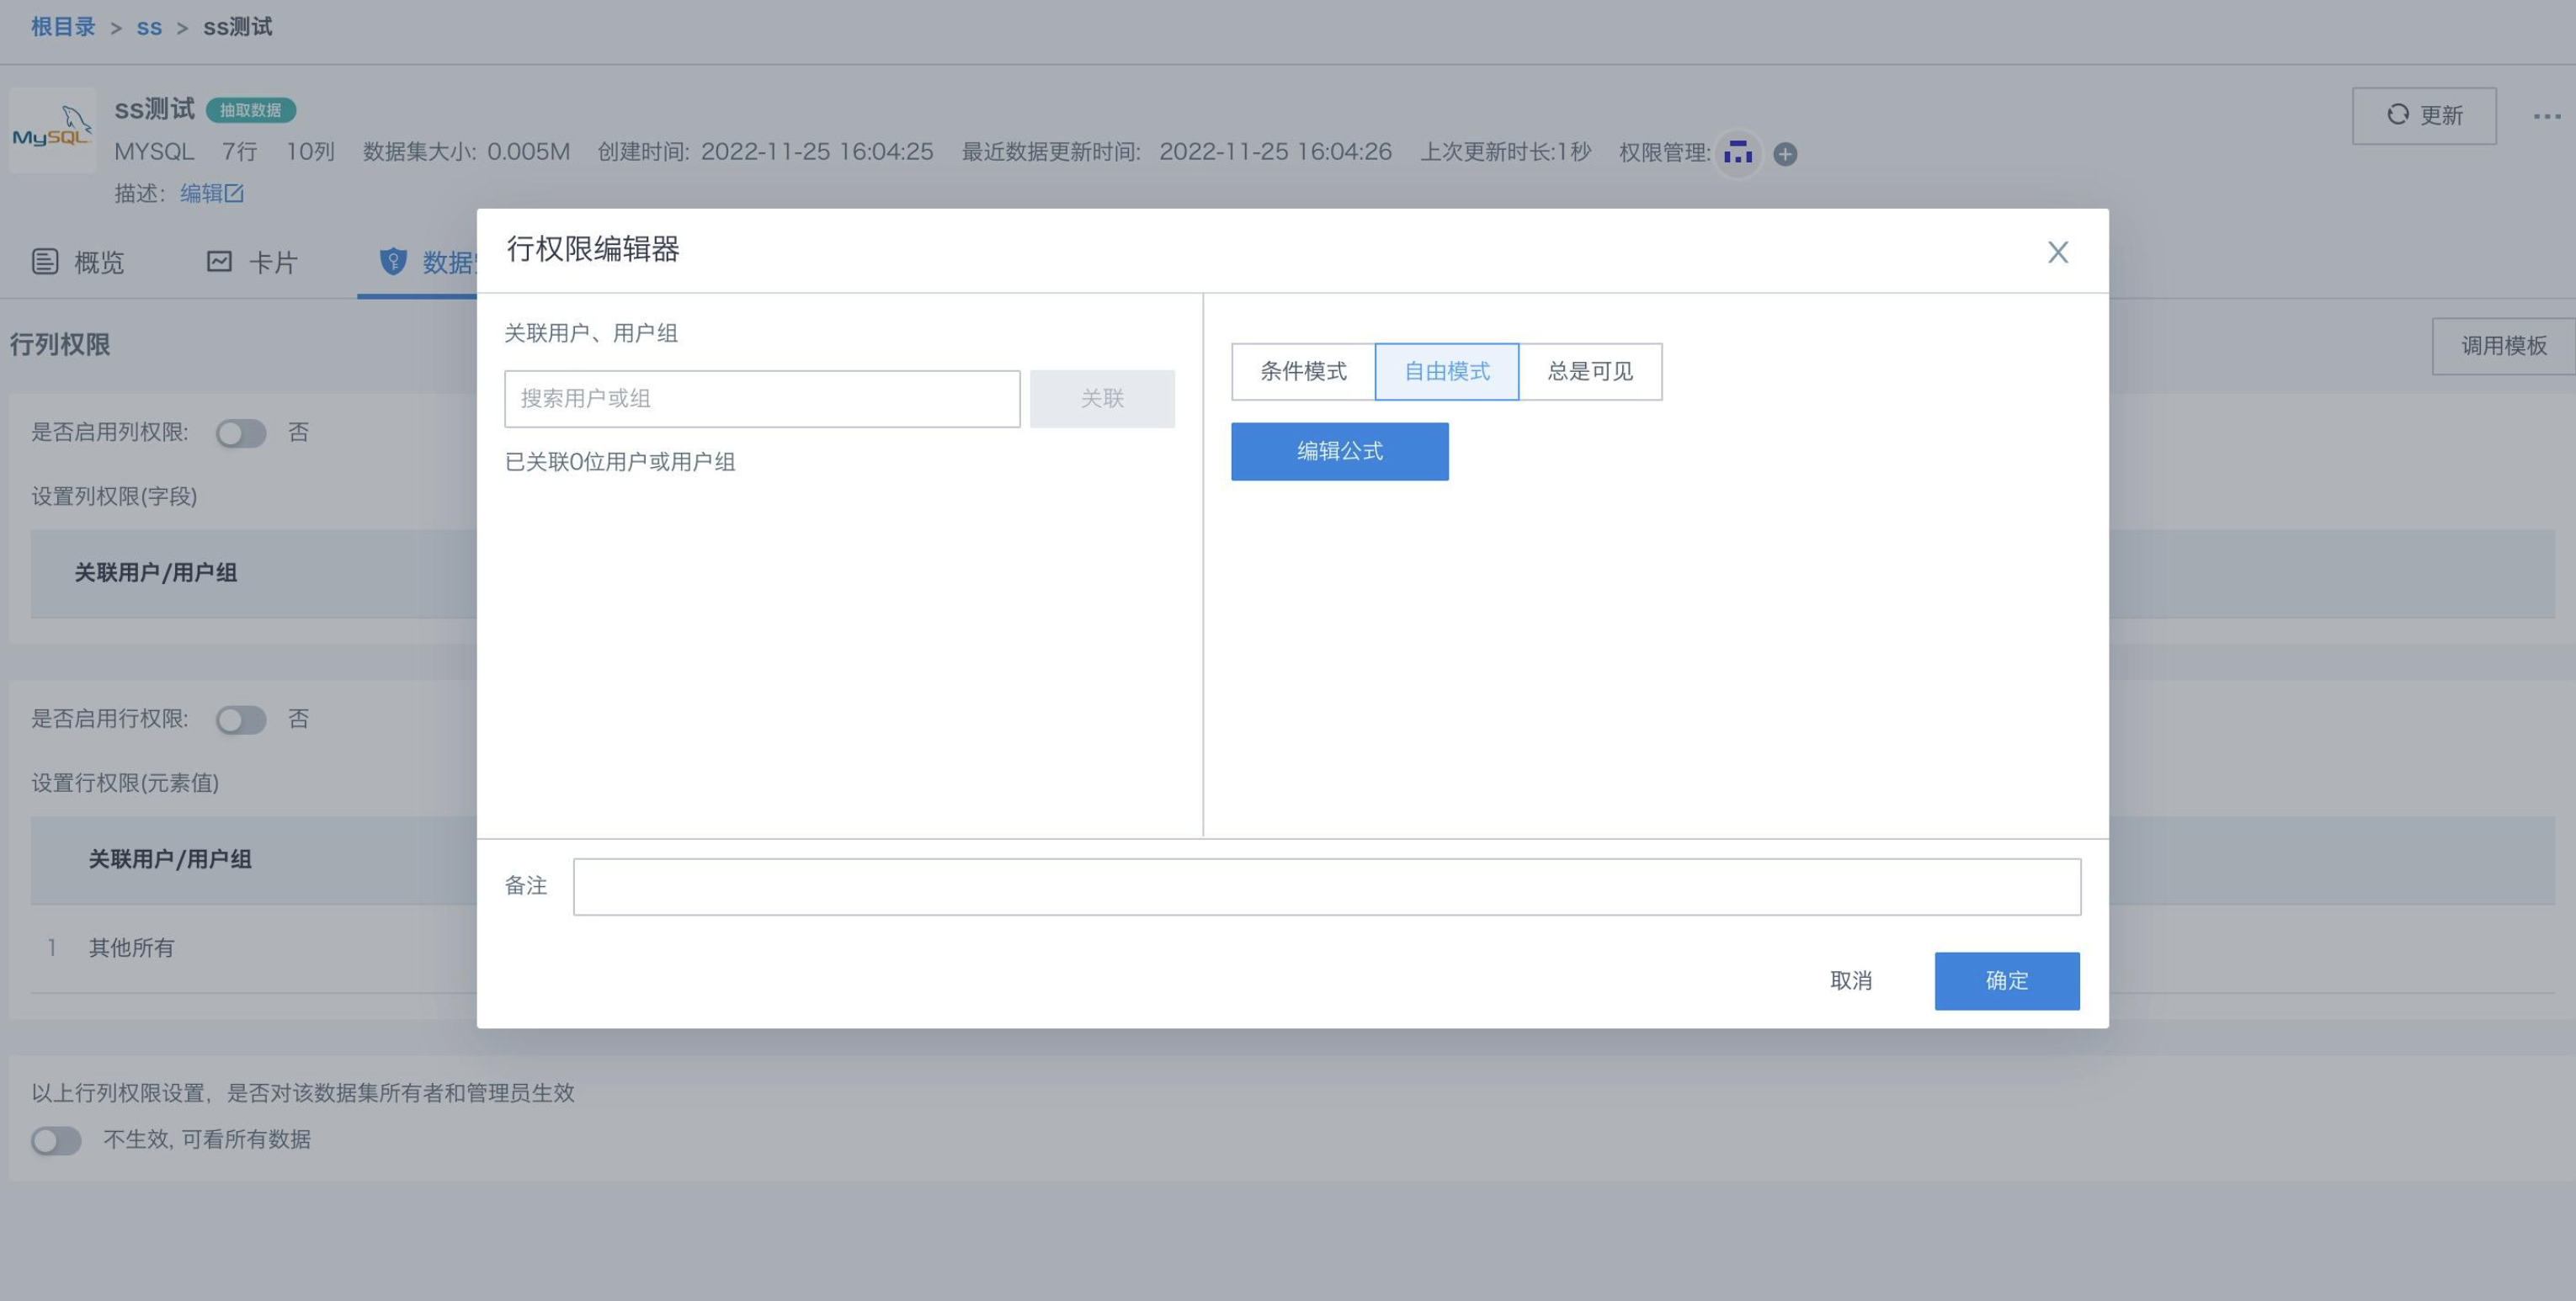
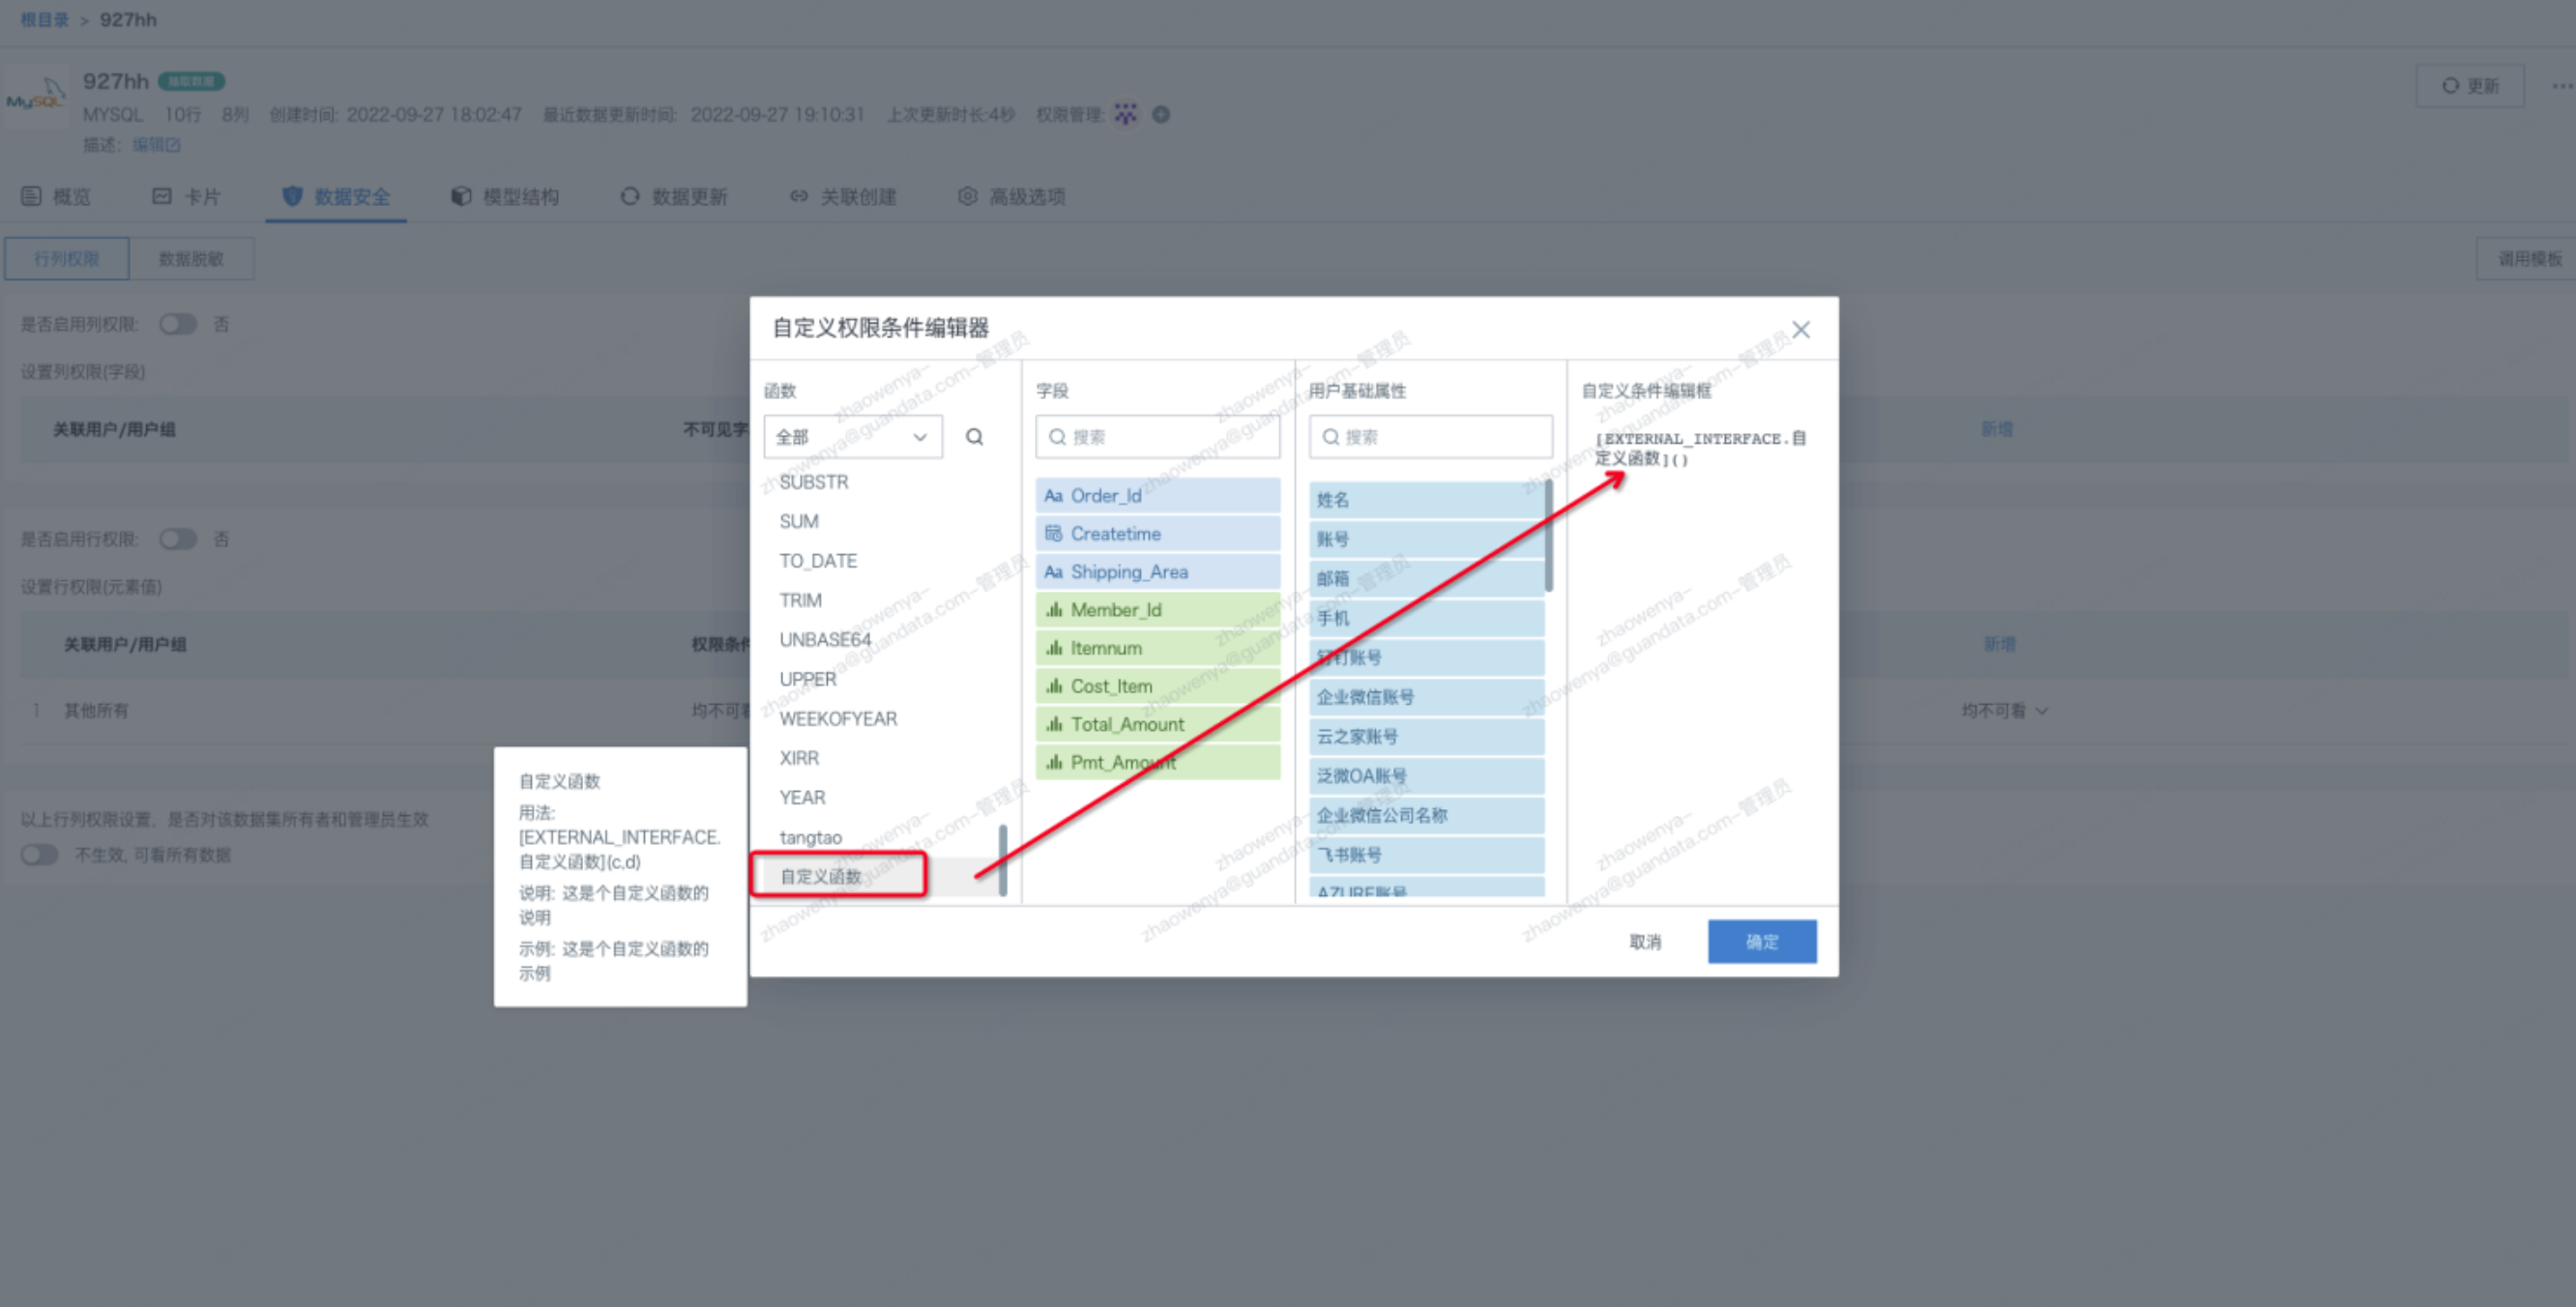
- Created functions will be available in row and column permissions - edit row permissions - free mode.
3. Data Permission Settings
On the "Data Security - Row and Column Permissions" page of the dataset details, as the owner, you can set whether to enable column and row permissions, and set invisible fields for different associated users/user groups. For quick permission control, you can choose Data Security Template. Designed row and column permissions can also be set to take effect for dataset owners and administrators.
3.1 Column Permission Settings
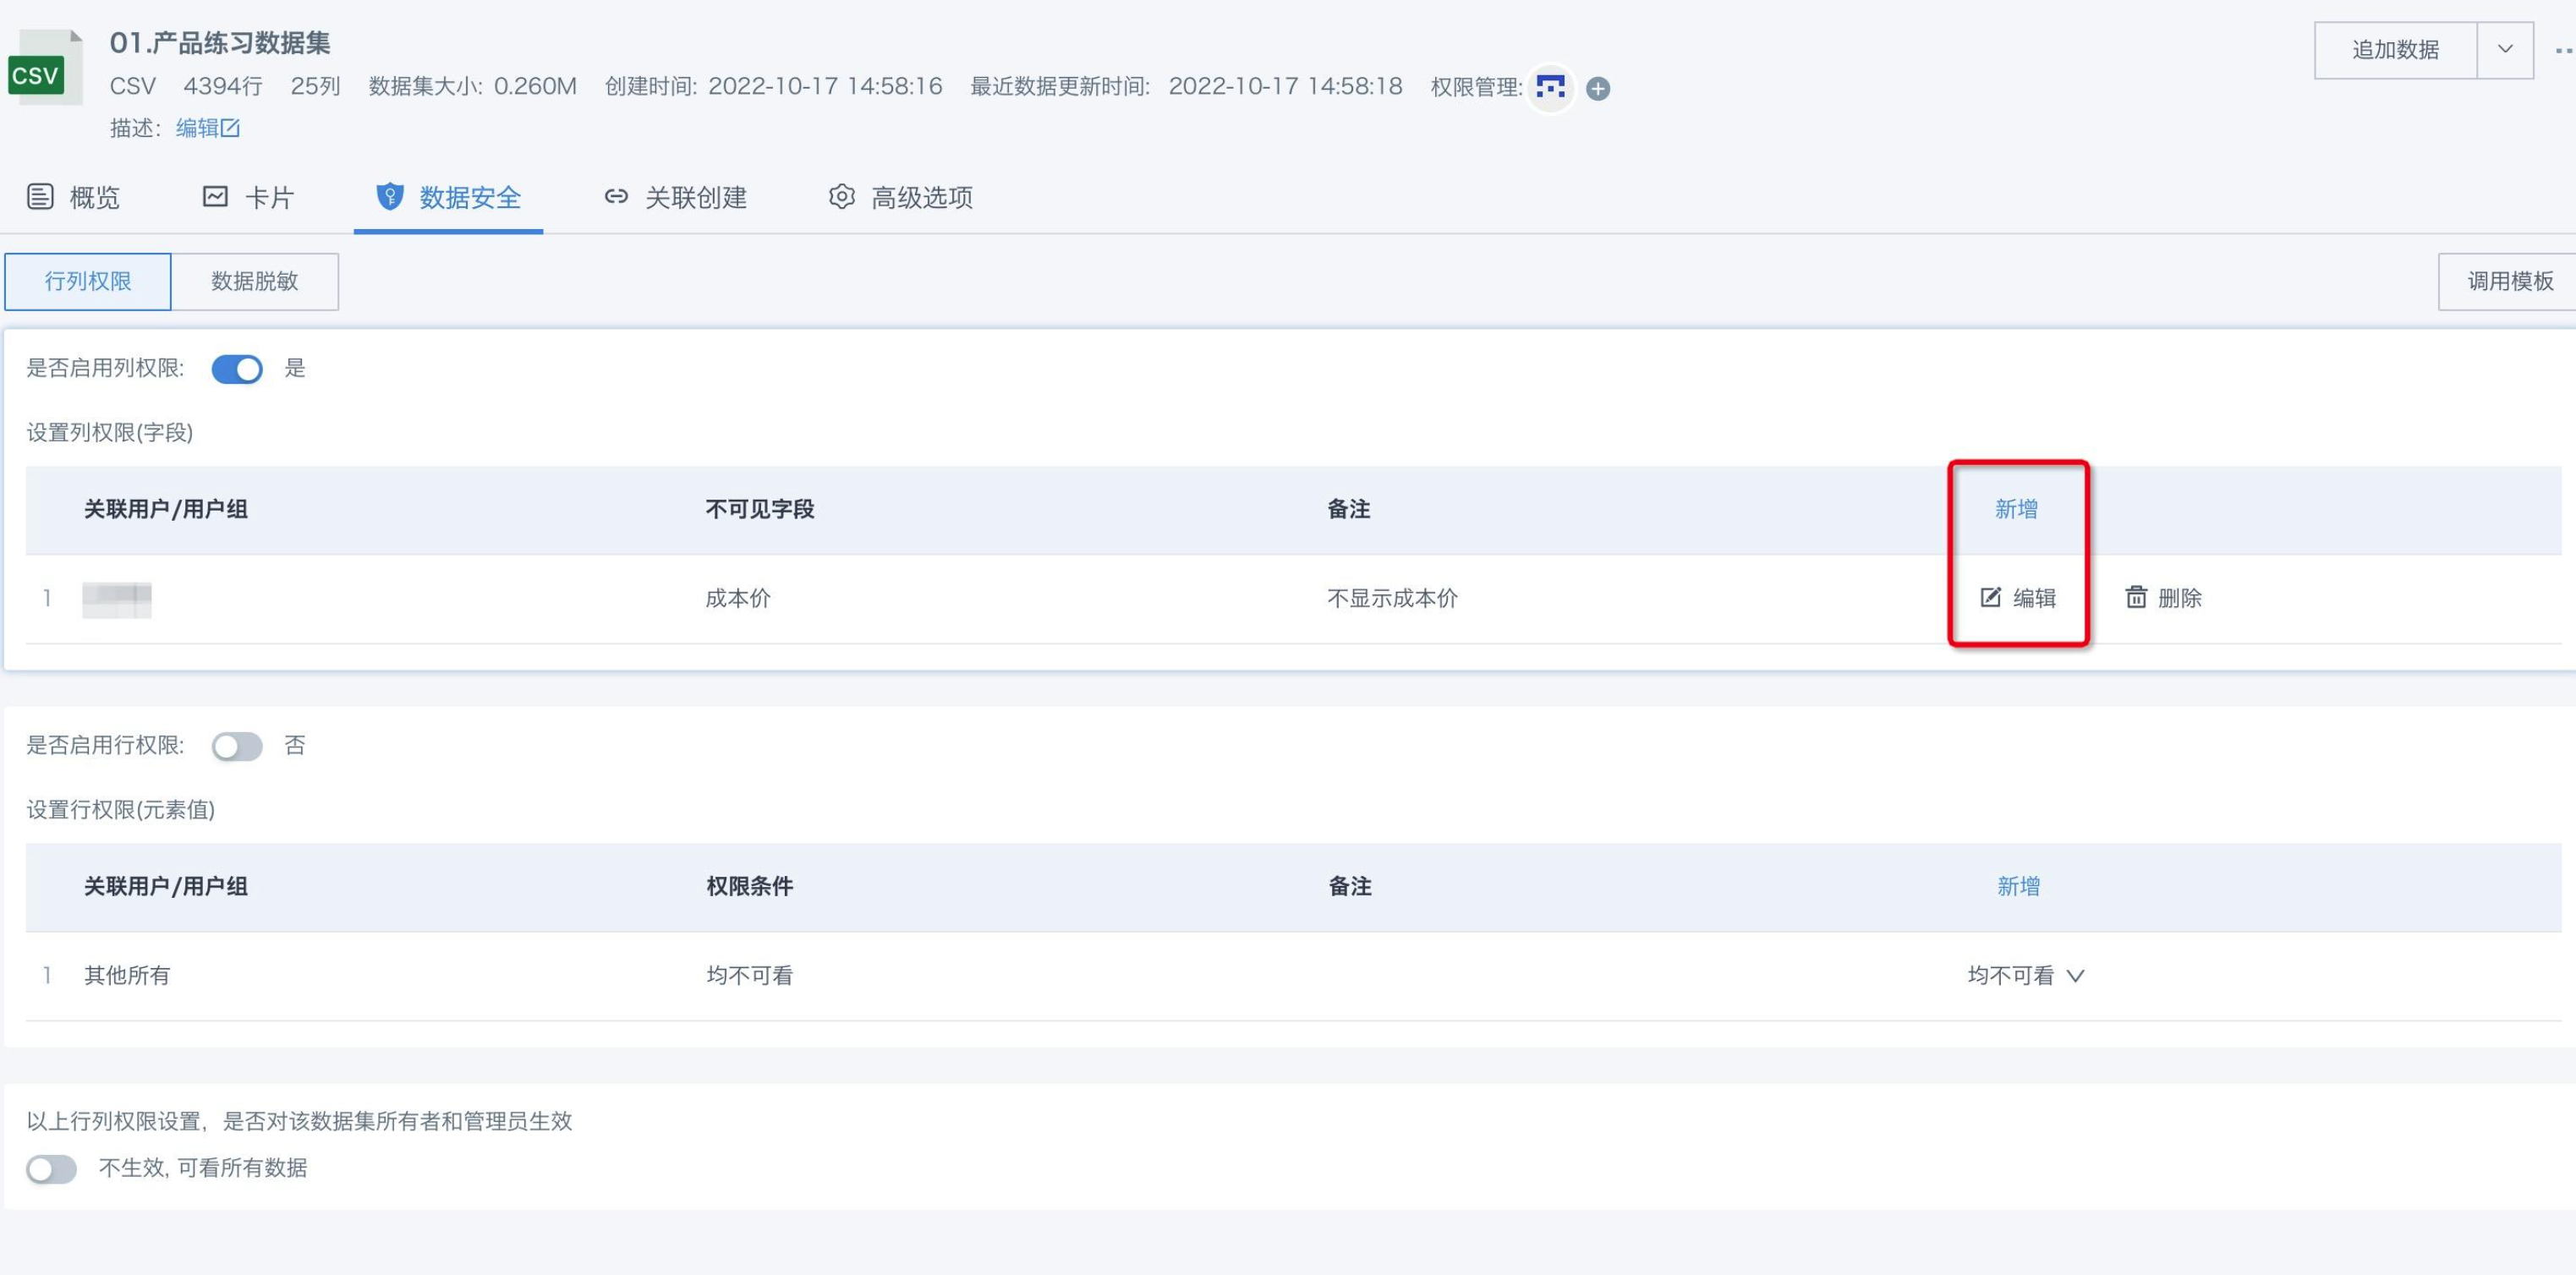
Column permission settings determine which fields users cannot see, e.g., ordinary staff cannot see cost price information.
3.1.1 Steps to Set Column Permissions
Step 1: Click the "Add" button for column permission settings, or click the "Edit" button for an existing column permission to enter the editor.
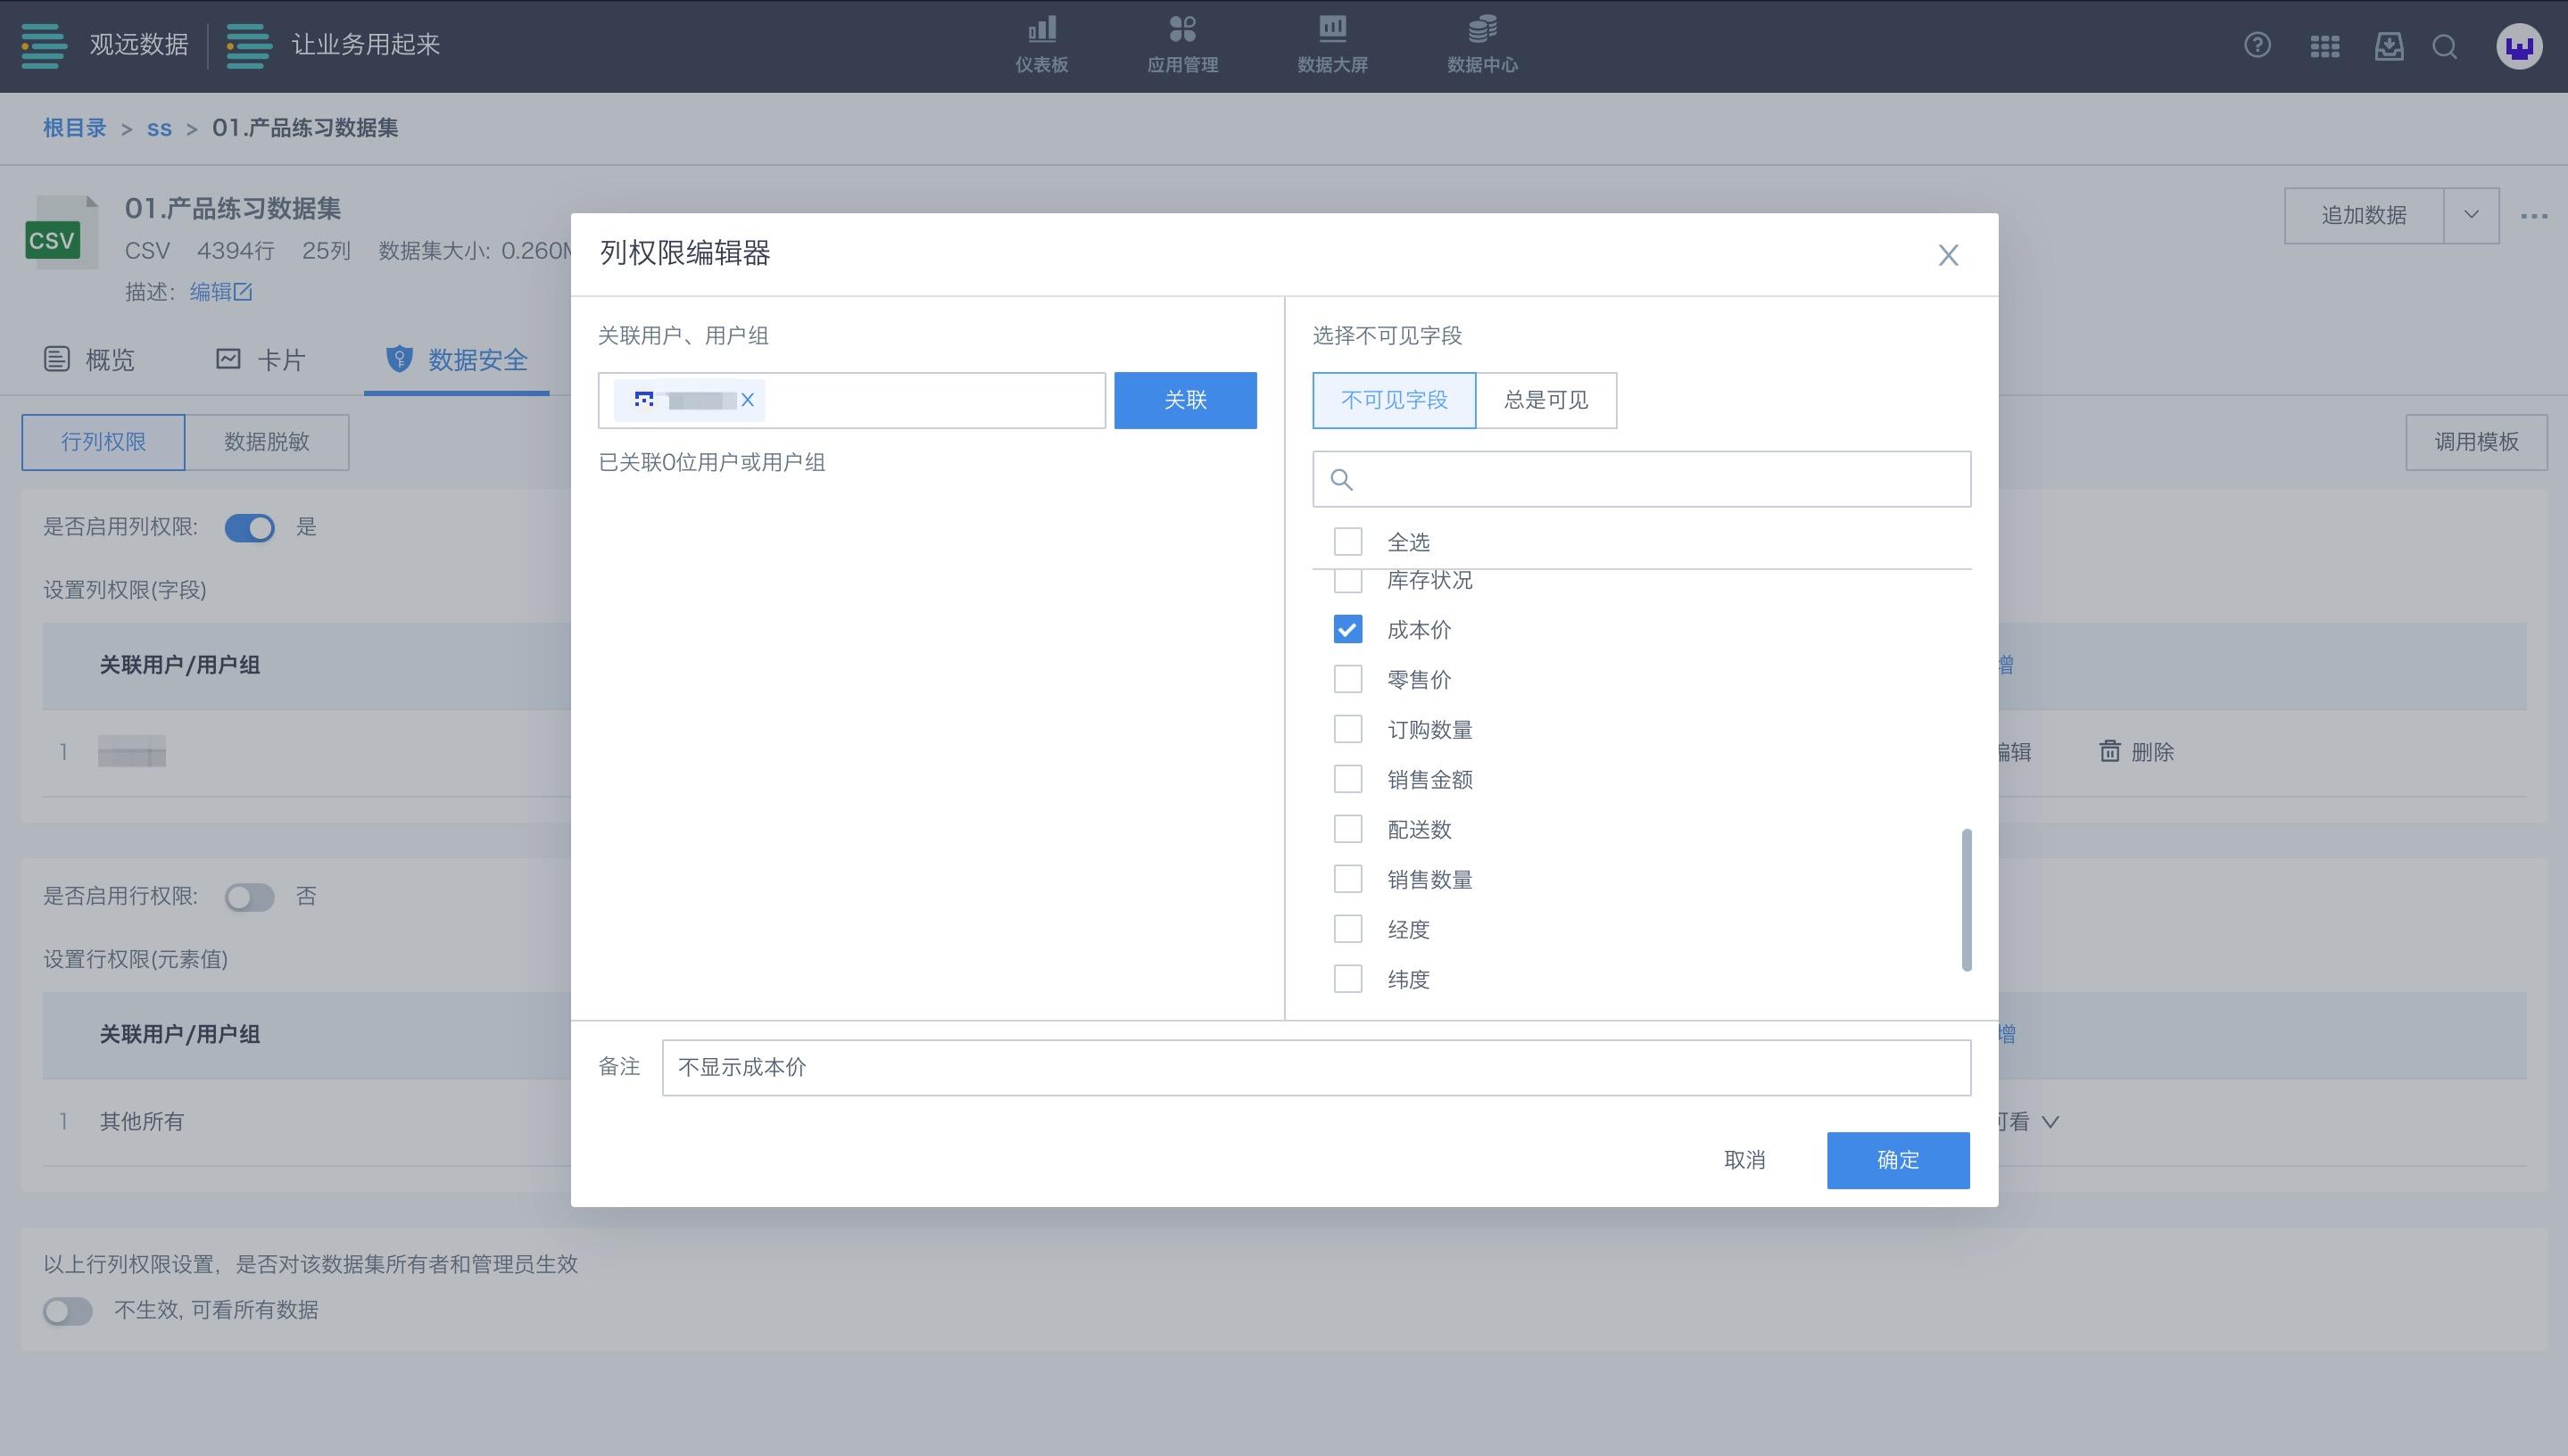
Step 2: Fill in the blank editor for the new column permission, including:
- Object of column permission: select associated user or user group.
- Content of column permission: which content the selected object cannot view.
- Remarks: for quick understanding later.
Step 3: After creating a column permission, if the switch is not turned on, the permission does not take effect; after turning it on, it takes effect.

3.1.2 Example of Column Permission Effect
Before enabling column permissions, salesperson A can see all information.
After enabling, salesperson A cannot see cost price information.
.png)
3.1.3 Special Cases
When a user is in different user groups with different column permissions, the data the user cannot see is the intersection of the data not visible to both groups.
For example, if a dataset has 5 fields, user group A cannot see fields 1 and 2, and group B cannot see fields 2 and 3, then the user cannot see field 2, but can see fields 1 and 3.
3.2 Row Permission Settings
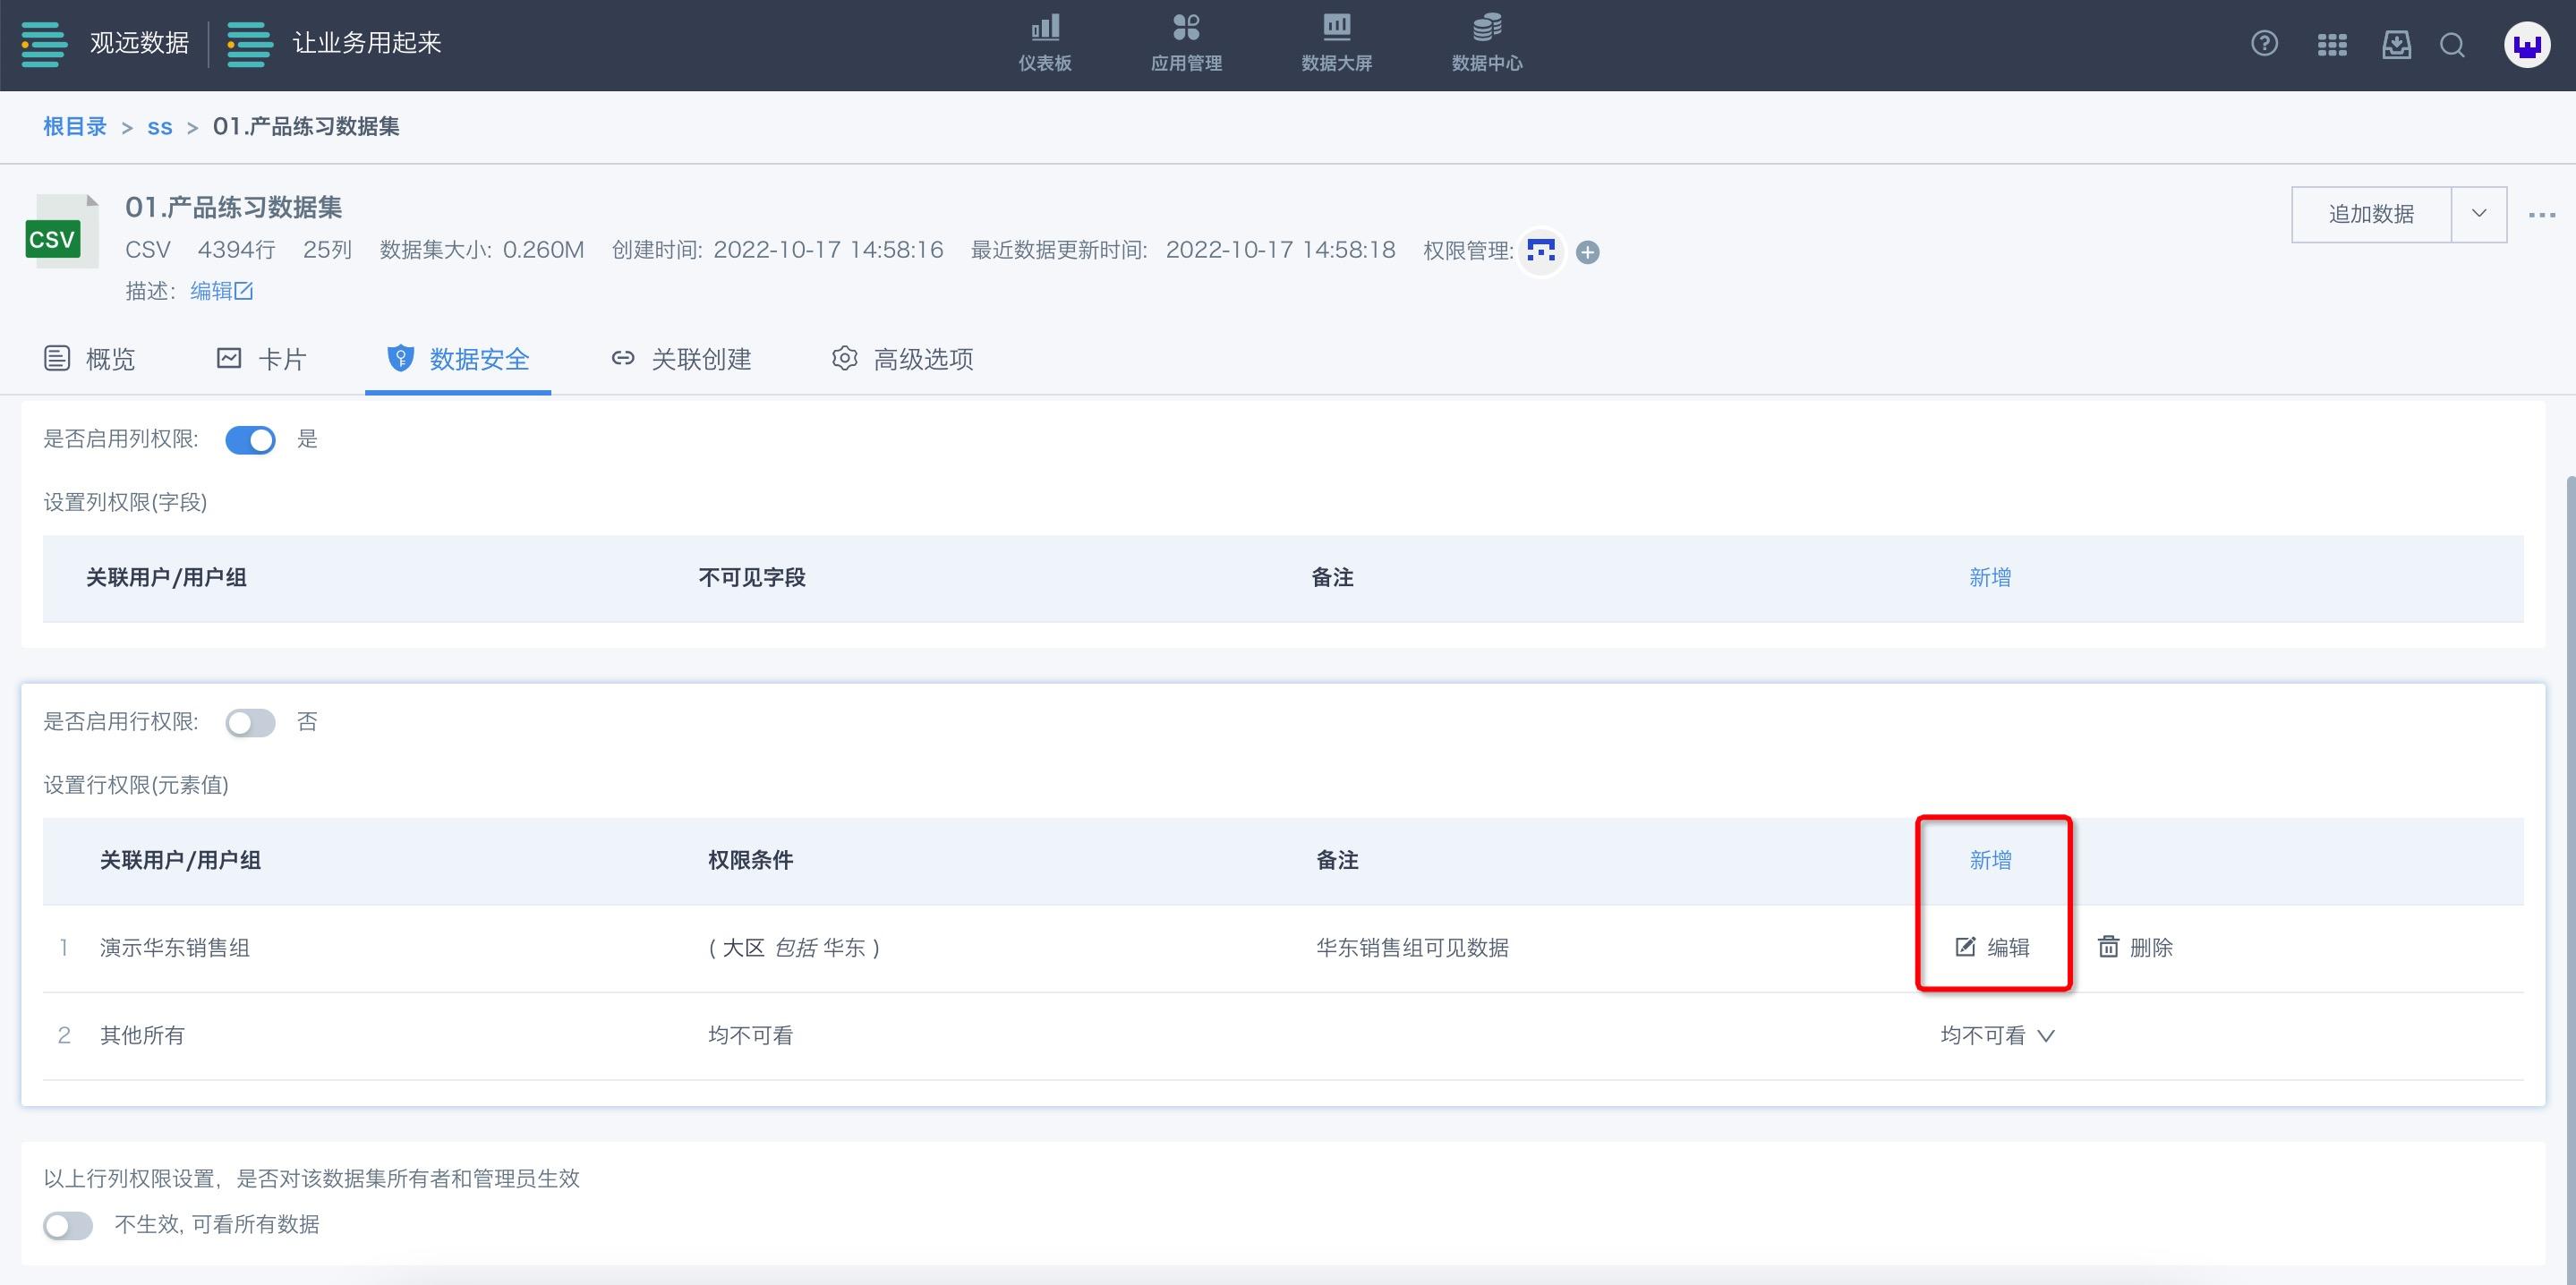
Row permission settings determine which information users can see under each field, e.g., sales staff in East China can only see East China data, not North or South China data.
3.2.1 Steps to Set Row Permissions
Step 1: Click the "Add" button for row permission settings, or click the "Edit" button for an existing row permission to enter the editor.
Step 2: Fill in the blank editor for the new row permission, including:
- Object of row permission: select associated user or user group.
- Content of row permission: which rows the selected object can view.
- Remarks: for quick understanding or searching later.
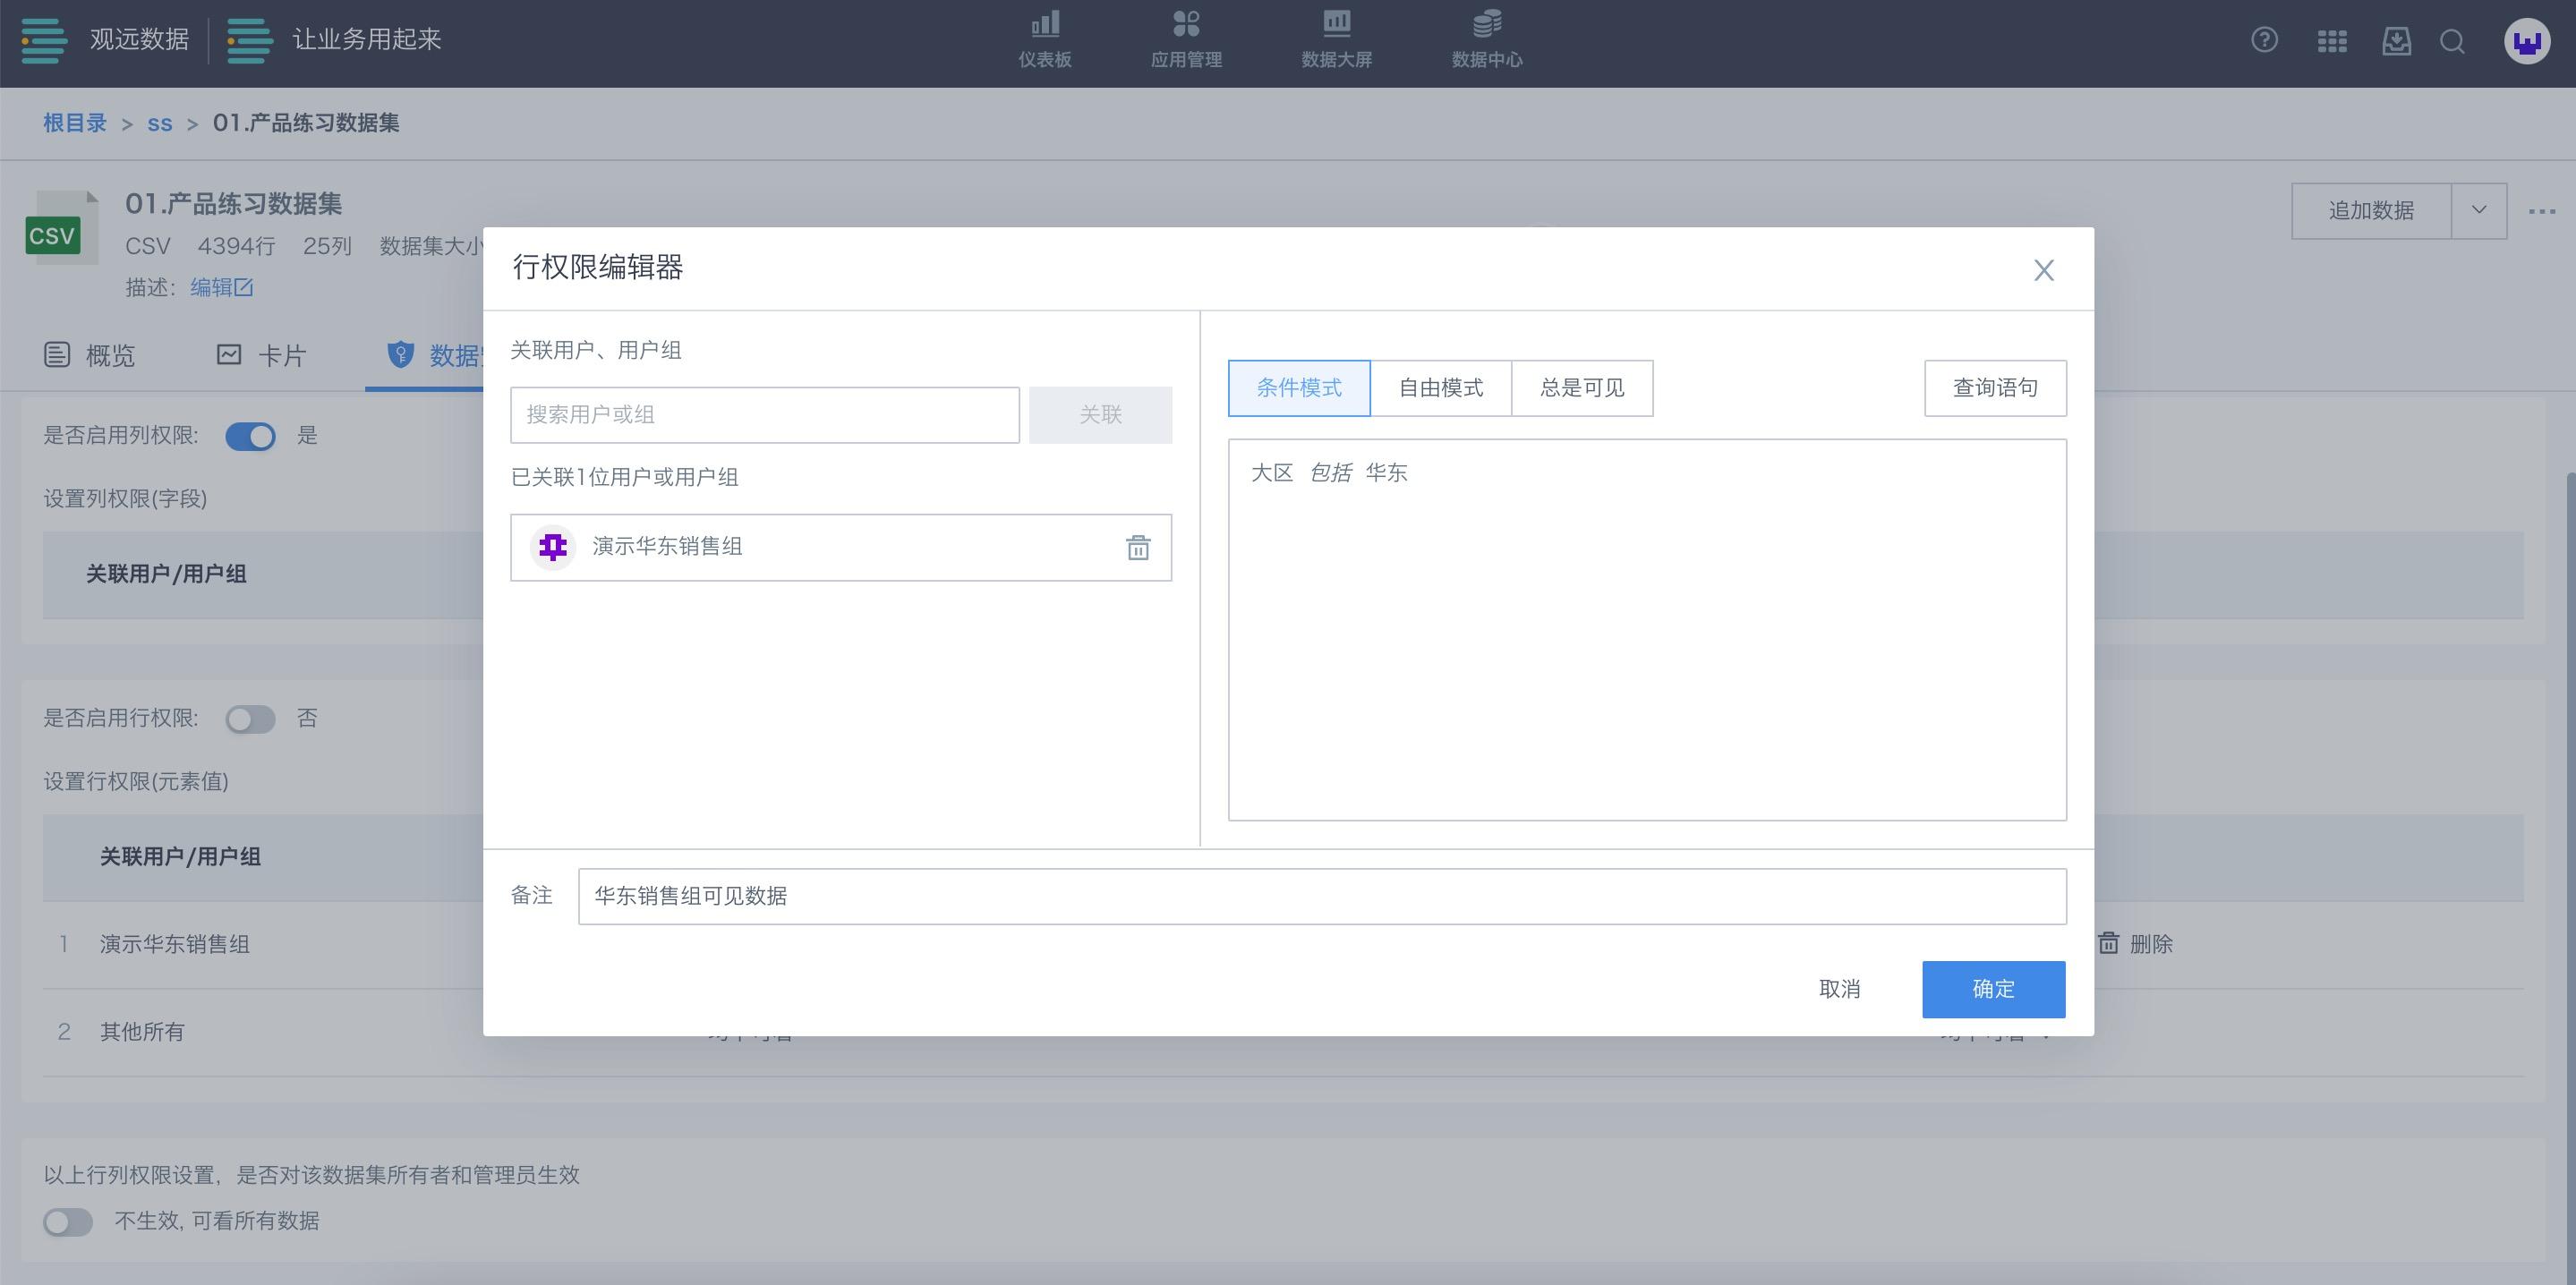
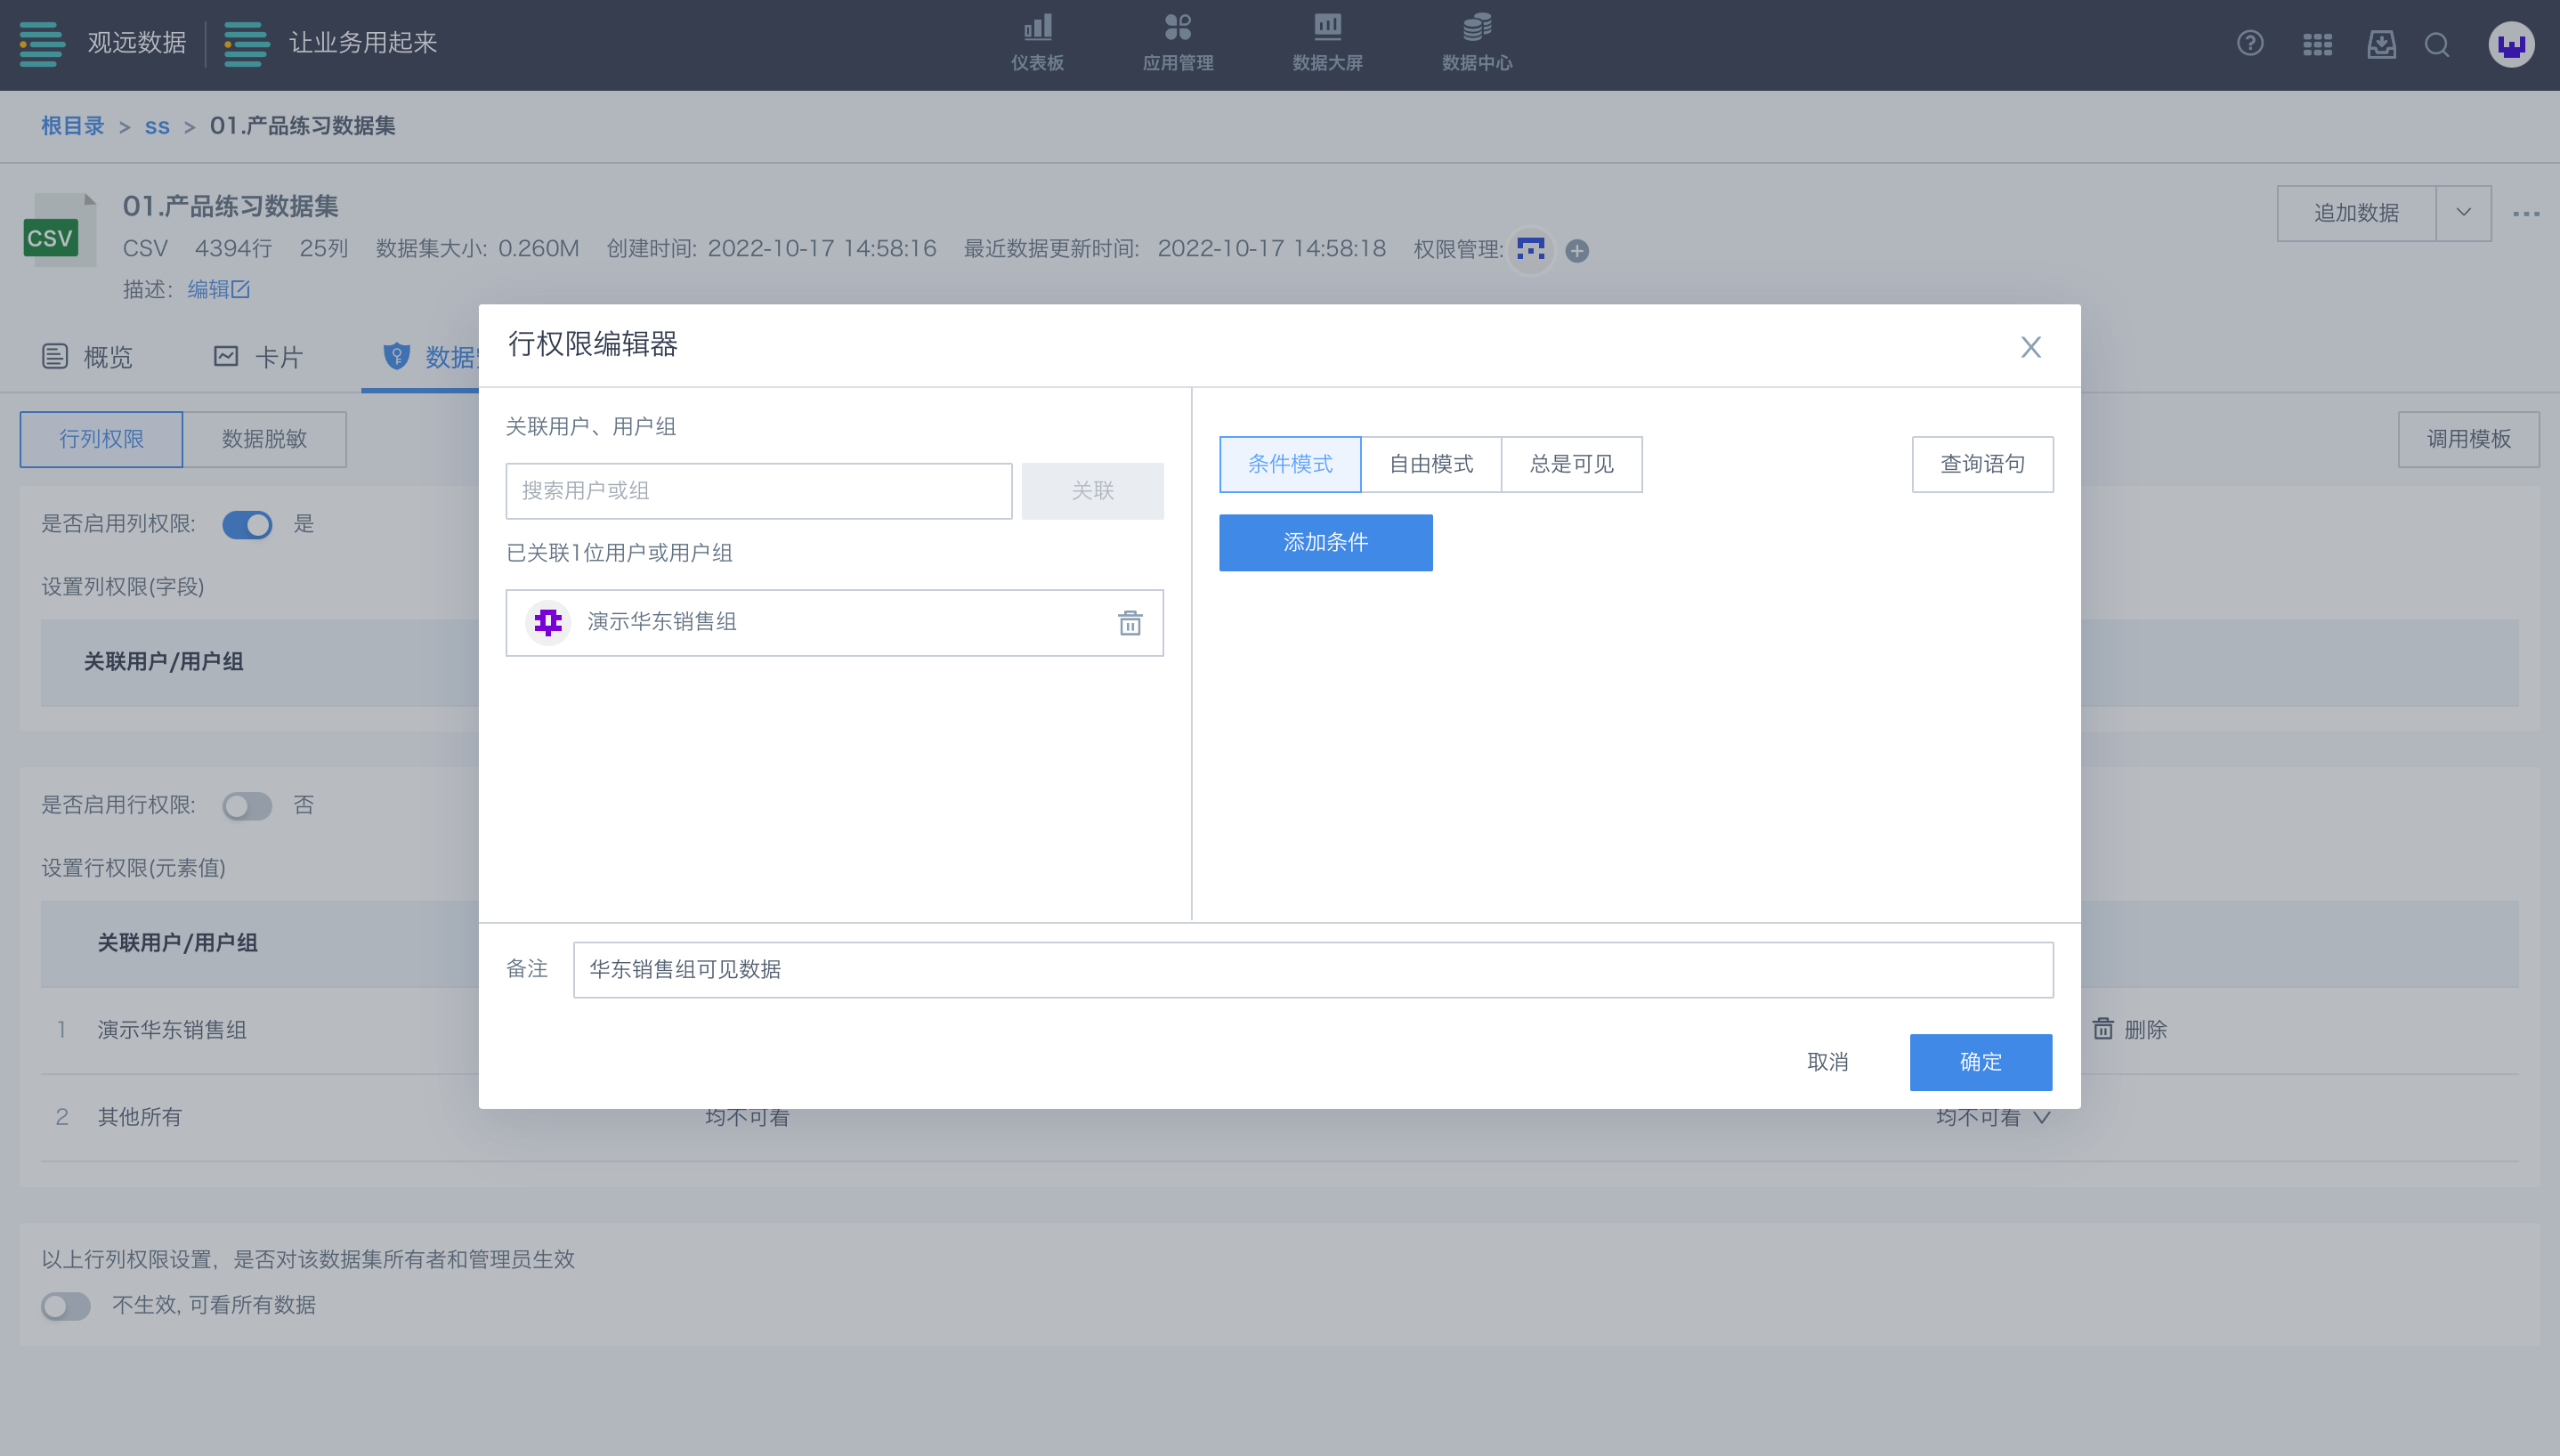
Row permission content has two editing modes: condition mode and free mode.
(1) Condition mode: Use existing fields and values for filtering.
As shown, only members of the East China sales group can view East China data; other regions are not visible.
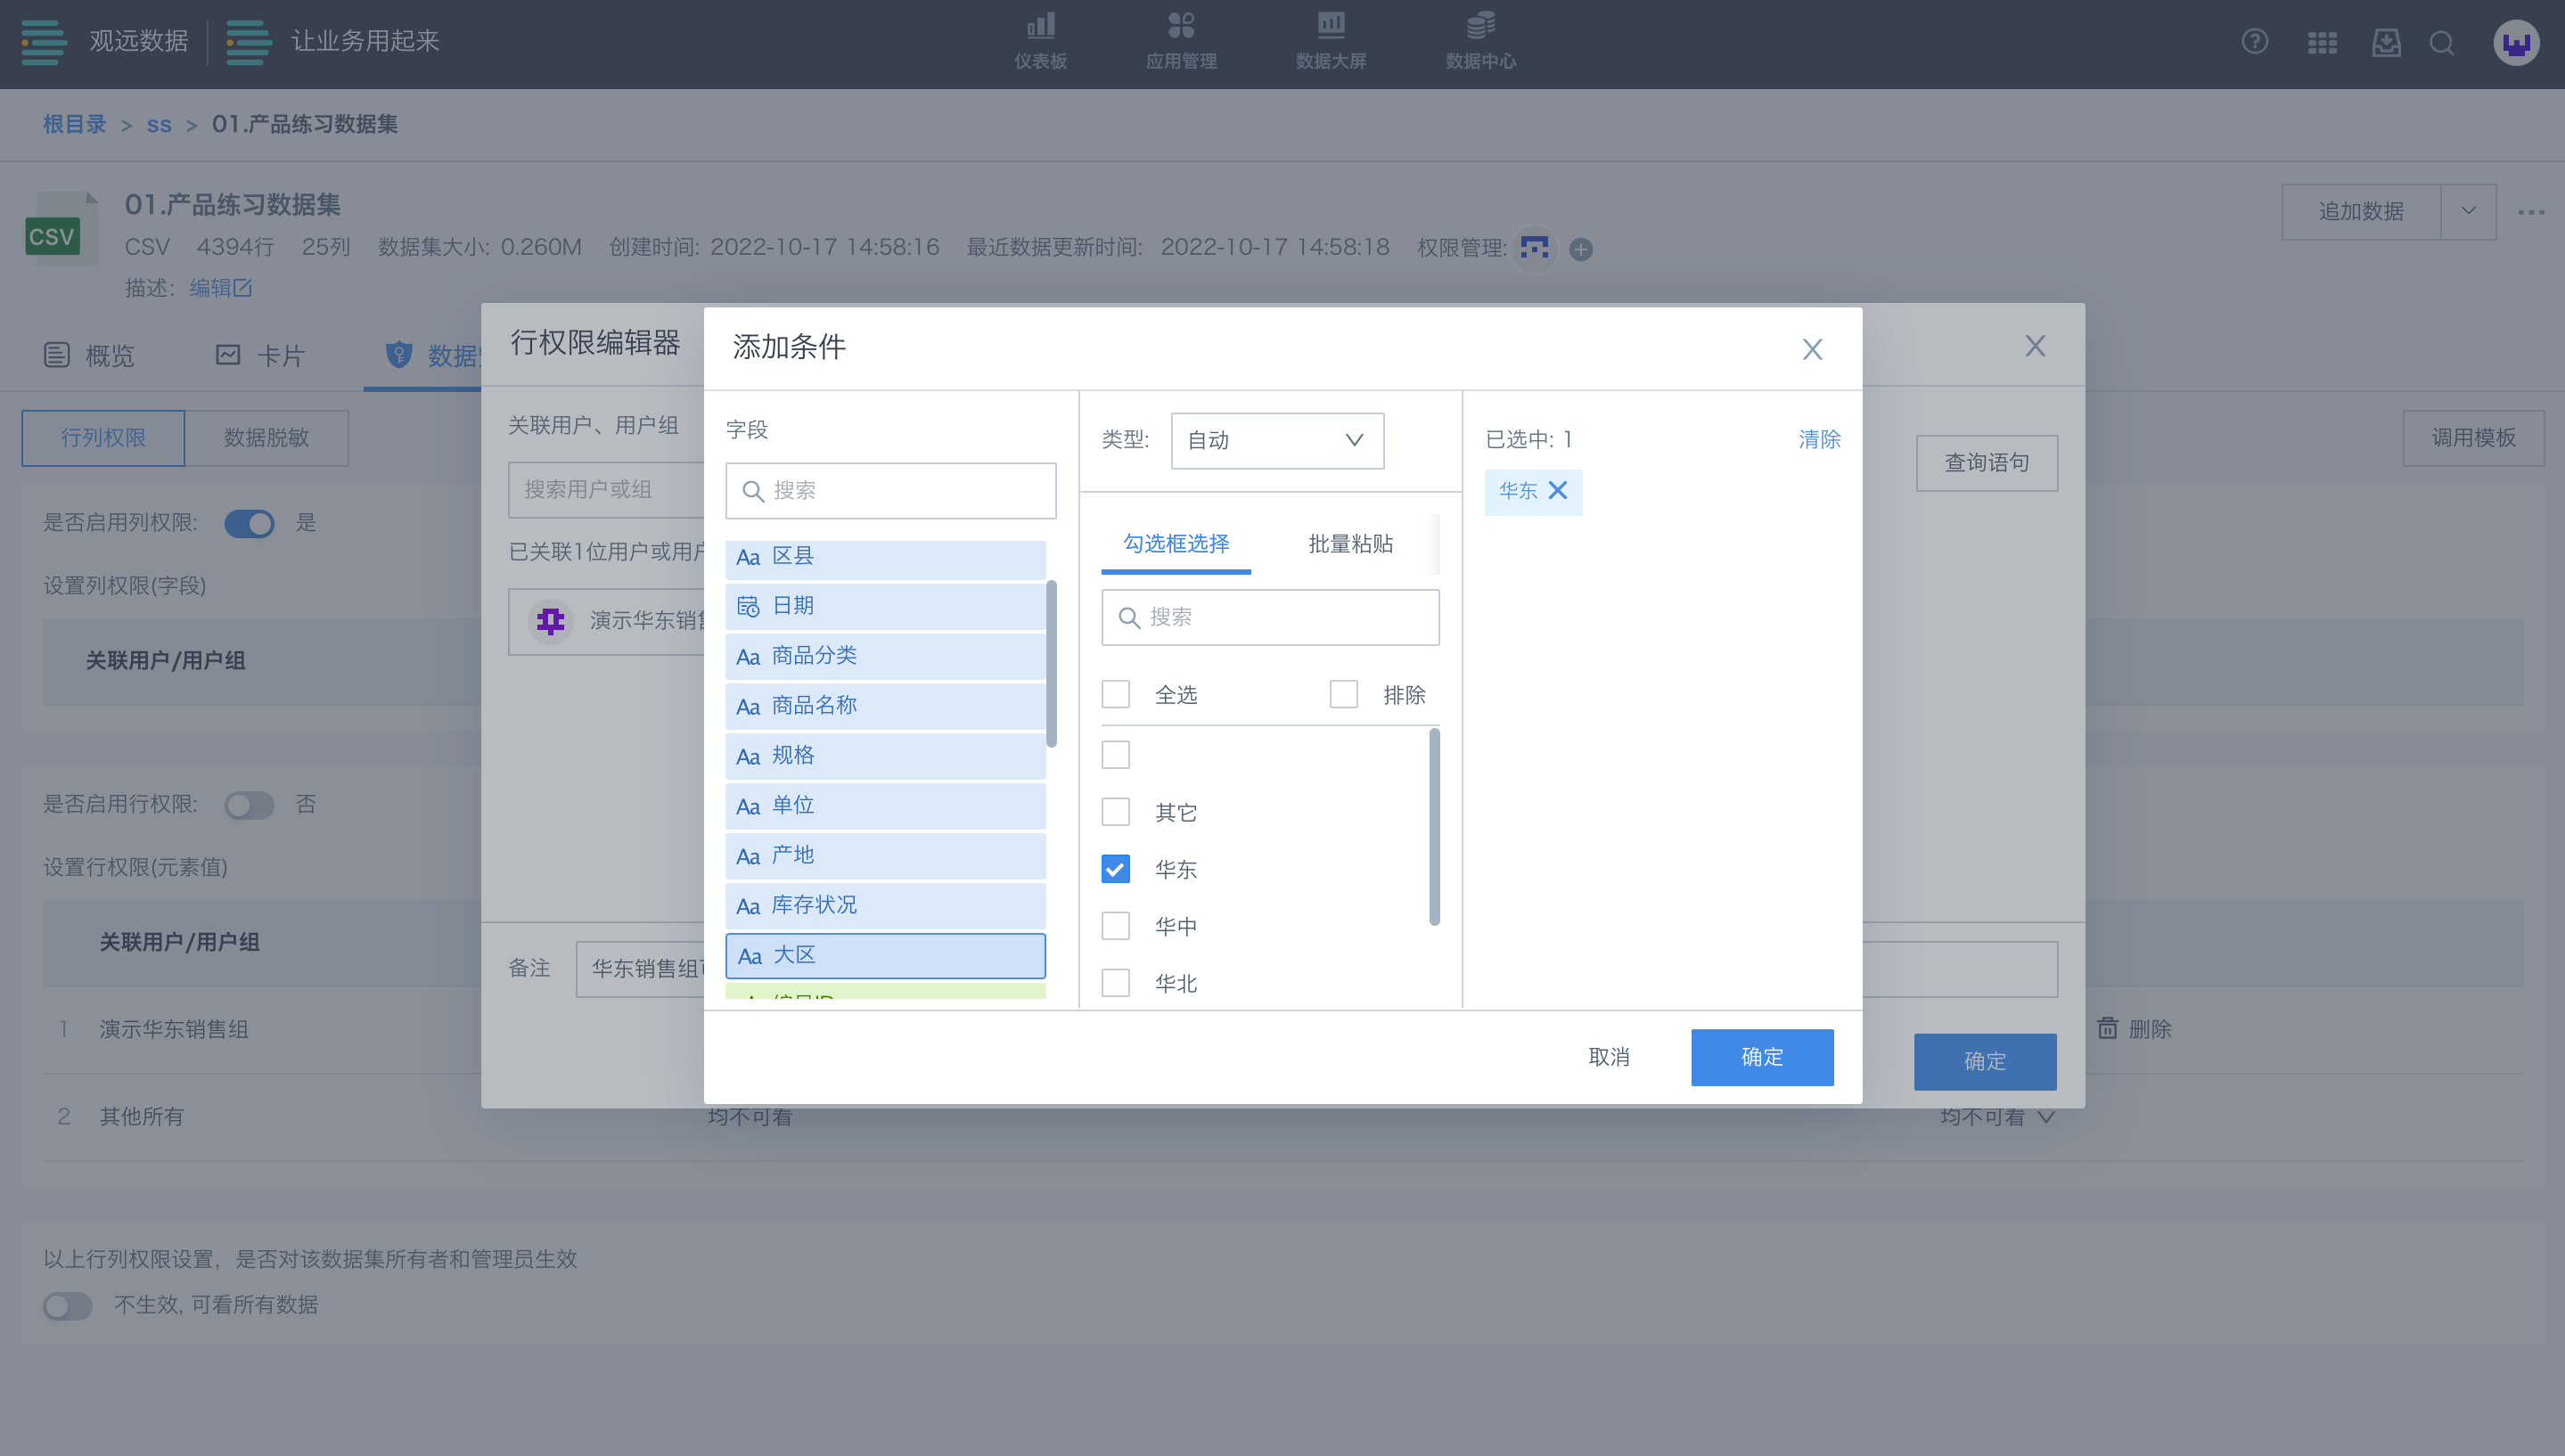
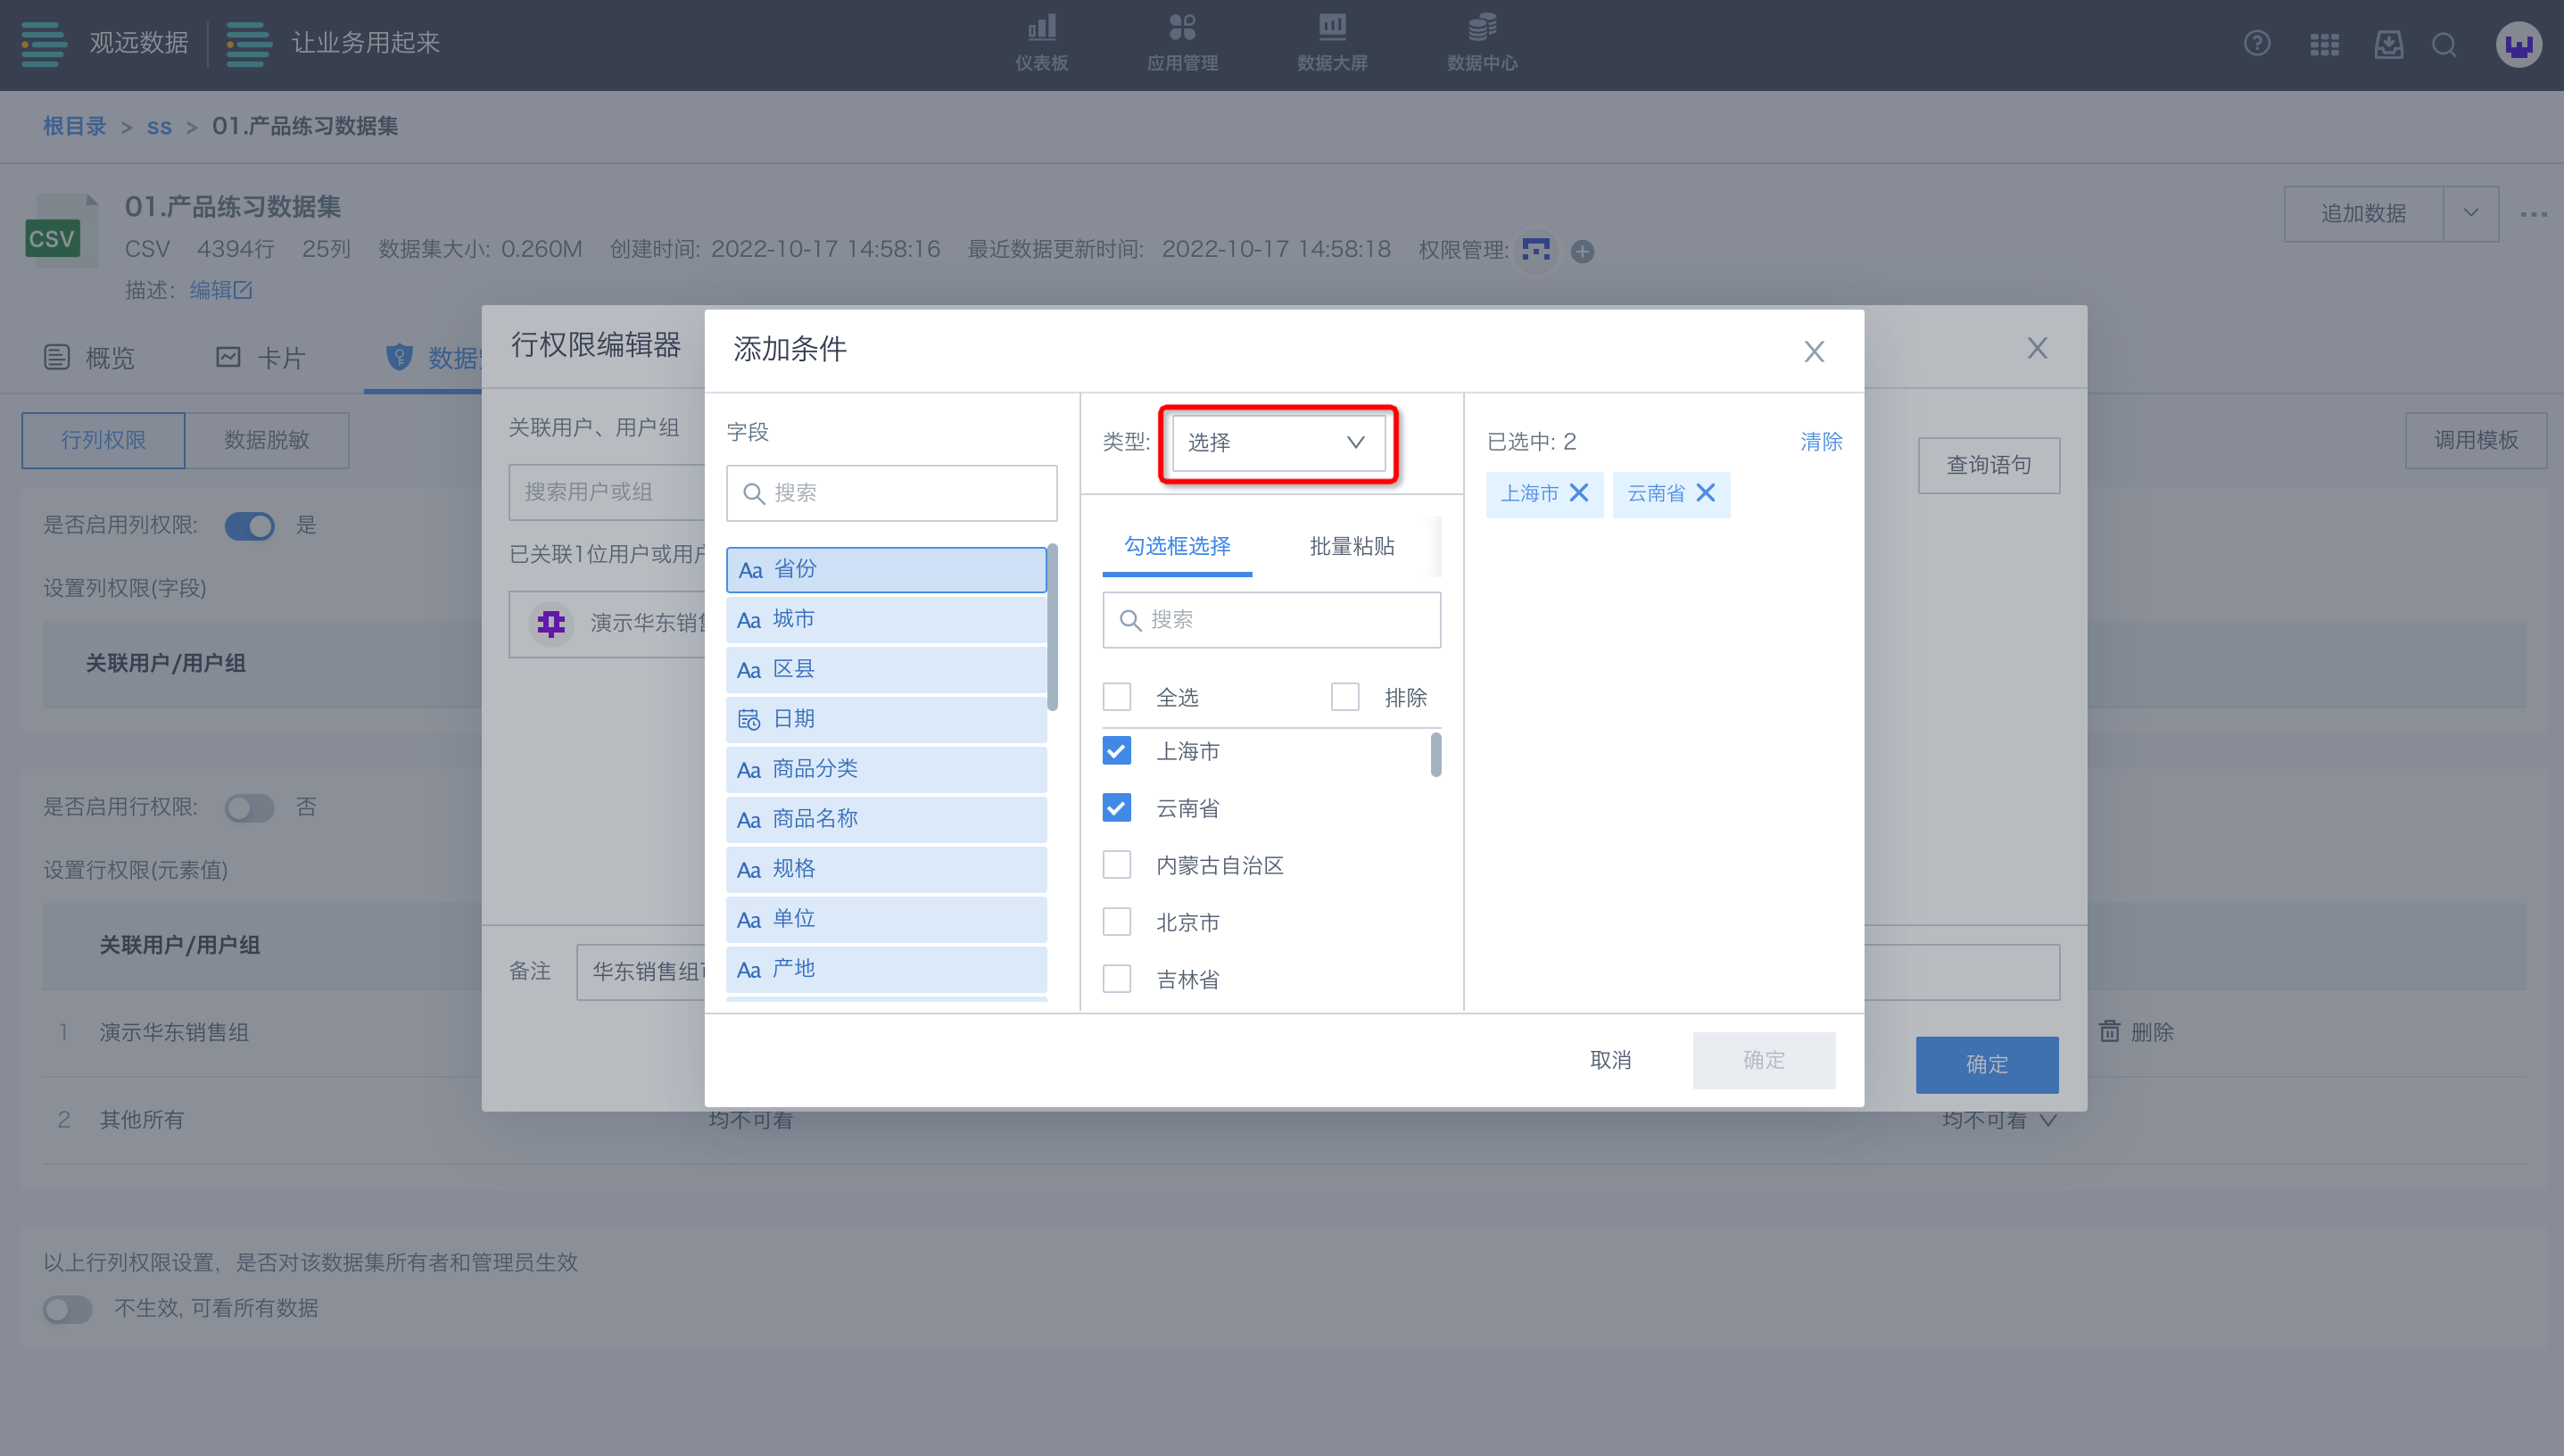
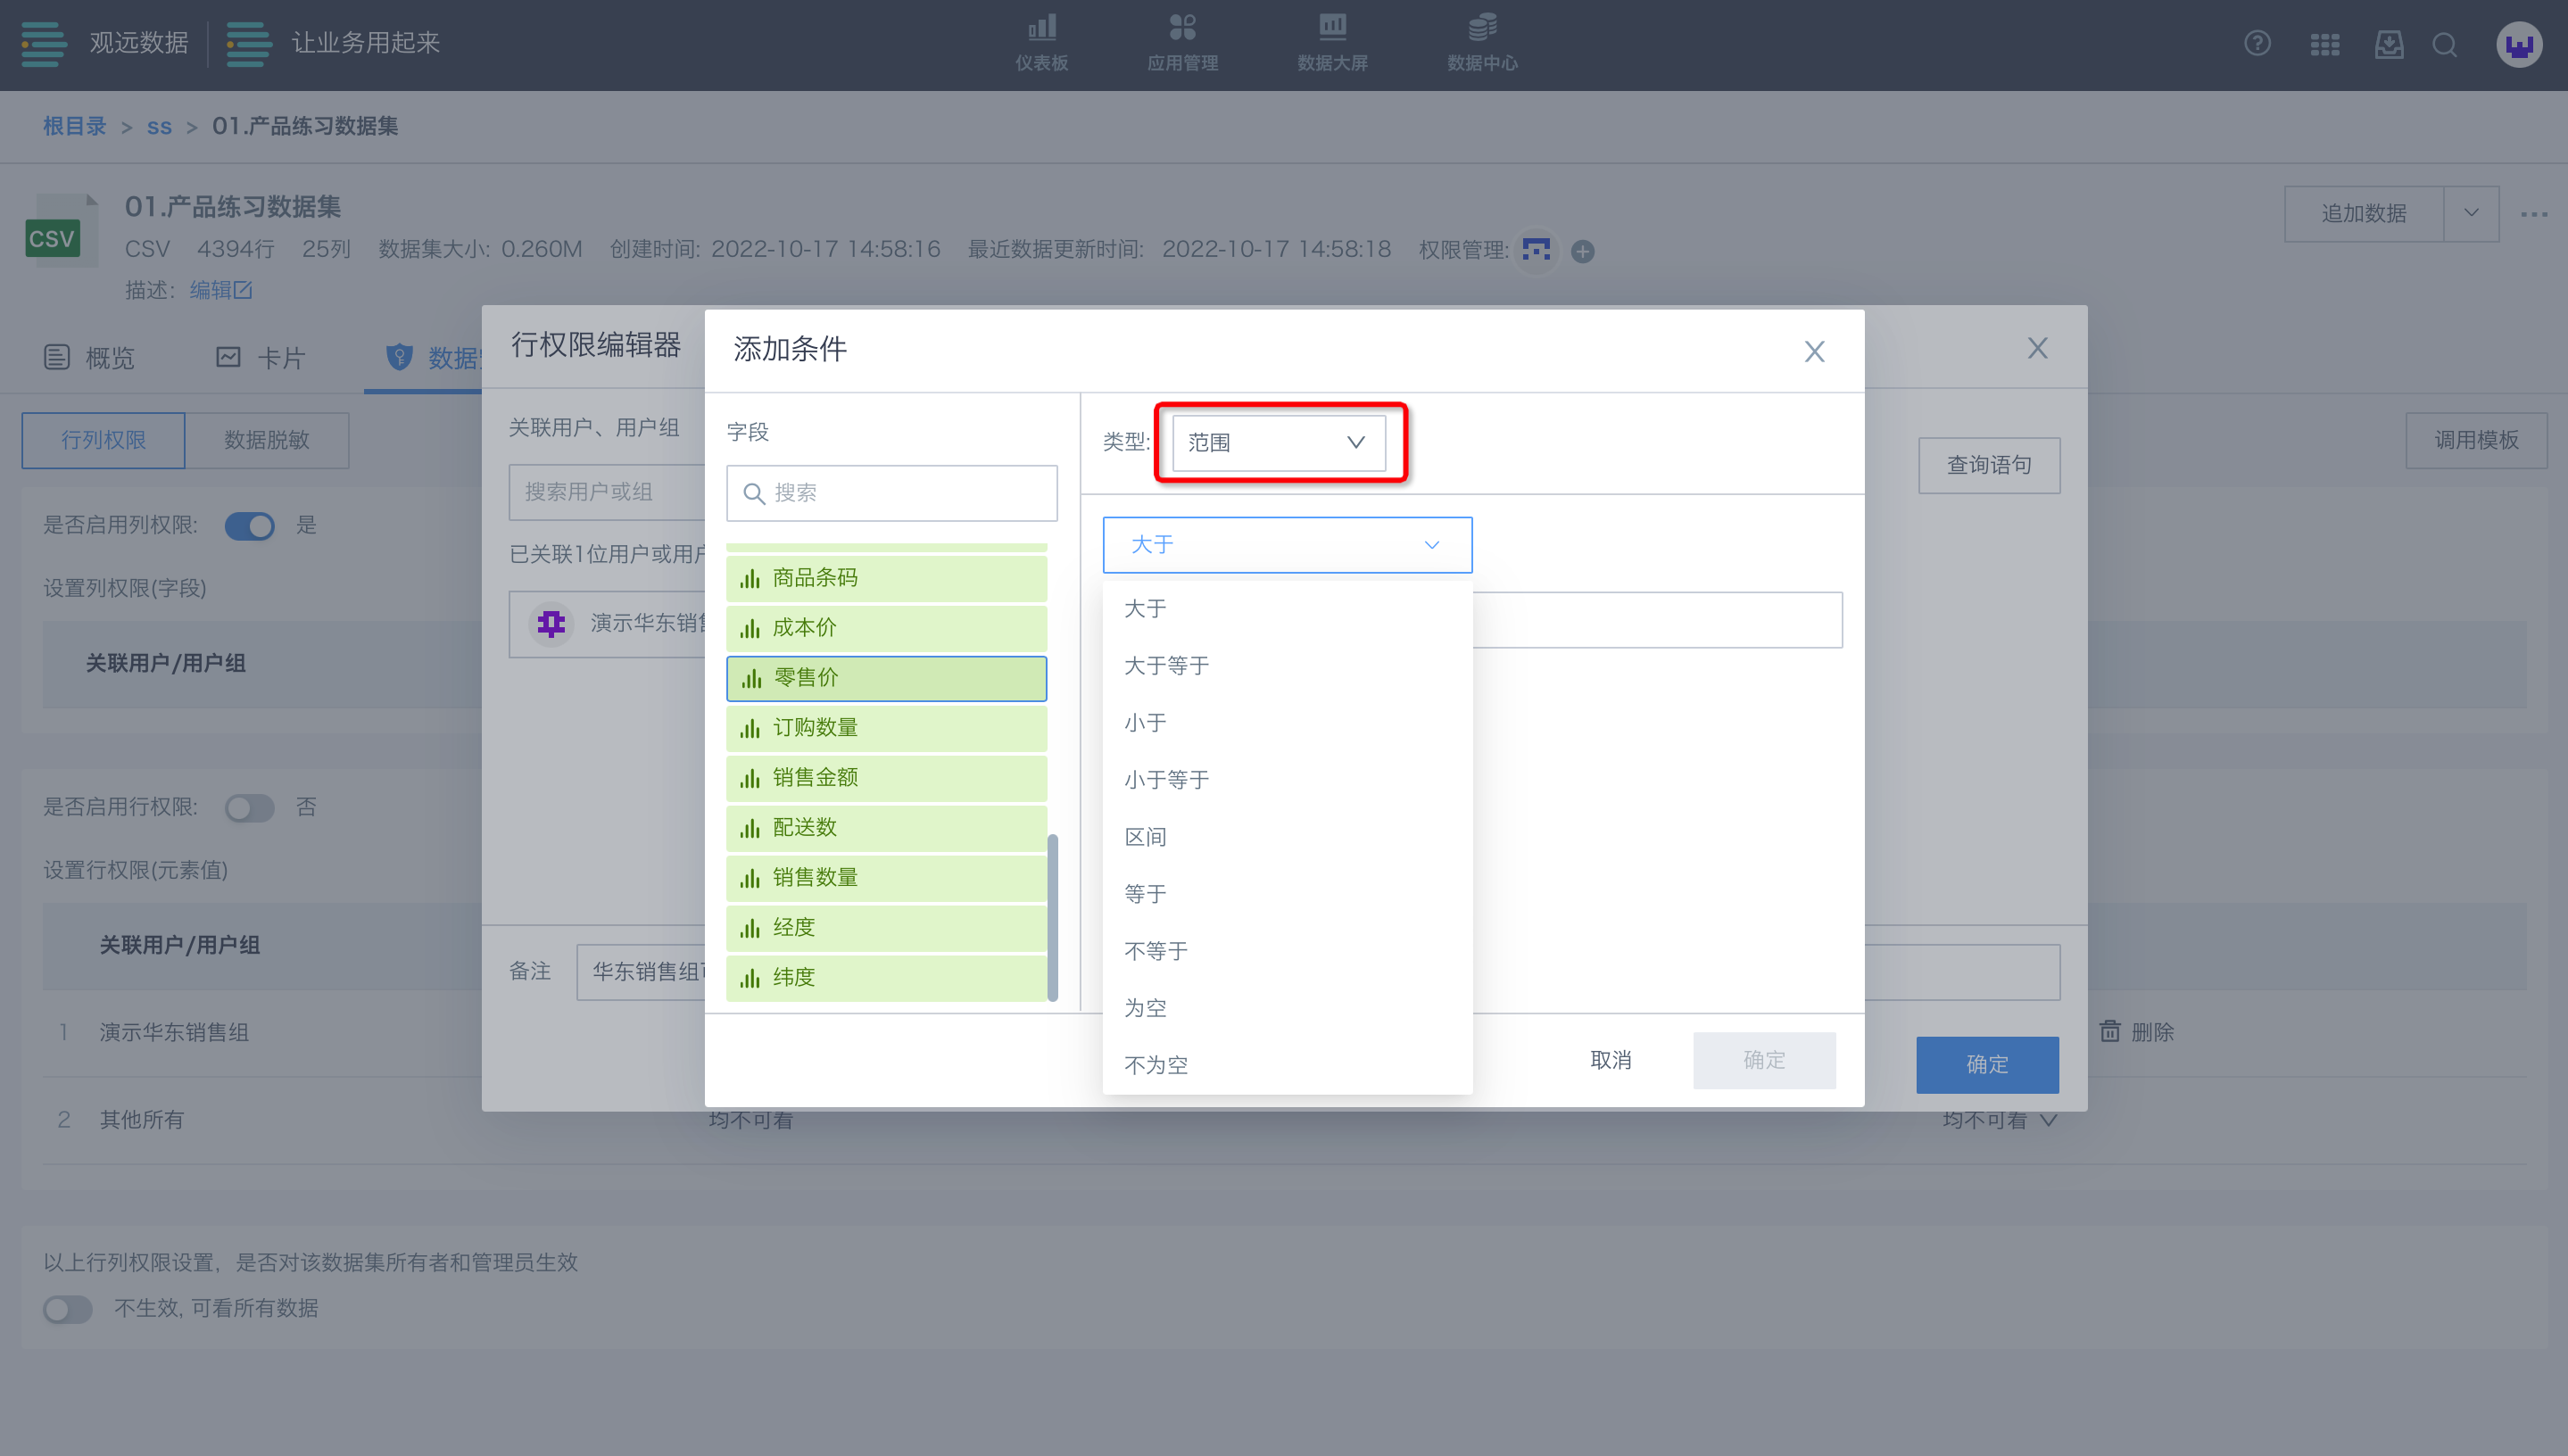
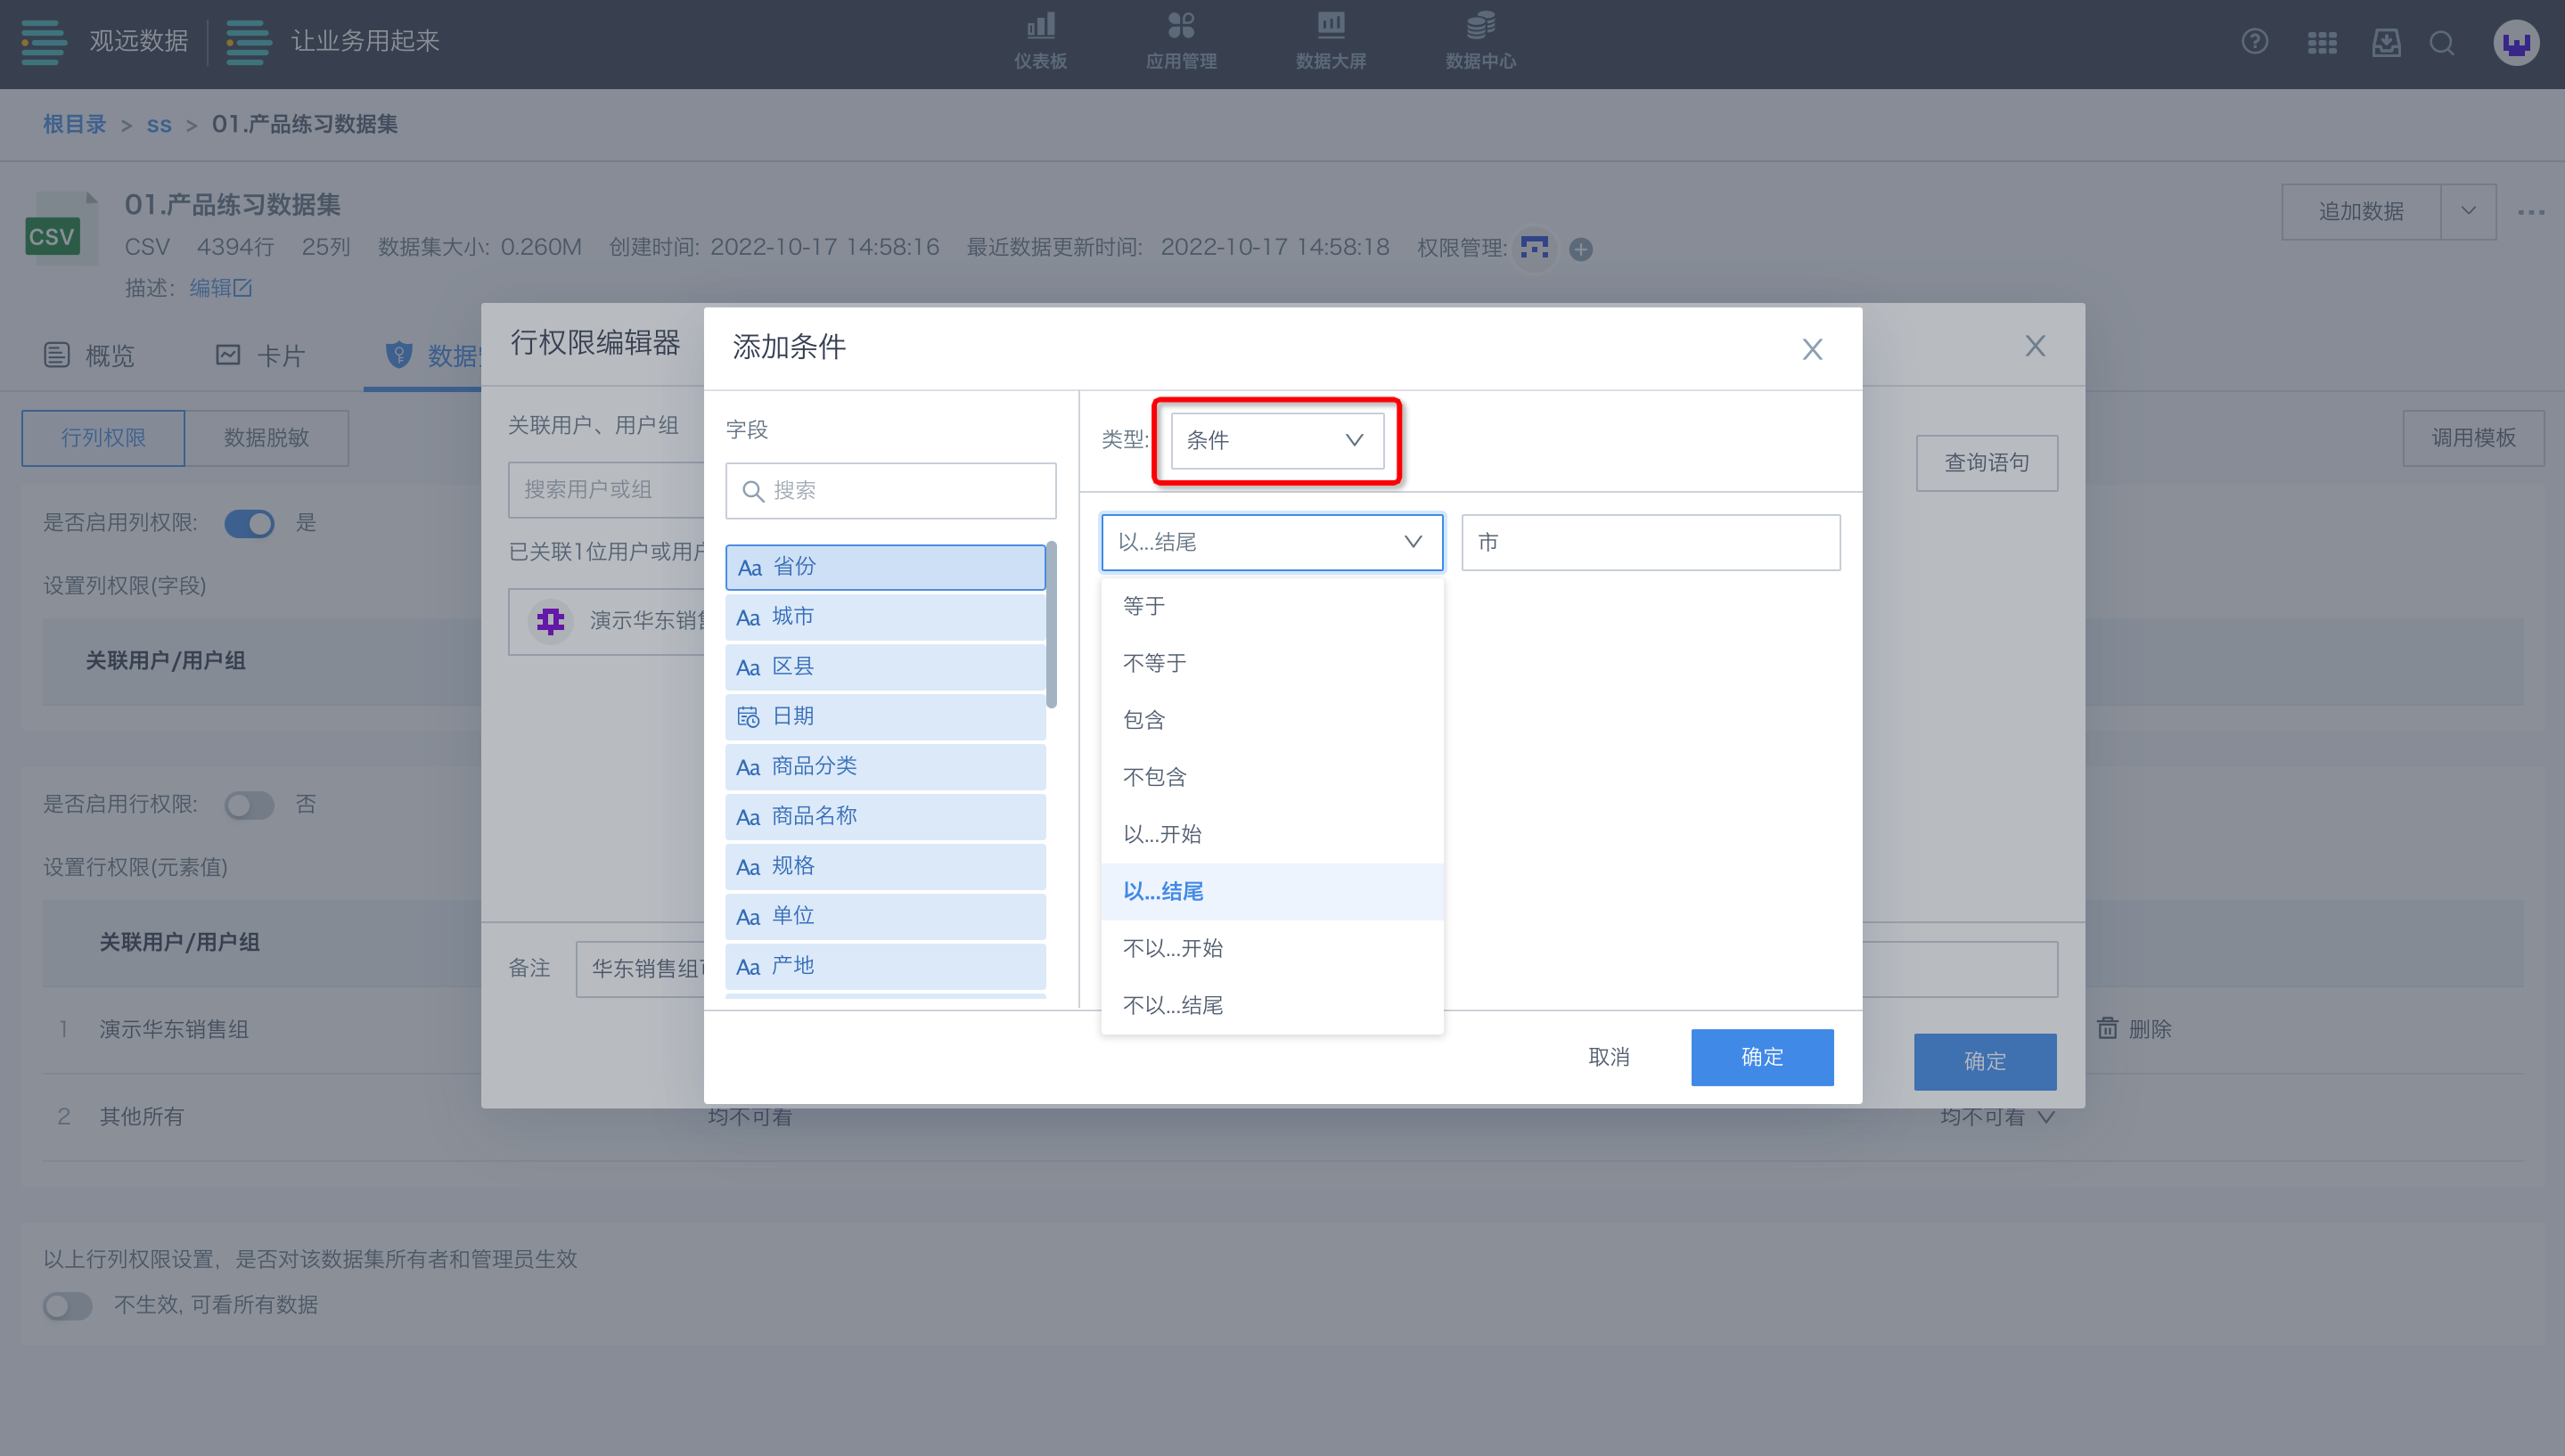
For different field types, different condition types can be set, including: select, range, condition, in (user attribute), and in (global parameter).
- Select: Directly check or batch paste conditions, suitable for text fields like province, category, name, etc.
- Range: Select the required format, such as greater than, less than, empty, etc. For date fields, supports today, yesterday, last 7 days, etc.; suitable for numeric fields like price, sales, date, etc.
- Condition: Select the required format, such as equals, contains, starts with, etc.; suitable for text fields like province, category, name, etc.
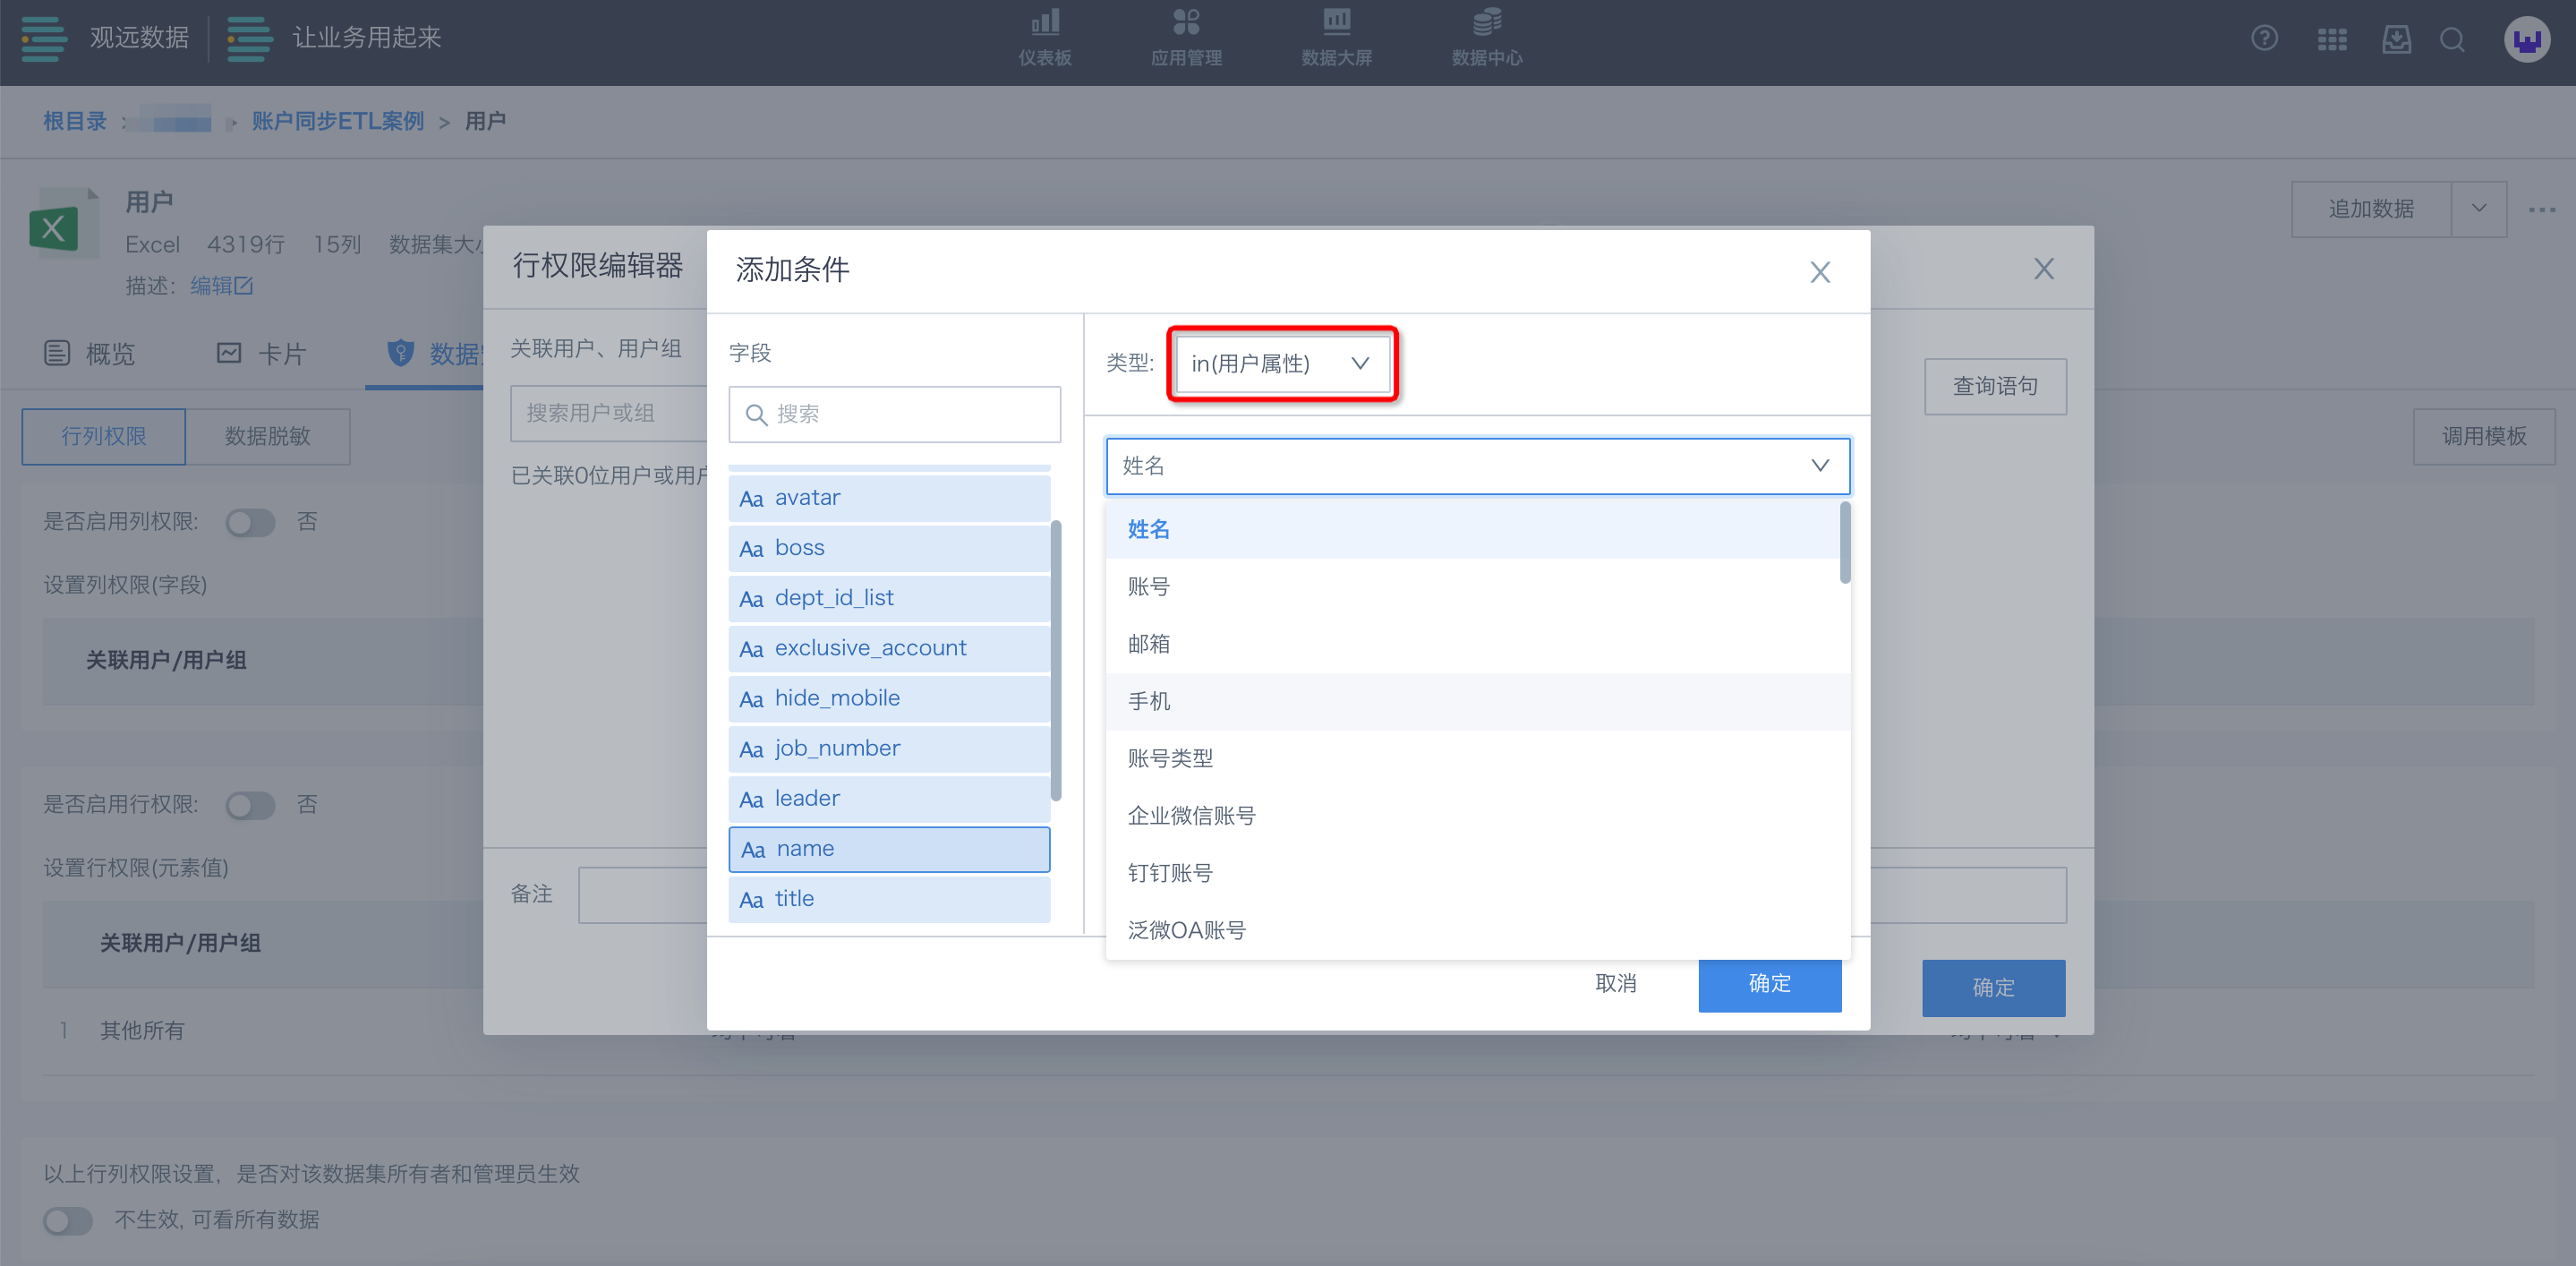
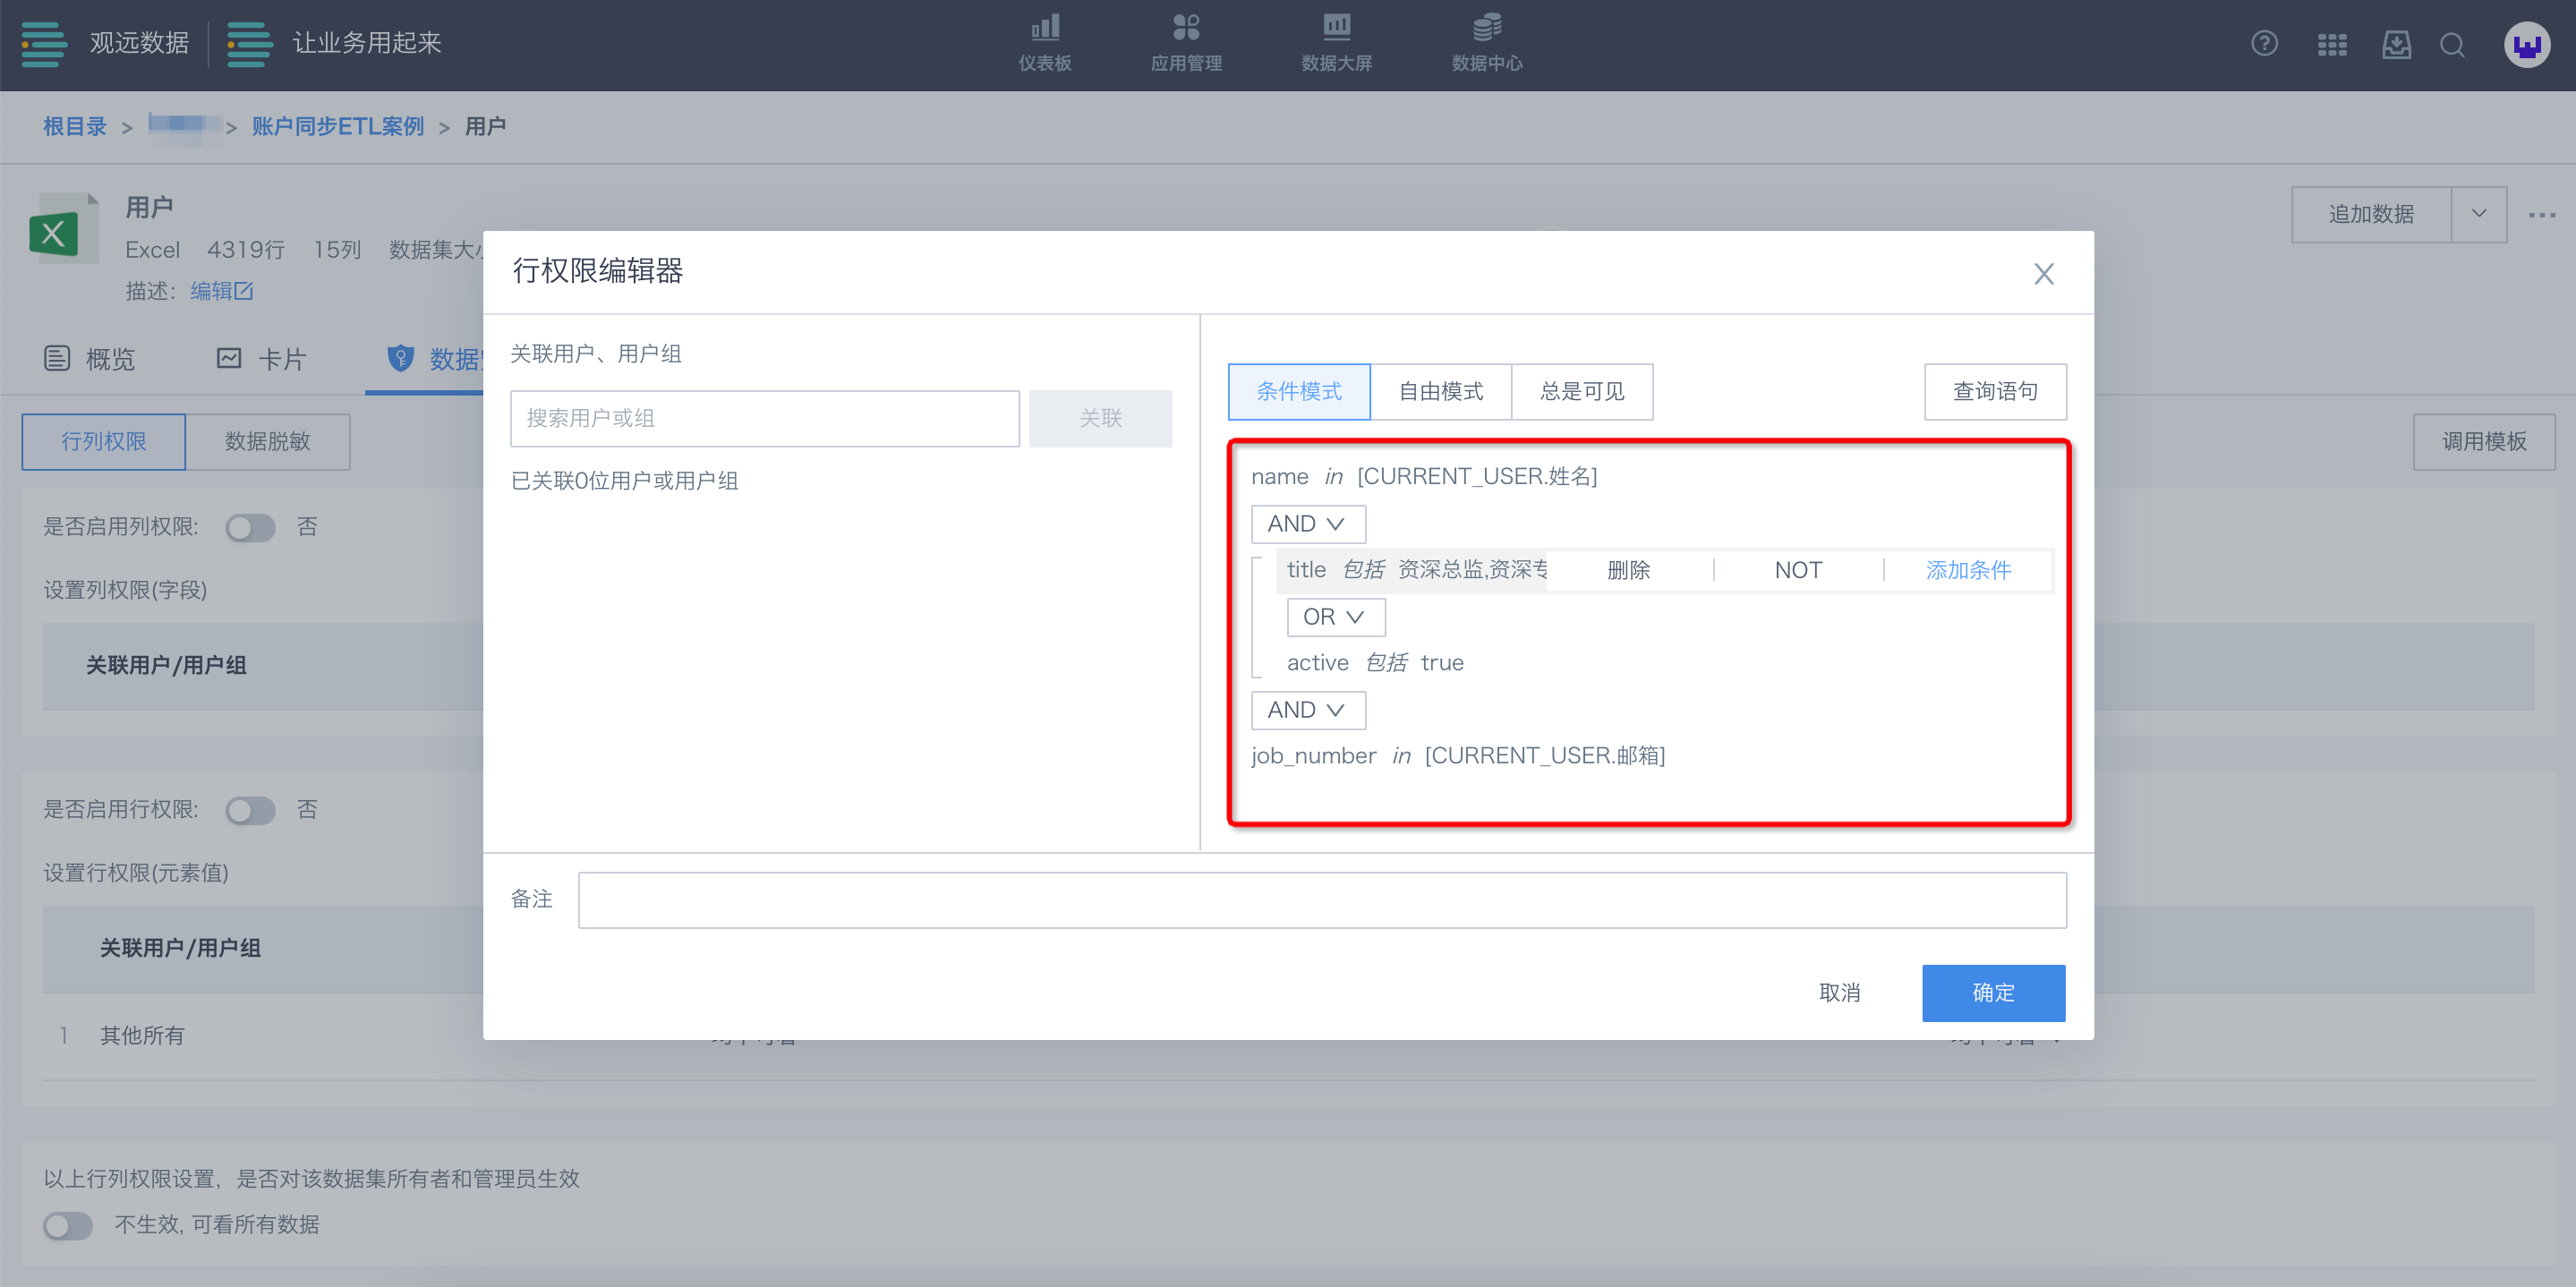
- in (user attribute): When a field contains a user attribute, select the attribute on the right; suitable for user attribute fields like name, employee number, department, etc.
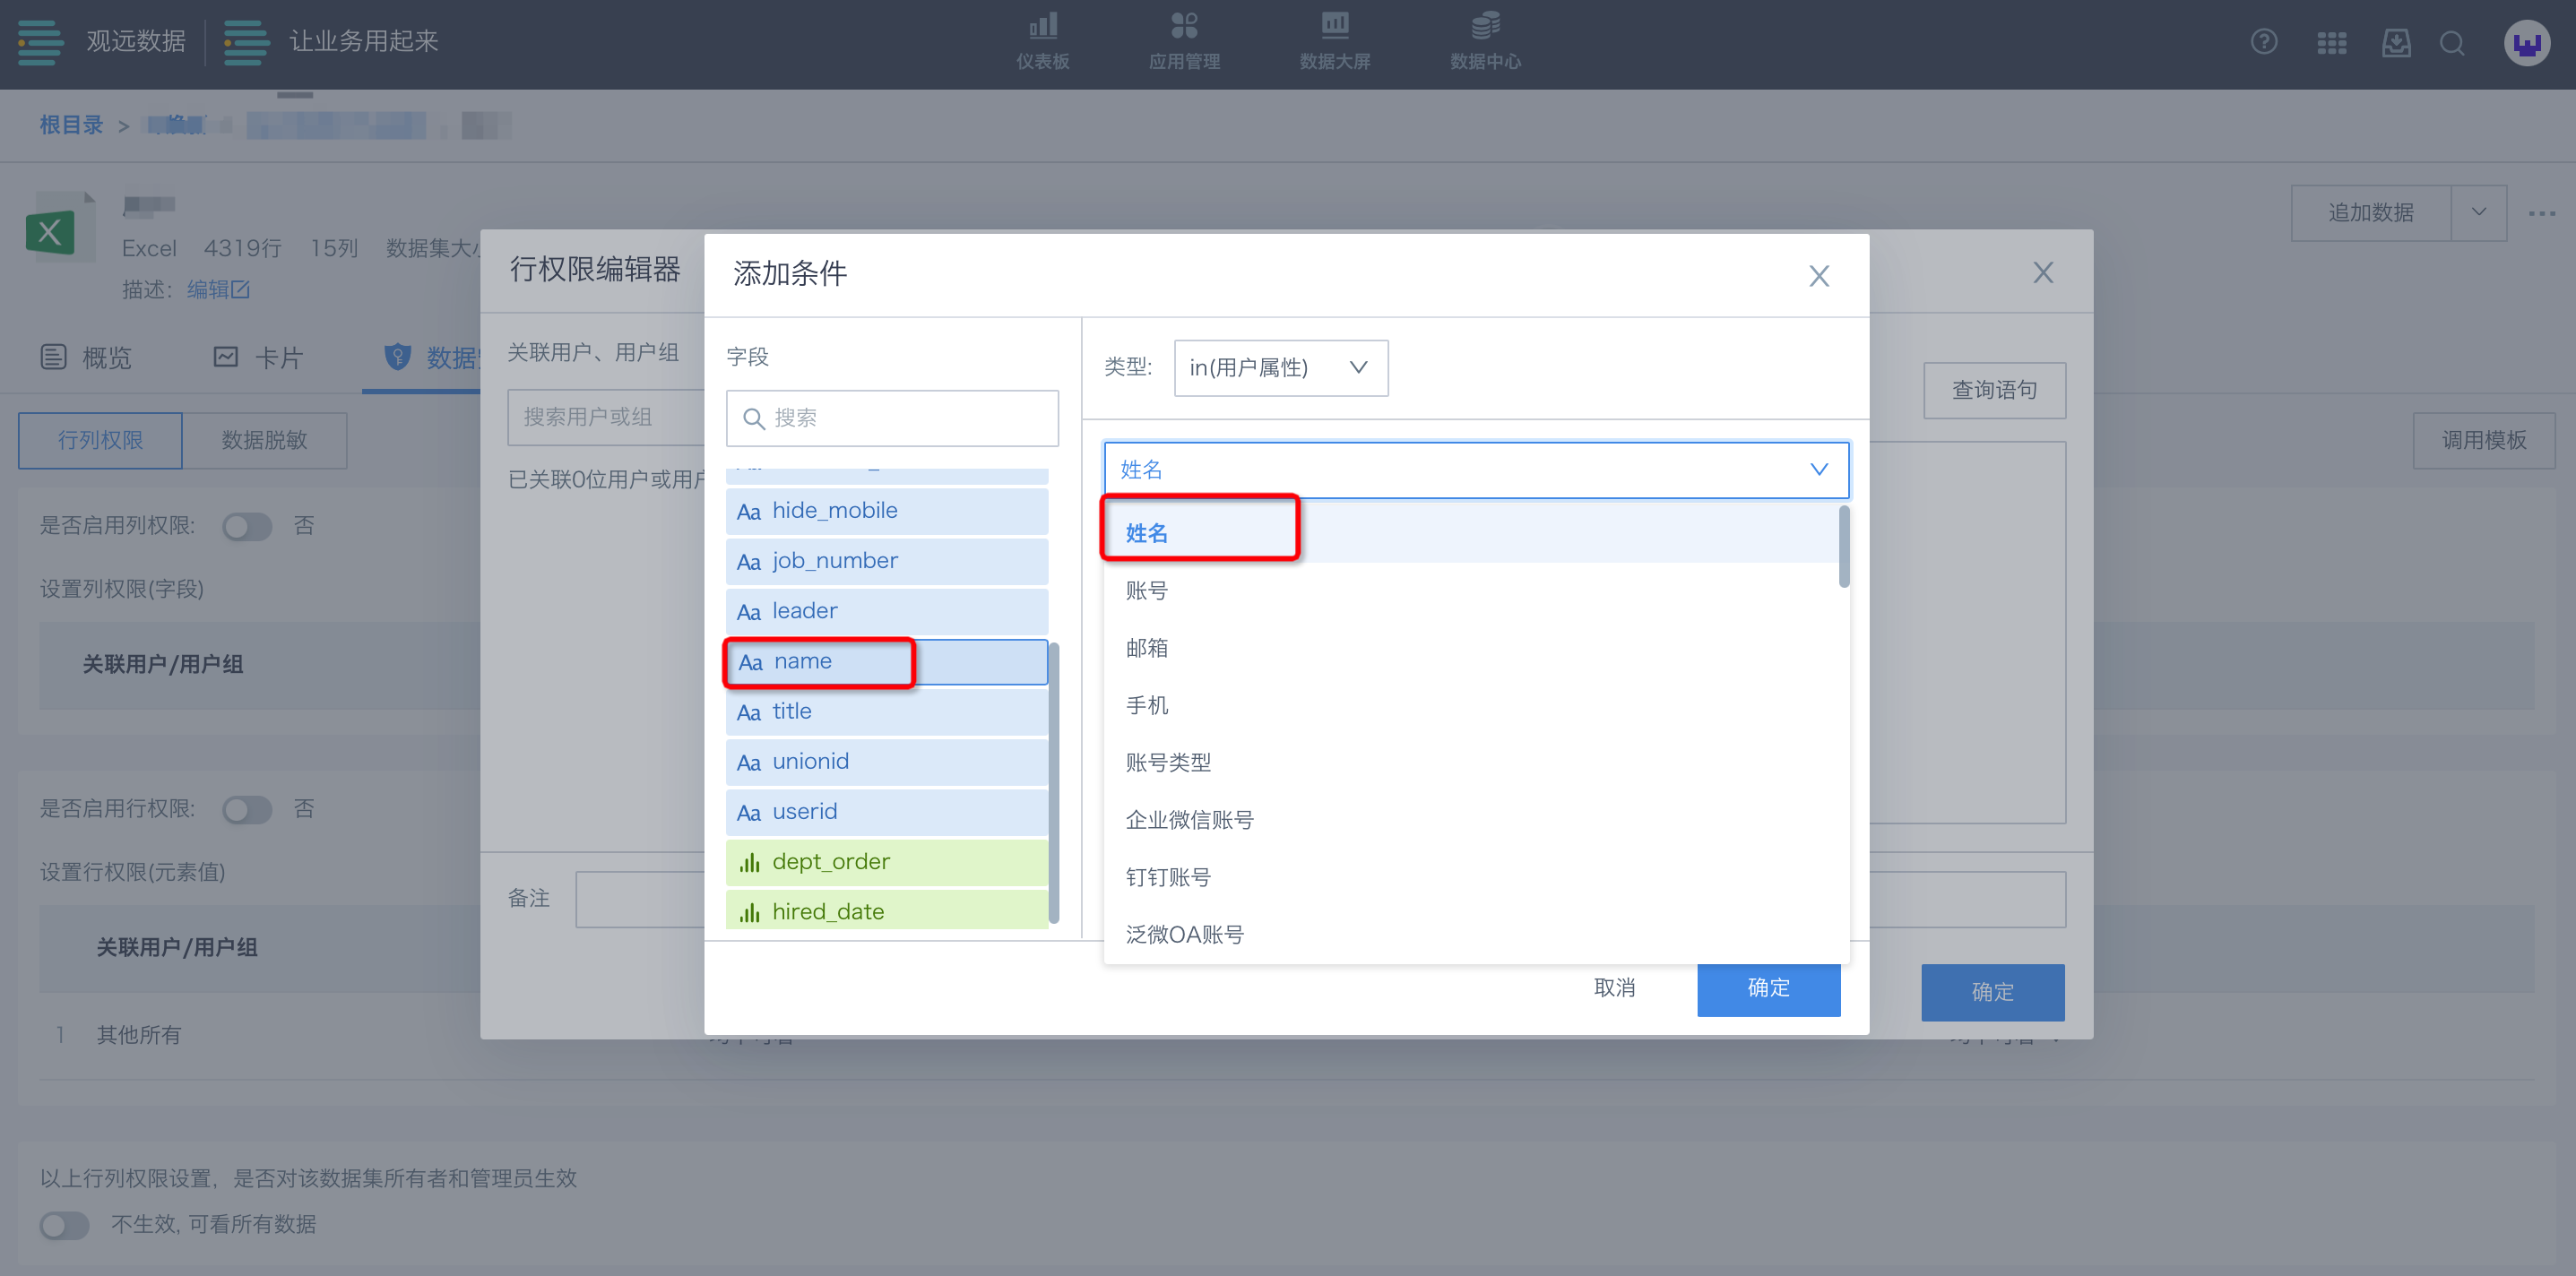
If you want each salesperson to see only their own data, set the condition as: the user name in the system (user base attribute) matches the salesperson name in the data (field), as shown below. After completion, users can see their own data.
- in (global parameter): When a field corresponds to a global parameter, select the parameter name from the dropdown. Row permissions can be dynamically determined by global parameters.
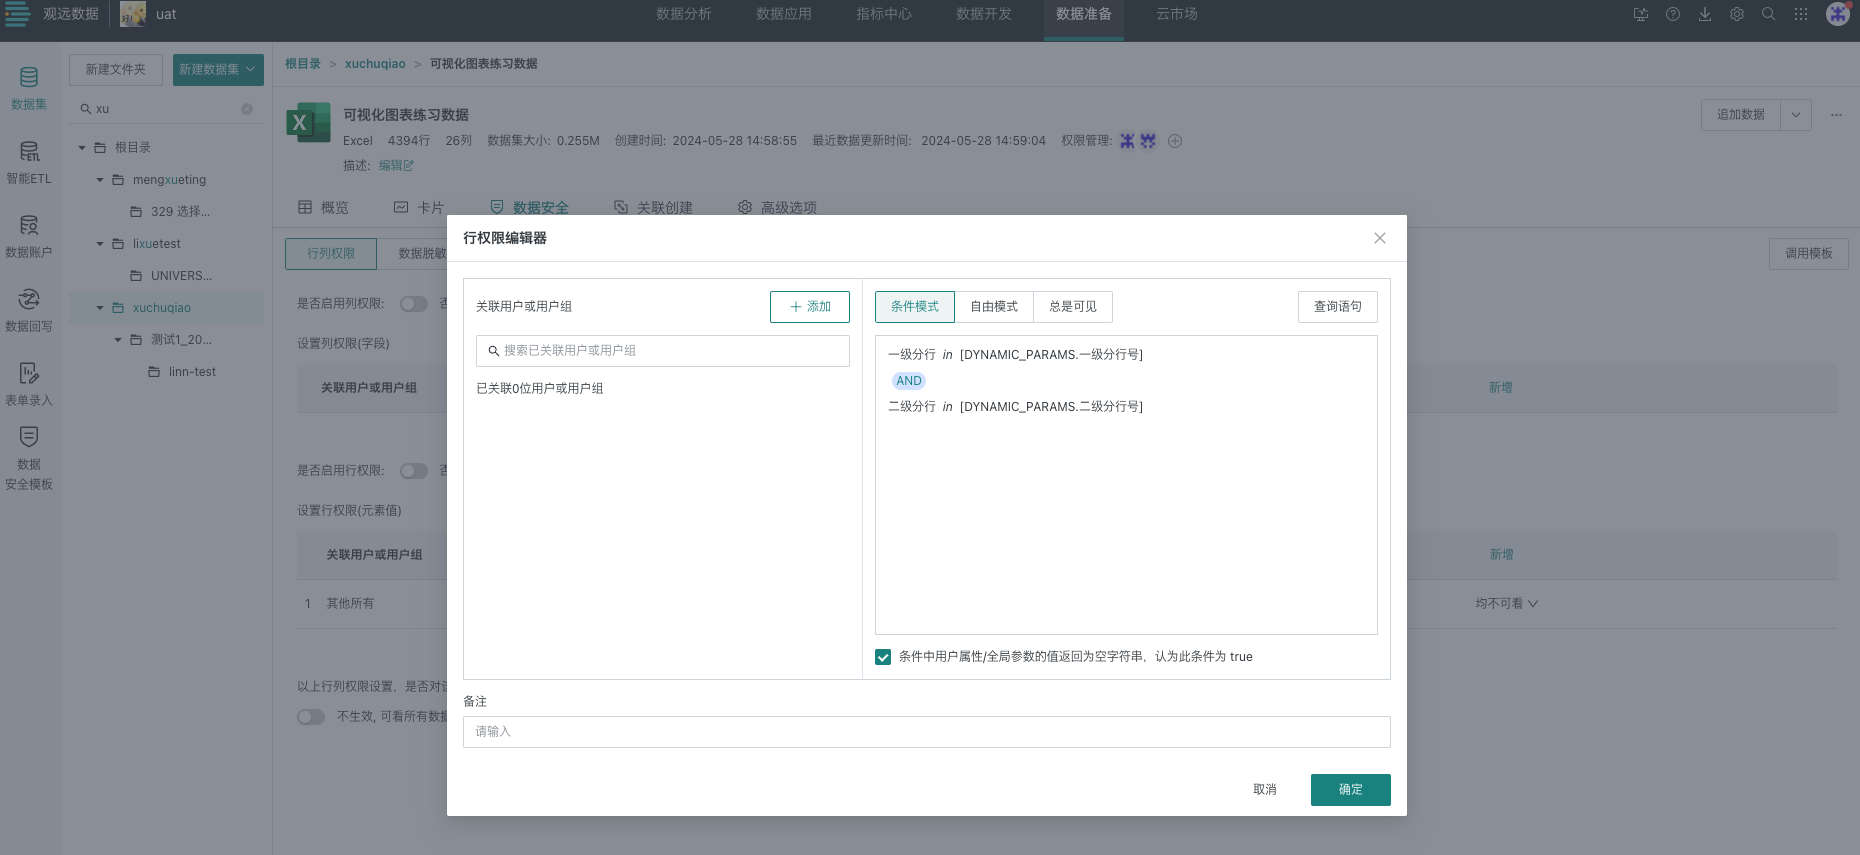
You can add, modify, or delete condition configurations.
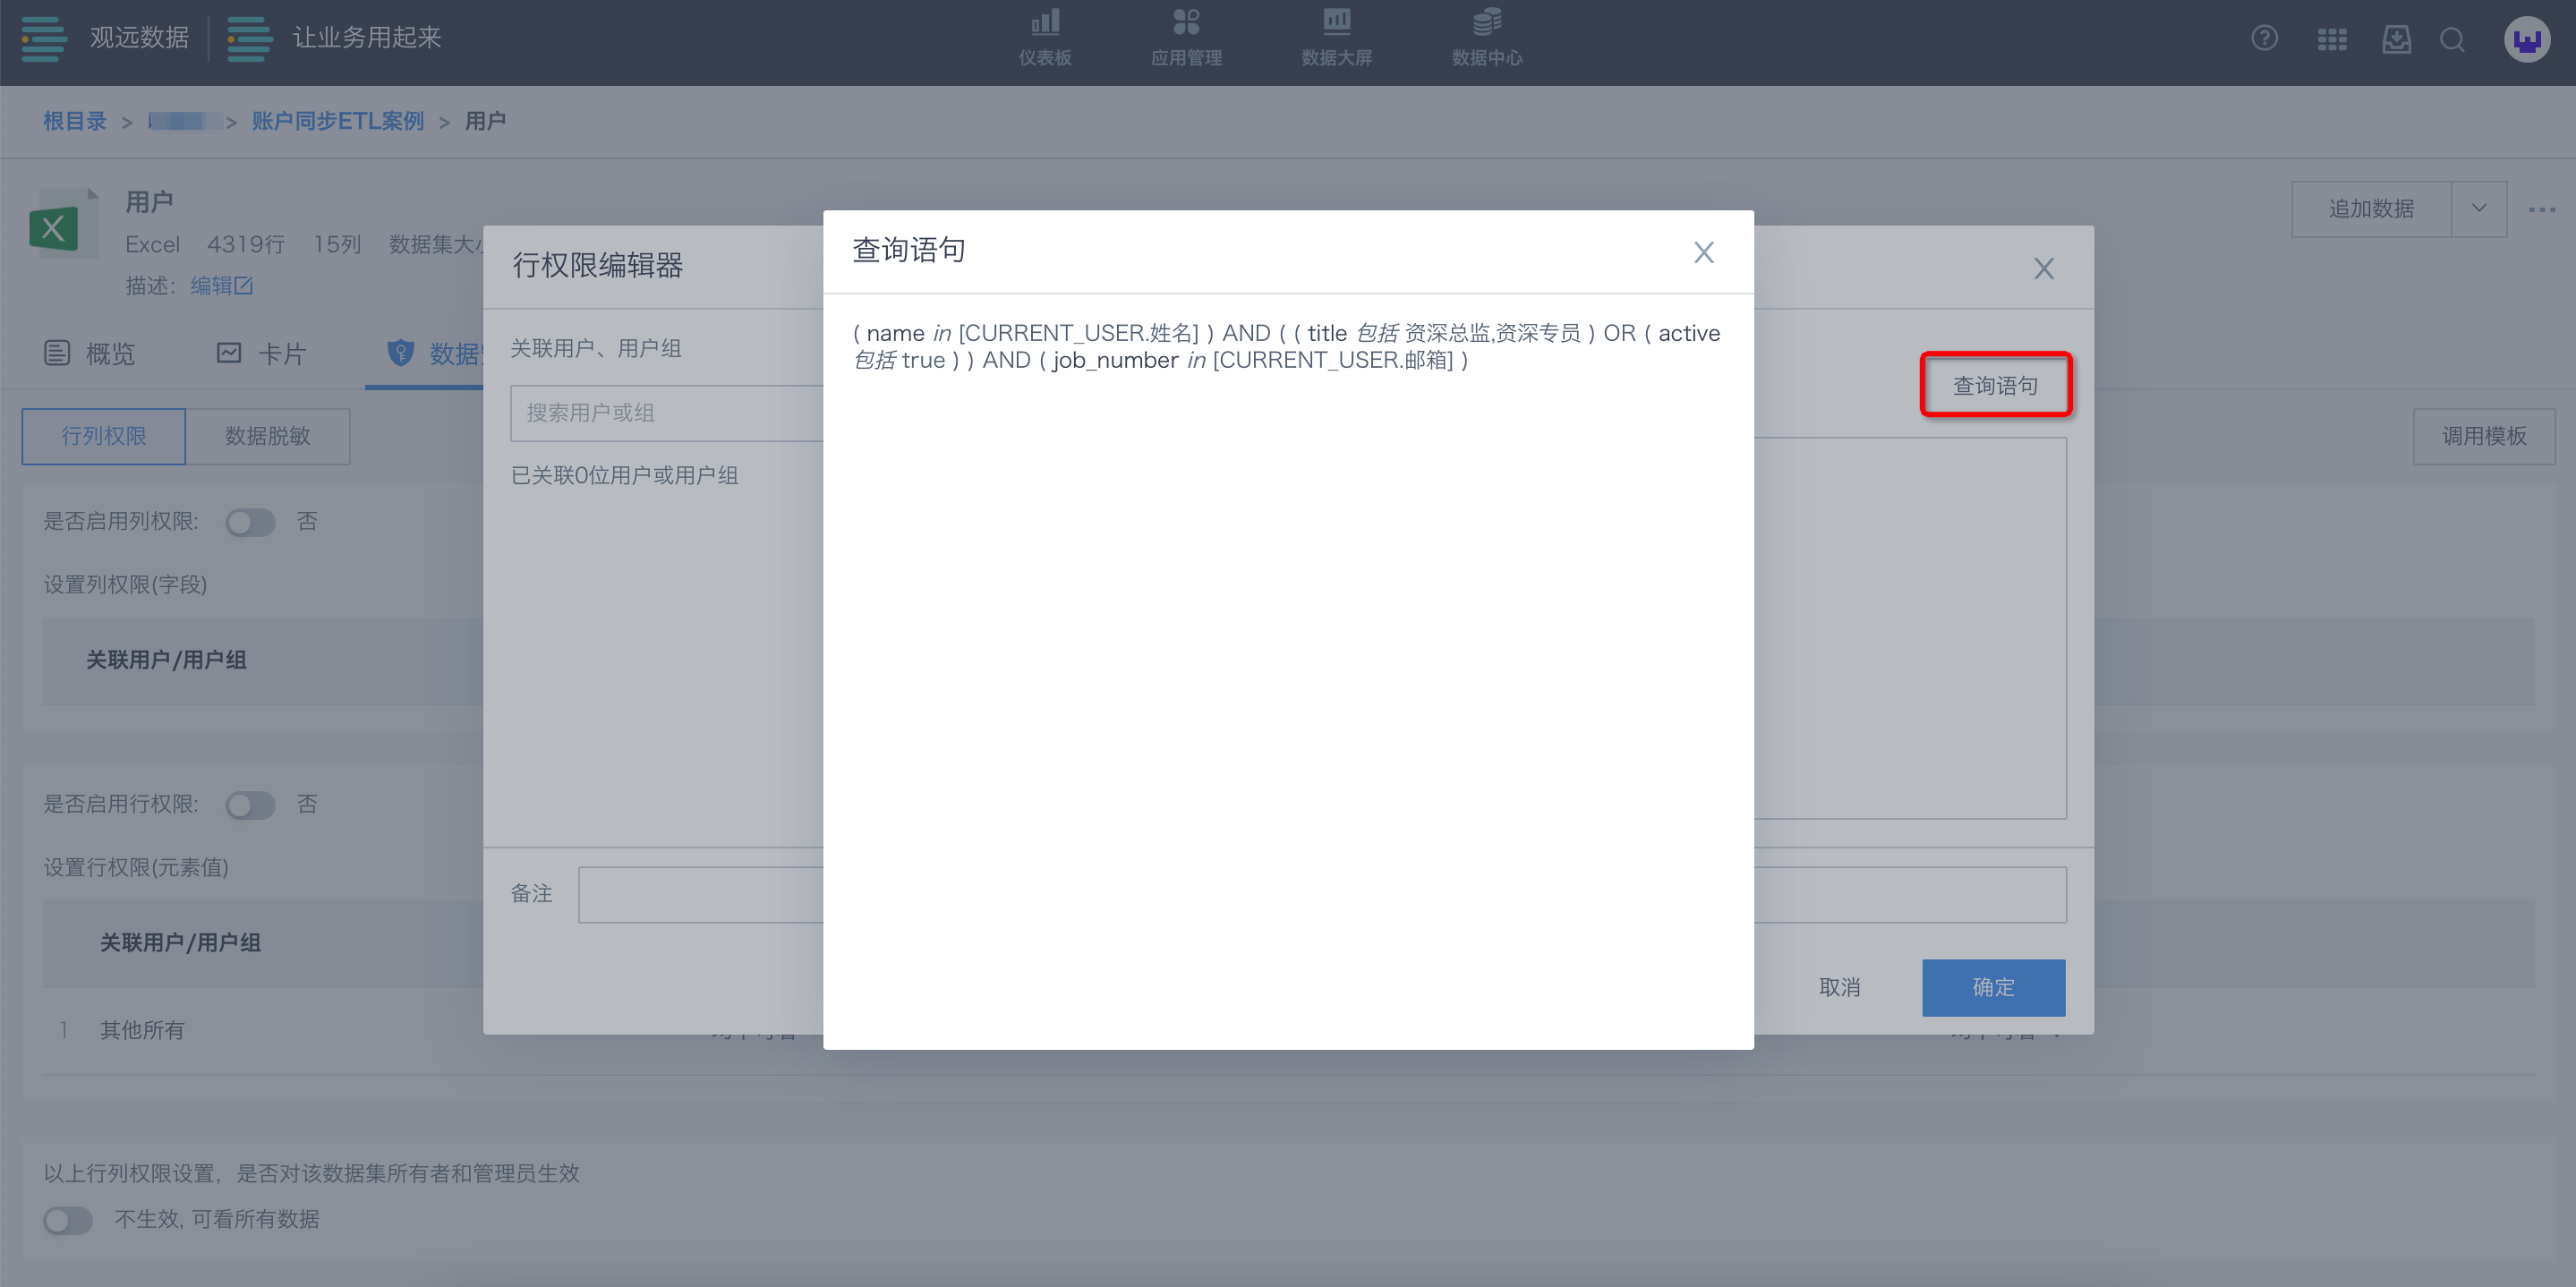
After configuration, click the "Query Statement" button in the upper right to view the generated SQL.
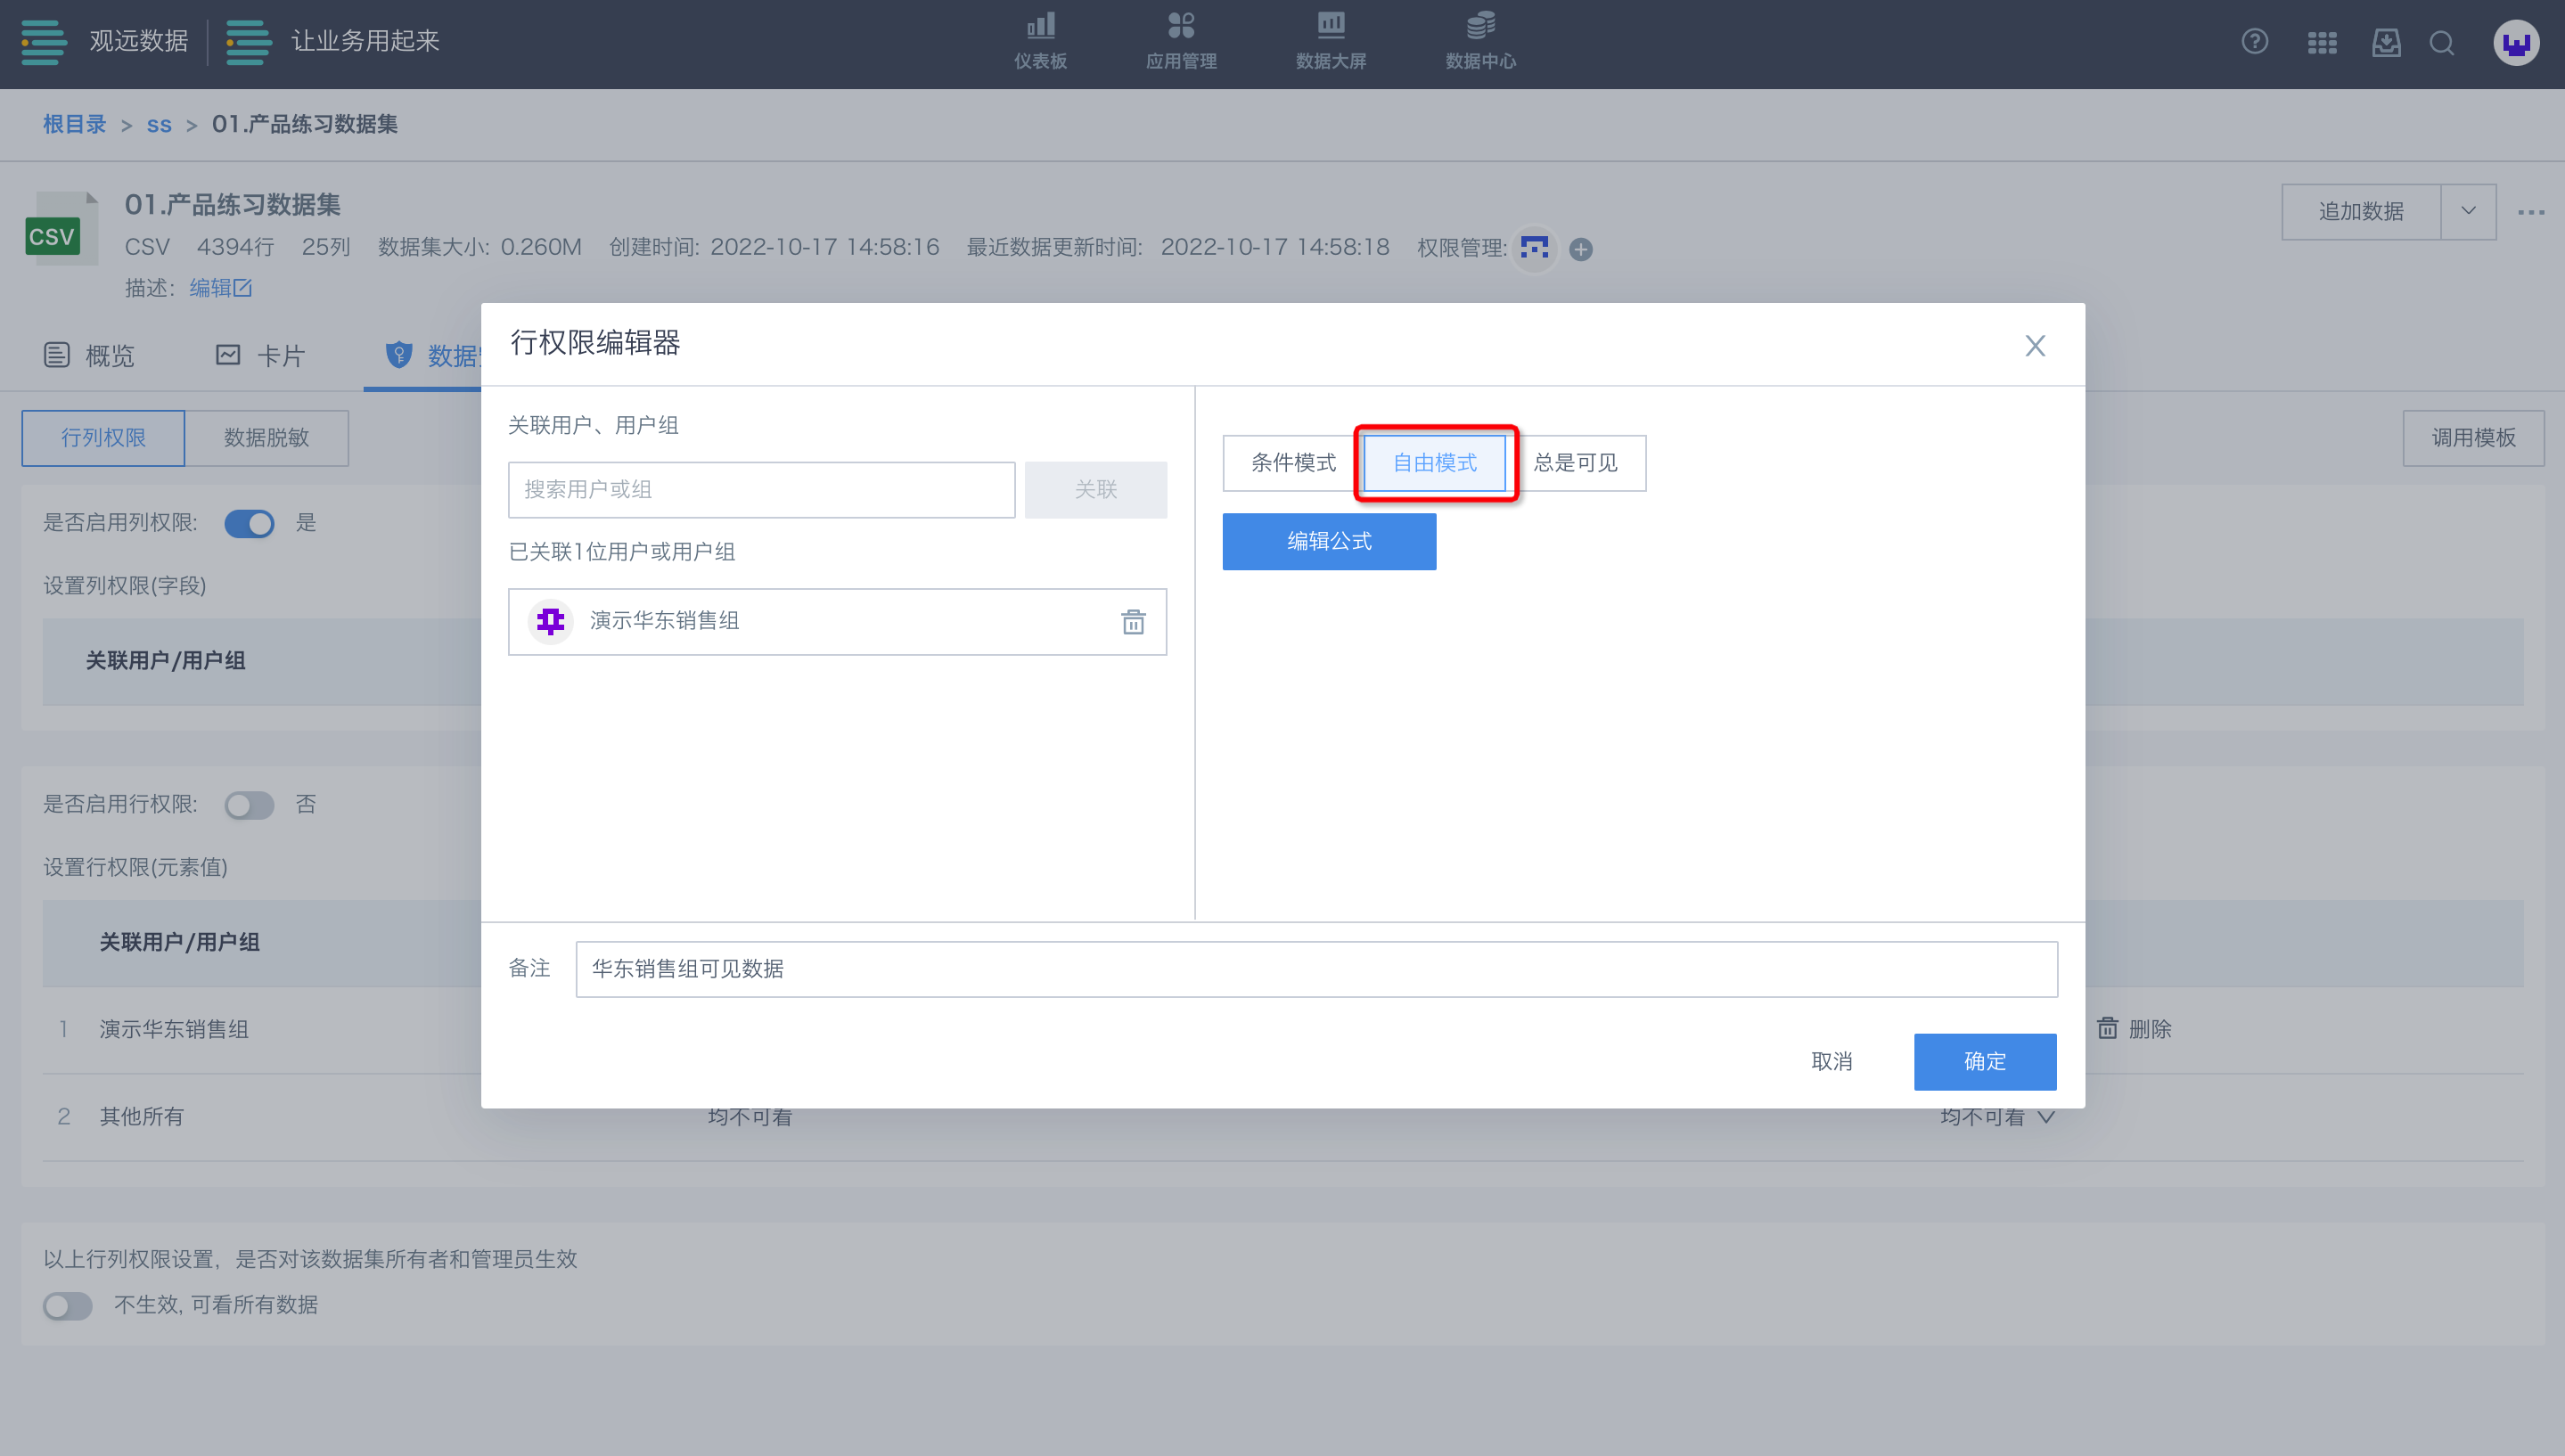
(2) Free mode: Use SQL statements for filtering.
As shown, only members of the East China sales group can view East China data. In free mode, you can use SQL statements like [Region]="East China" to achieve the same effect as condition mode.
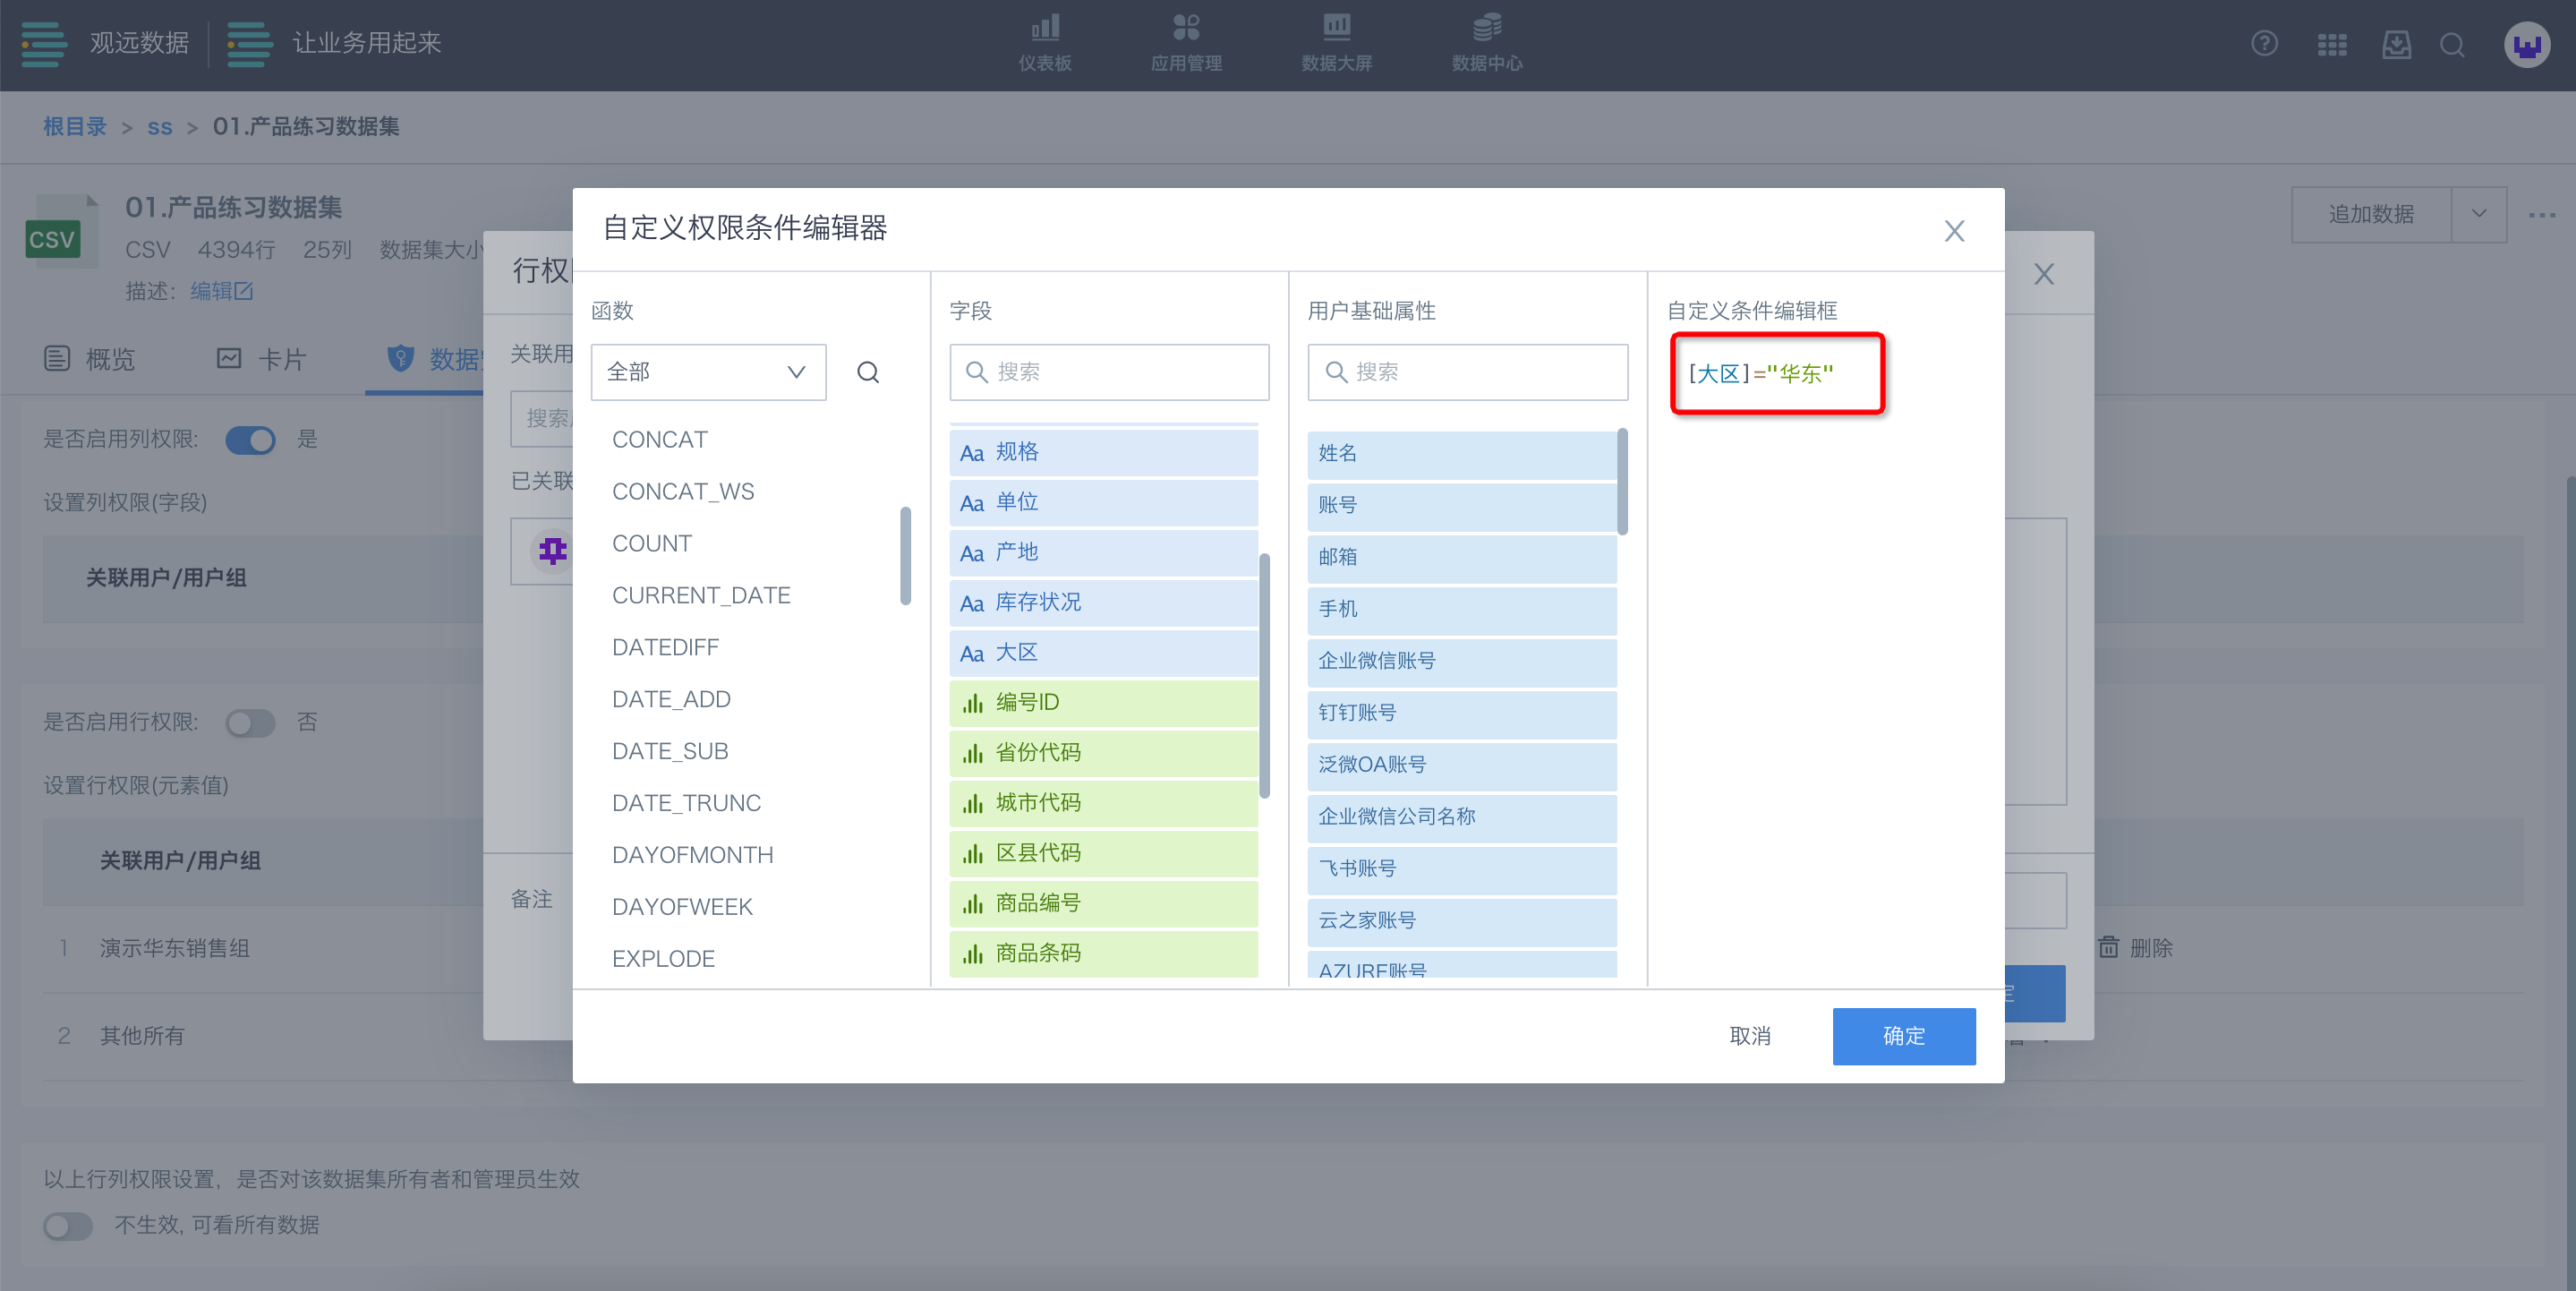
If you want each salesperson to see only their own data, set the condition as: the user name in the system (user base attribute) matches the salesperson name in the data (field). After completion, users can see their own data.
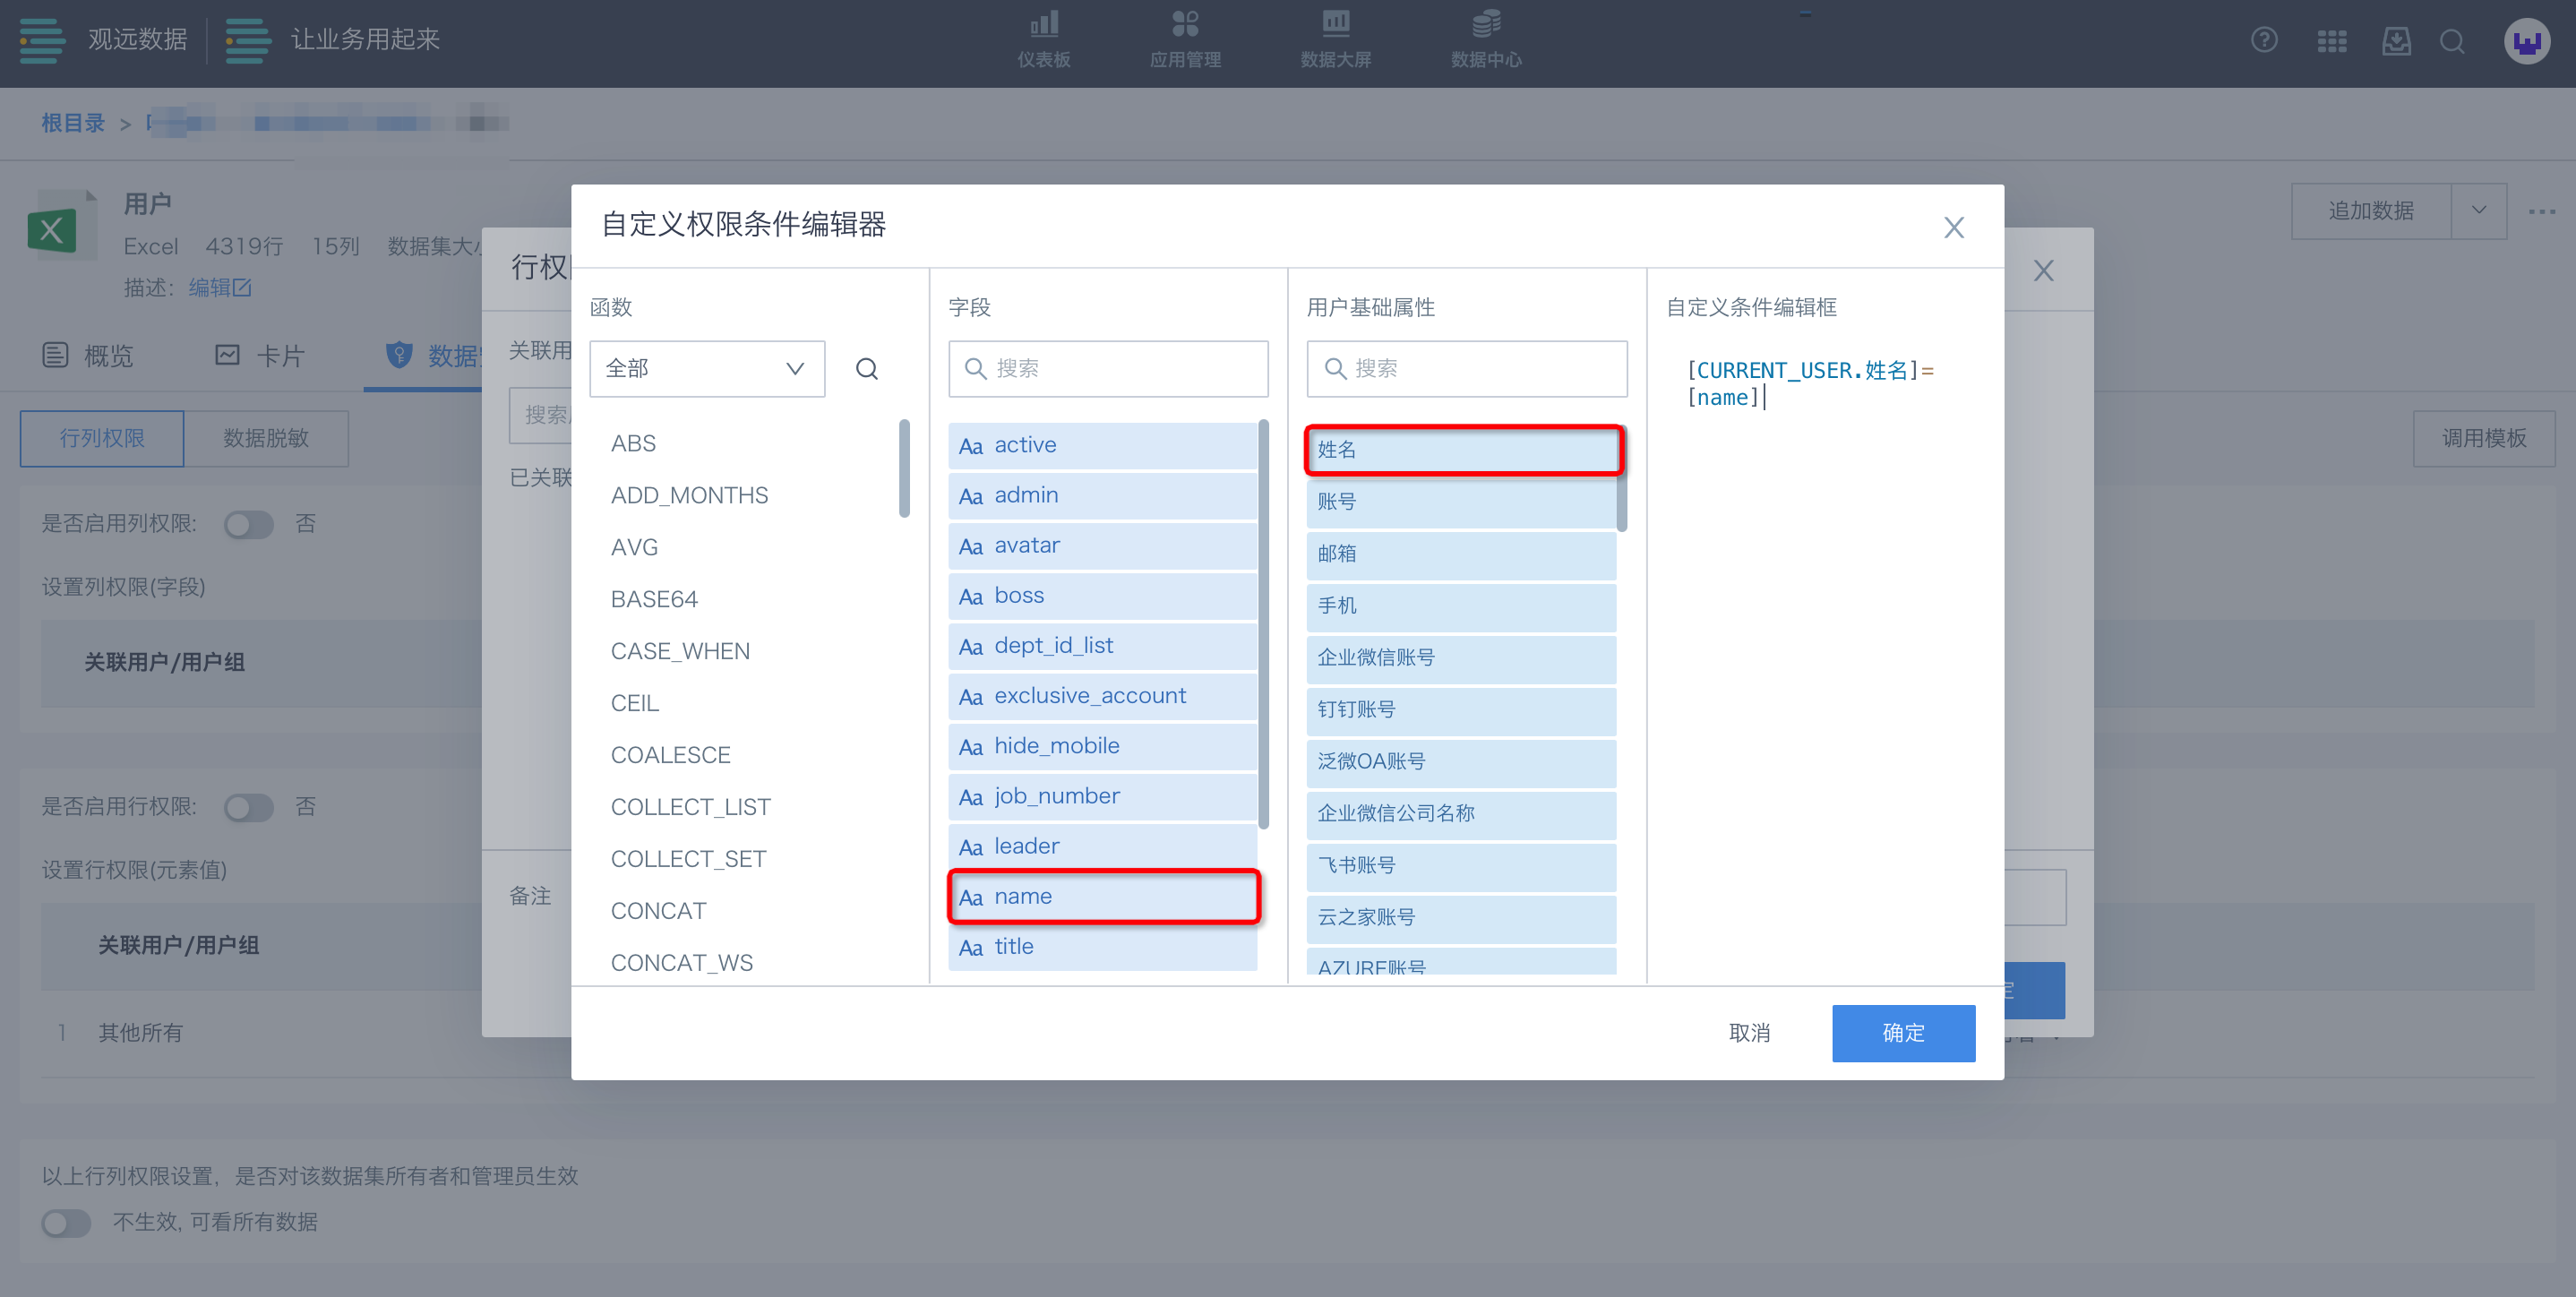
Free mode is very flexible and suitable for various complex custom conditions. For direct-connect datasets, use the corresponding database syntax (e.g., MySQL); for Guan-Index extracted datasets, use SparkSQL.
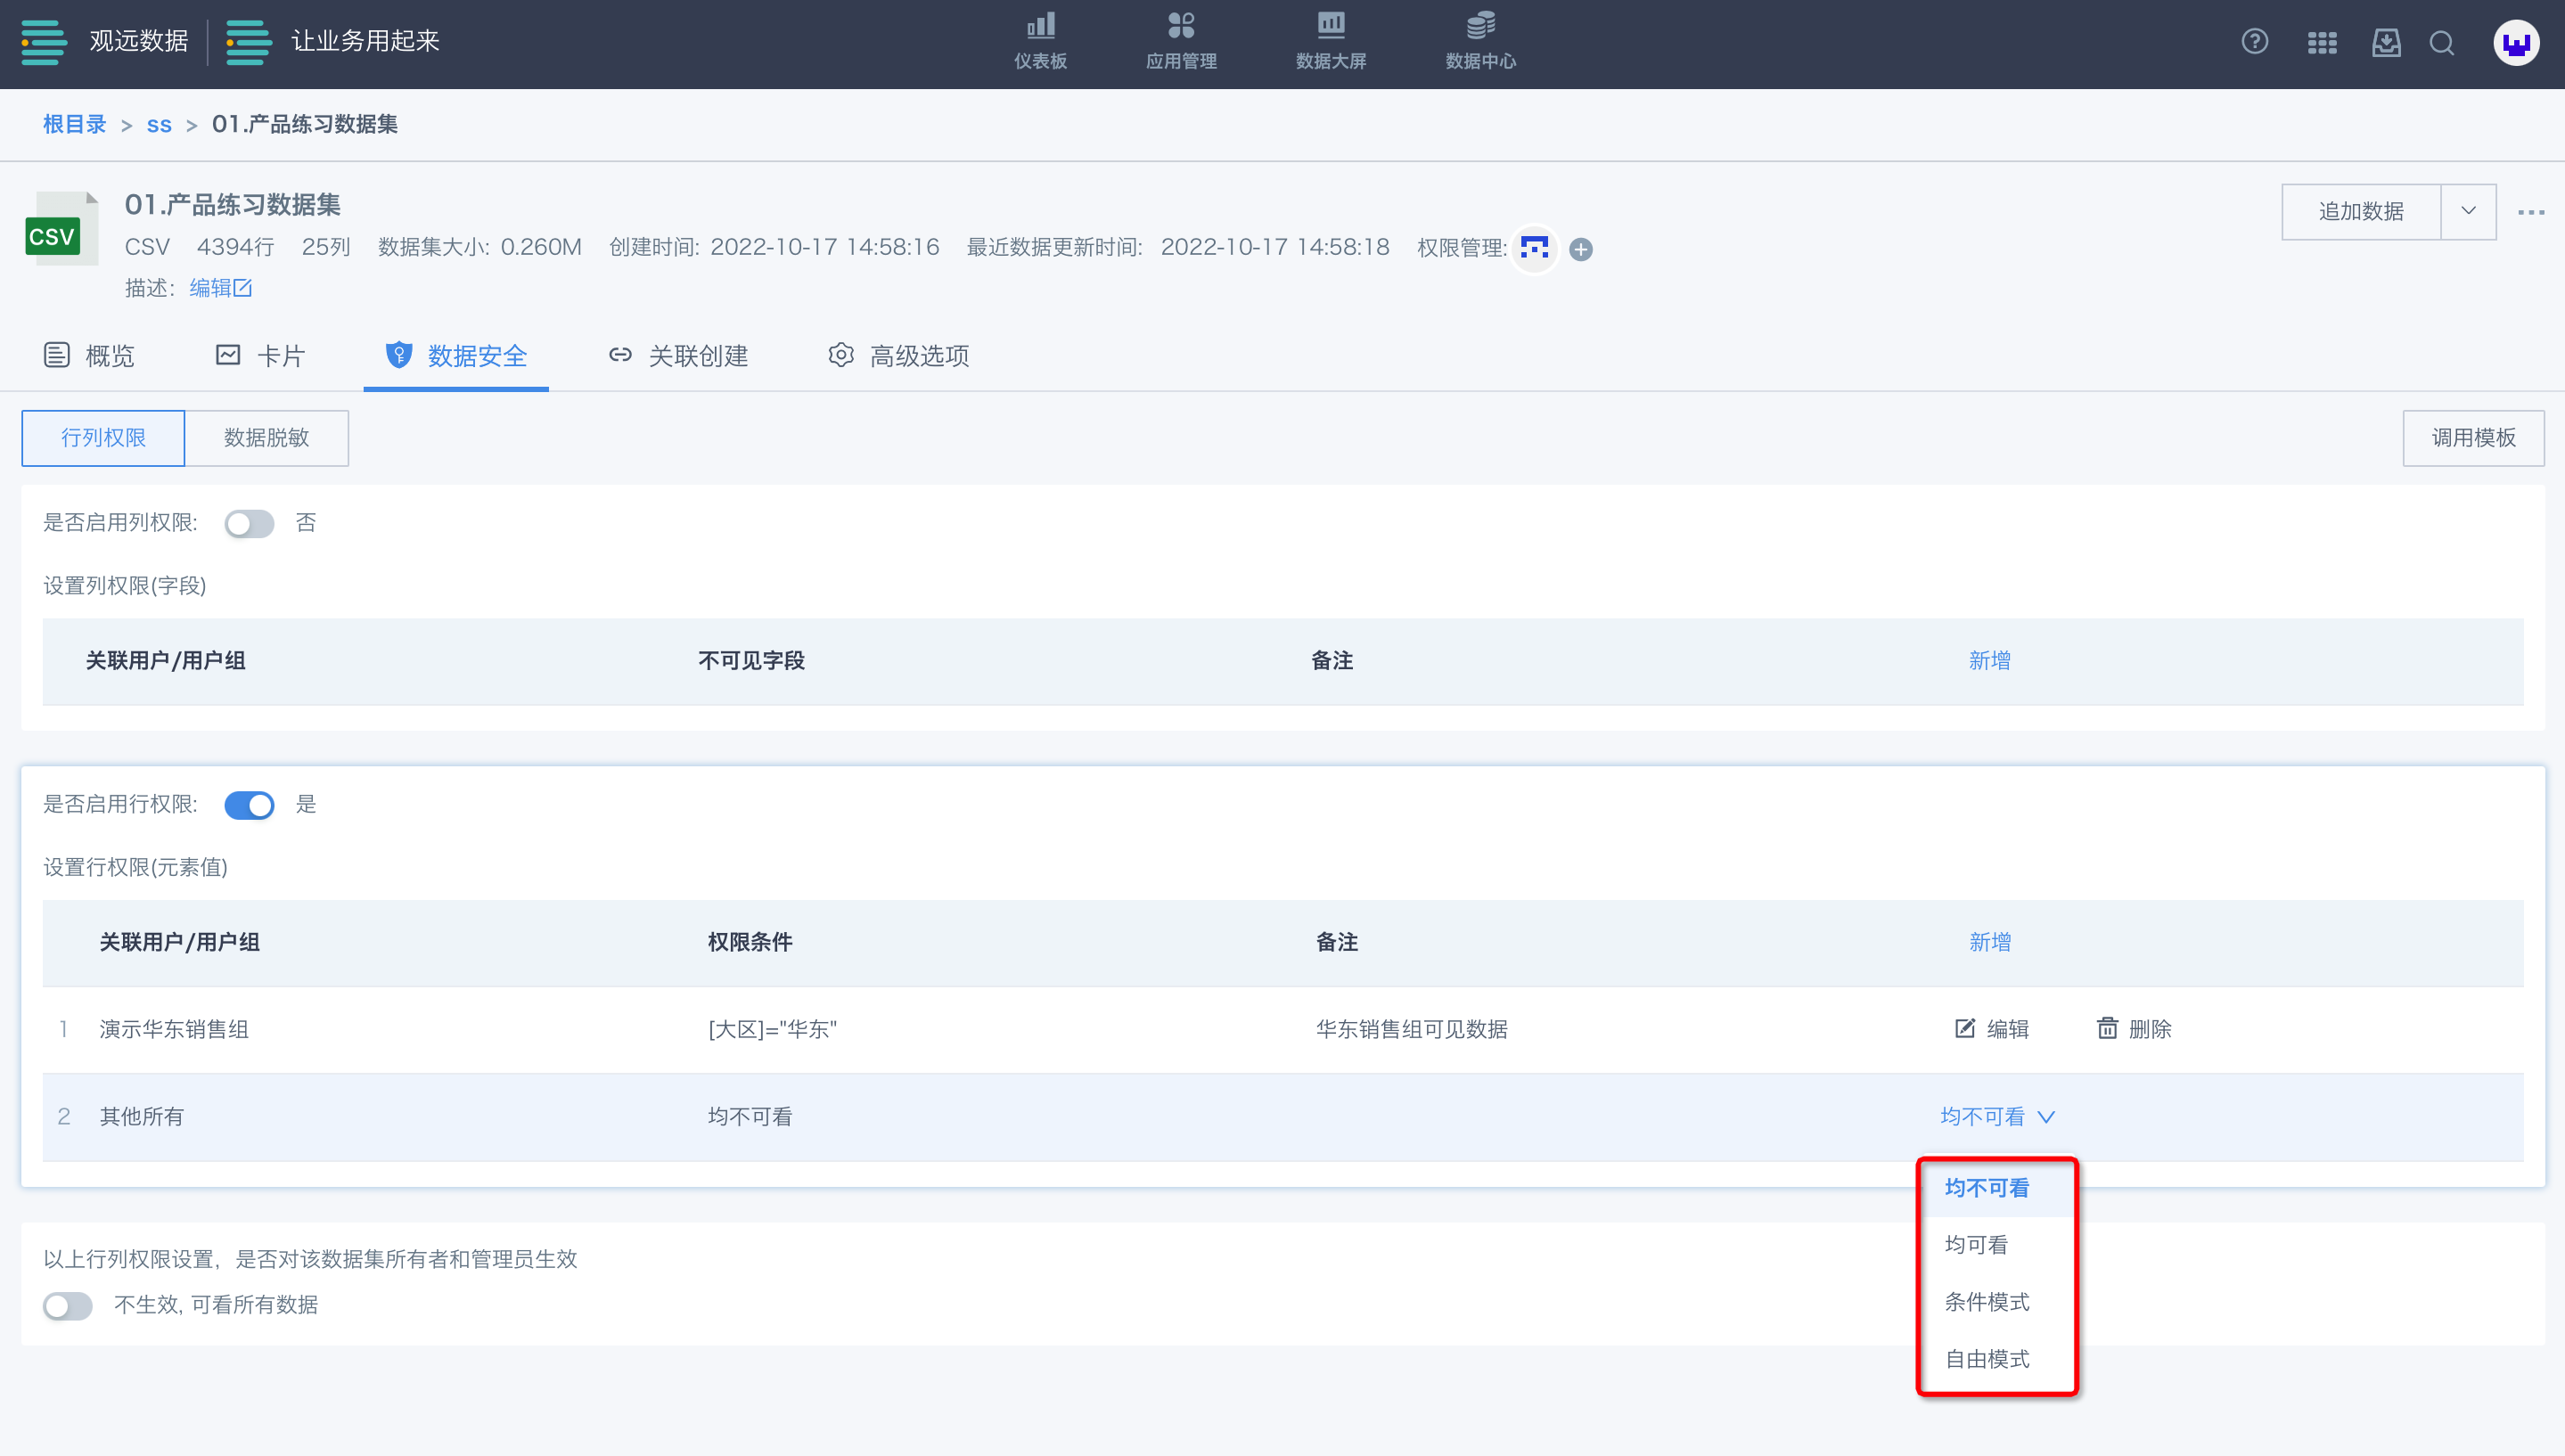
After setting visible data for associated objects, there are four options for what other users can see. Enterprises can set this as needed.
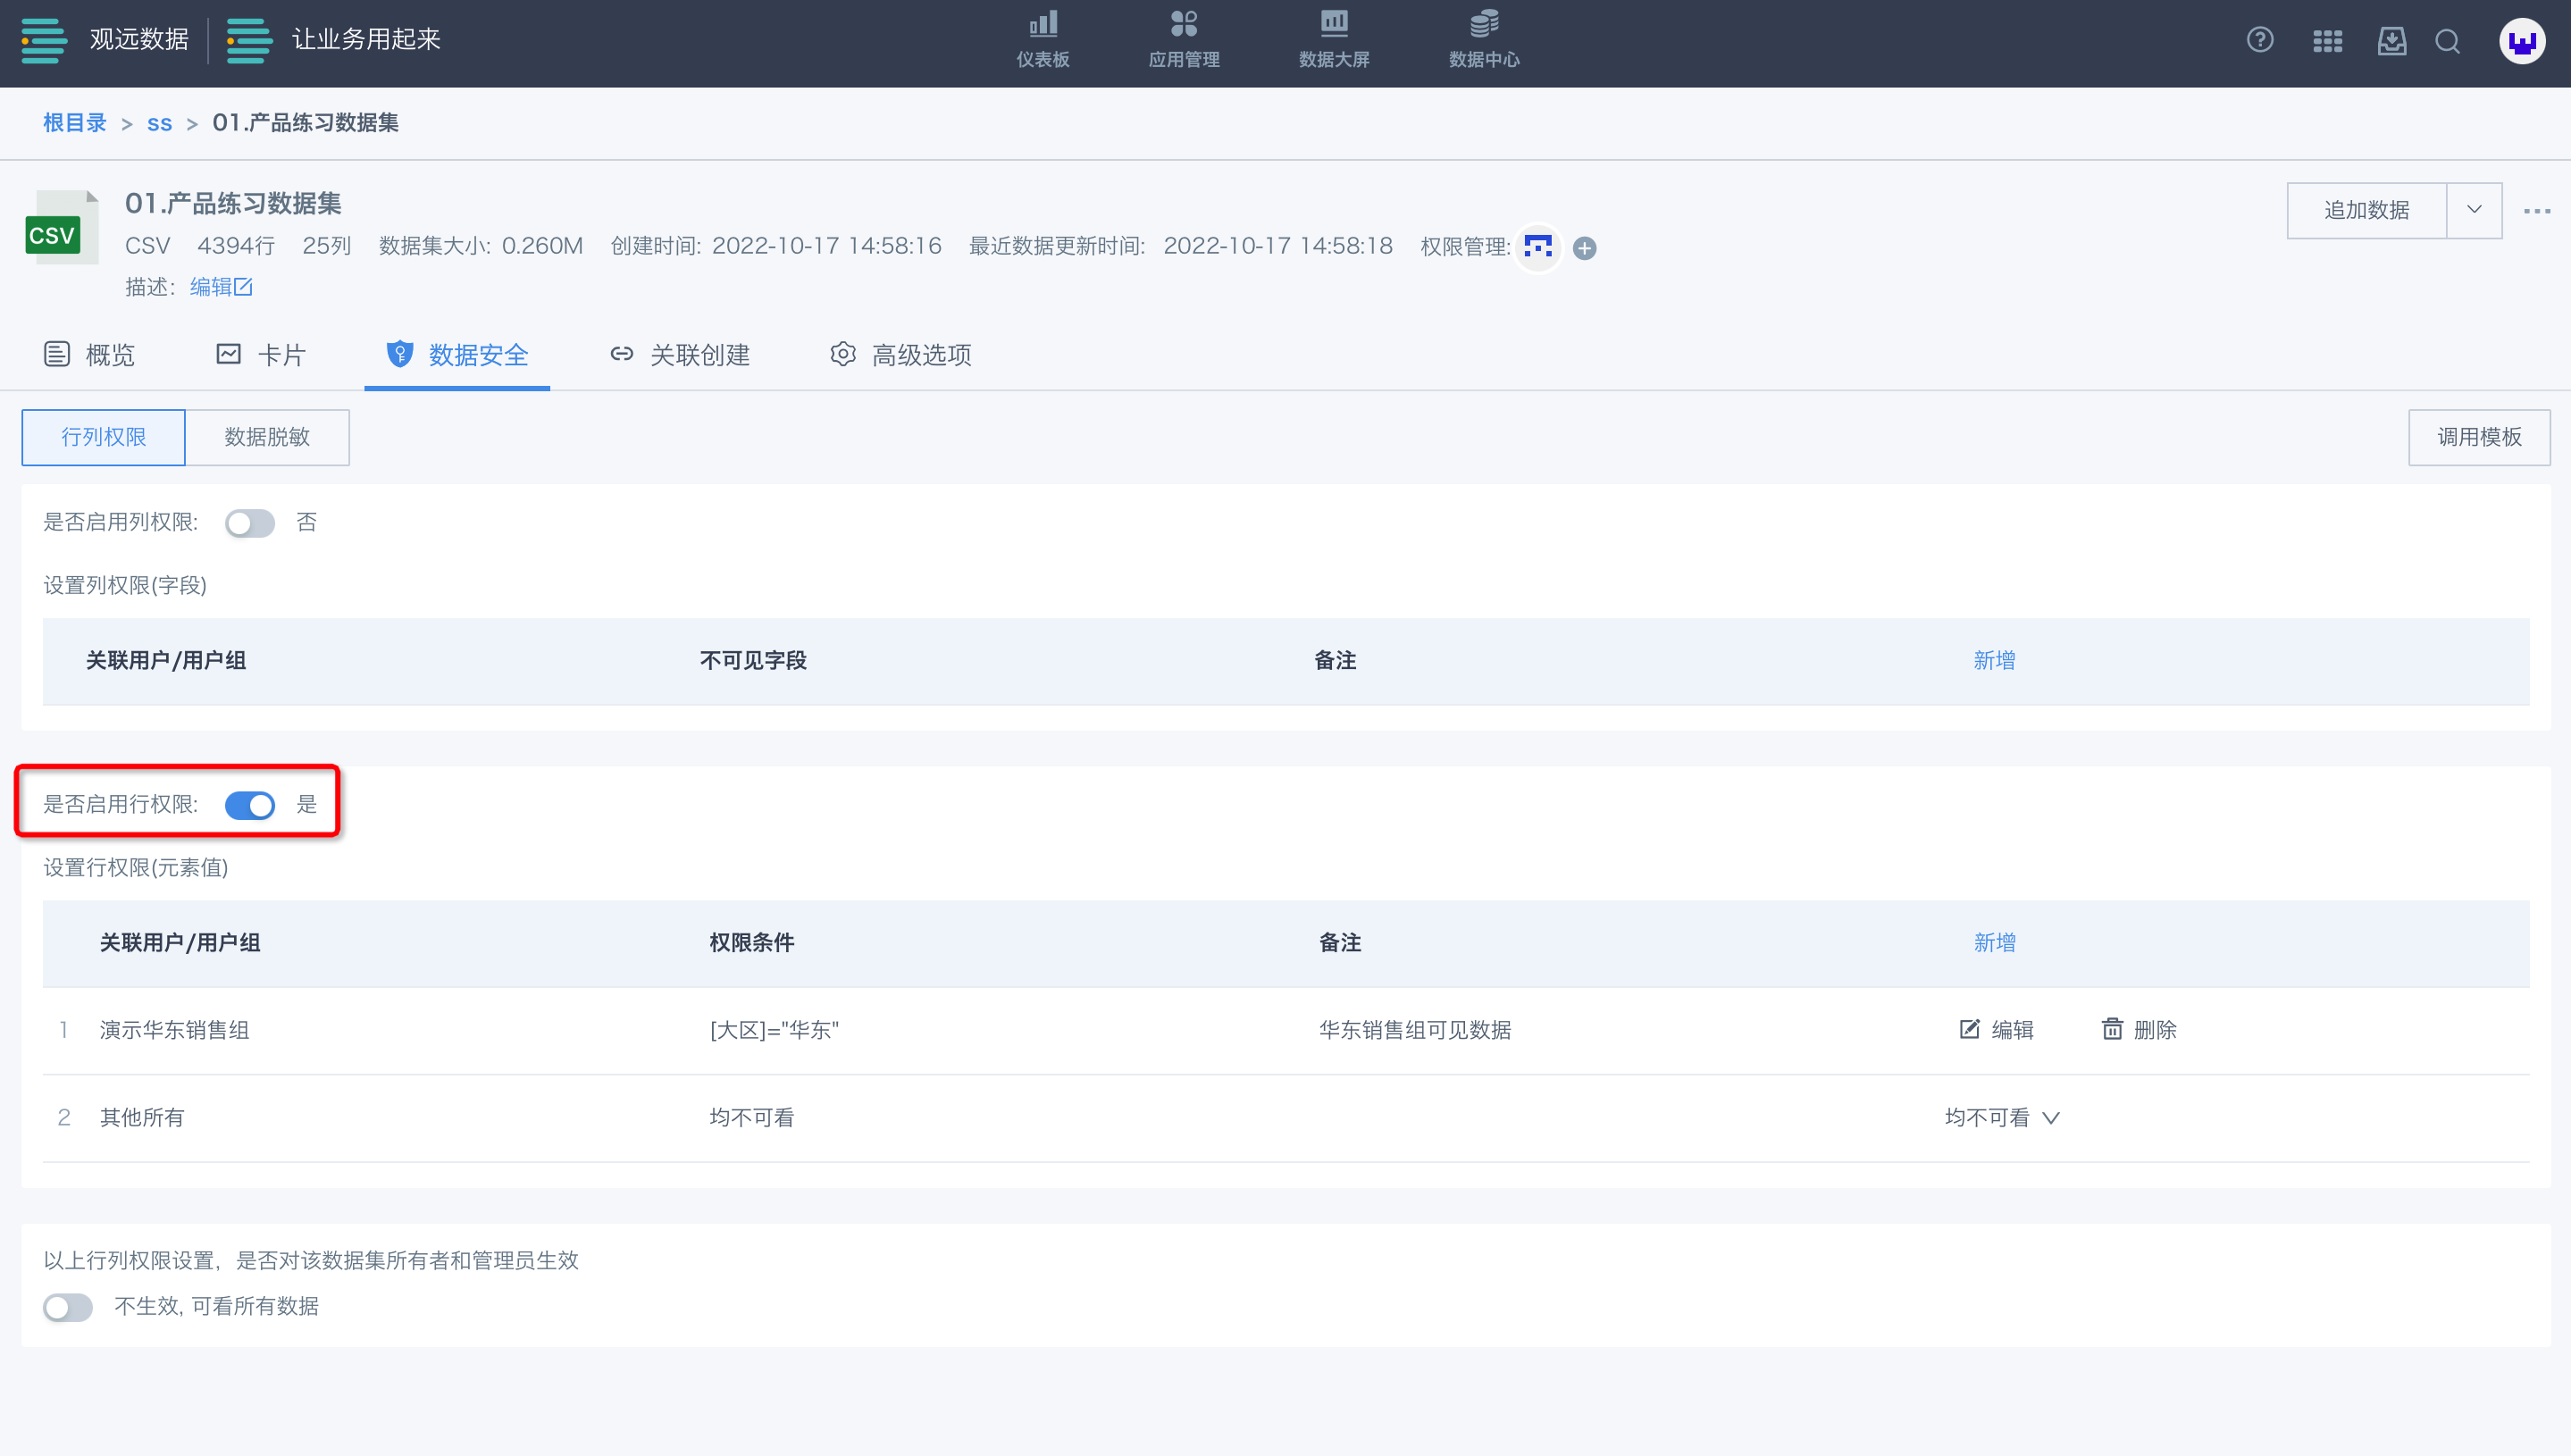
After creating a row permission, if the switch is off, it does not take effect; after turning it on, it takes effect.
3.2.2 Example
Before enabling row permissions, salesperson A (East China) can see data from all regions.
.png)
Example 1: Row permission set so "East China sales can only see East China data".
.png)
After enabling, salesperson A can only see East China data; data from other regions is not visible.
.png)
Example 2: Row permission set so "Salesperson can only see their own data".
.png)
After enabling, salesperson A can only see their own data; other people's data is not visible.
.png)
3.2.3 Special Cases
When a user is in different user groups with different row permissions, the user can see the union of the data visible to both groups.
For example, for the city field in a dataset, user group A can see Shanghai and Hangzhou, and group B can see Shanghai and Beijing, so the user can see Shanghai, Hangzhou, and Beijing.