Tree Field Management
Overview
Tree fields are used to manage dimensional data with hierarchical tree relationships and support scenarios such as tree tables and tree filters. Core capabilities include:
- Hierarchy maintenance: build tree structures through parent-child ID relationships
- Version-based management: switch between different tree versions based on time ranges
- Dynamic data association: dynamically update tree structures through linked Datasets
Create a Tree Field
On the Admin Center > Enterprise Configuration > Tree Field Management page, click Add Tree in the upper-right corner. A new tree field row is then added at the top of the page. There are two ways to rename the tree field:
Method 1: Double-click the name of the new tree field and edit it directly.

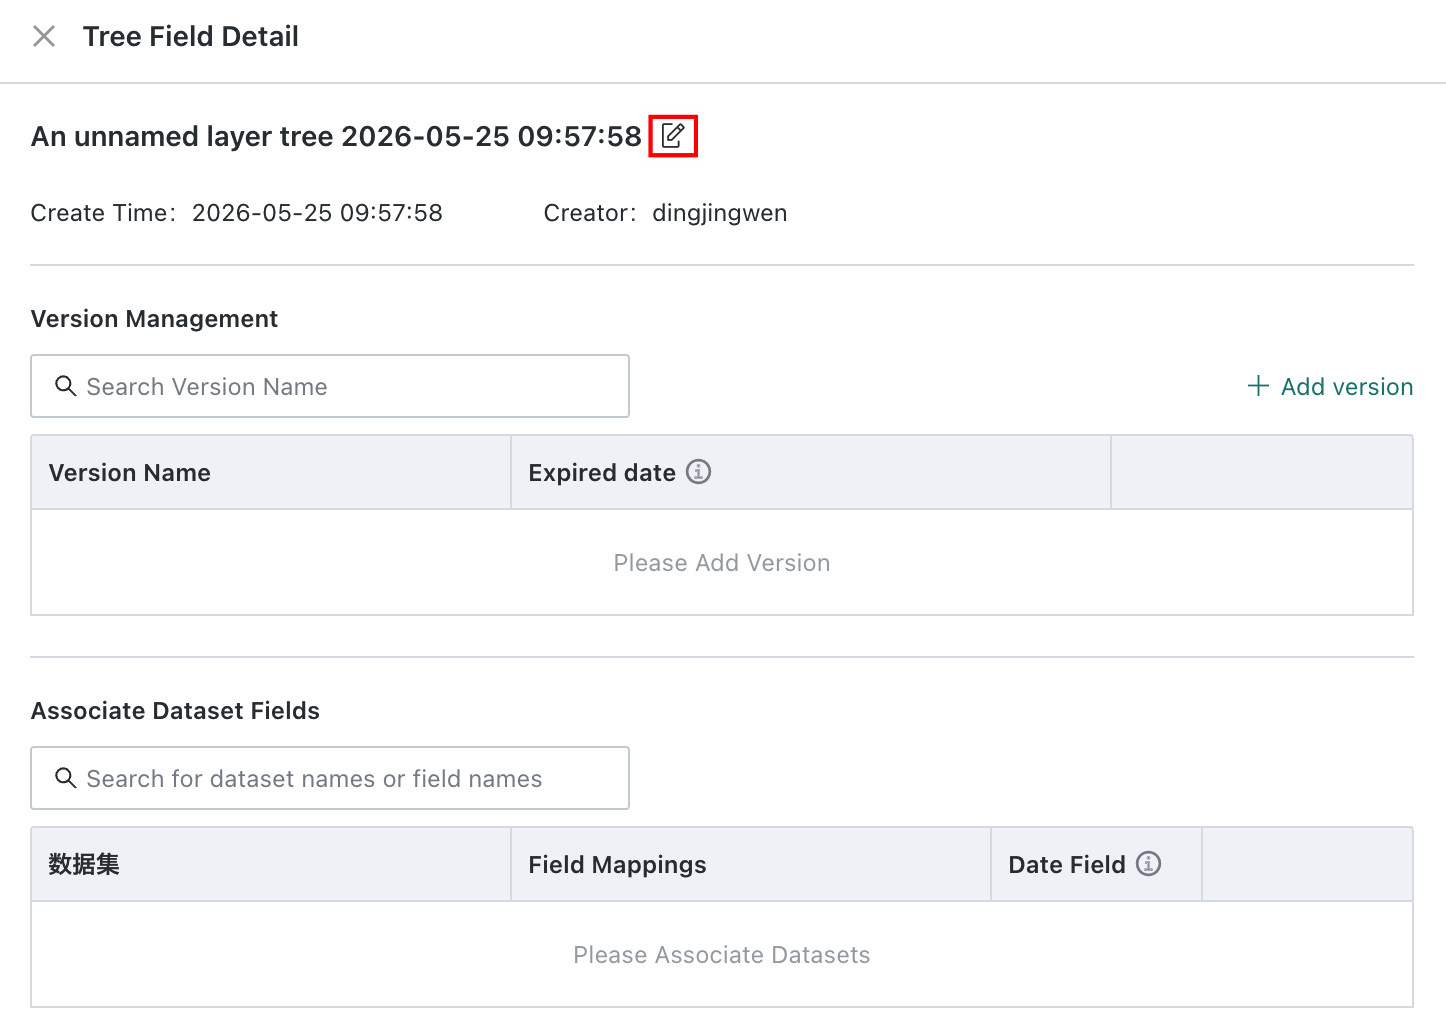
Method 2: Click Details on the right side of the new tree field, then click the edit button next to the name on the Tree Field Details page.
Version Management
Overview
Tree field version management is used for versioned control of hierarchical structure data. By recording tree structures from different periods, it supports structure change tracing, data consistency, and the needs of business iteration and system development.
Applicable Scenarios
Single version: suitable for stable structures that do not require historical traceability, such as administrative divisions, static architecture displays, and fixed classification systems.
Multiple versions: suitable for frequently changing structures, for example:
- Organizational changes: preserve historical organization versions to support retrospective analysis of data such as labor costs.
- Product category adjustments: record changes in category tree structures to assist sales comparison and customer service order lookup.
Procedure
-
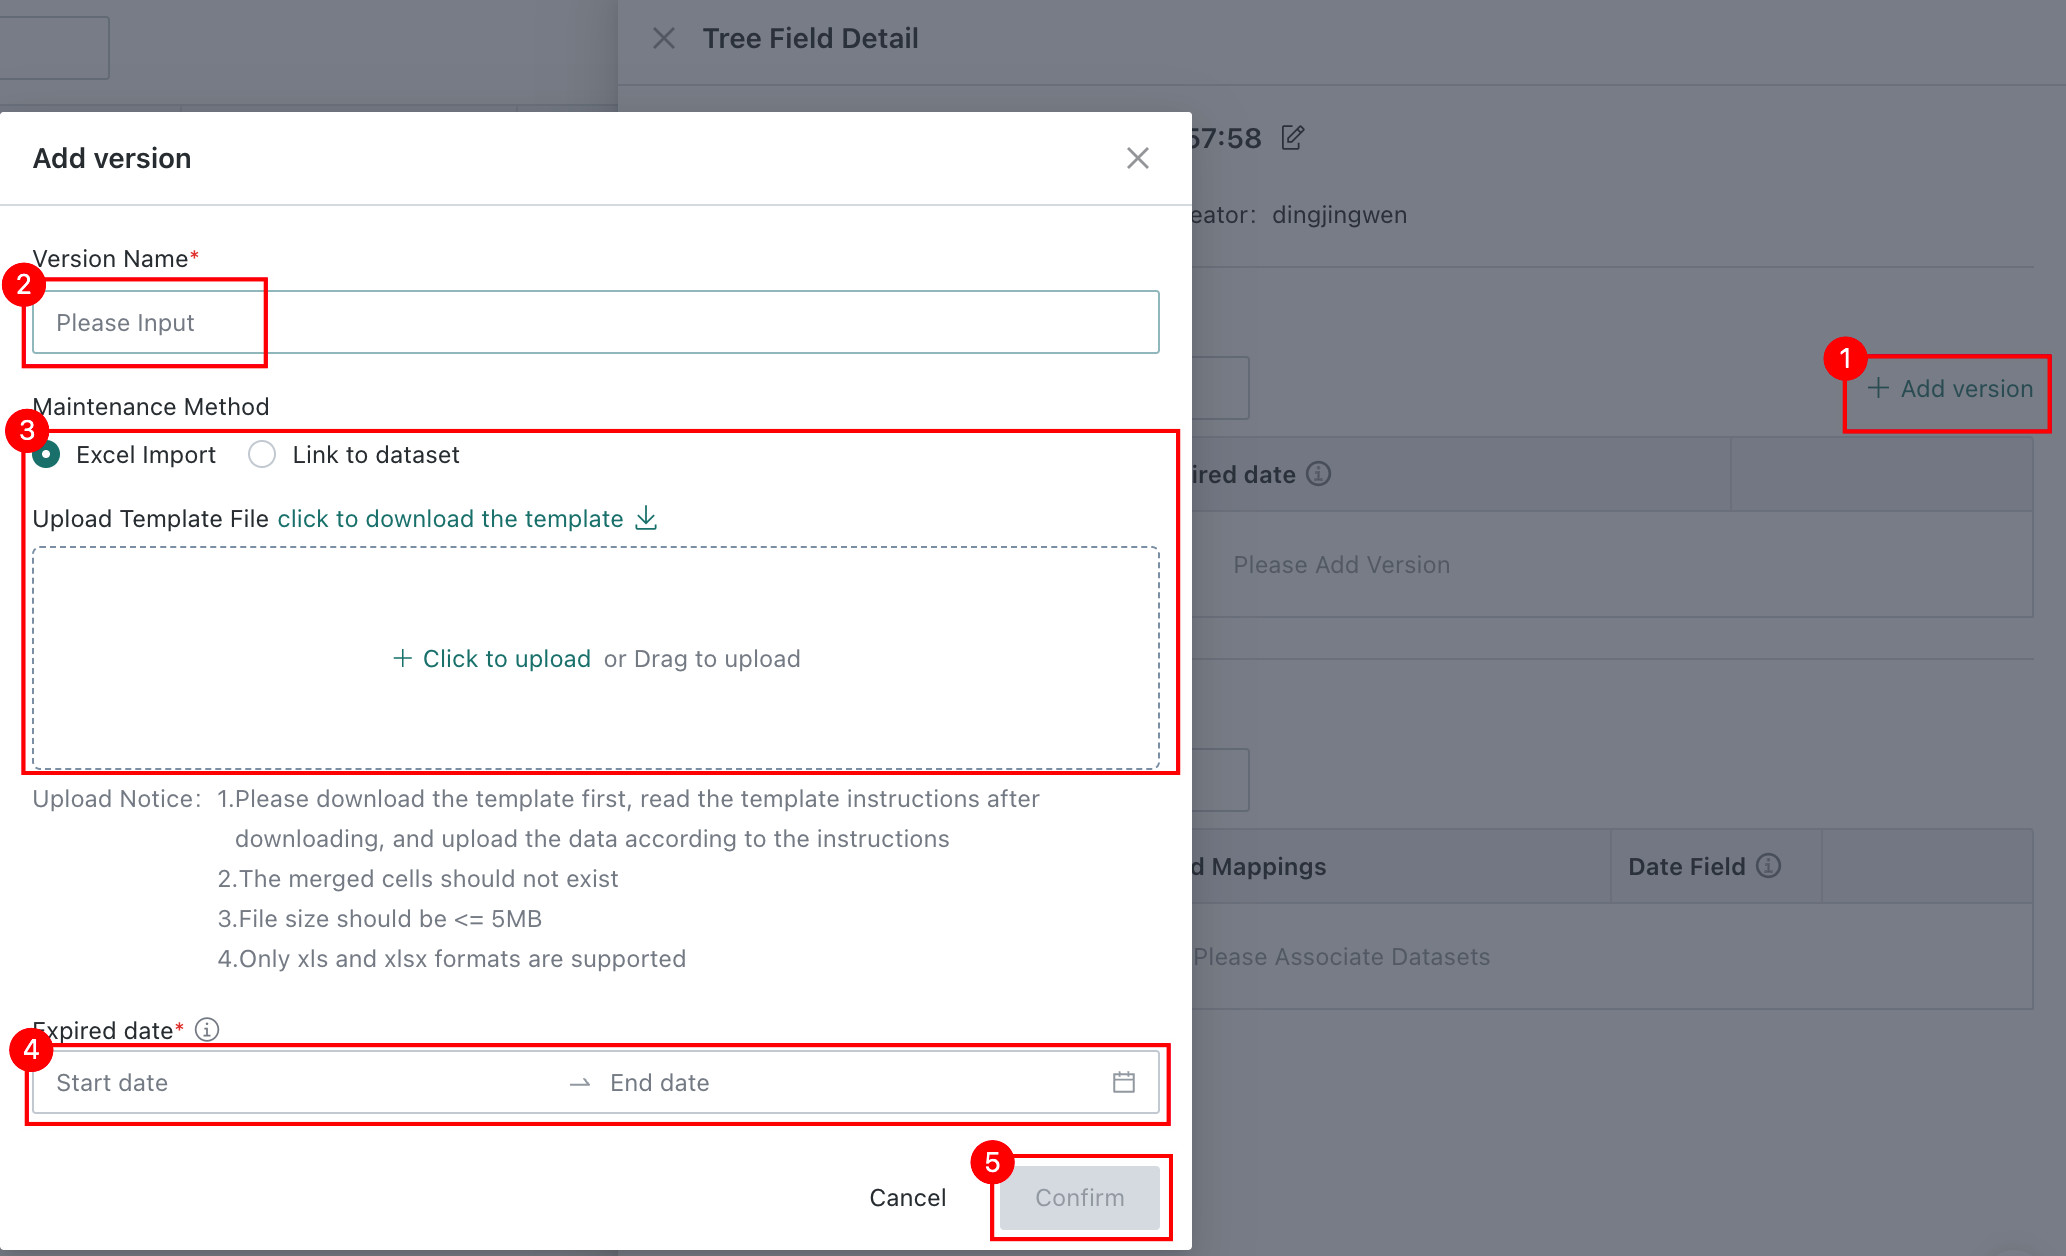
Click Add Version on the right side of Version Management.
-
Enter the version name. For multi-version scenarios, the default name format is
name + sequence number + creation timestamp, such asOrgStructureV1_20240101. -
Choose the version maintenance method for the tree field. Two methods are supported: Excel Import and Linked Dataset.
NoteIn single-version mode, only one maintenance method can be selected, either Excel or Dataset. The two are mutually exclusive. In multi-version mode, each version can independently use a different method, such as version 1 with Excel and version 2 with a Dataset.
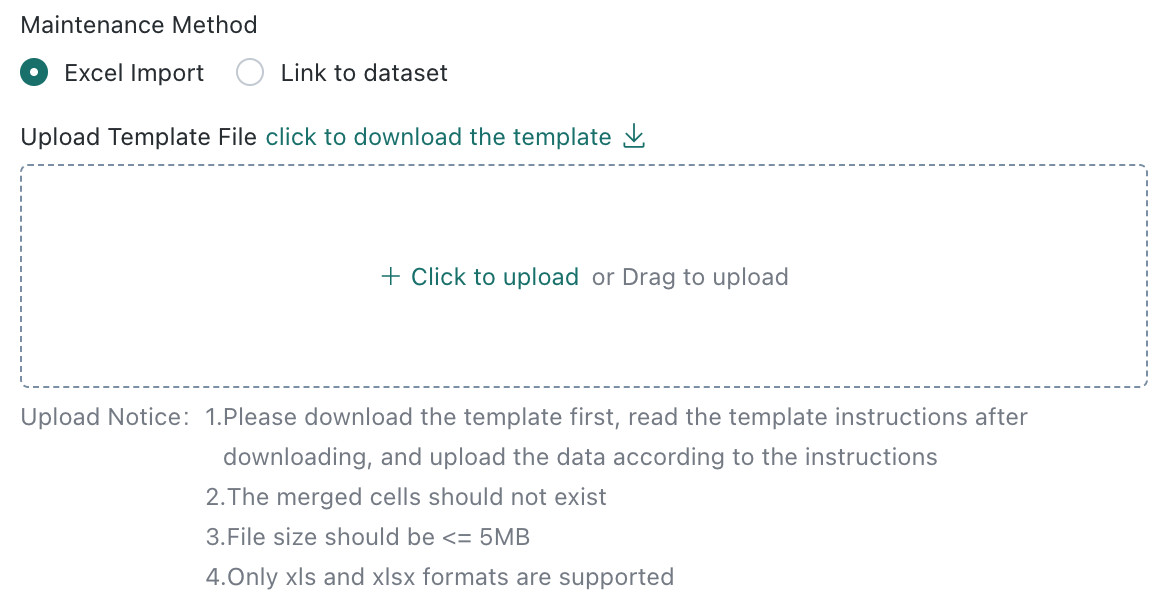
- Excel Import: download and fill in the template, then upload it. For upload requirements and restrictions, see Template Specifications and Restrictions. The tree field template used in this example is Tree Field Upload Template.
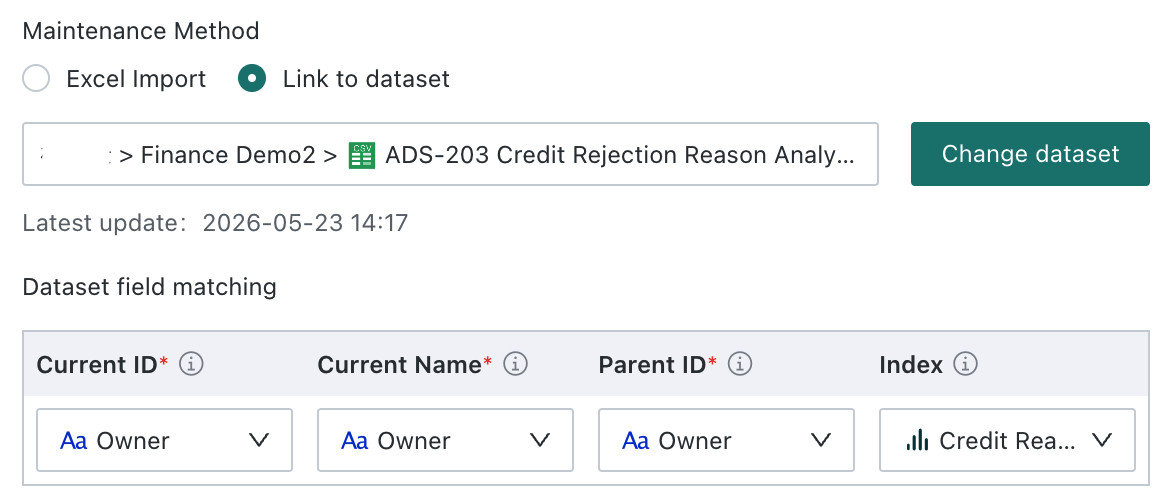
- Linked Dataset: select a Dataset for which the current user has usage permission to generate the tree structure. Only local file, online document, and database Datasets are supported.
For field matching, see Field Definitions.
-
Configure the version validity period. A version takes effect only during the specified validity period and expires automatically after that. If there is only one version, it remains permanently valid.
- Single version: use a wide time range.
- Multiple versions: multiple versions need to be used together with a date filter. Non-overlapping validity periods must be configured; otherwise, version filtering becomes invalid and only the default version takes effect.
For example, if the date filter is set to June 18, 2025, the system matches the version whose validity period includes20250618, and uses the corresponding tree field for analysis. If no version matches, the default version is used.
Other Operations

- Search: when there are many versions, search by name to find the corresponding tree field version.
- Edit: click Edit to modify the version, including its name, maintenance method, and validity period.
- Delete: delete the version. Single-version and default-version entries cannot be deleted.
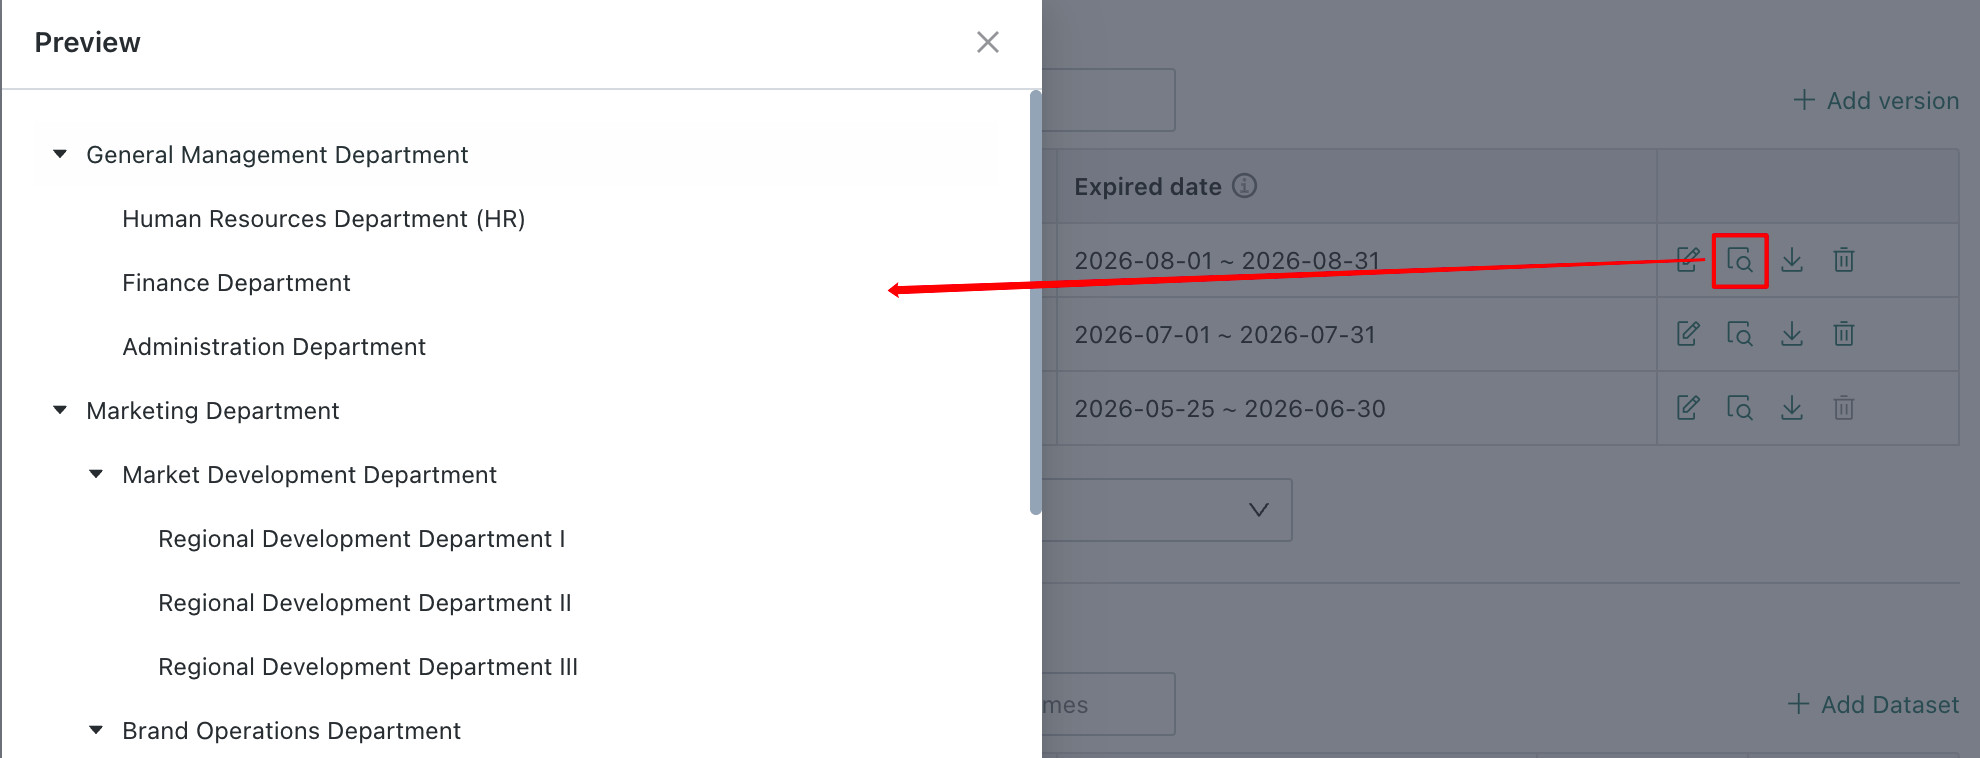
- Preview: after a tree field is uploaded successfully, click Preview to check whether the generated tree meets expectations.
-
Download: download the generated tree structure information, including four columns: current-level ID, current-level name, parent ID, and sequence number within the current level.
-
Select Default Version: choose the default version from the drop-down list. When the date filter does not match a version whose validity period includes the selected end date, the default version is used.
DescriptionThis is required only in multi-version mode.
Linked Dataset Fields
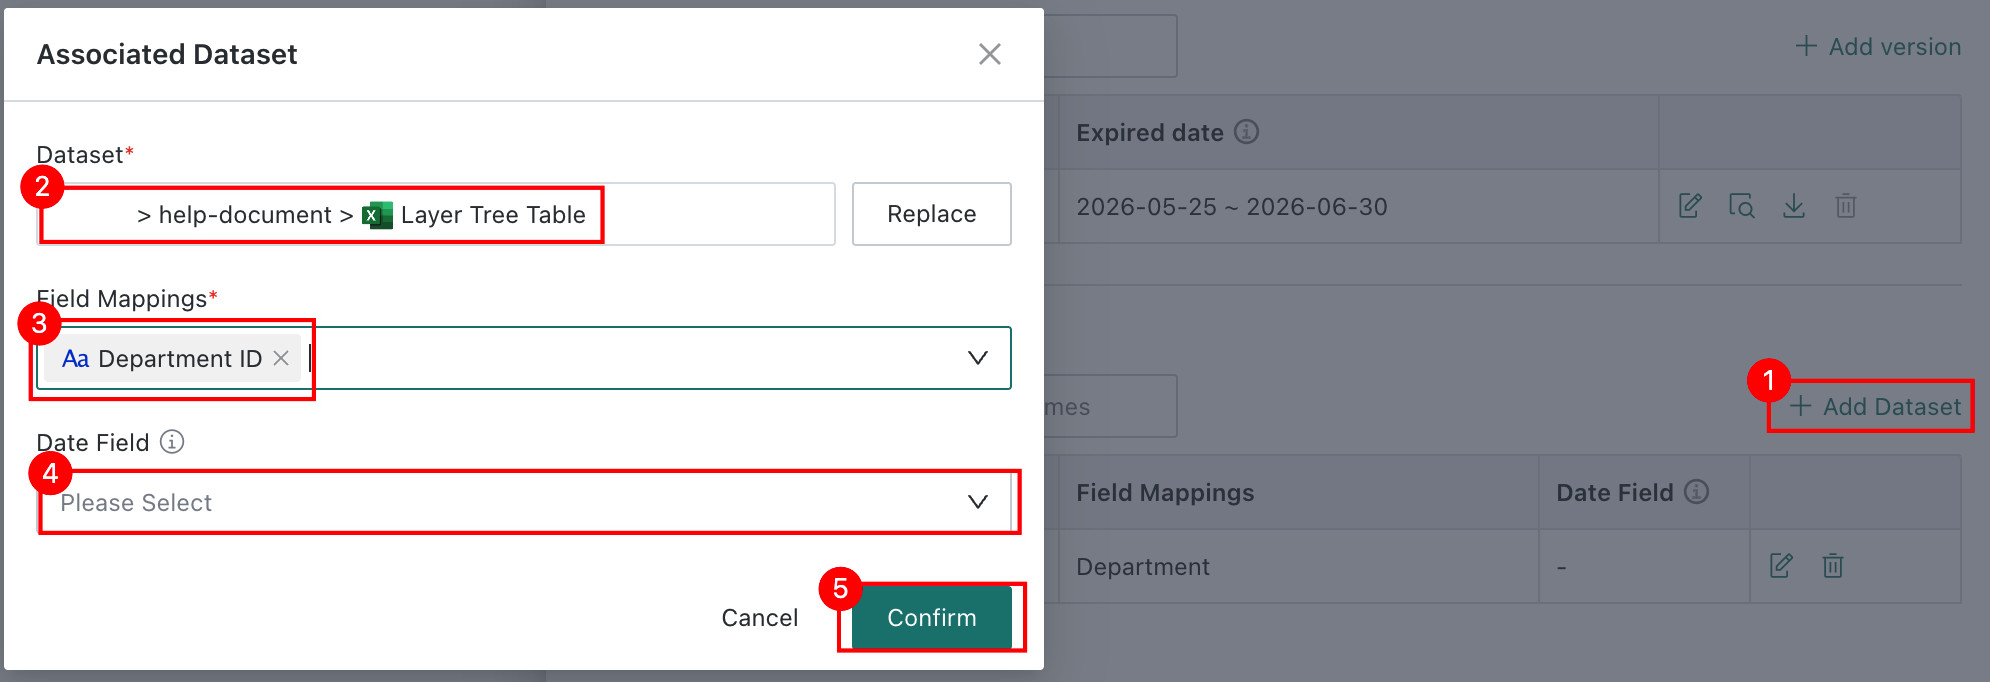
- Click Add Dataset on the right side of Linked Dataset Fields, select the Dataset to link, and click OK.
- Select the linked field.
The linked field in the selected Dataset must correspond one-to-one with Current-Level ID in the uploaded tree field template. - Select the date field.
The date field defines the effective period of each version and works with the date filter to determine the current applicable version. When multiple tree field versions exist in the system, a validity period must be configured; otherwise, version filtering will fail and the default version will always be used. - Click
Confirmto complete Dataset linking.
Use Tree Fields
Use the created tree field to generate a tree table or configure a tree filter. For details, see Tree Table and Tree Filter.
Template Specifications and Restrictions
Field Definitions
The template contains four columns: Current-Level ID, Current-Level Name, Parent ID, and Sequence Number Within the Current Level. The detailed requirements are as follows:
Fields are matched one by one based on column names, and other columns are ignored. Do not modify the header names when uploading.
| Template Field | Rules |
|---|---|
| Current-Level ID | Required; primary key; unique; cannot be empty |
| Current-Level Name | Required; cannot be empty |
| Parent ID | Required; can be empty, but if it has a value, it must come from Current-Level ID |
| Sequence Number Within the Current Level | Optional but recommended. Used to define value order in the tree structure. Natural numbers: 1, 2, 3, 4, n |
Upload Restrictions
-
File format: only
.xlsxand.xlsare supported. -
File size: no more than 5 MB.
-
Data limits
- Upload limit is 50,000 rows. Upload fails if the limit is exceeded.
- Up to 10 hierarchy levels are supported.
-
Format requirements
- Only text format matching is supported. Numeric and date formats are not supported.
- Upload fails if merged cells exist in the value area.
-
Logical validation
- Circular tree structures can be prohibited.
- Parent ID must exist in Current-Level ID.
- Names and sequence numbers must be unique within the same level.
Tree Field Migration
| Migration Scenario | Handling Rule |
|---|---|
| Dataset migration | If the Dataset is linked to a tree field version, the tree field does not need to be migrated separately. |
| Tree field migration | Only configuration information is migrated. The linked Dataset must still be migrated manually before the tree field can be used normally. Re-linking is not required. |
| Tree table migration in a Page |