Custom Map
Overview
Custom Map Management refers to the configuration and management of custom maps, including editing, migration, and deletion.
For detailed usage of custom maps, see Custom Map.
Procedure
-
Go to Admin Center > Enterprise Configuration > Custom Map Management. On this page, you can view the list of custom maps in the enterprise domain and Edit, Migrate, or Delete the current custom maps.

-
Click Modify to open the map property panel, name the map, and then select the linked Dataset. If the map changes dynamically in actual business scenarios, this method supports those changes.
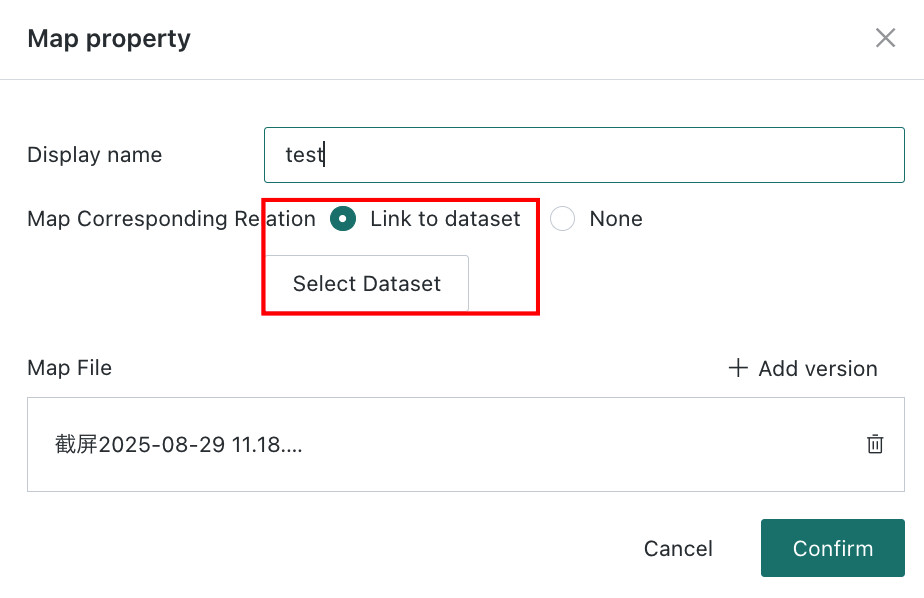
-
After selecting a Dataset, link its fields one by one with the fields in the map configuration.
When linking a Dataset, pay special attention to the required fields marked with an asterisk.
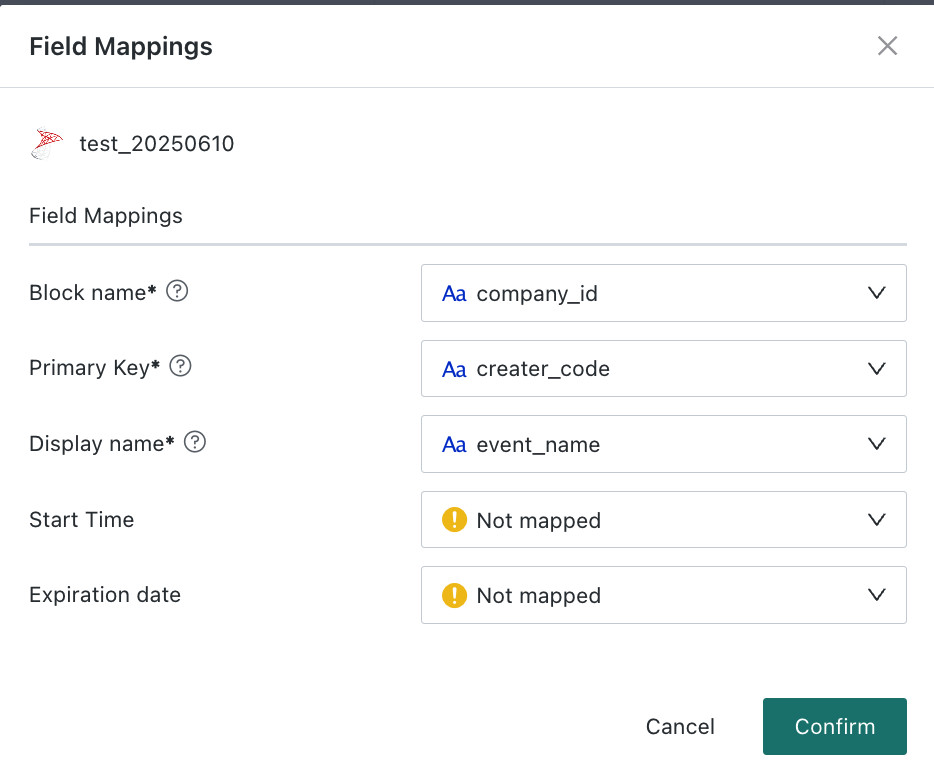
- Area Name: corresponds to Area Name on the map editing page.
- Map Primary Key: corresponds to the Dimension field when the chart type is Flat Map on the Card editing page.
- Display Name: the name displayed for each area when the map is used.
- Start Date and End Date: if the current map does not use multi-version management, these two fields do not need to be linked. If multi-version management is required, fill them in as the valid time range of the map.
-
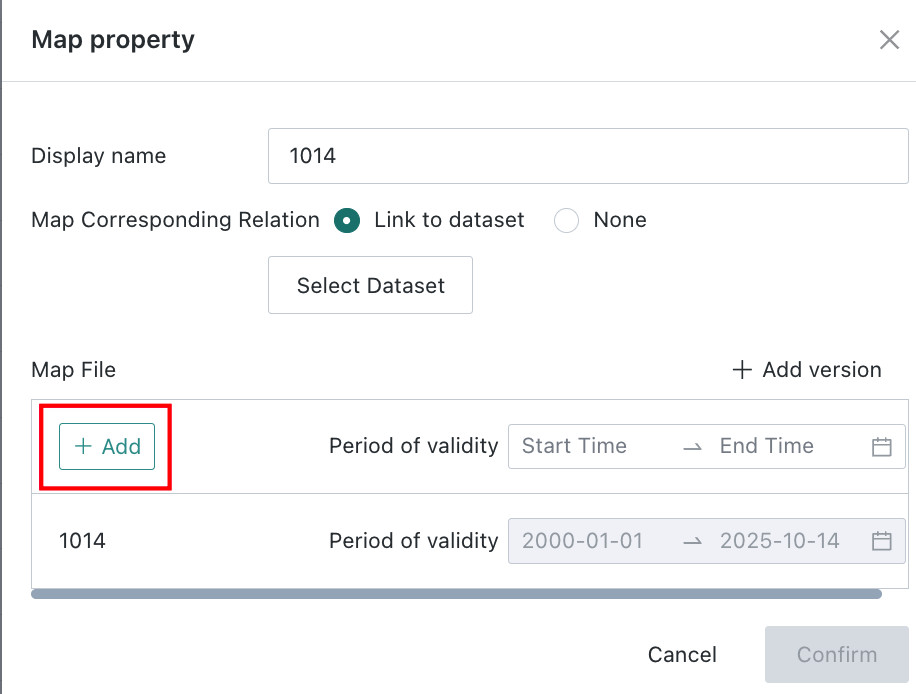
After the Dataset is linked successfully, click Create under Map File to enter the map editing page.
 Description
If you need multi-version management for the map, you can add a validity period, for example when stores in a shopping mall change over time. If there is only one version, a validity period is not required.
-
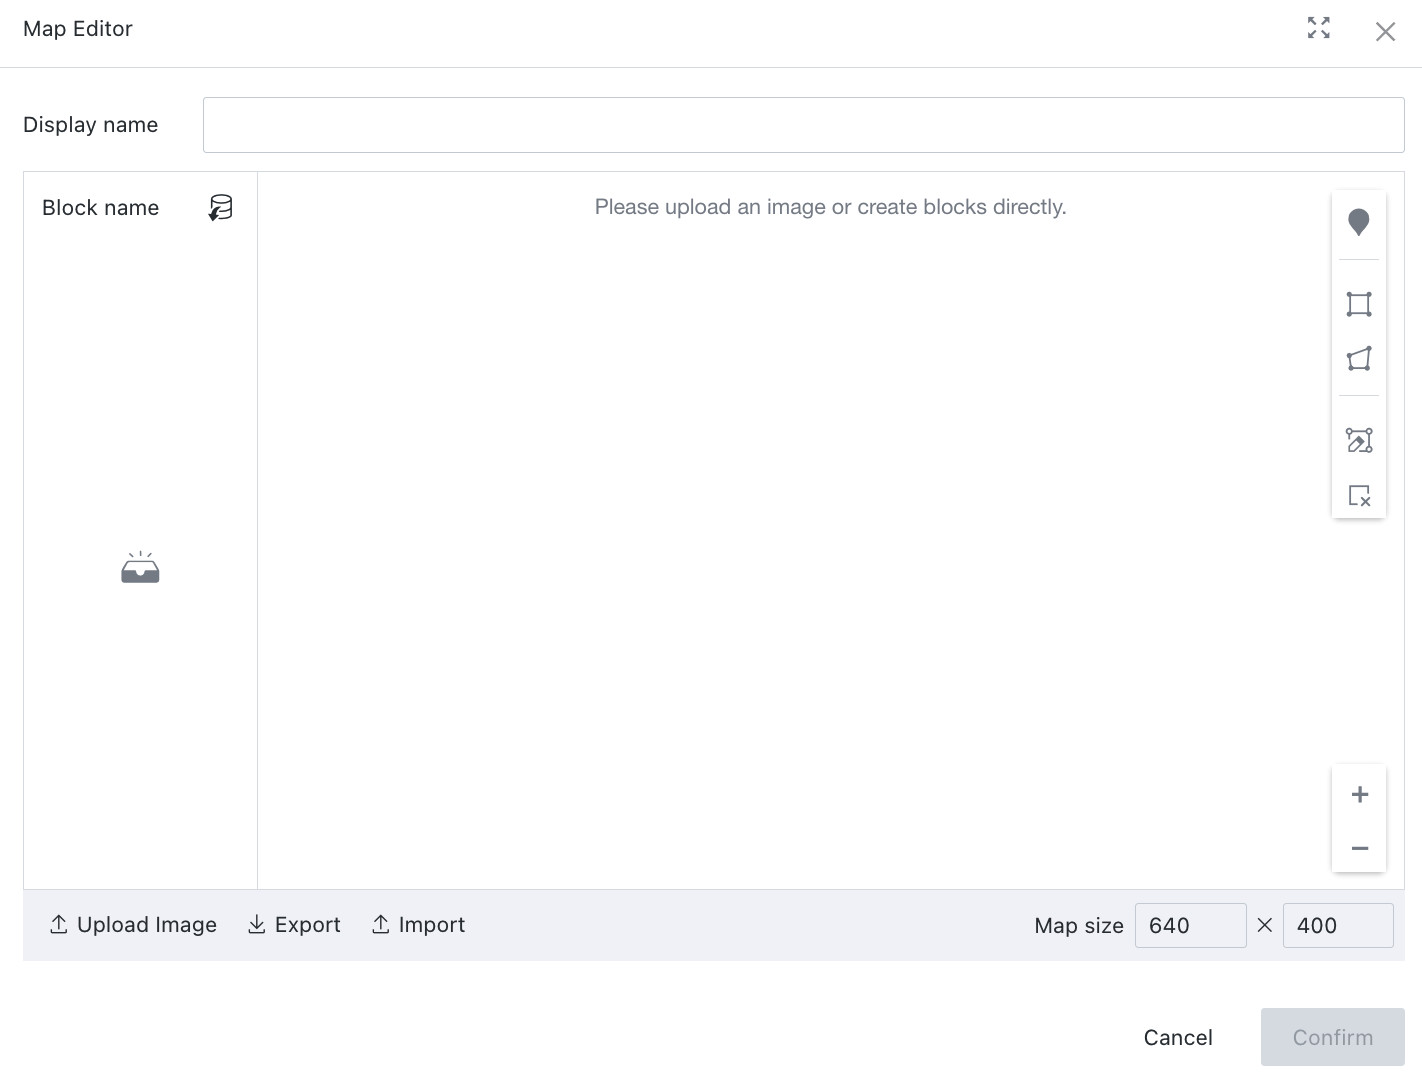
Fill in the display name. You can draw shapes directly in the blank area to represent regions, or upload a map image. After drawing the regions, you can export the completed image or import a previous version for minor adjustments when the map changes only slightly. Finally, click Confirm to save.
-
Select the validity period from the start time to the end time, then click Confirm to complete the configuration.