Implement Table "Traffic Lights" in Cards
Applicable Scenarios
Table "traffic lights" improve data readability. They are suitable for comparing data with previous periods (period-over-period or year-over-year), simulating traffic lights to trigger visual warnings as data changes, and identifying abnormal data in time. In Guandata BI, cards can easily implement traffic light effects through conditional formatting.
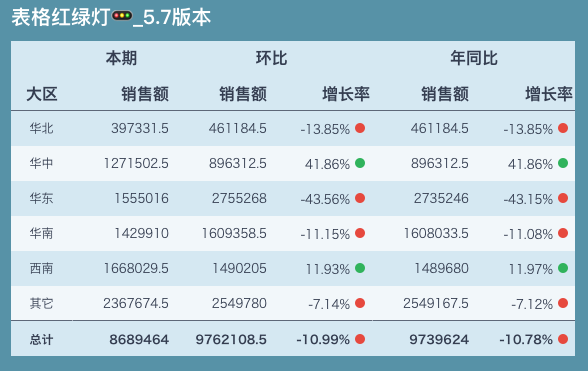
Result
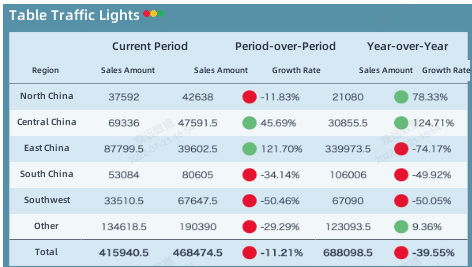
Method 1
Prepare Data
Create a table card and drag the required dimension fields into the dimension field well.
Create a Two-Level Header (Optional)
In the drawing area, click the gear icon in the value area, add a value group, set the corresponding name, and drag in value fields to generate a two-level header.
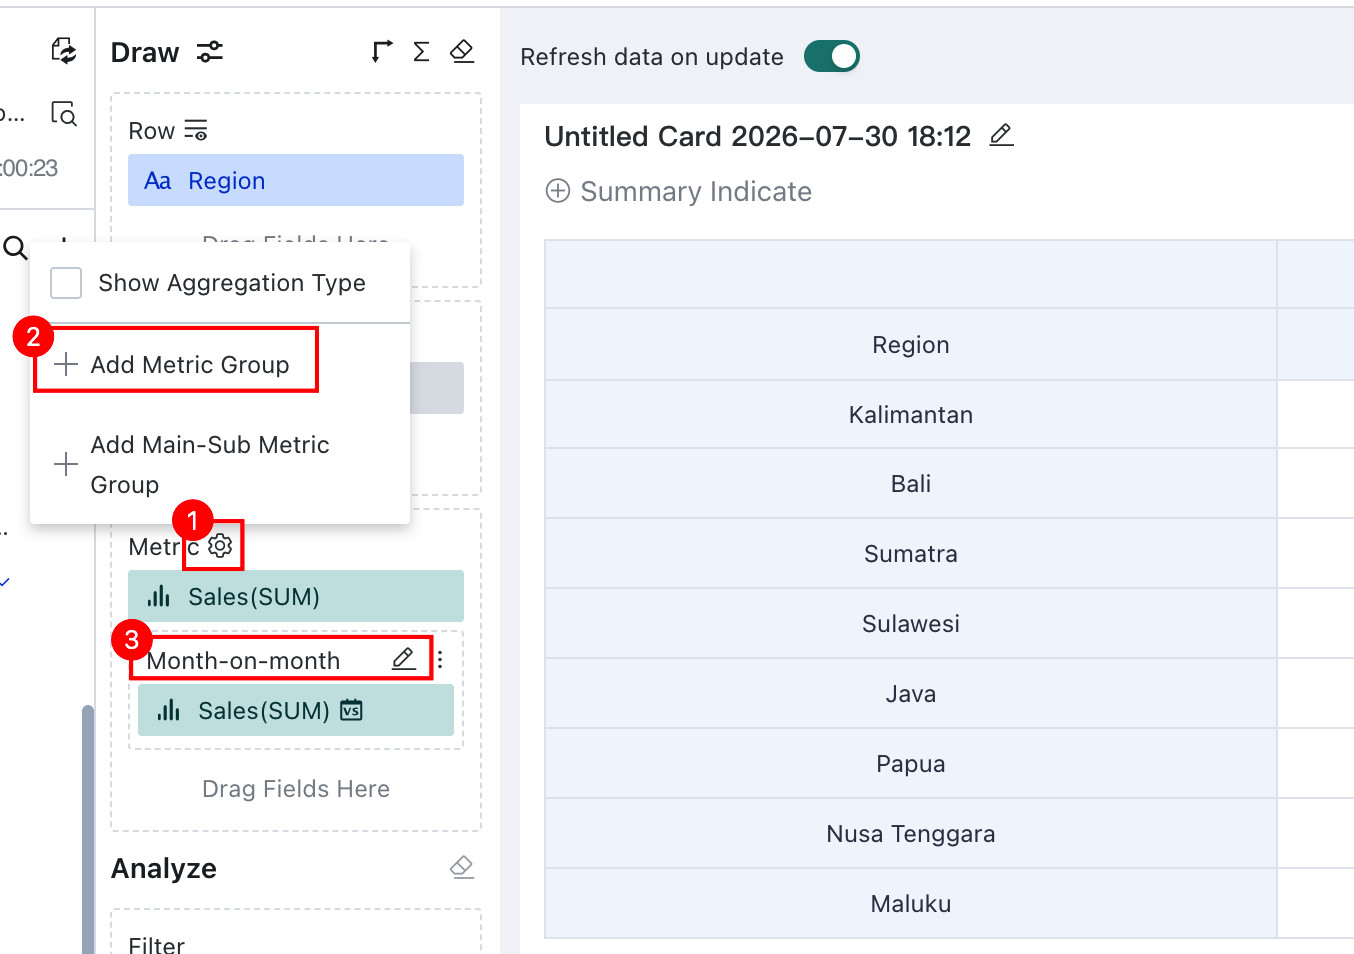
Period-over-Period Calculation
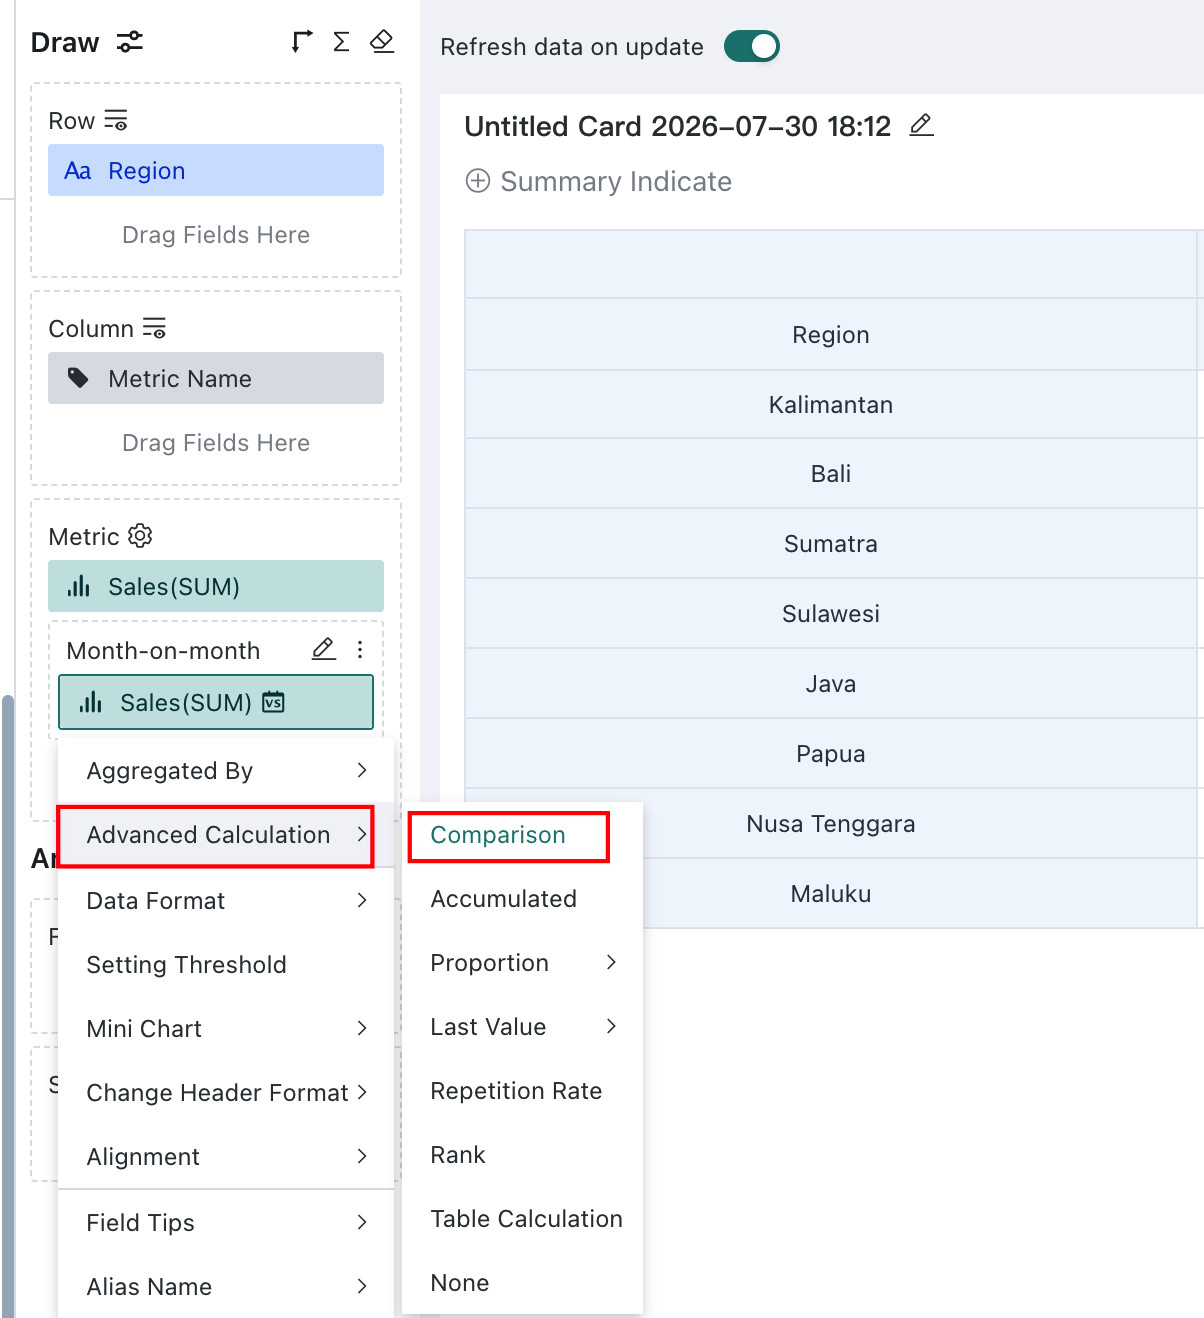
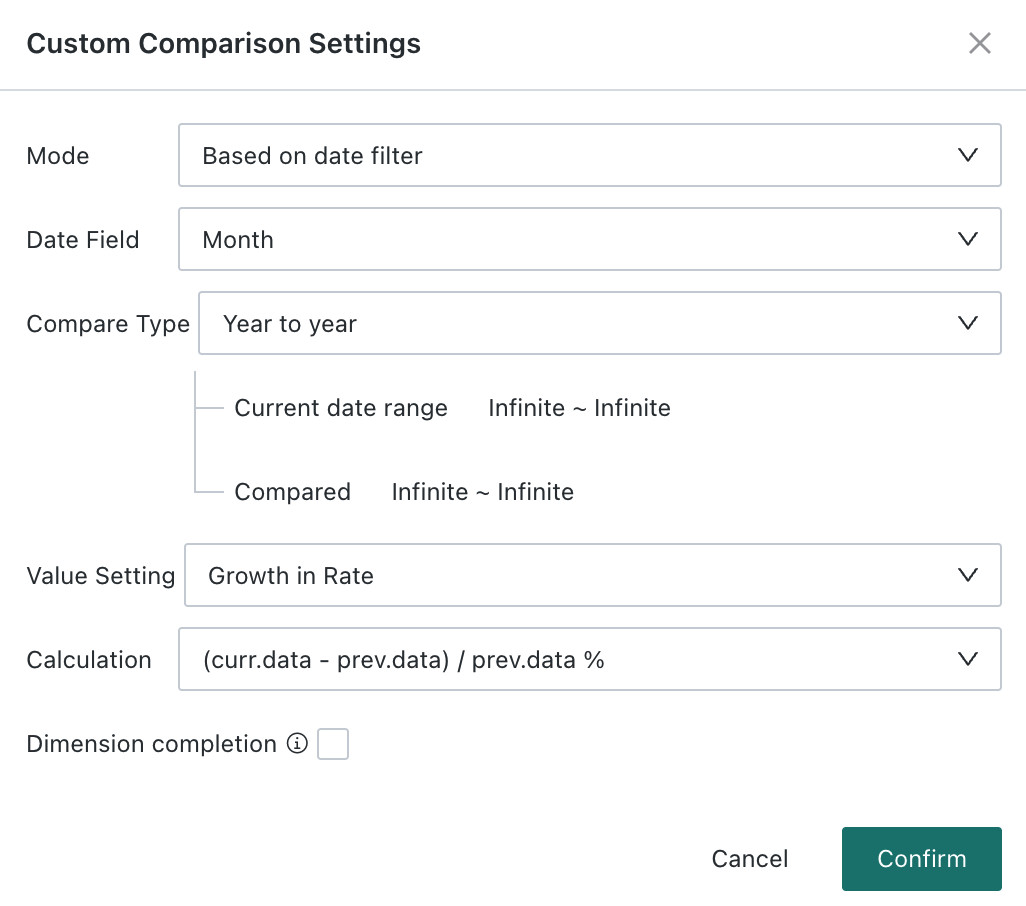
Drag the value field "Sales Amount" into the value group multiple times and use the same aggregation method. Configure Advanced Calculation -- Period-over-Period separately. For the field that needs a traffic light, set Period-over-Period -- Growth Rate. Then set field aliases one by one. When two fields have the same name or the same alias, the headers are automatically merged.
Set Conditional Formatting
Click the value field that should display as a traffic light and configure conditional formatting as shown below.
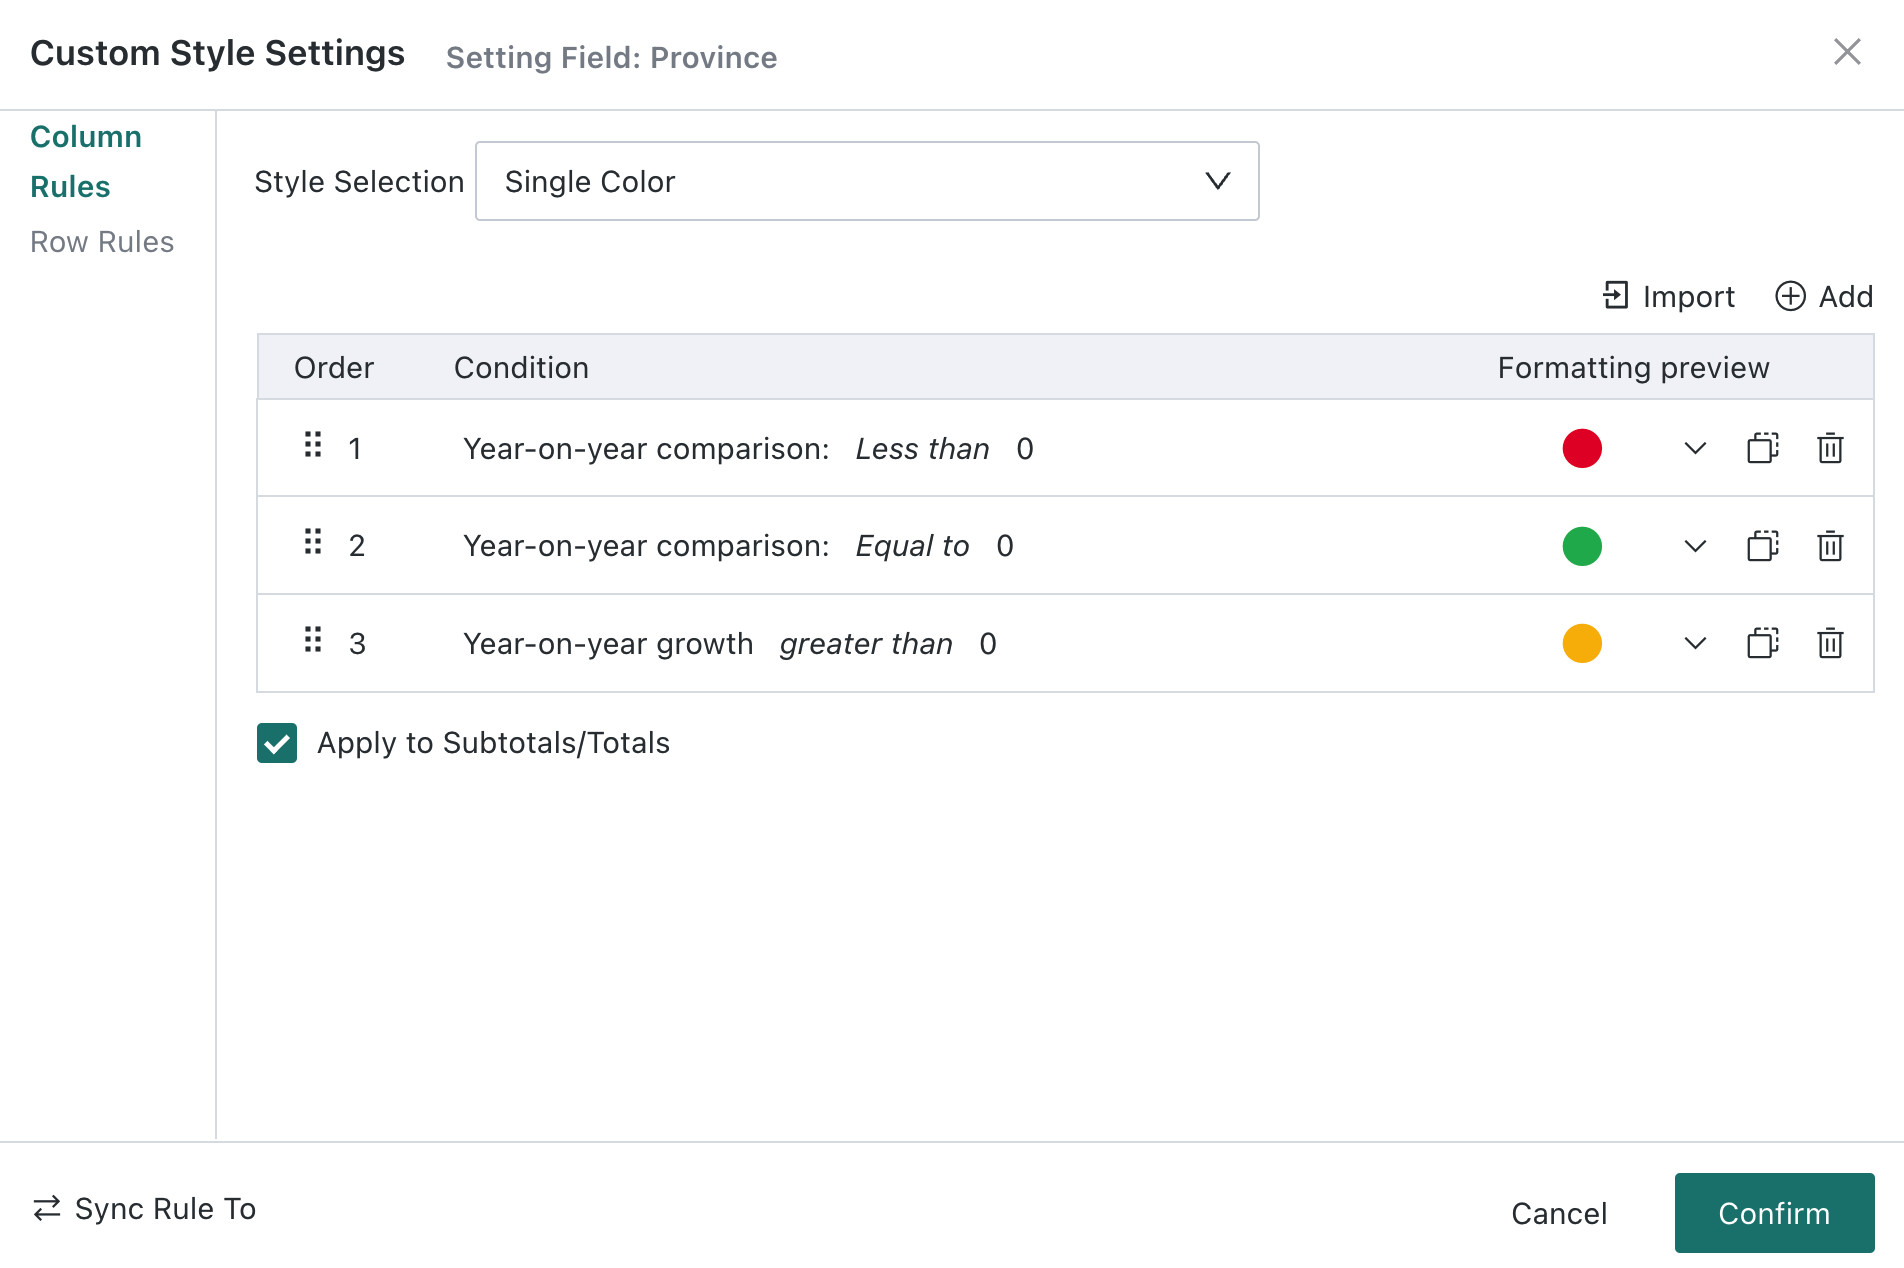
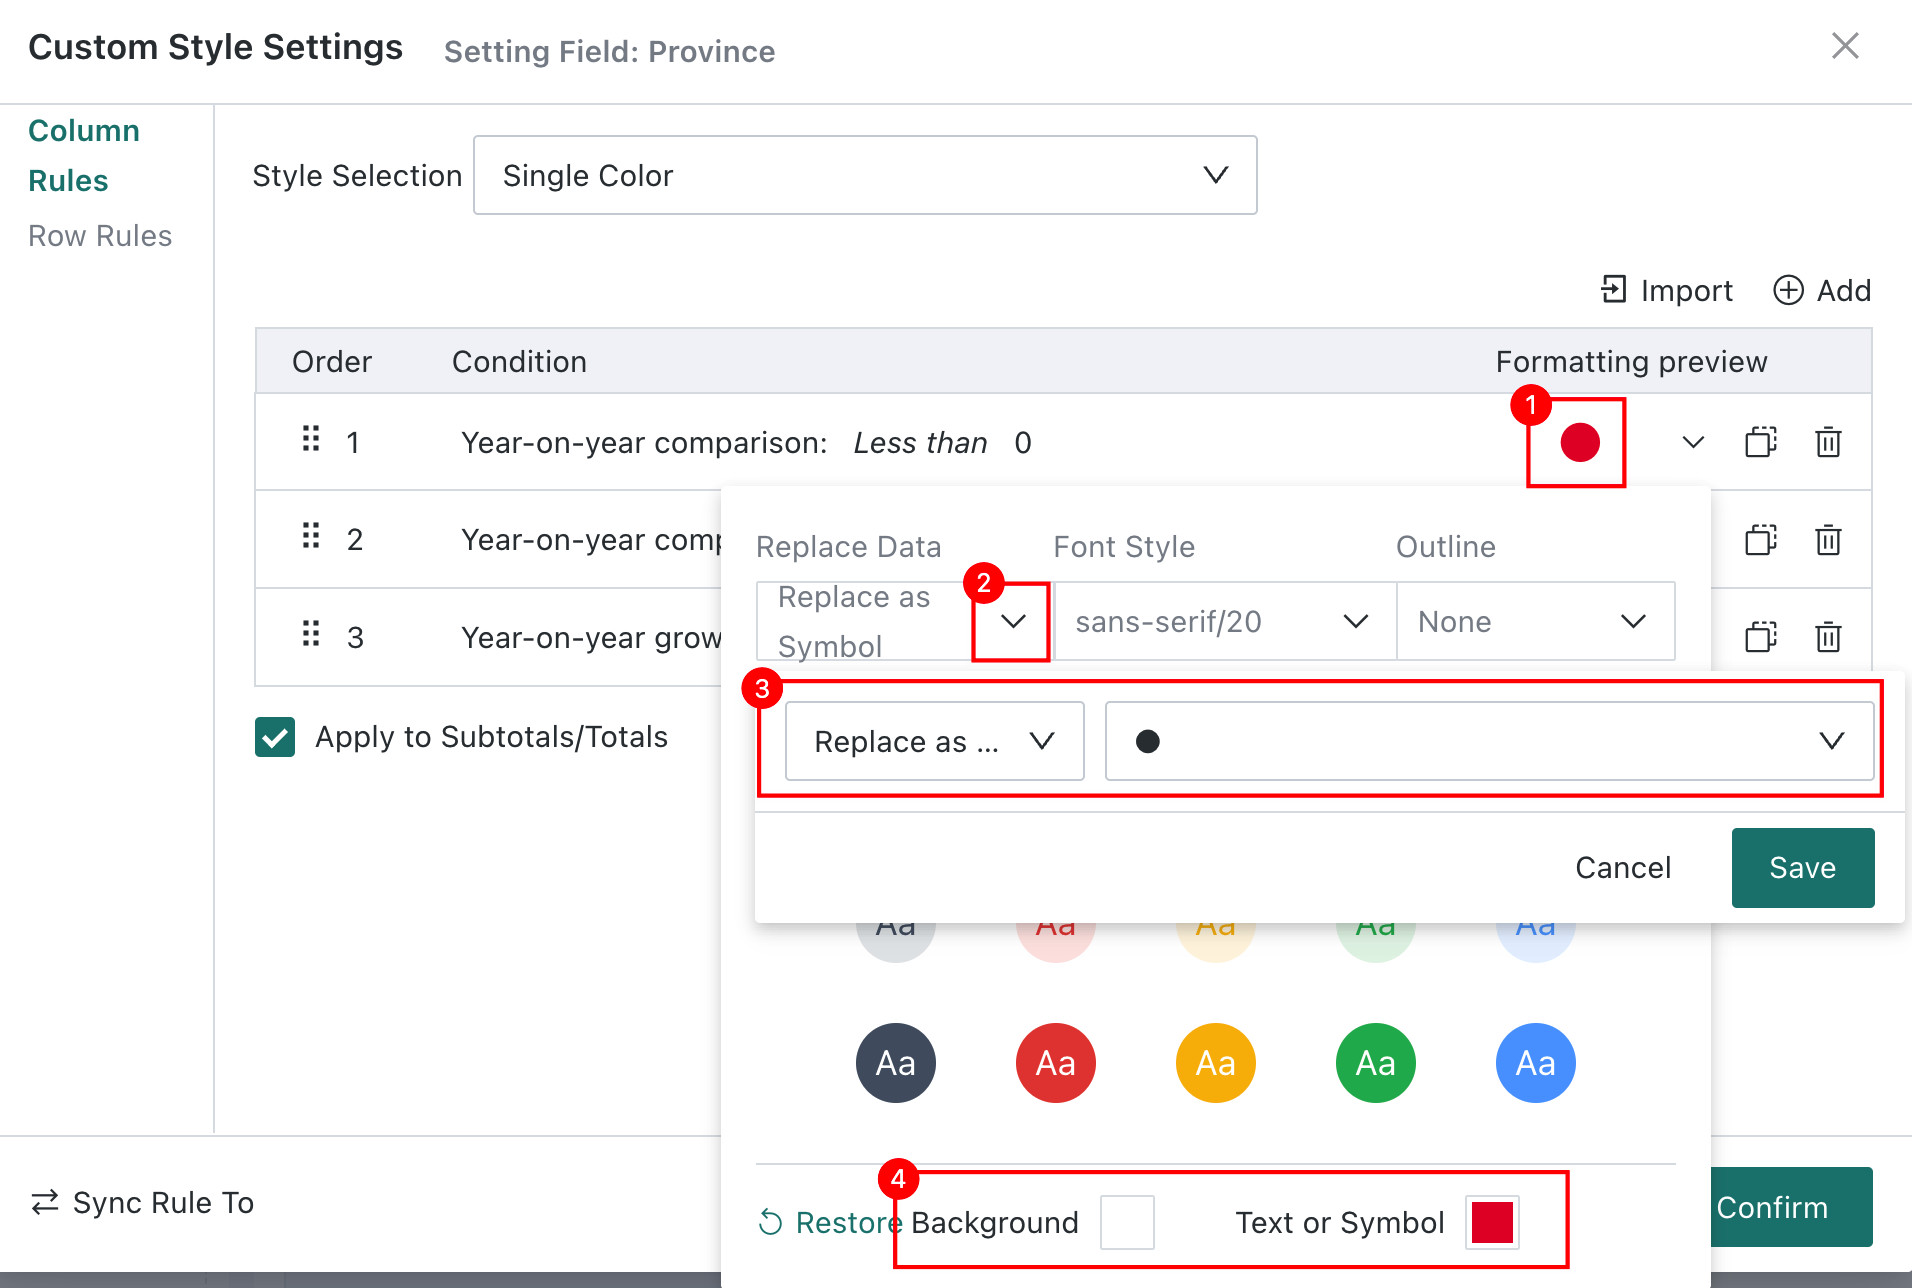
Set the Style
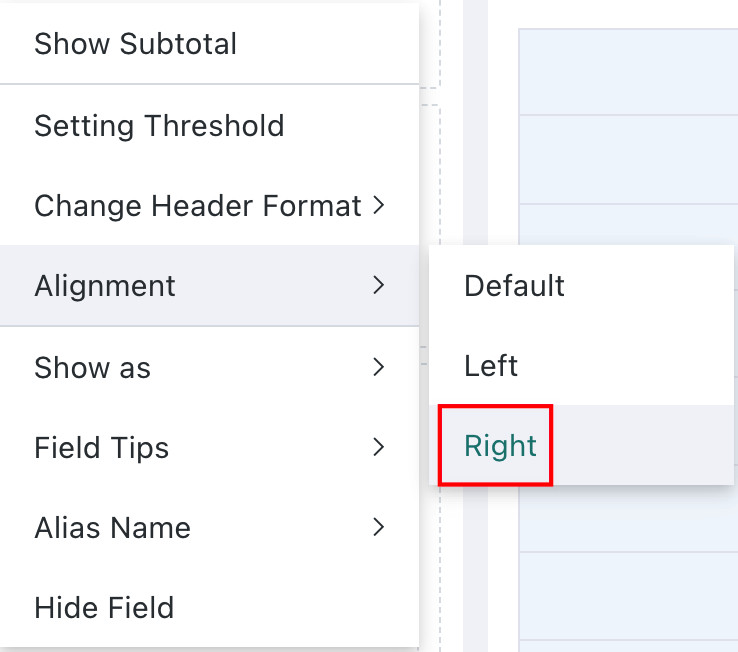
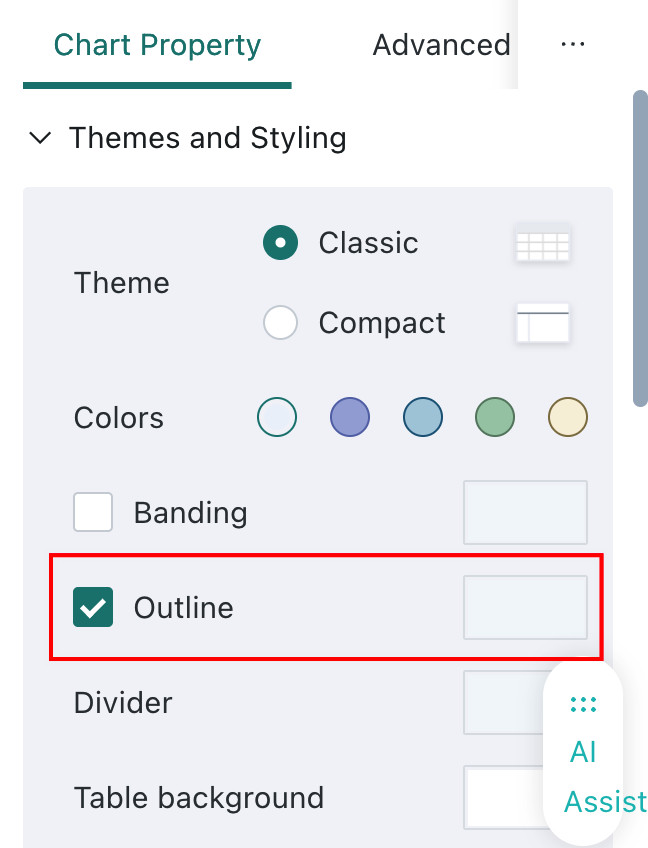
Set the alignment of the left traffic light column to "Right Align" and the alignment of the right value column to "Left Align". This cleverly combines the two columns visually. Adjust column widths as needed and make good use of color schemes and table border design. For example, set row and column dividers to a color close to the background or transparent for a better result.
Method 2 (Available Since Version 5.7)
Set Conditional Formatting
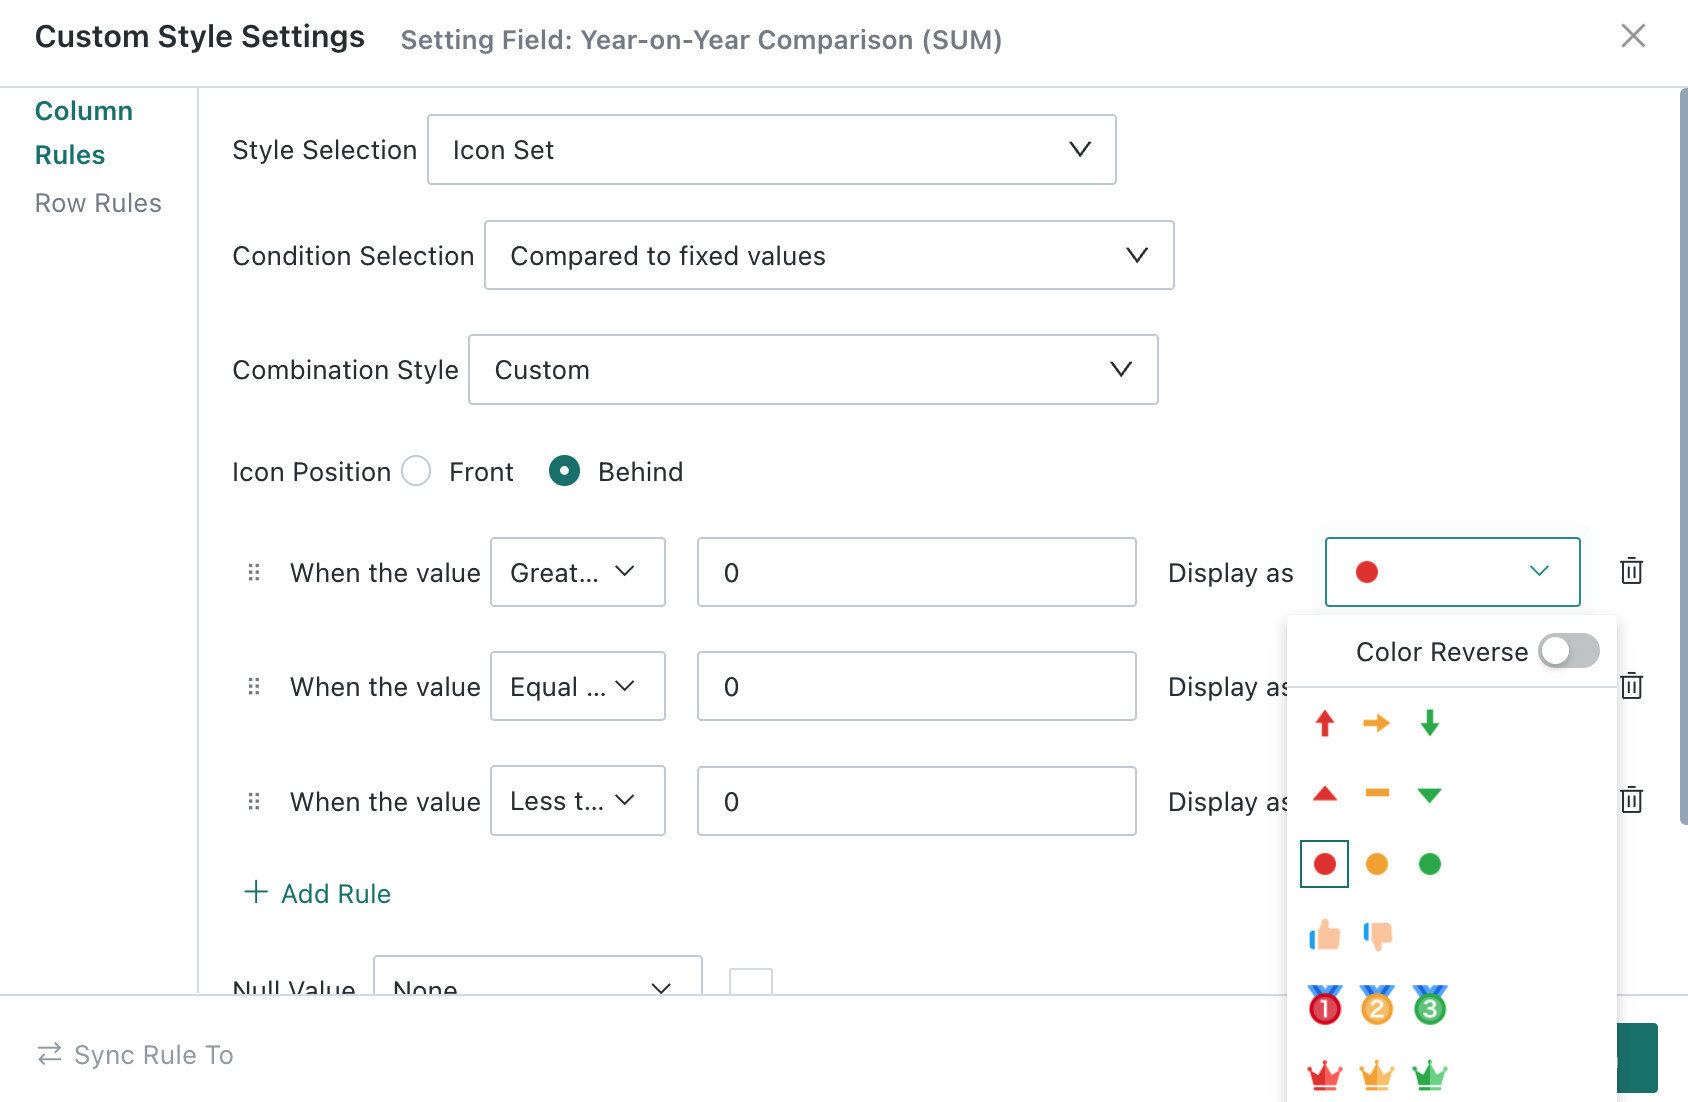
You do not need to drag in extra fields to create traffic light icons. Directly set conditional formatting on the field that uses Advanced Calculation -- Period-over-Period -- Growth Rate, select "Icon Set", and select traffic lights from the combination style drop-down list.By default, values greater than 0 are red lights. You can manually change them to green lights.
Align
Because icons are displayed on the right by default, set the value field alignment to "Right Align". The result is shown below.
Comparison of the Two Methods
Method 1: Applicable to all versions. The operation is more complex, but you can adjust styles such as icon position and size.
Method 2: Available in version 5.7 and later. The operation is simple, but styles such as icon position and size cannot be adjusted.